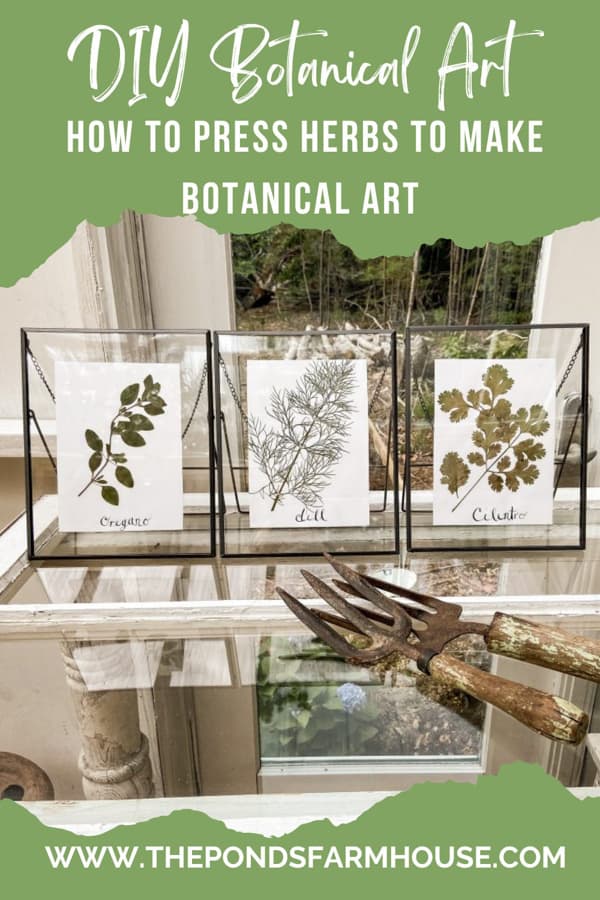
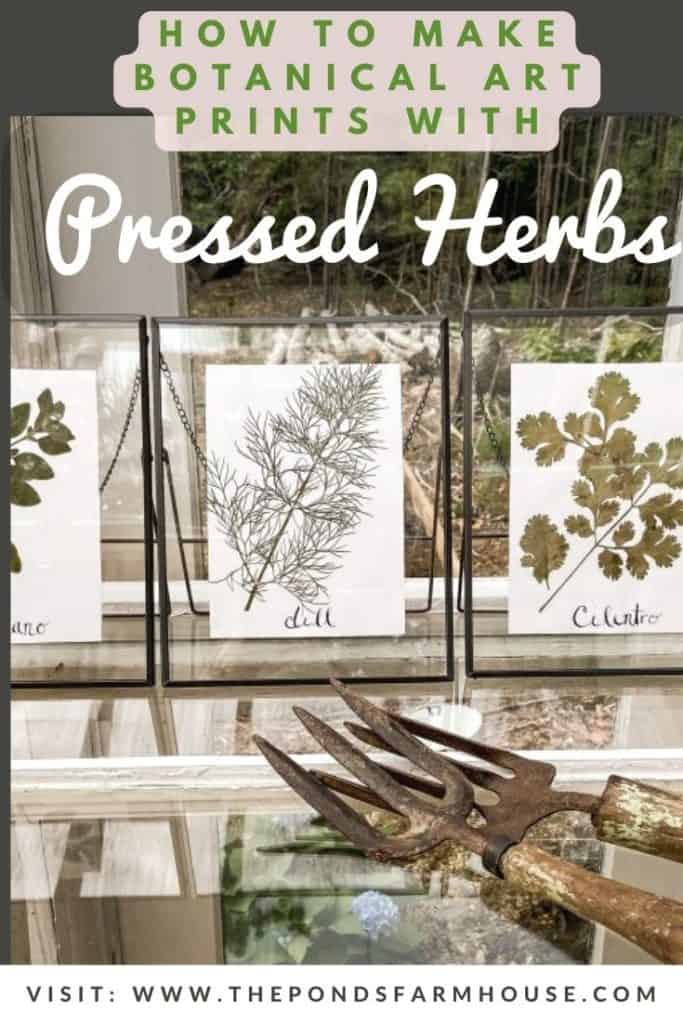
How to Easily Make Botanical Art with Pressed Herbs
Have you ever wanted to create your own botanical art prints? Today, you will learn how to press herbs to make botanical art. By doing so, you can preserve the beauty of nature and add a touch of greenery to your home.
Today, you will learn how easy it is to press herbs for botanical art and how to press flowers to preserve their beautiful blooms for years to come. In addition, you will learn the best way to frame pressed herbs. This project is fun for all ages, and you’ll love the results.
If you are pressing several flowers or herbs, you may want a flower press, and I’ll share a link to a tutorial on building an easy botanical press.
(Posts on The Ponds Farmhouse may contain affiliate links. As an Amazon Associate, I earn from qualifying purchases. See the full disclosure details here.)
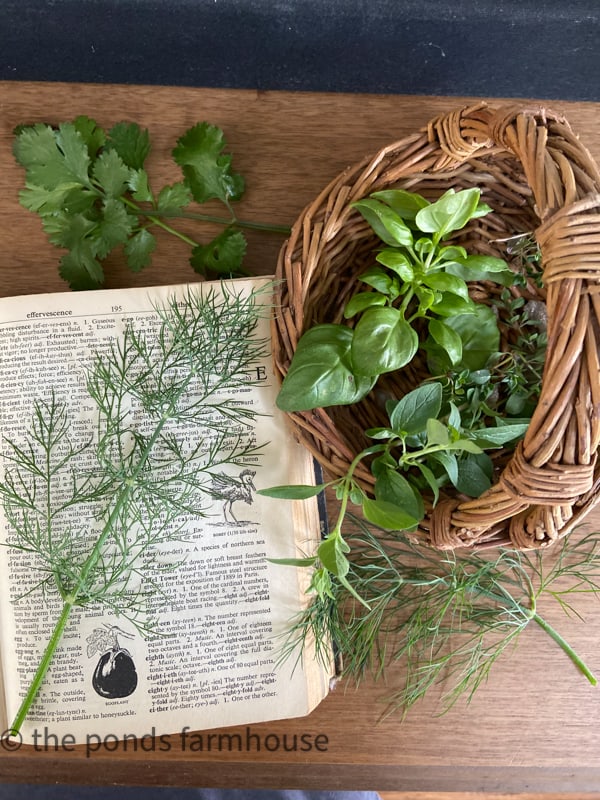
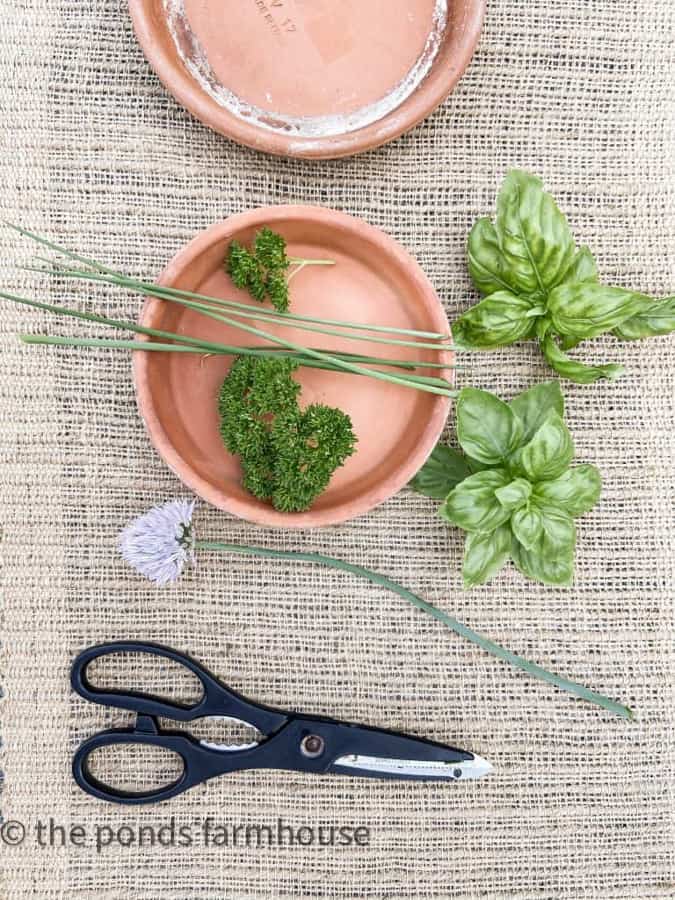
How to Gather and Prepare Herbs To Make Botanical Art
You will want to gather your herbs at peak time, when they look their healthiest. Gather on a sunny day when the sun has dried all moisture from the stems. Use sharp shears to harvest herbs.
Remove any excess leaves or damaged areas. It’s best if the plant leaf is as flat as possible. Leaves that are curled are not ideal for pressing.
How Do You Dry Herbs by Pressing?
The easiest method is to press herbs or flowers using a heavy book. However, if you are working with a large quantity, a flower press will work best.
Drying Botanicals With Old Books
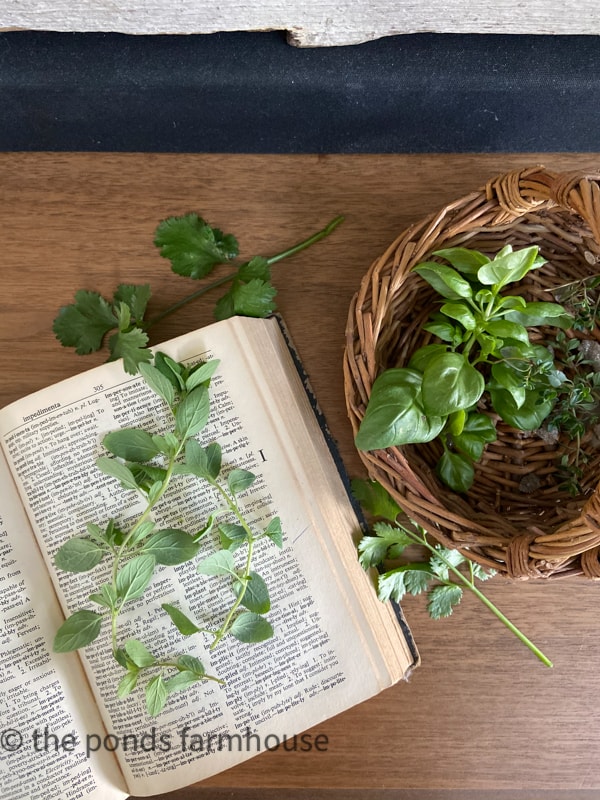
First, let’s explore pressing herbs with books. I have an old dictionary that I like to use. If you are not concerned about the book’s condition, you can lay your herbs between the pages without any protection. Some herbs, especially flowers, may stain the pages. If this is a concern, place your herbs between two pieces of parchment paper, copy paper, or paper towels, and then put them between the pages of your book. The parchment paper doesn’t let the herbs dry as quickly, but copy paper and paper towels may let moisture bleed through to your book pages.
Place the drying paper inside the open book, toward the back. Place the herbs on the paper and make sure there is no overlap. Place another piece of paper on top. For best results, cover them carefully so they do not shift their position. Close the book and ensure that all of the herbs are inside.
Add Weight To Press Herbs
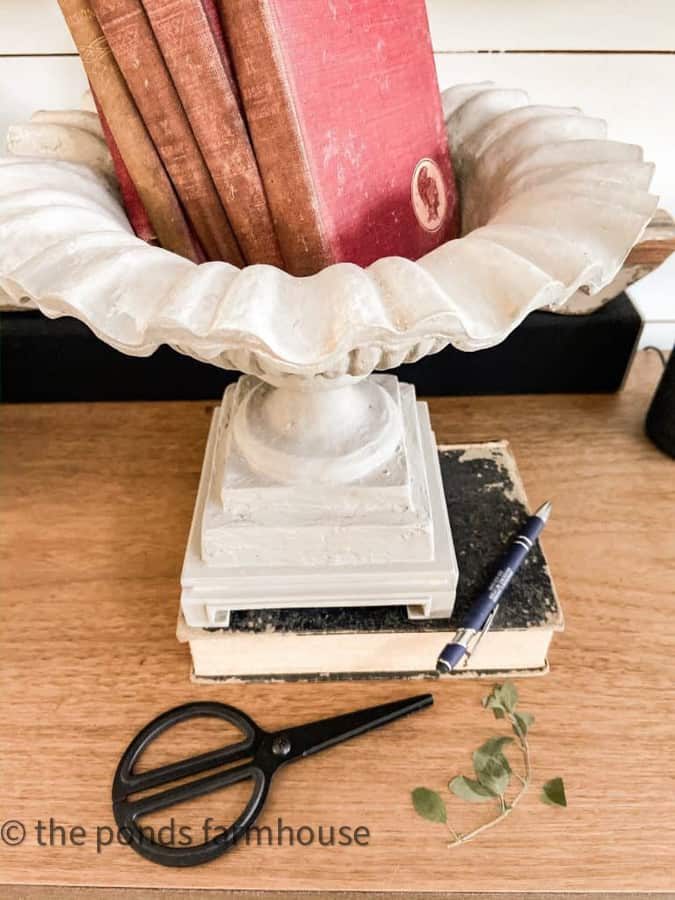
To press herbs, you can place small amounts between the book’s pages and add weight to the book.
I placed the book on my desk under this urn and added extra books for good measure. It’s important that the book presses the herbs evenly. Flat herbs are best for pressing between book pages. I allowed my last batch of herbs to stay in the book for two or three weeks.
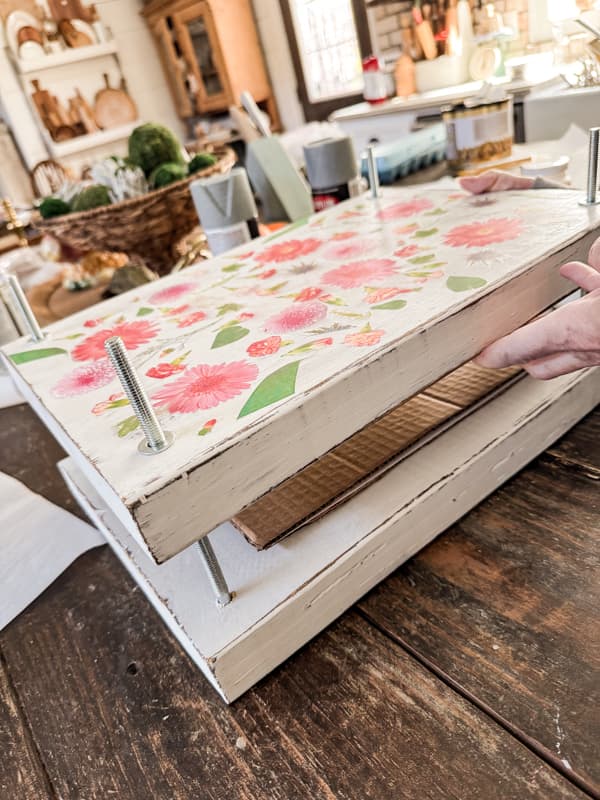
Safely Use A Flower Press For Drying
If you have large quantities of herbs or flowers to be dried, a flower press is your best option, and you don’t need to worry about damaging your old books. So to be safe, you can purchase a flower press or build one like this. This is an easy DIY, and I’ve shared the tutorial link at the end of the post.
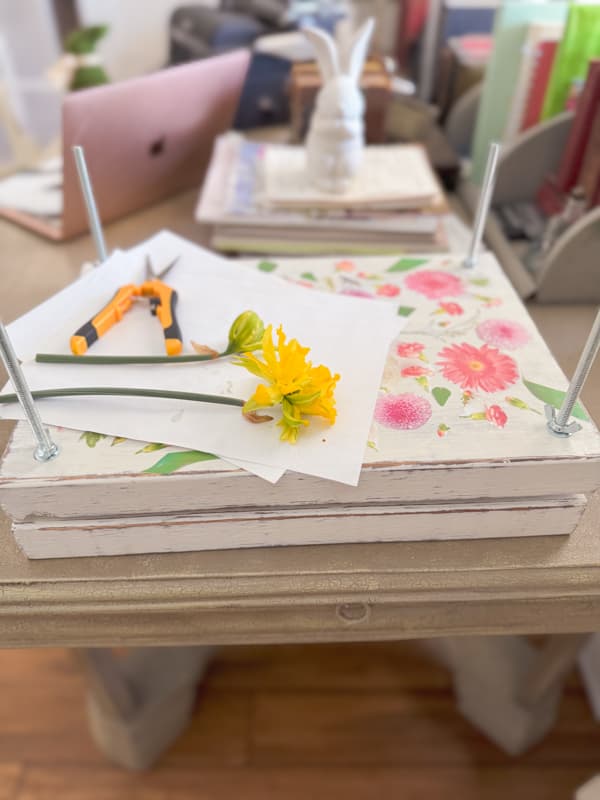
With a flower press, you can use copy paper and cardboard to easily separate the herbs. You can add several layers to be pressed simultaneously.
Place herbs on a sheet of paper inside the press. Arrange the herbs on top, then cover with another sheet. Then place a piece of cardboard on top. You can then add another piece of paper and make another layer. Just continue to place cardboard between each layer.
Once you have all the herbs or flowers arranged, add the top back to the press and tighten the screws. You will not need to add additional weight if the screws are tightened well.
Insider Tip
Your herbs will dry quickly between the paper and cardboard, usually within two weeks. Parchment paper doesn’t absorb the oils as quickly, and drying time may be longer.
Check Herbs For Dryness
Begin checking to see if your herbs are dry after a couple of weeks. Here is the result after three weeks of pressing. Not all herbs are great for pressing, and I was not as happy with my basil. The leaves are tiny and curly. Therefore, they didn’t dry as well this time. The flatter leaves of oregano and dill dry best.

Which Herbs Are Best For Pressing?
Although you can press all herbs, some press more easily and look better after drying. Here are my favorites.
- Dill
- Mint
- Thyme
- Oregano
- Cilantro
- Sage
- Rosemary
- Lavender
Now, To Make Botanical Art?
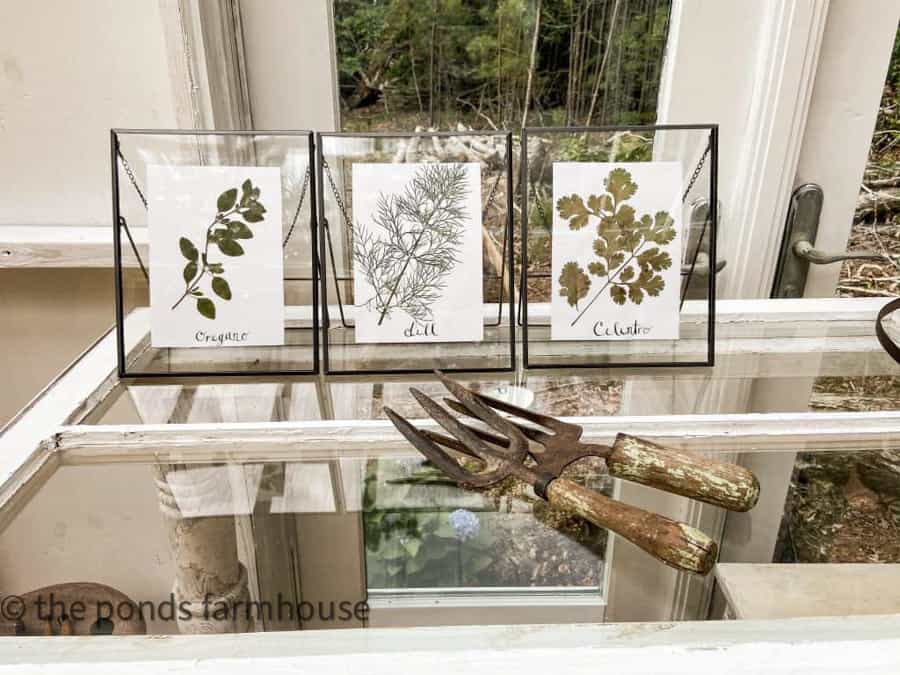
Now that your herbs are dry and flat, you can begin finding frames for your botanical art prints.
I love these gold frames; however, I already have three frames. I purchased them from IKEA for a future project, and since I’m always budget-conscious, I used what I had on hand.
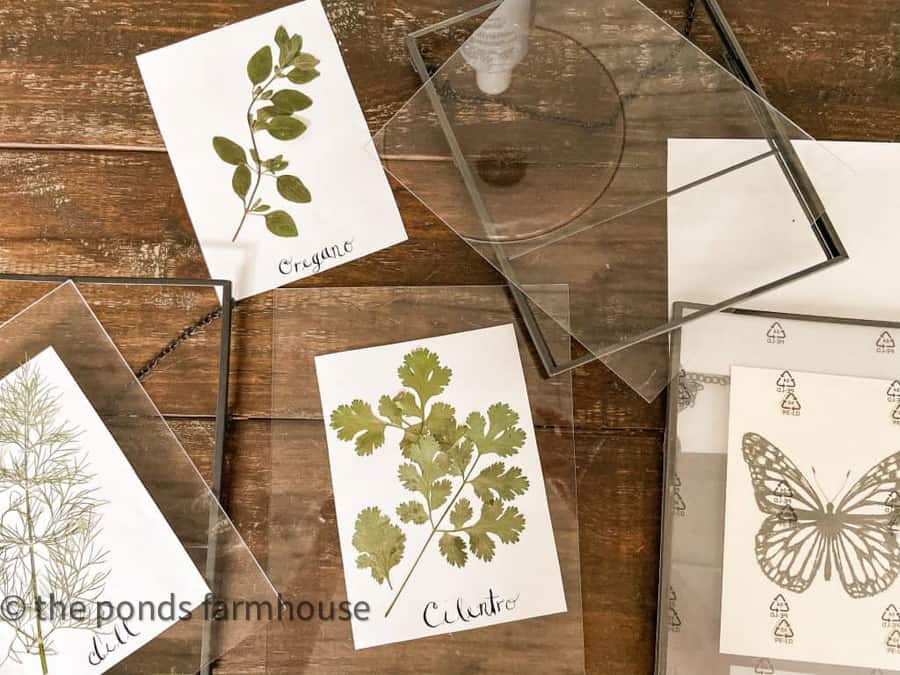
If you use a pressed glass frame, you will need a background for your herbs. I used some quality acid-free paper that I had on hand. In addition, I used a calligraphy pen and handwrote the names of the herbs on the heavy paper.
How Do You Attach The Pressed Herbs to Paper for Framing?
Next, you need to add the herbs to the acid-free paper to frame for botanical art.
I used basting adhesive to keep the pressed herbs from slipping. A light mist of spray will hold the herb in place on your paper. The basting adhesive is acid-free and helps to maintain the color of your herbs.

I held the spray can 24 inches from the herb and gave it a light spray.
Because pressed herbs are easily damaged, exercise caution when handling them, especially when applying adhesive.
Insider Tip
If you are framing your botanical art without pressing between glass, you will need to use a permanent glue to adhere the herbs to your paper.
Be sure to use acid-free glue and paper to preserve the color of your art.
How To Frame Pressed Herbs For Botanical Art?
Now, add your pressed herbs to the glass to make botanical art.
To attach the background paper to the glass, add just a mist of adhesive to the center of the paper. Then, align the paper in the center of the glass and press. Finally, gently place the top glass into the frame, being careful not to damage the pressed herbs.
Other Ways To Preserve Herbs
In addition to making botanical art, you may be looking for additional ways to preserve herbs for out-of-season use. Be sure to read How to Dry and Freeze Herbs for out-of-season use.
You might also enjoy this tasty basil pesto recipe. You can freeze this recipe, and it’s a great way to use up any excess basil.
I hope you enjoyed this tutorial. This technique also works for pressing and drying flowers. It’s a great way to preserve your flowers and turn them into art.
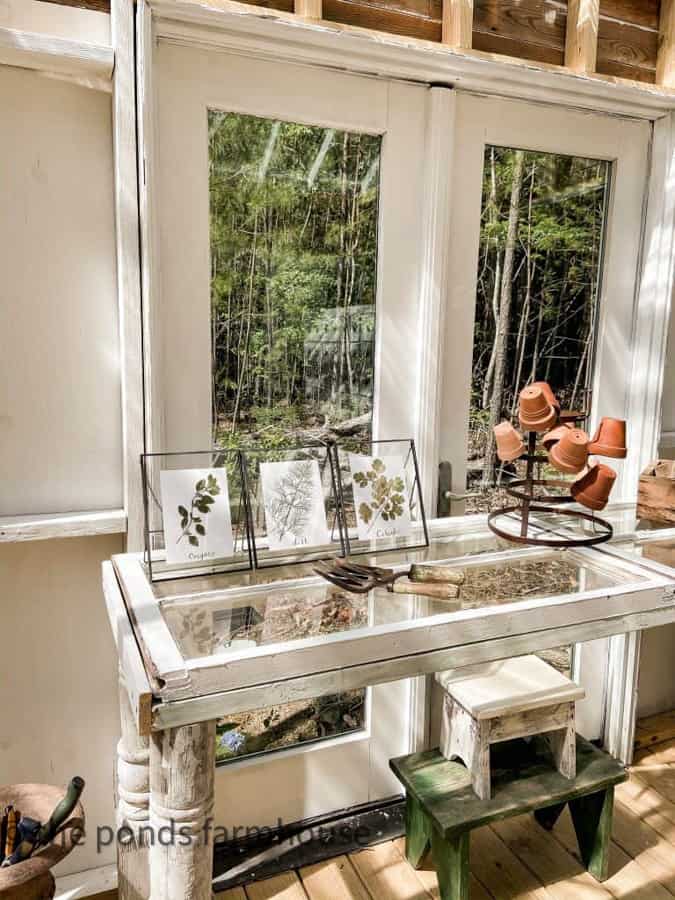
I began by displaying the framed botanicals to decorate inside the greenhouse. However, I quickly realized the excess sun exposure was fading the herbs.
Insider Tip – Sun Precaution
If you plan to display your botanical art in a greenhouse or sun porch, beware! The sun will fade the color of your botanical art very quickly.
I recommend displaying your dried herb art indoors, away from direct sunlight. You can also frame your art with UV-protective glass to help prevent fading.
Resources
Build a DIY Flower Press for Preserving Botanicals
If you are working with flowers and a large quantity of botanicals, you will need a flower press. You can purchase a flower press such as this one, or see how easy it is to make one from scrap lumber. See Easy Flower Press: Upcycle Scrap Wood To Preserve Botanicals
More Favorite DIY Projects
- How To Build A DIY Greenhouse
- DIY Apothecary Cabinet IKEA HACK
- Over The Table Rod Stand Tutorial
- How to Make A DIY Potting Table from Old Windows
- Copper Hanging Pot Rack
- DIY Copper Spice Rack
- Nautical Rope Mirror Tutorial
- Easy Rustic Ladder Tutorial
- Distressed Decoupage Lamp Makeover
- Easy Thrifted Lamp DIY – Pottery Barn Hack
- Pottery Barn Leaf Napkin Ring Hack
- DIY Flower Press Tutorial using Scrap Wood
I appreciate you stopping by; your comments and questions are always welcome.

Pin It To Remember It
Did you find some great ideas you’d like to save for future reference? Hover over the images you’d like to save and pin to your favorite Pinterest Boards when you see the PIN button.


Such a great DIY and perfect for summer decor. Love it! Pinned. 🙂
I appreciate your comments Cindy.
Thanks for stopping by.
Rachel
Luved this post Rachel. So cute. Pinned🙋🏼♀️
Thanks so much Ann
Rachel
I love this – I’m so going to try it with my herbs! Thanks for the great ideas! 💗
Barbara,
I’m so glad you found this informative.
Rachel
So glad you shared this again with us at Farmhouse Friday. Featuring it tomorrow. Hope you link up again soon. pinned
Thanks so much, I appreciate it!
Cindy
Thanks so much for sharing.
Great project! Pinned
Cindy,
Thank you and I’m glad you like it.
Very informative. Thank You
Thank you Carolyn, I’m glad this was helpful.
Oh how I love this. It’s just so beautiful.
Renae,
I appreciate this.
I love this Rachel…such a create project.
AnnMarie,
I really appreciate this.
This is so pretty! This year I want to make a pressed flower book of my garden.
Jennifer,
That would be amazing.
Rachel – love this! Can’t wait to try it!
Mary,
Please let me know how it turns out. I’d love to share a photo of your finished project. Have a blessed weekend.