How We Built a DIY Greenhouse With No Experience
Have you ever wanted something badly enough to jump into the project with blind faith that you could do it? I’m sharing our journey of building our DIY Greenhouse, with no experience and jumping in without a clue. Because we are not professional builders, this is not a step-by-step how-to with all the nitty-gritty details. This post will inspire you not to give up on your dreams and, hopefully, encourage you to step out of your comfort zone to take on new projects.
So let me walk you through our process!
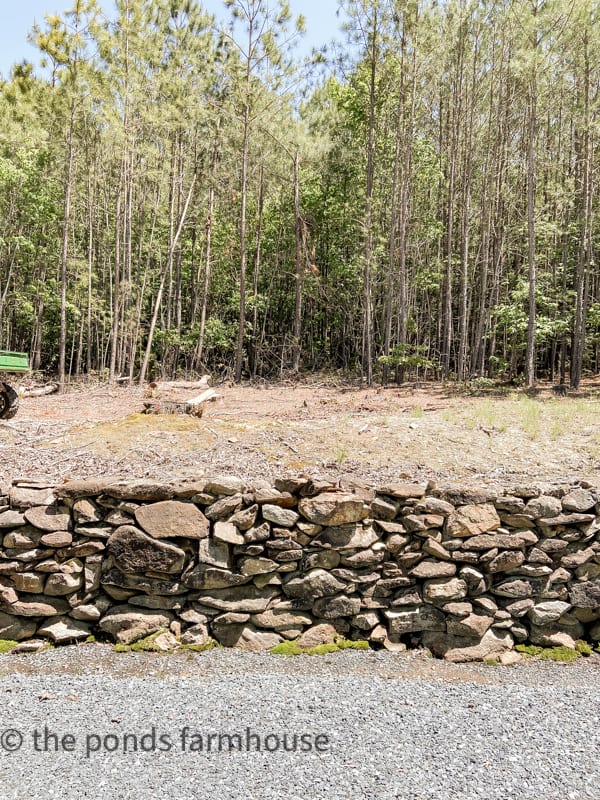
I had dreamed of a greenhouse since we moved to The Ponds. This spot behind the house was cleared to accommodate the new structure.
(Posts on The Ponds Farmhouse may contain affiliate links. As an Amazon Associate, I earn from qualifying purchases. See the full disclosure details here.)

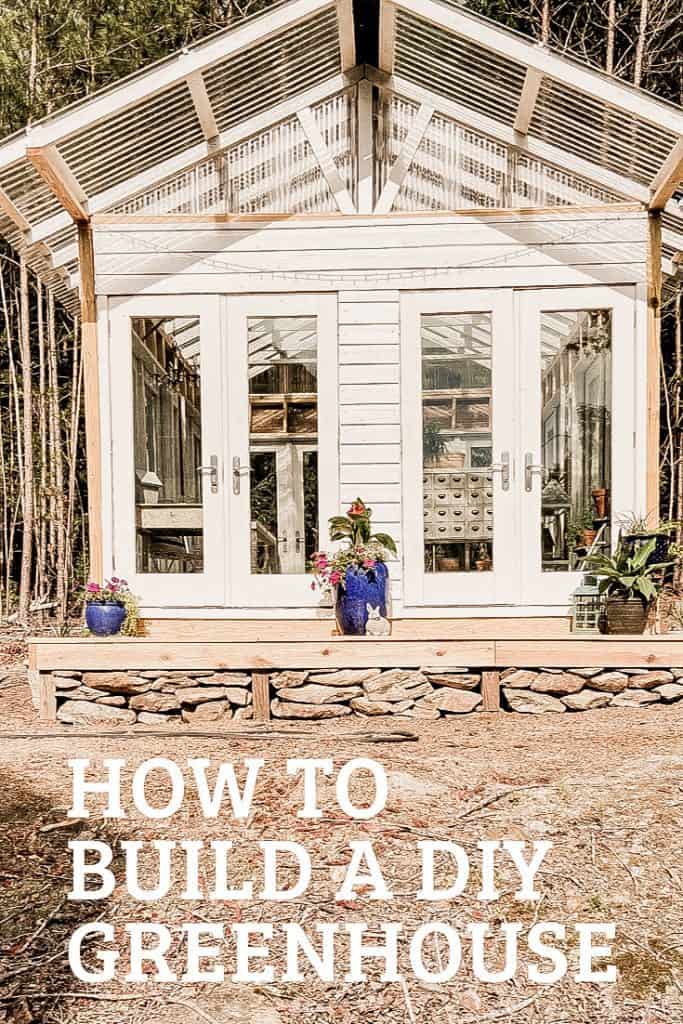
How to Build a DIY Greenhouse
Y’all, we did it. I’m still in shock and very tired, but we did it!!!! We are also excited that this post won the HOMETALK Summer DIY Project award for 2020.
If you’ve followed this blog for some time, you know that having a Greenhouse has been my dream. Well, as sometimes happens, things didn’t exactly go as planned, but the dream Greenhouse is finally a reality.
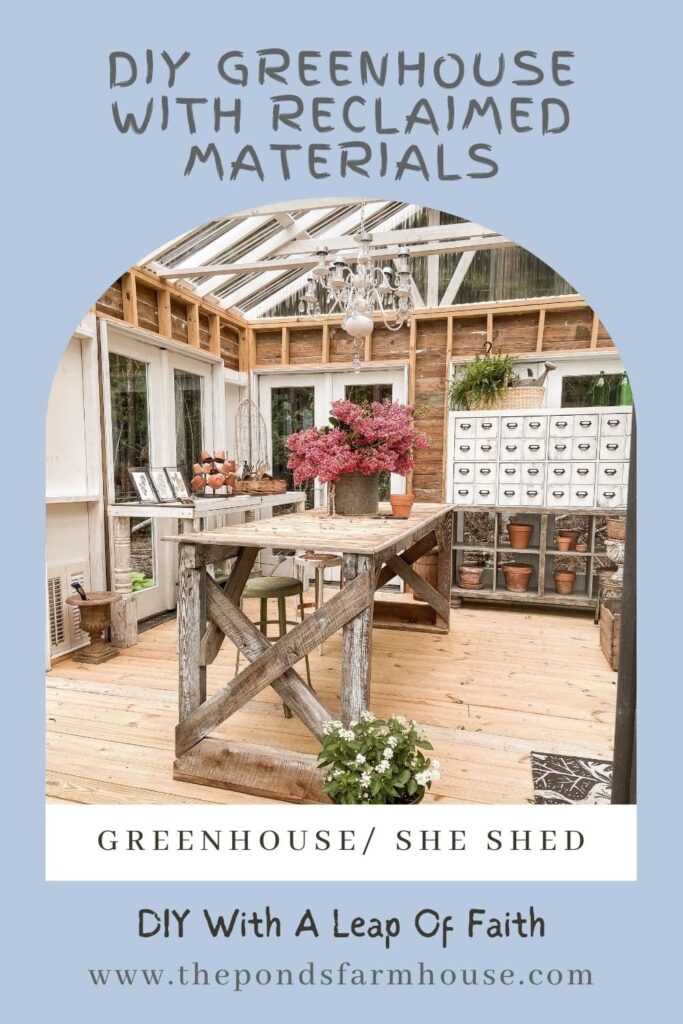
Here is the process of how we built a DIY Greenhouse from conception to completion. The satisfaction that comes with a handmade project and building with reclaimed materials was very appealing to us.
How the DIY Greenhouse Story Begins
After much debate, my husband finally agreed that we might attempt to build a greenhouse. A few windows had been collected, and a building site had been chosen.
Time to Window Shop And What Happened
Now that I had him on board, it was time for some serious window shopping. But then the COVID-19 Pandemic hit our country. Suddenly, all thrift stores and vintage shops were closed, resulting in no window shopping.
This was just a minor setback compared to the many hardships others endured. However, complaining about the situation on Instagram paid off because a follower contacted me with an offer.
He had several French doors rescued from a coastal home after Hurricane Florence. Unfortunately, he could not use them as planned and would sell them for a great price. Yay! Can you see my happy dance?
A Homemade Greenhouse
After several trips to pick up the doors and many days drawing on my graft paper, a plan began taking shape. It quickly became apparent that the doors would allow more than enough light for the space; therefore, the windows were no longer needed.
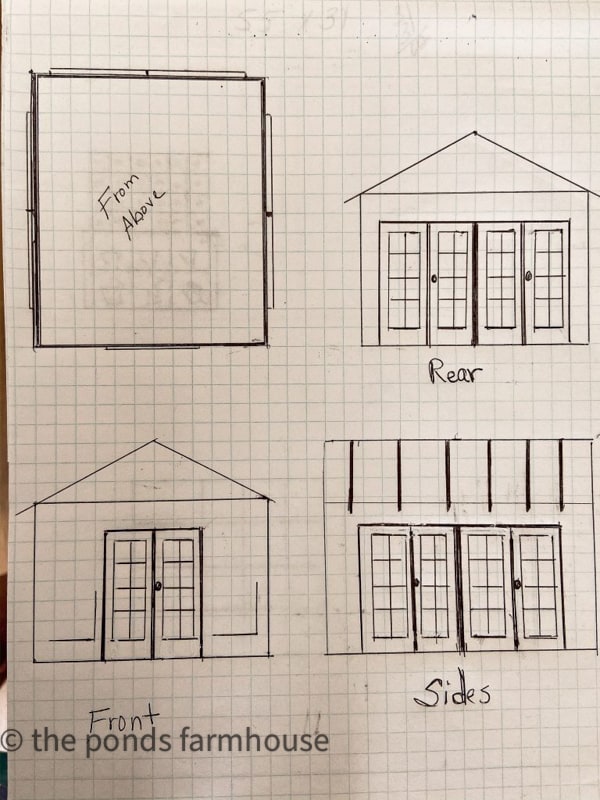
How To Begin Construction
Once we had our plan, we began cleaning the doors and calculating the supplies needed to complete the building. We placed an order with a local building supply company, and all the materials were delivered.
My husband was unable to travel for his job due to the pandemic, so we were able to begin the construction as soon as the materials were delivered.
Materials Needed to Build a Greenhouse 12′ x 16′
- Treated Lumber – amounts will vary depending on size of your structure
- 70 – 2 x 4 x 8
- 6 – 2 x 4 x 12
- 4 – 2 x 4 x 16
- 10 – 2 x 6 x 16
- 4 – 2 x 6 x 12
- 47 – 1 x 6 x 12 Deck Boards
- 4 – 4 x 4 x 8
- 12 – 1 x 4 x 8 trim boards
- 18 sheets of Clear Polycarbonate Roofing 4 x 8
- 8 Packs – Roof Panel Closures
- 8 Sets of French Doors – rescued
- 6 -Concrete Blocks
- 32 – Metal Joist Hangers
- Ridge Cap – 20′ long
- Reclaimed Shiplap siding
- 2 gallons – Primer Kilt z
- 1 gallon White Dove Exterior Paint
- 4- 4 x 8 Exterior Plywood Sheets
- 2000 Nail Gun Nails
- 200 Roofing Screws
- 2 boxes wood screws
Tools
- Nail Gun and Air Compressor Kit
- Circular Saw
- Chop Saw
- Table Saw
- Hammer
- Level
- Nails
- Screw Driver
- Drill
- Ladder
- Saw Horses

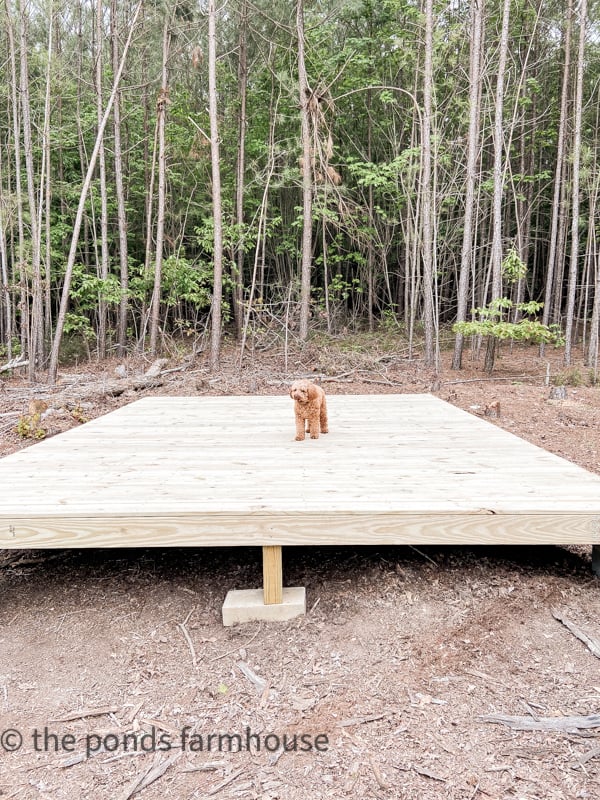
A Deck Foundation
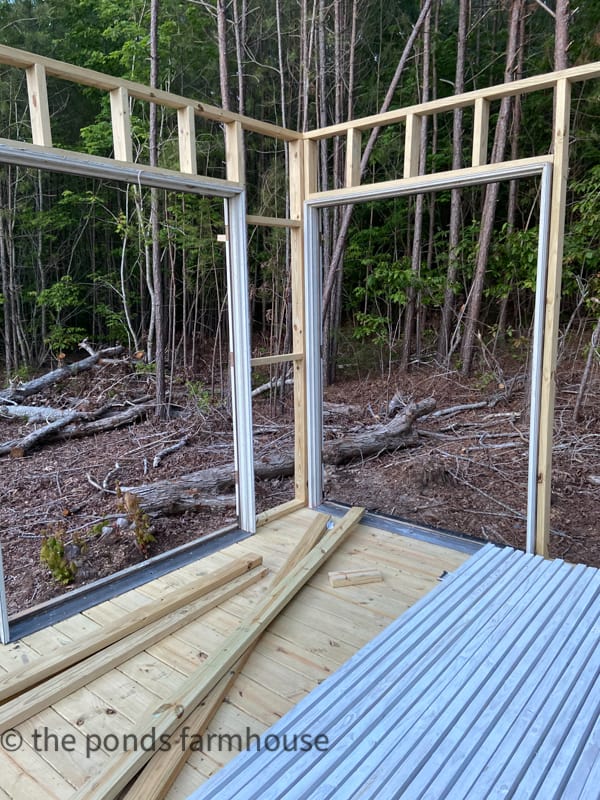
Since carpentry skills were minimal, we started construction on a deck as the base of the greenhouse. In addition, concrete blocks were used to level the foundation, and 2 x 6 x 16-floor joists were installed using metal hangers.
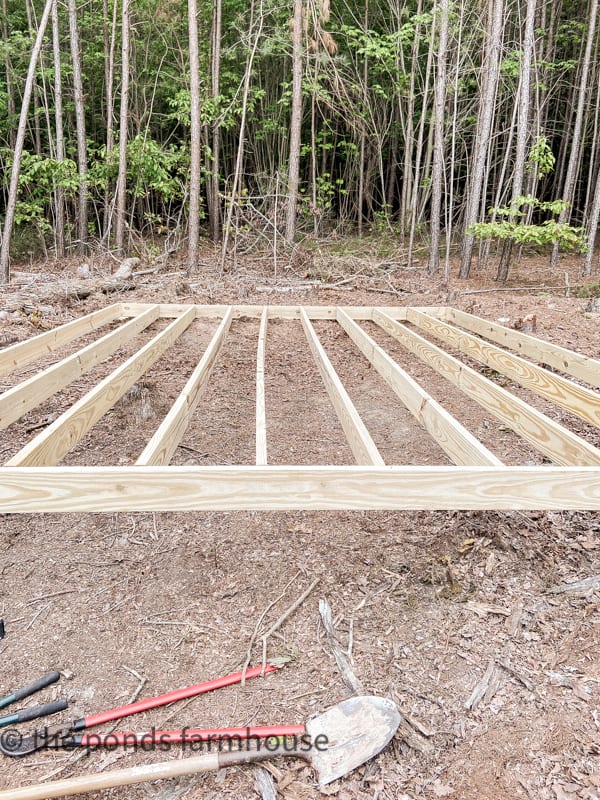
Next, the 1 x 6 x 12 deck boards were installed using a nail gun.
Because the greenhouse would not be 100% waterproof, treated lumber was used to build the frame of the DIY Greenhouse.
Because each process step could be written as a whole DIY Tutorial, this post is not intended to be a tutorial or a step-by-step how. Keep in mind it was just my husband and me working at a limited skill level. However, if you have questions about our process, be sure to ask in the comments, and we will try to answer to the best of our ability.
The Walls Go Up

Next, construction of the walls began, and we found that DIY tutorials came in handy. You can find a tutorial for just about anything you wish, which was fortunate for these two amateurs.
The walls came together with the aid of a nail gun, chop saw, rough plan sketch, and many prayers.
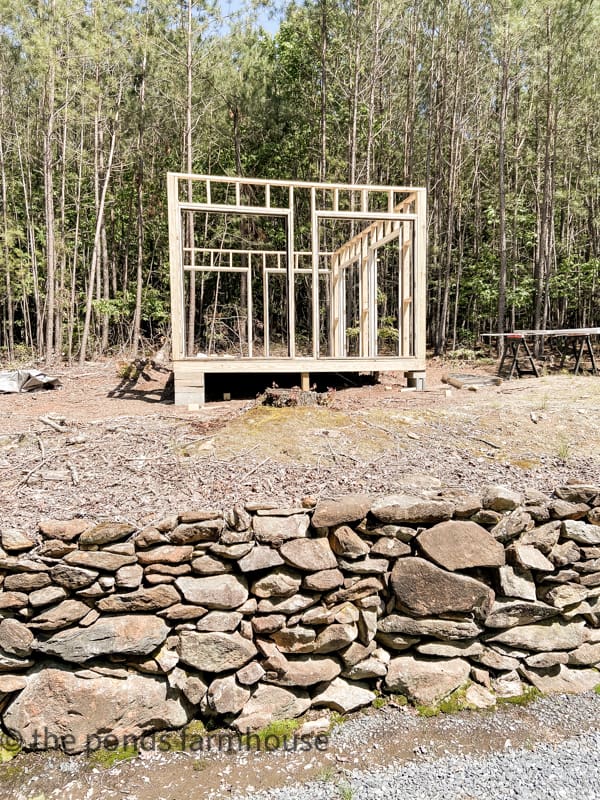
Construction was moving along at this point, and we felt pretty proud of ourselves.
Rafters Installed
Next, the rafters were built by hand using 2 x 4 x 8 treated lumber. Each rafter was constructed on the greenhouse floor before being installed.
In addition, the rafters were coated with white primer before installation to prevent painting on a ladder after they were installed.

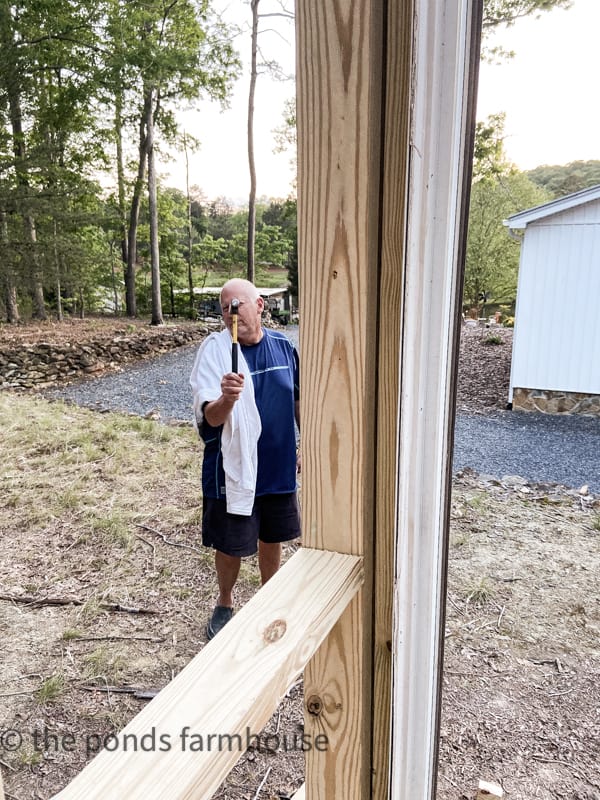
Nail Gun Caution
Use caution when using a nail gun. Yes, we did have one scary accident, which resulted in my husband having a nail sticking out of his thumb. Thankfully, no bone was hit, and the nail was pulled out before I realized what had happened. Whew, I might have fainted had I seen it.
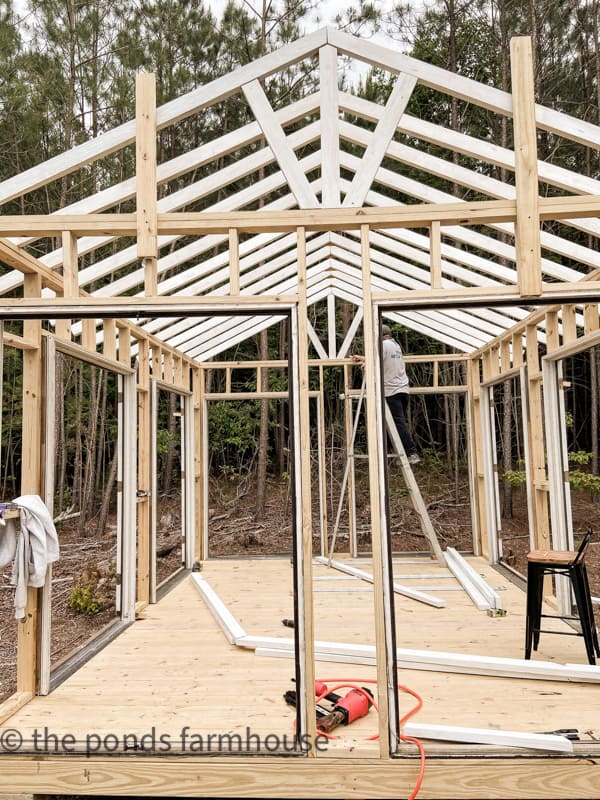
Because of the height, installing the rafters was a little more involved than building and installing the walls. Securing them simultaneously was quite challenging, with only two people holding the rafters steady. At this point, I was just a bit stressed. LOL
Moving Right Along with the Building of the DIY Greenhouse
Can you tell we’ve been working hard? Next up was the installation of the doors and roofing materials. This was the most challenging part of constructing the DIY greenhouse.
First, the doors are super heavy and hard to manage with just four hands. Also, each door frame needed to be square before hanging the doors.
Unfortunately, more than one door had to be rehung to adjust the level. Eventually, all eight sets of doors were hung and somewhat leveled. LOL
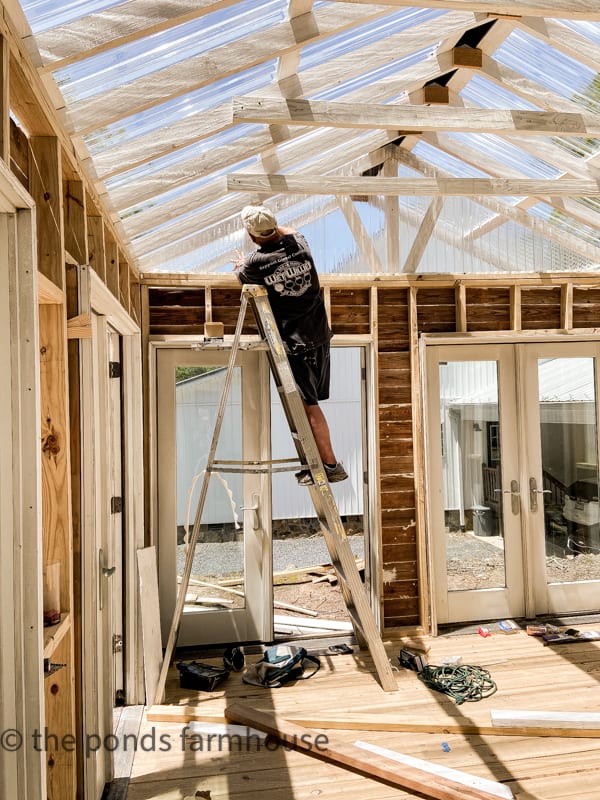
Preparing for the roof
To install the roofing materials, 1 x 4 boards were first attached to the rafters so the roofing could be fastened to them.
The clear polycarbonate roofing material was then attached using roofing screws. In addition, as the roof was being secured, my husband also installed the ridge cap as he moved from the front to the back of the building.
My husband had to install the roofing materials himself because holding the ladder and praying he wouldn’t get hurt was all I could do. In addition, there may have been some tears during this part.
Note: Using a ladder for this part of the project is not recommended. In hindsight, the job would have been much easier and safer had we rented scaffolding. However, the work was completed, and many lessons were learned. LOL
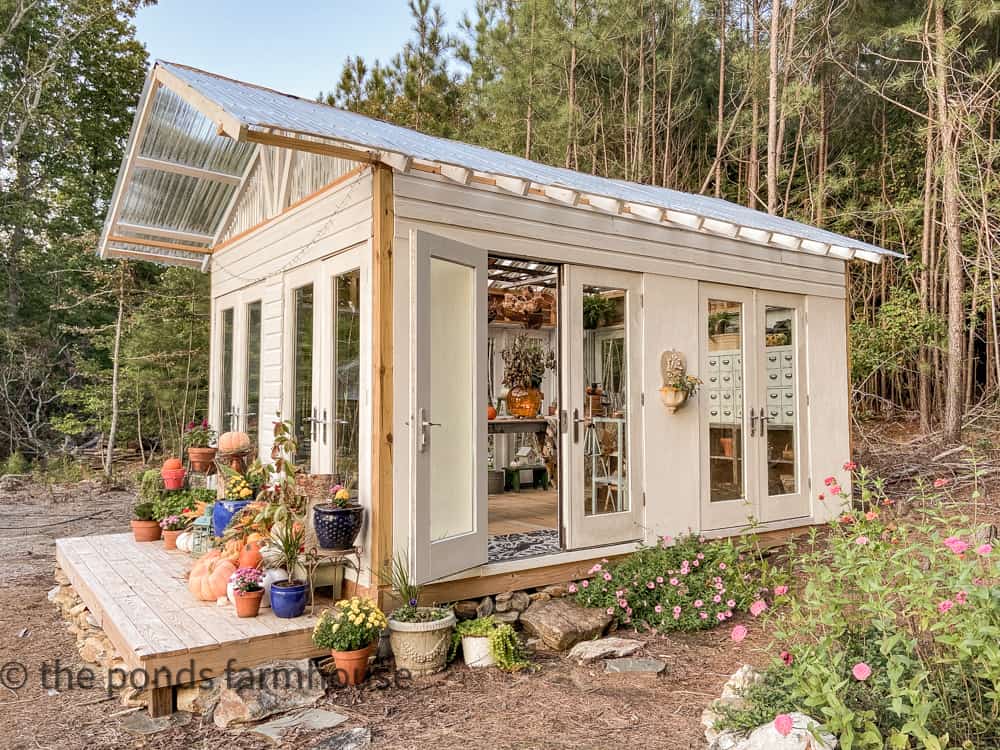
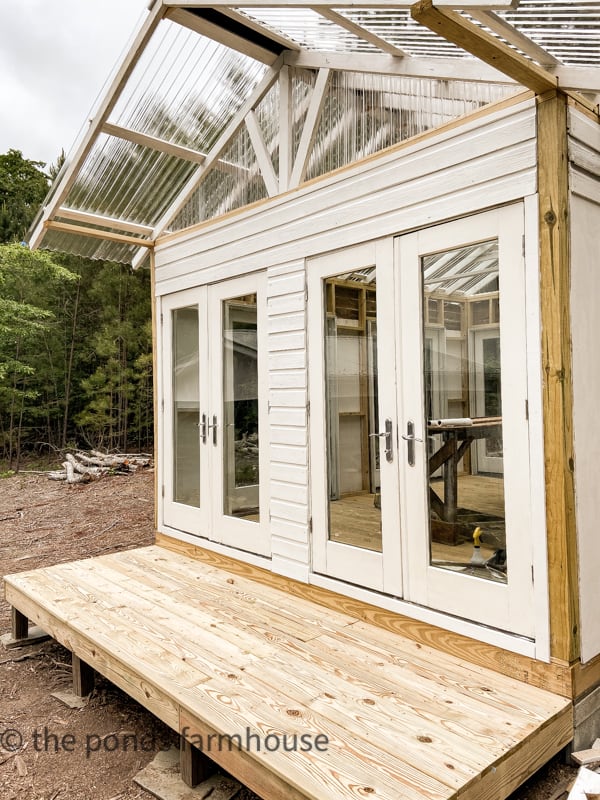
Clear polycarbonate sheets were used over the front and back doors to allow plenty of light to flood the greenhouse. From this view, you can see the natural side of the reclaimed shiplap.
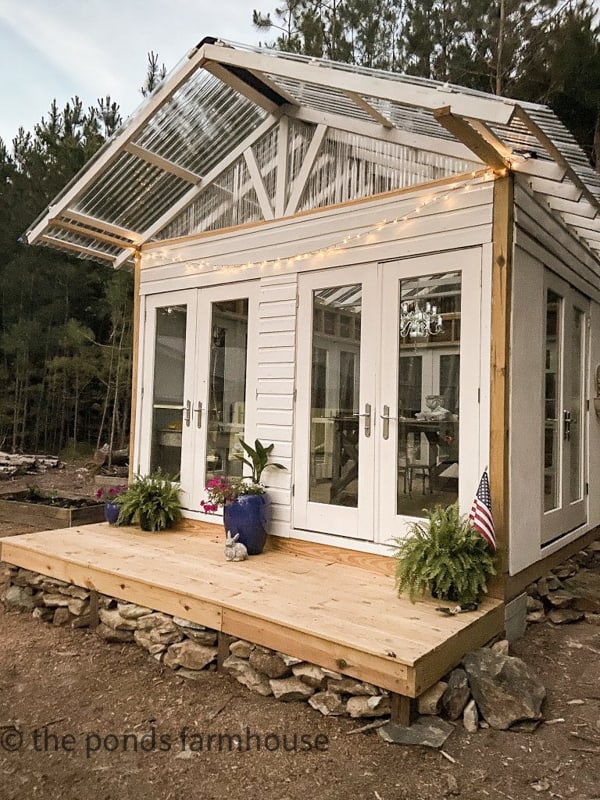
The DIY Greenhouse Is Closed In.
Finally, the walls are entirely closed, and the roof is finished. From this view, you can see the reclaimed shiplap siding covering the exterior. Since there was not enough for the entire project, outdoor siding was added to fill the gaps.
To tie the exterior together, Benjamin Moore painted everything with White Dove exterior paint. At this point, the construction has been underway for precisely three weeks.
Note: We were working continuously during this three-week period. We were obsessed with getting the project finished quickly.
Because it was now Memorial Day Weekend, it was a perfect time for a break.
However, the finishing touches were quickly completed once the break was over. All the trim work was applied, and some interior painting was completed. Whew, almost at the finish line.
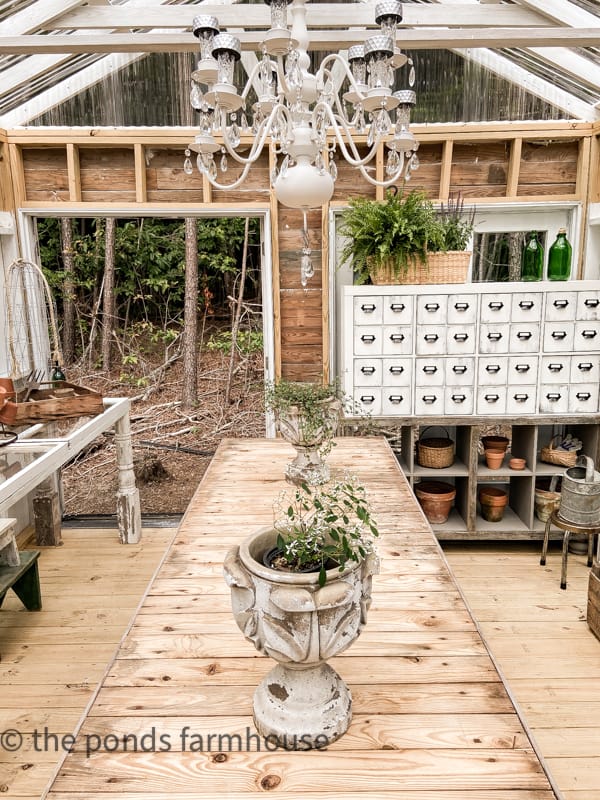
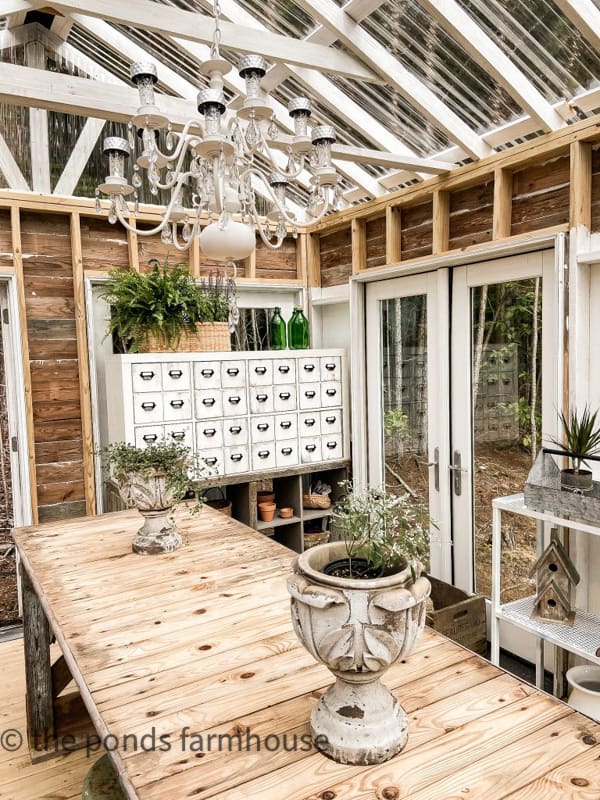
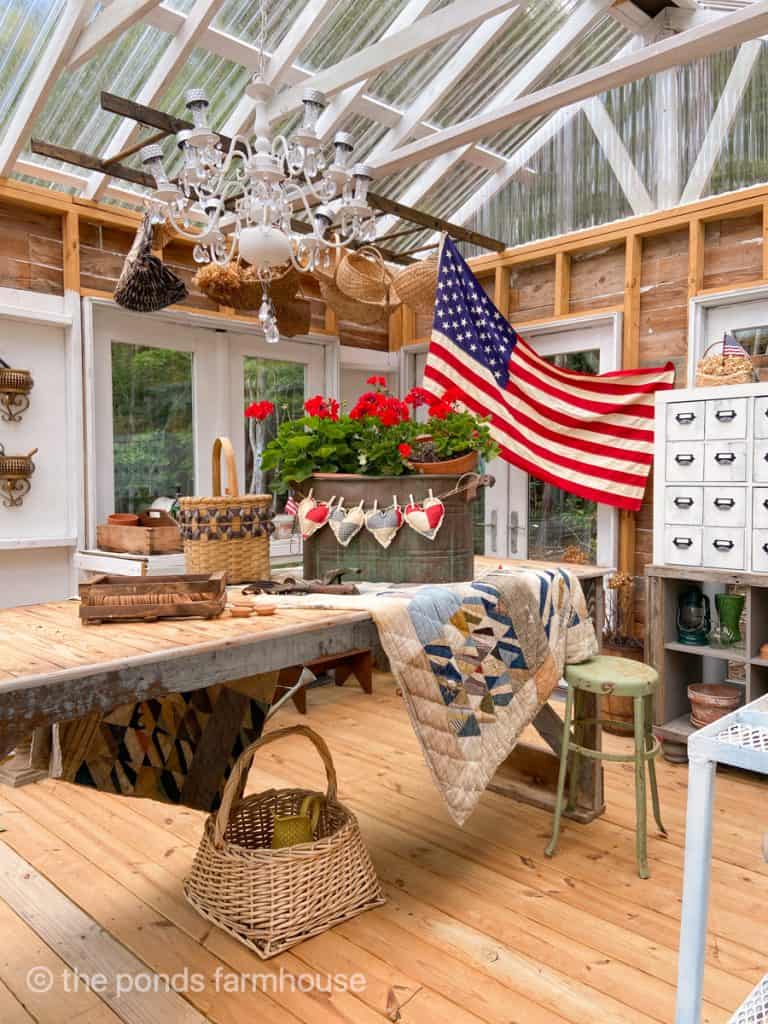
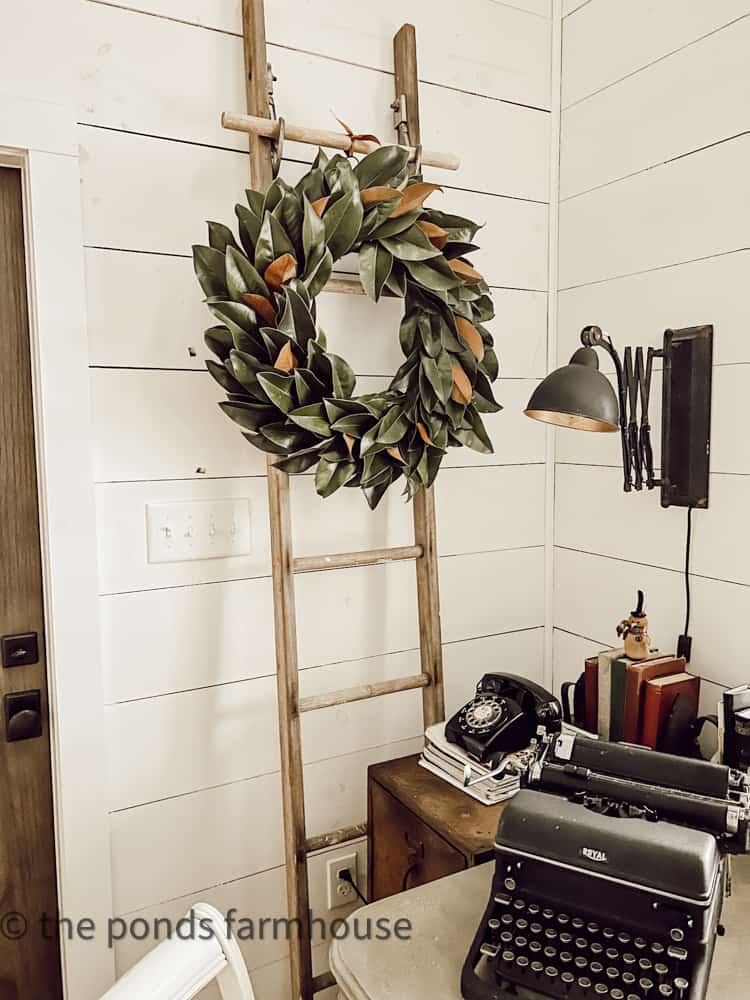
Some interior Views
At this point, some styling began. First, a primitive work table rescued from my dad’s workshop was perfect in the center of the greenhouse.
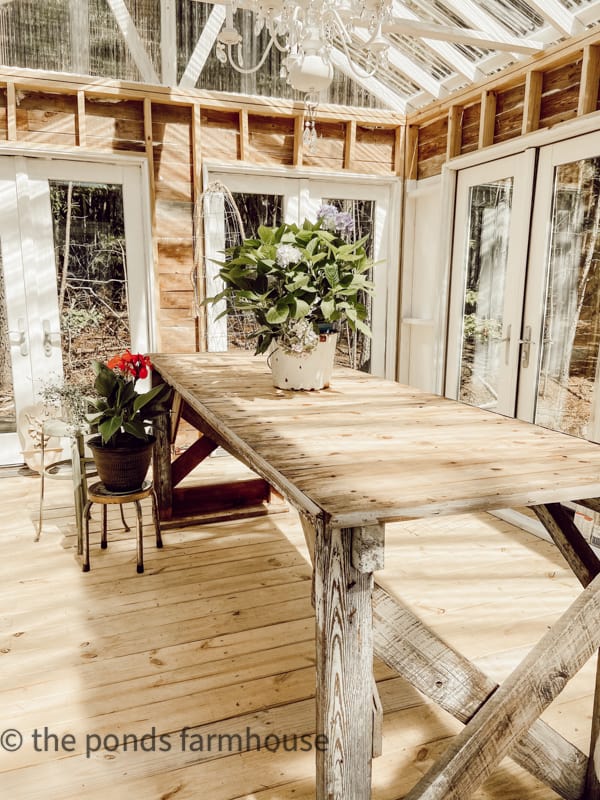
Next, a thrift-store chandelier got an update and worked perfectly in the greenhouse thanks to the solar lights. See details on how to re-purpose a boring thrift store chandelier.
How To Add A Foundation With Field Rock
Another finishing touch was adding field rock around the greenhouse’s foundation. We gathered rocks from the edges of the pastures, and a few larger ones were set as stepping stones to the greenhouse doors. This was a relatively simple process because our pastures are full of field rock.
We began by stacking the larger rocks at ground level and continued stacking until the foundation was covered with field rocks.
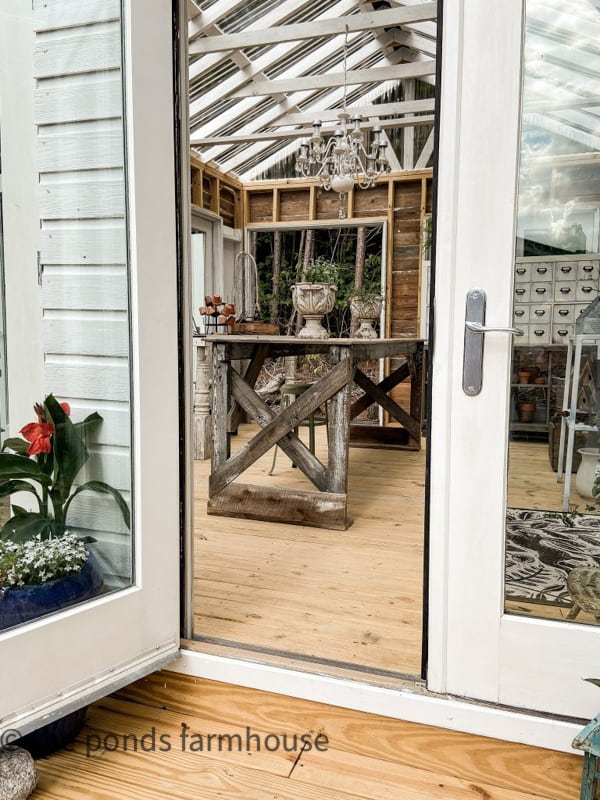
To avoid disturbing anything inside the greenhouse, all the doors were installed to open outward. As a result, tables and such could be placed anywhere within the room without worry, allowing for great airflow.
A quick video of the step-by-step process
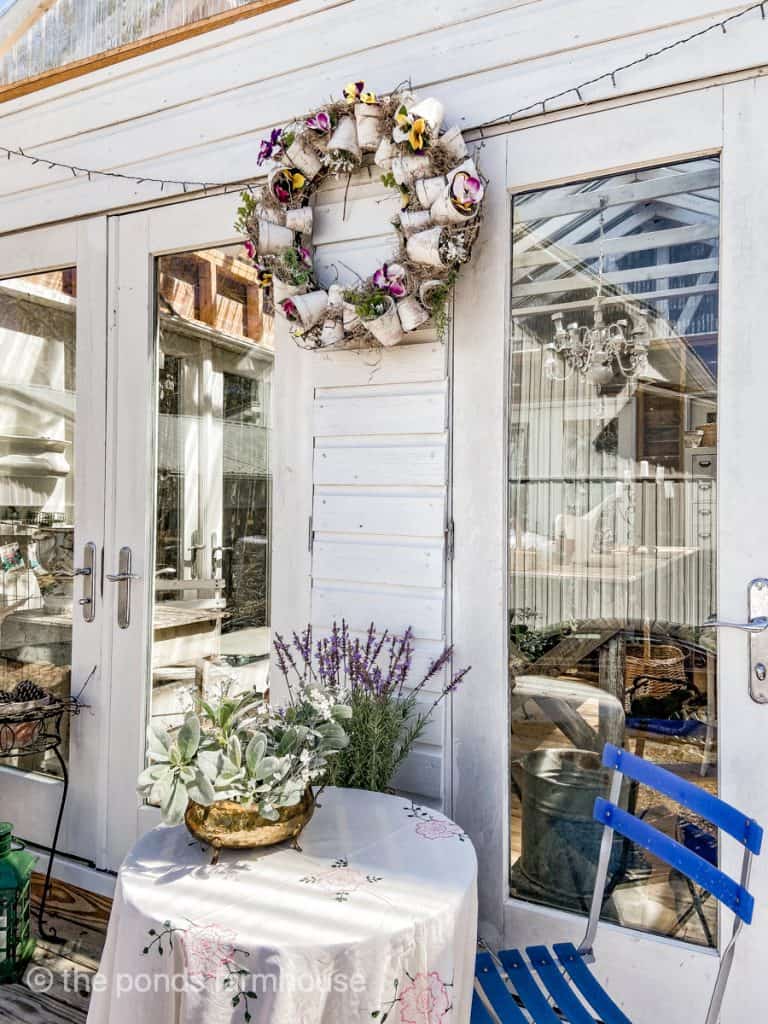
Decorating the greenhouse is so fun, and this DIY Terra Cotta Wreath was a great addition. In addition, I shared this Rusted Can Fall Wreath, which worked perfectly for fall.
Although building a DIY Greenhouse was the most challenging project we have ever tackled, the results are a dream come true. It’s a little late in the season to use the greenhouse for growing, but it is ready for this Fall and next Spring.
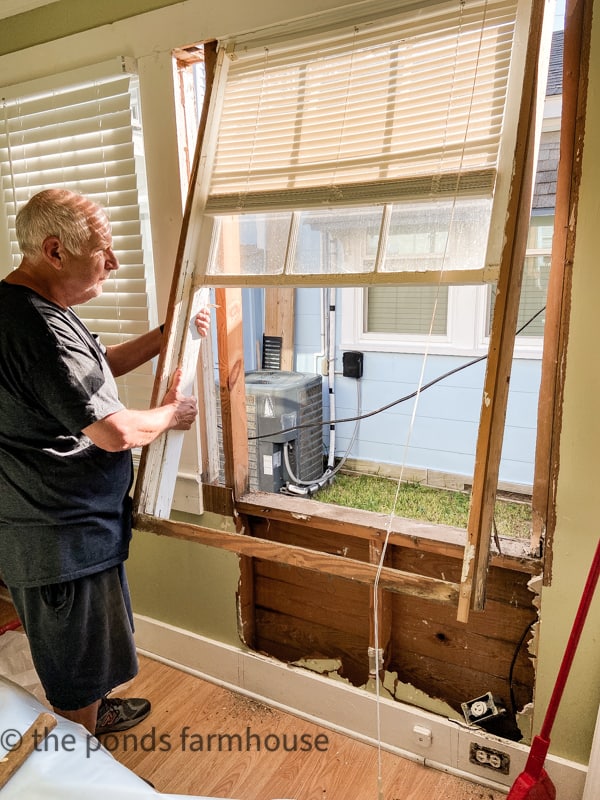
The success of this project gave us the courage to renovate our tiny beach cottage from top to bottom. If you missed seeing that before and after, check it out at Tiny House Ideas For Beach Cottage Remodel: Before & After.
In addition, I hope this inspires you to step out of your comfort zone and attempt projects you never dreamed you could complete.
Update: Seasonal Greenhouse Tours
- First Christmas In The DIY Greenhouse
- Summer Greenhouse Tour
- Fall in the Greenhouse
- A Patriotic Greenhouse/She Shed
The new greenhouse/she-shed is truly a dream come true. See Dreaming of a Greenhouse/She Shed to see how I was inspired.
Resources

Thank you for stopping by, and I hope you enjoyed seeing the process. Your questions and comments are always appreciated.

Pin It To Remember It
Did you find some great ideas you’d like to save for future reference? Hover over the images you’d like to save and pin to your favorite Pinterest Boards when you see the PIN button.


Good Morning Rachel
Wow that was a fun process to watch. All that work that went into making that gorgeous greenhouse. I love every single thing. It is so charming and nice and large(mine is tiny) enjoy every second using it
have a great day***
deezie
Deezie,
Thank you for all your encouraging words.
Rachel
I am in awe of y’all! That’s a lot of measuring and so out of my element. I think I’d fill those rafters with string lights and live out there! I could bring my own mattress (okay and an air conditioner) and sleep happily right there on that bench! Love this and congratulations. It’s even styled beautifully! Just gorgeous! Pinning and still grinning!
Cindy,
I’m so glad you like this. This was our most challenging diy ever. So glad it worked out.
Rachel
Hi Rachel,
Wow you knocked this out and achieved your dream. The greenhouse is stunning!! I love tge structure itself and the roof us beautiful. It’s going to bring you joy for years to come.
Enjoy every second!
.Cindy
Cindy,
Thank you so much for this.
Rachel
Your greenhouse is the prettiest one I have ever seen! I am green with envy.
Have a great week,
Kippi
Kippi,
I’m so glad you liked this. Thanks for your sweet compliments
Rachel
Oh my gosh Rachel – so much work and perseverance! And what a wonderful result!! You must be so proud! I’m totally inspired! What are the dimensions? I’m wondering if I have room for something the same size. 🙂 Thanks so much for sharing your fabulous project!
Oh my word, Rachel your greenhouse is FABULOUS! Green with envy over here, I’d love to have something like this in my yard. Wow, as an avid DIY couple ourselves, I’m so impressed just the two of you did this build. I LOVE how you’ve styled it inside too – magazine worthy!
Marie,
That is so sweet of you to say. to be honest, we are actually amazed with ourselves. Now that it’s finished it’s hard to believe we actually did it.
Rachel
Ooh! I am coveting this gorgeous greenhouse! Thanks for sharing at Vintage Charm–pinned!
Cecilia,
Thanks so much. I appreciate your input.
Rachel
What an awesome greenhouse!! Great job! I don’t have the room for one. I am jealous! Lol Happy planting and growing!
Lisa,
It’s been a dream of mine forever. Thanks for your comments.
Rachel
Color me green with envy! WOW, love it! I would love to have a greenhouse like this! I would have so much fun decorating it! I am not good with plants, so mine would be mostly to look at! (and get away) LOL
Great job!!!! What a good Hubby you have!
Shelly,
Thanks so much for stopping by. Yes, I’m very fortunate that my husband is willing to help me with my crazy ideas.
Rachel
I absolutely love this Rachel. We are planning on building a playhouse in the backyard for the grandkids. and this has given me inspiration! Thanks for sharing!!
Michelle,
I really appreciate this and I’m so glad you are inspired. Best of luck with your project.
Rachel
Well done👍 You have The Best Hubby! Thanks for posting😍
Hey Molly,
I will tell him you said this. I appreciate your support of my blog and you sweet comments.
Rachel
Rachel =. The greenhouse is beyond belief. Just gorgeous,BUT, the best thing of all is you and your husband. No question The Lord brought you two together. Not many husbands, unless under threat, would do this or be able to do this. Give him a big kiss from all fans.
Diana,
Oh I will. I got pretty lucky I must say. Thanks for taking the time to comment. It means so much to me.
Rachel
Is that a card catalog from a library??
Jill,
No, it is a diy project. Here is the link https://www.thepondsfarmhouse.com/diy-faux-apothecary-cabinet-card-file-chest/
I’m glad you got your dream – perhaps a COVID dividend? Your photos make the project look doable – no basement, or poured concrete slab, etc. I’m happy for you and look forward to seeing you use it throughout the year.
Jeanne,
I really appreciate this. It was definitely a hard project but so worth it.
Hello. Do you mind sharing the cost to build this beautiful greenhouse?. I would love to have one just like this. Thank you so much.
Kris,
It was approx. 2,200 and we did all the work ourselves. Thanks for stopping by.
I would love to know what stain you put on your treated wood deck? I love how it is neutral and blends well with your White Dove paint. Thank you!
Lynn,
It’s not stained at all. This is just the natural aging process of our treated decking lumber. Thanks for stoping by.
It is very attractive, but have you made any plans for ventilation/air movement within the structure? That is VERY IMPORTANT in keeping your plant materials healthy. I don’t see vents or any smaller opening windows that will allow for decent air movement. You need to allow air to enter “low” and to exit “high” to get the proper movement…..
Pat,
All the doors open outward to allow plenty of air flow and the eves are open as well. They are set so they can be opened fully or just a small amount depending on the need. Thanks.
Thanks so much for sharing my greenhouse.
Thanks so much for sharing.
It turned out beautifully. I love it!
Debbie,
I’m so glad you like it.
Beautiful!!!! Your husband did an awesome job. He must have some construction back ground? Your decor ideas look perfect! The doors worked out wonderful too! Congratulations!
Thanks Jan, we have really enjoyed it.
thanks
How charming, innovative, and inspiring is this post?!! I love that you both dream it then do it. Not everyone has the “chomps” to tackle big projects…you definitely did not bite off more than you could chew!!!
Gail,
there were many moments when we had our doubts. I appreciate you sweet comment.
Rachel, oh my! You and your husband are both ambitious and brave! What a fabulous post~so impressed that you did this yourself. Wow. Now you’ve got me thinking of where I want one of my own!
Mary,
You should do it. You would love it.
Hi Rachel,
What is the ceiling height of your greenhouse. I love this idea, I just need a very tall ceiling.
Thanks
Sherry,
The walls are 8 ft. but the ceiling peaks at around 12 ft. I’m so glad you like it.
This is so beautiful! Thanks for sharing- do you have any idea if a rough cost estimate gif materials. I am starting my diy journey and have found your post super helpful.
Rebekah,
I shared the approx. cost on the blog post but that was 2020. Prices are so much higher now.
Great blog post…so inspirational. 💕
Lena,
Thank you so much. We love it so much.
A favorite project you guys did for sure!!!
Stacy,
Thanks it’s mine too.
I just finished reading your post on building a DIY greenhouse, and I absolutely loved it! The step-by-step instructions were super clear, and the tips for beginners made it feel achievable even without any prior experience. I’m excited to get started on my own greenhouse project! Thanks for sharing!
Thank you for your comments.
This post is incredibly helpful! I’ve always wanted to start my own greenhouse but didn’t know where to begin. The step-by-step instructions and tips for beginners make it seem so achievable. Can’t wait to get started on my project! Thank you for sharing!
Thank you. So glad you found this helpful.
Rachel, I have always enjoyed seeing pictures of your Greenhouse but seeing how you and Brad built it is beyond amazing! It’s so beautiful! How great that you had a vision and saw it to fruition. I have never seen such a wonderful Greenhouse as what you have built. I love how you used your Dad’s table. This is so special and I know he would be so proud of you. I really love seeing all your seasonal touches that you add — just so pretty. You are so talented and how great to see it in everything you do. Enjoy your wonderful Greenhouse, Rachel! Thanks, so much, for sharing it with us. Also, congrats on the award you received.
Mary-Ann
Thank you so much for your kind words. I’m so glad you enjoyed seeing our process. have a blessed day.