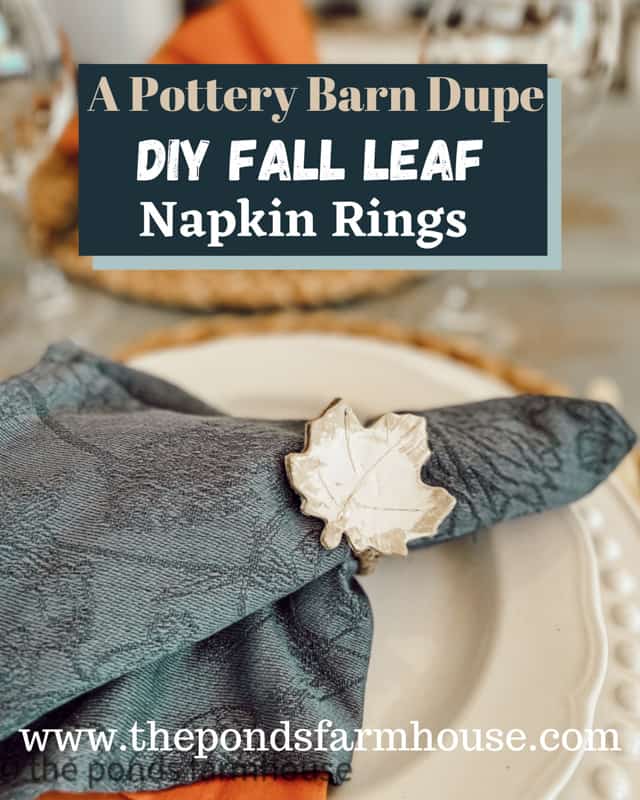
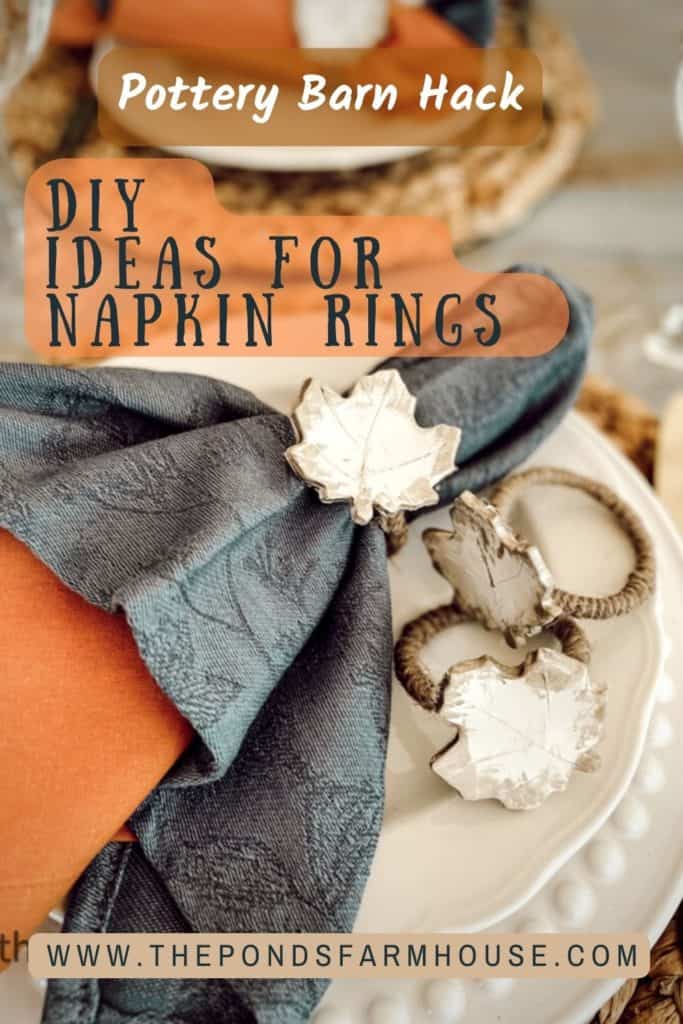
DIY Ideas for Napkin Rings Pottery Barn Style
Do you love the Seasonal Decor at Pottery Barn? If so, you will love these budget-friendly creative ideas for Napkin Rings, Pottery Barn Style. This easy tutorial will teach you how to make the cutest DIY Thanksgiving Napkin Rings for your fall tables or for any occasion.
Each season I love seeing what creative new items Pottery Barn has available. However, most items are beyond my price range. Therefore, I look for alternative options for getting the look for less.
This project is definitely a favorite, and I’m sure you are going to be impressed with the results.
(Posts on The Ponds Farmhouse may contain affiliate links. As an Amazon Associate, I earn from qualifying purchases. See the full disclosure details here.)
Table of contents
How To Make Napkin Rings Pottery Barn Style?
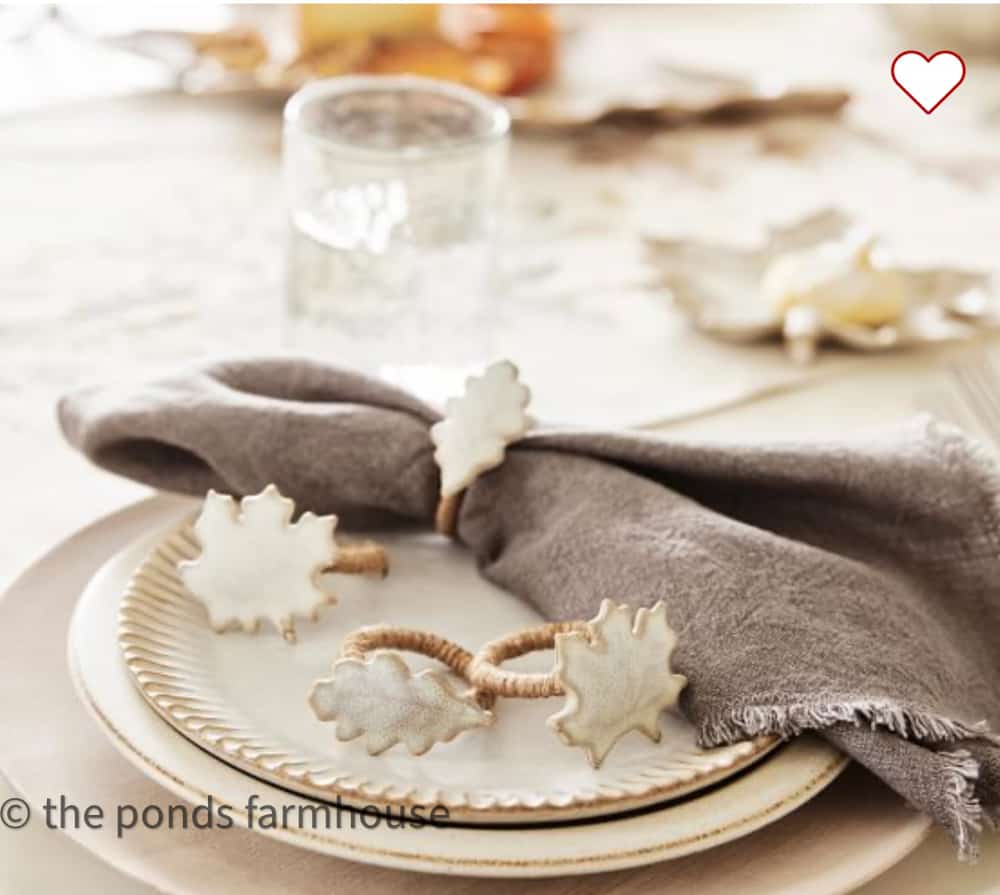
First, the inspiration for these DIY Thanksgiving Napkin Rings came from the Fall Pottery Barn Look Book.
Y’all know I love setting a pretty table, and I loved these cute napkin rings. However, when I calculated the cost of 8 napkin rings, I started searching for a budget-friendly solution.
Ideas for Napkin Rings
First, begin with your current supplies. I had everything I needed for this project except the cookie cutters. To keep my project budget-friendly, I choose to only purchase maple leaf cookie cutters.
I had originally planned to use thrifted napkin rings but only had a set of 4 that I felt would be appropriate for this project.
Instead, I remembered seeing a post from Anne & AnnMarie at Simply 2 Mom’s where they had used binder rings to make napkin rings. Since I had a supply already on hand, I decided to use their technique for the base of the Thanksgiving Napkin Rings.
Supplies
These are the supplies I used for DIY Napkin Rings.
I recommend using the supplies you have on hand for making this cute craft project. You can substitute the cookie cutter shape, or you may have thrifted rings that will work. In addition, you can be creative with your paint colors.
- Air Dry Clay
- Maple Leaf Cookie Cutter
- 2 Inch Binder Rings
- 1/4 inch Jute Rope
- White Chalk Paint
- Antique Gold Paint
- E6000 Glue
- Hot Glue Gun & Glue Sticks
- Clear Spray Sealer
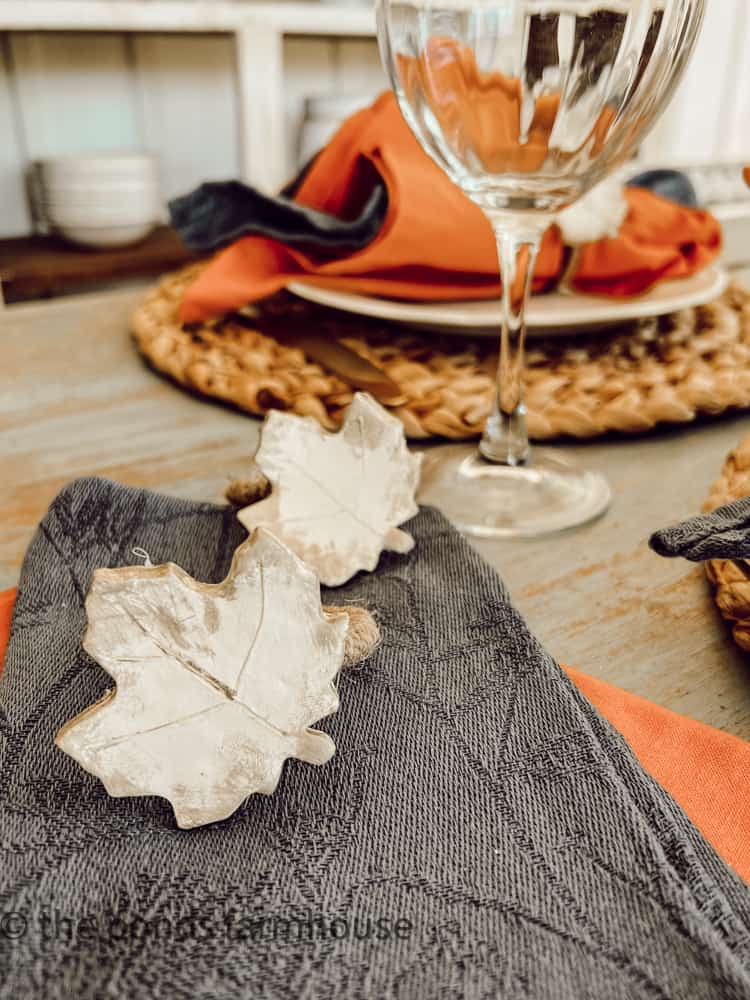
How to Make the Clay Leaves?
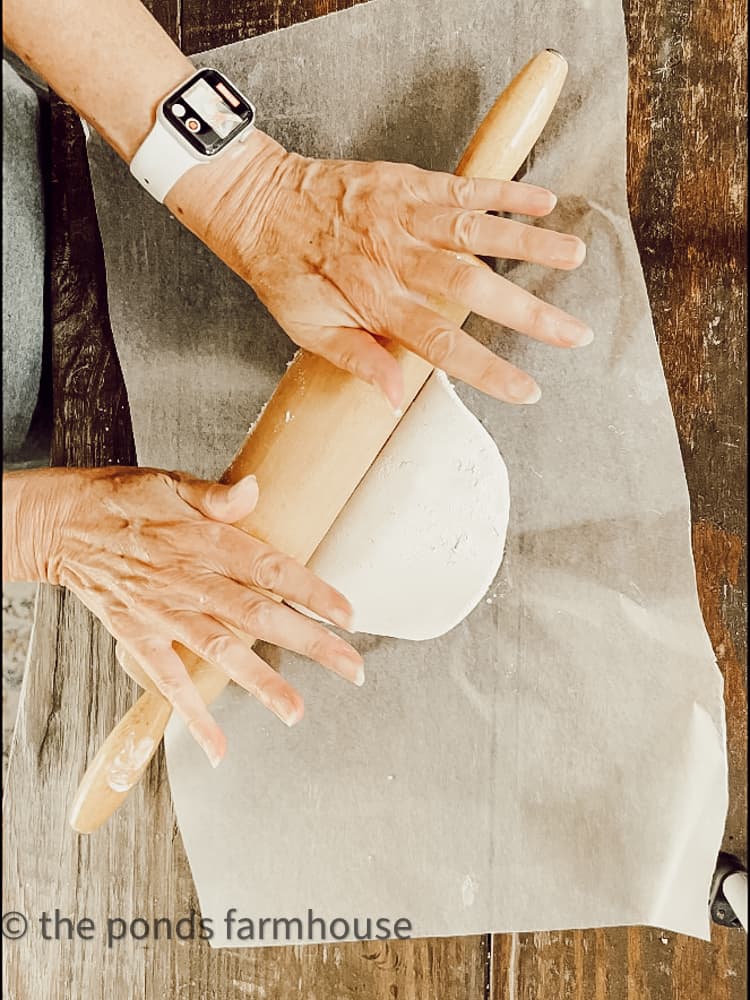
First, you want to make your clay leaves.
Begin by rolling a small ball of Air Dry Clay and placing it on a piece of wax paper on a solid surface. Use a rolling pin to flatten the clay to approx. 1/8 -1/4 inch thick.
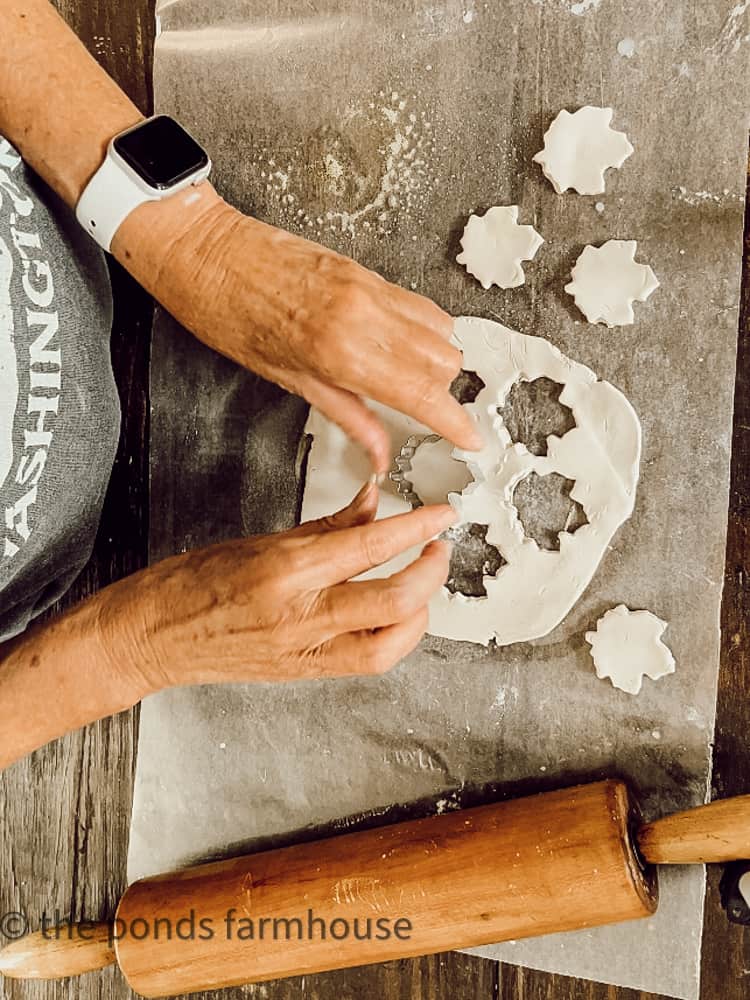
Once the clay is the desired thickness, begin to cut the leaves with your maple leaf cookie cutter.
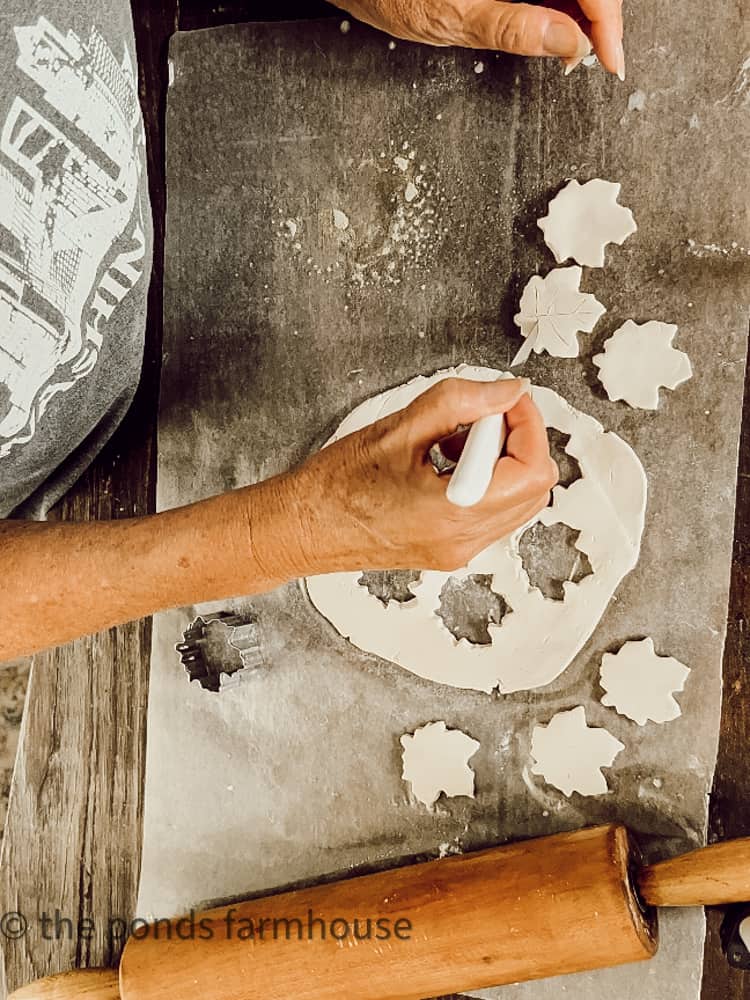
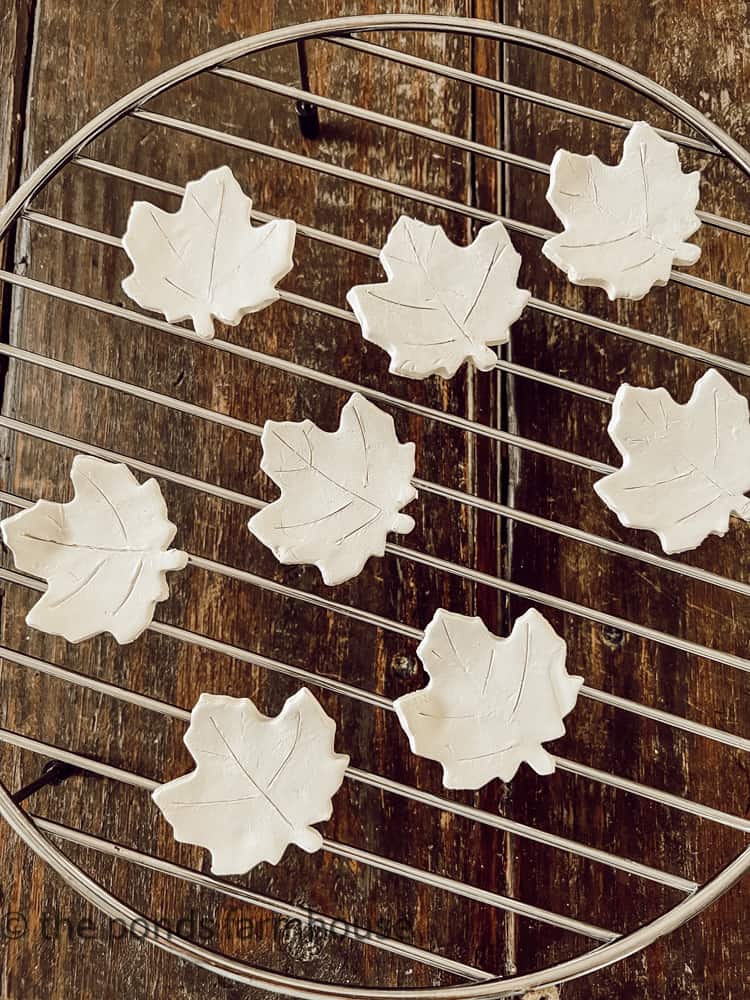
Dampen fingers to smooth out any rough edges or dimples in the clay leaves.
Finally, take a paring knife and cut shallow lines into the surface of the clay to form leaf veins.
Place the leaves on a wire rack for faster drying time. It will take approx. 24 – 48 hours to completely dry.
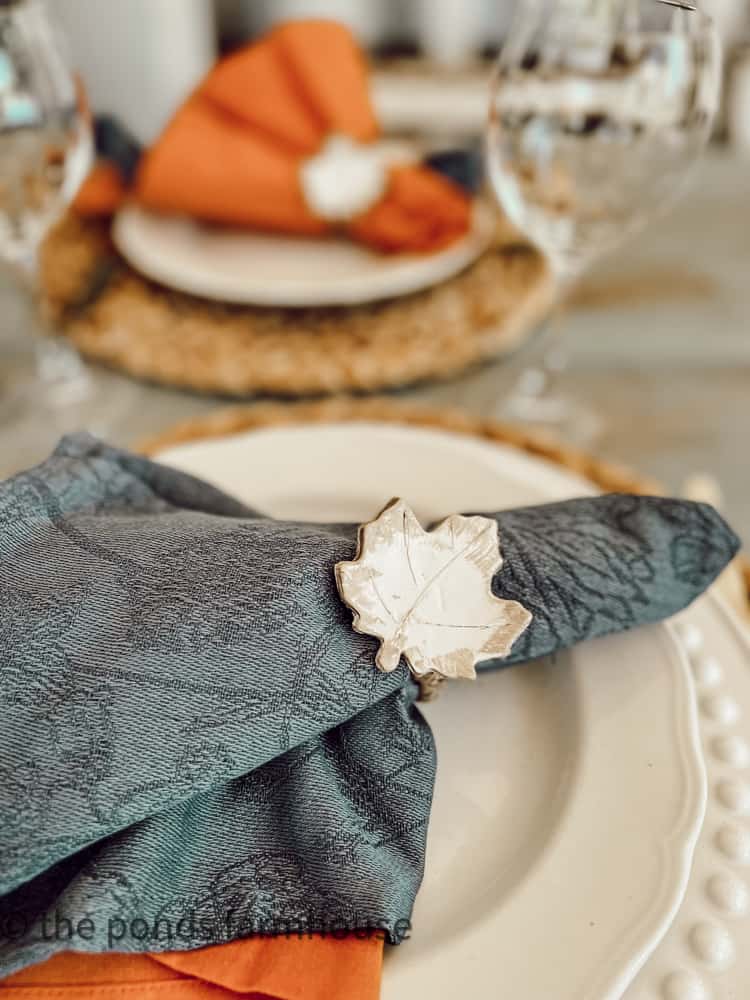
Paint The Napkin Rings Pottery Barn Style
To achieve the Napkin Rings Pottery Barn Style appearance, begin with a coat of white chalk paint. Brush evenly over the surface of the leaf.
You may choose to paint your leaves another color to match your fall tablescapes.
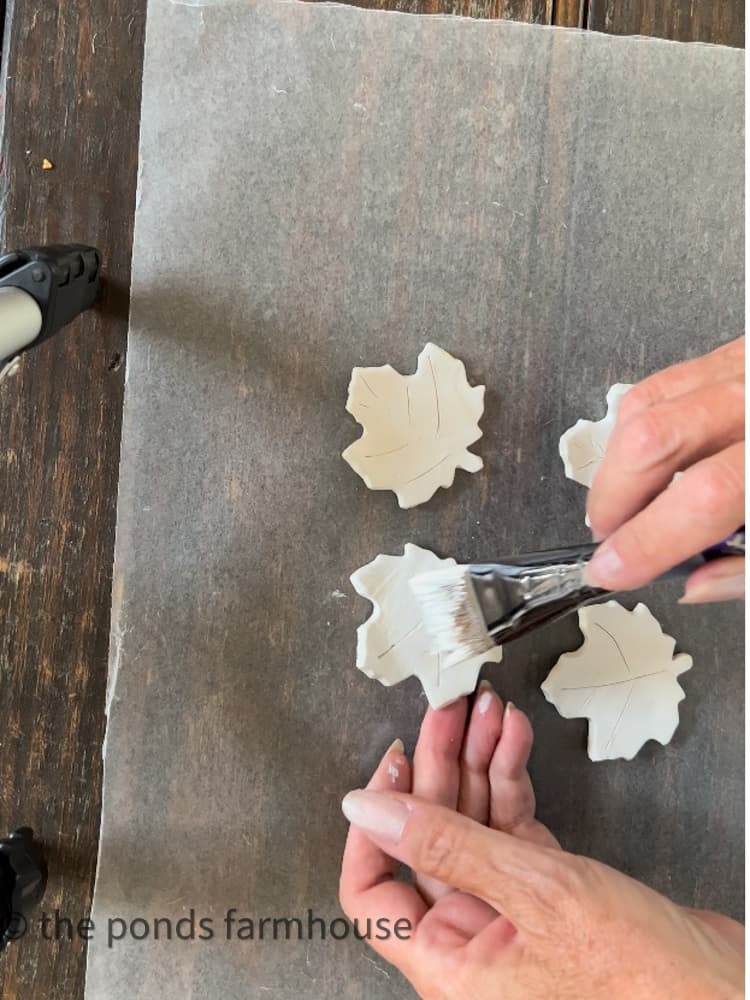
Once the white paint is dry, begin adding a touch of Antique Gold paint to the edges of the leaves.
Make Jute Napkin Ring
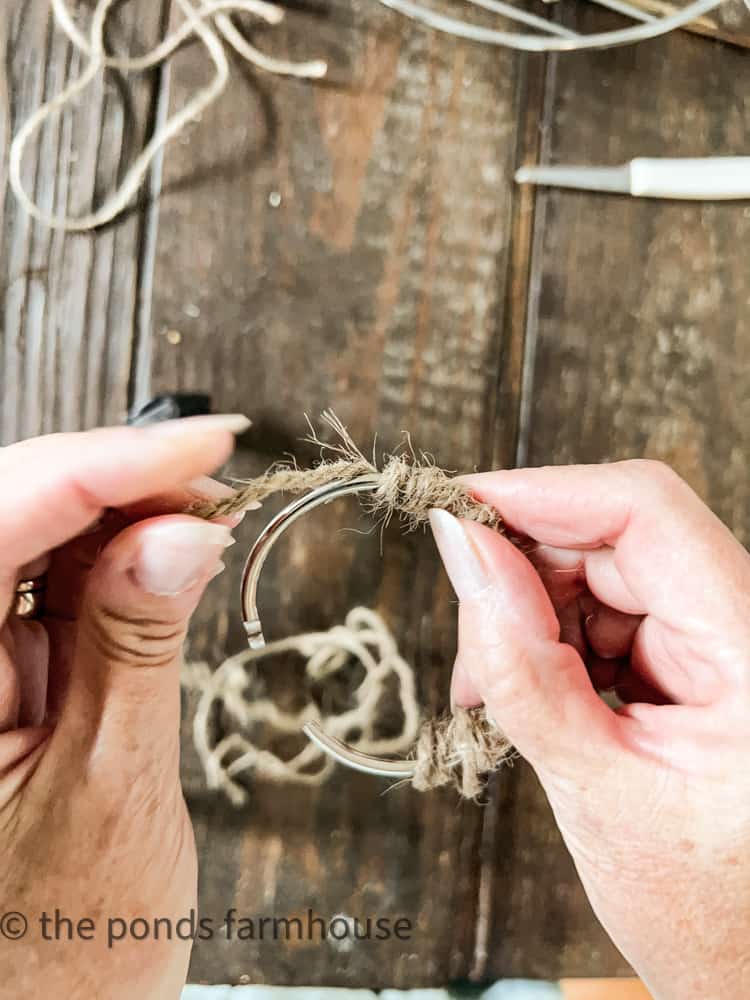
At any time while waiting for the clay leaves to dry, you can begin to make your jute napkin rings.
Begin by opening the binder ring and cutting the length of the jute rope approx. 2 yards.
Tie the end of the rope and secure it with hot glue or tape to prevent unraveling. Begin wrapping the rope tightly around the ring until you reach the end.
Reconnect the ring and continue wrapping until no silver is showing.
Secure with glue to prevent unraveling.
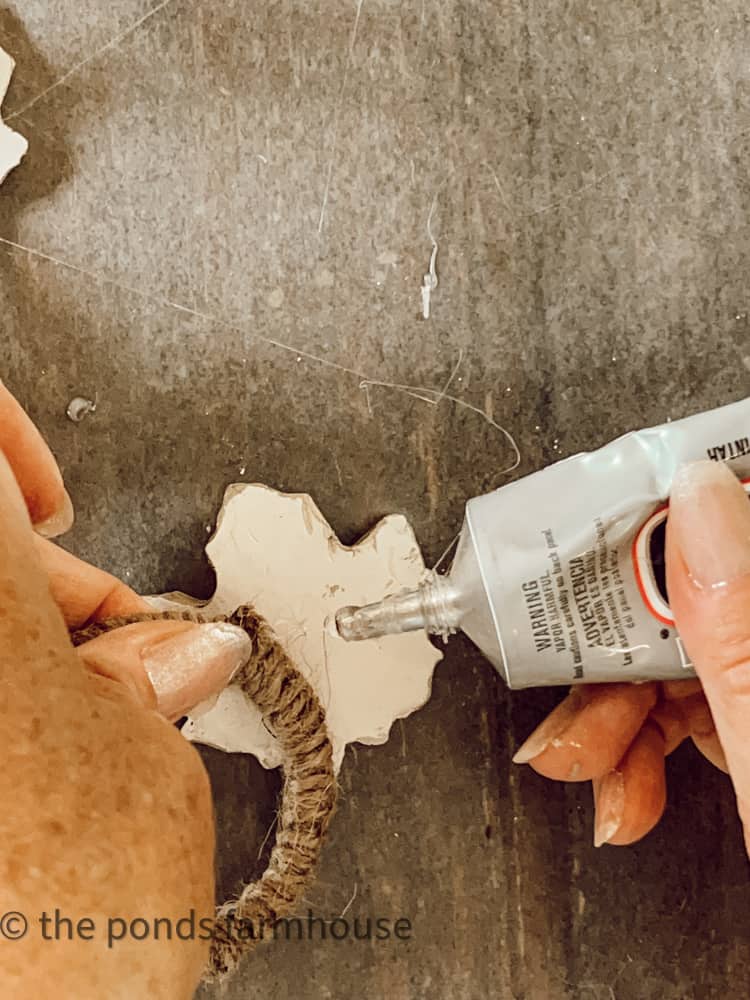
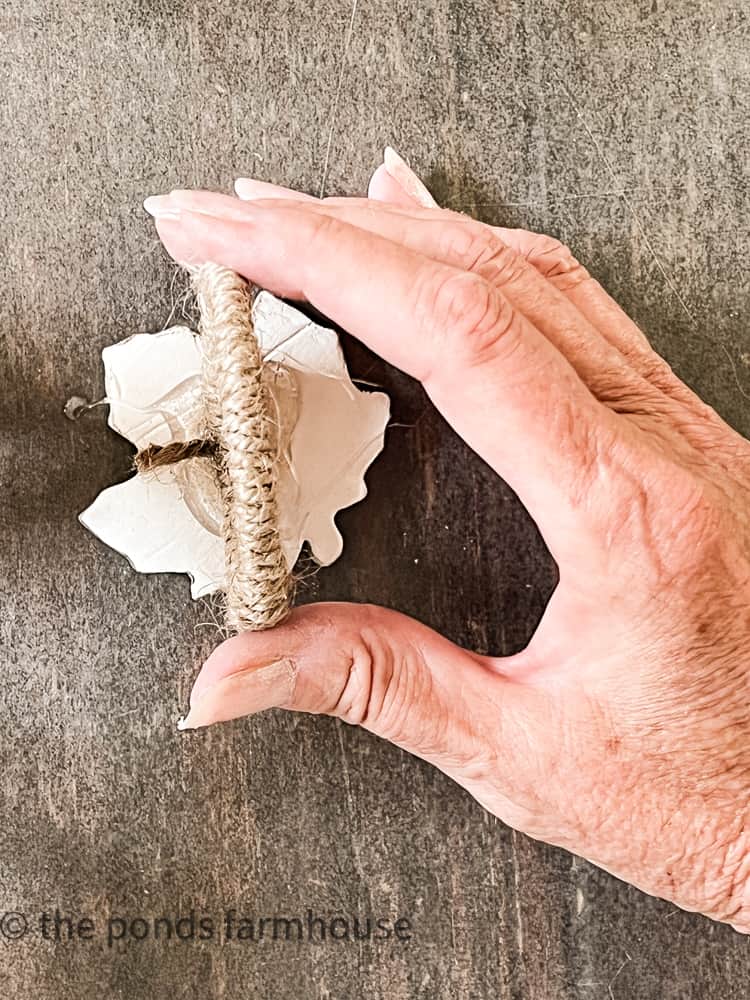
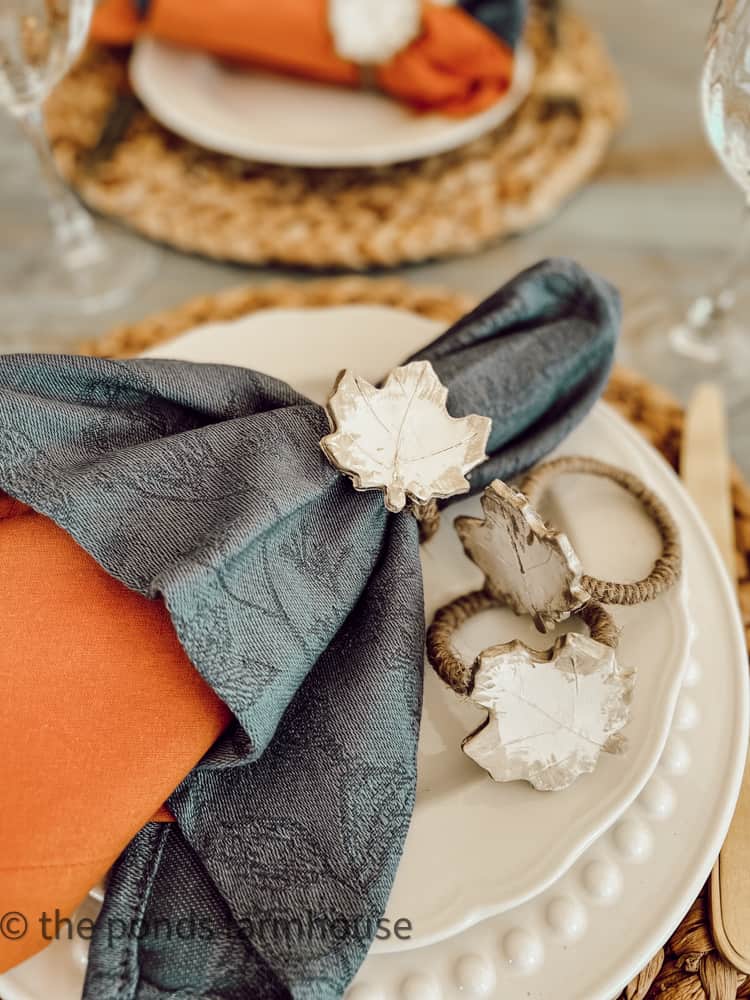
How to Attach Clay Leaf to Jute Napkin Ring?
The creative idea for napkin rings is almost complete. Once everything is dry and secure, you are ready to glue the clay leaves to the jute napkin rings.
Begin with a drop of E6000 Glue on the backside center of the maple leaf.
Then place the jute-covered ring in the position you desire.
Surround the ring with hot glue to secure it.
Note: The E6000 will be more secure than the hot glue. You can avoid using hot glue if you can secure the ring to the clay long enough to allow drying time. The hot glue is a quick way to secure the position of the ring to allow the E6000 glue drying time.
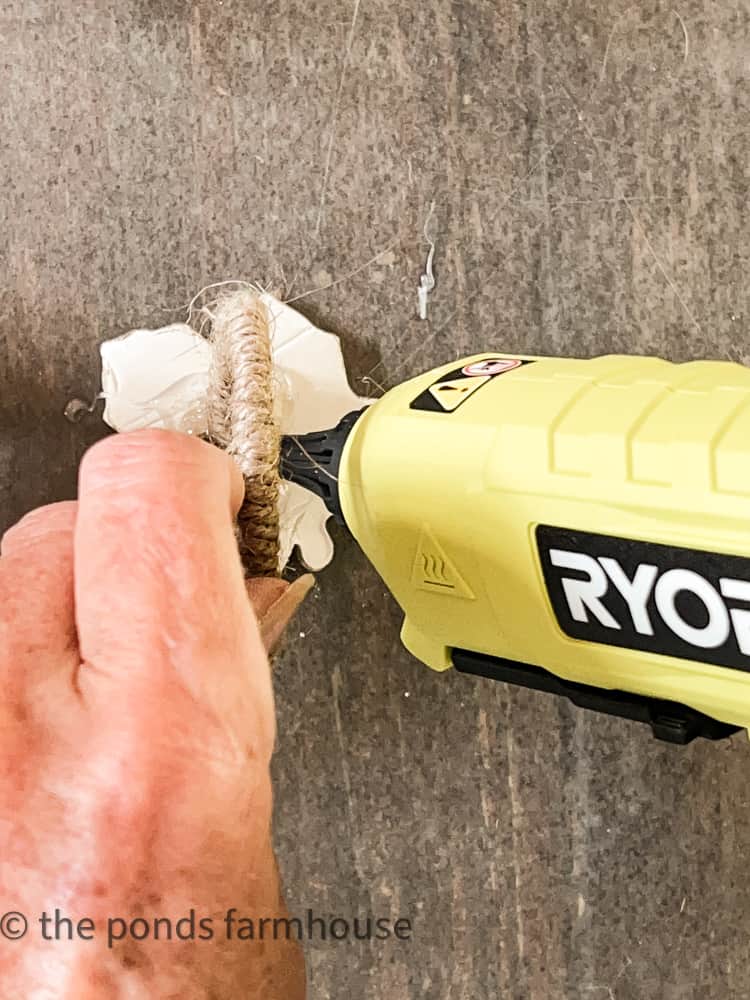
You will need to hold it in place until the hot glue has set.
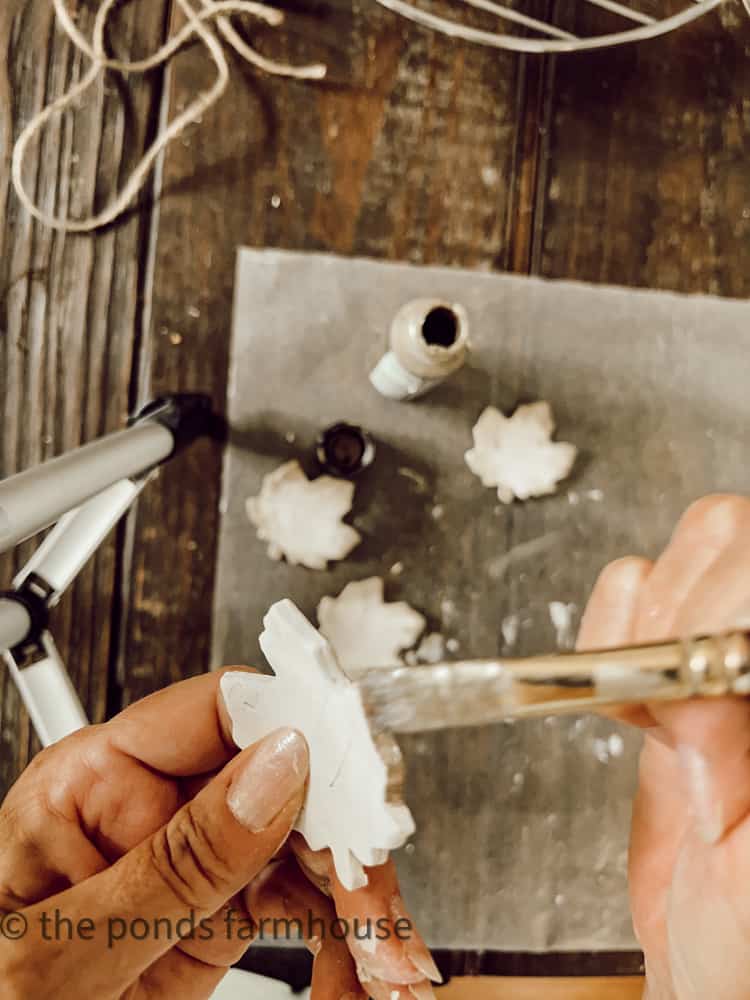
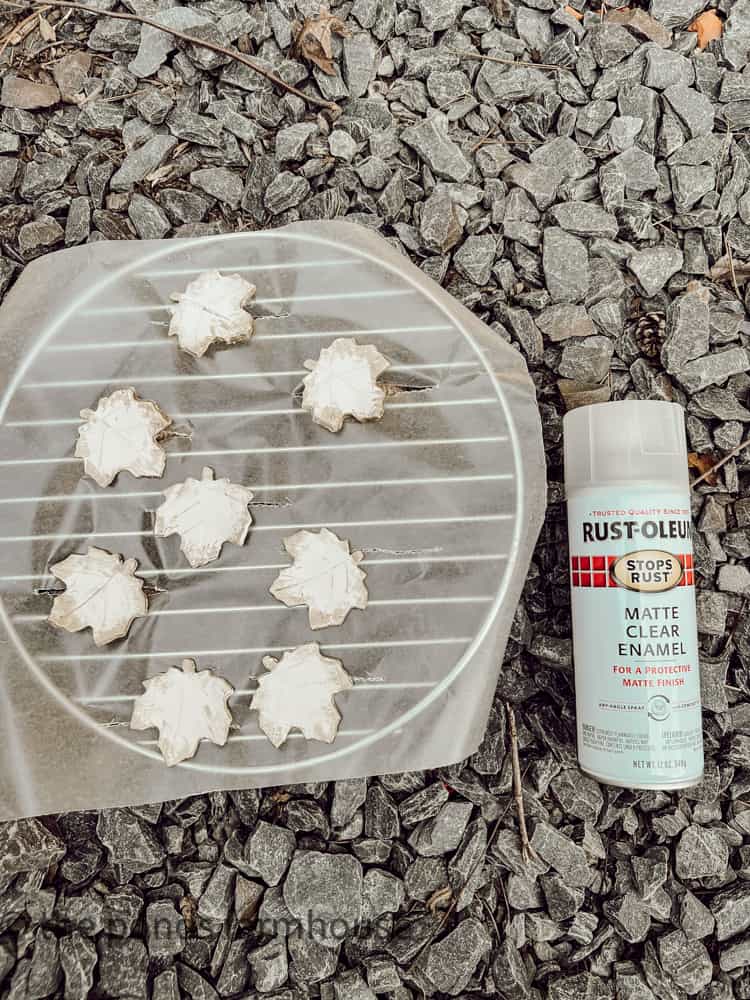
Finally, seal the painted leaves with a clear matte spray sealer to protect the finish.
Once dry, you are ready to style your Fall or Thanksgiving Tables.

DIY Idea for Napkin Rings Pottery Barn Style
Equipment
- Hot glue gun
- Drying rack
Materials
- Air Dry Clay
- Maple Leaf Cookie Cutter
- Jute Twine 1/4 inch
- 2 ” Binder Rings
- White Chalk Paint
- Antique Gold Metallic Craft Paint
- Matte Spray Sealer
- E6000 Glue
- Hot glue
Instructions
- Roll small ball of Air Dry Clay flat with rolling pin. Approx. 1/8 to 1/4 thick.
- Cut 8 maple leaves from clay with cookie cutter
- Smooth edges and any ruff spots with damp fingers.
- Dry 24-48 hours
- Make Jute Napkin Rings with binder rings.
- Open ring and attach approx. 2 yards of jute twine to one end.
- Wrap tightly until almost completely covered.
- Hook the ends of binder ring back together and wrap until completely covered and no silver is showing.
- Secure the end of the twine with glue.
- After air dried clay leaves are dry, paint with one coat of white chalk paint. Allow to dry.
- Paint edges and tips with Antique Metallic Gold Craft Paint and dry.
- Attach painted leaves to jute napkin rings with E6000 Glue
- Apply hot glue to hold the ring in place and allow the E6000 to complete cure.
- Once glue is dry, spray with matte sealer to protect the finish.
Video
Notes
Click Image To Shop


Ideas for Napkin Rings Pottery Barn Style
Here is the result of my idea for napkin rings Pottery Barn Style.
Although the inspiration photo has two leaf shapes, however, to make this more budget-friendly, I opted to only purchase one maple leaf cookie cutter shape. The savings will vary depending on what supplies you have on hand; however, I saved $50.00 on my 8 napkin rings.
These Ideas for Napkin Rings are going to be perfect on my fall tablescapes as autumn approaches.
I hope you liked these ideas for DIY Thanksgiving Napkin Rings and that you will be inspired to try this DIY project. Be sure to watch the Full Video Tutorial Here.
Here are some budget-friendly options if you are not into crafts. Click Image for Details.


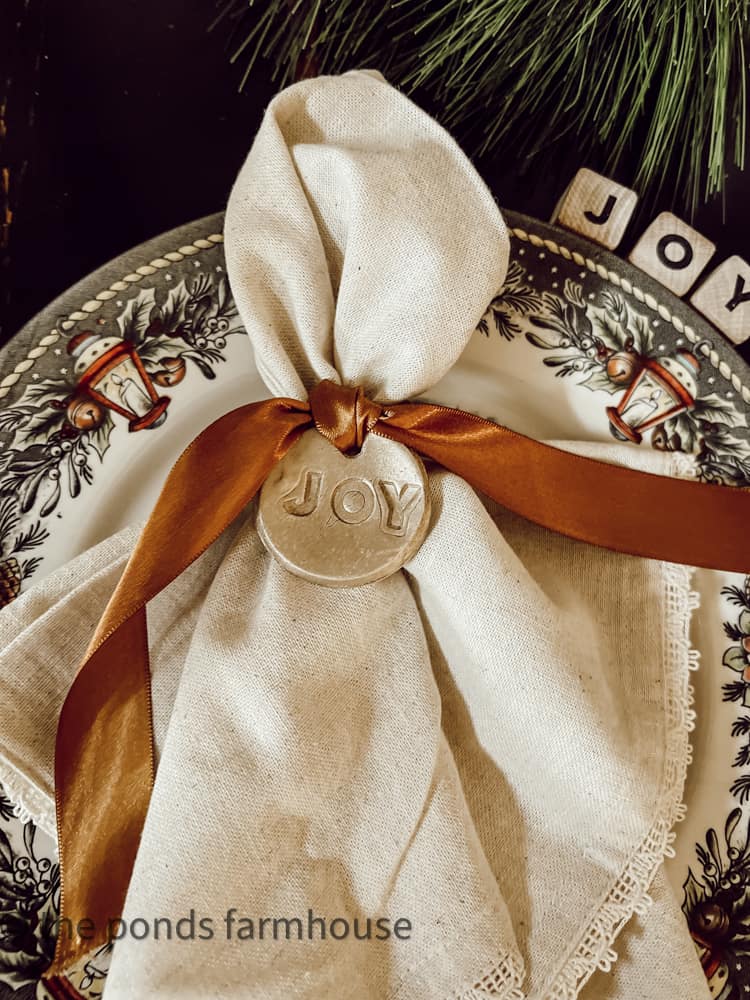
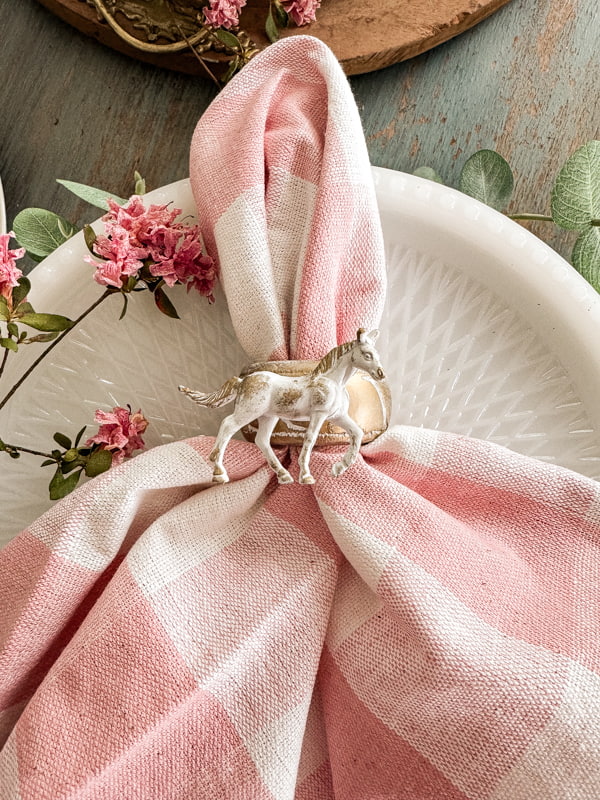
Another cute napkin ring idea
While making air-dry clay Christmas ornaments, I decided to use the smaller versions as napkin charms. Super easy to make and look great. You can adapt this idea to any season.
More Favorite DIY Projects
- DIY Apothecary Cabinet IKEA HACK
- Over The Table Rod Stand Tutorial
- How to Make A DIY Potting Table from Old Windows
- Easy Rustic Ladder Tutorial
- Easy Thrifted Lamp DIY – Pottery Barn Hack
Thanks for stopping by. I look forward to sharing my next adventure with you.

PIN IT TO REMEMBER IT


Oh, they came out fabulous!!! We are on the same wavelength because I’m in the middle of an air-dry leaf craft…I’ll link yours when I post it later this week!!
Jennifer,
I can’t wait to see what you are up to. I’ll back link yours also.
Oh my! I’ve got to try this!!
So glad I found you:)
Kate,
I’m so glad you found me too. Thanks so much for your sweet comment.
Love the pretty napkin rings! Great diy
Stacy,
I’m so glad you like this.
Pottery Barn has been my favorite store forever so these are fantastic! Look amazing and so easy. I would have never thought to use binder clips. Genius!
Cindy,
I’m so glad you liked this idea. I’m so happy with them.
Dying over how amazing these are sweet friend! They look just like the PB napkin rings – that is so cool. I just made some goat ornaments with air-dry clay but I feel like I need to get my supplies back out and make some napkin rings. Love and pinning as always, CoCo
CoCo,
Thee were easy to make and I’m glad you like them.
Your napkin rings are super cute, Rachel. I love the neutral Fall look with the white paint! so versatile from now to Thanksgiving.
Debra,
I’m so glad you like these napkin rings.
What a great DIY for fall Rachel. I’m definitely going to have to try this.
Kim,
I’m so glad you liked this.
CoCo
You are so kind to share this.
Rachel, this is an amazing DIY project! I like yours better than the Pottery Barn rings! Linking in my Mitten Moments this weekend!
Kim,
I appreciate this so much.
Love these Rachel! I would like to feature your post on my Saturday Morning Gather post tomorrow.
Michele,
You are so kind. Thank you.
Thanks Michele,
Kim
I appreciate this so much.
Rachel, I’ve never used air dry clay. You have inspired me to try this! They are so pretty! Your talent is endless.
Mary,
I really appreciate your encouragement. Thanks for stopping by.
Rachel, this project is wonderful! I love these napkin rings. I am going to link you in my Sunday post.
Tammy,
I’m so glad you like them and I really appreciate you for sharing my tutorial. Thanks
Rachel, Oh my word! These are to die for…pinned!!
Have a happy weekend,
Brendt
Brendt,
I’m so glad you like them. Thanks so much.
These turned out so pretty Rachel! I absolutely love them!!
Kristin,
I really appreciate this
These look amazing! I love them. I have never used air dry clay. I’m going to have to give this a try.
Renae,
It’s super easy to use. Good luck.
Super cute Rachel, I have pinned it for reference. I will share this on my Saturday post.
Wendy,
I really appreciate this.
I absolutely love these DIY napkin rings! The warm colors and fall-themed designs are perfect for the season. Can’t wait to try this out for my Thanksgiving table setting! Thanks for the inspiration!
Oh, I’m so glad you like them. Thanks for your kind words.
I love the ideas you shared for DIY napkin rings! The combination of rustic and elegant styles really captures the essence of fall. I can’t wait to try making my own with some of these techniques. Thank you for the inspiration!
Thank you! I’m glad you like this idea.
I absolutely love these DIY napkin ring ideas! They’re such a beautiful way to elevate fall table settings. I can’t wait to try out some of these suggestions for my Thanksgiving dinner. Thanks for the inspiration!
Thank you!