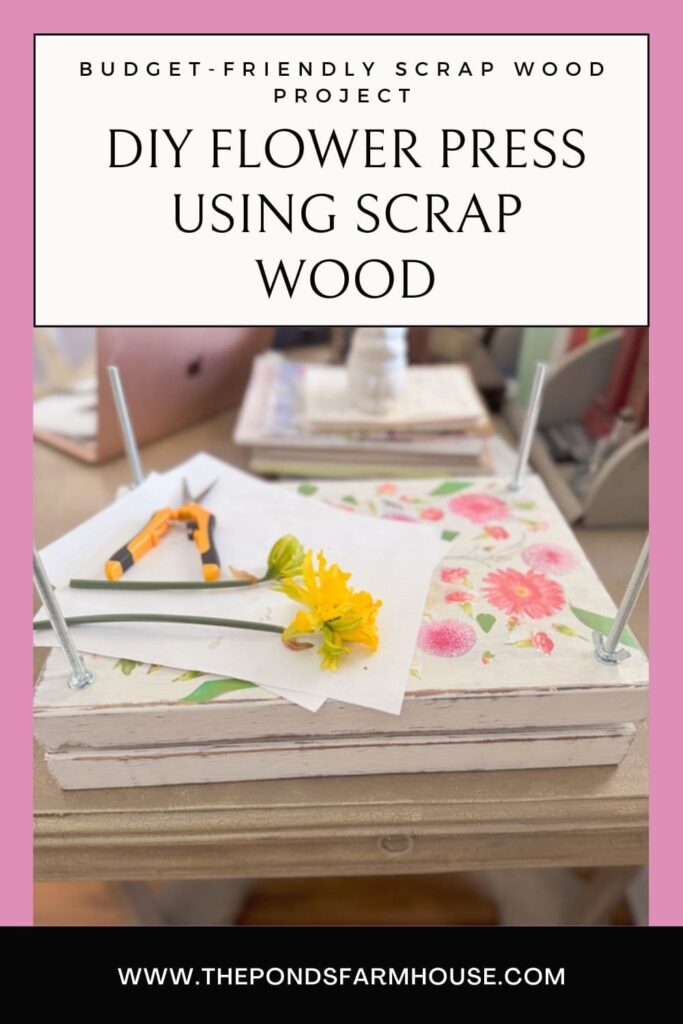
Easy Flower Press: Upcycle Scrap Wood To Preserve Botanicals
Breathe new life into scrap wood and capture the beauty of your blooms and herbs forever. This easy DIY flower press lets you sustainably preserve botanicals for years to come. Learn how to press flowers with a stylish, botanical press that you can proudly display while creating future floral art.
Do you save your scrap wood for future projects? It drives my husband crazy to store the wood, but I almost always find a way to use even the smallest pieces.
I’m so glad we saved these boards, and I can’t wait for you to see the upcycled scrap wood flower press we created.
(Posts on The Ponds Farmhouse may contain affiliate links. As an Amazon Associate, I earn from qualifying purchases. See the full disclosure details here.)
Table of contents
- What is a Flower Press?
- How To Press Flowers, Herbs, Etc. ?
- What Are Pressed Flowers and Botanicals Used For?
- How To Build A DIY Flower Press With Scrap Materials?
- Prepare Your Scrap Lumber
- How To Heat Decoupage the Floral Print
- Construct Your Flower Press
- Which Flowers and Herbs Are Best For Preserving by Pressing?
- How Long Does It Take To Press Flowers and Herbs?
What is a Flower Press?
A flower press is a tool used to flatten and dry fresh flowers, herbs, wildflowers, and leaves. It typically consists of two flat surfaces made of wood that are pressed together by a screw mechanism. Flowers and leaves are placed between absorbent materials (such as paper or cardboard) inside the press. The press is then tightened, and the moisture is slowly squeezed out of the plant material. This process preserves the shape and color of the flowers and leaves.
How To Press Flowers, Herbs, Etc. ?
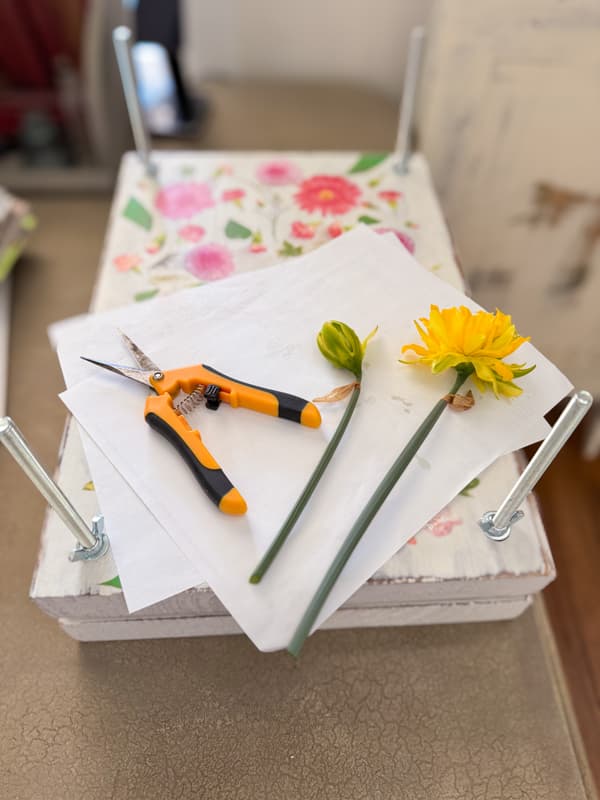
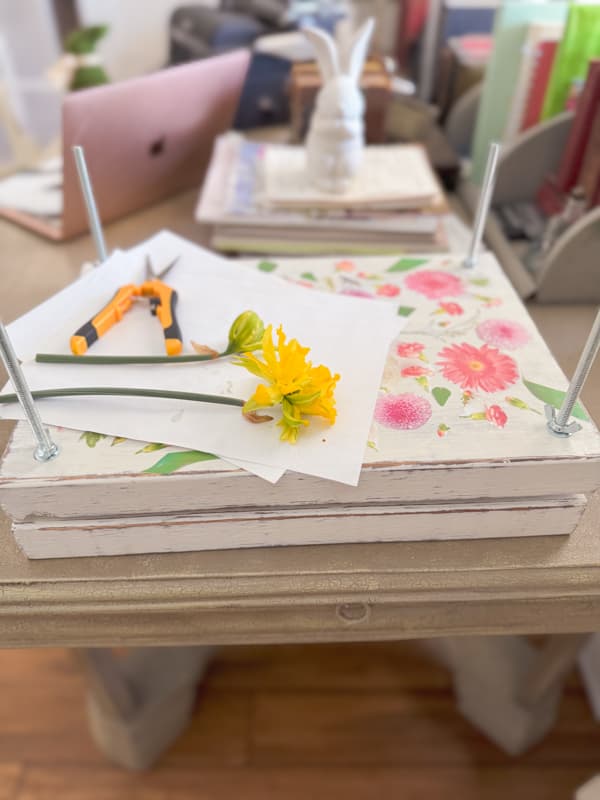
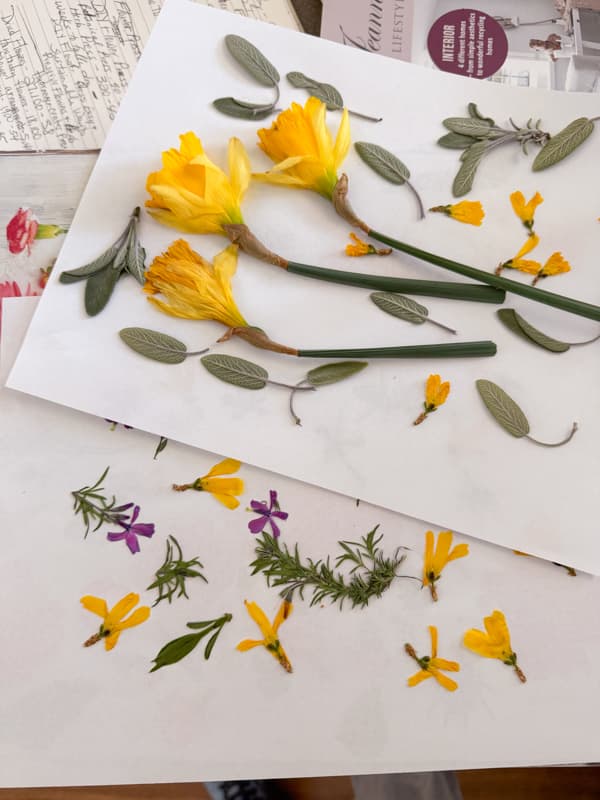
First, gather your flowers at their peak before they begin to wilt. Remove any unwanted areas of the flowers, such as excess petals or leaves.
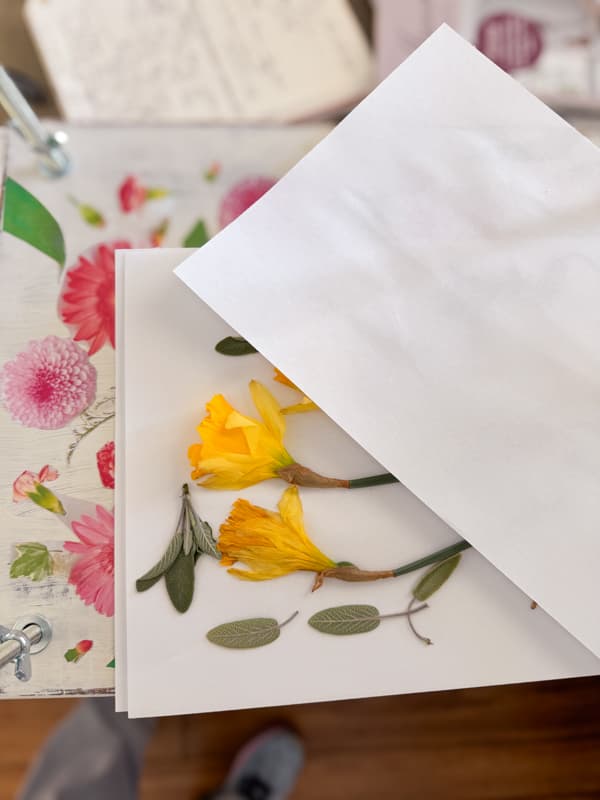
Place a sheet of cardboard on the bottom of the flower press (or on the last top layer if you are building layers) and cover it with a sheet of copy paper or paper towel. Arrange the flowers or herbs on the paper, making sure that the plant materials do not overlap. Cover with another piece of paper and cardboard.
Add the top of the flower press and tighten the wing nuts. If you are working with several layers, you will need to continue to tighten the screws as the flowers flatten. Check the bolts for looseness every day or so.
Can I Press Flowers In Books?
Yes, you can press flowers between book pages, and I’ve pressed herbs successfully. However, you risk damaging the book.
You can easily slide a couple of blooms into a book without the need for a flower press. However, there are a few things to consider. Fresh-cut flowers will dry best, and they may contain moisture that will damage the book.
- You may damage the book from the flower’s moisture.
- If you press thick flowers, the book may not press evenly.
- If you are pressing several flowers at once, you need several books.
- You can press multiple flowers and foliage with a flower press.
- With a flower press, you don’t risk damage, and you can adjust the pressure evenly to dry your flowers and herbs quickly.
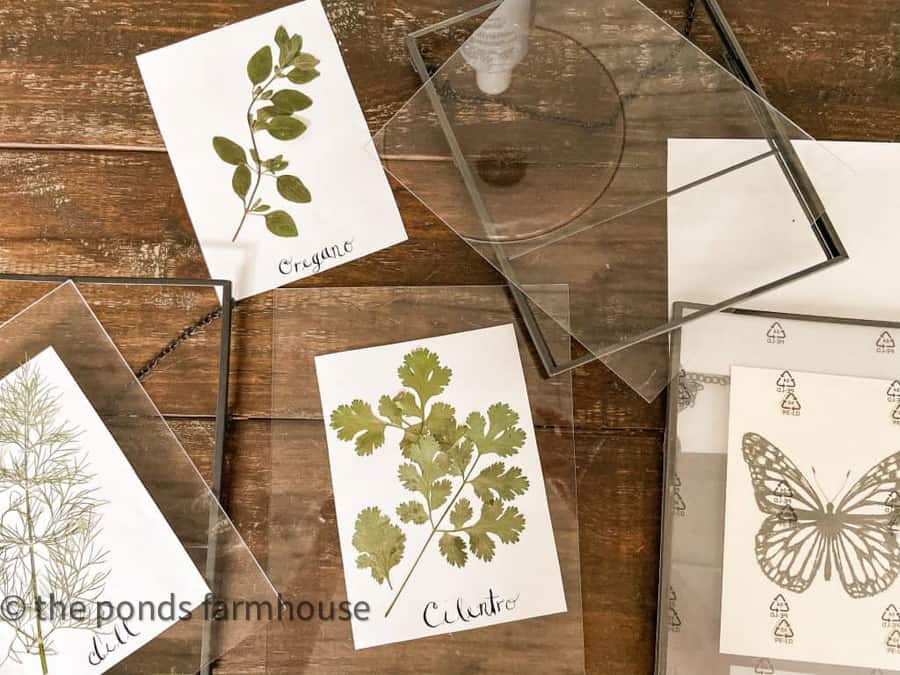
What Are Pressed Flowers and Botanicals Used For?
There are many ways to use pressed flowers and herbs. Once they are preserved, they can be used to create botanical art, craft projects, scrapbooking, card-making, and many other paper crafts. In addition, you can press them into candles or soaps, and they can be decoupaged onto vases, boxes, dishes, etc.
How To Build A DIY Flower Press With Scrap Materials?
This is such an easy project. You only need a few supplies and tools to make your own DIY flower press. First, you need lumber. You can make your flower press any size you desire, and if you have scrap wood, it’s a win-win situation. I will share the exact size of everything I used but keep in mind you have options.
Materials for DIY Flower Press
- 2 – boards 11 x 16 x 2 inches ( NOTE: You don’t need 2-inch thick boards; even plywood will work)
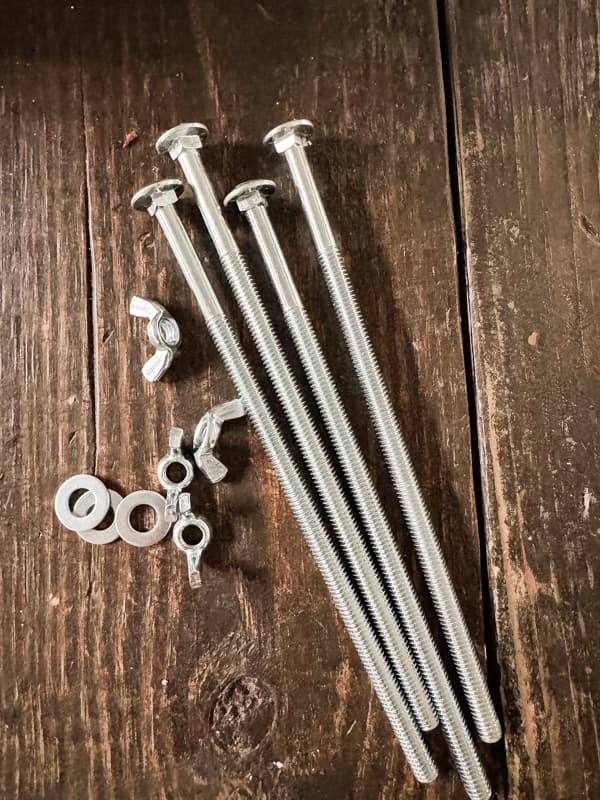
- 4 – Carriage Bolts 8 inches long x 5/16-inch
- 4 – 5/16 washers
- 4 – 5/16 Wing Nuts (or Butterfly nuts)
- 2 – Cardboard cut paper size 8 1/2 x 11 inches.
- Copy Paper for pressing botanicals.
- Wood Stain (optional)
- Paint (optional)
- Wax (optional) Clear Wax and Dark Wax
- Copy of Flower Print (optional)
- Mod Podge (optional)
Tools for DIY Flower Press
- Cordless Drill with 3/8 inch drill bit
- Drill press with 5/16 inch drill bit (optional – see instructions for more details)
- Countersink 1-inch drill bit (large enough to let the carriage bolt head sink)
- Wood Clamps
- Miter Saw
- Sanding blocks
- Tack Cloth
Prepare Your Scrap Lumber
Once you have your scrap lumber or new lumber, you need to decide what size you want your DIY flower press to be.
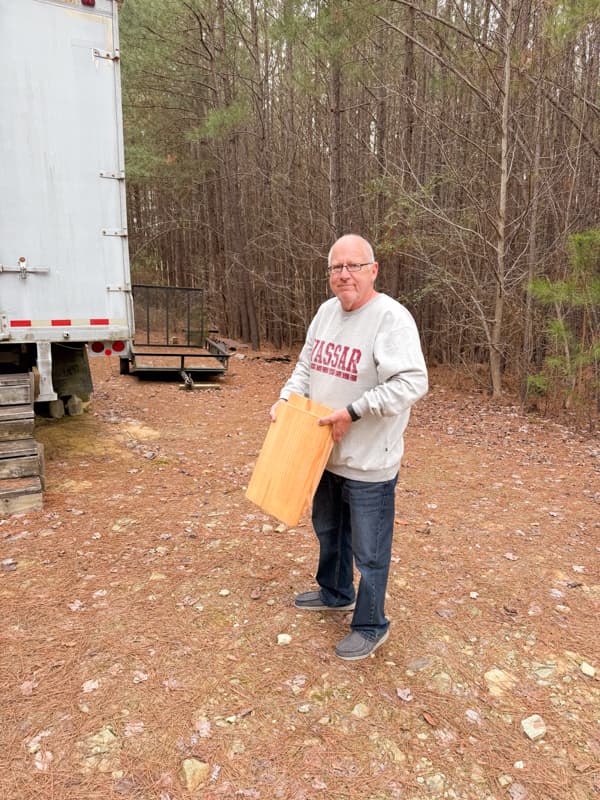
Brad found two pieces of scrap lumber that were the exact same size, and we decided to go with that size.
These pieces are 11 x 16 x 2 inches. First, you don’t need anything this large. You can use materials as thin as plywood. However, I do recommend that you consider the paper size when planning the length and width. If you are using 8 1/2 x 11 paper, I’d make the boards at least 9 1/2 x 12 inches to allow for bolt placement.
If you need to cut your lumber to size, you can use a miter saw and then sand the edges.
Insider Tip
Be sure that the two boards you use are flat and not warped. They need to lie flat together for a flower press.
Be careful if you choose new wood. If it hasn’t dried properly, it can warp as it dries.
Plywood can easily warp if exposed to moisture, so use with caution.
To Paint or Not To Paint?
Next, you should decide if you want to paint or stain your flower press. You can stain before or after you drill your holes.
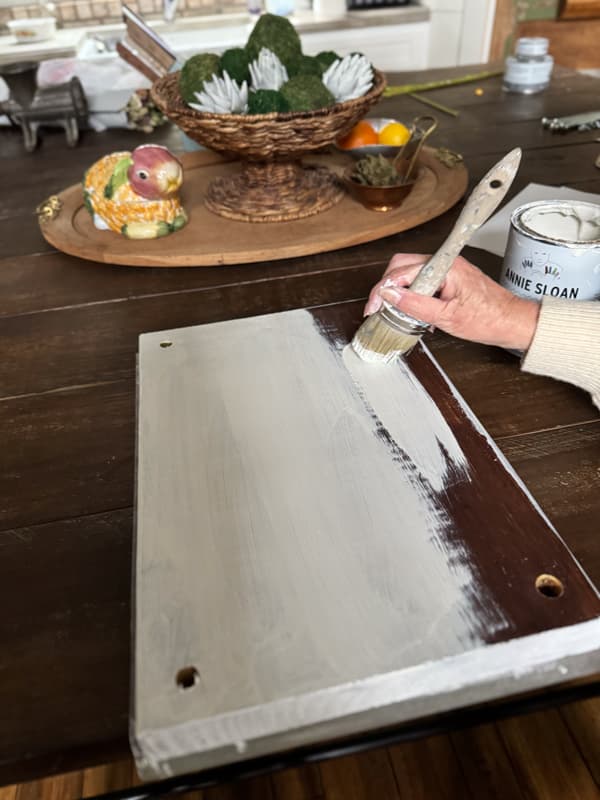
Because I planned a distressed finish for my DIY flower press, I stained the wood before beginning.
I used a gel stain, and rubbing the stain on with a cloth was quick and easy.

Insider Tip
If you are working with new wood and plan to paint it with a distressed look, you should stain it first. After you paint over the stained wood, you can rub or sand away areas of paint to reveal the dark stain beneath.
Drill Holes To Make Flower Press
Next, you will need to drill holes for the carriage bolts to construct the DIY flower press.
Begin by determining where each bolt will be placed. They should be spaced evenly around the four corners of the boards. Measure and mark the spot for the holes.
Clamp your two boards together. Then, using a drill press and a drill bit the exact size of your carriage bolt, make the four holes through both boards.
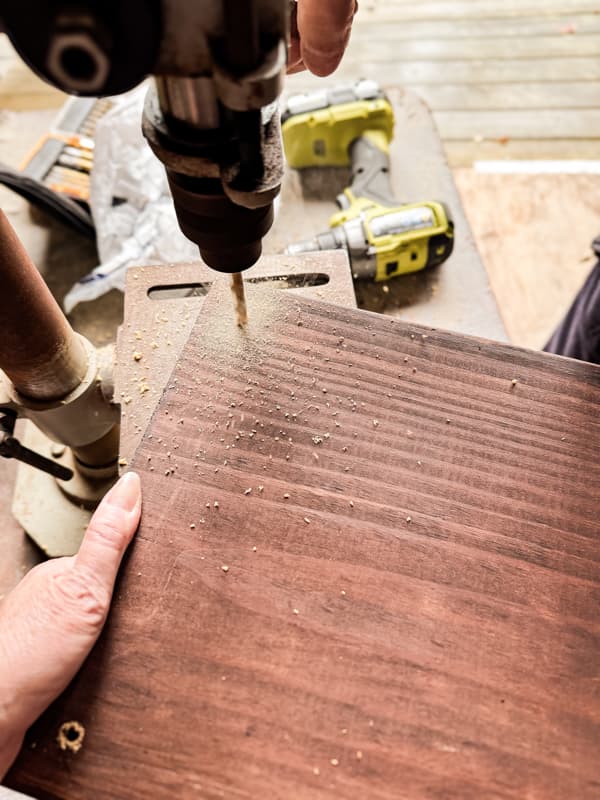
Note: If you don’t have a drill press, you can use a cordless drill. However, you need to be sure you drill straight downward and not at an angle. If your holes are not aligned correctly, it will be difficult to slide the top board from your flower press.
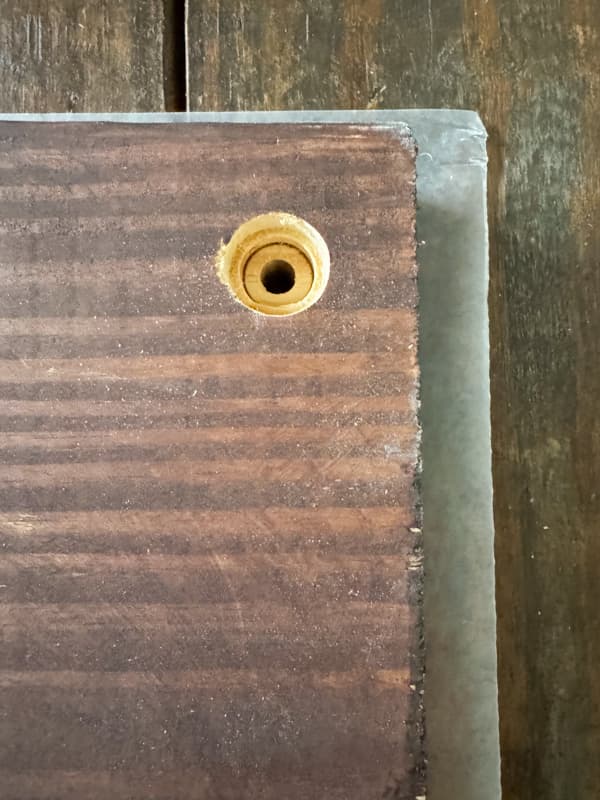
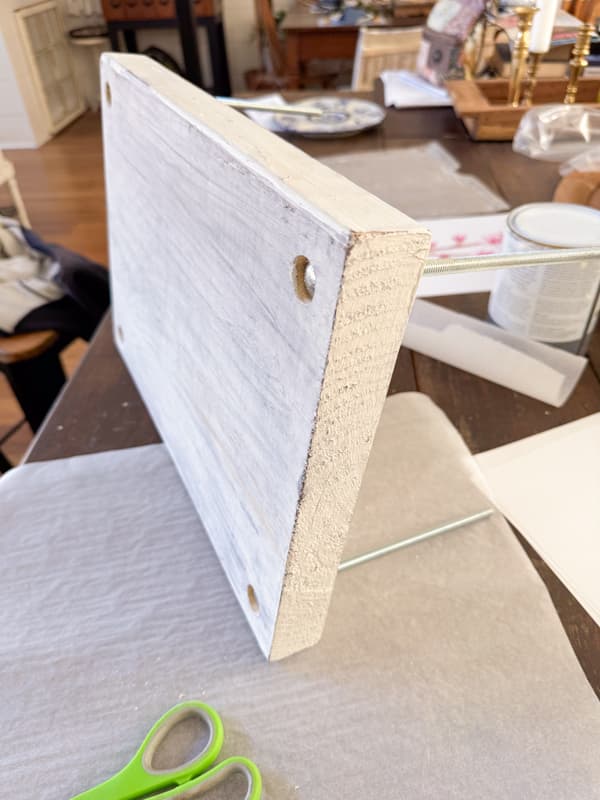
Next, turn the bottom board upside down and use the countersink drill bit to create a countersink at each hole.
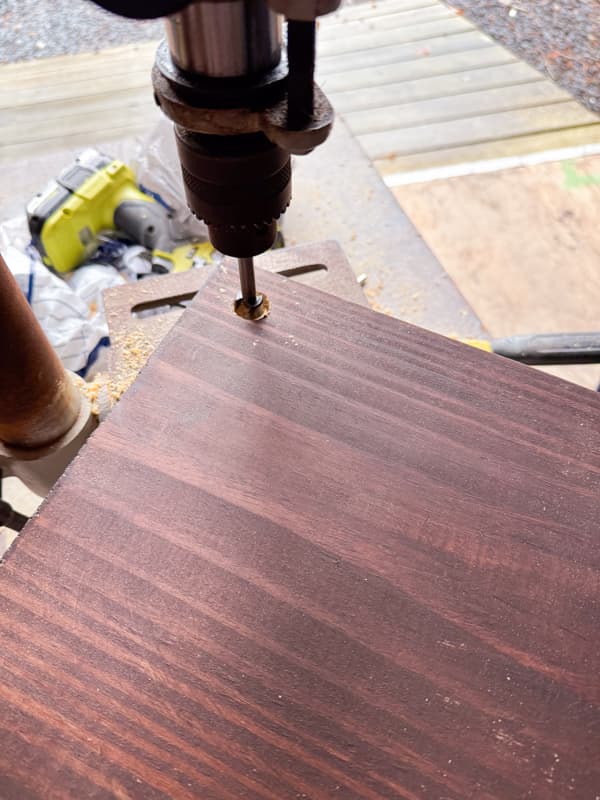
Finally, take the top board and create slightly larger holes in the top board. Be sure to drill into the exact same hole that you previously created. Use a drill bit one size larger than the first drill hole that you drilled.
This will allow the top board to slide up and down the bolts with ease.
Sand around all the holes to remove any ruff edges.
Paint and Decorate Your Boards (Optional)
This step is optional, and if you plan to leave your flower press stained or plain, skip down to adding the bolts.
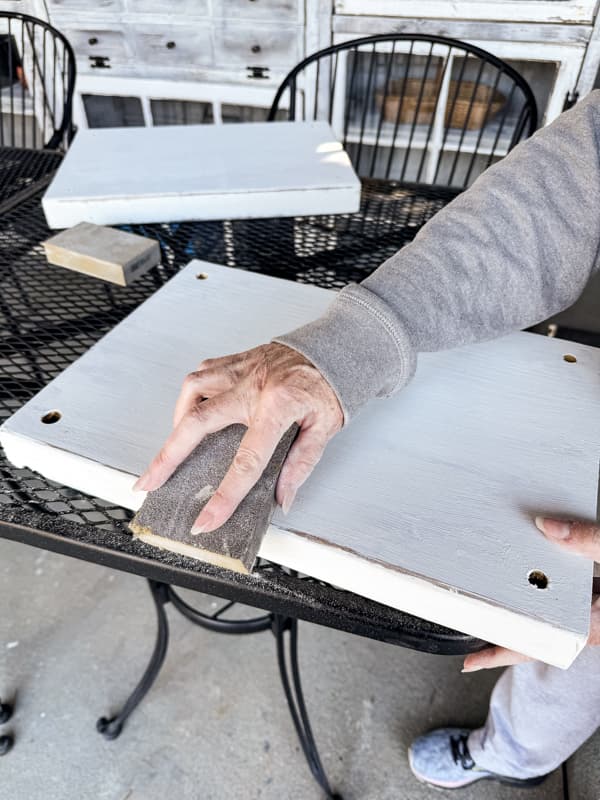
Next, paint your boards on all sides. Once the paint is dry, you can distress the paint by sanding the edges with a sanding block. Remove any dust with a tack cloth.
Next, you can choose to decorate the top of your press.
Here are a few options:
- Add pressed flowers to the top with a decoupage technique
- Add a graphic or poem with vinyl that you purchase or make using a Silhouette or Cricut.
- Print a free downloadable design and decoupage it to the top.
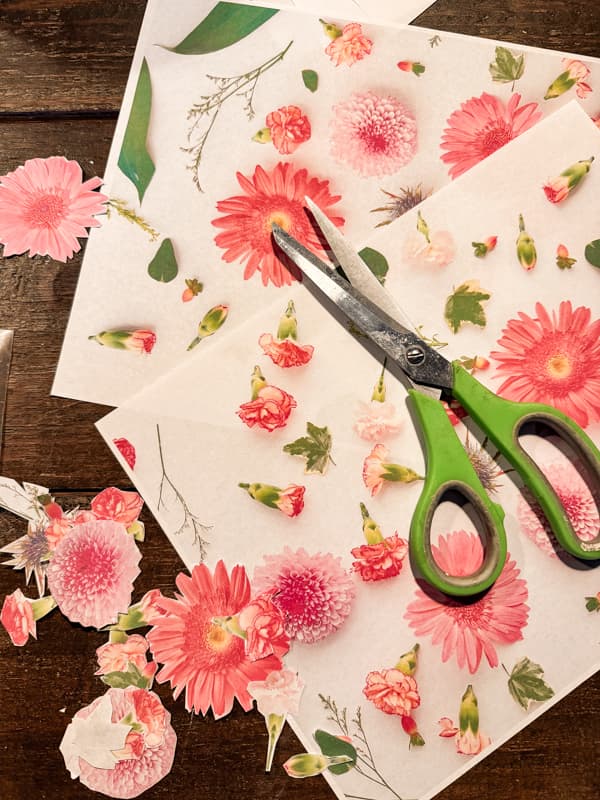
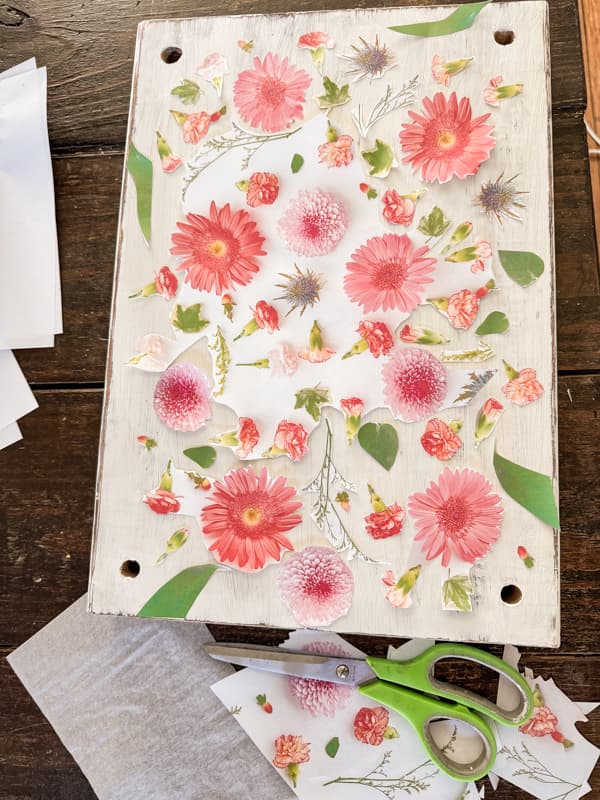
I downloaded and printed a flower flat lay print from Canva. I thought the print was perfect for a flower press.
I made 3 copies on thin copy paper so that I could cover the entire surface. In addition, I cut many of the flowers individually from the sheet.
How To Heat Decoupage the Floral Print
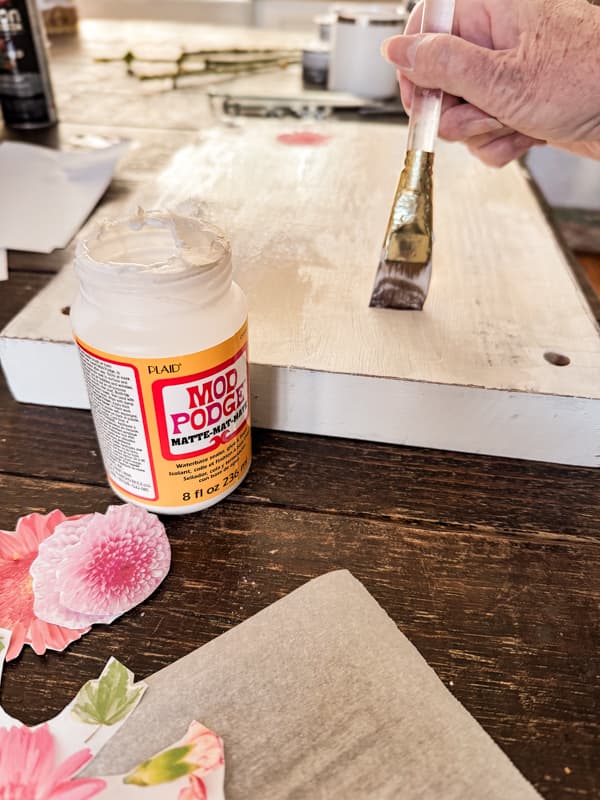
Since the copy paper was thin and the press top was flat, I decided to decoupage the design using a heat press technique.
First, cover the entire lid with Mod Podge and allow it to dry. You can use a hair dryer to speed up the process.
Arrange your design on the board. You’ll notice that I left some of the pieces attached.
It was very tedious to cut each piece, and I was also concerned about the pieces shifting and overlapping.
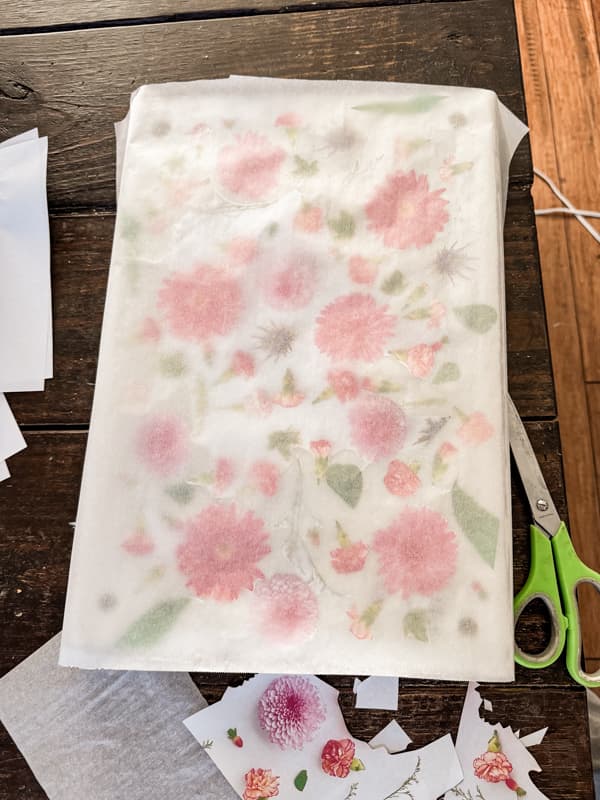
Next, cover it with parchment paper or Teflon. Be careful not to let any of the pieces shift under the paper.
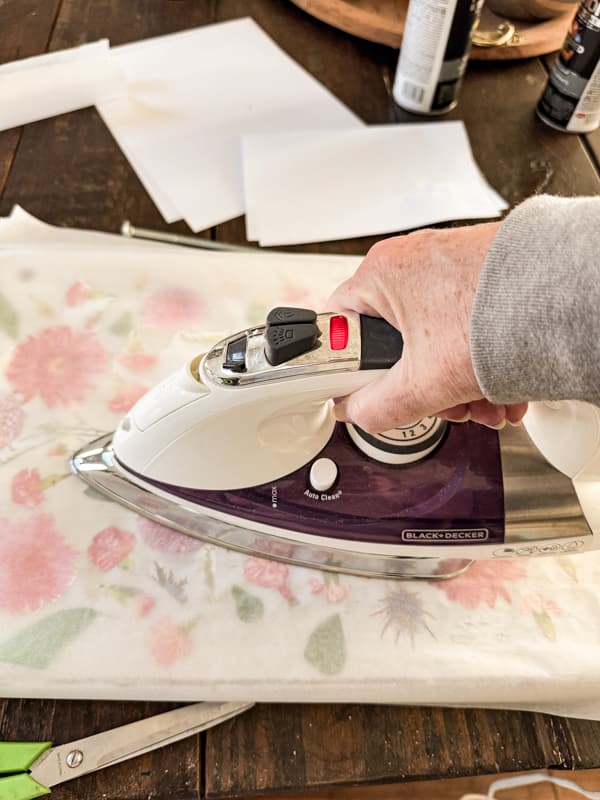
Use a medium hot iron to press the design and activate the Mod Podge. Continue to press with the iron until all pieces are attached.
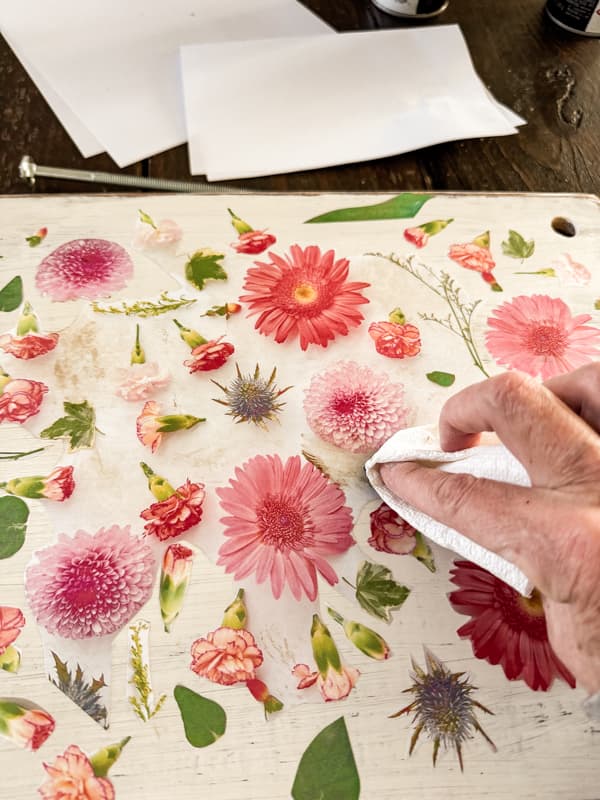
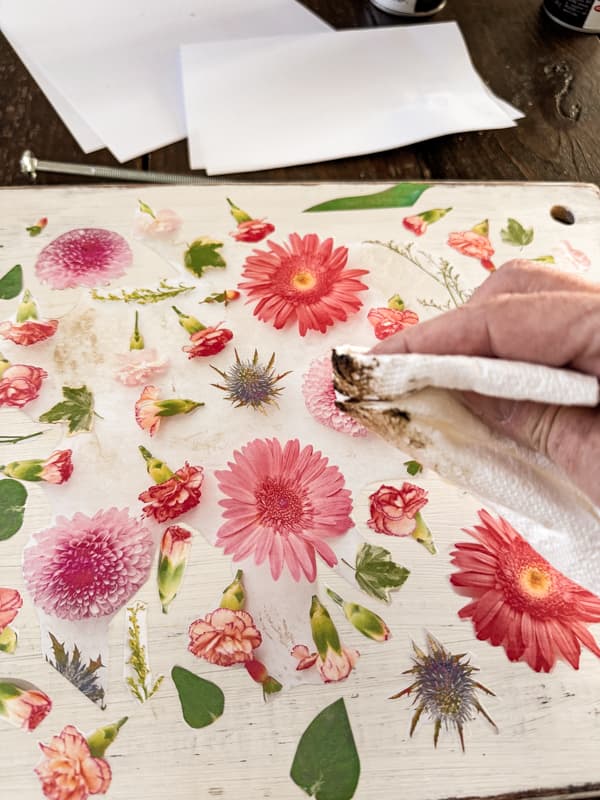
Finally, apply the clear wax over all the boards, being very generous over the decoupaged design.
If necessary, you can add dark wax to the decoupaged print background to help it match the exposed wood on the front. Buff the wax until it shines.
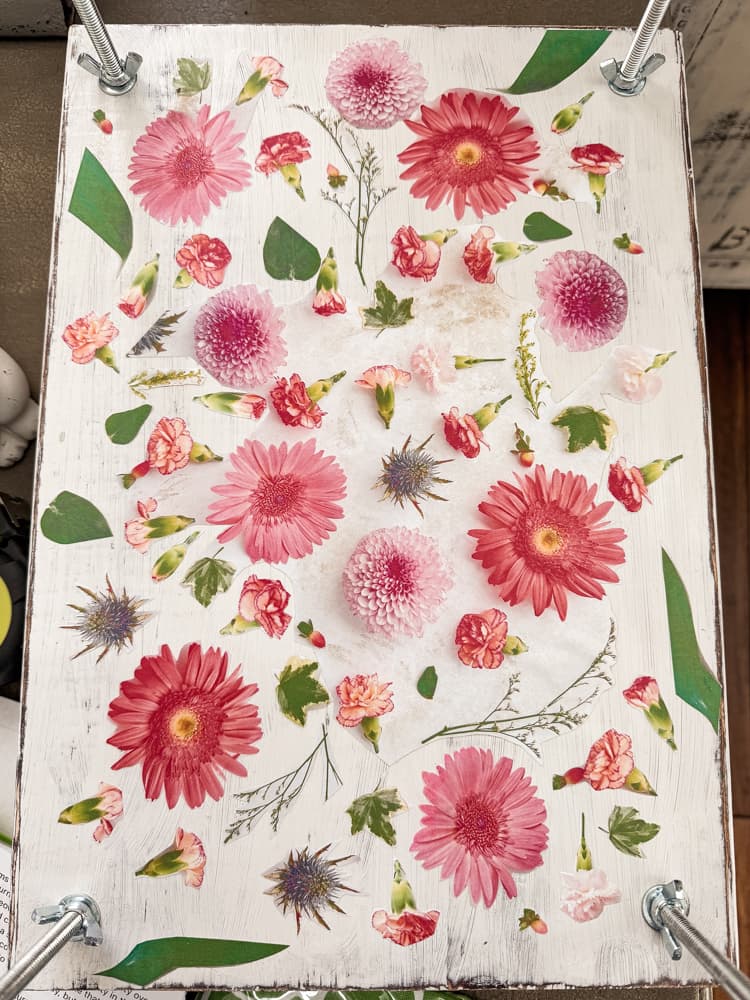
Construct Your Flower Press
Once the wax has been buffed and dried, you are ready to construct your DIY Flower Press.
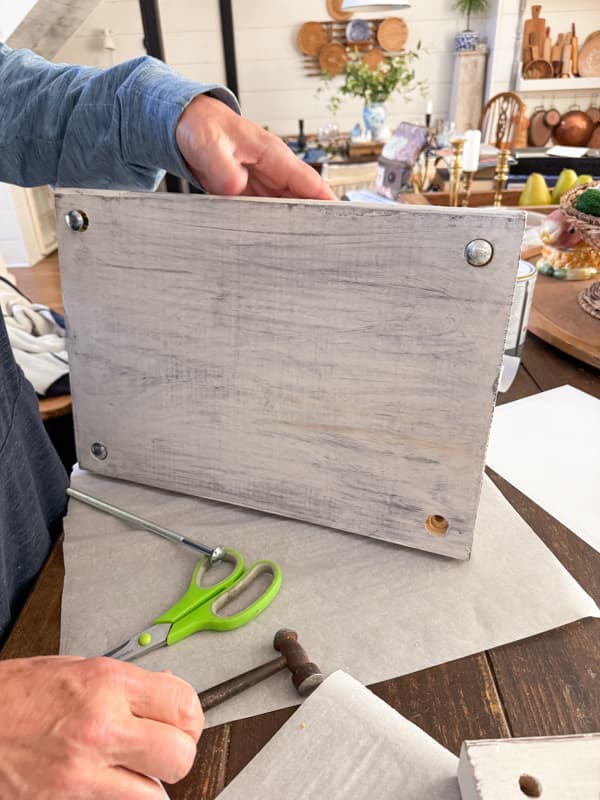
Begin by adding the carriage bolts to the bottom board. The bolt heads are recessed, and the board will lay flat once constructed.
Turn the bottom board upright and add the cardboard and copy paper sheets to the center.
Slide the top board onto the bolts, and add the washer and wing nuts to tighten.
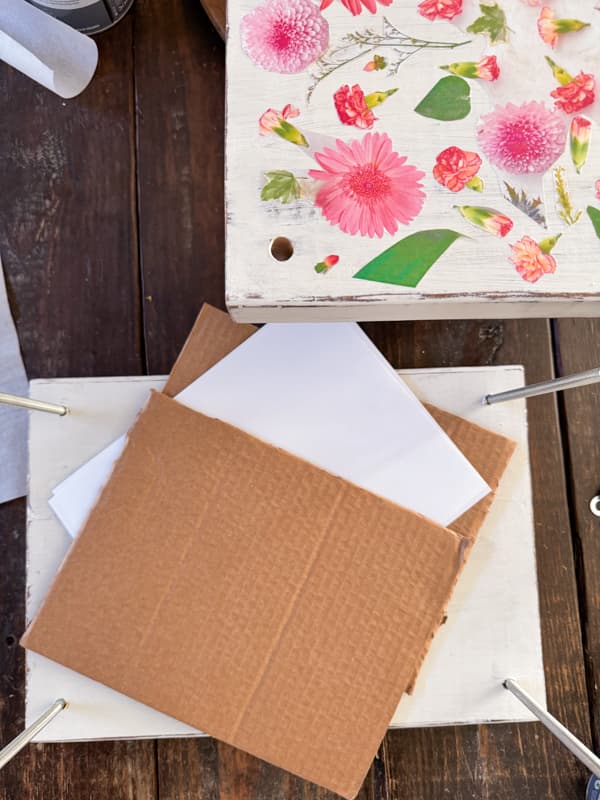
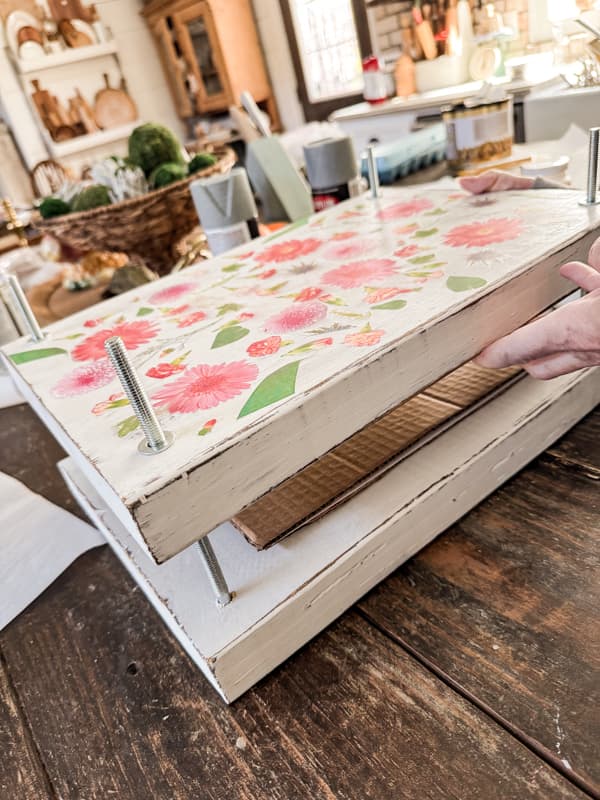
The DIY Flower Press is now ready for flowers, herbs, and other botanicals to be added.
Which Flowers and Herbs Are Best For Preserving by Pressing?
You can preserve any flower or herb in your press. However, some flowers are better and are more attractive than others.
The easier it is to lay the flower flat, the better it will press. Here are some things to keep in mind and examples of easy-to-press flowers.
- Flat or single-layered petals: This would include such flowers as pansies, violets, daisies, and forget-me-nots.
- Low moisture content: They will dry more quickly and are less likely to mold.
- Already fully bloomed but not yet wilting
- Larkspur
- Cosmos
- Yarrow
- Anemone
- Lavender
- Queen Annes Lace

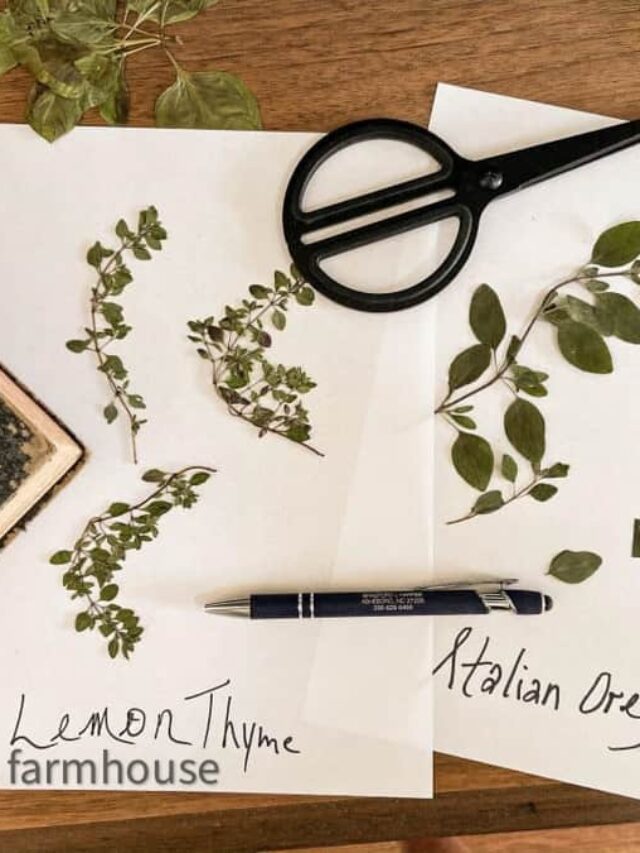
Which herbs are best for pressing?
Herbs are also easy to press. Because they are thinner and lay flat easily, I’ve had good success pressing herbs in books. Here are some of my favorites to press…
- Dill
- Mint
- Thyme
- Oregano
- Cilantro
I love making botanical art with pressed herbs, and you can read this article, “How To Create Botanical Art With Pressed Herbs.”
How Long Does It Take To Press Flowers and Herbs?
Some flowers will dry faster than others. As a rule of thumb, leave the flowers undisturbed in the press for 1-4 weeks, depending on their thickness and the humidity levels. Check on them occasionally and replace the blotting paper if it becomes damp.
Herbs will dry in as little as two weeks. Also, don’t overlook pressing leaves. You can create some beautiful art with preserved leaves, and they dry quickly as well.
Frequently Asked Questions
- Do I have to use the exact materials you used?
No, you can adjust the size of the wood, the bolt size, and more to create a flower press that suits your needs.
- Do I have to use 8 1/2 x 11 paper?
No, you can make your press much smaller. This size paper worked with my scrap lumber and I didn’t have to cut it.
- Can I use other materials to construct my press?
Yes, you can use plywood or heavy-duty press wood. You can use paper towels instead of paper between cardboard pieces. I’ve also seen boards with several layers of plywood to reduce the need for cardboard.
There are many options, and you can use your creativity to construct your flower press.
Resources:
Click the images below for resources to make your own flower press.

I hope you found this article helpful, and I look forward to sharing my next adventure with you.

Pin It To Remember It
Did you find some great ideas you’d like to save for future reference? Hover over the images you’d like to save and pin to your favorite Pinterest Boards when you see the PIN button.


Rac, This is awesome!!! I’d love one..the premade ones are so small.
Jennifer,
I’m so glad you like it. Thanks.
I am blown away! I love this. Can I borrow your hubby for a week? Heck, let’s make it a month. There are just too many things on my list I’d like him to make for me. Starting with this then on to the shiplap tree!
Cindy,
Thank you! I keep him pretty busy so it might be hard to get a shiplap tree. LOL.
I forgot to mention I am featuring this on Farmhouse Friday tomorrow. Thank you for sharing it with us. pinned again!
Cindy,
Thank you so much.
Love this! Can you do more than one layer of flowers at a time ?
Diana,
Glad you like it. Yes, you can stack them as high as screws allow. Have a blessed day.