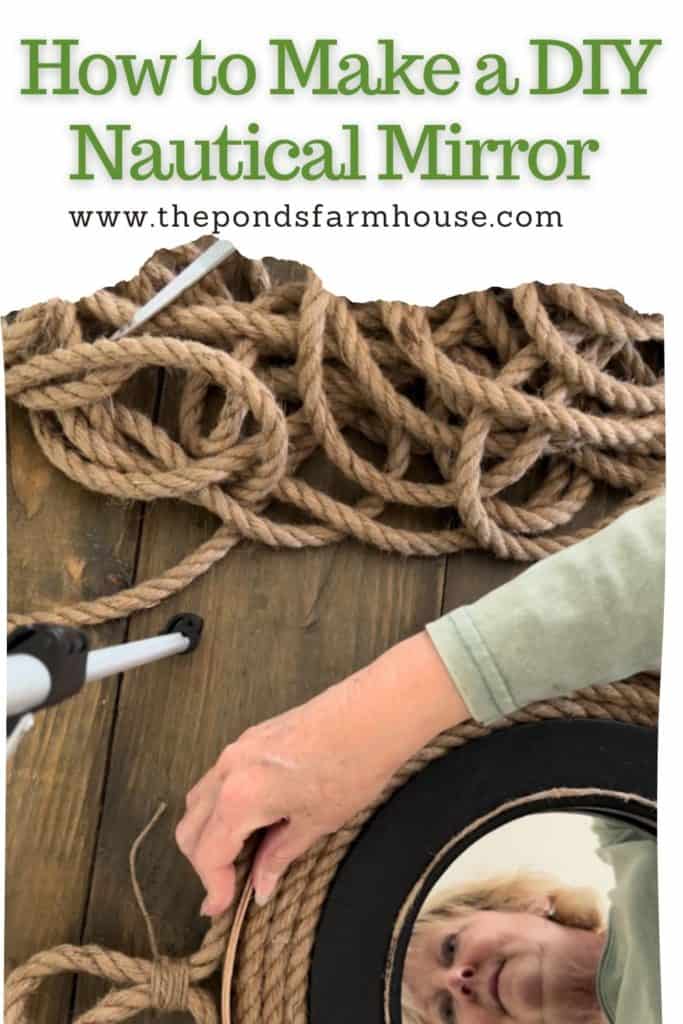
How to Make a DIY Nautical Mirror with Rope
After we added our accent wall to the beach cottage, I wanted to add a nautical round mirror. After seeing the prices of ones I liked, I decided to look through my thrift store stash.
How to Make a DIY Nautical Mirror with Rope is an easy project featuring 3 thrift-store finds. There are several options, and you can make your mirror with a variety of supplies and mirror sizes. Let me share how easy and budget-friendly this project is.
(Posts on The Ponds Farmhouse may contain affiliate links. As an Amazon Associate, I earn from qualifying purchases. See the full disclosure details here.)
Thrifted Finds To Make A DIY Nautical Mirror
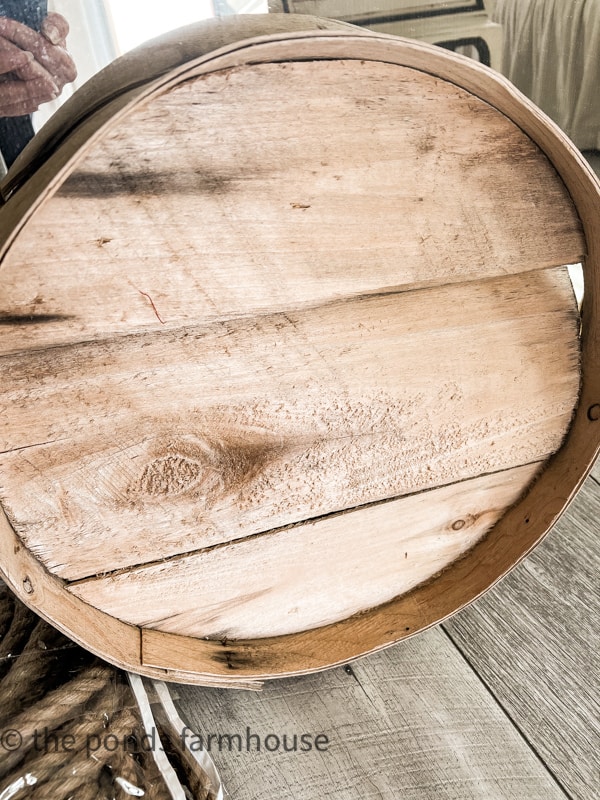
I have a wooden cheese box that I found last year for only $1.00. I had never used the lid, and it was the right size to use as the base of the mirror. I had also purchased several yards of jute rope for only $5.00 at Goodwill last summer. Now, all I needed was the mirror.
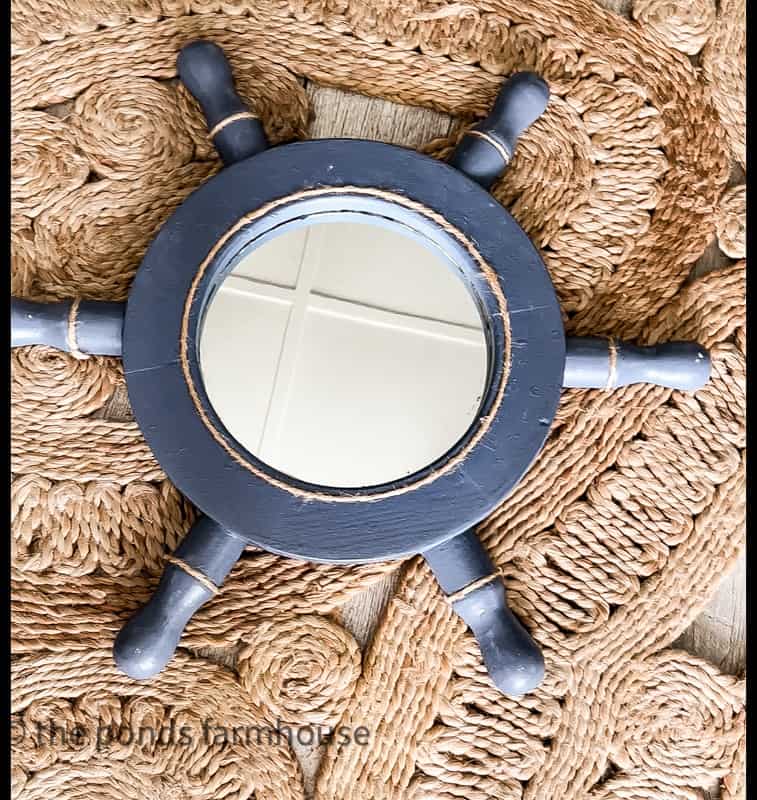
I had found the jute rope at the Goodwill in Wilmington, so I decided to check it out. Much to my surprise, I found a captain’s wheel mirror with a touch of jute rope on the frame. It was only $6.00, so I was sold.
Additional Supply List
How To Update The Nautical Mirror
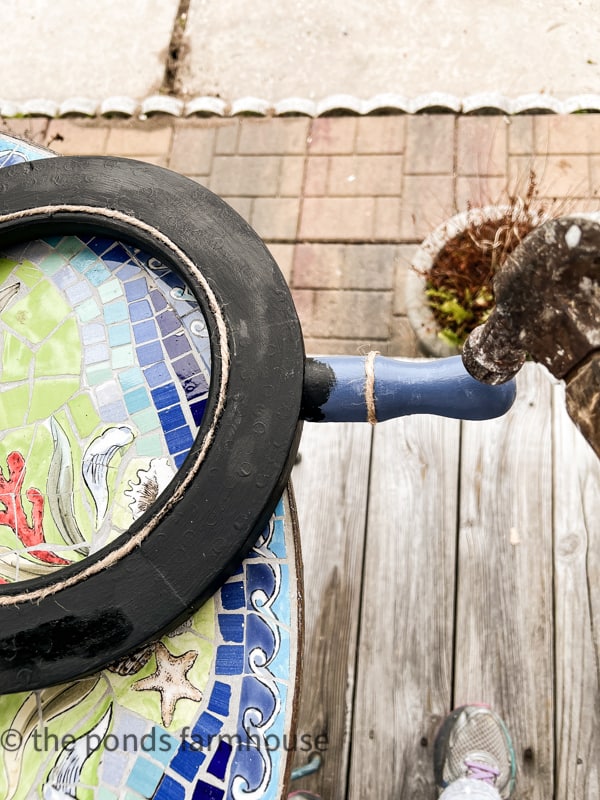
First, although it’s actually nautical, I’m not a fan of the captain’s wheel or the blue color. Any round mirror would work for this project, but since I found such a good deal on this one, I decided to modify it. So here’s what I did.
- Remove the wheel’s spokes. I used a hammer to knock them loose, and they came out easily.
- There was no need to fill the holes as I planned to cover the edges with rope.
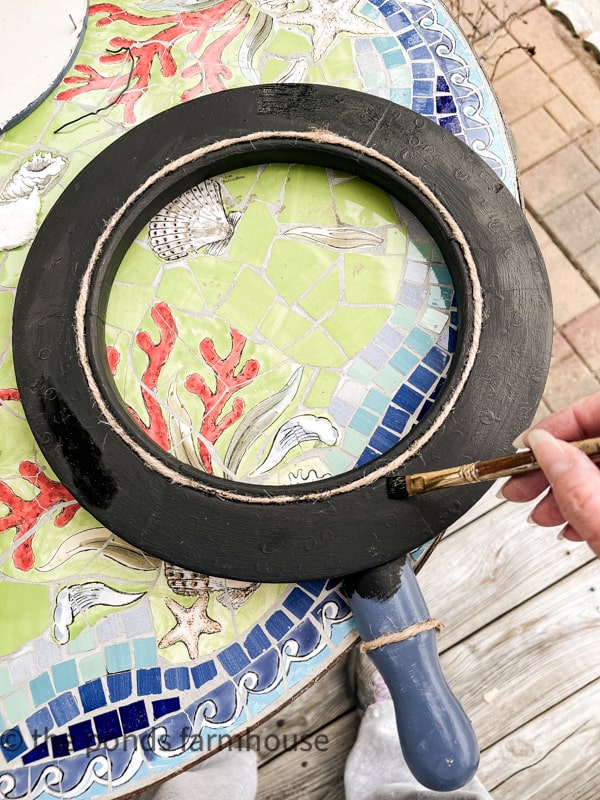
- I then removed the mirror and kept one spoke attached to make painting the frame easier.
- Then I painted the entire wheel black and kept the embedded rope as unpainted as I could.
- Once the entire mirror was painted black and dried, I used the hammer to knock the final spoke from the frame.
How To Add Rope To Nautical Mirror
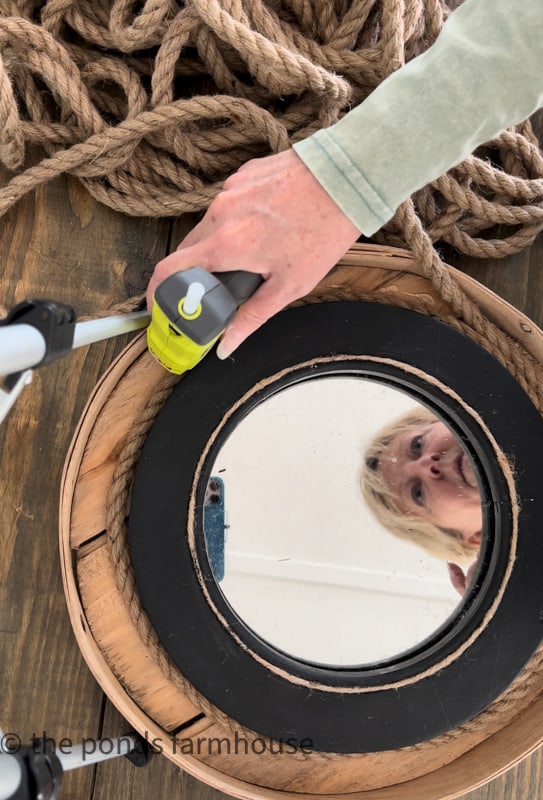
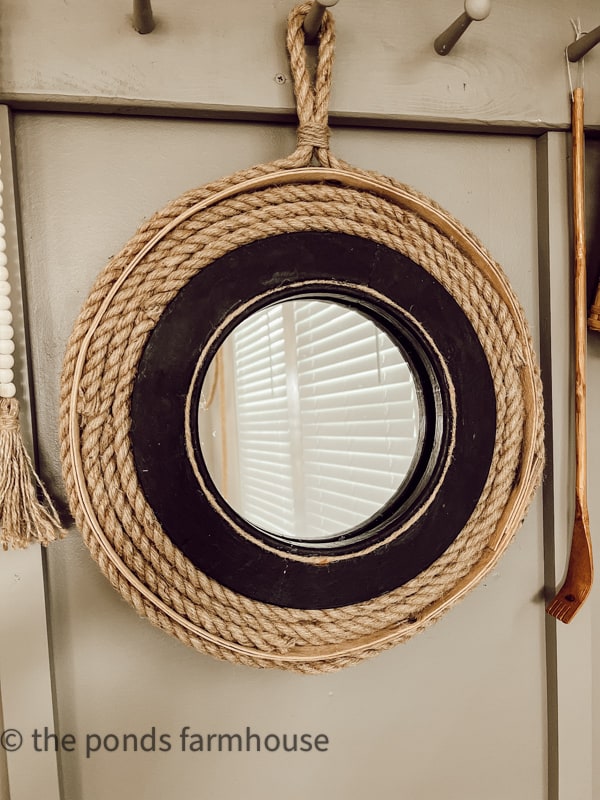
To make the nautical mirror, begin by attaching the mirror to the inside of the cheese box lid at the exact center.
I used Gorilla Glue Clear Adhesive Sealant to secure the mirror and allowed it to dry overnight for added safety. A round tray, platter, or even a pizza pan are other options for a base.

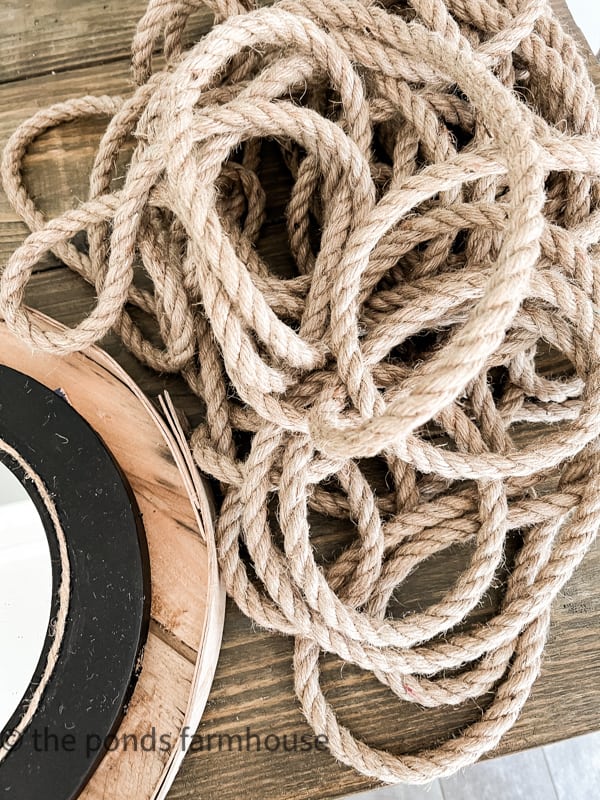
Next, you will want several feet of jute rope to surround the mirror and cover the inside of the cheese box lid.
In addition, you need enough rope to wrap around the lid’s diameter twice, plus approx. another 10 inches for hanging and securing the rope.
I was fortunate to find this rope secondhand; however, you can find the same size rope here.
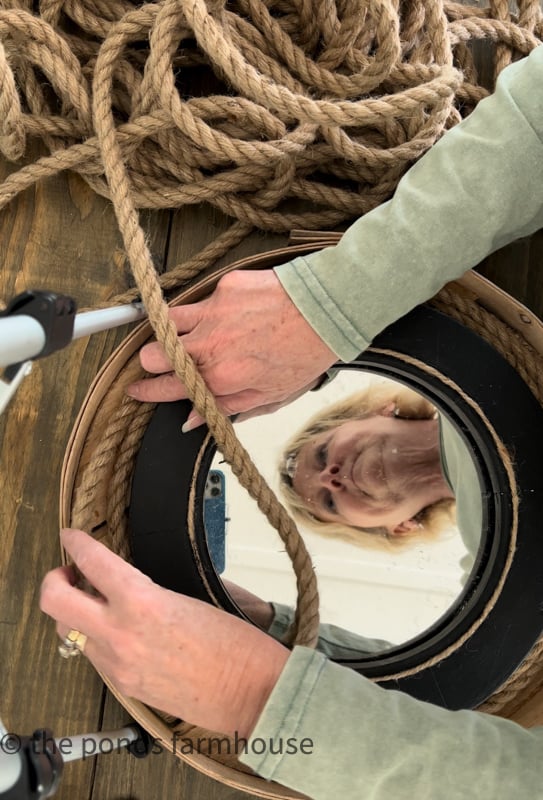
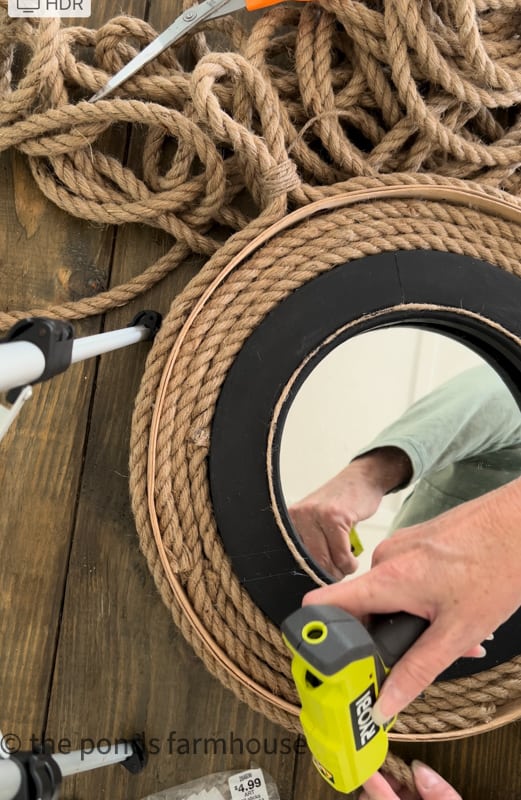
Begin applying a bead of glue, next to the mirror, approx. 1/4 inch from the mirror frame.
Continue applying glue and pressing the jute rope into it as you go around the mirror.
Prepare to Hang a Nautical Mirror
Once the entire lid is covered with jute rope, measure the outside diameter of the cheese box lid. I just used the rope to measure with. Then double the lid’s diameter because you want to wrap the rope around the outside twice.
In addition, you should add approximately 10 inches of rope to make the loop hanger, then tie it securely.
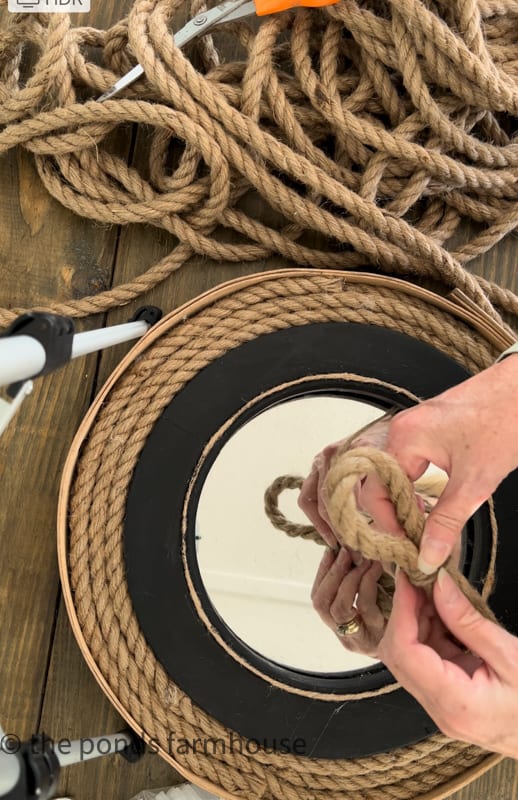
How To Make a Loop Hanger
Fold your rope in half and make a loop approximately 2-2 1/2 inches from the top to the bottom. This can vary depending on how big you want your loop to be.
Take your small jute twine and tie it around the bottom of the loop to secure. Wrap the jute twine several times around to secure.
How To Secure the Hanger To The Lid
In order to secure the hanger to the lid, begin at the top of your nautical mirror and position the loop as you see below. Secure with hot glue.
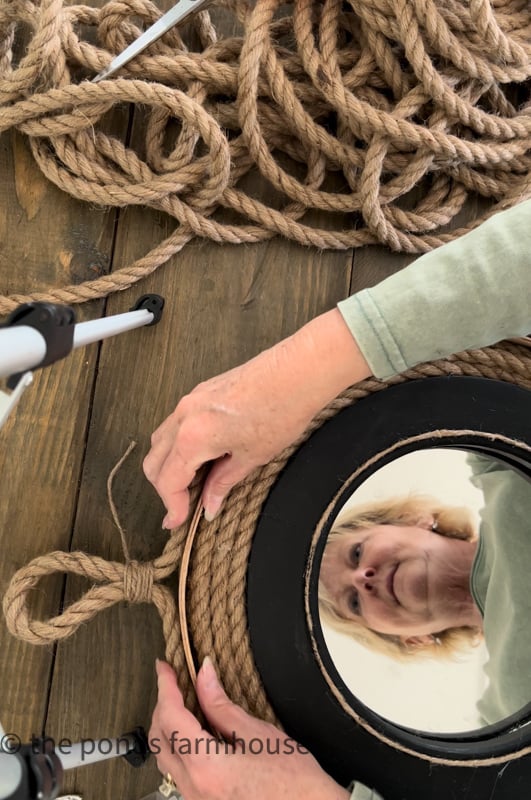
Continue securing the rope around the outside edge of the lid until it has been wrapped twice.
Next, tie the excess rope on the back side of your loop, and secure it to the back of the cheese box lid with hot glue. Don’t allow the tied excess rope to be visible from the front of the nautical mirror.
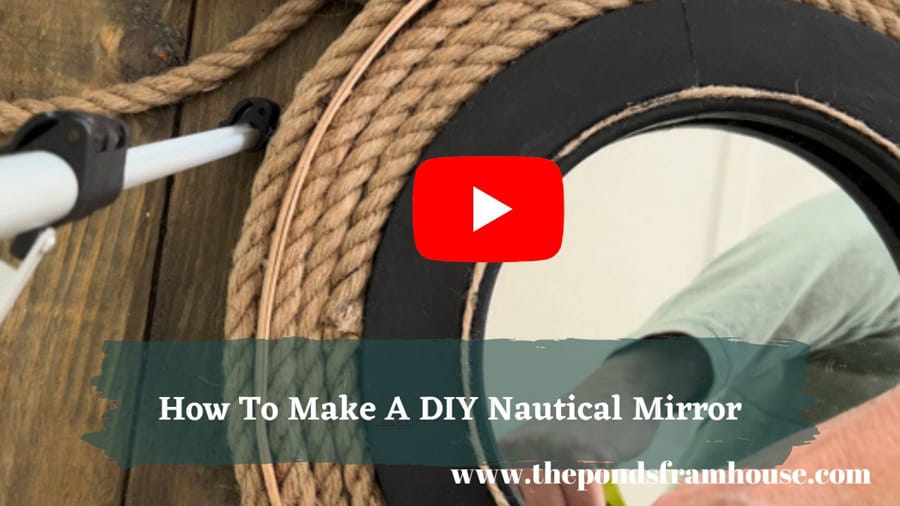
See Latest Video
Decorating With DIY Rope Nautical Mirror
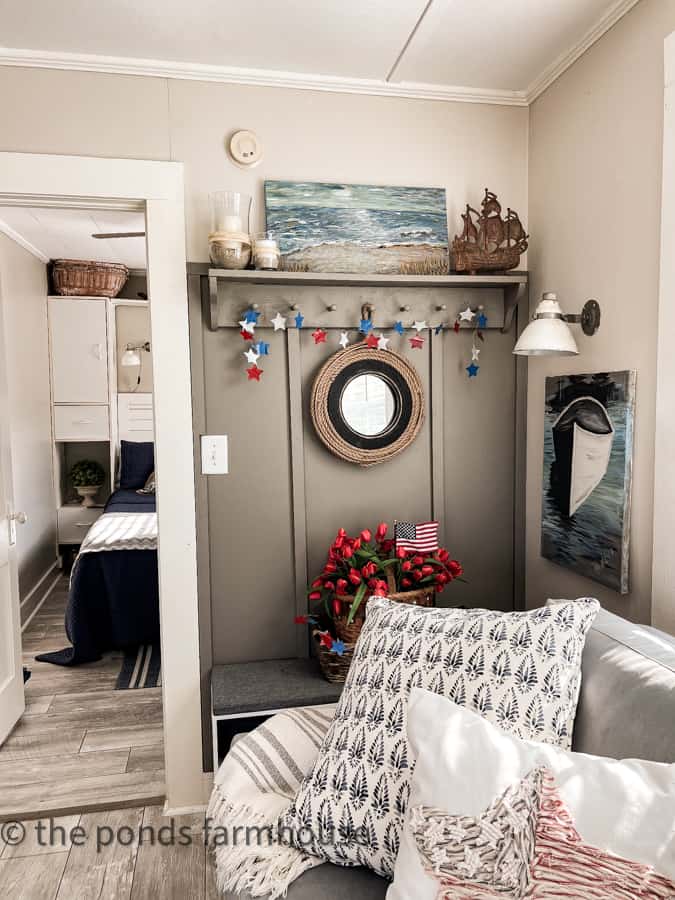
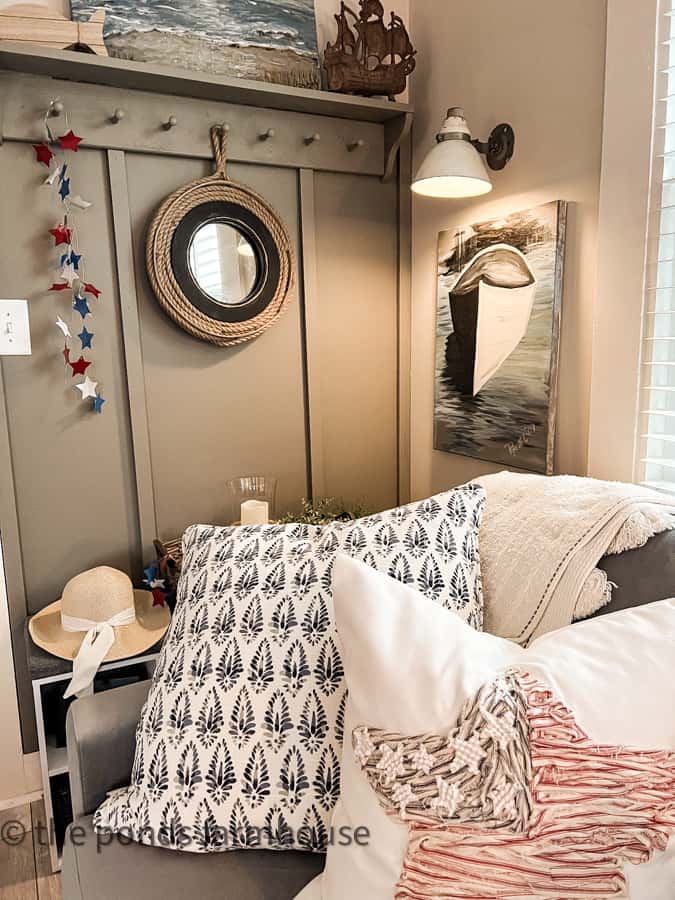
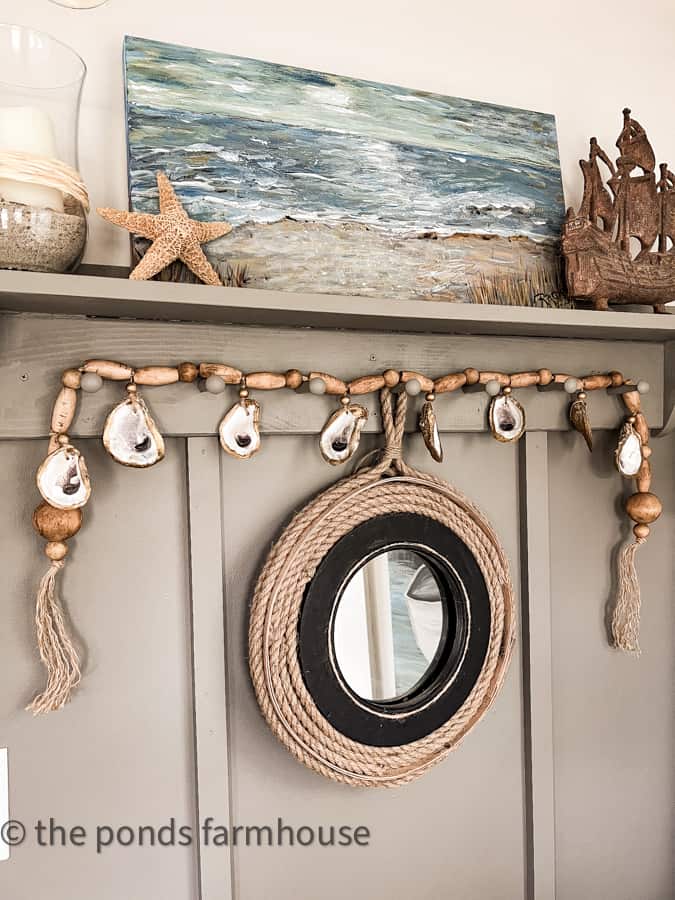
The mirror looks perfect hanging from a shaker peg on the new accent wall in the Beach Cottage, completing another project for our renovations.
It is easy to decorate around the mirror with different seasonal decor.
I hope you enjoyed How to Make a DIY Nautical Mirror with Rope.
More Budget-Friendly Ideas and Beach Cottage Projects
Links To Beach Cottage Renovation and DIY Projects
- Tiny House Ideas for Beach Cottage Before & After
- Creative Small Bedroom and Budget Storage Ideas
- How To Add A Wood Accent Wall
- How To Build An Open Kitchen Cabinet
- Thrifted Coastal Farmhouse Decor on a Budget
- How To Use Wall Stencil To Create Faux Wallpaper
- Budget-Friendly Small Bathroom Remodel for under $500
- Clever Ways To Add Lighting Without Wiring
Thanks for stopping by today, and I look forward to sharing my next adventure with you.

PIN IT TO REMEMBER IT


Love this! What a great re-creation! By looking at the nautical wheel mirror I wouldn’t have thought the wood handles would just pop off as easy as they did for you. Can’t wait to see the reveal.
Lori,
I really appreciate this. Thanks so much for stopping bby.
This turned out amazing! I love it.
Renae,
Thanks so much.
This turned out awesome! Great idea!!!
Stacy,
Thanks so much
Another winner, Rachel! And I have 5 cheese boxes waiting for me. This just might be one of them.
Diane,
I’m so glad you found this helpful. I appreciate you for stopping by and I can’t wait to see what you do with your cheese boxes.
I love this tutorial! So creative and I can’t wait to make some! Please come and link up to my linky party and share this post. https://karinskottage.com/2022/03/bring-on-spring-linky-party.html
Karin
Karin,
I really appreciate this. Thanks for stopping by.
I need to make one of these for my beach cottage. Love this Rachel.
Thanks so much Kim!
Karin,
Thanks for your sweet share. I’m loving that mirror.
It’s the handles that make it the Captains Wheel. That is what I loved! I still need to figure that out to make mine.
Awww it just depends on how you want yours to look.
Any ideas on what I could use?
Shelia,
Thanks for stopping by. It would depend on what you want it to look like.