DIY Potting Table from Upcycled Windows | Greenhouse Project
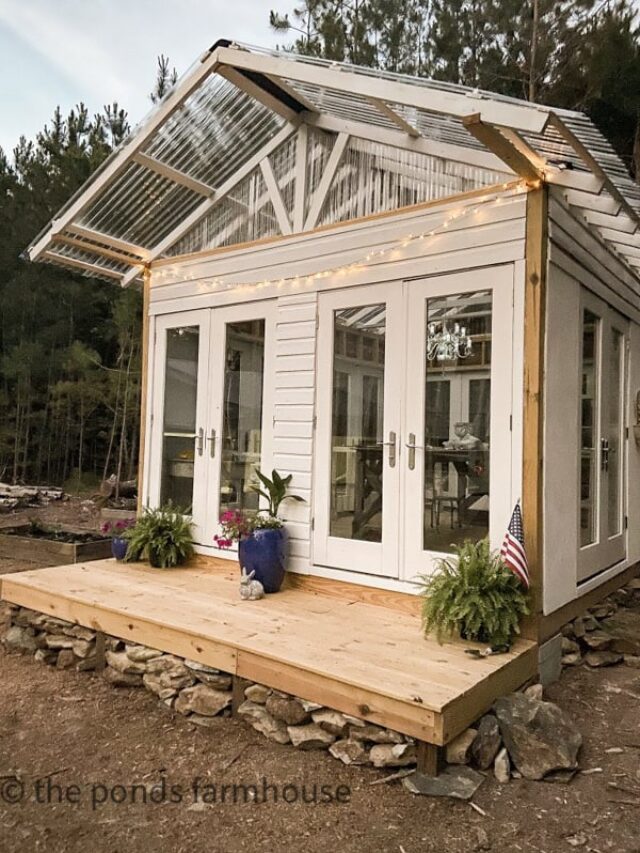
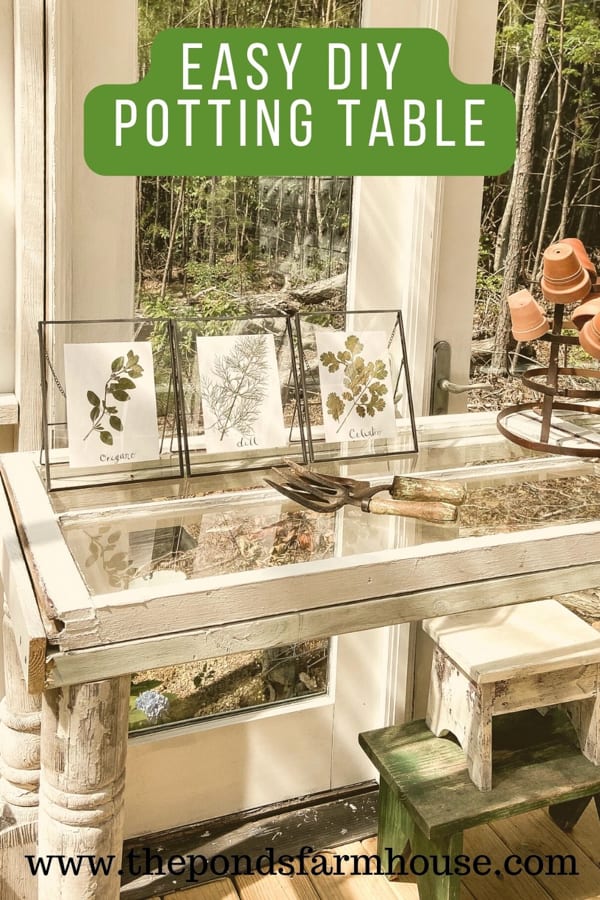
Hey friends, do you remember that we built our greenhouse with old French doors? Well, I had started collecting reclaimed windows even before we lucked into those doors. Since I needed a potting table inside the greenhouse, I decided to upcycle those old windows into a creative workspace. I even used some old porch posts for the legs! The entire project is made from salvaged and reclaimed materials, and I’m excited to show you how easy it was to make. It just goes to show that if you save your reclaimed materials, you’ll always find a use for them.

(Posts on The Ponds Farmhouse may contain affiliate links. As an Amazon Associate, I earn from qualifying purchases. See the full disclosure details here.)
DIY Potting Table
When we started planning the DIY potting table, I began looking at supplies I already had on hand. Before building the DIY Greenhouse, I had collected some reclaimed windows and other materials. I wasn’t sure what we might need, so I had several items collected.
Supply List
- 2 – identical windows which together will be the length of your table
- 2 – 8′ salvaged porch posts.
- 2 – treated 2 x 4 boards
- 2 – treated 4 x 1 boards
- Wood Screws
Easy DIY Potting Table Instructions
Once you have gathered your supplies, you’ll need to cut the legs to the desired height and decide how to secure the windows to them. Let’s break down each step of the process.
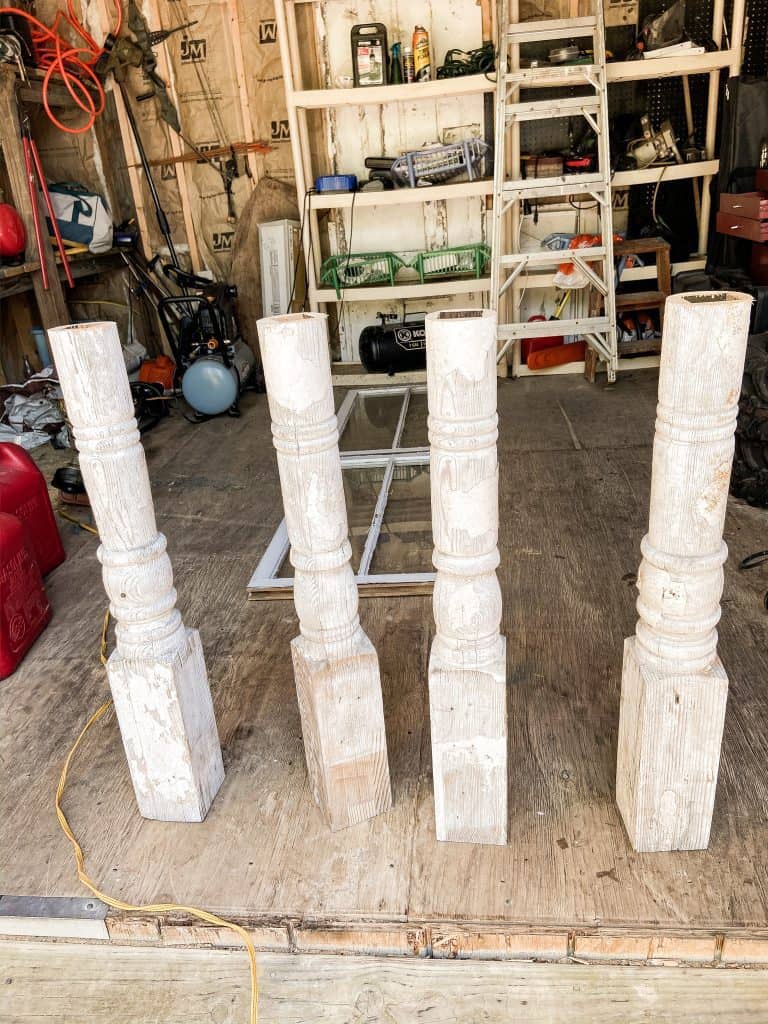
Porch Post Legs
First, ensure that you build your table at the correct height. I personally feel that 36″ is a good working height for a garden or potting table. Since you will be cutting the post in half, you need to remove the excess length first.

Begin by cutting the excess length off each post using a chop saw, and then cut the post in half. As a result, you will have four identical posts.
Measure Windows
Next, let’s measure the length and width of the windows used to build the potting greenhouse table or gardening bench. Then, you will create a frame using your lumber.
Using a chop saw, cut your 2 x 4 lumber to the exact window length. At this point, begin attaching each board to the top of the posts using wood screws and a cordless drill.
Additionally, align each board with the edge of the posts to form the front and back lengths of your table.
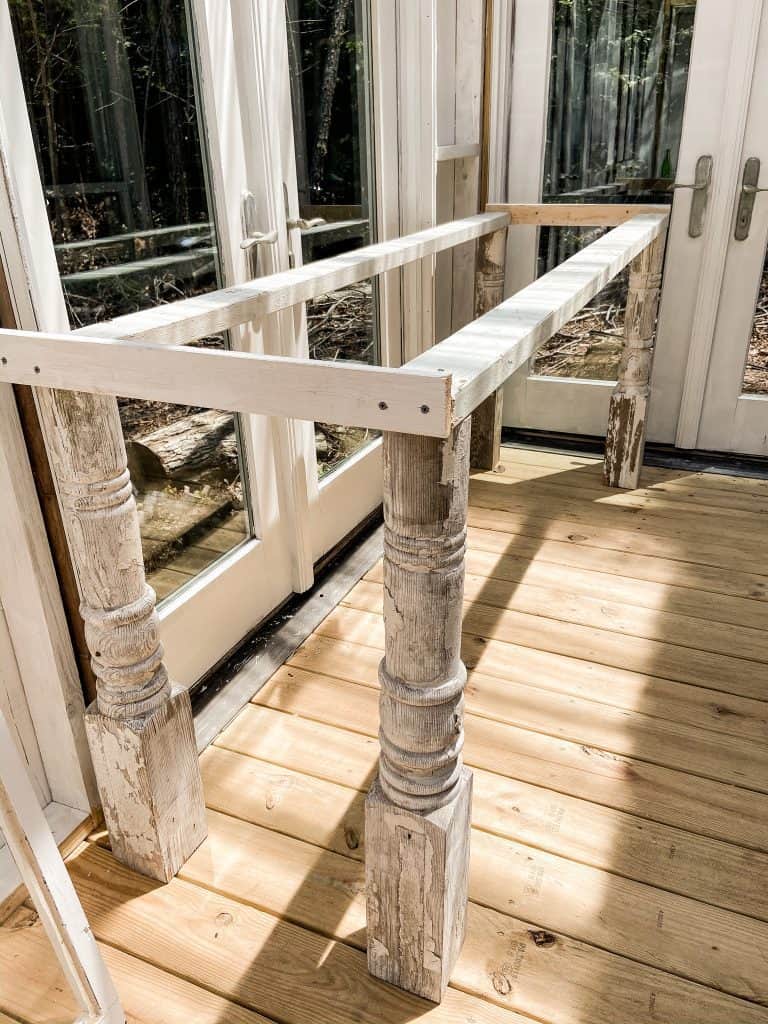
The end is a thinner 1″ board and is used to attach the two lengths. Similarly, you will want to cut these end boards to the exact width of your window.
Build Frame
Next, attach the end boards to the 2 x 4 boards using wood screws and a cordless drill.
However, these boards should be attached from the outside so that the ends rise above the 2 x 4 boards to form a slight lip. In other words, allow the end board to create a frame for the windows to sit inside.
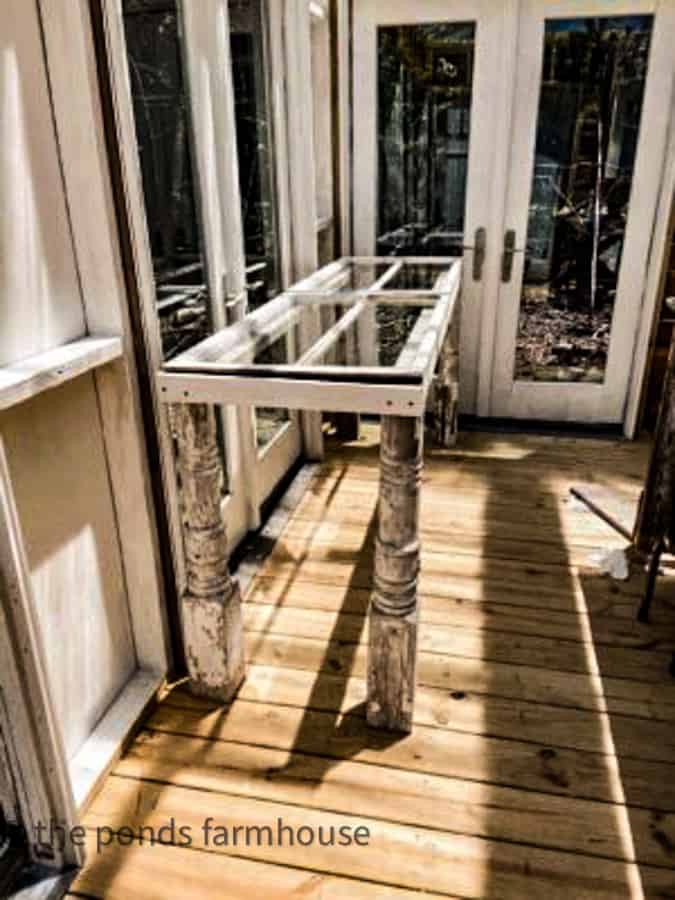
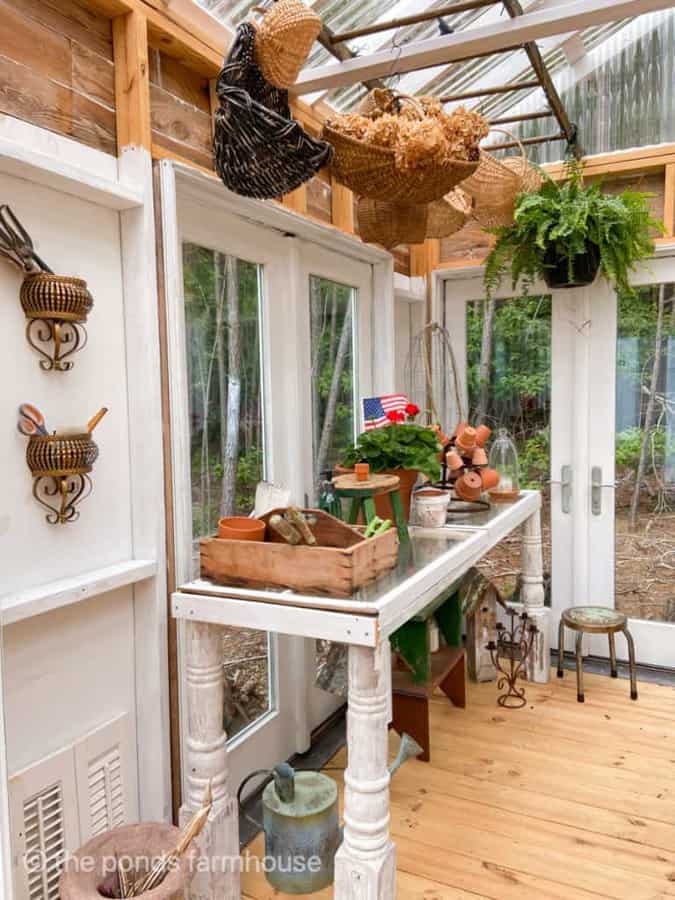
Add Windows to Complete Your Potting Table.
Now, place your windows on the frame and attach them to the base using wood screws from underneath.
Avoid using screws that are longer than the thickness of your board and window, as they will be visible on the top of your table. Additionally, ensure that you attach wood to wood and avoid allowing the screw to come into contact with the glass.
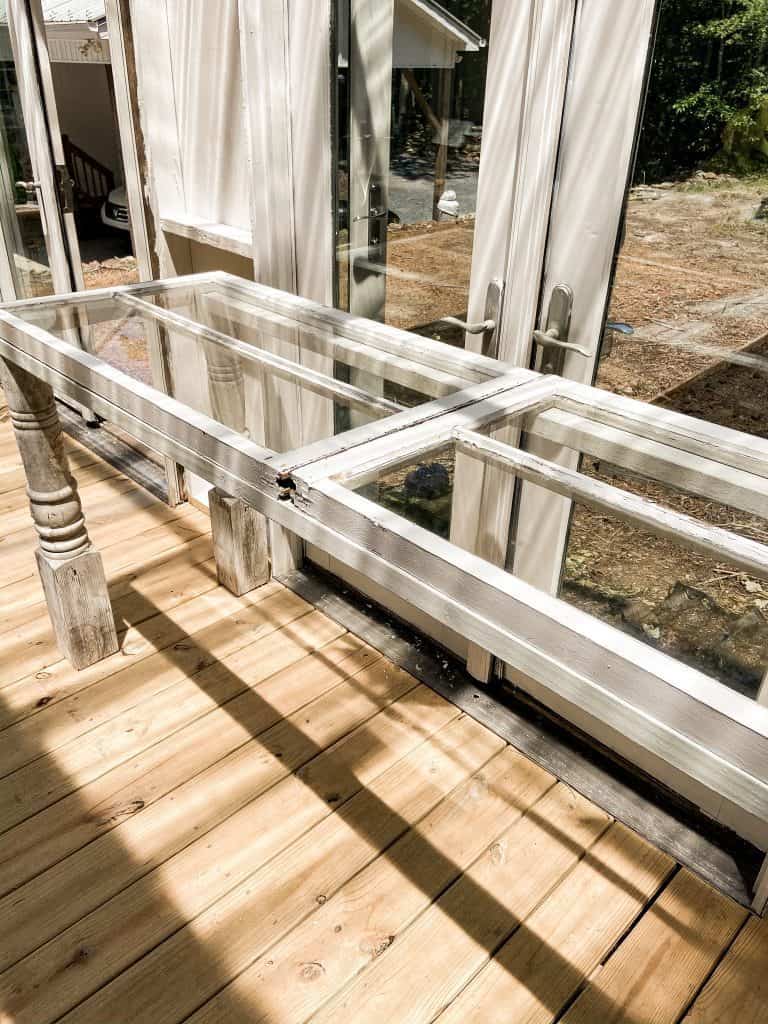
The DIY Potting Greenhouse Table is a very rustic gardening bench that works perfectly inside the greenhouse.
If you plan to use your table outside, consider using all-treated lumber or sealing your potting table with exterior paint. As a safety precaution, I plan to add a sheet of Plexiglas to the top of the table.
DIY Greenhouse
We are thrilled with our DIY greenhouse, but building it created a need for additional projects to fill the space. The excess supplies came in handy for several projects, and I’ll share a few of the additional tutorials.
You can see all the Greenhouse details.
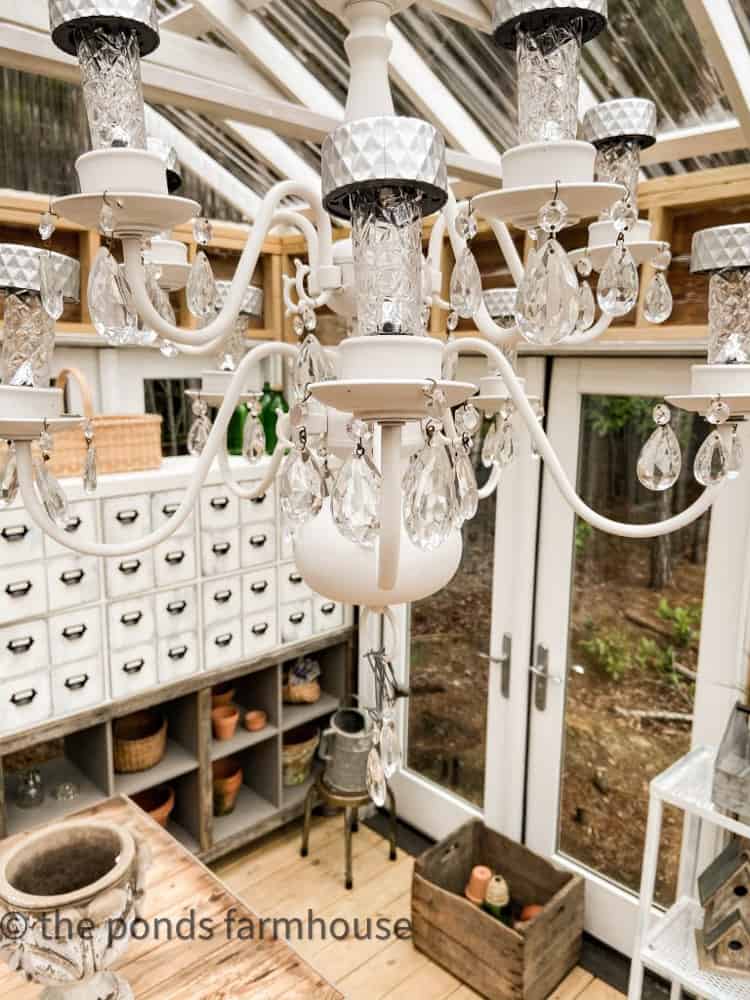
Additional Greenhouse DIY Projects
To fill the greenhouse with storage, we repurposed an IKEA Cube and created an Apothecary Cabinet. It’s hard to believe this used to be a 16-cube IKEA storage unit. Please look before and after.
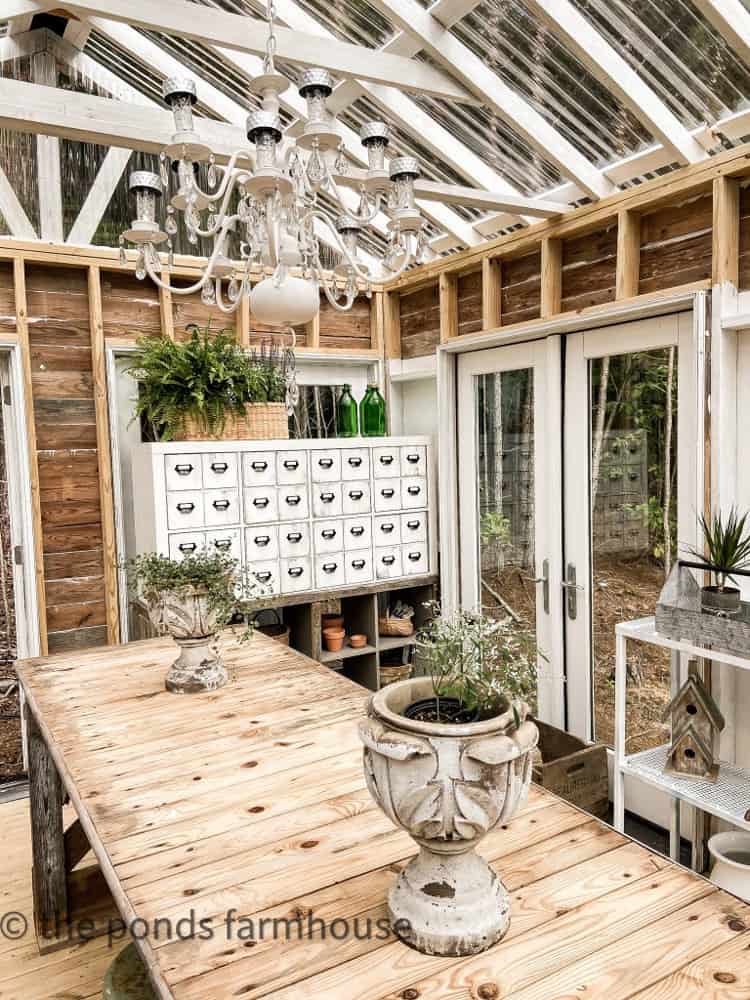
Additionally, I discovered an old chandelier at the thrift store and converted it into a solar-powered chandelier for the greenhouse.
Resources: Shop This Post
This is a simple way to repurpose old windows and other architectural salvage into a functional potting table/gardening bench. I hope you enjoyed this idea.

Pin It To Remember It
Did you find some great ideas you’d like to save for future reference? Hover over the images you’d like to save and pin to your favorite Pinterest Boards when you see the PIN button.


One of my favorite things to do is repurpose old goodies and this is a fantastic idea. Pinned BTW, you are doing a great job on your blog! I’ll be your # 2 fan. I bet the hubby is your #1. 😉 Hope you have a great week!
Cindy,
Wow what a compliment! I’m still learning so much and have a long way to go. I appreciate you so much for these kind words.
Rachel.
I love this Rachel! Now I am going to see how you did the greenhouse. I have a conservatory made of old windows. It is big and fits on top of an old table.We had to cut it’s top off to fit it in our screend in porch and put it back on inside! I told my husband at least nobody can take it! LOL
Oh my gosh! How fun is that. Thanks for sharing!
Rachel.
So, I’m confused. Is this ANOTHER table and work shop that u made recently, or just the tutorial again for those who may have missed it the past couple times you’ve posted it? I’ve noticed that your opening statement changes for many of your posts but they seem to be repeats. Do u have plans for any NEW projects in the near future?
Ronnie
Ronnie,
This tutorial is from a few years ago when we first built the greenhouse. I often update the posts with new photos or improved instructions as I’ve grown as a blogger. I try to share two to three new ideas each week. I rarely share an old project without updating it. However, I’m having to rely on more older posts as I’m going through cancer treatments. Sorry for any confusion.
One of the most stunning projects I’ve seen! Very nice.
Linda,
That just made my day. Thank you for this. I have a wonderful day.
Rachel