Easy DIY Valentine’s Day Felt Craft: How to Make a Heart Topiary Centerpiece
What could be cuter than handmade felt heart flowers for Valentine’s Day? This DIY Valentine’s felt craft transforms simple grapevine wreaths and flower hearts into a stunning heart-shaped topiary centerpiece. By using thrifted brass containers, you can create a high-end look on a budget. This easy tutorial is fully customizable with various felt flower options, ensuring your Valentine’s Day decor is truly one-of-a-kind. Let’s dive into the simple supplies and my favorite styling tips!

(Posts on The Ponds Farmhouse may contain affiliate links. As an Amazon Associate, I earn from qualifying purchases. See the full disclosure details here.)
Supplies for Your Felt Flower Heart Topiary
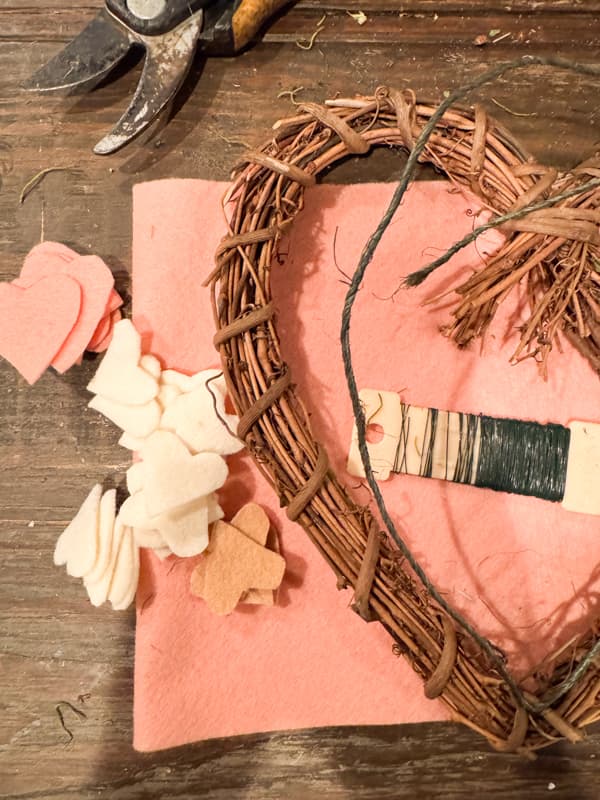
- Small Grapevine Hearts – Set of 3
- Dowel Rod or Small but Sturdy tree branch
- 2-3 Colors of Felt Sheets – I used this set of colors
- Covered heavy wire floral twine
- Floral Wire
- Hot Glue Gun
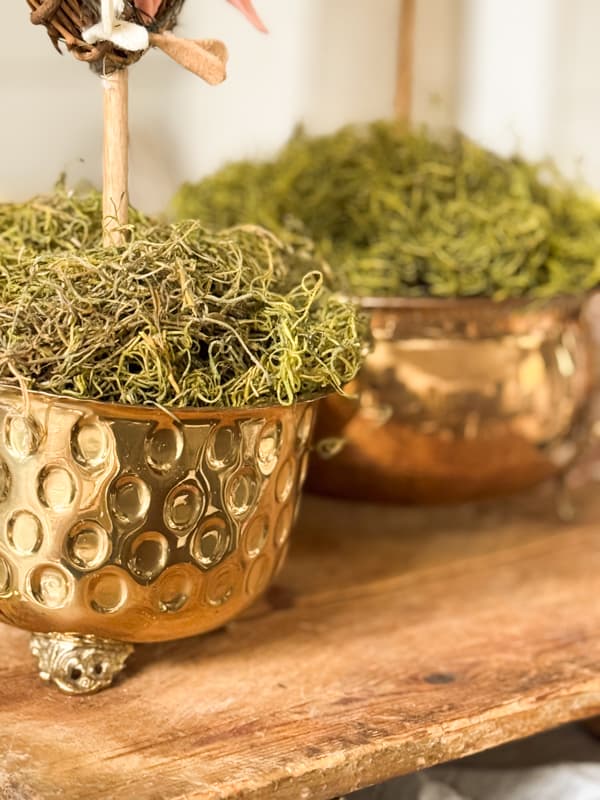
- Reindeer Moss
- Styrofoam
- Containers of your choice
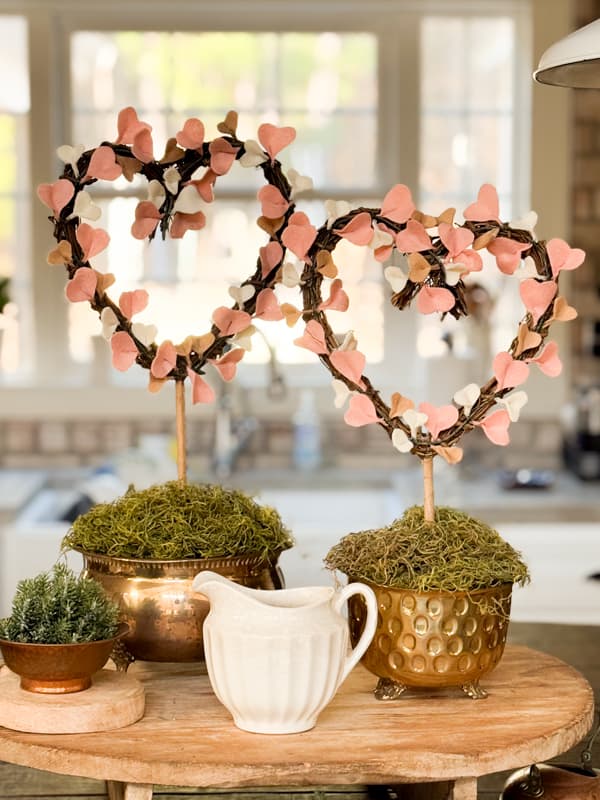
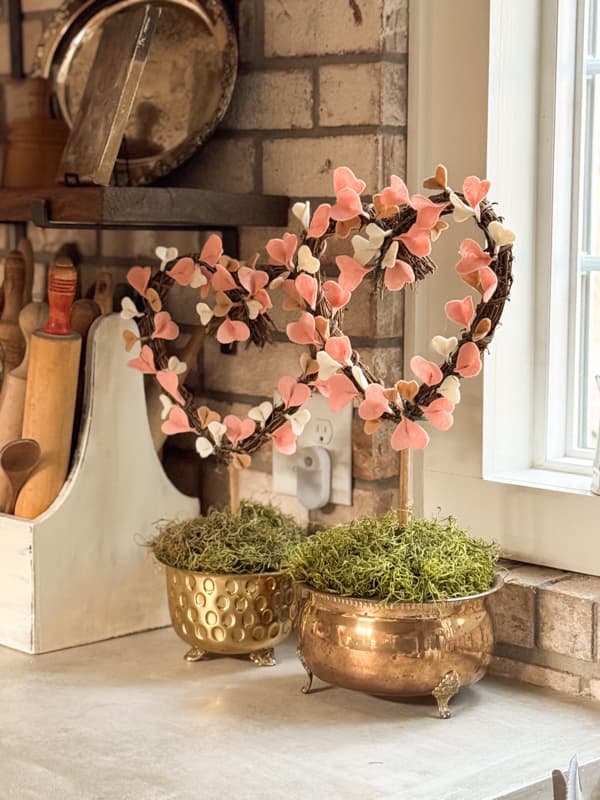
Choosing the Perfect Container (The Thrifted Brass Look)
I made my felt heart topiaries to create a Valentine’s Day Centerpiece for my dining table. So I wanted to give them a stylish life with brass containers. I had two thrifted vintage brass containers that worked perfectly. They are two different sizes, so I used the larger container for the taller one and the smaller for the shorter one. This helped to balance the size difference. Here are some other options depending on your design aesthetic.
- Thrifted Brass or Silver Containers: Look for serving pieces, floral containers, sugar bowls, vases, and more.
- Terra Cotta Pots – With a variety of sizes, you have unlimited options
- You can leave the terra cotta pots plain for a rustic garden feel or paint them to match your table setting.
- Another option is to napkin decoupage the pots for an upscale decor style. See How To Decoupage Clay Pots with Napkins for more details.
- This DIY Hot Glue Decorative Pot project tutorial is another way to enhance the clay pots.
- Milk Glass Containers – Using thrifted milk glass jars and vases is another budget-friendly option.
- Purchased or thrifted plant containers in metal, plastic, or ceramic would look lovely.
Step-by-Step Instructions For Felt Flower Heart Topiaries
Let’s get started with the basic instructions for creating the felt flower hearts and turning them into a stunning topiary centerpiece.
How To Prepare Grapevine Heart Wreaths
The first step is to determine the height of your topiaries. I used dowel rods in two different lengths.
How To Measure for Your Topiary Height
I didn’t measure exactly. I just used a visual estimate to adjust the heights. Here are my simple steps.
- Place the dowel rod or stick in the container you plan to use.
- Hold it at the bottom and then hold the grapevine heart wreath in front of the rod, going up and down until you like the height.
- Mark where it needs to be cut.
- Be sure to allow for the rod to fit into the base of the heart. Mine was approximately 1/2 inch extra.
- Cut the dowel rod with pruning shears.
- Repeat for the second topiary, making it either taller or shorter than the first.
How To Attach Dowel Rod To Grapevine Heart
After you cut the dowel rod to size, you are ready to attach it to the grapevine wreath. I used scissors to create an opening at the base of the grapevine heart.
- Just wiggle the scissors between the branches at the tip end.
- Then turn the scissors sideways to create an opening.
- Slide the dowel rod into the opening.
- Allow the rod to barely peek out inside the heart frame.
- Wrap some floral wire around the rod and secure it to the wreath.
- Add hot glue to further secure it.
- Set aside to dry.
- Don’t put in the container until the felt hearts have been attached.

Creating The Felt Flower Hearts
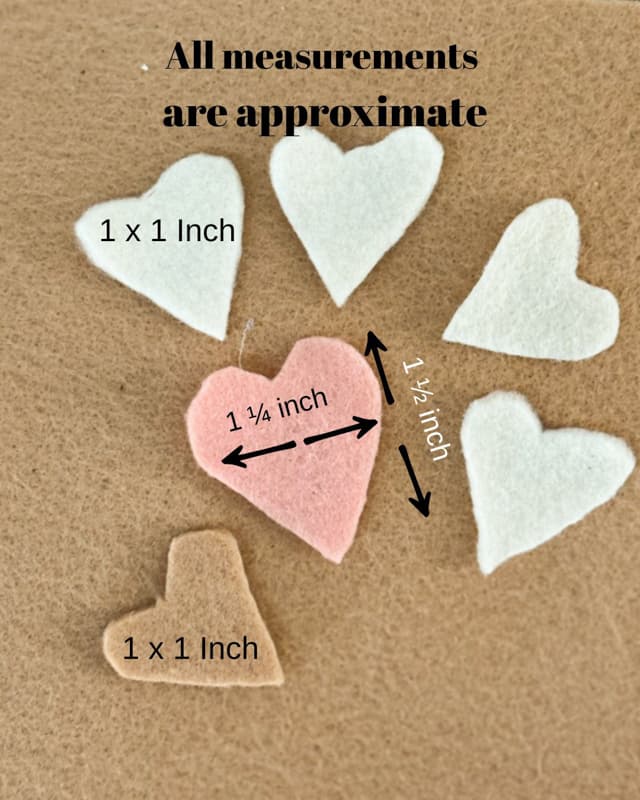
The first step is to create a paper pattern. I used scrap paper and cut two sizes of hearts. The larger heart is approximately 1 1/4 inches wide and 1 1/2 inches tall, while the smaller hearts are 1 x 1 inches. Don’t worry, the sizes can vary as you cut the felt; it will all look good in the end.
Each heart topiary consists of approximately 20 large hearts and 10 of each color smaller hearts. This can vary depending on the placement and size of your grapevine hearts.
Choosing Felt Flower Hearts Color Palette
I love using the felt flower hearts because your color choices are unlimited. I decided to make the two sizes in three colors.
My main color, a peachy pink, is for the larger hearts, and the smaller ones are made with cream and beige colored felt. I think pink, red, and cream would look pretty, too.
I suggest you consider your table setting and what colors you plan to use before choosing your felt colors. Use one predominant color and two accent colors.
How to Assemble Your Heart-Shaped Topiary
Here are the step-by-step instructions for creating the heart-shaped topiaries.
- Create a wire to attach the hearts to.
- Then attach the hearts to the prepared wire.
- Lastly, attach the heart-filled wire to the wreath frame.
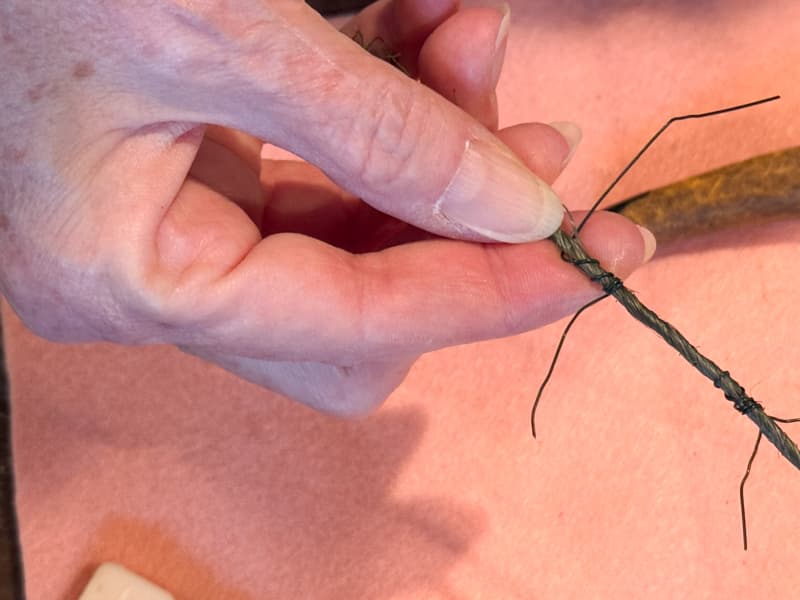
How to create a Wire to Attach the Felt Hearts
- First, measure around the grapevine wreath and cut a length of heavy-duty wrapped floral wire to cover the front of the wreath.
- Next, cut approximately 20 pieces of lightweight floral wire, each measuring 5-6 inches.
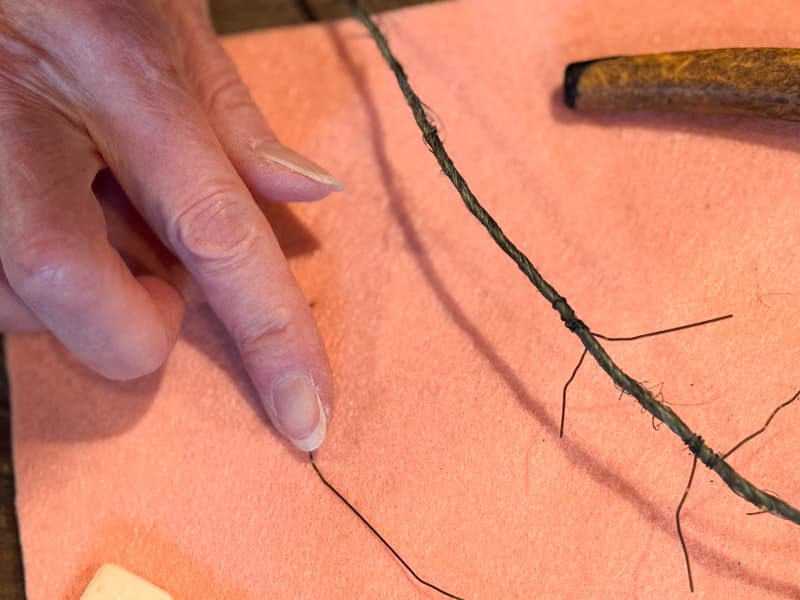
- Place the lightweight wire around the heavy wrapped wire at the center of the 5-6 inch piece.
- Twist the wire from both ends until it is secured to the main wire, leaving the ends approximately 1-2 inches long.
- Continue to fill the heavy-wrapped wire with the smaller wire, spacing each approximately 1-2 inches apart.
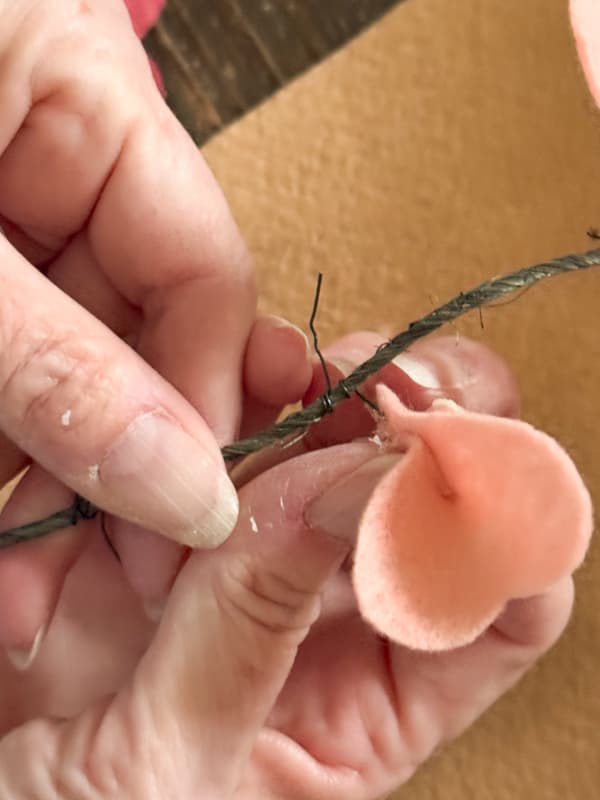
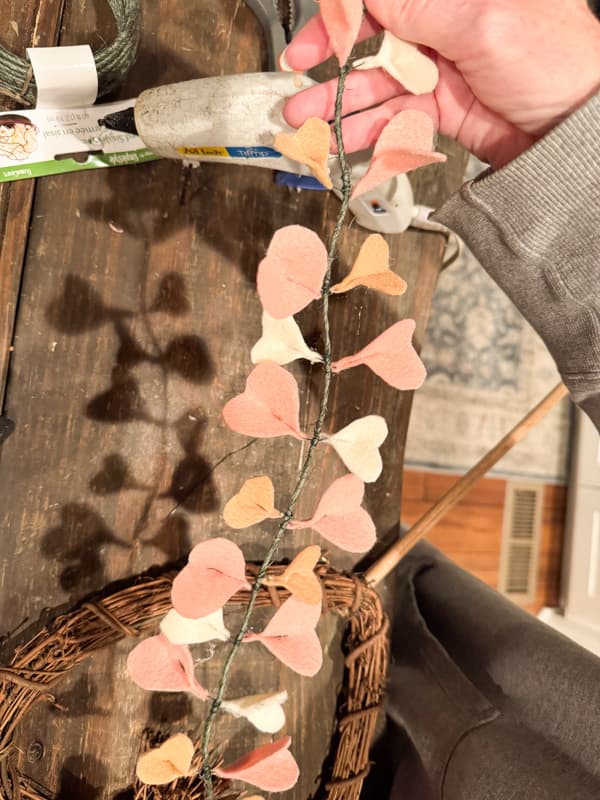
How To Attach Felt Flower Hearts To Wire
Once you have the heavy wire filled with floral wire pieces, you are ready to begin adding the felt. Heat up your hot glue gun, and let’s get started.
- To attach hearts, apply a bead of hot glue to the bottom point.
- Wrap the felt with hot glue around the wire, then pinch the bottom together to secure.
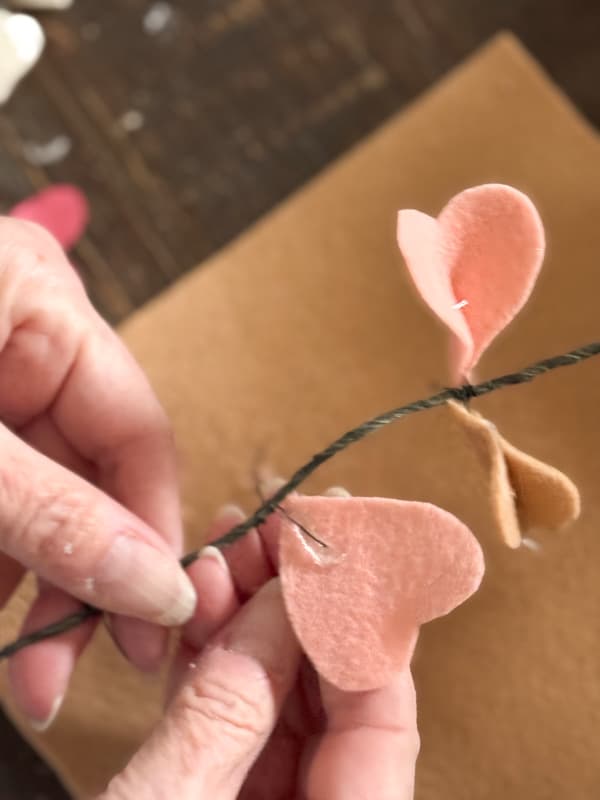
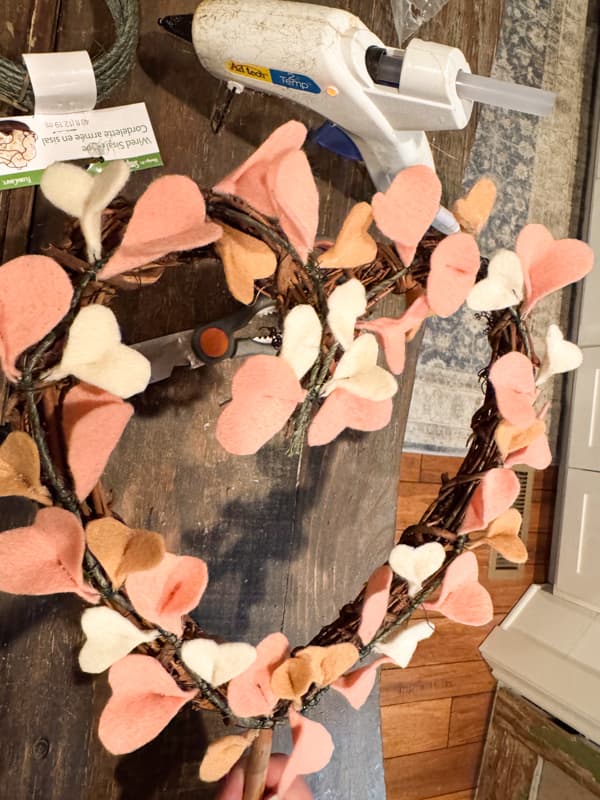
Before starting the attachment, determine the pattern you wish to create. I placed a large heart on each floral wire. First one to the outside and the next to the inside, and so on for the full length of the wire. Then I add two of each color opposite the larger hearts on the same pieces of wire. Example: A cream colored small heart on the inside and then one on the outside, followed by a small beige heart on the inside and then one on the outside. Just keep repeating along the wire.
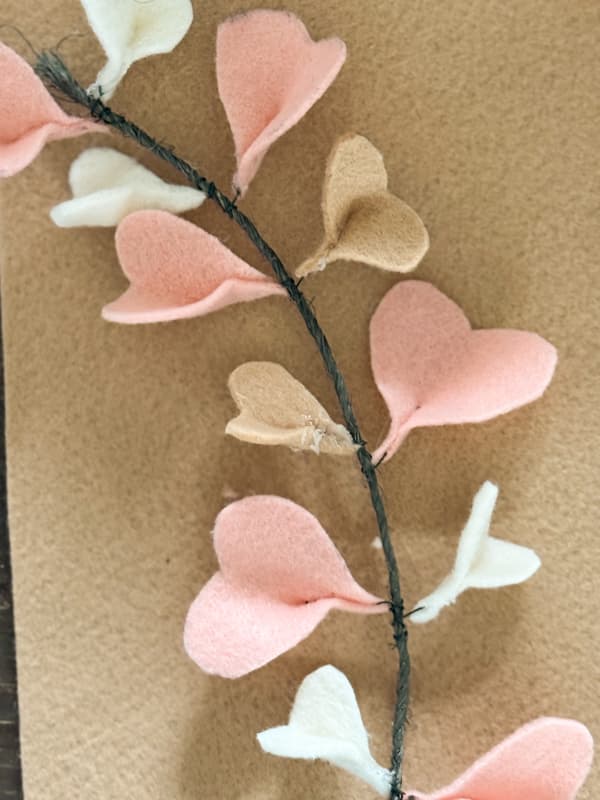
Attach the Hearts to the Wreath Frame
Once the wire is filled, you are ready to attach it to the wreath frame. I used the lightweight floral wire to wrap around the frame and secure the heart-filled wire to the front side. Bend the wire into the shape of the wreath and wrap the wire tightly to secure it in place. Continue bending and wrapping until the frame is covered.
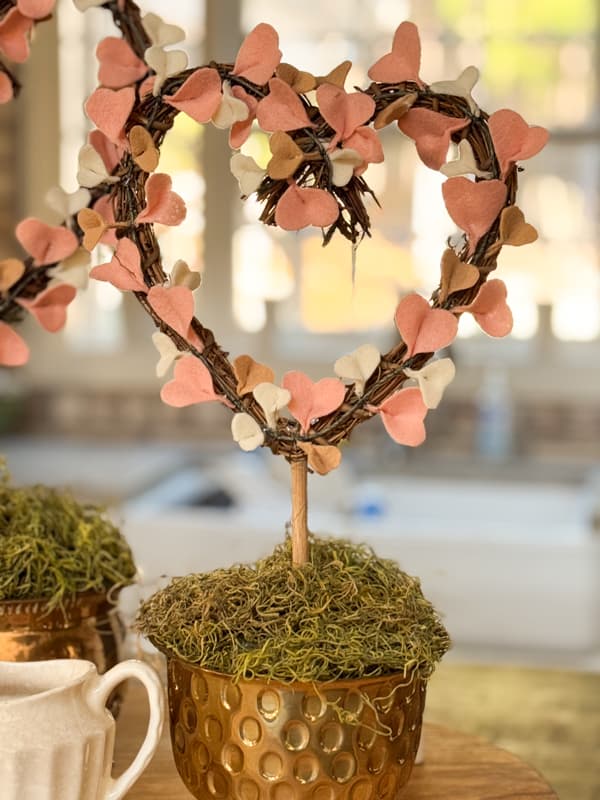
Add Felt Heart Topiary To Containers
Now you are ready to add your topiaries to your container.
- Add styrofoam to the container and secure.
- Find the center of your container and press the dowel rod into the styrofoam until it hits the bottom.
- Add a little hot glue around the rods where it connects to the styrofoam to secure.
- Fill the container to the top with reindeer moss to cover the styrofoam.
Styling Tips for Your Topiary Valentine’s Day Decor
These adorable felt heart topiaries are perfect for a Valentine’s Day centerpiece. If you are looking to style your kitchen, you can use them on your kitchen island or on your countertops. They work equally well to add a romantic touch to your kitchen, dining, living, and bedrooms. I tried them in several areas of the farmhouse to see where I liked them best. Let’s take a look at some of the areas I styled with this fun Valentine Craft.
Add the Valentine Craft to your Kitchen
When I finished making this craft, I thought I’d add both pieces to the kitchen island. I used a vintage cheese board as a riser to gather all the pieces for a fun centerpiece. With the addition of a small ironstone pitcher and copper bowl with greenery, they added a bright spot to the island.
I then tried them on the kitchen countertops. I first wanted to add them beside my stove, but quickly realized that the tall topiary wouldn’t fit between the countertop and the cabinet. So I moved them beside our open shelving and next to my toolbox filled with vintage rolling pins.
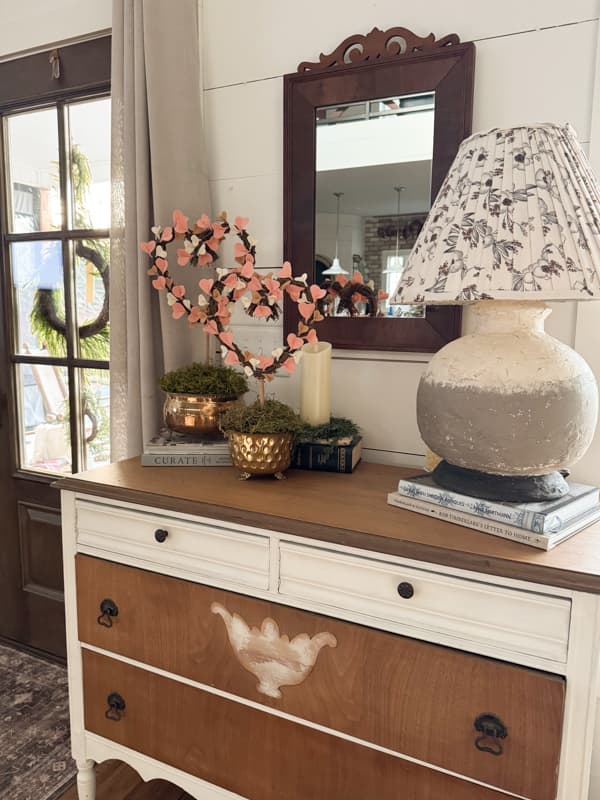
Entry Table Decoration
The entry table also looked charming with the topiaries. I used some books as risers and included the earthenware DIY lamp to style the space.
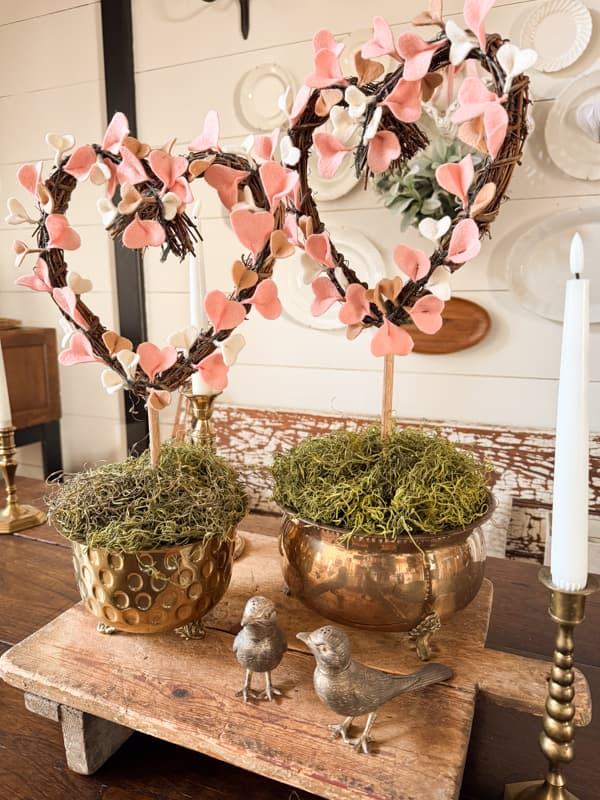
Dining Table Centerpiece
Ultimately, I found that my favorite spot to style the DIY topiaries was as the centerpiece for my Valentine’s Day tablescape. I used a wooden table riser and my favorite brass bird salt and pepper shakers to create the base of the centerpiece. The charming soft hearts are like icing on the cake.
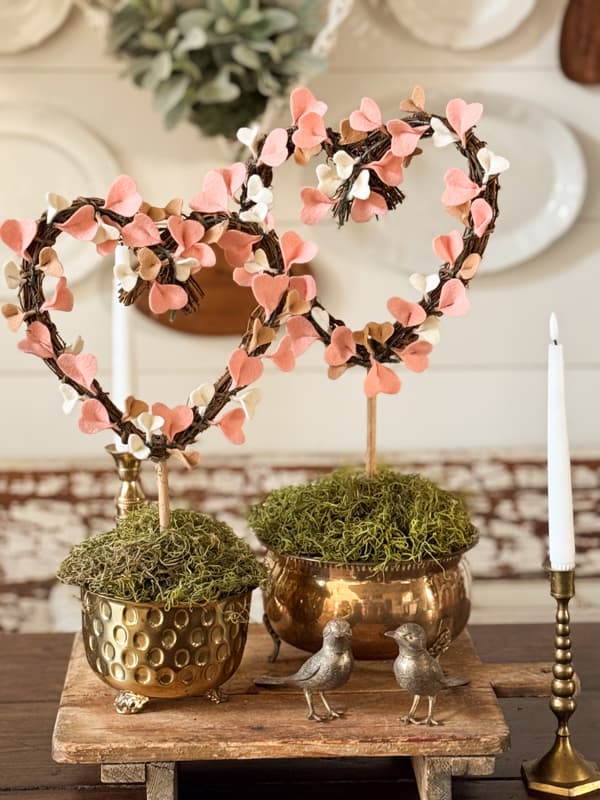
I gathered some of my vintage brass candlesticks with battery-operated tapers to complete the centerpiece. See the full Valentine’s Day Tablescape.
Additional Styling Ideas
In addition to these areas to style the topiaries, there are several more places where they would look lovely.
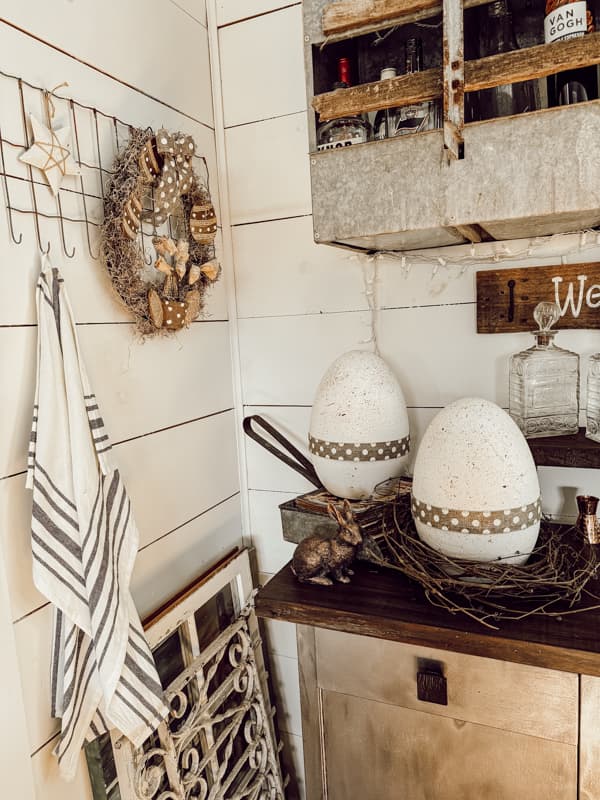
- Mantel – this duo would look lovely on a mantel
- Bedroom – add to your side table or dresser
- Bathroom – use them on your countertop or behind the toilet
- Screen Porch or Sunroom – they would be perfect to decorate coffee table, dining, or side tables for a romantic touch.
FAQ
Thank you for stopping by andI look forward to sharing my next adventure with you.
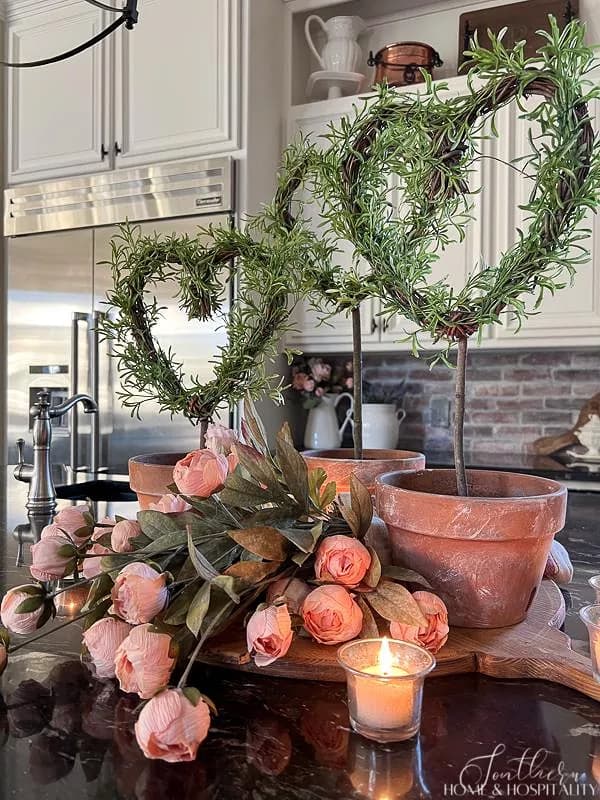
Today’s post is part of our monthly Pinterest Challenge series hosted by Cindy at County Road 407. This month, Valentine’s Centerpiece inspiration comes from Kate at Southern Home and Hospitality. Her lovely, creative toparies inspired all these talented bloggers to create their own versions. Up next is Cindy from DIY Beautify with her creative heart topiary. Click each link below to follow along and be inspired.


Oh I LOVE your felt heart! They remind me of sweet spring blossoms. A good thing right now to remind us the cold won’t last. Such a pretty vignette!
Laura,
I’m so glad you liked this idea. I’ve been loving felt this year and I’ve never worked with it before so it was fun. Thanks for your comments.
Rachel, the felt hearts are such a sweet addition to your Valentines topiaries!
Cindy,
Thank you! This was a fun challenge.
Rachel, oh my goodness… I LOVE how your Valentine topiaries turned out!!! The felt hearts look like those ginko leaves fluttering in the wind; great movement!!! I read through your tutorial and it’s easy to follow. Happily pinning a bunch to my Crafts & Sewing and other boards for you. <3
Have a Happy Valentine's Day and I can't wait to see your table,
Barb 🙂
Barbara,
Thank you for your kind words. I’m glad you liked this idea and thank you for pinning.
This is such a sweet and charming Valentine craft, Rachel! Simple, sweet, and perfect for Valentine’s décor—love this felt topiary idea!
Lynne,
Thank you! I’m glad you liked this idea. It was a fun challenge.
I think you knocked this challenge out of the park, Rachel! The felt hearts are perfect. And oh mmm gee – I adore the containers you’ve put them in. Great inspiration! pinned
Cindy,
Thank you for your find compliments. I appreciate your enthusiasm for the topiaries. This was a fun challenge and I appreciate you for hosting.
What a fun diy project! I love using scrap fabrics for pretty craft ideas like this…you got me thinking;)
Lora,
Thank you and I’m glad I gave you an idea.
Rachel, what a pretty way to make a topiary. I also love working with felt because it comes in so many colors and is so easy to work with. Your topiary will look lovely no matter where you display it. I love those brass containers, too.
Carol,
Thank you for your kind compliments. Have a blessed week.
Rachel,
These sweet felt toparies are so sweet! Perfect for Valentine’s day. Pinned for later.
Libbie,
So glad you like them. Have a blessed week.
Rachel,
These are precious! What a sweet idea that you could use for many seasons. The perfect whimsical touch!
Christy,
Thank you for your kind words. So glad you liked them.