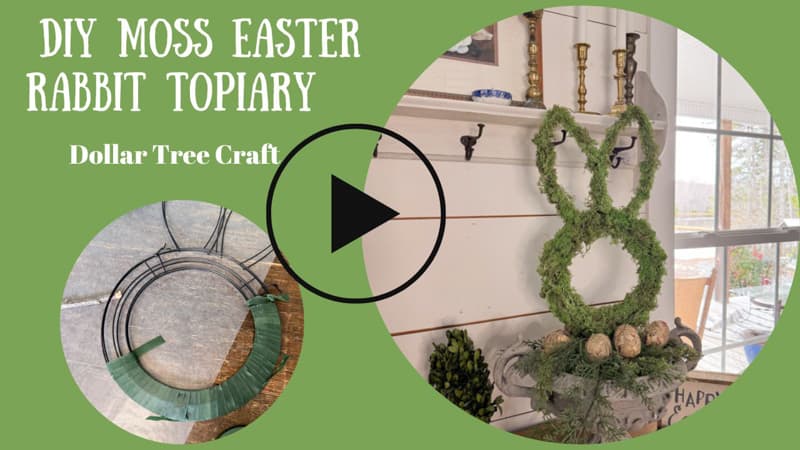
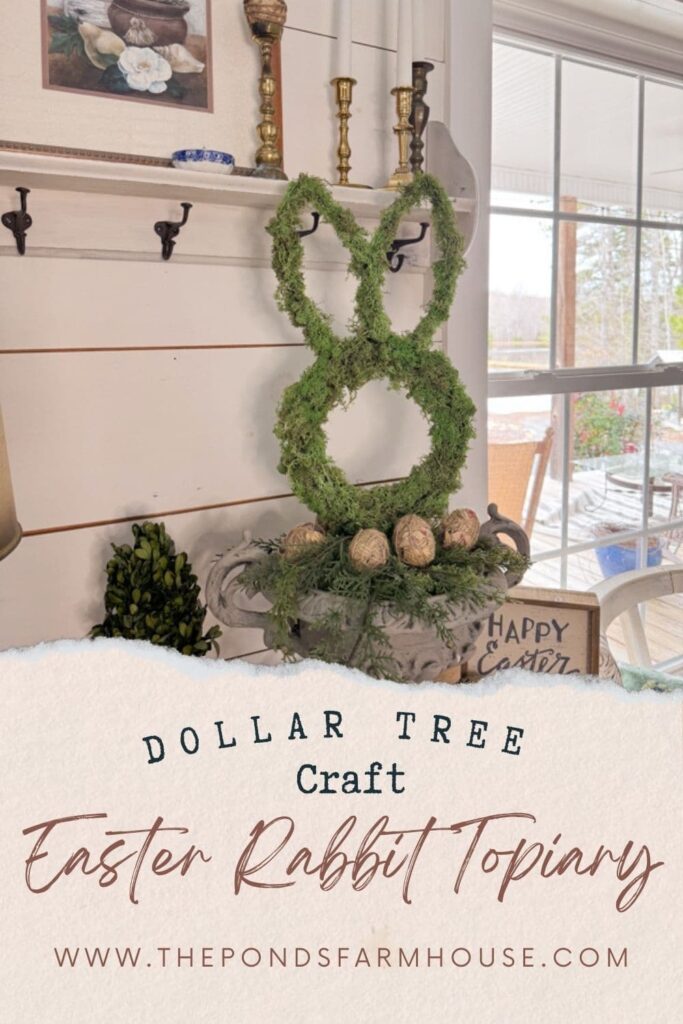
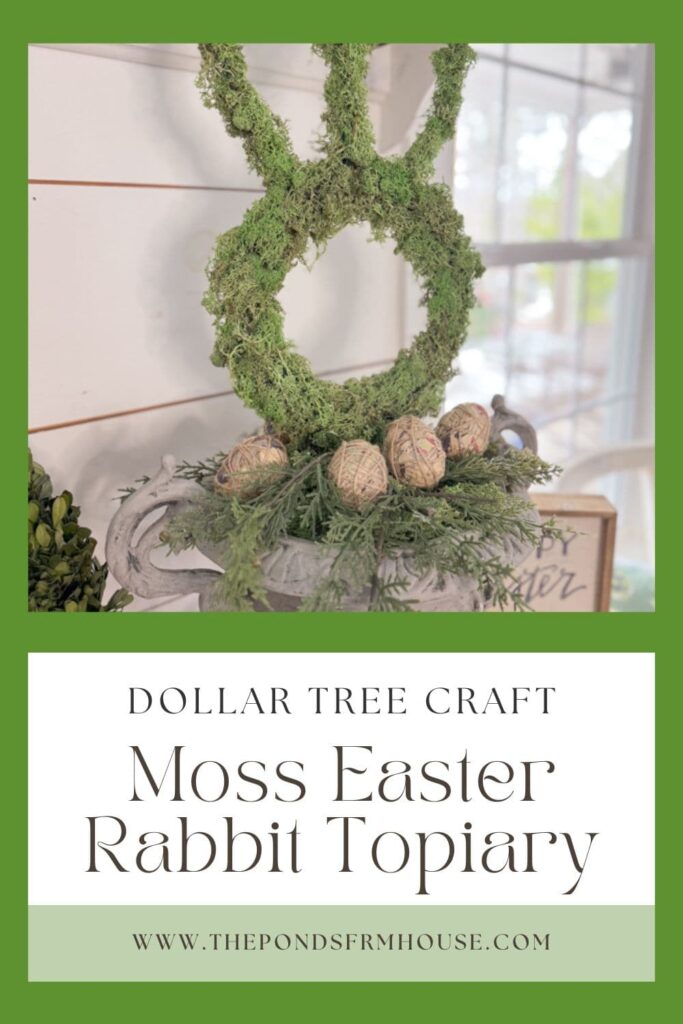
Hop To It! Stylish Moss Easter Rabbit Topiary (Dollar Tree Craft)
Are you looking for budget-friendly Easter Rabbit decorations for your Spring decor? Wait until you see this inexpensive DIY Moss Easter Rabbit Topiary, a Dollar Tree Easter Craft. This cute Easter bunny decoration looks boutique-worthy but costs less than $10.00. If you hop to it, you can easily make this moss bunny craft in an afternoon to kick-start your Easter decorating.
The cute Dollar Tree Easter Bunny wreath frame caught my eye, but I had already planned my Easter wreath for this year. Therefore, I decided on another way to use the bunny frames. You will need two frames and can find all the supplies except the recycled container at Dollar Tree.
(Posts on The Ponds Farmhouse may contain affiliate links. As an Amazon Associate, I earn from qualifying purchases. See the full disclosure details here.)
Table of contents
Easter Rabbit Decorations
Are you a fan of the Easter Bunny? My bunnies have been hopping to get out of their storage crates, and I have several to spread around the house for Easter Decorations. However, I can always add a few more, and I love moss Easter bunnies.
I don’t have any Easter topiaries, so a Moss Easter Rabbit Topiary sounded like a good idea.
Let’s take a look at how this easy rabbit topiary came together.
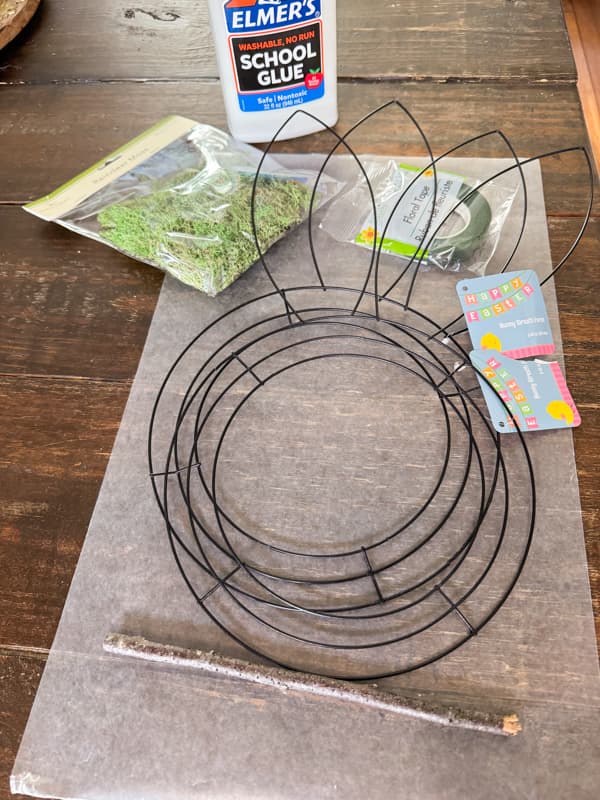
Supplies Needed For Dollar Tree Easter Craft: Rabbit Topiary
These are the supplies I used for the Dollar Tree Easter Craft cute Rabbit Topiary. Most everything came from Dollar Tree. However, I’ve also added links for alternative options in case you don’t have a Dollar Tree (or they are out of stock)
- 2 Dollar Tree Metal Bunny Frames (Set of 4 Bunny Frames)
- 4 Packs of Dollar Tree Reindeer Moss (Here is an option on Amazon for reindeer moss)
- Green Floral Tape
- 2 – Free gathered sticks (or dowel rods)
- Dollar Tree Styrofoam Block (bulk option on Amazon)
- Elmer’s Craft Glue
- Hot Glue Gun
- Container To Hold Topiary (urn style planter)
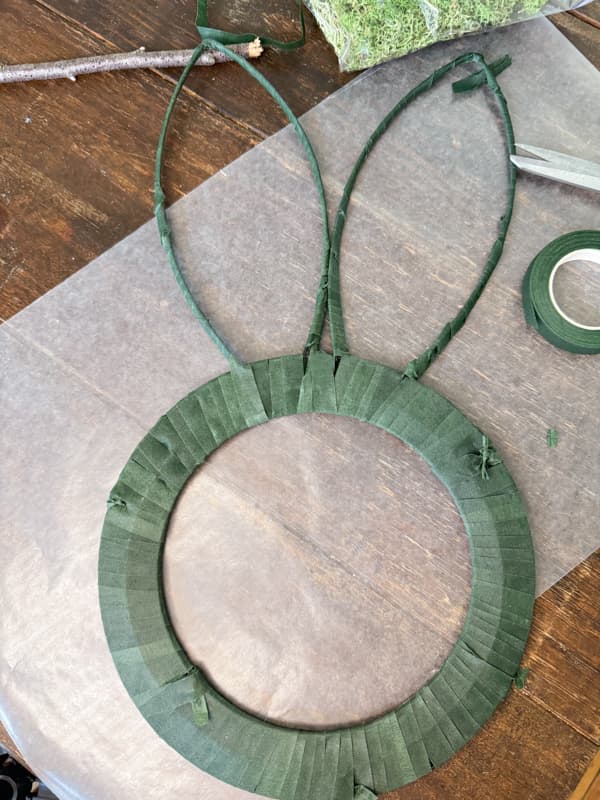
How To Attach Rabbit Topiary Frames?
First, connect the rabbit topiary frames if you want a well-rounded bunny.
Place the bowed sides outward and align the ears and head evenly. I recommend beginning with a couple of twist ties to keep the frames in place until you get them secured with the floral tape. This will allow the rabbit topiaries to be finished on both sides and can be placed on a coffee table or kitchen island.
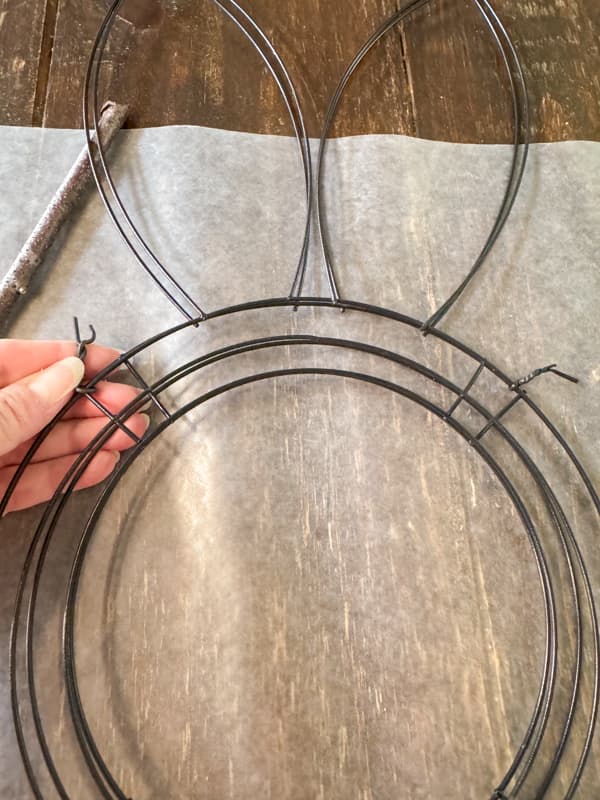
Once the frames are secured, begin to wrap the frames with the floral tape. It’s easier to tie the tape onto the frame at the beginning and cut the tape into smaller sections. Pull the tape tightly to hold the two frames together.
Continue to wrap until the entire frame is covered.
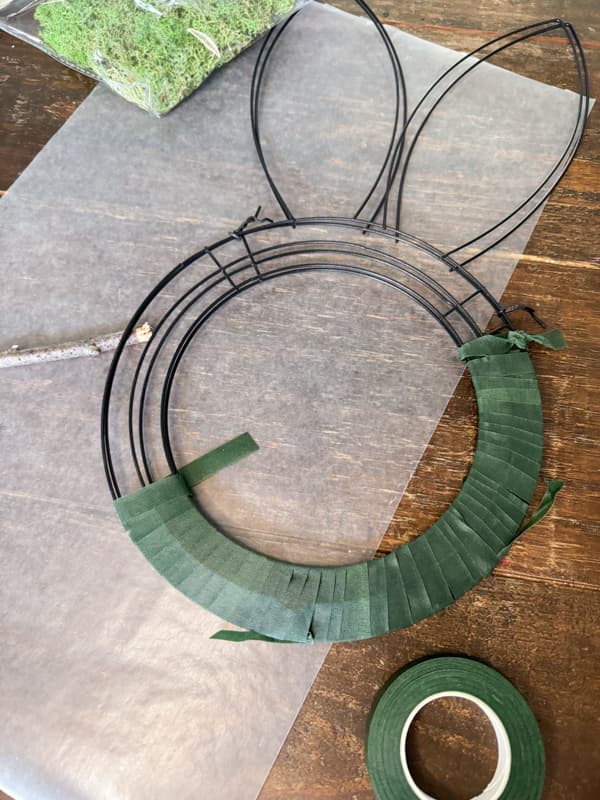
Insider Tip
If you are sure you will place your topiary against a wall, you can use one frame and only apply the moss to the front side of the tape.
I plan to use my Easter Rabbit decoration in an area where it can be seen from all sides.
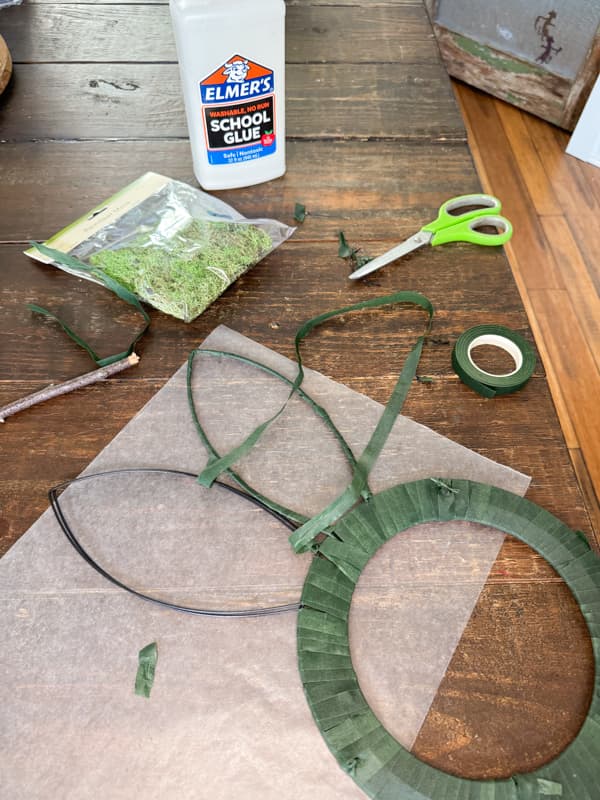
How To Apply Moss To Easter Rabbit?
Now, you can apply the moss to your Easter Rabbit Topiary. Be sure to add a protective layer of wax paper to your workstation.
Begin on one side of the Dollar Tree Bunny Frame and apply a heavy coat of glue to a small frame section.
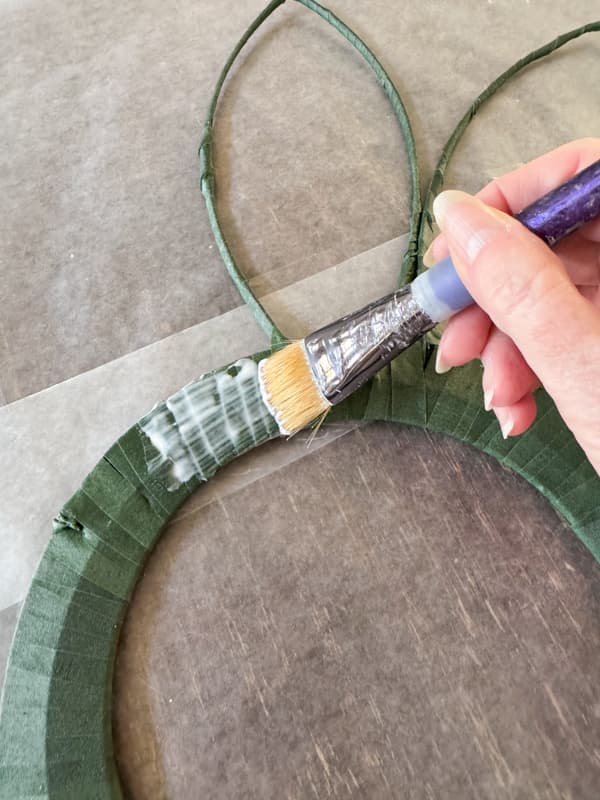
Press small pieces of the reindeer moss into the glue and continue around the frame until it is completely covered. Lift the frame and make sure there isn’t an excessive amount of glue on the wax paper. If there is, place the frame on a clean sheet of wax paper and allow the glue to dry for approximately one hour.
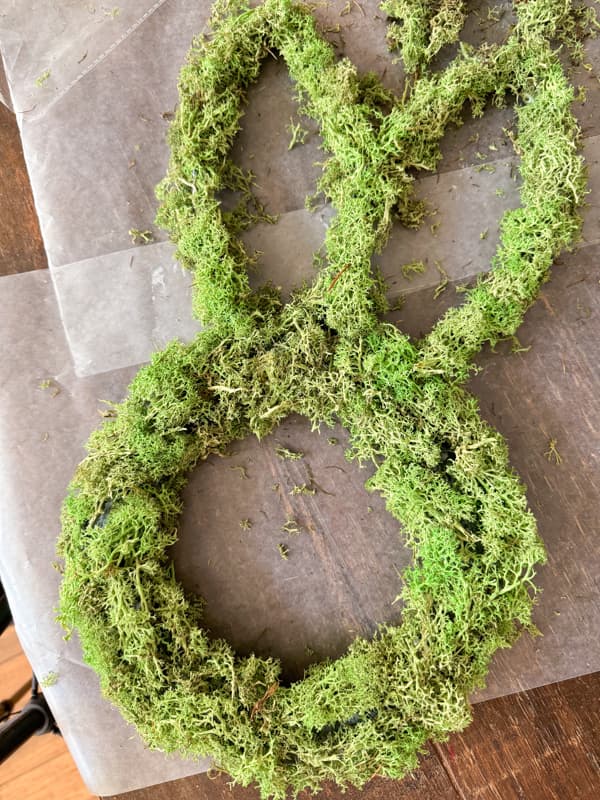
Then, turn the DIY Bunny Topiary over and place it on a clean sheet of wax paper. Repeat the process of adding glue and moss to cover all areas of the Easter Topiary.
Insider Tips: Options
Here are a few options that you may want to consider to speed up the DIY process.
- Use a hot glue gun to apply the moss. If you use this method, you will need finger protection, and it will take several applications to cover the frame.
- Use spray adhesive to attach the moss. I find this method very effective for large projects. However, it can be messy, and since this was a small project, I opted for the simple Elmers Glue Method.
The disadvantage to the Elmer Glue Method is you need drying time between the front and back applications. You may also want to wear disposable gloves to keep glue off your fingers.
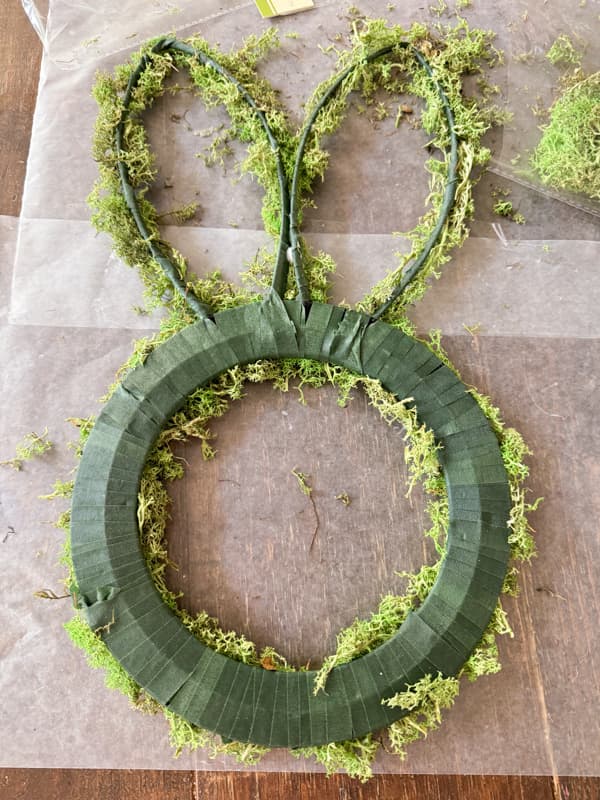
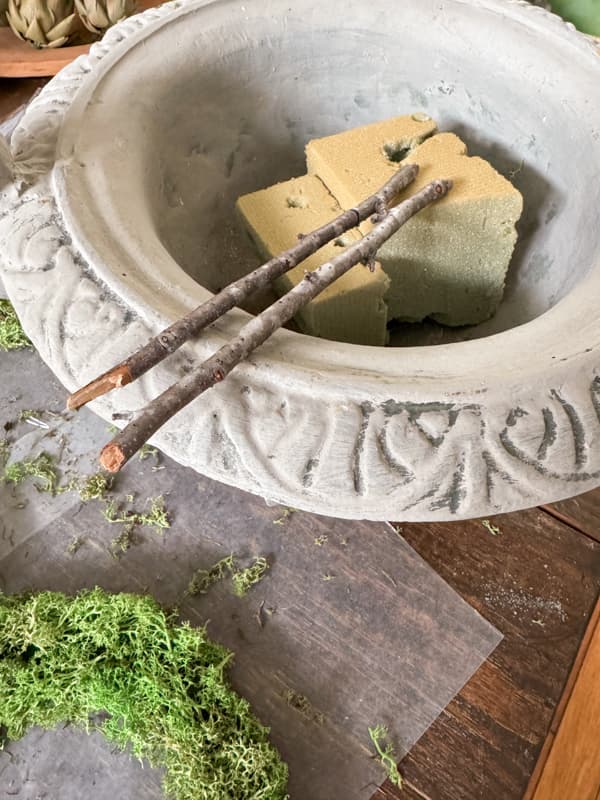
How To Add Support Sticks To Rabbit Topiary?
Next, you will need your chosen container to determine adding the sticks to the Rabbit Topiary. Be sure that your sticks are sturdy and not rotten.
Begin by holding the moss bunny frame over your container and measure from the inside of the frame to the bottom of your container.
Then, cut the sticks to that length and attach the styrofoam to the bottom of the container with hot glue.
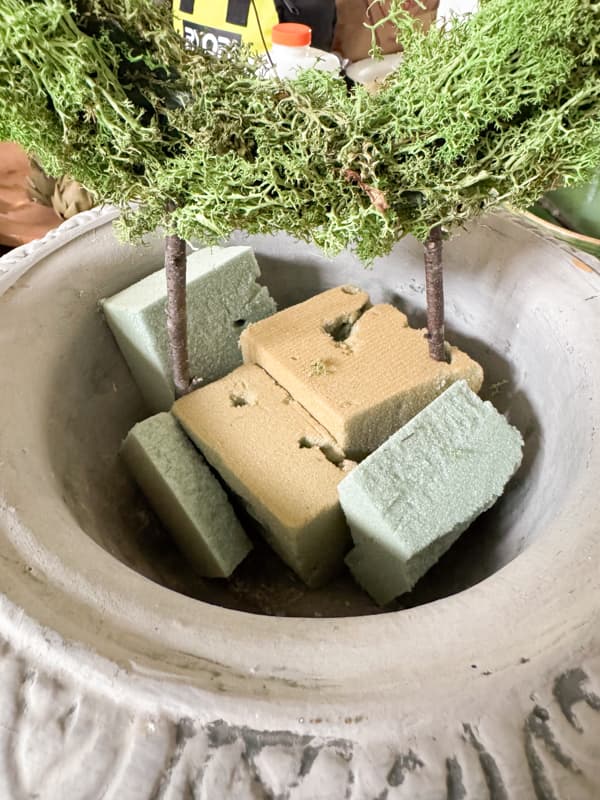
Determine where you need the sticks to be placed on the topiary and cut through the floral tape in that area. Push the stick between the two frames to be sure it’s in the right position.
Now remove the stick and add hot glue around the top of it and down approximately one inch. Carefully, reinsert the stick between the two frames and position it properly. I suggest wearing finger protection when separating the frame and inserting the hot glue-covered stick to prevent injury.
Once the glue has set, push the sticks into the styrofoam blocks in the container. Be sure that the rabbit topiary is straight and level. Fill in around the styrofoam with filler such items as recycled plastic grocery bags or anything to help secure the position of the rabbit topiary.
You may also notice that I used recycled styrofoam for my filler.
Finishing Touches
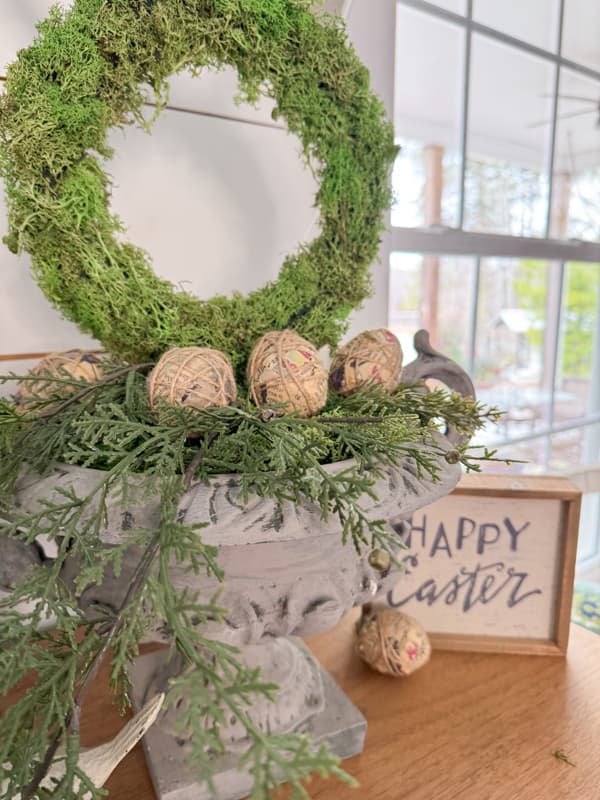
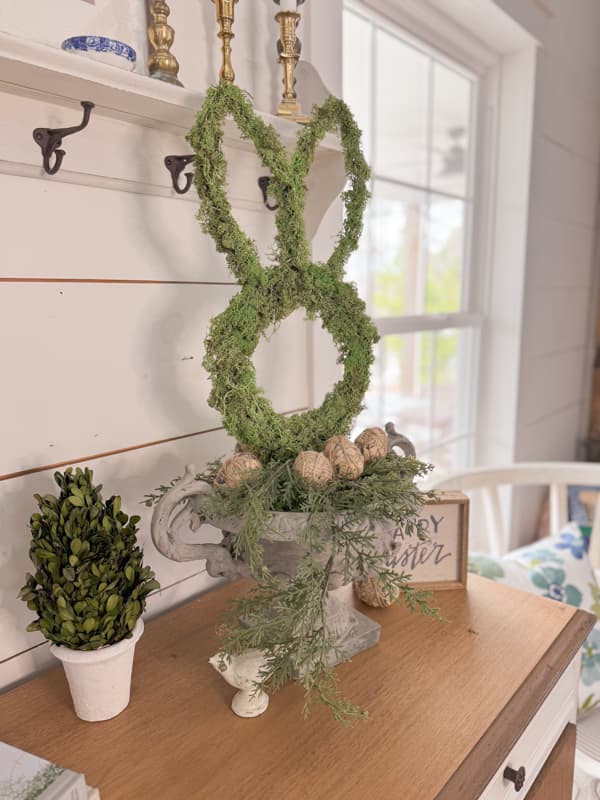
To finish your Easter Rabbit Decoration, fill over the styrofoam with pieces of faux greenery and the remaining moss.
In addition, I added a few of the DIY Decoupage Old Book Page Easter Eggs from last year to the container. These are the same eggs that are featured in the Spring 2024 issue of Farmhouse Style Magazine.
Inside Tip
Before adding the bunny frame topiary to the container, give it a good shake to remove any loose moss.
Then once you have the rabbit secure in the container, look for any gaps. If you notice any gaps in the moss, quickly add a drop of hot glue and attach more.
You can also add hot glue to hold faux greenery in position if needed.
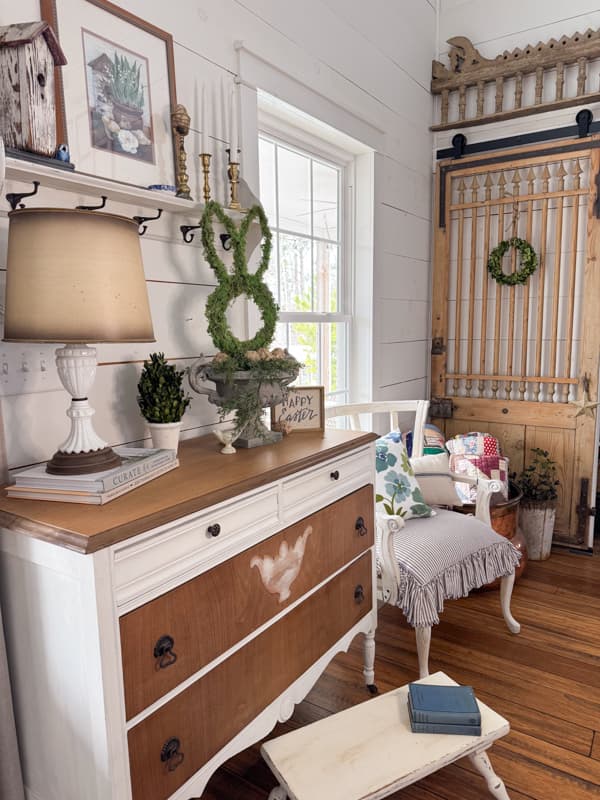
Dollar Tree Easter Craft Moss Rabbit Topiary
The Moss Rabbit Topiary is such a stylish addition to the entry table. I had originally planned to use it on the sofa table, but it’s slightly larger than I had originally imagined.
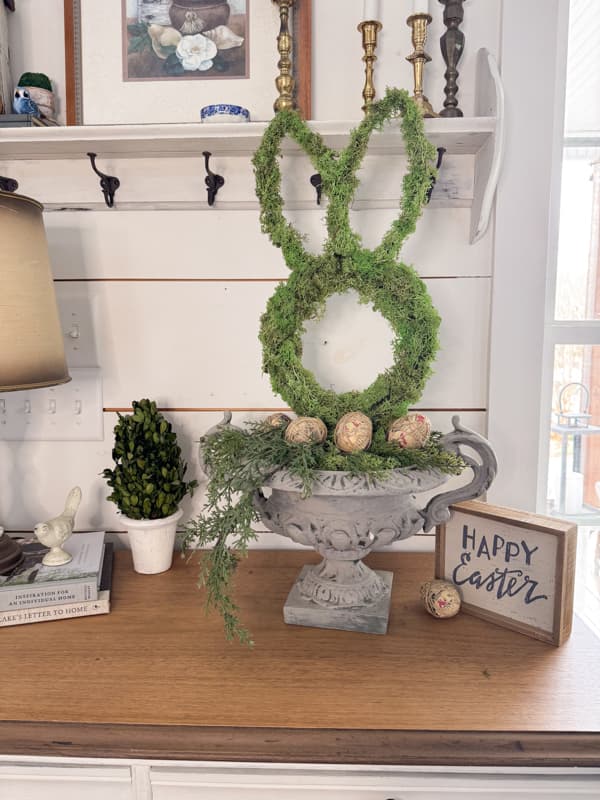
I updated the entry table with an early Spring garden feel using a thrift store print and a thrifted birdhouse.
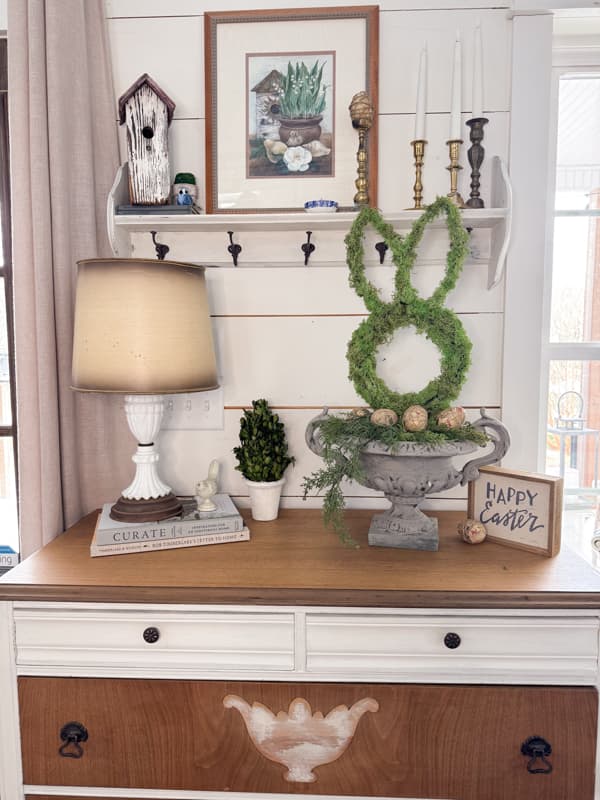
The milk glass lamp and brass candlesticks are also thrift store finds that add a rustic curated feel.
Moss Rabbit Easter Wreath
There are several options for using the Dollar Tree Easter Craft Moss Rabbit in addition to making a topiary.
It would look great as a moss bunny wreath, just as the Dollar Tree Bunny frame was intended.
More DIY Topiary Ideas
Here are some additional DIY Topiary Ideas you will enjoy.
- How To Make An Easy Grapevine Topiary
- Corn Stalk Topiary Craft
- Fresh Boxwood and Lemon Topiaries
- Real Cedar and Dried Orange Topiaries
- Easy DIY Topiaries For Spring
Thank you for stopping by, and I look forward to sharing my next adventures with you.

Pin It To Remember It
Did you find some great ideas you’d like to save for future reference? Hover over the images you’d like to save and pin to your favorite Pinterest Boards when you see the PIN button.

I really love this bunny topiary, Rachel. And you’ve styled it so beautifully.
Kim,
You are so sweet. I appreciate all your comments.
Super cute Rachel! I adore all of the fun crafts you do.
Wendy,
Thank you so much for stopping by.
I read that you updated the entry table. Is that chest new? I thought I remembered a totally different table there before. I could be crazy. Either way, the chest looks amazing there! Love the two-toned color and the topiary is such a cute addition. Always love your ideas. Bring on the spring! pinned
Cindy,
When we added the DIY mantel and moved the chest to this new area. Thanks for stopping by.