How to Make a DIY Grapevine Topiary: A Fun and Easy Project
Are you good with houseplants? I do much better with outdoor plants, but love the look of greenery topiaries for indoor decor. This grapevine topiary is an easy DIY project; you can make it in about 30 minutes. You only need a few supplies, and you will love the results. Best of all, you don’t have to worry about killing it. LOL
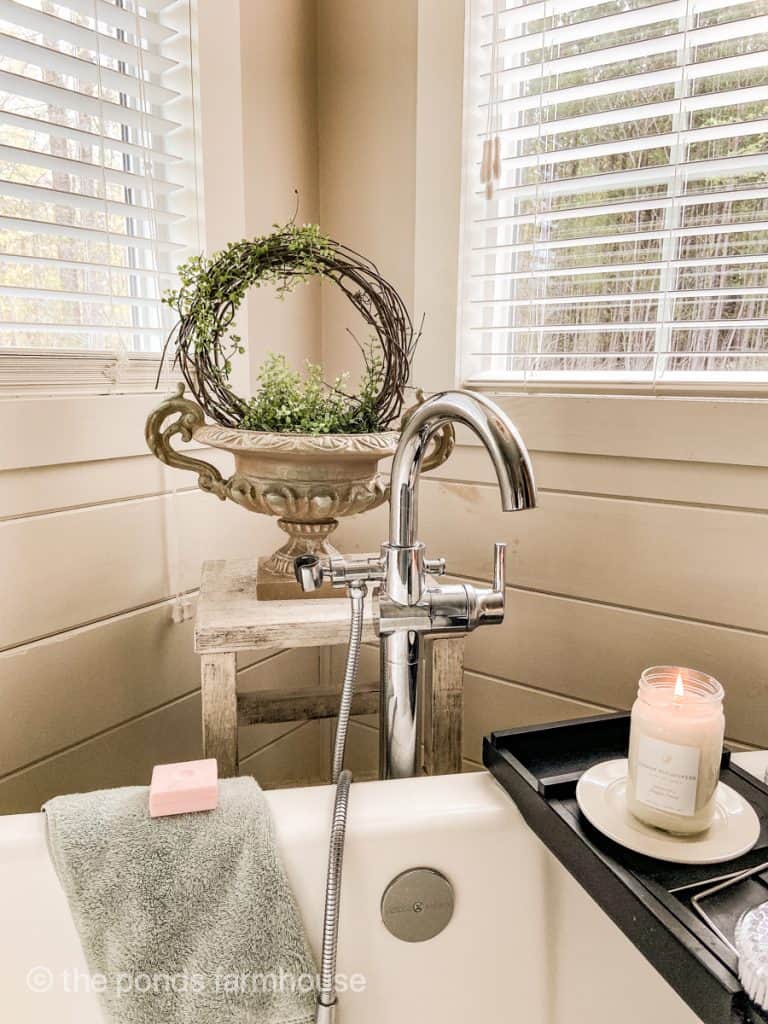
I love climbing plants and made a faux climbing topiary for my bathroom. Since I’m not good with houseplants, I thought I might be able to keep it alive. LOL

(Posts on The Ponds Farmhouse may contain affiliate links. As an Amazon Associate, I earn from qualifying purchases. See the full disclosure details here.)
How To Make A Grapevine Topiary
Depending on your chosen container, this easy tutorial can be made with large or small grapevine wreaths.
You can use purchased grapevine wreaths, thrifted wreaths, or foraged wreaths. With an abundant supply of wild grapevine, I decided to make some simple wreaths from the foraged grapevine.
It’s best to wrap the vine into a wreath while it is fresh. Otherwise, you may need to soak the vine in water before making the wreaths.
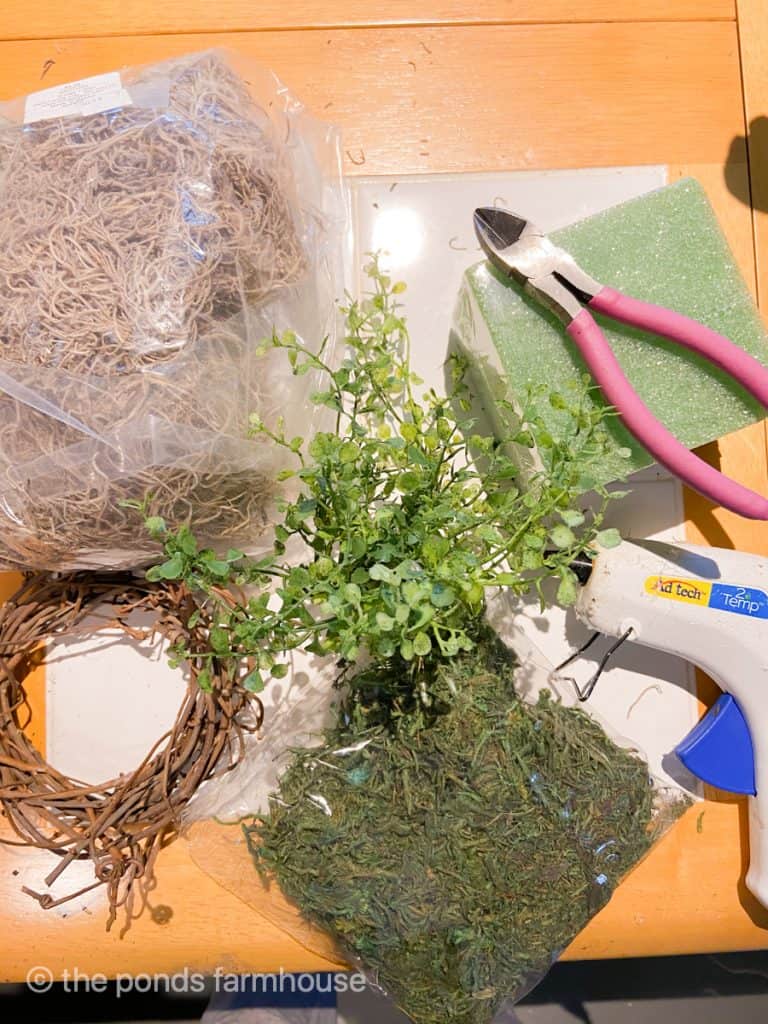
Supply List
- Container
- Grapevine wreath – approx. the same diameter as your container.
- Greenery Stems
- Hot Glue Gun
- Styrofoam block
- 2 sticks ( or dowel rods) Cut slightly longer than the depth of your container.
- Spanish Moss
- Green Moss
- Floral Wire Snips
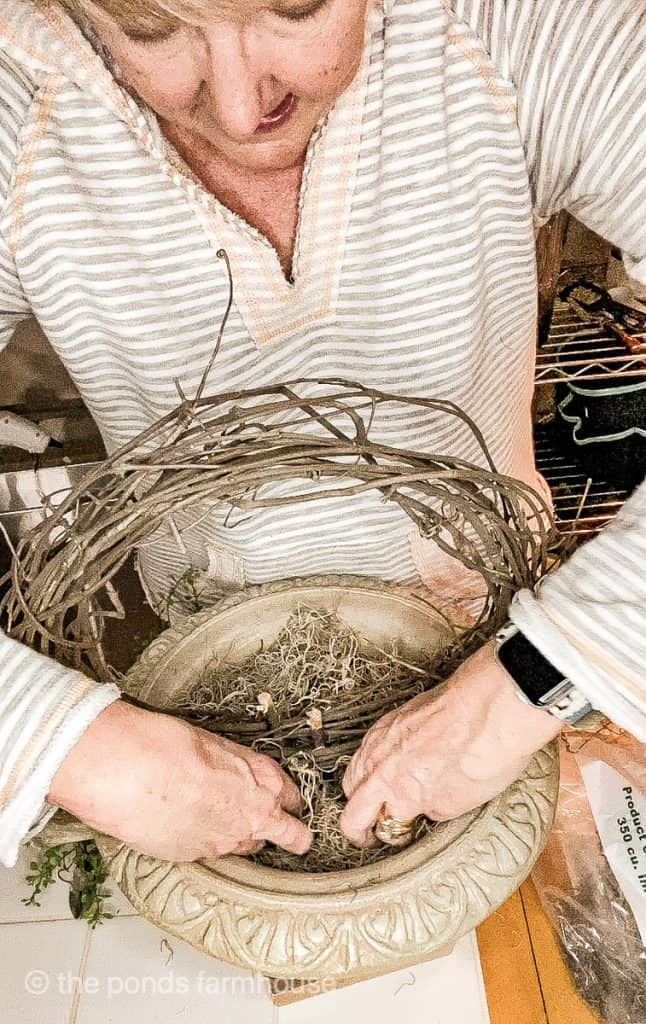
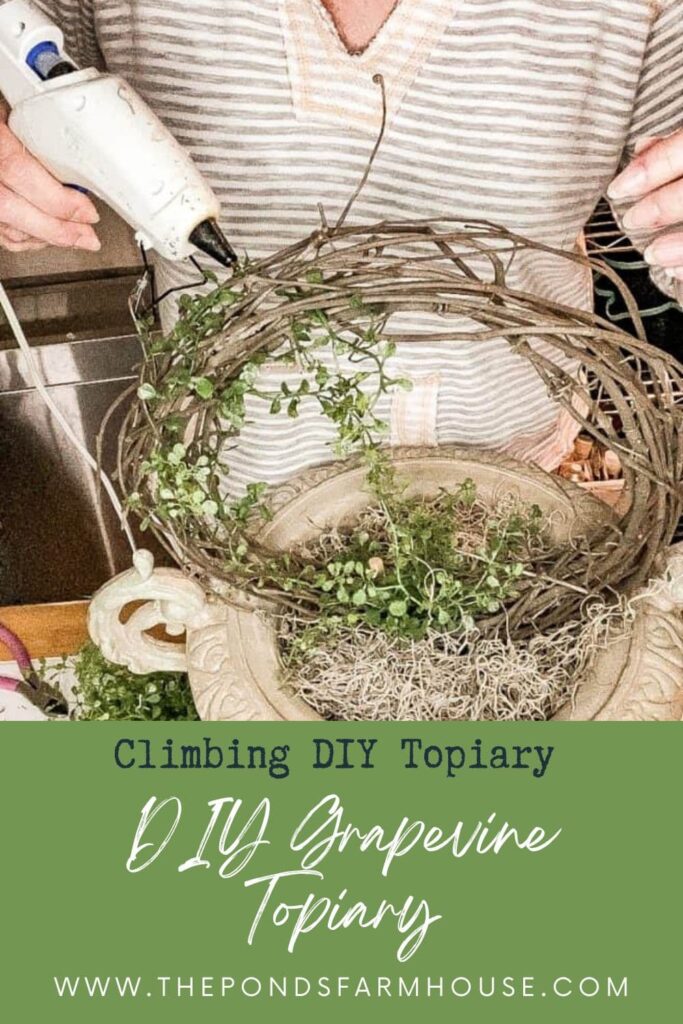
Step 1 – Secure the Grapevine to the Container
Begin by pushing one of the wooden sticks into the styrofoam in order to secure the grapevine to the container.
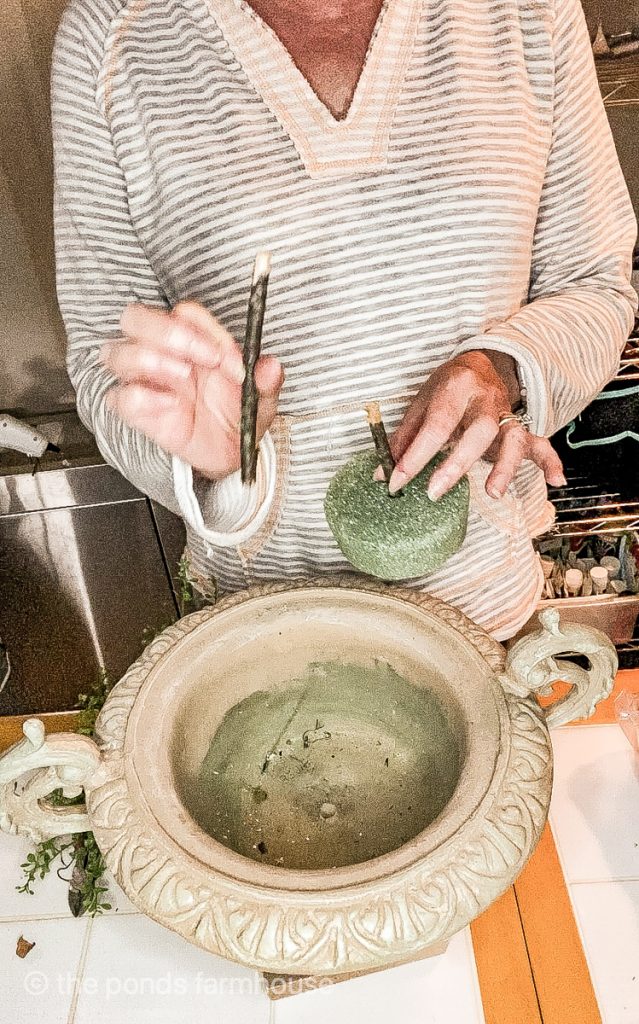
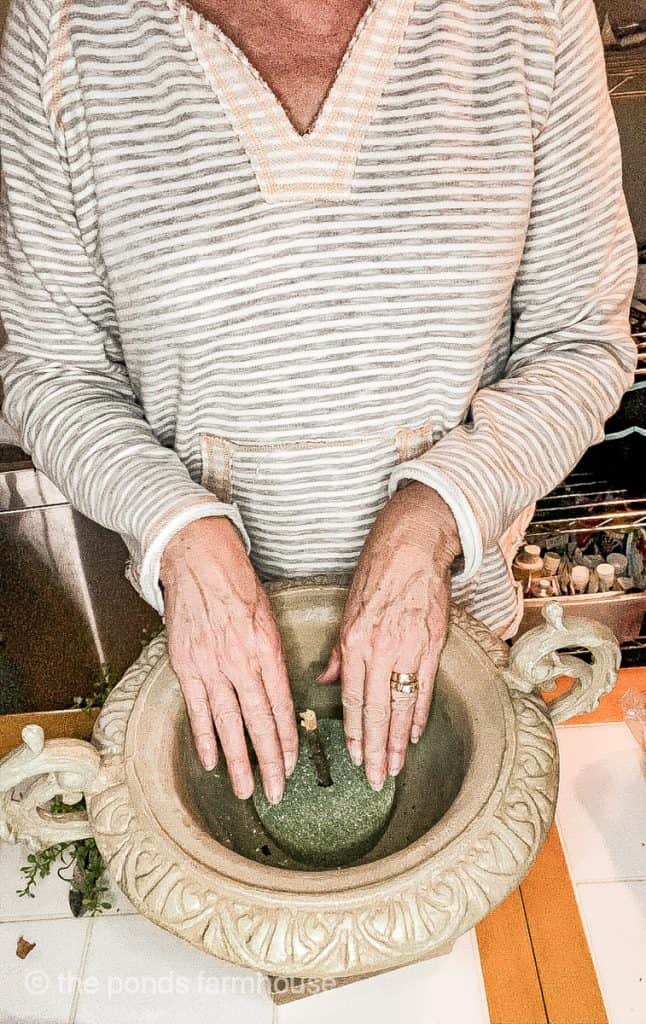
Apply hot glue to the bottom of the styrofoam and press into the bottom of the container. Hold until secure.
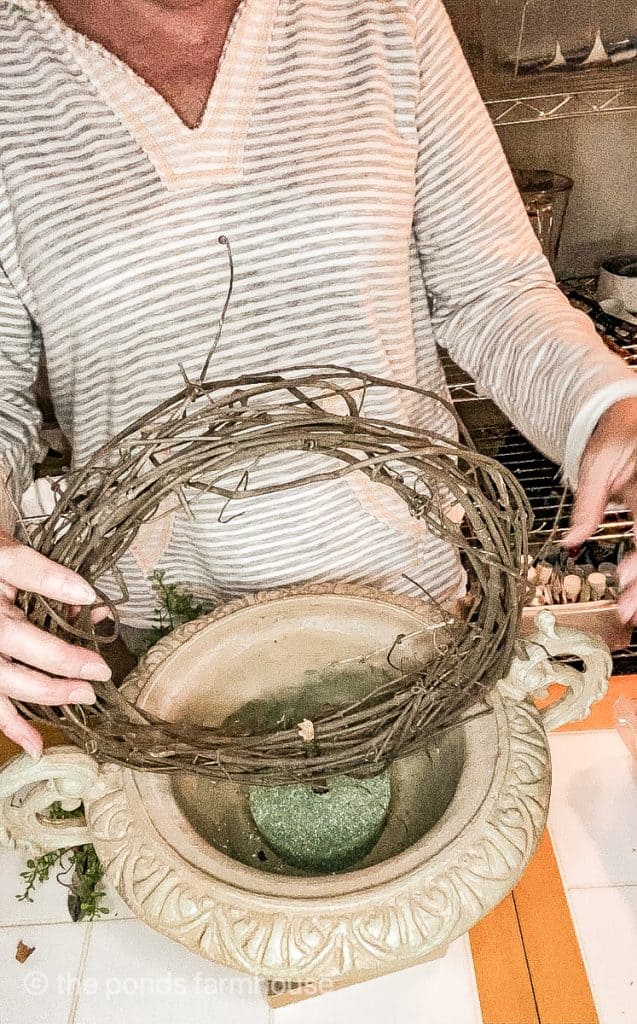
Next, separate a section of the grapevine wreath to allow the stick to be pushed through. Then use the second stick to push through another section of the grapevine and into the styrofoam. Using two sticks will hold the grapevine more securely.
In addition, add a few drops of hot glue around the sticks for extra stability.
Lastly, fill in around with spanish moss to hide the styrofoam.
I love making topiaries, and here is one I shared last spring: Easy DIY Topiaries You Can Make Yourself. \
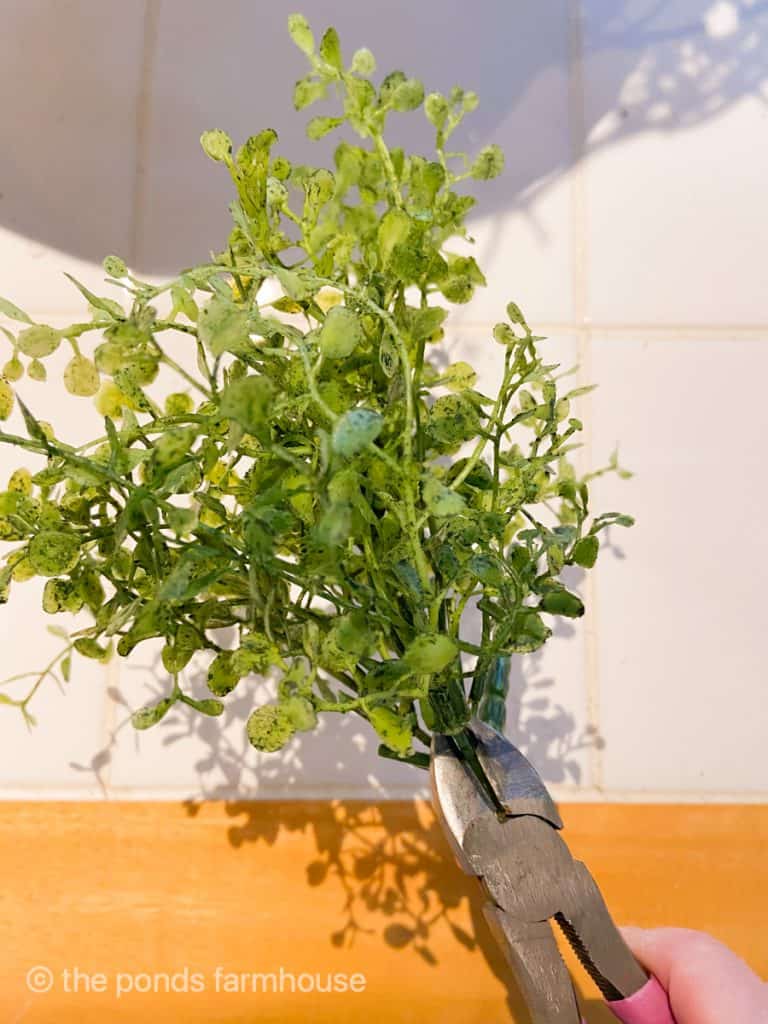
Make The Topiary
To create the climbing topiary, begin by cutting several pieces of the faux greenery stem.
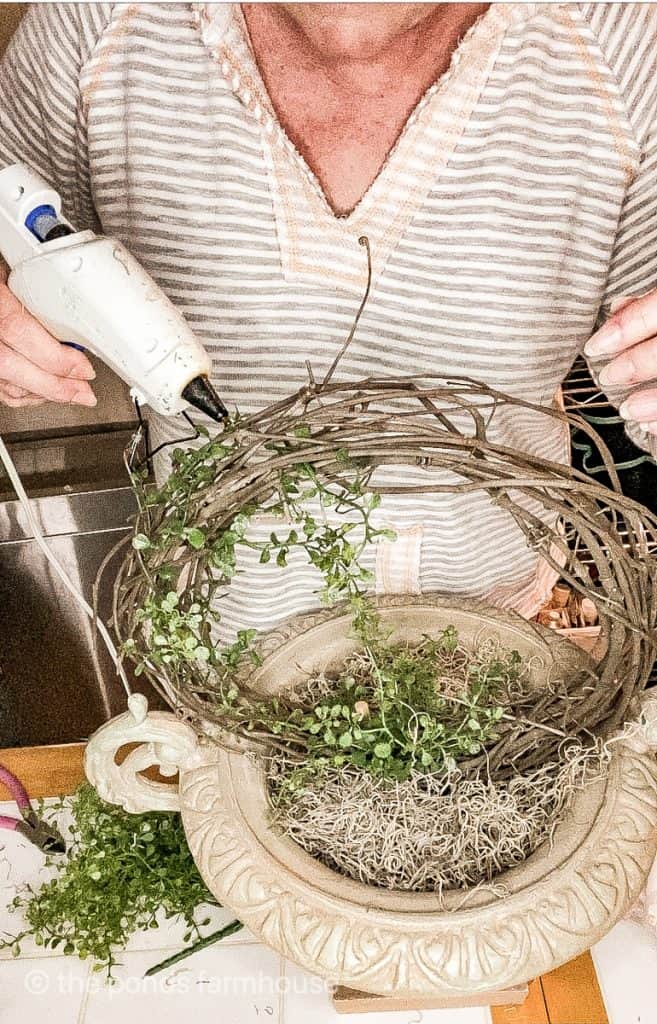
Apply a generous bundle at the base of the grapevine to cover the exposed sticks.
Then, apply the smaller cuttings by weaving them into the grapevine as though they are climbing up.
Use small amounts of hot glue to secure the cuttings in place.
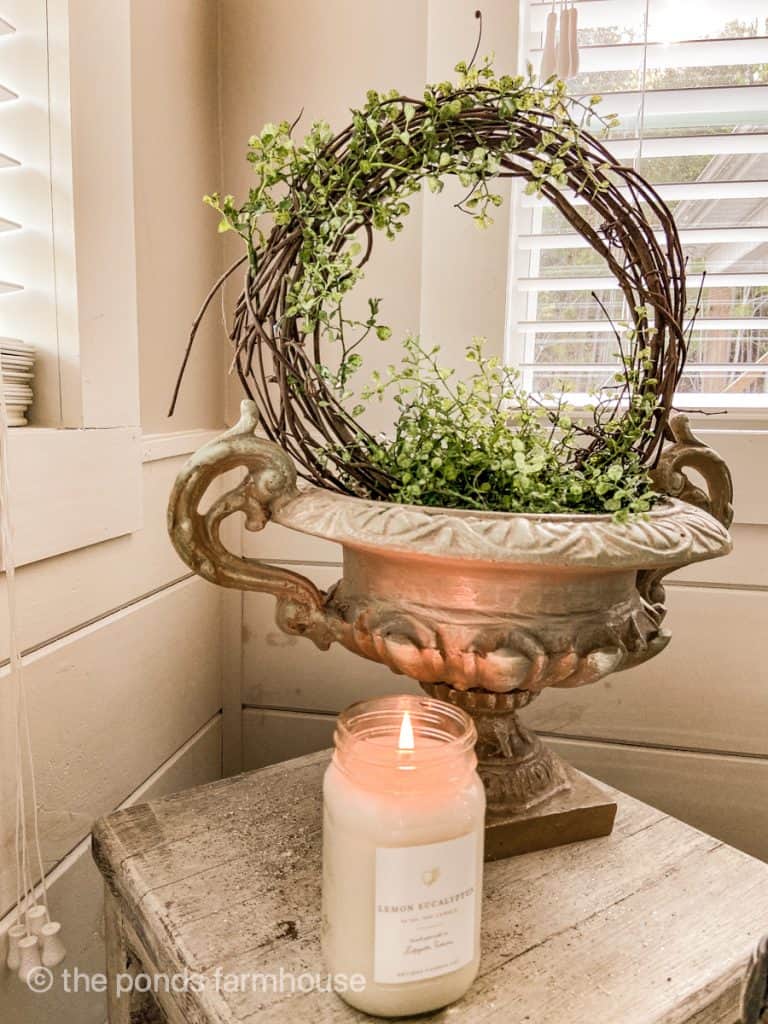
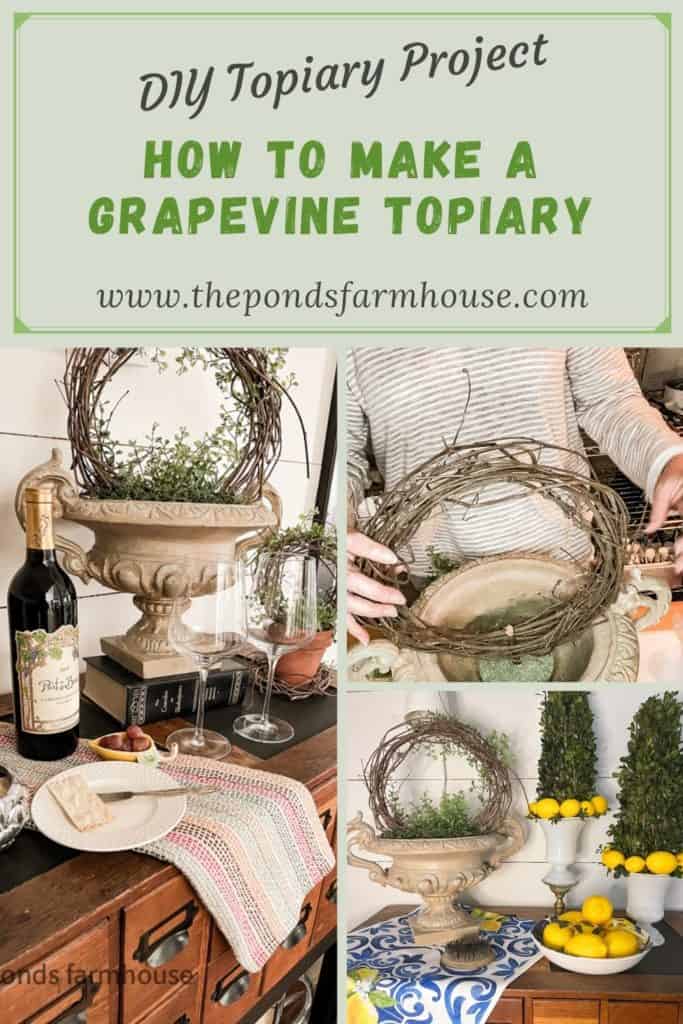
Finished Grapevine Topiary
Ta Da! See how easy that was. This project took less than 30 minutes to complete, and I love the greenery in my master bathroom.
Resources: Shop This Post
Scroll and Click for Details
You can easily make smaller variations of this topiary to decorate your entire home.

More DIY Topiary Tutorials
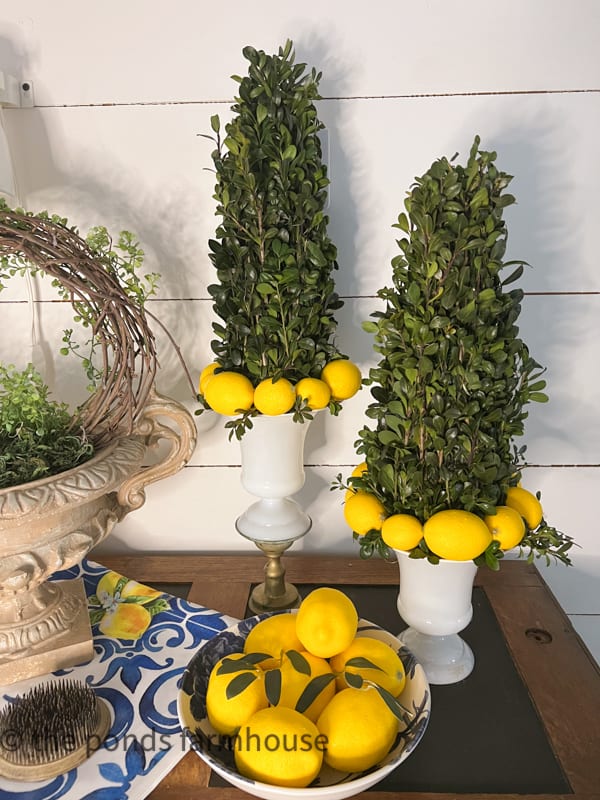
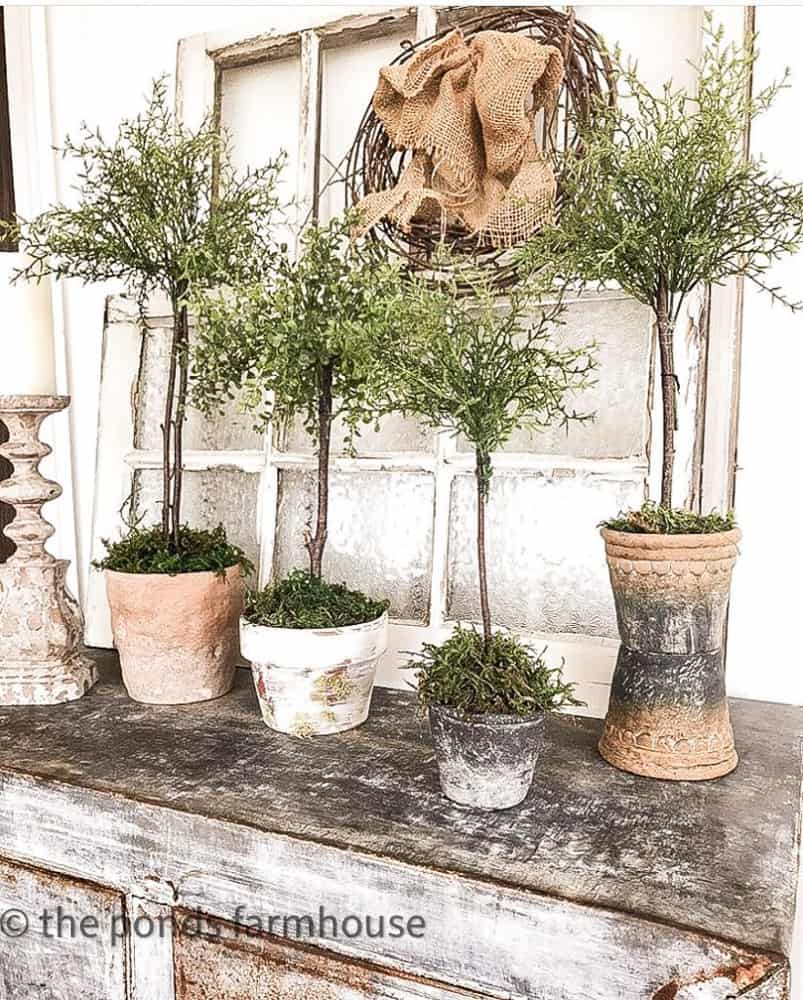
I have used the Grapevine Topiary all around this farmhouse. Here, it is grouped with these DIY Fresh Boxwood and lemon Topiaries.
Topiaries are so much fun, especially in spring. I have several tutorials on how to make a Topiary, and if you click on any of the highlighted links, you will be taken to the other options.
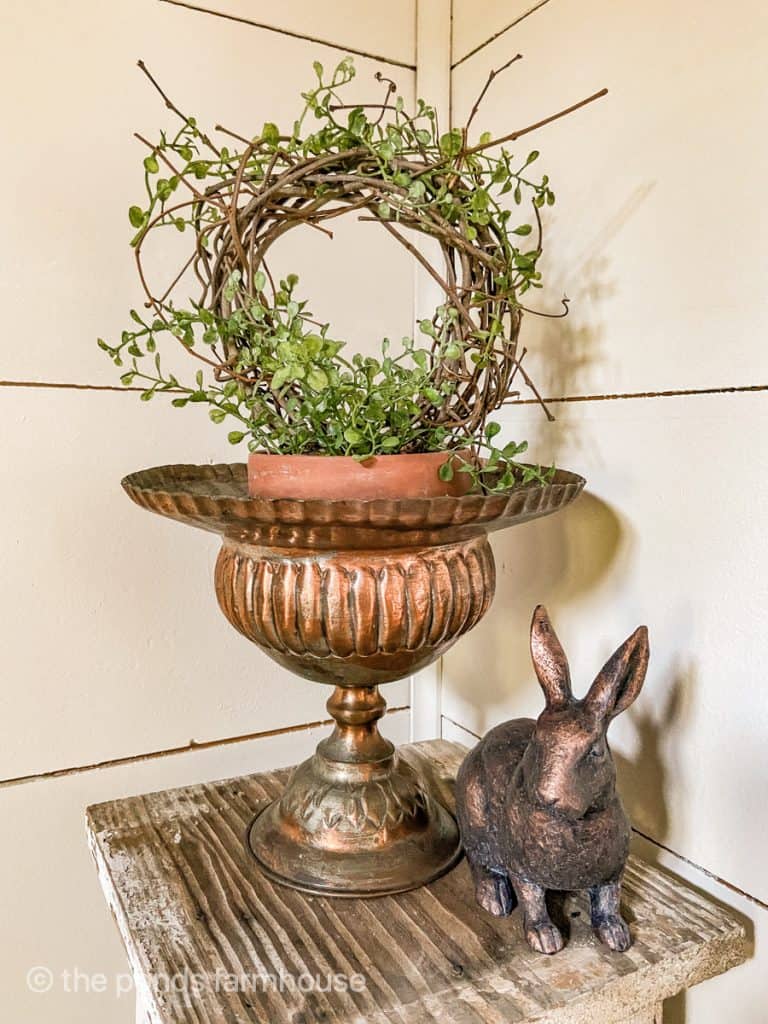
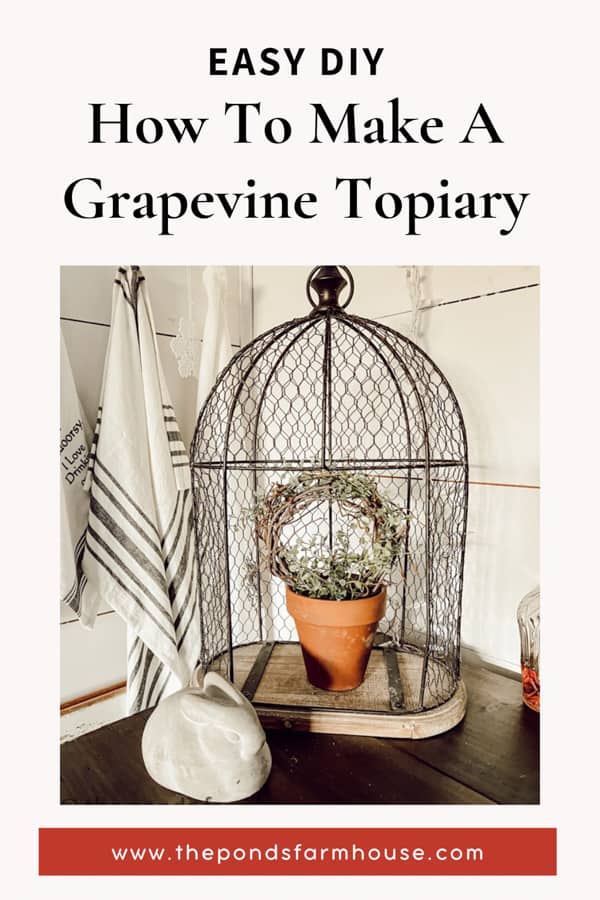
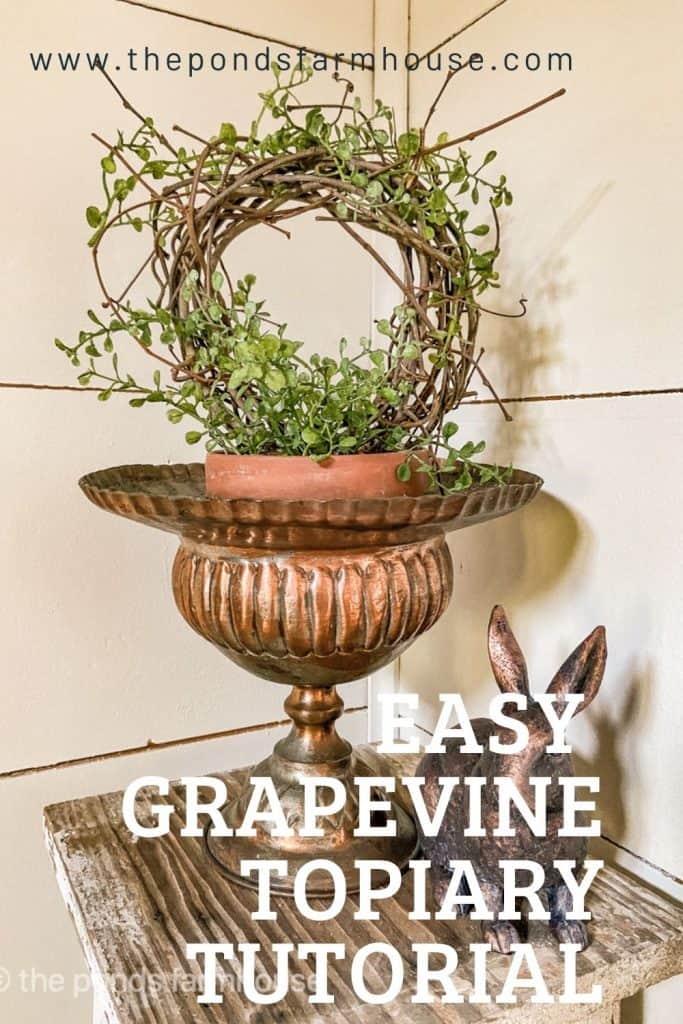
Here is a smaller version that I made previously. It inspired the larger one I’m sharing today. You can get creative and use any greenery for your climbing topiary. I want to try ivy next!
It looks perfect in this vintage copper container.
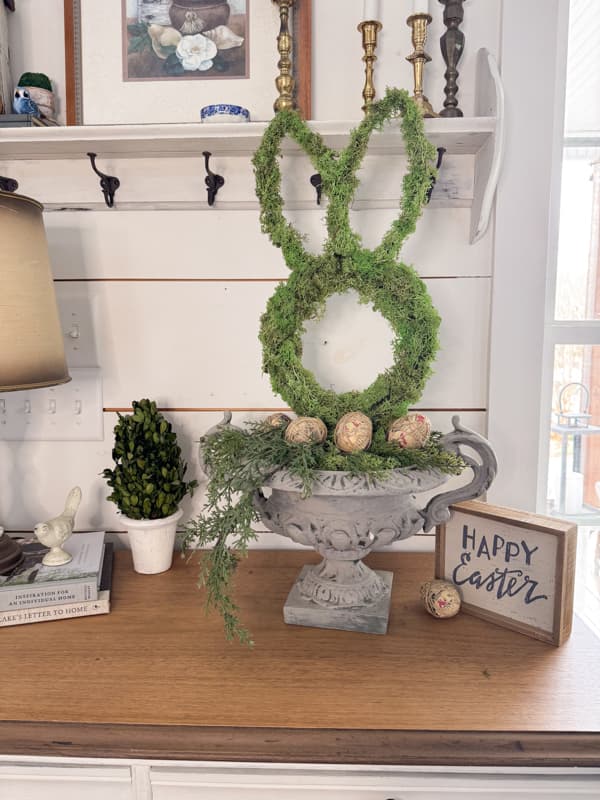
Below are two Easter bunny topiaries that are perfect for Easter and all spring. The moss and ivy bunny is a William and Sonoma look-alike, and the Dollar Tree Bunny Frame inspired the Bunny Ear Topiary to the right.
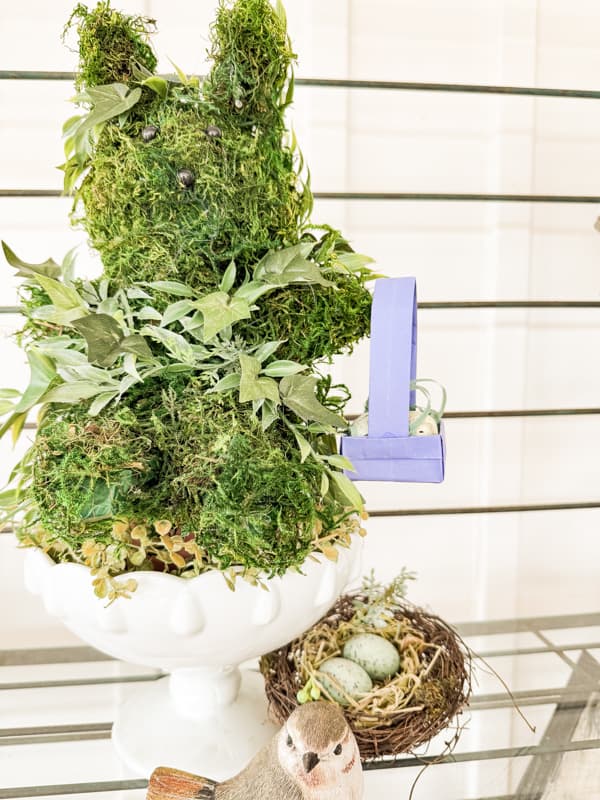
Be sure to see my original instructions for these DIY Topiaries.
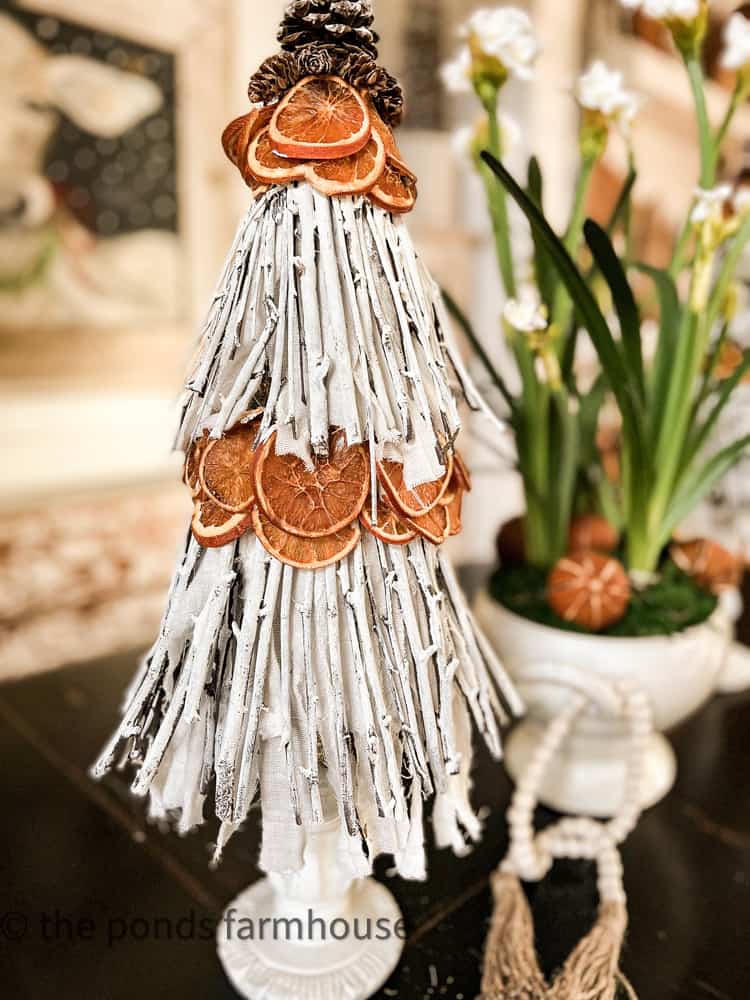
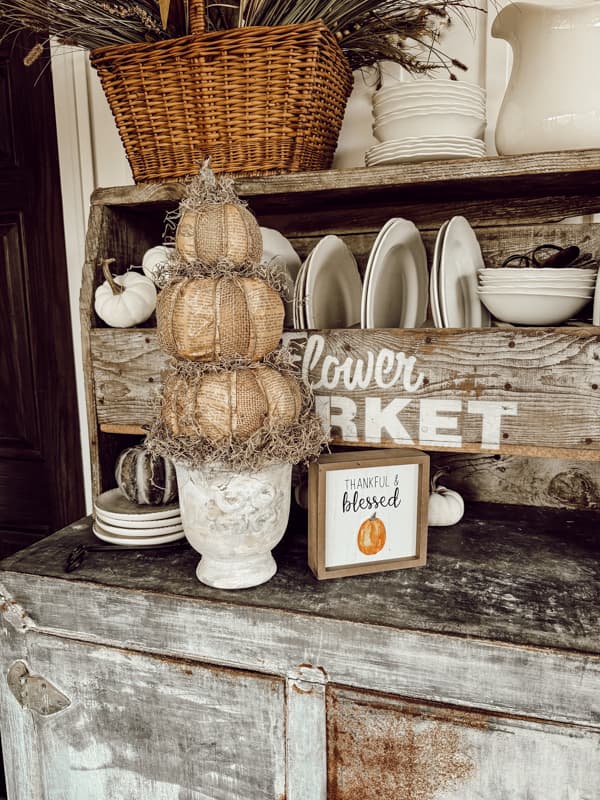
Seasonal topiaries are perfect for decorating tablescapes and mantels. Below the twig & dried orange toparies are eco-friendly for a holiday table. The primitive fall pumpkin topiaries look great in the repurposed thrift store containers. I used Dollar Tree supplies for the budget project.

Related Articles
I hope you enjoyed this easy DIY Grapevine Topiary Tutorial. Please feel free to ask any questions; your suggestions are always welcome.

Pin It To Remember It
Did you find some great ideas you’d like to save for future reference? Hover over the images you’d like to save and pin to your favorite Pinterest Boards when you see the PIN button.
Click to Shop


I seriously want to visit and just craft with you! I love all your DIYs!
Stacy,
you are so sweet. I would love that.
I really love this Rachel, I am definitely going to be making one* or two 🙂
thanks for the instructions on how to make it. You always do the best projects
deezie
Deezie,
I am so glad you think so. I appreciate your encouragement.
Love that idea! Thanks for sharing!😊
Margie,
I really appreciate this.
Hi Rachael
I love your decorating ideas.
I love this wreath you did but I noticed the Bunny-Rabbit in your photos.
I love bunnies.
I love watching your videos and how-to’s.
I have a Christmas Topiary but never had the chance to bring it out for Christmas.
I will this next coming Christmas.
You are so talented in decorating that I wish we lived closer to each other because I feel like I have known you a long time in life.
Brenda,
I am so glad you stopped by. Your comments just made my day. Thanks so much.
Those are both adorable! Thanks, Rachel.
Miche,
I really appreciate you for stopping by today.
Rachel, these are both so adorable and are really quite simple to make. I just love all of the ideas that you share with us!
Tammy,
I really appreciate this. Thank you for your encouraging words.
Thank you, these are so cute, you are very good at repurposing things so unusually. Pinned it, need to buy a grapevine.
Marlene,
I really appreciate your encouragement. Thanks for stopping by today.
Oh Rachel I love this!!! I can’t keep house plants alive either. I had an Ivy topiary and sadly it died. Your faux tutorial is just what I need! Thank you!!!
Kelly,
I really appreciate this.
How fun, Rachel. I love an easy DIY and this turned out beautifully!
Jen,
It was so easy and I also love how it turned out.
It’s so pretty Rachel! This is definitely my style and I’d love one of these in my home.
Shawna,
They are so easy to make. I hope you make one.
This is such a great idea for a DIY Rachel! Thanks for sharing!
Kim,
Thanks so much.
This is so stinking cute!
Ana,
I really appreciate your comments.
You are so creative, Rachel, this looks amazing! I can’t wait to try this too. Just pinned – LOVE! Hugs, CoCo
Coco,
I really appreciate this.
Thanks
Rachel I love this DIY and want to make one here for the new house.
Yes, it would be perfect.
This is my kind of topiary! Love that you shared a gorgeous faux option, I can’t wait to make it.
Brendt,
I’m so glad you like it.
To be included in your round up was such an honor. Thank you! And your topiaries are genius. I’ve never thought to use a grapevine wreath or anything other than a ball on the top of a stick so I’m super excited to try this. You always make things look easy so it’s on my list! pinned
Cindy,
I’m so glad you like it.
This is such a great tip to keep adorable topiary around!
Jessica,
Thanks for your sweet comment.
I so want to come craft with you!
I’d love that.
Thank you for sharing
I can’t wait to make one of these!
Thanks for sharing! Now I just need to figure out which style I want to make first🤔
Margie,
Thank you and I can’t wait to see what you come up with.
Oh my goodness! I love this idea. I have a vintage cast iron urn that I have been waiting for an idea to pop into my head for. Thanks for the inspiration. I would love to share this on my newsletter next week. Hugs to you.
Renae,
I’m so glad you like this idea and thank you for sharing my ideas on your newsletter.
This is such a great project! Thanks so much for sharing!
KariAnne,
Thank you for stopping by.
Love how this turned out! We’re sharing it on Simply Stated tomorrow. Happy weekend!
Anne,
I really appreciate this.
This turne out amazing! Love it!
Stacy,
Thanks for stopping by.
This is so cute!! I noticed my real ivy topiary looks a little sad, I may have to try the faux route. Clever idea using the branch to hold the grapevine in place.
Jennifer,
I appreciate this. It’s an easy and fun project.
Love this idea, Rachel. I have a thrifted vase sitting in the closet that needed a job… it will have one later today!
Frances,
I’m so glad you like this one. Thank you.
Rachel, I just loved reading your post today! Your topiaries are absolutely beautiful! You have given me so many ideas. I especially love your topiary in your vintage planter that you put on a stool in your bathroom. It looks so pretty in there! I especially love that it is faux greenery that you used. I have a planter similar to yours that I have had a faux plant in but now I am going to make a topiary just like you did as it is so pretty and, the good part, you don’t have to worry about watering the topiary! Thanks, once again, for sharing this. You always have such fabulous ideas — and great instructions, too! Have a wonderful week! As I’m typing this, we are getting another day of snow! Our river is slowly coming to life as the ice is starting to break up.
Mary-Ann,
Thank you! This is one of my favorite topiaries and I use it year round to decorate the farmhouse. I can’t wait to hear how it turns out.