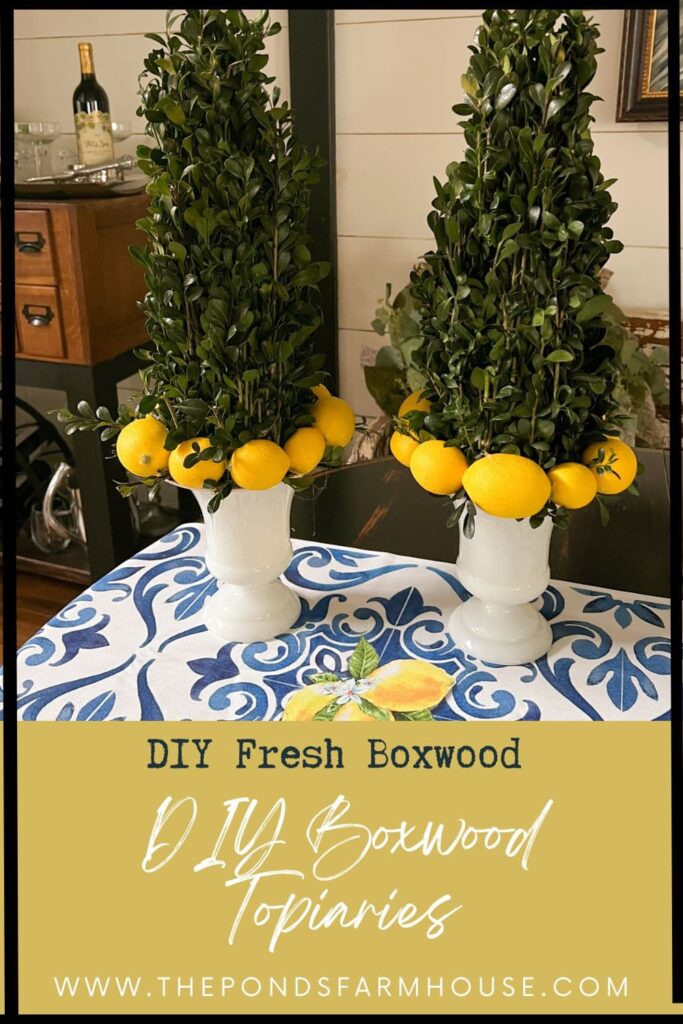
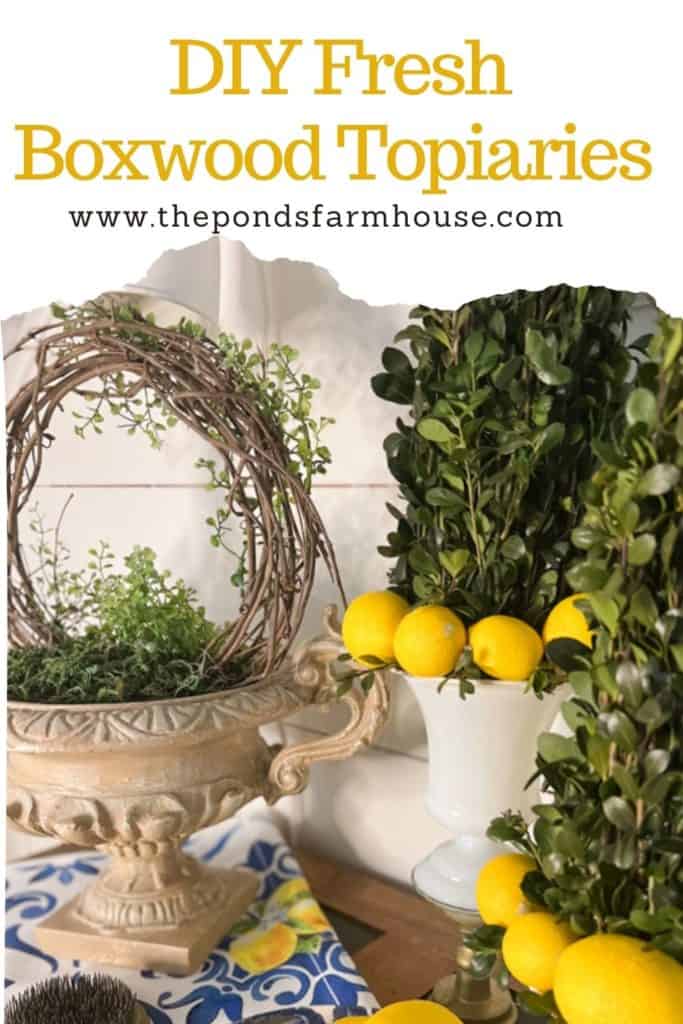
DIY Fresh Boxwood Topiaries with Lemons
If you are looking for refreshing and inexpensive topiary ideas, you will love this project. It is an easy DIY tutorial for making Fresh Boxwood Topiaries or Boxwood and Lemon Topiaries.
Including the lemons is optional if you prefer a simple boxwood topiary.
This inexpensive and easy tutorial will be helpful and will spark your imagination for other topiary options.
DIY Boxwood Topiaries
For this project, I’ve combined fresh boxwood and faux lemons to create an Italian table accent. Using fresh boxwood will limit the life of your topiaries, however I love the look of the real boxwood. It’s almost impossible to find a good faux boxwood, in my opinion.
In addition, there are tips for keeping boxwood fresh longer, and you can see how to keep any greenery looking fresh here.
If you prefer, you can use preserved boxwood, but supplies are usually much more expensive. I’ve tried preserving boxwood without great success, however I may give it another try, just not today.

(Posts on The Ponds Farmhouse may contain affiliate links. As an Amazon Associate, I earn from qualifying purchases. See the full disclosure details here.)
Using Fresh Boxwood
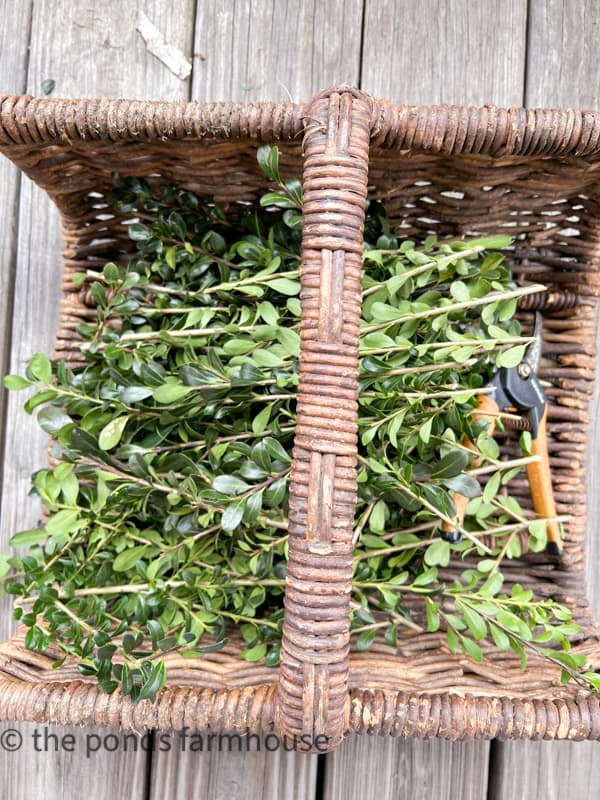
This is a great time of year to cut boxwood because it will keep fresh longer when brought indoors. Boxwood cut in the summer months will fade and dry out very quickly.
I have cut boxwood at Christmas and have kept the stems in my home until June with great success.
That said, the leaves will eventually become brittle, so you will want to place your stems in an area that is not easily disturbed.
To keep them fresh longer, check out this post that I shared above.
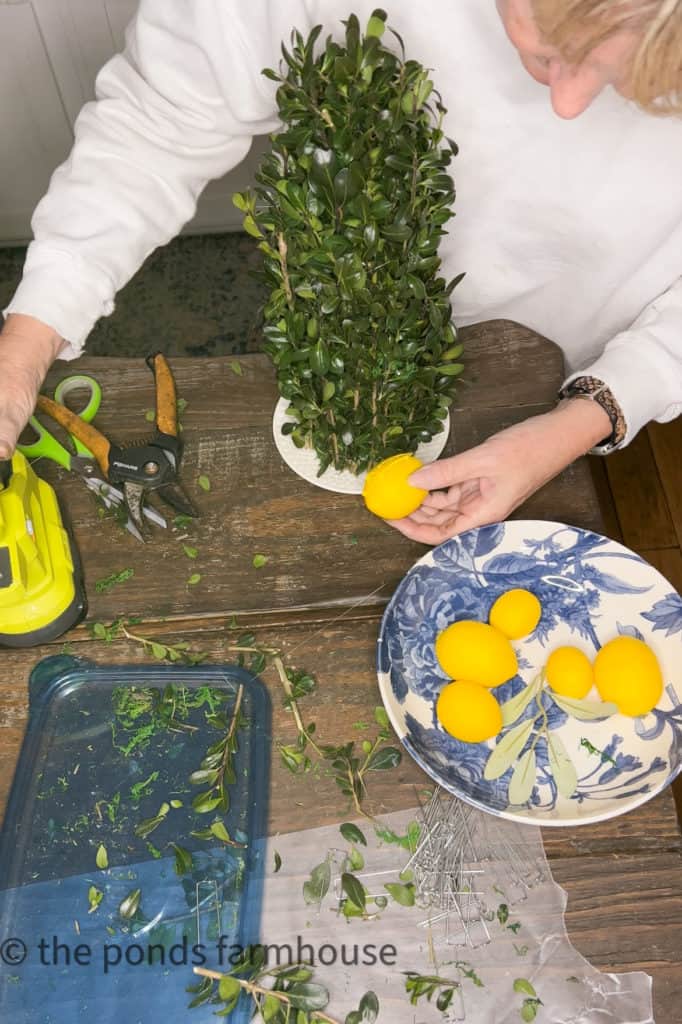
Supplies for Boxwood Lemon Topiaries
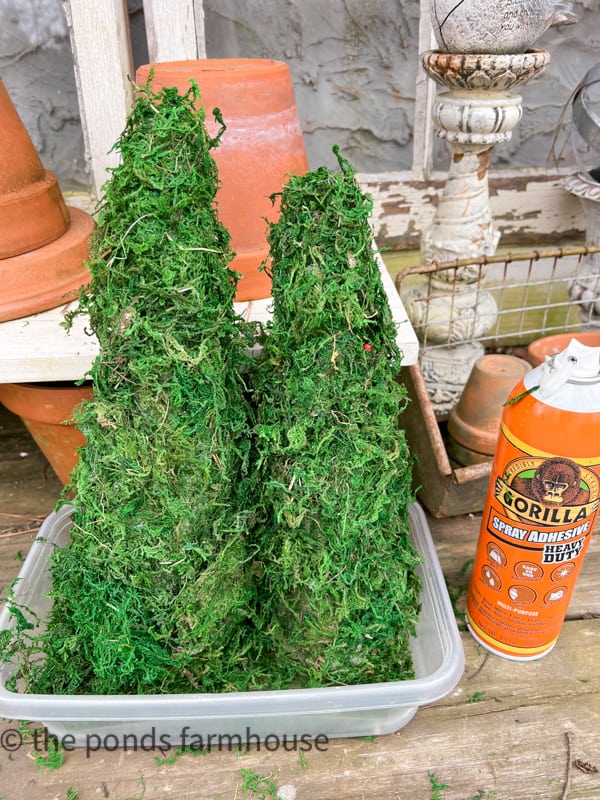
- Cone Shaped Styrofoam (I used some that I had recycled from this previous fresh greenery topiary).
- Preserved Moss
- Spray Adhesive
- Fresh Boxwood Stems – cut in a variety of lengths from 2 to 14 inches
- Cordless Hot Glue Gun
- Hot Glue Sticks
- Faux Lemons – You can use real lemons if desired
- Floral U Pins
Prepare Cones
Begin by covering the styrofoam cones with preserved moss. Spray small sections of the cone with spray adhesive and press the moss onto the cone to adhere. Continue until the cone is completely covered with moss.
This will ensure that your topiary looks full and lush. Without the moss, you will have difficulty covering the styrofoam, which makes working with the boxwood difficult.
Assemble Boxwood Topiaries
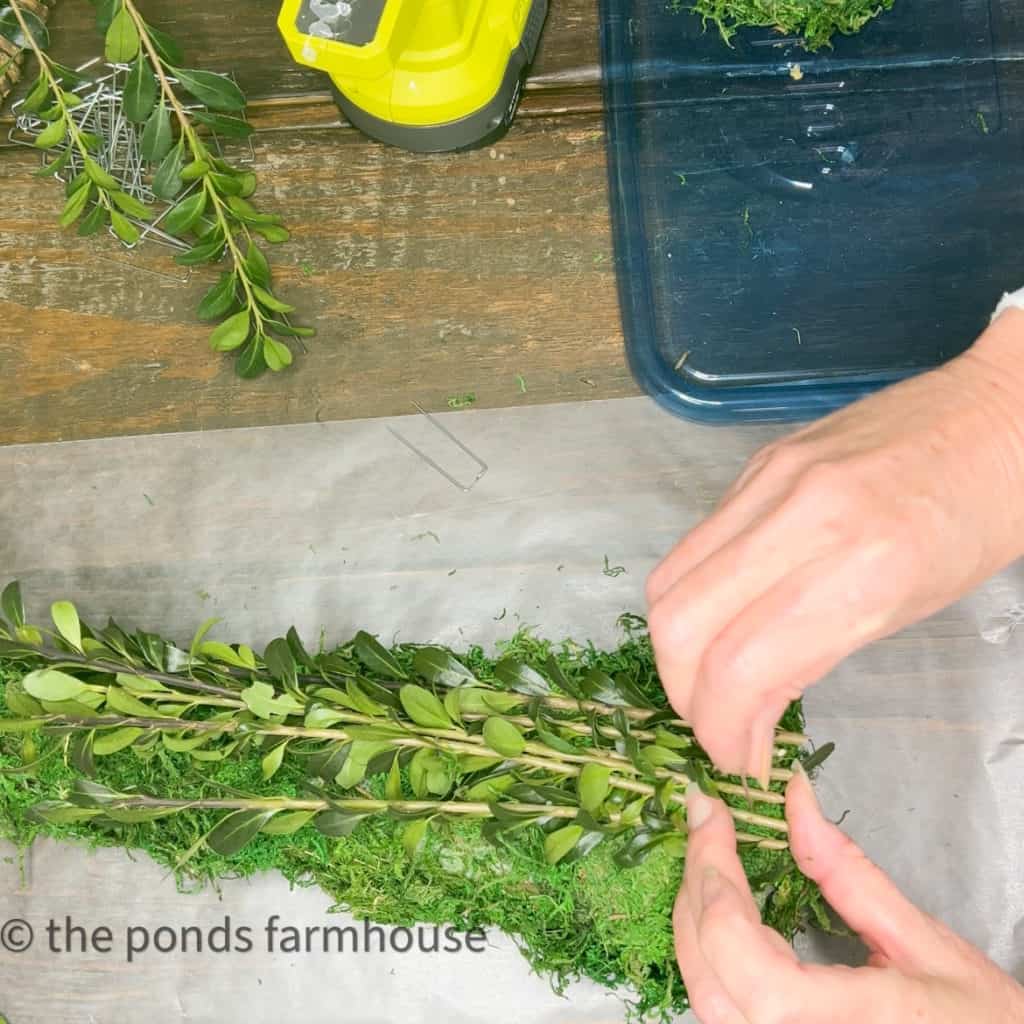
The boxwood stems should be straight. You don’t want stems branching off from the main stem because they will not lay close together.
Begin at the bottom of your cone and attach several longer stems running upward on the cone. Using the U pins, you can attach 4-6 stems with each pin.
You will need to add some short stems intermingled with the longer stems because the cone narrows as you go up.
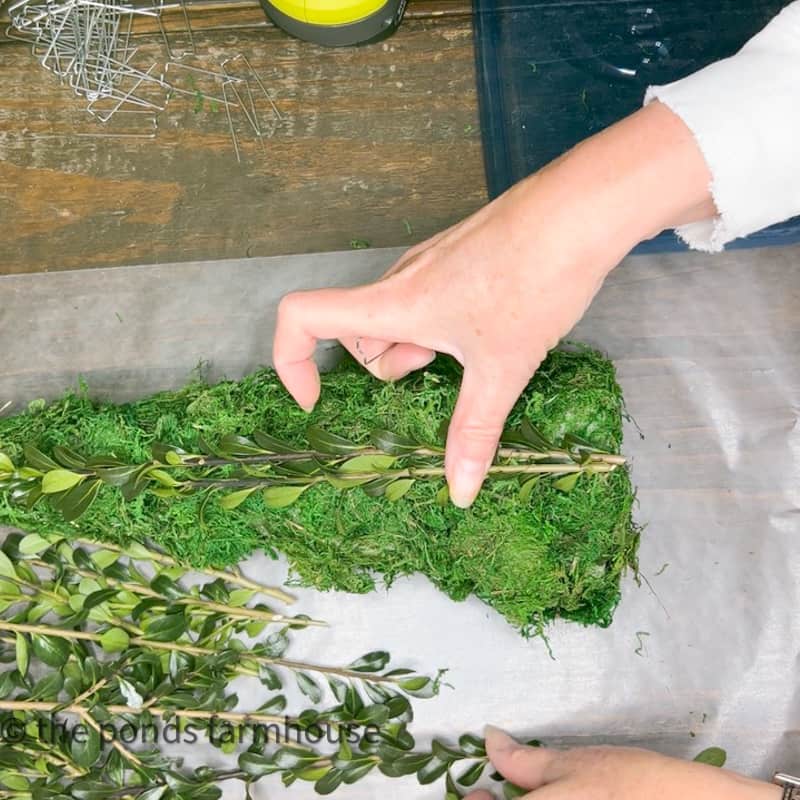
Continue around the base of the cone until the area is filled.
Next, you will want to fill the upper area of the cone using a mix of shorter stems.
At this time, you will want to attach the tops of longer stems with the U pins as you add the shorter stems. This will ensure that all the stems hug the cone.
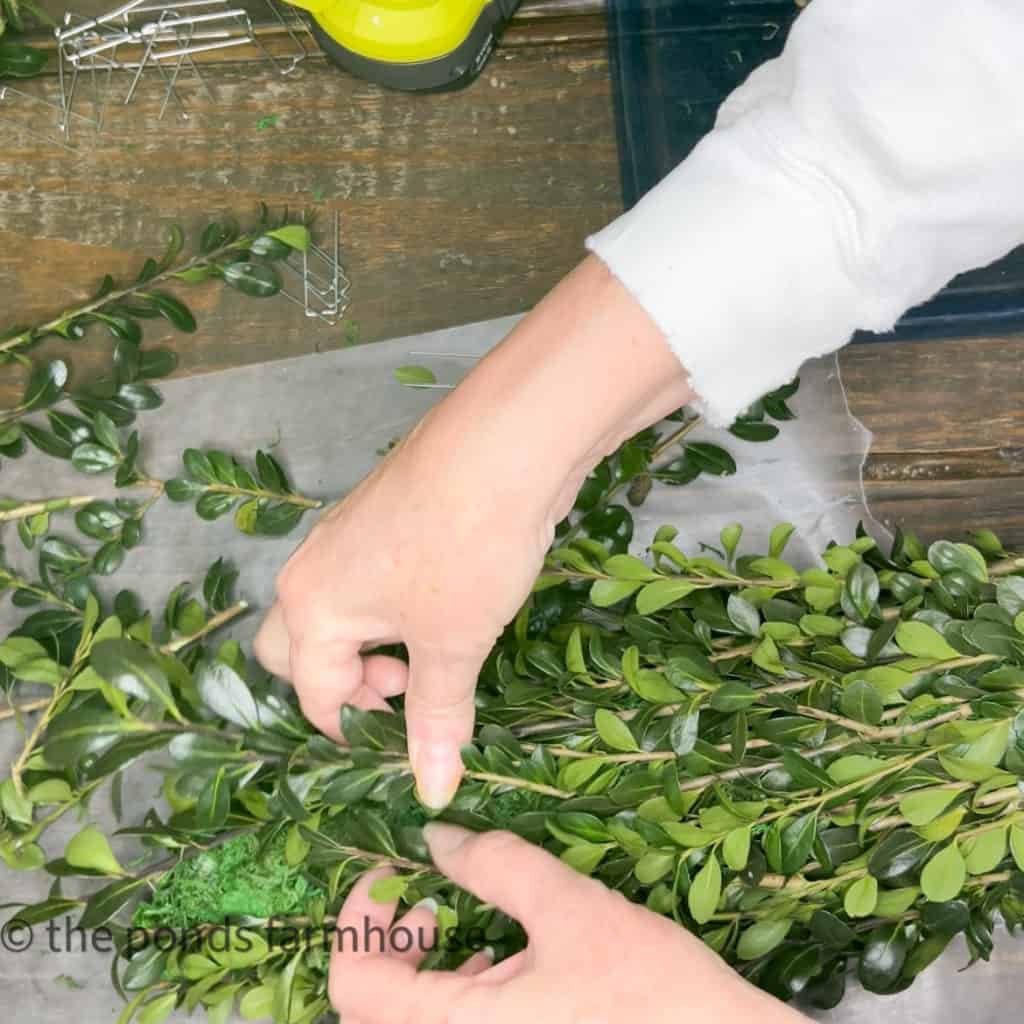
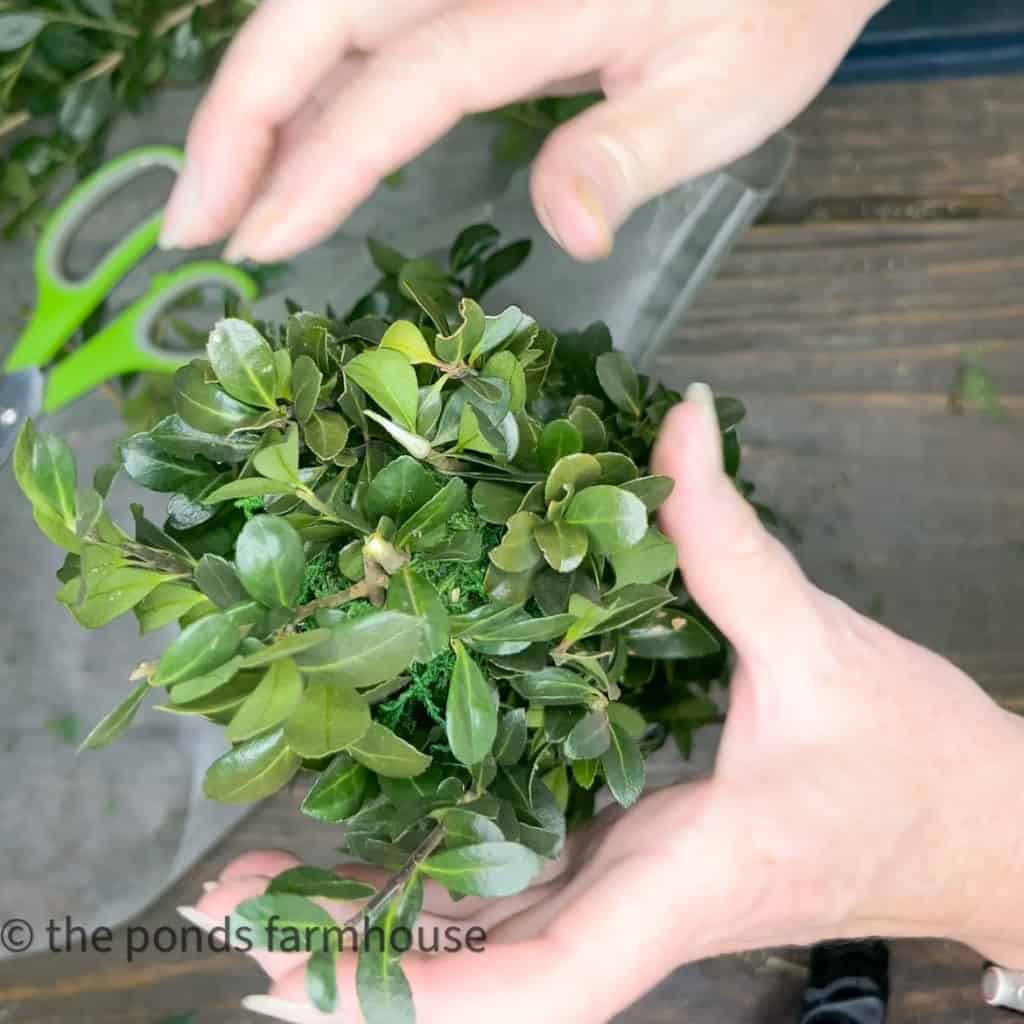
Finally, at the top of the cone, you will add a few short stems and you can trim away any wild stems that are sticking out using scissors or pruning shears.
You can add additional stems using hot glue to cover any exposed U pins and to fill any areas that need additional coverage.
Continue to fill in with small pieces of boxwood until you have a desirable cone shape.
See the Video Below for visual instructions.
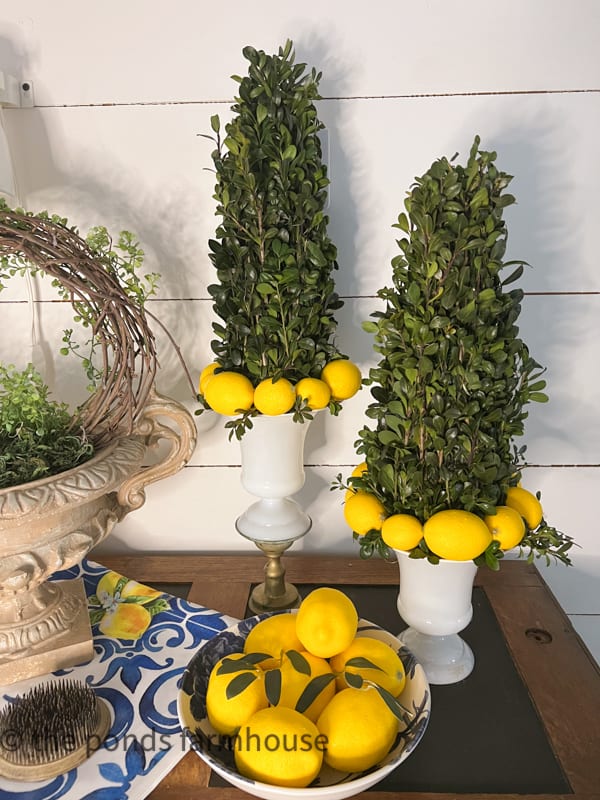
Lemon Topiaries
As an option, you can add lemons to your boxwood topiaries. They can be intermingled with the boxwood or added to the bottom of the topiaries as I’m showing here.
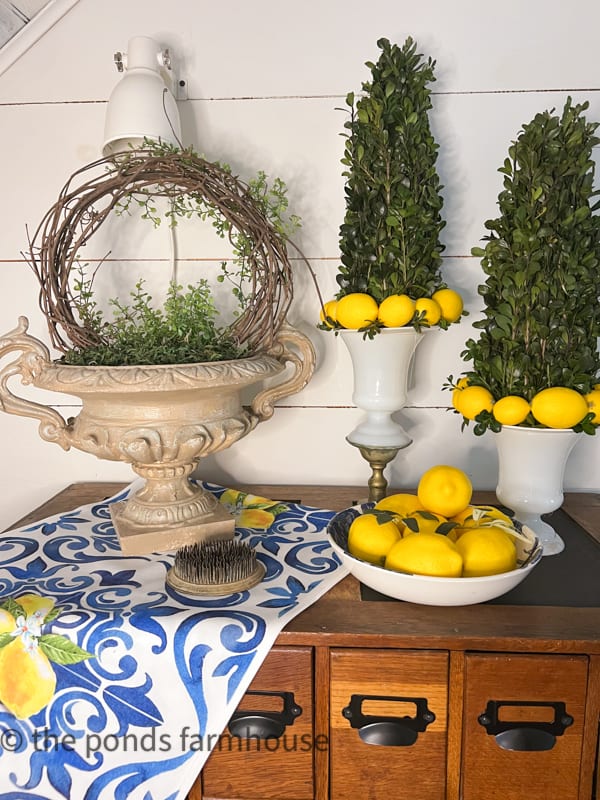
Lemon Topiaries Containers
First, determine the container for your boxwood topiary. There are so many options, such as a terra cotta clay pot, a wooden base, a large candle holder, vintage tea cups, vintage bowls, small cake plates, etc. Just be creative with your choices.
For this project, I am using small white saucers which I will add to vintage milk glass vases for height.
For this same technique, you can use a plastic or heavy-duty paper plate and set it on any item that matches your decor.
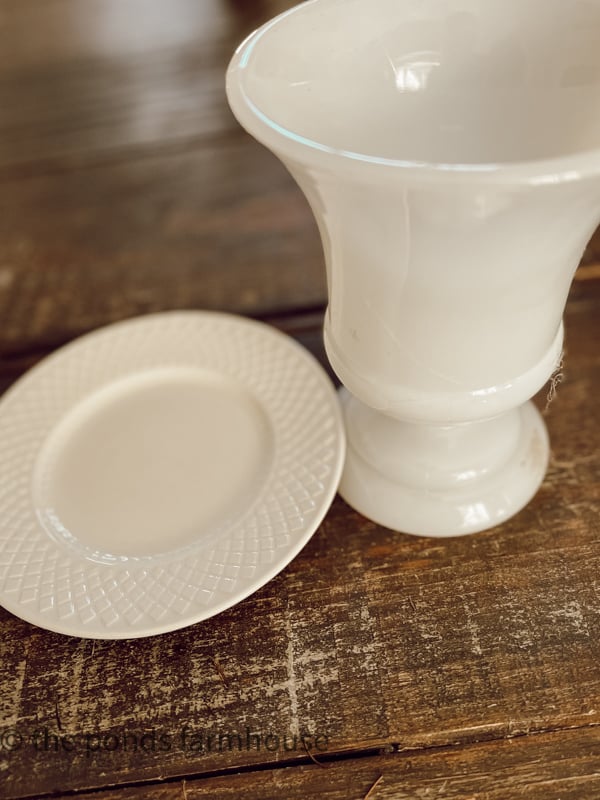
For this technique, instead of placing the topiary directly inside a container, you need a rim to attach the lemons.
They will stick to the boxwood, but they don’t adhere securely, and you risk the weight of the lemons pulling away leaves from the boxwood.
A slight rim, such as the one on these plates, allows the lemons to have a resting spot, and your topiary will be sturdy.
Note: Real Lemons will not adhere to the topiaries as easily as faux lemons. They may require floral picks to secure.
Attach Faux Lemons
To begin attaching lemons, center the topiary on your container or plate. Add a small amount of hot glue to the lemons, allowing them to attach to both the greenery and the plate.
Continue around the base of your topiary until it is filled with lemons.
Next, using hot glue, add sprigs of the boxwood to fill holes around the lemons.
I love topiaries that look natural, and I’ve made several versions.
Here is my first attempt at making simple topiaries that you might also enjoy. These Topiaries were recently featured on Decorative Inspirations by Meagan Trento.
What to do when the boxwood is dead!
As I said in the beginning, using fresh boxwood does not guarantee that these topiaries will last forever. However, if you follow some of the tips I mentioned above, they will last much longer.
However, eventually, you will want to remove the dead stems. If you think you will make this project again next year, here is what to do.
- Remove all dead stems and U-pins
- Remove the lemons from the cone
- Gather a plastic bag and place the cones, any loose moss, and lemons inside
- Add a few silica bags and securely tie the bag
- Place with your craft supplies and label what the contents are
It will be easy just to add new fresh boxwood next year.
You can also use the moss covered cones for other projects in the meantime.
DIY Fresh Boxwood Lemon Topiaries
I hope you like the DIY Fresh Boxwood Lemon Topiaries as much as I do.
The topiaries are the same height; however, a brass candlestick was added to add additional height for this vignette.
These topiaries were used on this Italian-themed tablescape, and I can’t wait for you to see the full table.
See VIDEO TUTORIAL

The topiaries are displayed with a grapevine topiary, and you can see the tutorial here.
Resources

Other Topiary Ideas
- Corn Stalks Topiaries
- Real Cedar and Orange Topiaries
- Easy Topiaries You Can Make Yourself
- Sweet Gum Ball Stems
- How To Make A DIY Magnolia Wreath
Thanks so much for stopping by today, and I hope you’ll check out the Italian Tablescape these were created for.

Pin It To Remember It
Did you find some great ideas you’d like to save for future reference? Hover over the images you’d like to save and pin to your favorite Pinterest Boards when you see the PIN button.


This is such a happy and bright project Rachel. Boxwood and lemons are two of my favorite things.
Kim,
I really appreciate this.
Rachel these turned out great! I love them!
Stacy,
Thanks so much.
These came out so pretty! It’s nice to work with fresh greens or flowers this time of the year. Have you ever tried preserving boxwood with glycerin? It’s been on my “maybe I’ll try it someday” list (with 4,999 other things)!!
Jennifer,
I tried to preserve magnolia leaves and it was not a success. I do want to try boxwood but didn’t have the time for this project.
Such a wonderful and creative idea Rachel! Love these!
Michele,
You are so sweet. Thanks so much.
Love these and I have a huge boxwood in my backyard. Will have to try these. Faux boxwoods are terribly expensive. Thanks for sharing all your creative ideas. Enjoy them immensely!
Kimberly,
I really appreciate this. Yes, that’s why I prefer to use the real deal.
I love the way these turned out so much, Rachel! They’re really beautiful and can be used in so many different places throughout the house too. As always I can’t wait to see what you’re up to. I know it’s going to be amazing if you’re involved. Big hugs, CoCo PS: There must be something in the air because I’m sharing a faux dill topiary on Wednesday 🙂
CoCo,
I can’t wait to see what you share. Topiaries are great for Spring and even faux makes everything feel fresh again.
How cool are these?! I love how you used fresh boxwood. The lemons are so vibrant and get me so excited for warmer weather ahead. These would work so well in any room to add color and texture. Thanks so much for sharing!
Rachel,
I’m so glad you like them. I feel they are a great transition from Winter to Spring.
Ooh! I love this idea so much. It’s gorgeous. This is awesome. I would love it if you would share this on The Fabulous Friday Link Party this Friday. https://www.peacockridgefarm.com/category/fabulous-friday-link-party/
Hugs to you.
Done.
I am a big fan of topiaries! Yours turned out great and I love the bright yellow color of the lemons paired with the green of the boxwood. So pretty! Donna
Donna,
I’m so glad you like them. I can’t wait for you to see my table with them included. I appreciate you for stopping by.
Thanks so much for sharing.
Loving your lemon topiary trees. Beautiful. Thank you so much for the link to my website. Your the best.
Meagan,
You are welcome.
These are so pretty, Rachel! I didn’t know this was the best time to cut boxwood and now I’m thinking I need to go make a topiary!
Anne,
Thanks for stopping by.
These are so pretty, Rachel. I love them. HUgs to you.
Thank you Renae.