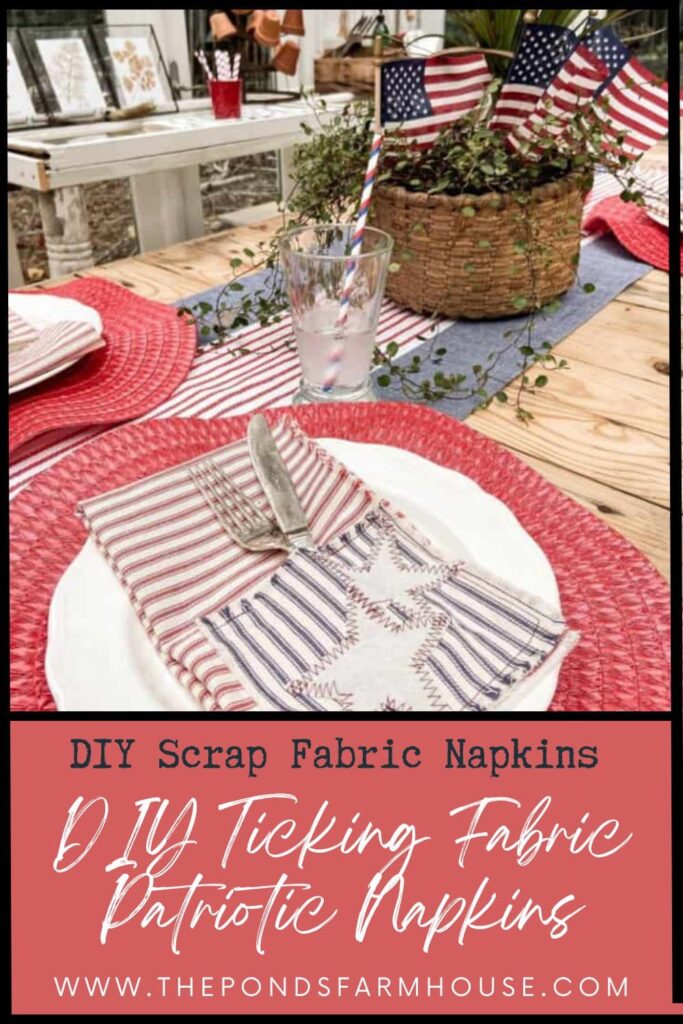
DIY Ticking Patriotic Napkins with Cutlery Pocket
Looking for some patriotic tableware ideas? Wait until you see these cute scrap fabric cutlery pocket napkins. It was a spur-of-the-moment idea to make my own DIY Ticking Patriotic Napkins. I wanted to avoid going to the store to look for fabric. You may know I love ticking fabric and use a lot of it, so y’all know I had some scrapes on hand. Here’s how to make these cute handmade napkins. I’ve included a no-sew method to ensure everyone can make this project.
Y’all know I usually make it when I can’t find what I’m looking for. When I was planning a 4th of July tablescape and couldn’t find the perfect napkins, I decided to make some.
(Posts on The Ponds Farmhouse may contain affiliate links. As an Amazon Associate, I earn from qualifying purchases. See the full disclosure details here.)
Table of contents
How To Make DIY Patriotic Napkins
First, gather your supplies.
- Approx. 1 yard of Red Ticking Fabric
- 1/4 yard of Blue Ticking Fabric
- Scraps of Drop Cloth Fabric
#1 Cut-out Design for Handmade Napkins
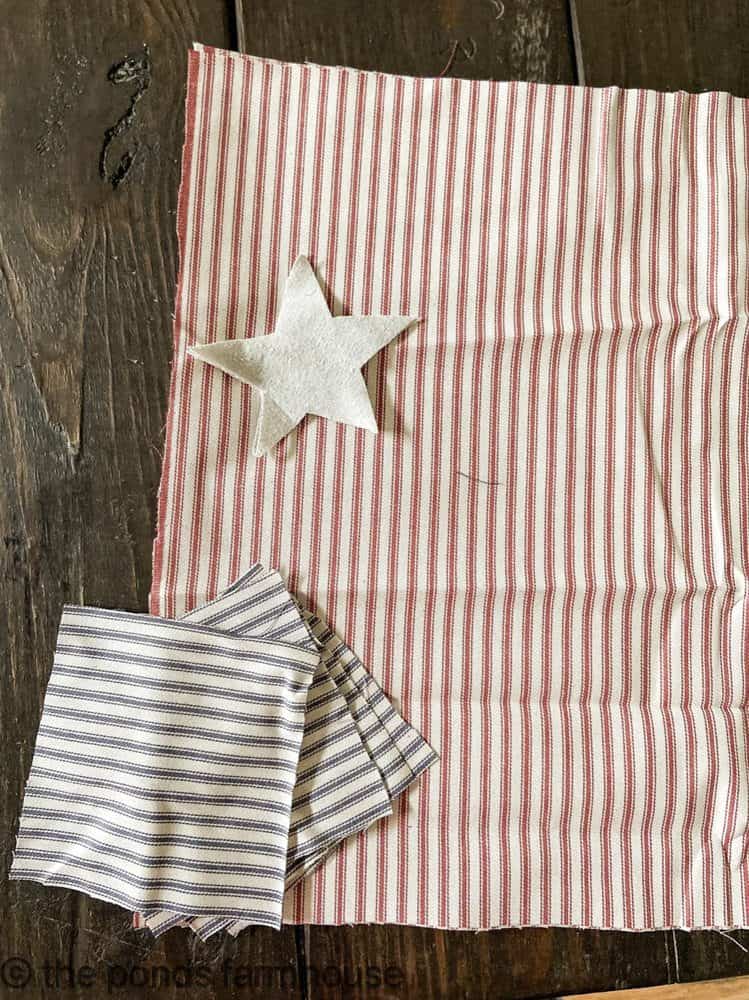
First, cut out your fabric pieces.
- 4 18X18 inch squares – Red & Creme Ticking fabric
- 4 5×5 inch squares -Navy & Creme Ticking for cutlery pockets
- 8 (approx. 3″ diameter) stars – drop cloth fabric exact same size
- 8 smaller stars
# 2 – Wash & Dry
Next, wash and dry the squares.
This naturally frays the edges and creates a fringe-like edge around each napkin.
# 3 – Stitch the Stars for PATRIOTIC Napkins
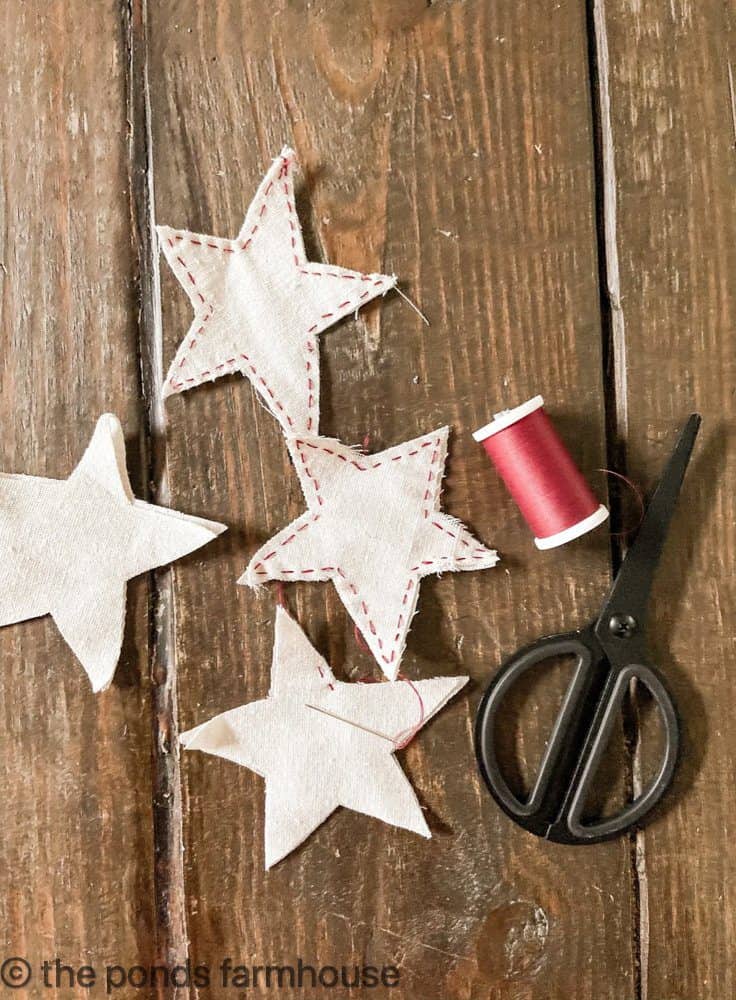
While the fabric is drying, stitch 2 larger stars together using a sewing needle to apply a simple quilting stitch with red thread.
Repeat until you have four stars. Note: use the 8 of the larger stars cut the same size.
Check out this DIY Feed Sack project if you like drop cloth projects.
#4 – Press
Once your fabric is dry, you’ll notice that the edges are frayed, and you will have a lot of strings to remove.
Remove the excess strings and press the squares with a hot iron.
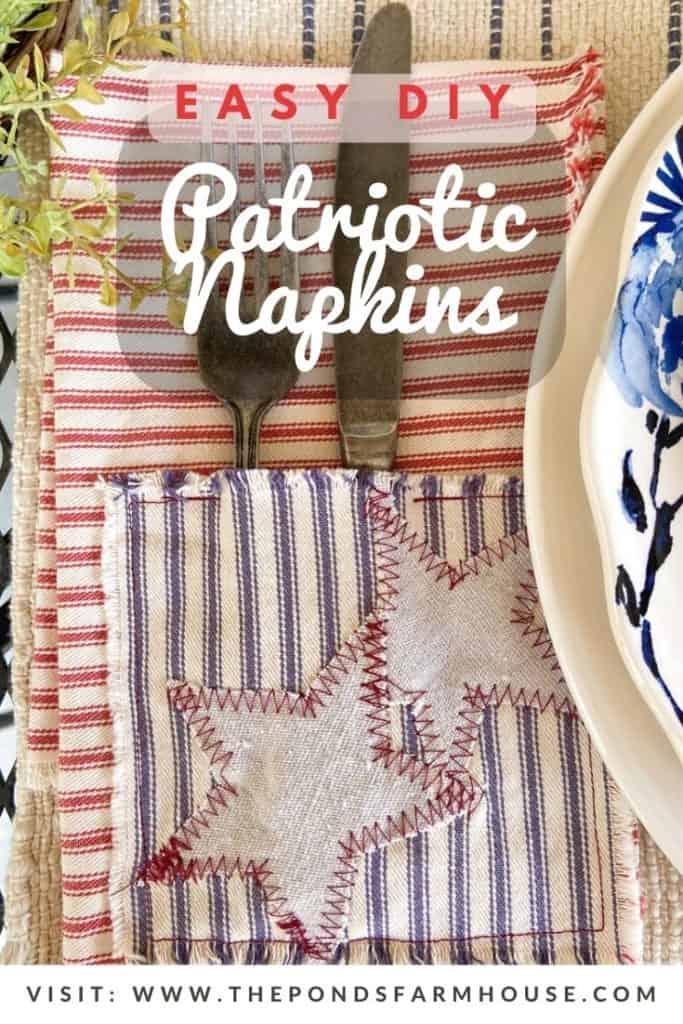
#5 – Stars For DIY Ticking PATRIOTIC Napkins
Add stars to the cutlery pocket blue squares.
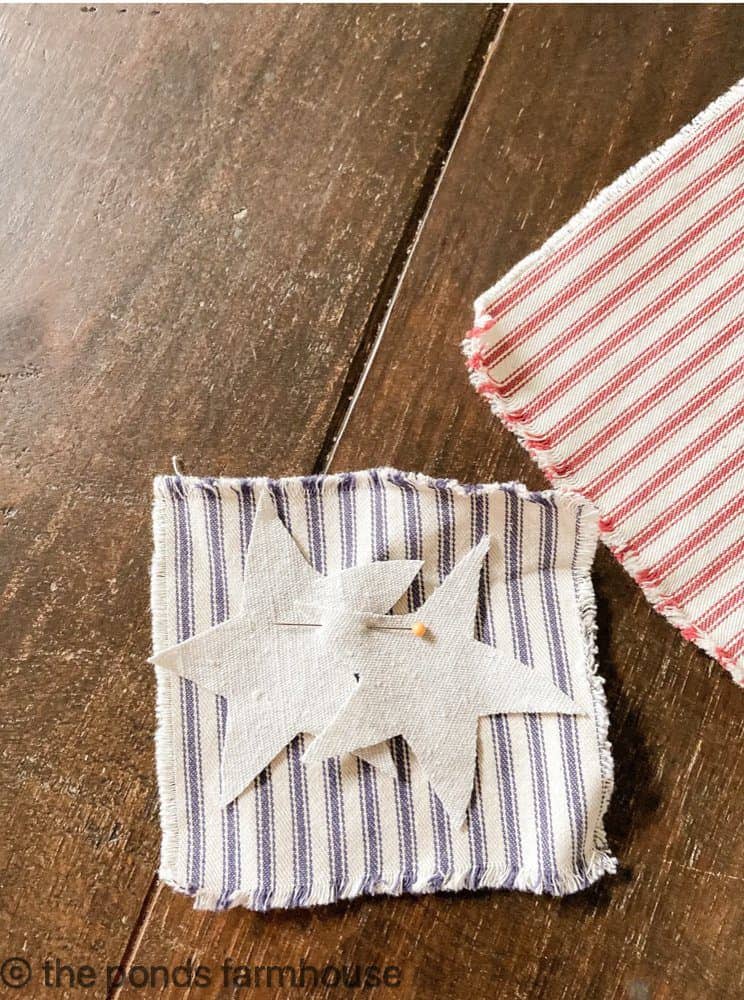
Next, using the smaller stars, arrange them on the blue ticking square in a pleasing arrangement. Use a straight pin to hold them in place.
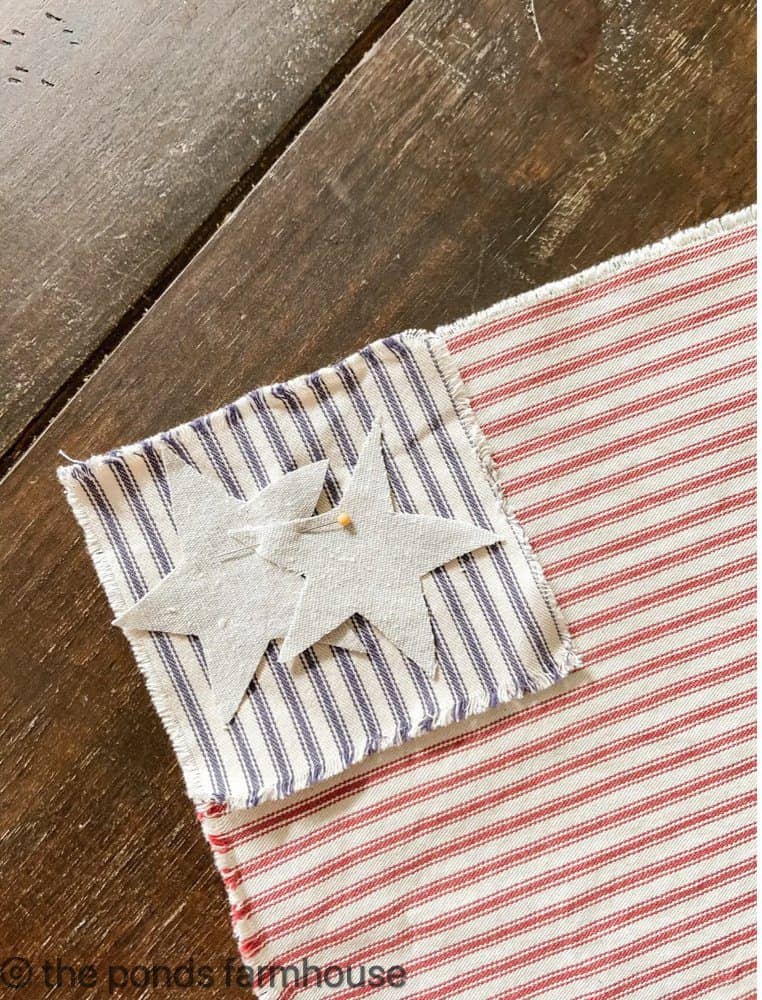
Place the cutlery pocket on the napkin to get a preview of how this placement will look when the handmade napkins are complete.
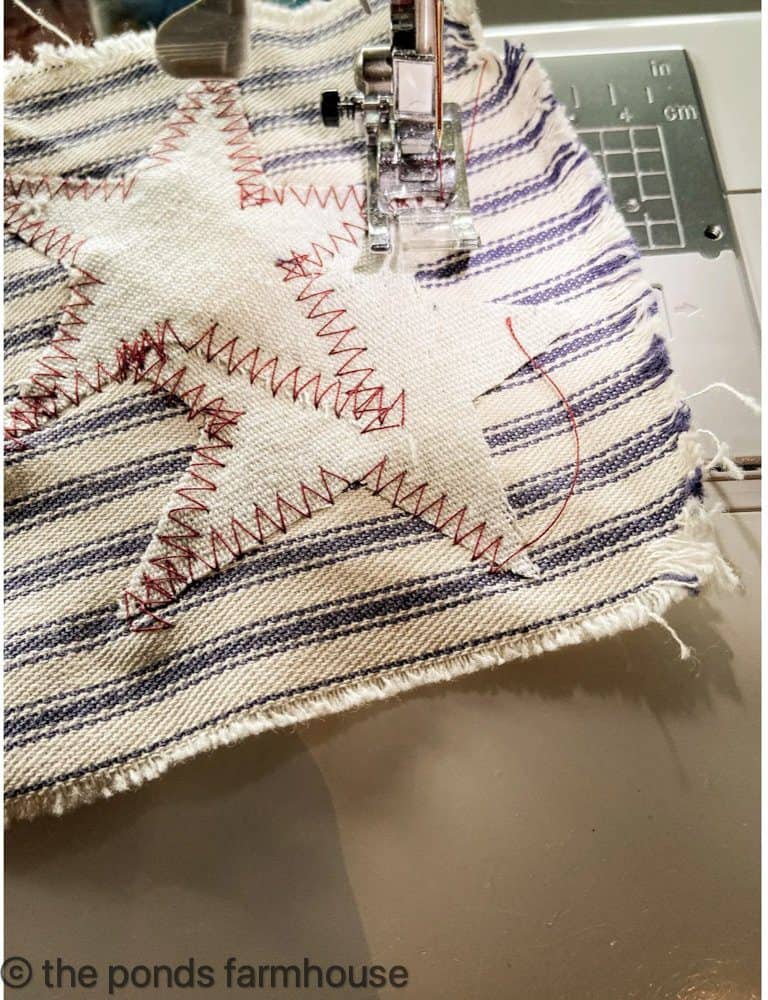
Next, place your red thread in your sewing machine and use a simple zigzagged stitch to attach the stars to the blue and creme ticking square.
It’s important to cover all the star edges to avoid fraying.
#6 – Attach to Red Flag Napkin
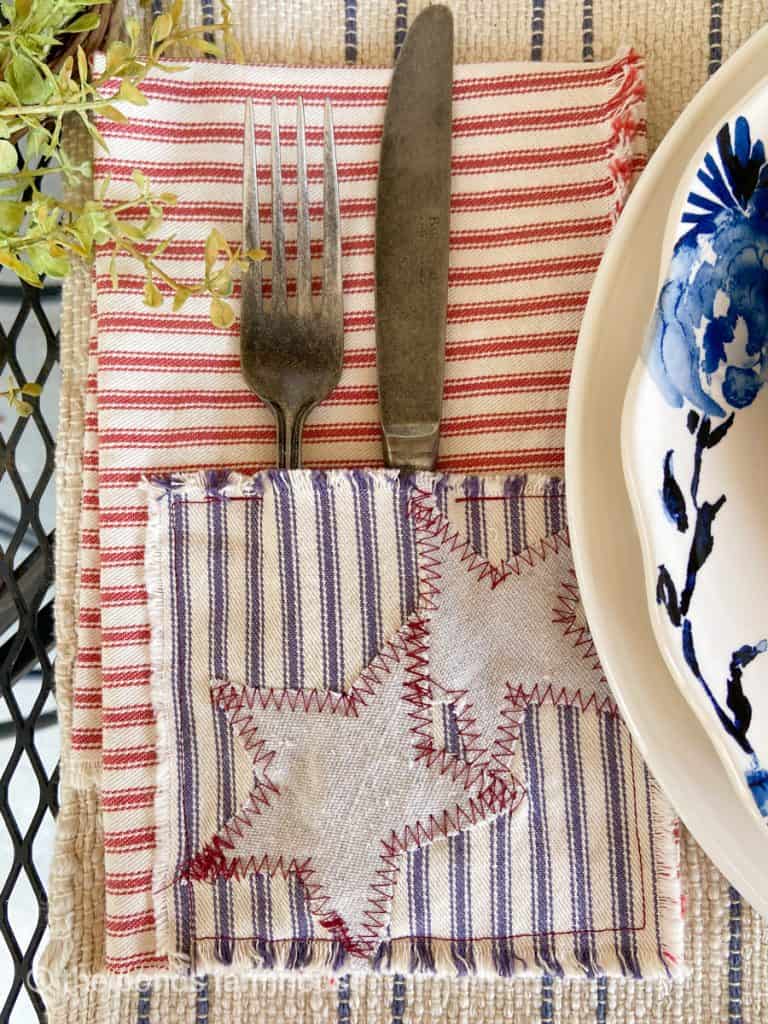
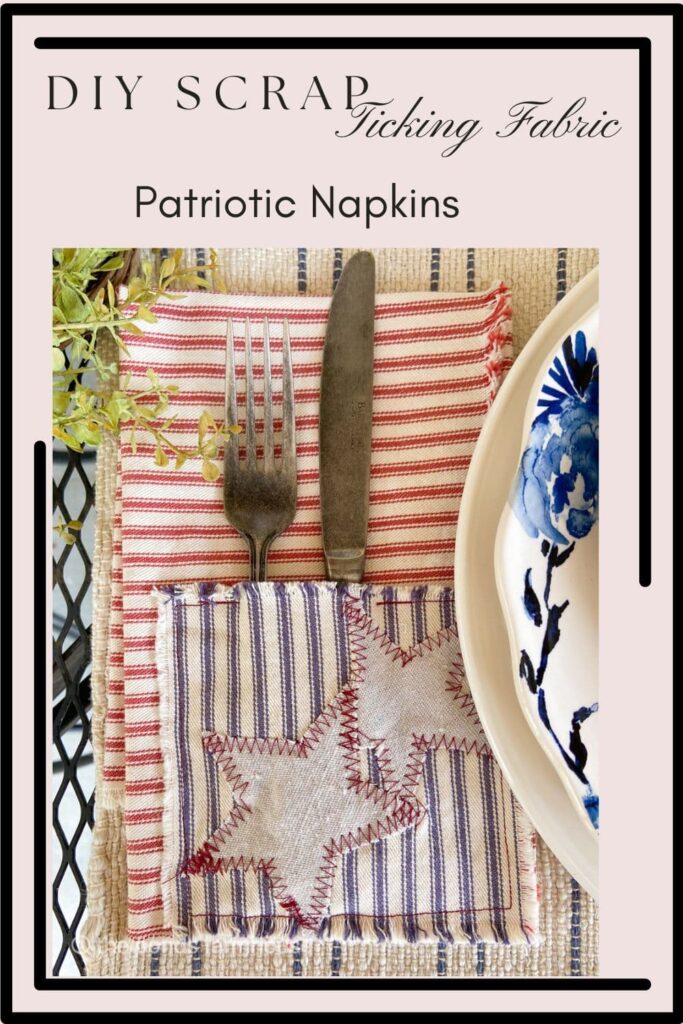
Now attach the blue ticking cutlery pocket to the corner of the red ticking napkin.

Here, you want to be sure the stripes are not running in the same direction to give the illusion of a flag.
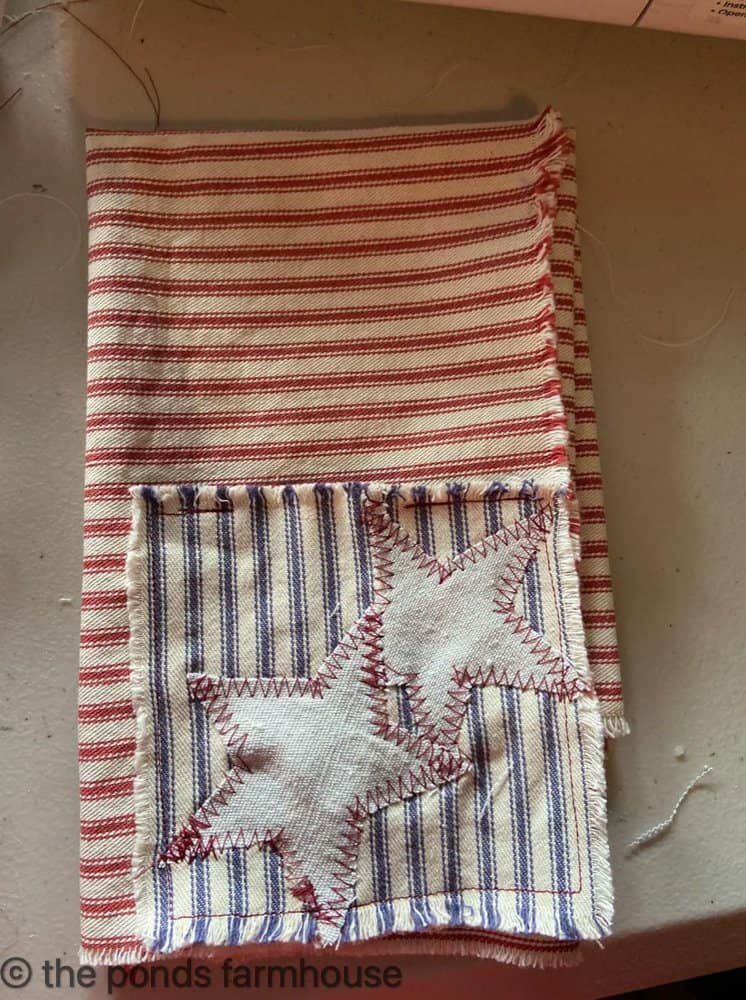
You will use a straight stitch to attach the two squares.
Use red thread stitch around the edges of the blue & creme cutlery pocket, leaving a 2-inch pocket gap at the bottom of the square, as you can see in the above photo.
The gap in your stitching should be along the edge where your red stripes run horizontally.
This will allow for the silverware to be placed inside the pocket.
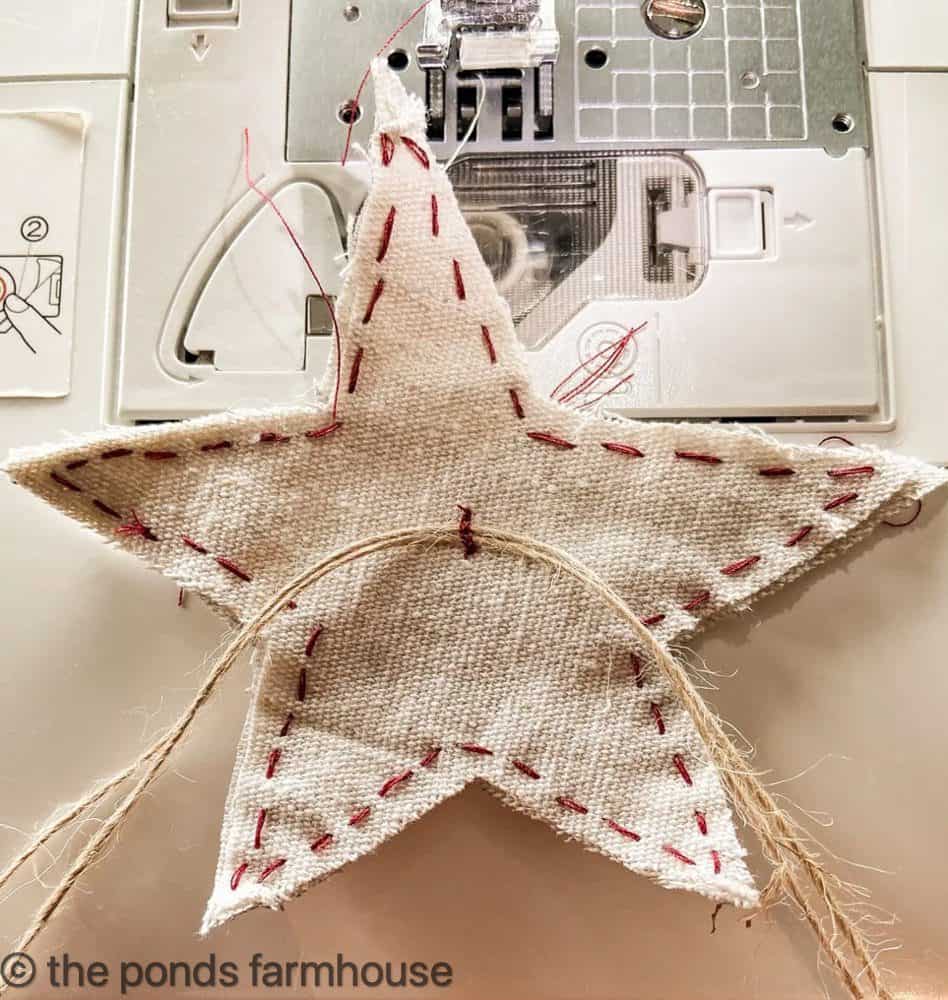
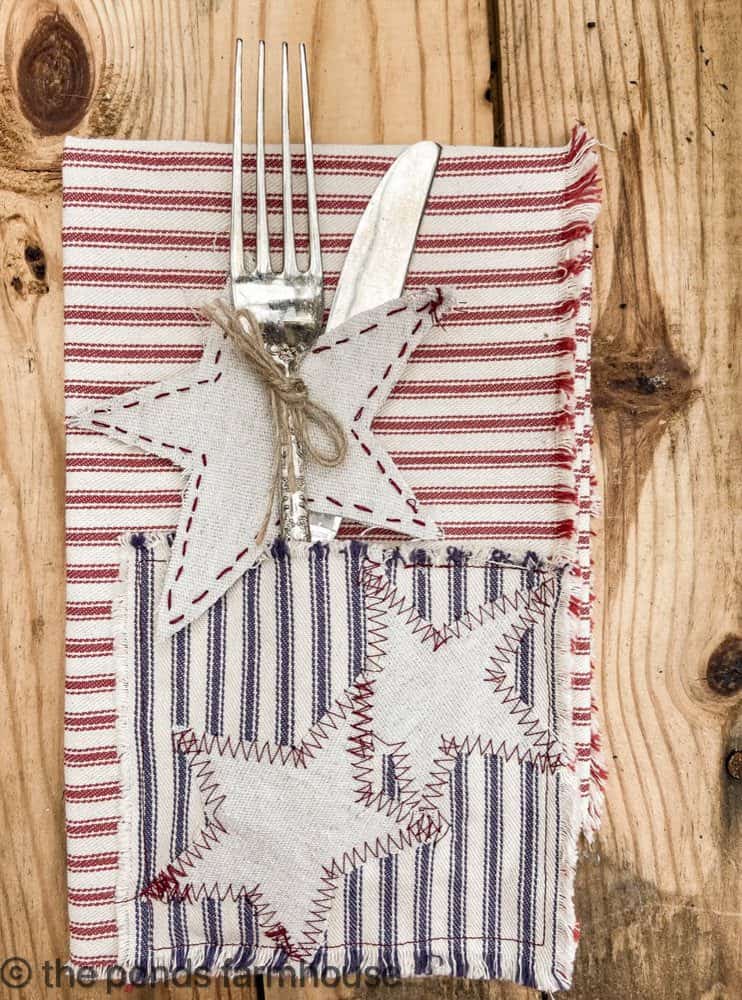
Add a couple of strands of jute string to the center of the double stars. If you choose, you can tie the string around the cutlery.
Don’t Sew: No Problem
If you don’t sew, these napkins can be easily made without a sewing machine. You can use permanent fabric glue and run a thin bead of the glue along the areas where the stitching lines are to connect the fabric.
- Step 1: Attach the stars to the front of the pocket first and allow them to dry. If you want to enhance the edges of the stars, you can hand-stitch around the edges. Do this before adhering the pocket to the napkin.
- Step 2: Lay your napkin flat with a protective paper underneath where the pocket will be attached. (I use wax paper)
- Step 3: Turn the pocket upside down and apply glue to three sides along the edges where the stitching would have been.
- Carefully lay the glue side down onto the napkin, making sure it’s in the correct position. Press along the glue line from the outside to ensure it adheres, and allow it to dry.
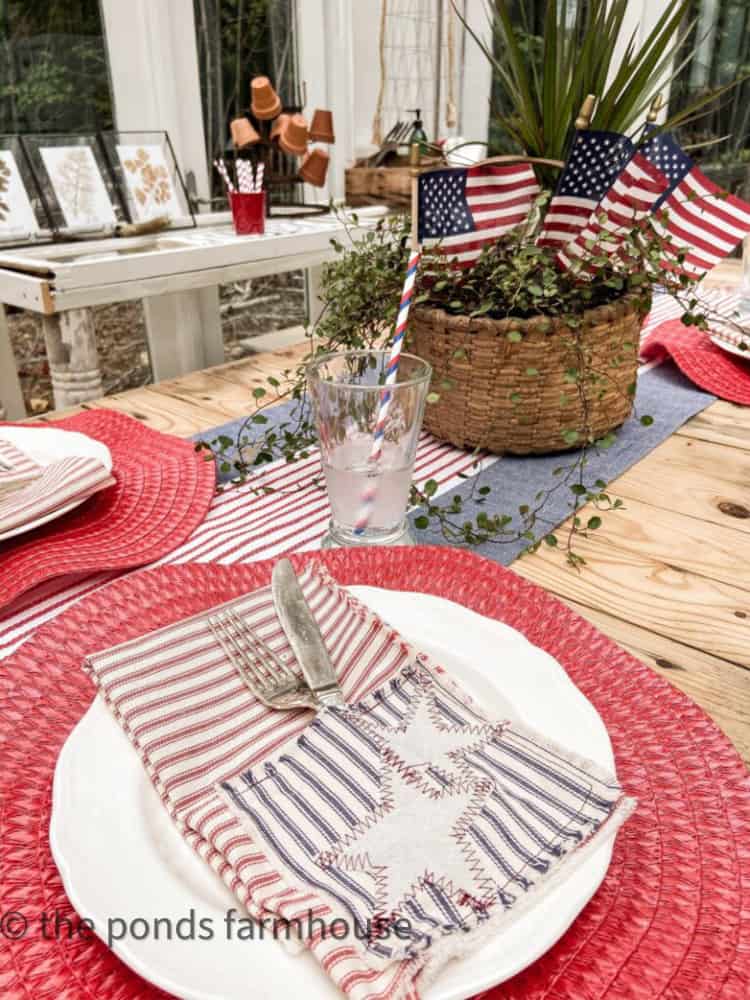
Add Silverware to your Handmade Patriotic Napkins
Slide the silverware into the cutlery pocket and place it on your table.
How do you like them?
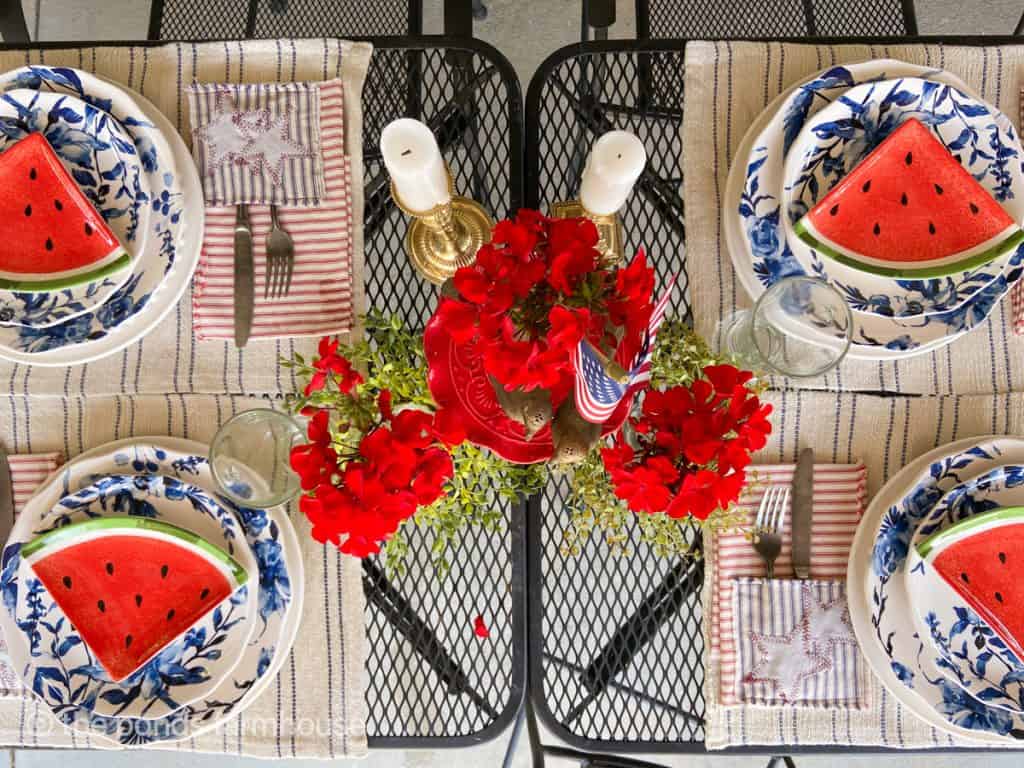
I’m using these Handmade DIY Ticking Patriotic Napkins on my 4th of July table and decided to leave the cutlery untied for this table setting.
Both options look great on the table setting.
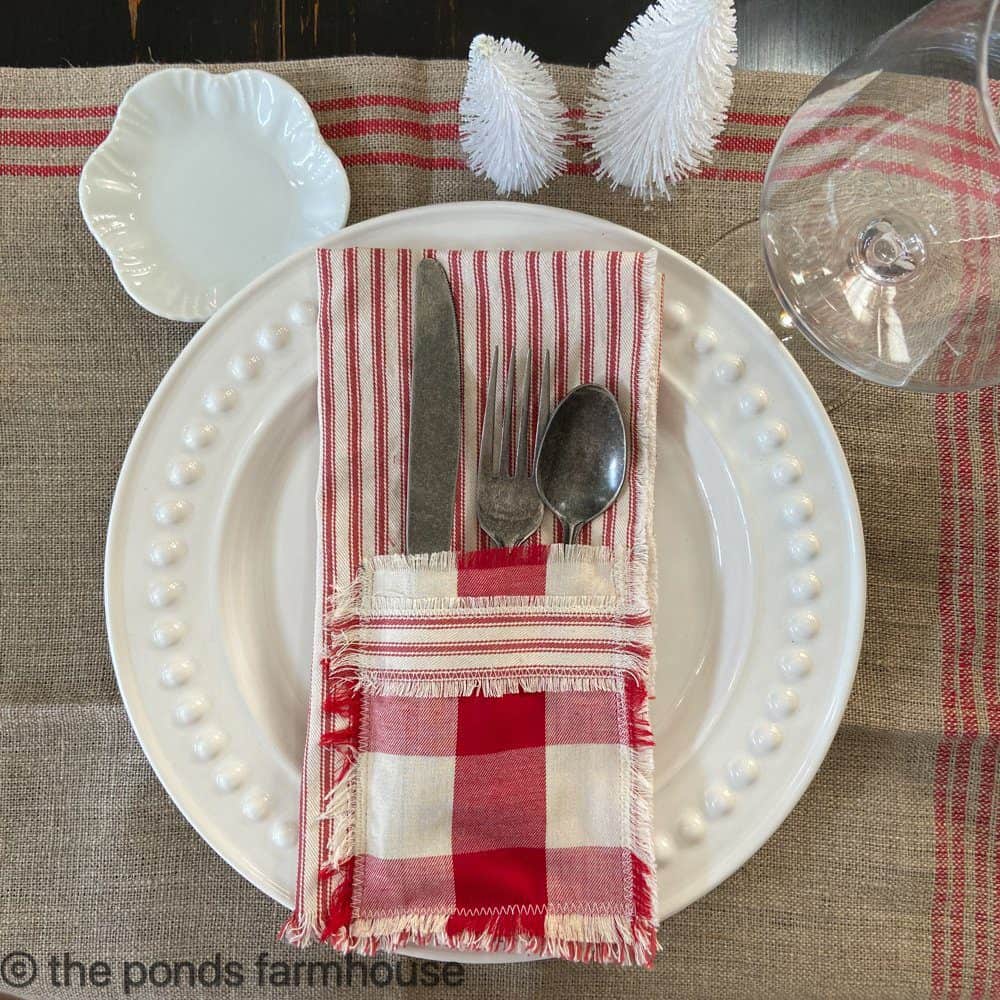
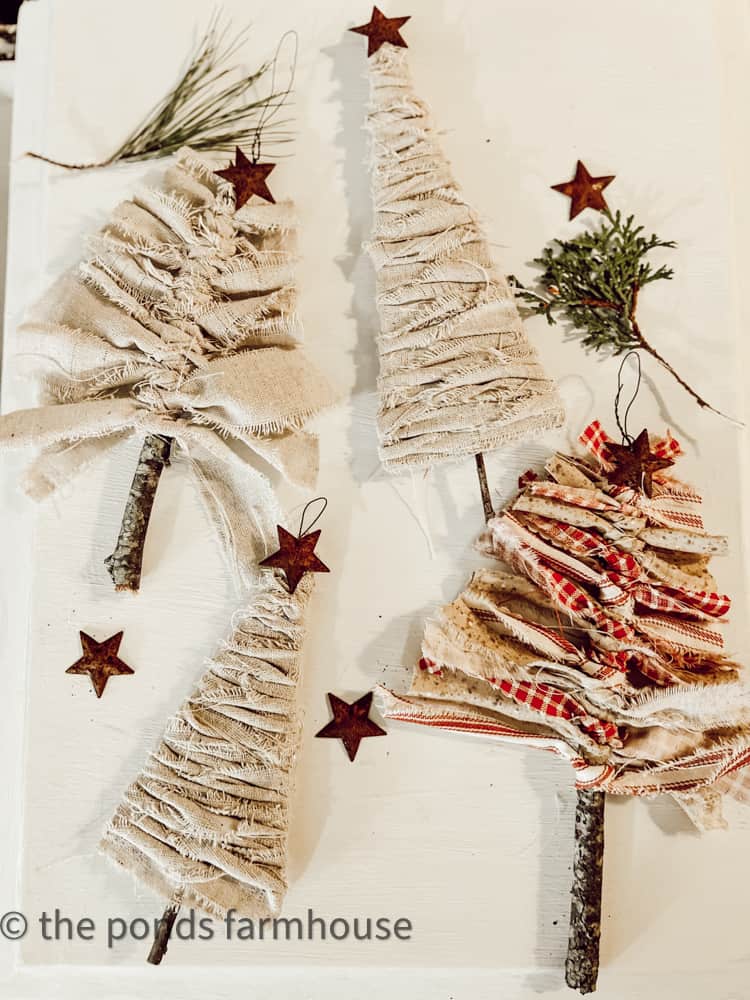
I like this design so much; I made these red and white cutlery pocket napkins for a Christmas Table Setting.
I hope you enjoyed this inexpensive tutorial.
Additional Tableware DIY Projects You Can Make
- How to Paint Flour Sack Napkins
- Hand-painted DIY Drop Cloth Table Runner
- DIY Burlap Napkin Rings Tutorial
- Pottery Barn Inspired Leaf Napkin Rings
- Easy Lemon & Lime Drop Cloth Table Runner
- DIY Ticking Cutlery Pocket Napkins
- Easy Christmas Table Runner in Red and White
Thank you so much for stopping by today. I can’t wait to share my next adventure with you.

Pin It To Remember It
Did you find some great ideas you’d like to save for future reference? Hover over the images you’d like to save and pin to your favorite Pinterest Boards when you see the PIN button.


Hi Rachel
These are the cutest* I absolutely love them. You amaze me with your ideas you come up with. They are so vintage looking also with the material you used. Love them so much Rachel. Another wonderful project
deezie
Deezie,
Thanks so much for your encouragement and sweet compliments.
Rachel
These are adorable! I love the ticking trend, this is perfect for Independence Day!
Pamela,
Thanks so much. I really appreciate your input.
Rachel
Hi Rachel, I’m visiting from . . . somewhere . . . ? LOL! I forget where I started, but your pretty napkins caught my eye. I, too, love ticking. I’m a little confused by the larger, two sided stars. Are they attached to the napkin, or just tied around the silverware with the jute? They are just darling! Thanks so much.
Marilyn,
I appreciate your comments and thanks for stopping by. I’m sorry about the confusion. I was originally going to tie the double sided stars around the flatware and I did for one picture. I felt it was almost to much with the stars on the pocket so I used the double sided stars on the garland I made for the chandelier. You can see that on my Patriotic Tablescape post here – https://www.thepondsfarmhouse.com/made-easy-patriotic-tablescape/
Again, Thanks so much. I appreciate this so much.
I LOVE your seasonal ideas! You are such an inspiration. I look forward to checking out your new ideas every week! Thank you!
Gale
You are so sweet. Thanks for making my day.
As always you amaze me with your talent and creativity, Rachel! Love the way these napkins came together and can’t wait to be a part of your fabulous hop. Big hugs, CoCo
CoCo,
I’m so glad you like these. Can’t wait for Tuesday.
These napkins are so adorable. Thanks for the step-by-step instructions. I LOVE ticking for summer and your tablescape with the watermelon plates are festive and so cute!!!
Debra,
I’m so glad you liked these napkins. Thanks so much.
This is soooo adorable, Rachel! Your tutorial is great. I want to make some for my house! I pinned it to my Patriotic board to share. Such a cute project!
xoxo
Jennifer,
I’m so glad you liked these. Thanks so much.
Why don’t I know how to sew?? I see adorable things like this and ask myself why…like I have a brand new sewing machine still in the box!! I really want to make those cute stars with the red stitching.
Jennifer,
Get that machine out of the box. It’s really not hard. Best of luck.
thanks for sharing Michele.
These are so darn cute! love them
Wendy
Thank you.