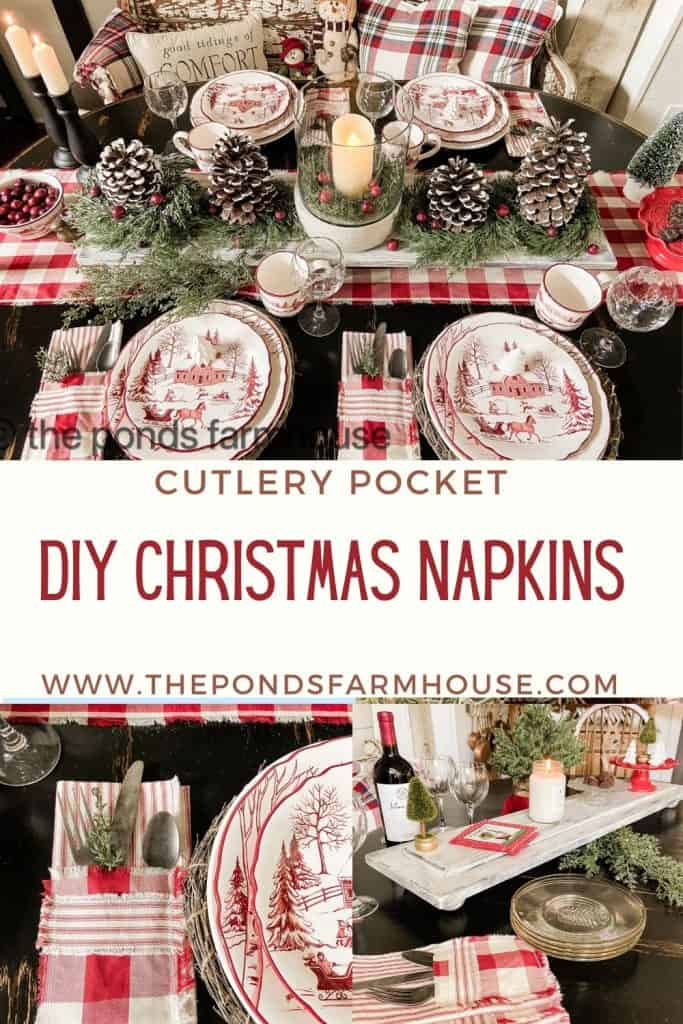
DIY Christmas Napkins with Cutlery Pocket
So here is a quick and easy DIY Christmas Napkins with Cutlery Pocket tutorial. These are perfect for the Christmas Holiday Season but can be easily adapted for any season.
Do y’all remember the patriotic napkins I made over the summer? I absolutely loved those napkins and wanted some similar ones for Christmas. So…….. here’s what I did.
If you don’t sew, no worries because I’ve included a no-sew tutorial as well.
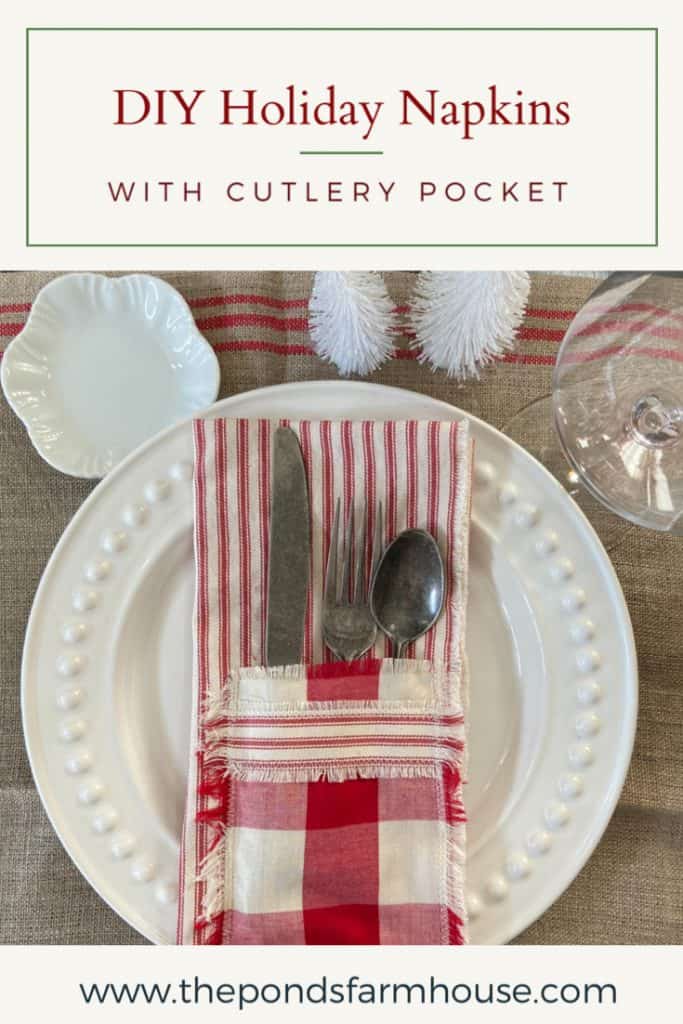
What Are Cutlery Pocket Napkins?
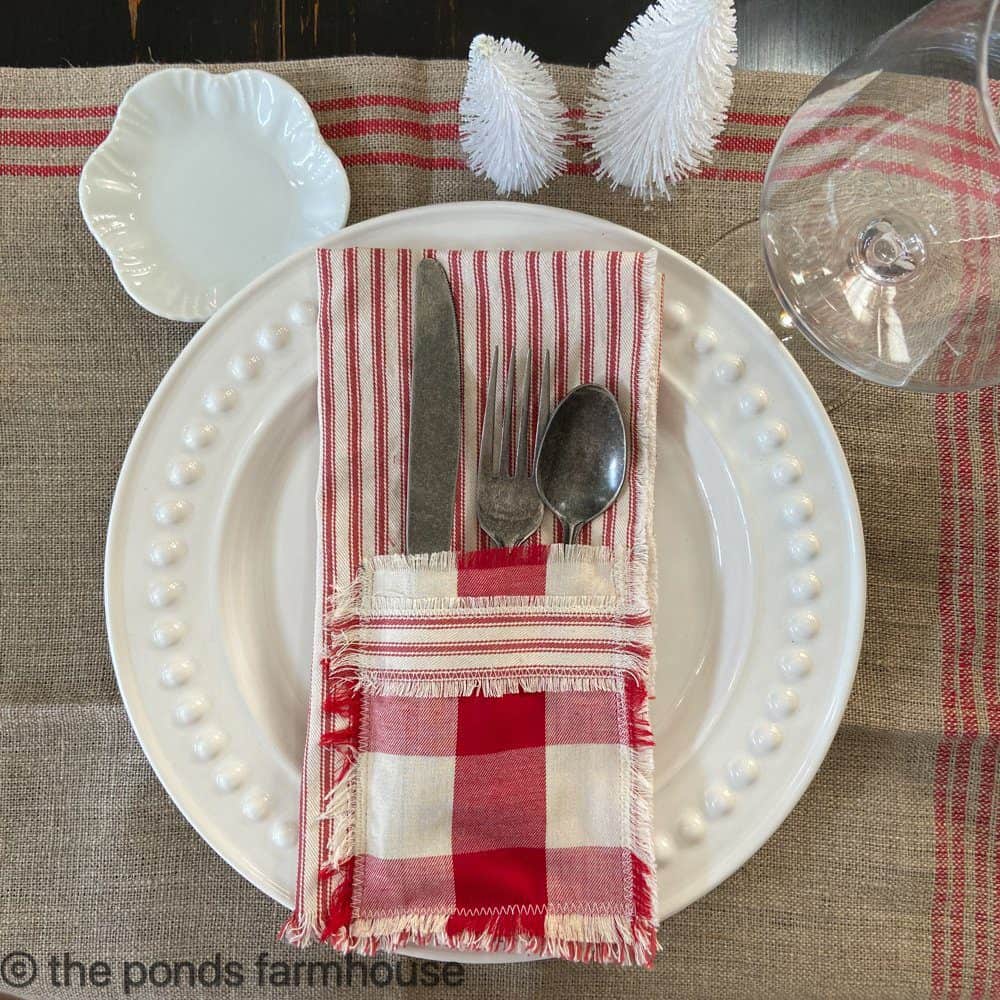
A cutlery pocket is a space to add your silverware to your table setting.
Therefore, a Cutlery Pocket Napkin is a napkin with a pocket attached. The pocket is on top when the napkin is folded, and the silverware slides right inside the pocket.
Easy DIY Christmas Napkins
First, I use ticking fabric for the napkin itself because the stripe is woven into the fabric, not printed. These are 100% cotton and are easy to care for. So begin by cutting your napkins from the ticking fabric measuring 18 x 18 inches.
Note: These will shrink after washing. If you prefer a larger napkin, please take that into account.
Also, Note: These are cute without the pocket and so easy to make. Just cut, wash & press!
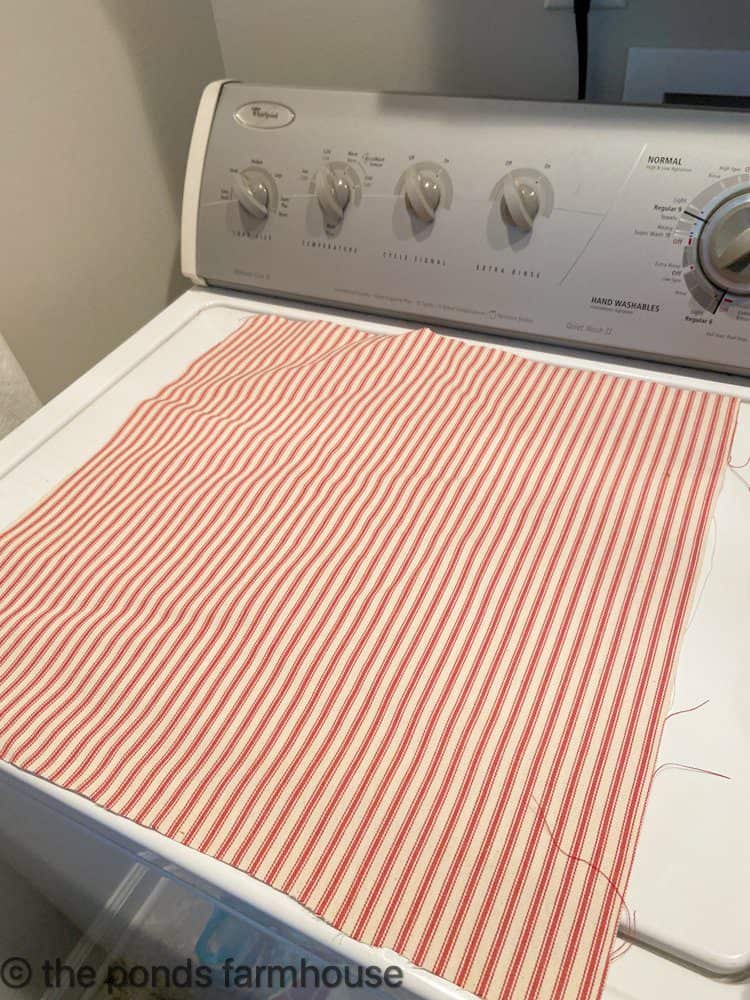
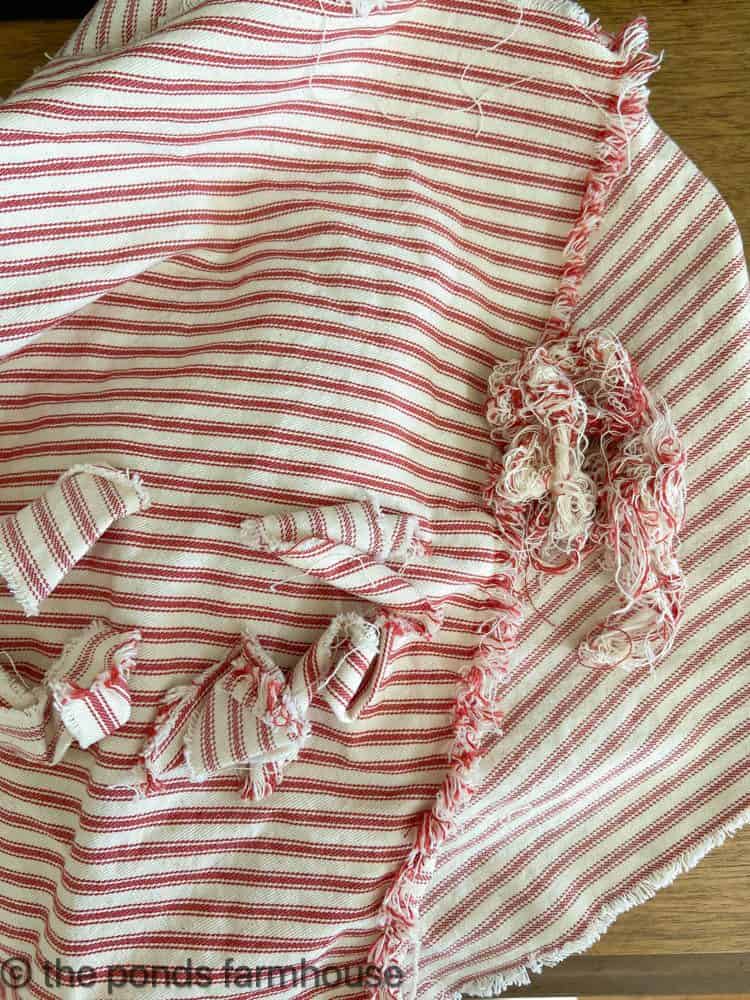
You will also want to cut your trim pieces for the pockets with the stripe running horizontally at 5 inches by 2 inches vertically. Wash and dry all the ticking fabrics. This is what they will look like when removed. Lol
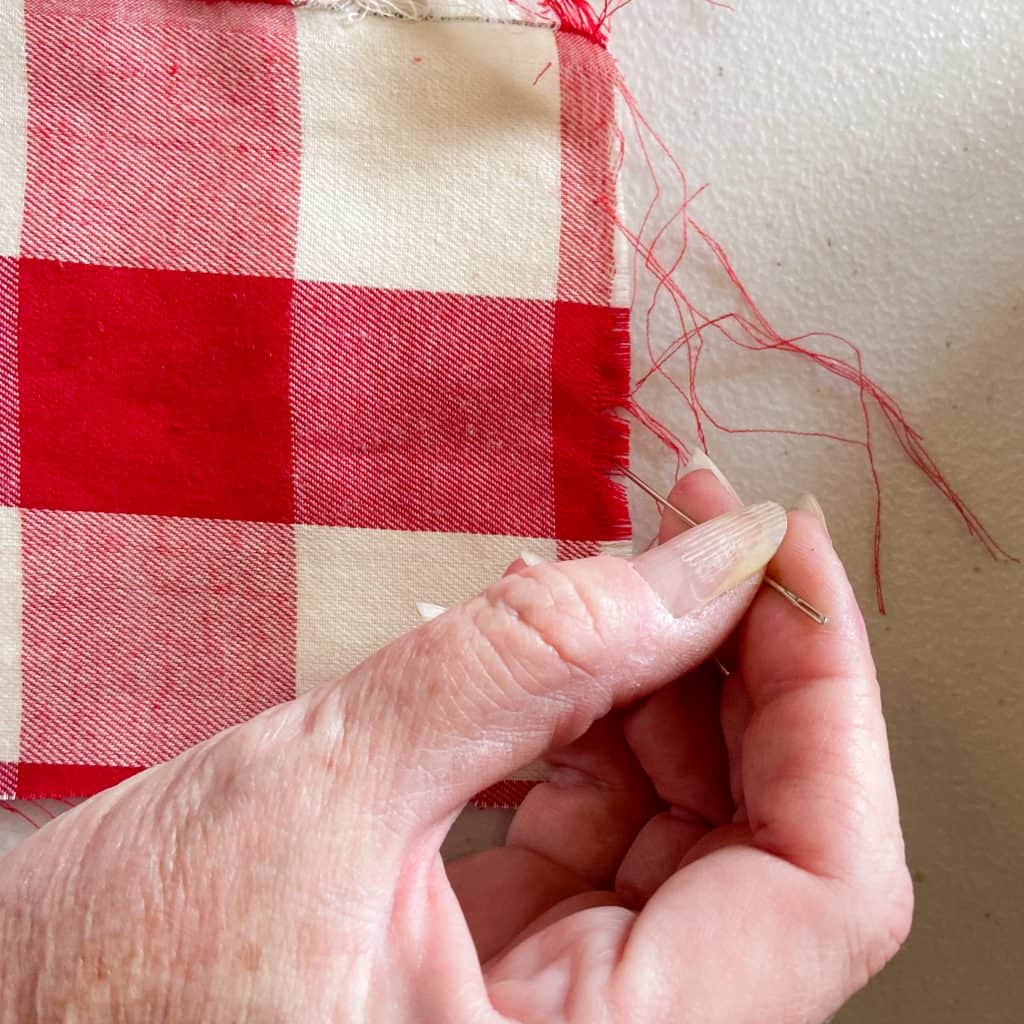
Pull or cut all the excess strings from the fabric, leaving you with frayed edges.
(Posts on The Ponds Farmhouse may contain affiliate links. As an Amazon Associate, I earn from qualifying purchases. See the full disclosure details here.)
Press the Ticking Fabric
Because the fabric will now roll around the edges and be very wrinkled, it is necessary to press the ticking fabric until everything is flat and smooth. I like to use a Cricut for pressing, but any hot iron will work.

Constrasting Fabric Cutlery Pocket
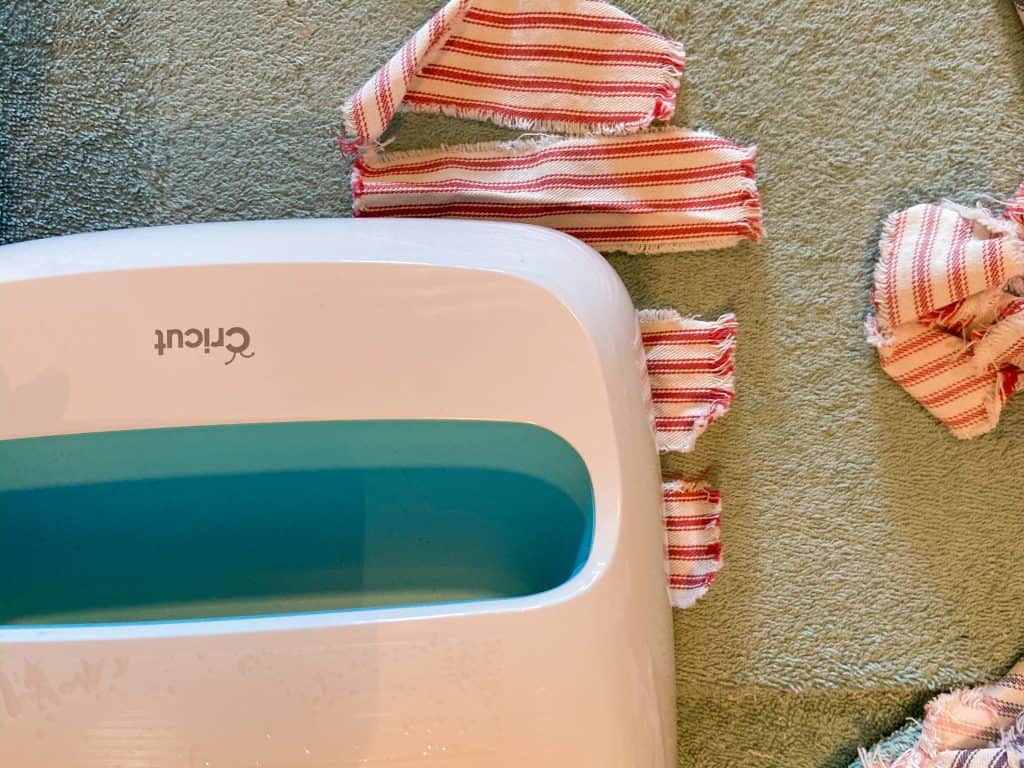
For this step, I choose a red and white buffalo print fabric for the cutlery pocket. Begin by cutting the contrasting fabric 7 x 5 inches. Then using a straight pin, begin to make a fringe around the edges by pulling the strings. Once you finish, your pocket should be approx—6 x 4 inches, not including the fringe.

Both of these fabrics were purchased at Hobby Lobby, and you can use a variety of combinations to match your holiday décor.
Sewing Method for Christmas Napkins
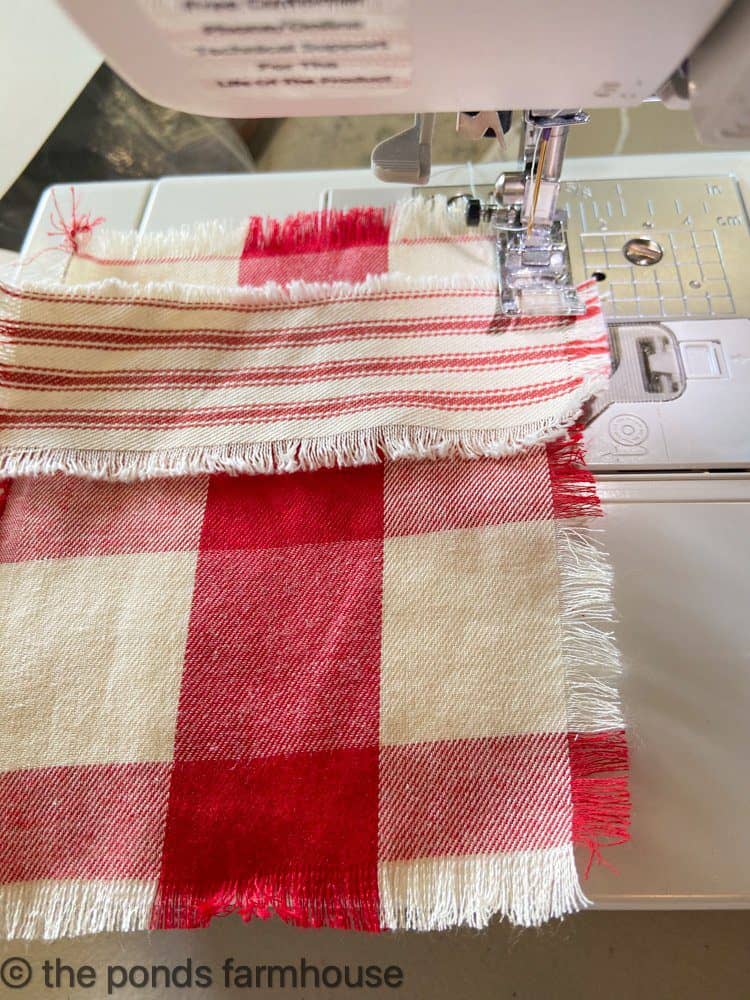
You will want to attach the trim to the contrasting fabric pocket before you attach the pocket to the Christmas napkin. Using your sewing machine, set on a close stitch zig-zag, and attach the trim to the pocket approximately 1/2 inch from the top. Stitch around the entire edge of the trim, just inside the frayed edges.
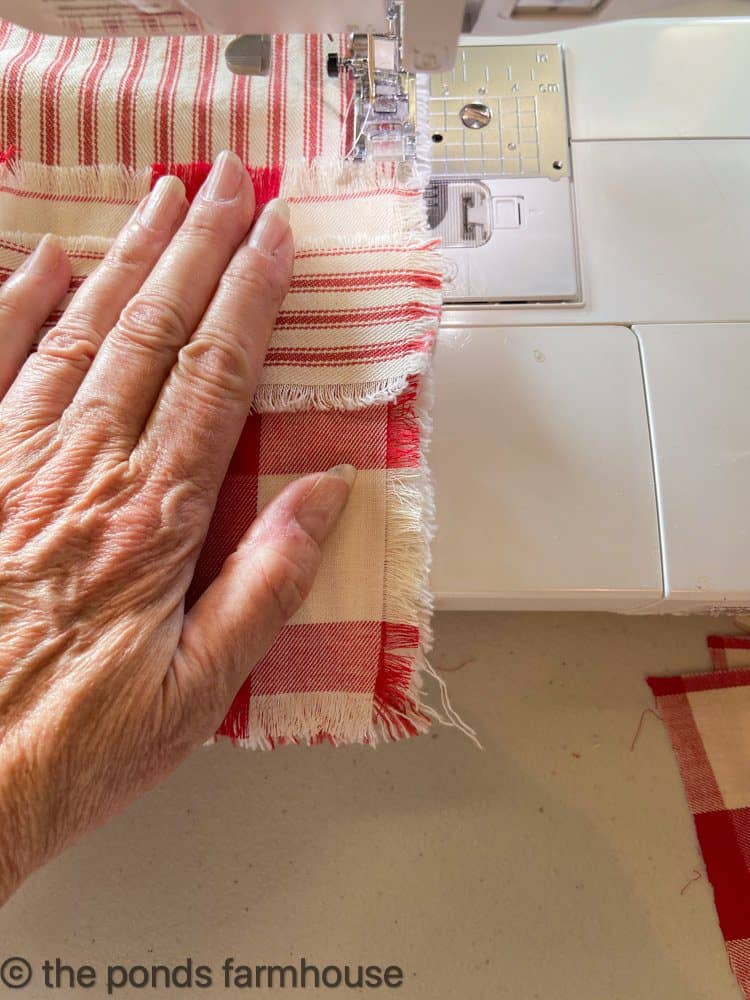
Then stitch the pocket to the lower right-hand corner of the napkin, leaving the top open to allow for the cutlery. Be sure that the stripes on the napkin are vertical and the stripe on the trim is horizontal.
Refer to the Patriotic Napkin Tutorial if you would like to see more examples of this method.
No Sew Method for DIY Christmas Napkins
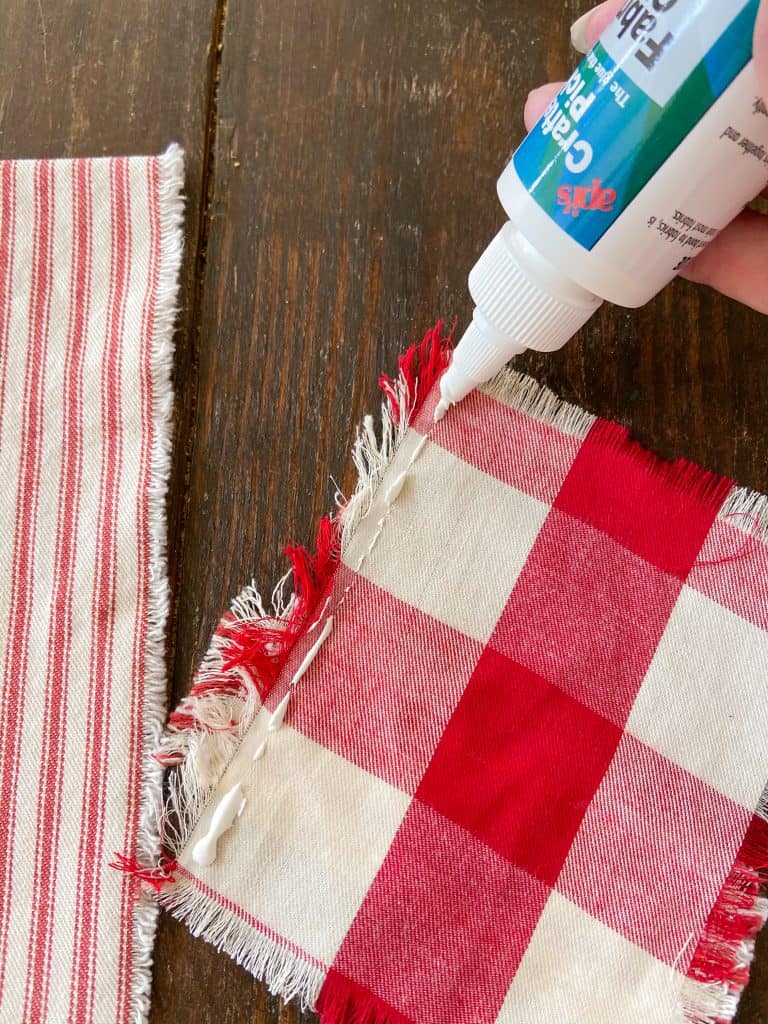
Using fabric glue will work great on this project if you don’t have a sewing machine or prefer a no-sew method.
Begin by attaching the trim to the pocket by applying a light bead of fabric glue along the back side of the fabric just inside the edge of the fringe.
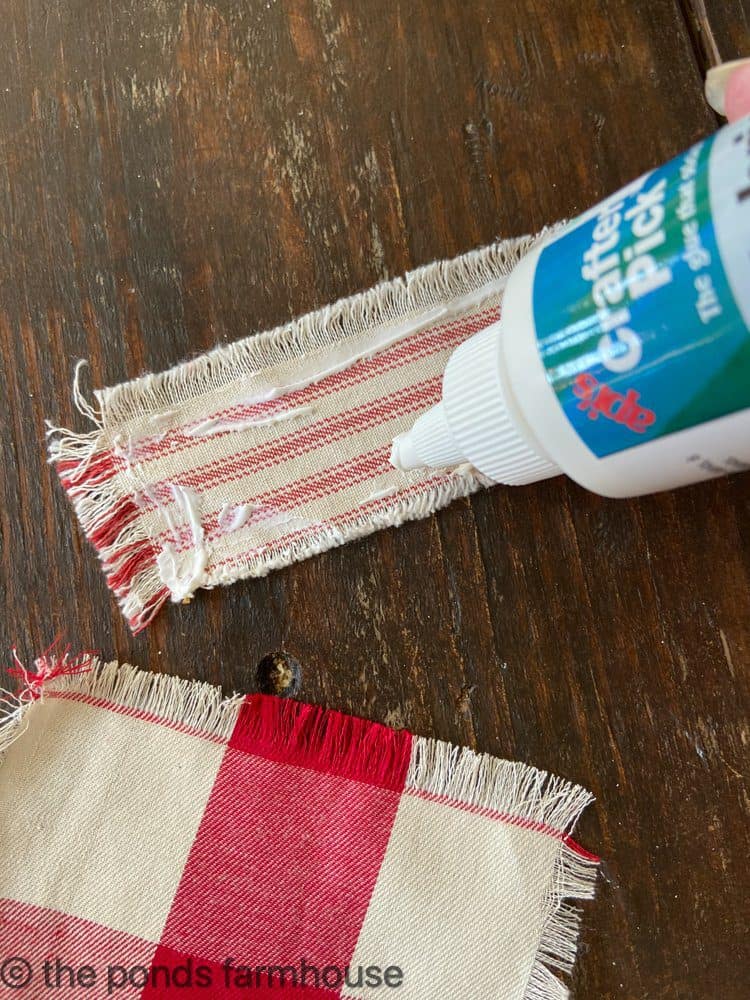
Once the trim is attached, approx. 1/2 inch from the top of the pocket, you can turn over the pocket and apply another bead of glue to all edges except the top edge.
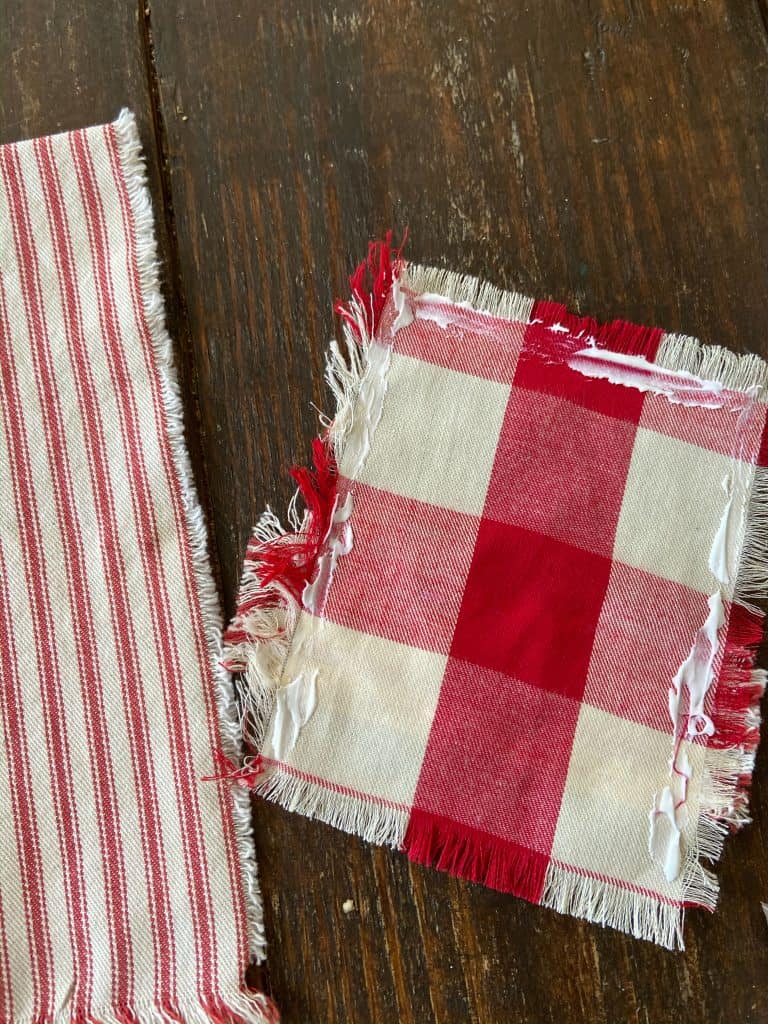
Attach the pocket to the lower right-hand corner of the napkin with the opening at the top. Follow the instructions on the fabric glue for drying time.
Once it is dry, you have finished your DIY Ticking Napkin with Cutlery Pocket.
Comparison of Both Methods
As you can see, there is very little difference in the appearance of the two methods. Both should be very durable. However, the napkin and the pocket edge may fray more with continued washing. I prefer a rustic worn look, and if more strings need to be removed, I give the napkin another haircut.
If you prefer a less rustic appearance, you can finish the edges of both the napkin and pocket by turning under the raw edges and stitching with either the sewing machine or the no-sew method.

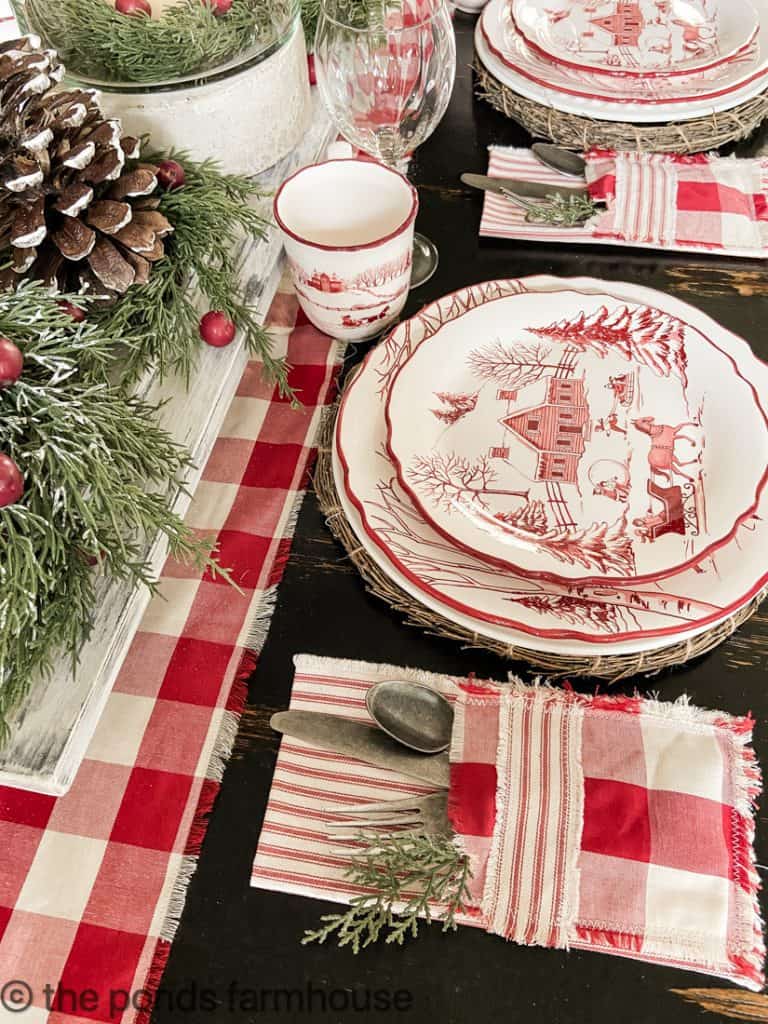
The Finished Ticking Napkin with cutlery Pocket
These will be perfect and so cute on the table for Christmas! You can see some examples below of The DIY Ticking Fabric Napkins styled in a couple of simple ways.
If you like using ticking fabric in your home décor, you may enjoy seeing this chair cushion in the deconstructed chair. Plus, don’t miss this fun table runner made using these tassels.

How To Make Napkins with Cutlery Pockets
Equipment
- Sewing Machine
- Iron or Press
Materials
- 4 – 18 x 18 Ticking Fabric 100% cotton
- 4 – contrasting fabric 7 x 5 inches
- 4 – 1 ” x 4″ Ticking Fabric for Trim
Instructions
- Begin by washing and drying the ticking fabric.
- Press the fabrics and remove all the loose strings leaving frayed edges.
- Attach the trim piece (with the stripes running Horizontally) to the contrasting fabric pocket before attaching to the napkin. Zig-zag stitch the trim piece to the pocket approx. 1/2 inch from the pocket top. Stitch around all edges of the trim piece.
- Stitch the pocket to the lower right-hand corner of the napkin, leaving the top edge open to allow for the cutlery.
- Be sure that the stripes on the napkin are vertical and the stripe on the trim piece is horizontal.
- Fold the napkin with the pocket on top.
- For the no-sew method, follow the same instructions but use permanent fabric glue instead of stitching with a sewing machine.
The table runner is perfect with the cutlery napkins, and the full tutorial is available here.
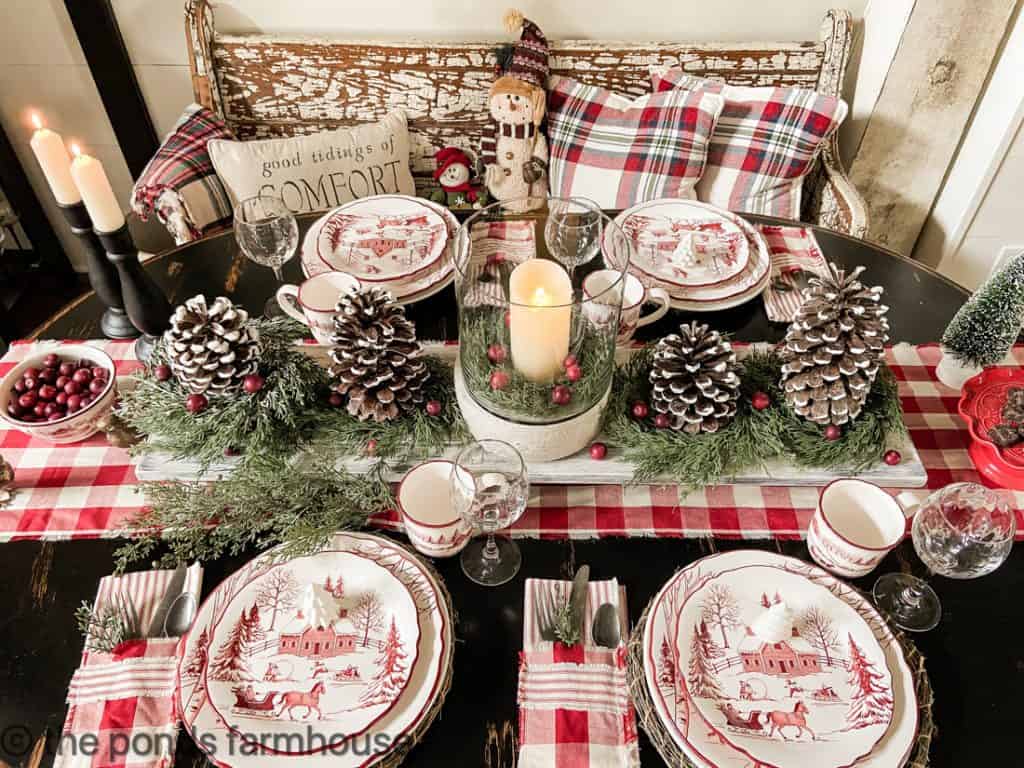
See Easy Tips For A Christmas Tablescape to see the full table details
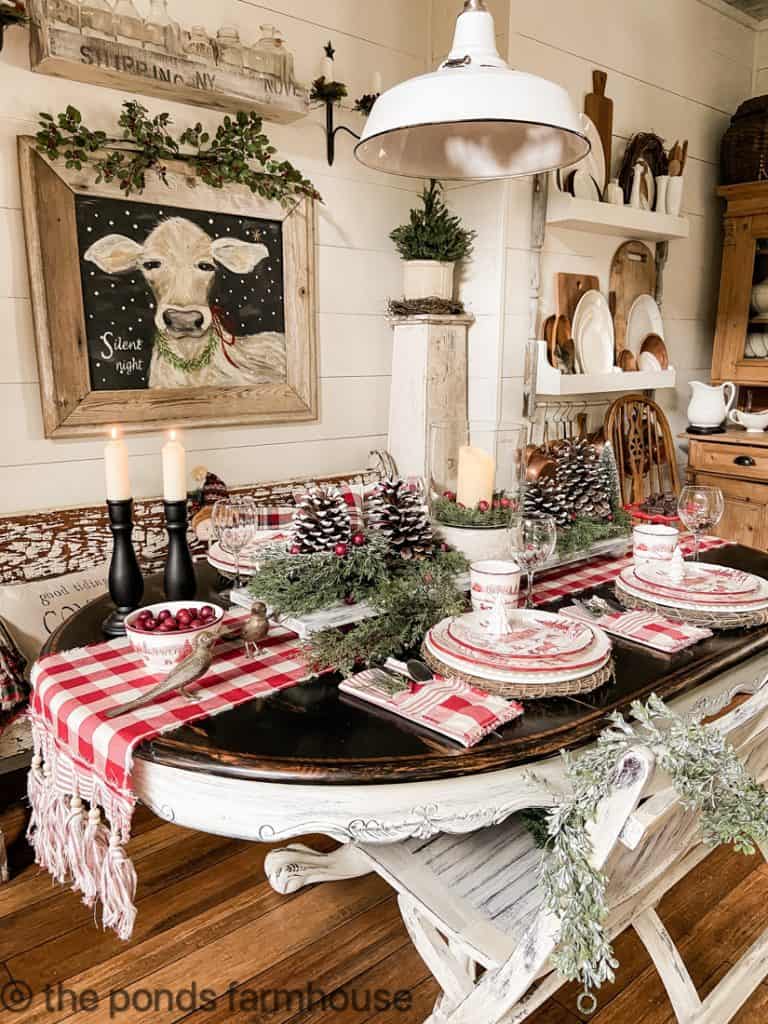
See these festive dishes here from Bico Ceramics.
You may also like to read Easy to Make Farmhouse Table Riser.
Sophie my Silent Night Print is available here.
Thanks so much for stopping by and I look forward to sharing my next adventures with you.

pin it to remember it


Adorable and pinned! Have a fun at the beach with the ladies!
Miche,
Thank you so much.
Rachel
Super cute idea Rachel! Love those fabrics together.
Cindy,
I really appreciate this.
Rachel
I love this idea too Rachel! What a fun way to decorate your table and hold cutlery.
Stacy,
I’m so glad you like them. Thanks for stopping by.
Rachel
This is just beautiful! Ticking stripe is one of my favorite things, and I love the cutlery pocket! If I had the room to store Christmas dishes, the Santa pattern would be my pick!
Danielle,
Thank you so much. I’m glad you like them.
Rachel
Oh my gosh, I love these!!
Jennifer, I really appreciate this.
Rachel