Easy DIY Air Dry Clay Christmas Ornaments
Looking for unique ways to make Christmas Ornaments? Check out this Air Dry Clay Ornament Tutorial. Clay Christmas Ornaments DIY is a great way to create unique, one-of-a-kind ornaments for your tree. Get the whole family involved and see who can create the best ornaments. Gather fun supplies such as greenery, stamps, cookie cutters, and other household items to press into the clay. Let’s get started.
Clay Christmas Ornaments DIY
Clay Christmas Ornaments DIY is fun for the whole family and is very kid-friendly as well as budget-friendly.
You can use a variety of supplies around your home to create the ornaments and keep the cost down.
(Posts on The Ponds Farmhouse may contain affiliate links. As an Amazon Associate, I earn from qualifying purchases. See the full disclosure details here.)
Supplies for Air Dry Clay Ornaments
Here are a few things that I used to make my ornaments. Let your own creativity soar when choosing your supplies. Click items to shop.
- Air Dry Clay
- Biscuit Cutter or Small Glass
- Cutting Sheets
- Cookie Cutters
- Greenery from your landscape – Leaves, pine, cedar, etc.
- Wooden Christmas cutouts
- Alphabet Letter stamps
- Christmas Stamps
- Water
- Dark Wax (optional)
- Ribbon – Copper Satin Ribbon
- Spray Paint Metallic Warm Gold and Hammered Copper
- Rolling pin
- Drying rack

How To Make Air-Dry Clay Ornaments
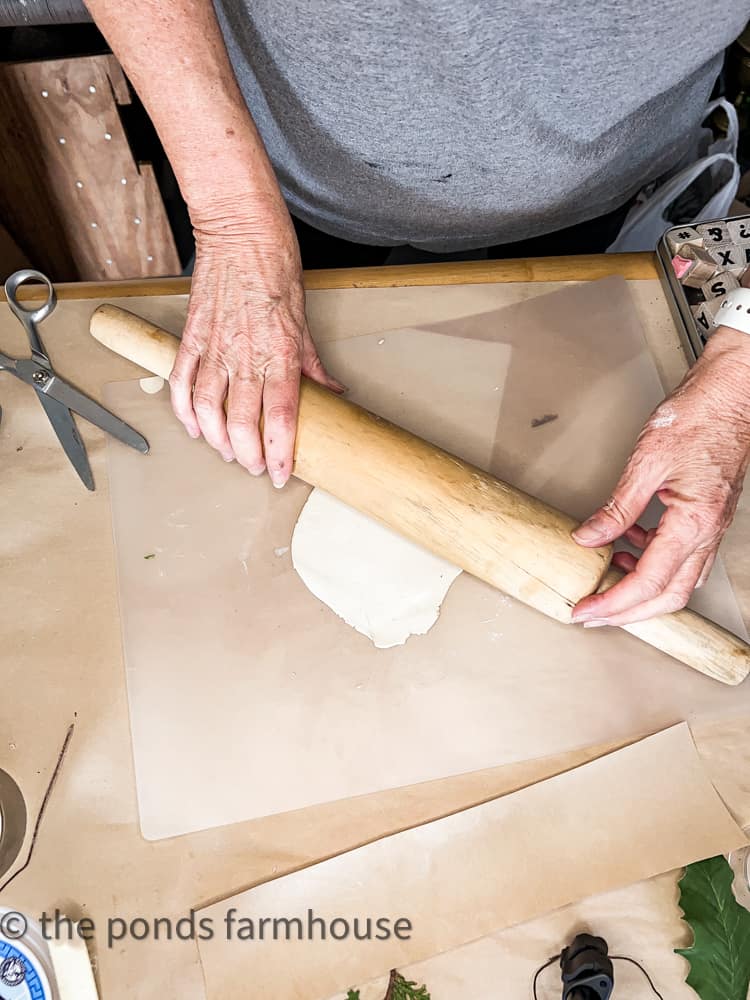
Begin by preparing your table surface. I like thin, flexible cutting sheets to roll the clay onto.
Prepare Clay
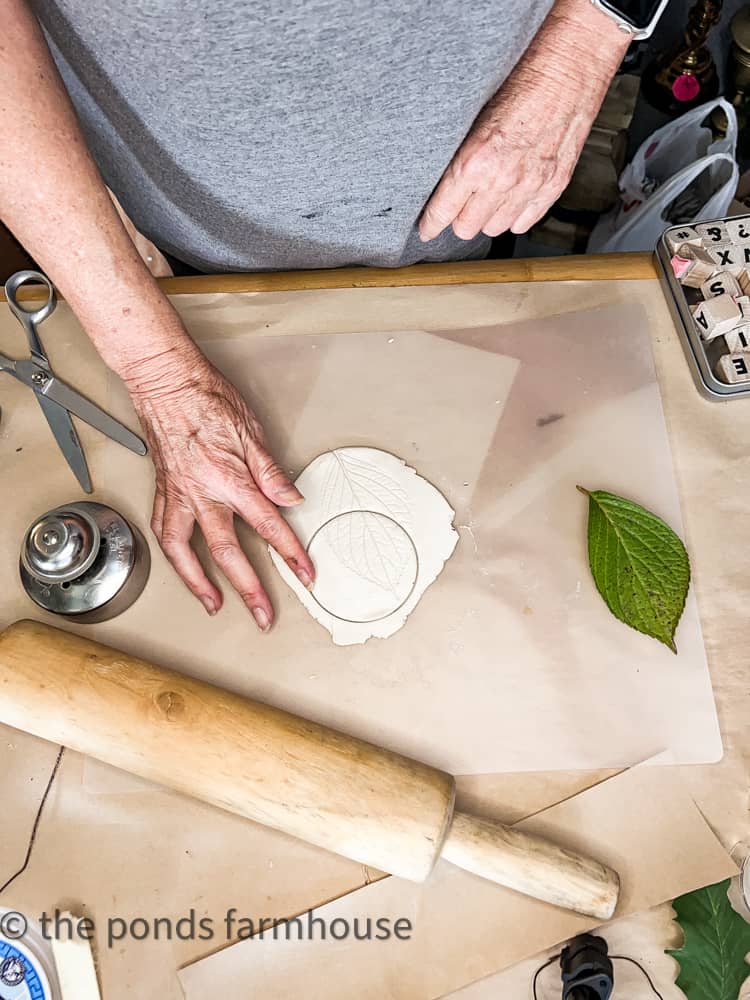
Add a small amount of clay rolled into a ball to the cutting sheet. Use a rolling pin or sizeable smooth glass to roll the clay until it’s approx—1/4 inch thick.
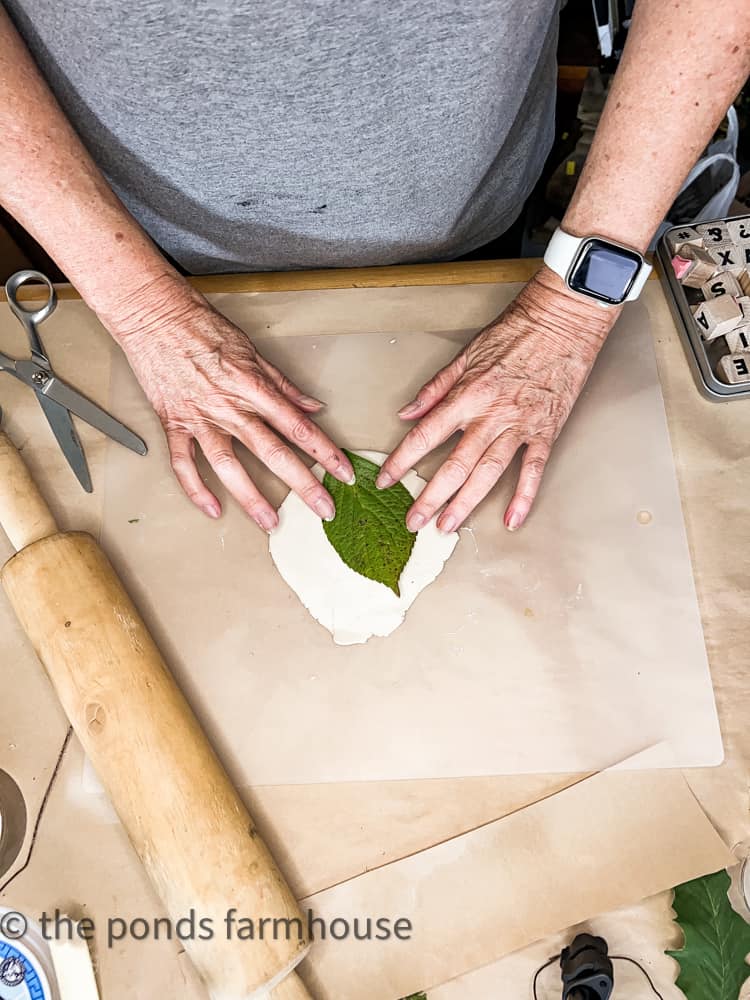
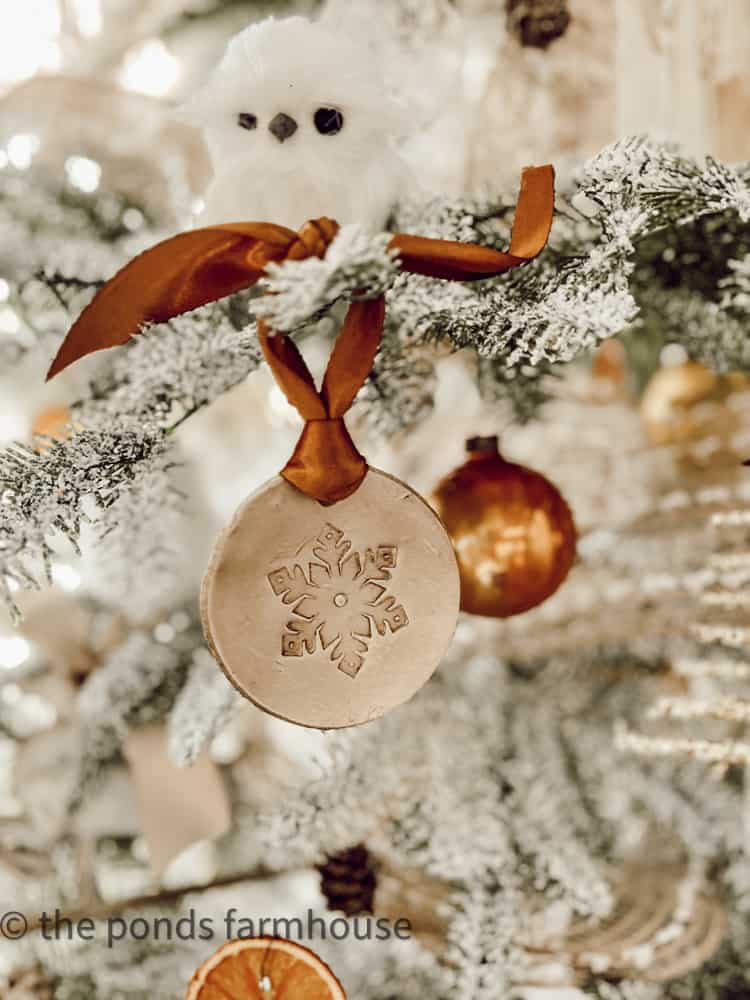
Add Design to Clay
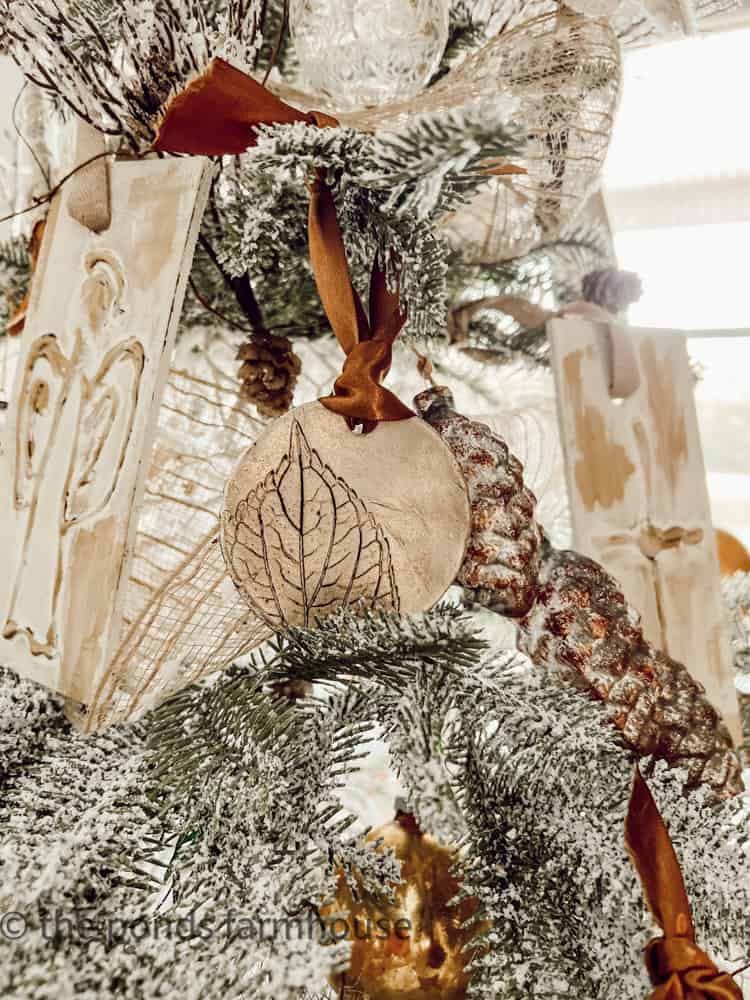
Next, add a design to your clay. Here I’ve used an evergreen leaf from my yard.
Press the leaf or other item into the clay and use your fingers to press firmly. Make sure you don’t press deeply to avoid pushing through the clay.
Now you can place the biscuit cutter over the design and cut the clay in the area you prefer.
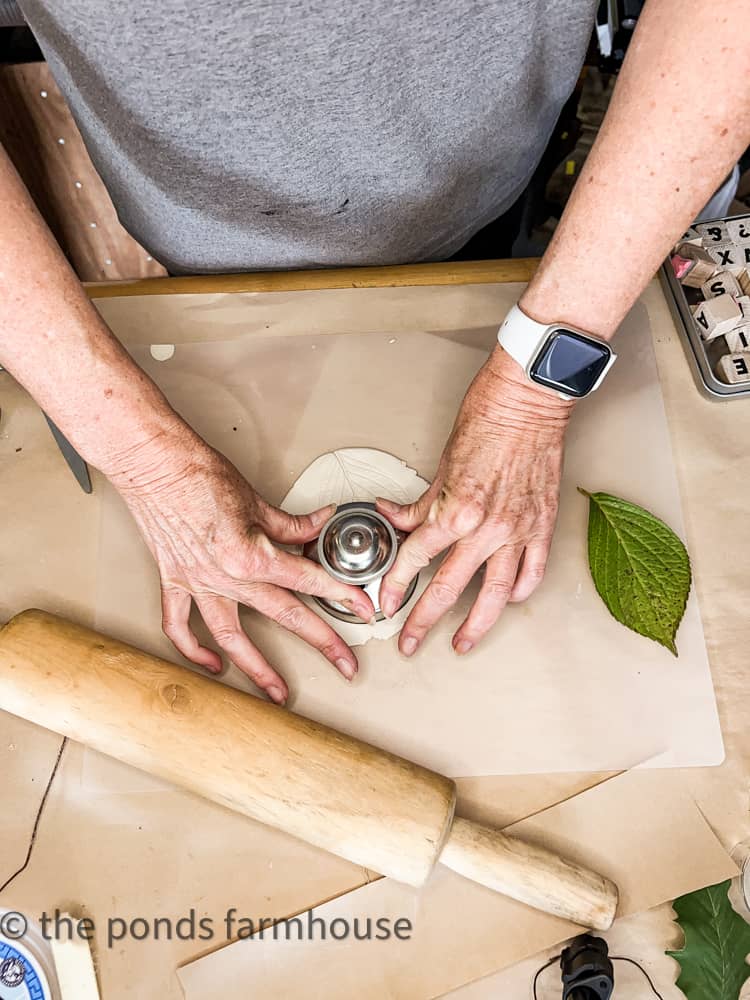
I only allowed the design to show on 1/2 of the ornament.
Make an ornament hanger
Next, use a straw to punch a hole in the clay for the ornament hanger.
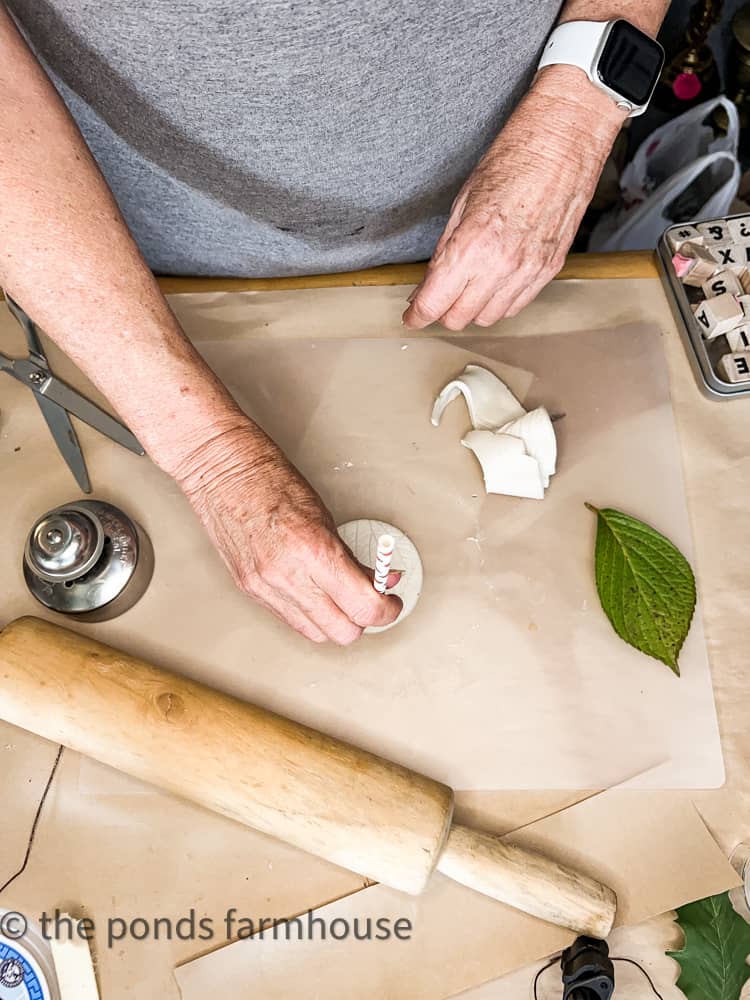
Finally, dampen your fingers and rub around the edges to smooth any uneven spots on the ornament.
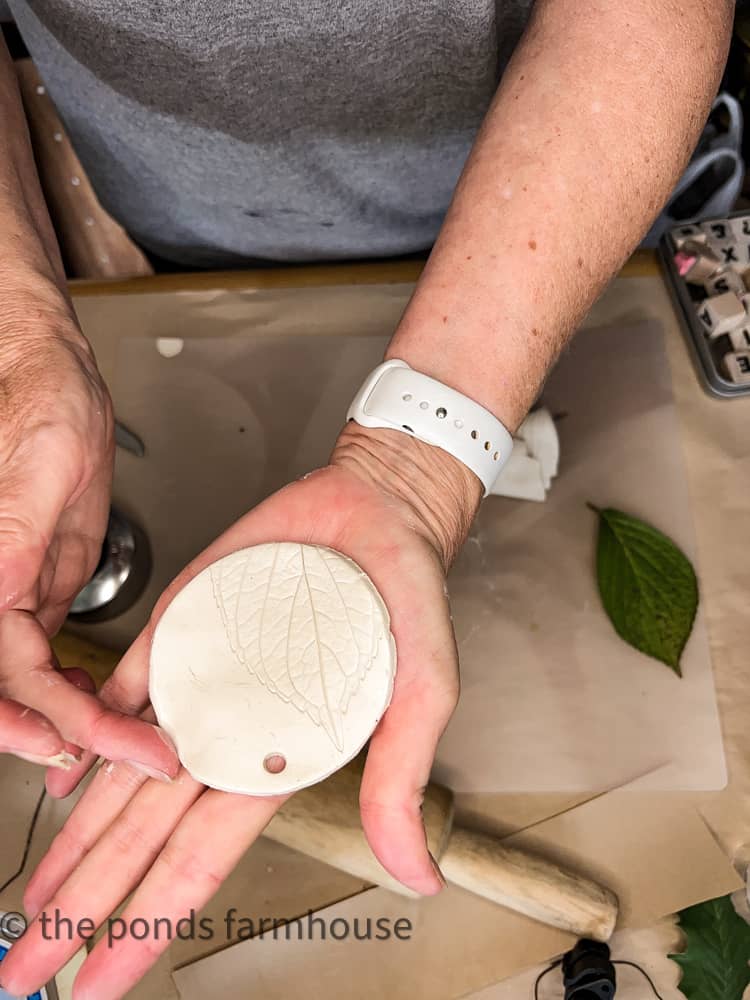
How Long Do You Allow Air-Dry Clay to Dry?
Now you can place your ornaments on a drying rack lined with wax paper to speed their drying.
The clay Christmas Ornaments DIY will take a minimum of 24 hours for the ornaments to harden. You may want to wait 48-72 hours to ensure they will not break.
The hanger area is the most fragile, and I did break one of mine while adding the ribbon.
How To Finish Ornaments
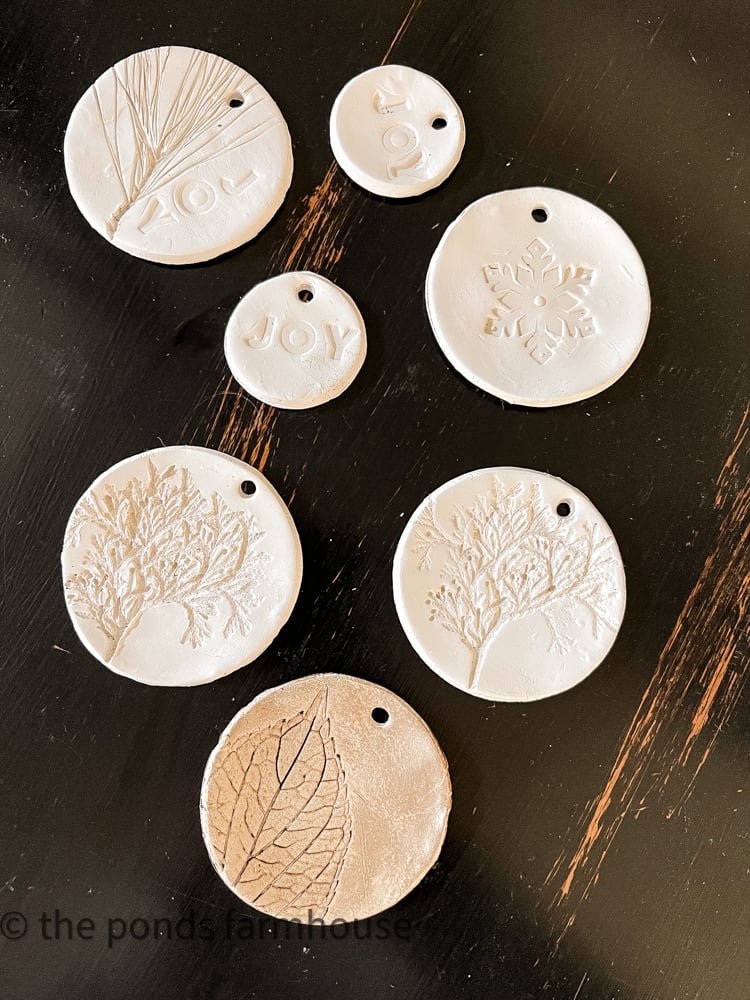
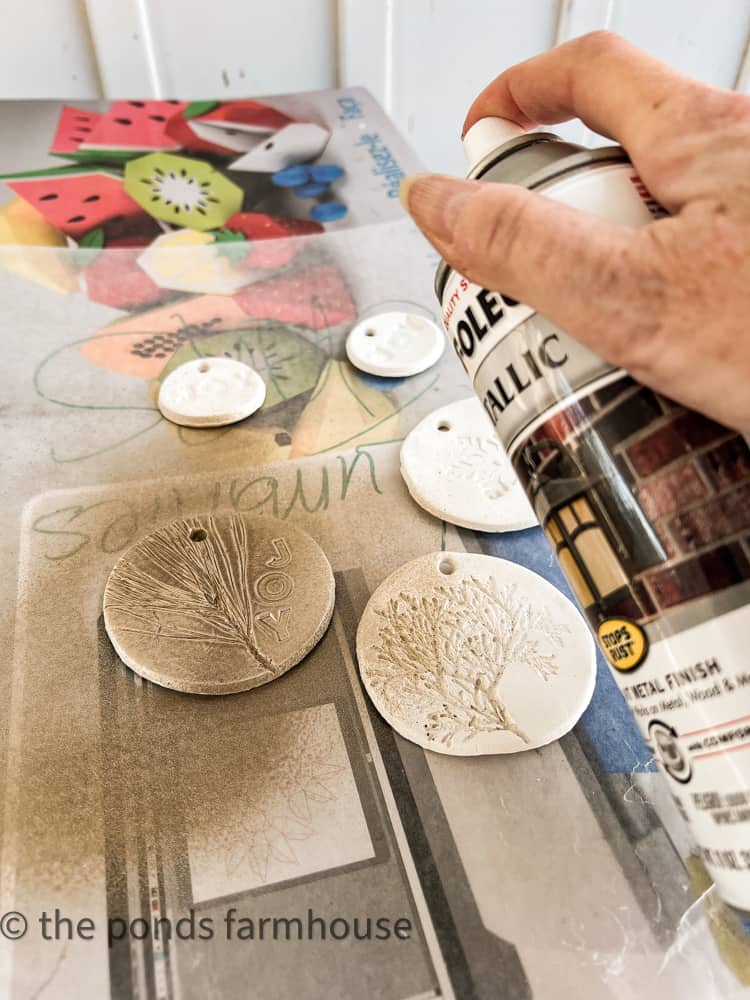
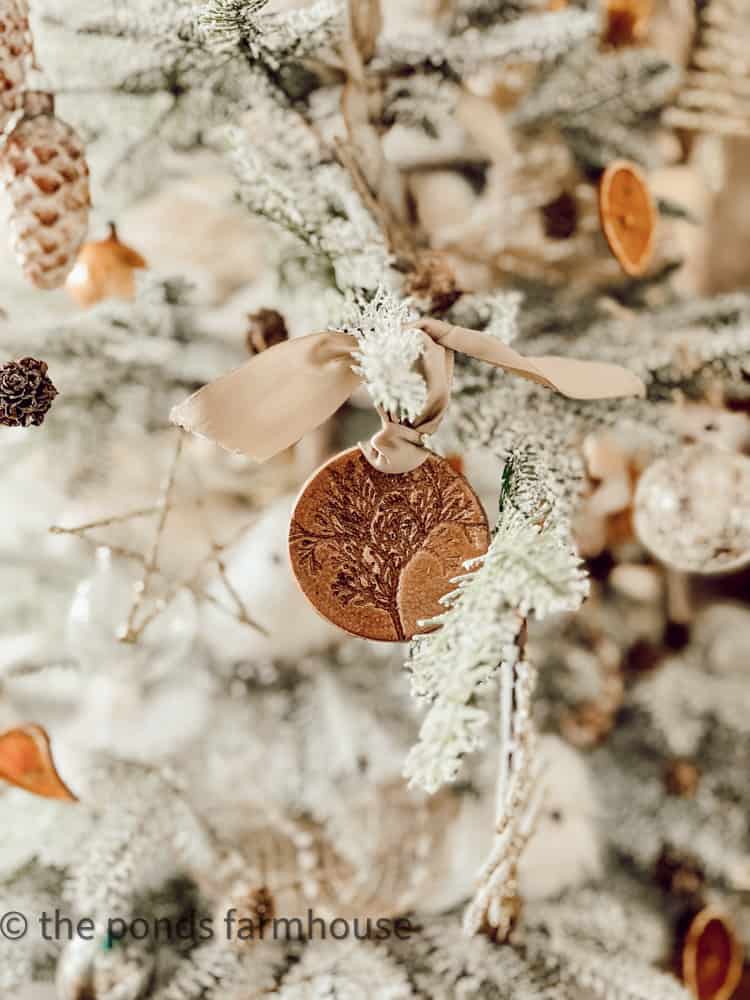
Now it’s time to finish the air-dry clay ornament. You may choose to paint the ornaments or leave them natural.
For this clay Christmas Ornaments DIY, I sprayed mine with metallic gold and copper paint.
To Add Wax or Not?
After the paint is dry, you may want to add dark wax to the ornaments.
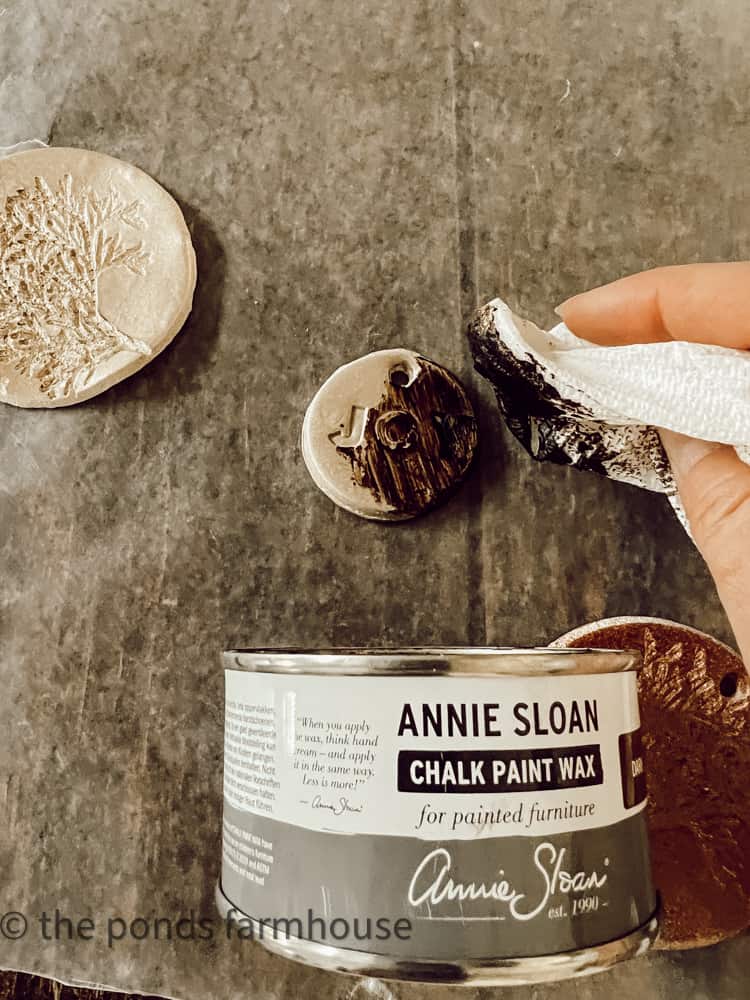
This is an optional step, and you can see the difference below. The addition of the wax helps to enhance the design stamped on the ornament.

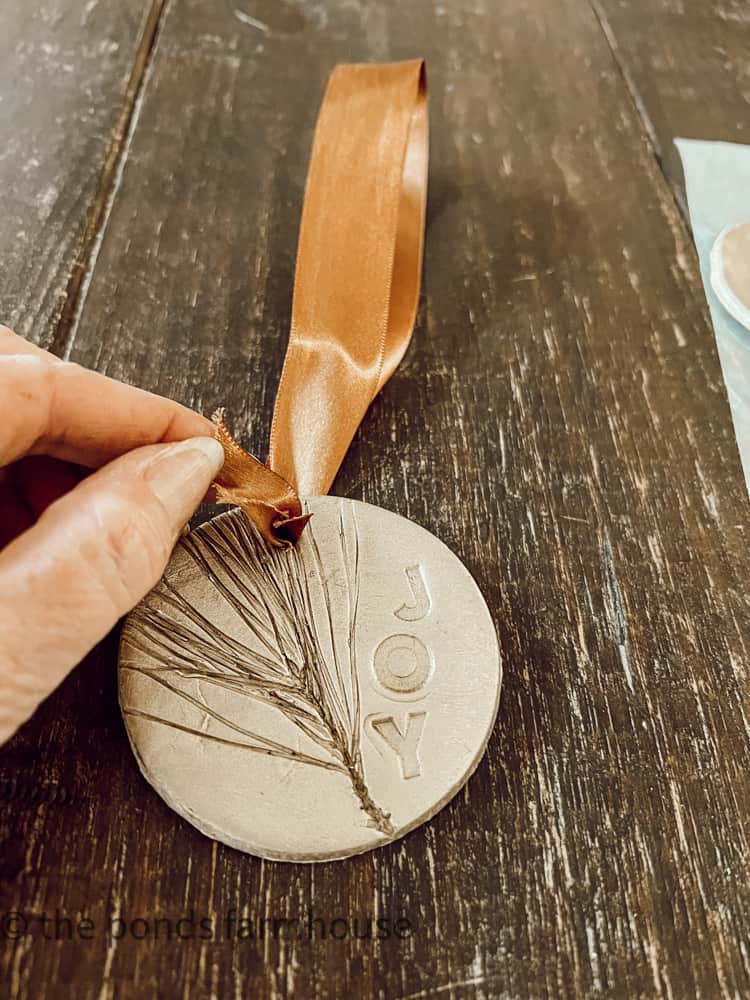
Add Ribbon to Air Dry Clay Ornament
To add a ribbon to the air-dry clay ornament, begin by cutting a length of ribbon approximately. 10 inches long.
Gather both ends of the ribbon together and fold to push through the backside of the ornament hanger hole.
Gently pull the ribbon through the hole and run the ends back through the ribbon loop. Gently pull to tighten.
Note: Aggressively pulling the ribbon through the hole may cause the clay to break. I lost one ornament because of this.
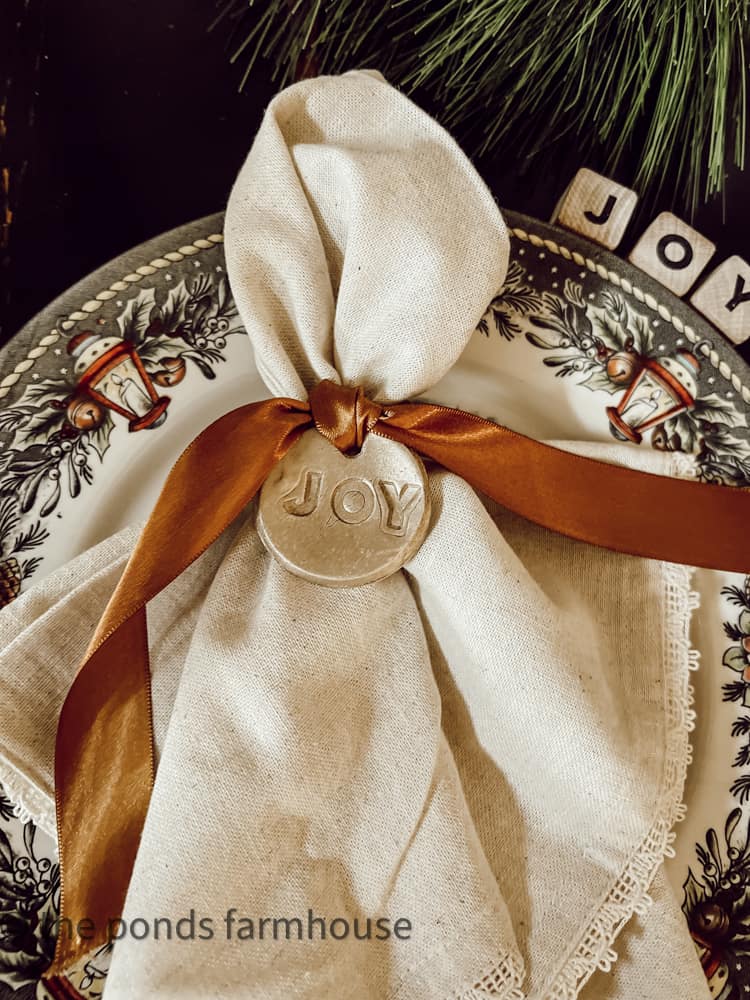
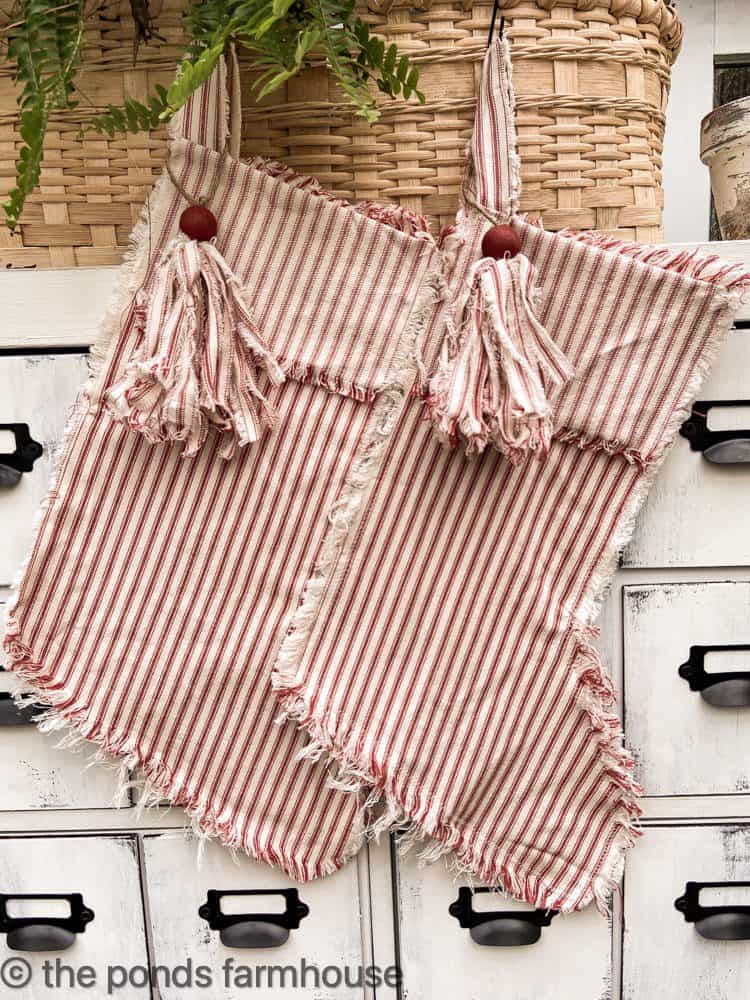
Napkin Ring Charm
In addition to the ornaments, I made some napkin charms.
These are just smaller versions of the ornaments, but I love how easy they are to make. This idea can be adapted for any season by changing the words.
You may also remember these Pottery Barn-style Leaf Napkin Rings I made for fall from clay.
The ornaments look great with the other sustainable and cheap Christmas tree decorations.
You may also like to see these Easy Christmas Tree Ornaments made with hot glue and these Eco-friendly foraged DIY Ornaments for money-saving tips on Christmas Tree decorating.
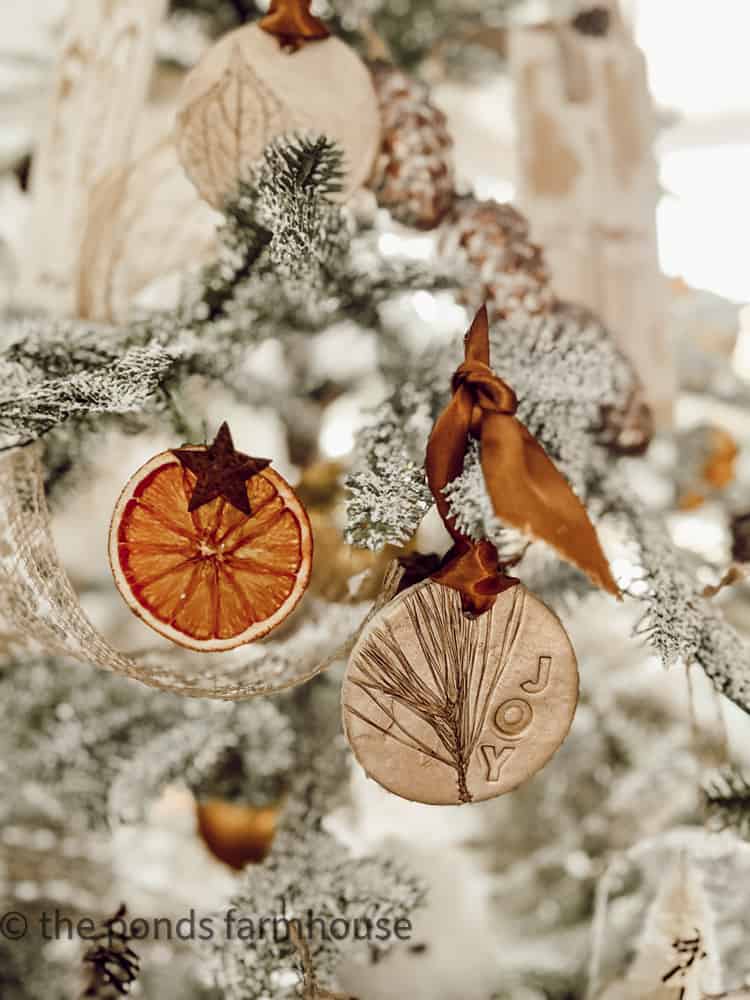
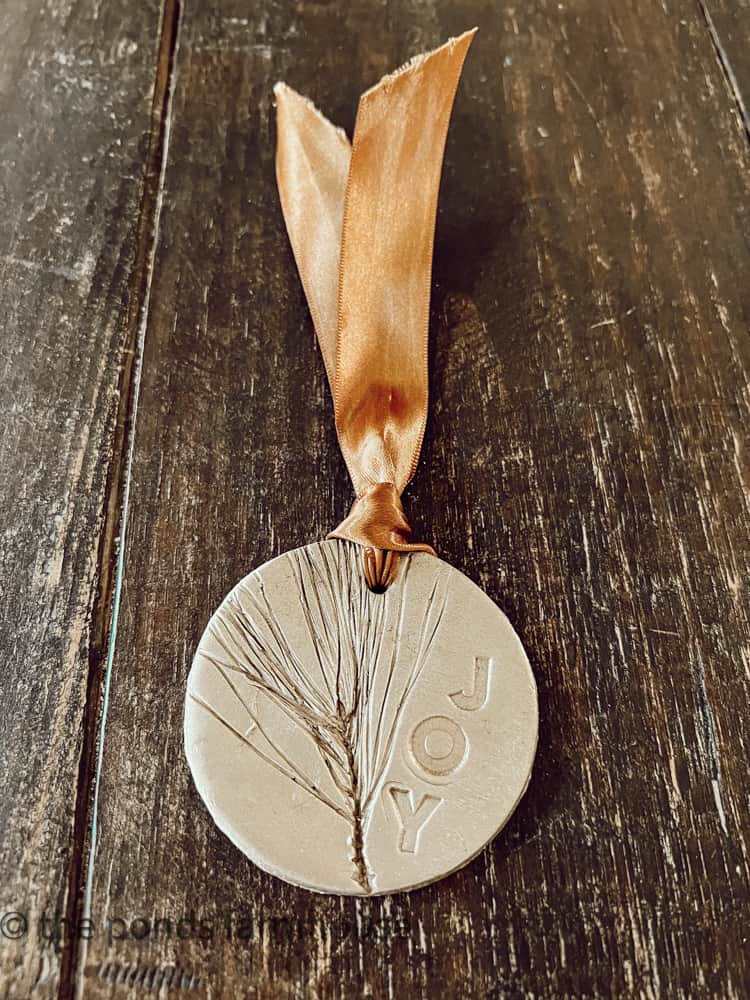
I added both gold and copper DIY clay Christmas ornaments to the tree.
However, I like the warm gold ornaments with the copper ribbons best.

Easy DIY Air Dry Clay Christmas Ornaments
Equipment
- biscuit cutter
- foraged leaves, stems, etc.
- alphabet stamps
- Cookie cutters
- Other optional items for stamping such as leaves, stamps, wooden cutouts, etc.
Materials
- Air Dry Clay
- Spray Paint
- Dark Wax Optional
- Ribbon
Instructions
- Roll out the clay on a cutting sheet until approx. 1/4 inch thick
- Press a design into the clay
- cut the desired design area with the biscuit cutter
- use a straw to make a hole for the hanger
- use dampened fingertips to smooth edges or ruff spots
- place on a drying rack
- Allow drying a min. of 24 hours
- Spray paint with the desired color
- Allow drying
- Use a dark watch to enhance the design (optional)
- Add ribbon to hang
Thanks so much for stopping by. I look forward to sharing my next adventure with you.

Pin It To Remember It
Did you find some great ideas you’d like to save for future reference? Hover over the images you’d like to save and pin to your favorite Pinterest Boards when you see the PIN button.


These are darling Rachel and look so great with the dried orange oranaments.
Wendy,
Thanks so much. I appreciate your comments.
Just pinned these, Rachel, they are so beautiful! I love how you added the metallic spray and aged them with the dark wax. They’re fabulous! Hugs, CoCo
CoCo,
You are so kind. Thanks so much for stopping by.
I just love these and they are definitely on my list to try and make! What a fun project with multiple uses! Merry Christmas, Rachel!😘
Kim,
Thanks so much.
I love these so much! Did you use anything under the clay to help it not stick? I’m wanting to decorate both sides. Curious how you kept the back smooth without messing g up the front after decorating.
Cyrena,
I only decorated the front side and left the backside smooth. I feel you can decorate both sides but will need to lay the decorated side on a very smooth surface covered with wax paper and be gentle when adding design on the back side. If you press to hard, it will damage the front side. I hope it works out. Thank you for stopping by.