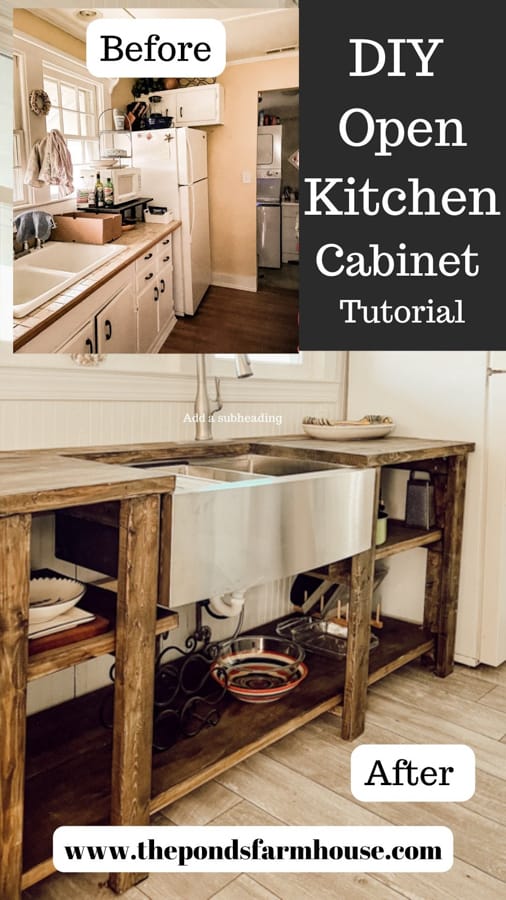
DIY Budget Open Kitchen Cabinets: Build Your Own In A Weekend
Are you looking for a way to update your kitchen with budget-friendly ideas? If so, consider building your own open kitchen cabinets with no doors. This rustic DIY open kitchen cabinet plan will add storage space and style to your kitchen, and you can make it over the weekend.
Do you have a small kitchen? A cabinet with no doors will make the space appear larger, and everything is within easy reach.
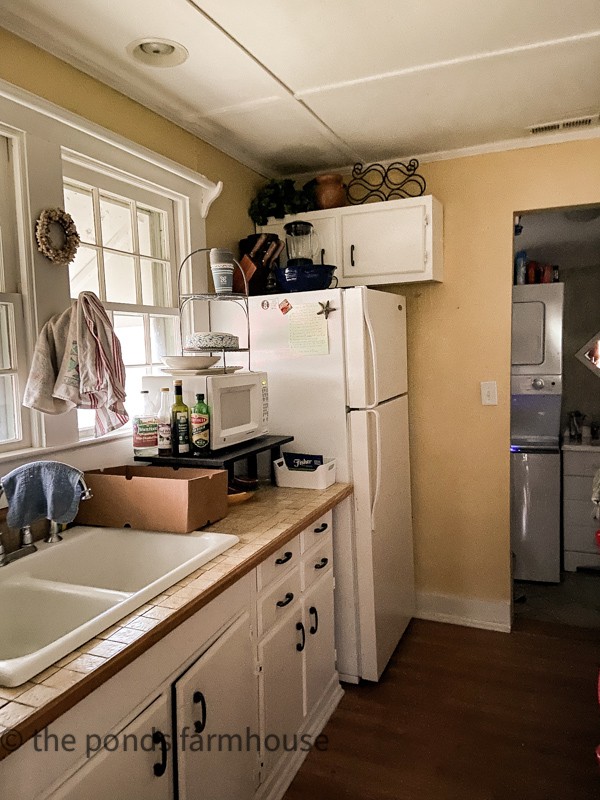
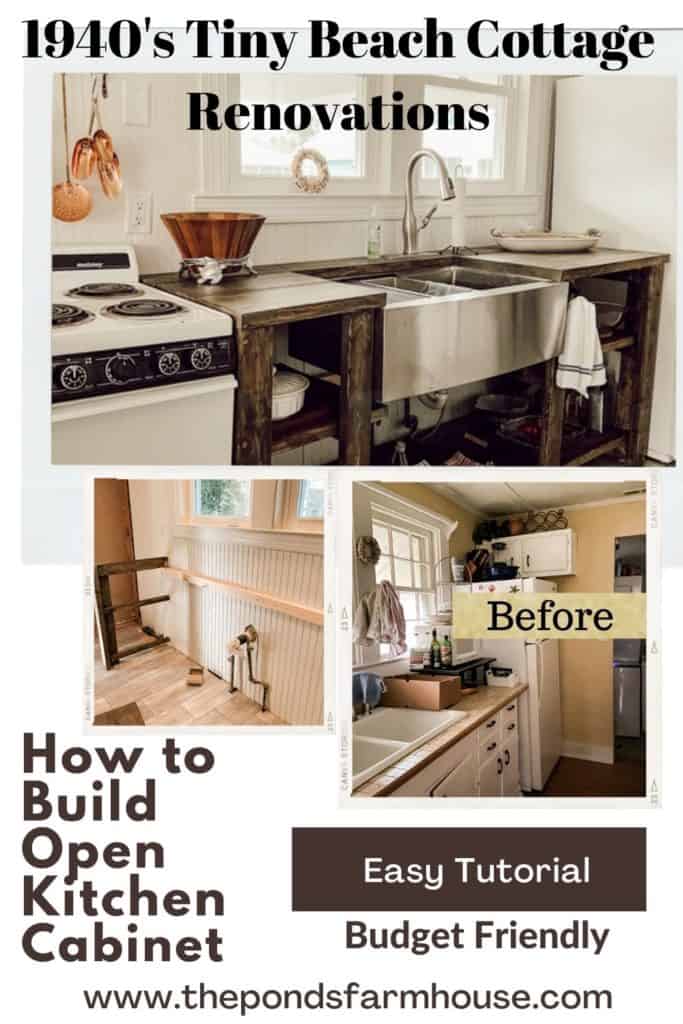
Brad built these open cabinets for our tiny beach cottage kitchen, which is only 84 square feet. I wanted to open the space to create a larger feel for the small room.
The existing kitchen cabinet and countertop were only 79 inches long. Therefore, a kitchen cabinet with no doors would be a budget-friendly option.
Warning Note: Disclaimer: We are not professional cabinet builders. These instructions are our amateur attempt at saving money by building our kitchen cabinet. The cabinet feels very sturdy. However, any construction should meet the building codes in your area. If you plan a kitchen renovation, you should check with your city or county building codes before attempting a project of this nature.
1940s Beach Cottage Kitchen Before

(Posts on The Ponds Farmhouse may contain affiliate links. As an Amazon Associate, I earn from qualifying purchases. See the full disclosure details here.)
Table of contents
Materials for a Rustic Open Kitchen Cabinet
Materials to build a Rustic Open Kitchen Cabinet will vary from project to project. I’ll share the types of lumber and supplies we used, but each project will vary.
- 2″ x 8″ x 8′ Pine Lumber – For Countertop
- 2″ x 10″ x 8′ Pine Lumber – For Countertop
- 2″ x 12″ x 8′ Pine Lumber – For Shelving
- 2″ x 4″ X 8′ Pine Lumber for Cabinet Legs and Side Pieces
- 2″ x 3″ x 8′ Pine Lumber for Back Wall Brace
We used simple 2″ pine boards to build the new rustic kitchen cabinet countertop due to our limited budget.
This is the same wood technique that we used to build our farmhouse DIY Kitchen Island, and we are happy with the sturdiness of the wood surface.
For this project, we purchased a combination of 2-inch thick pine boards in various widths in order to accommodate the countertop width.
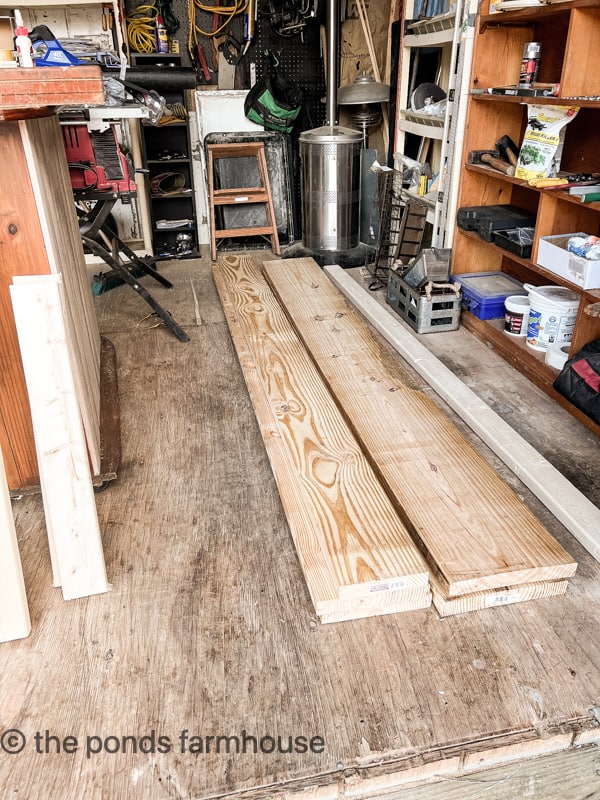
To construct the countertop, we used a combination of two 10-inch and one 8-inch wide boards to make the countertop the appropriate depth.
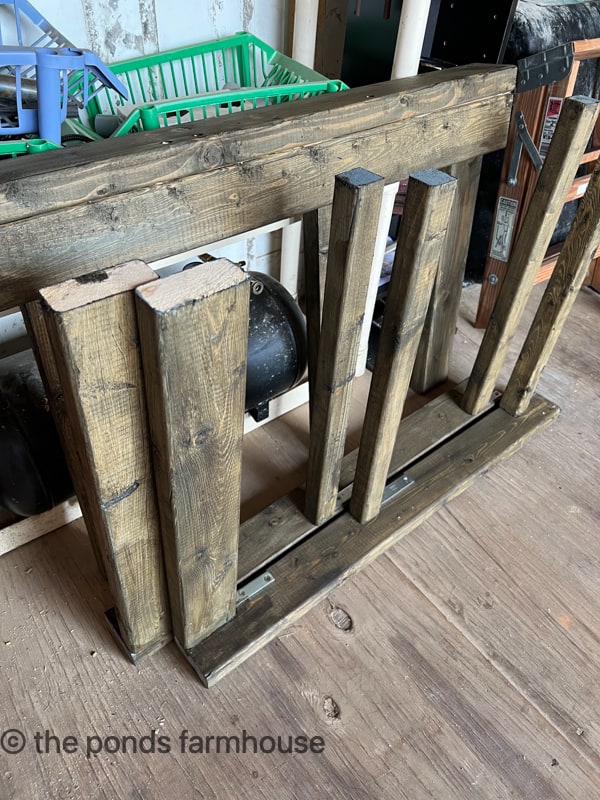
Next, we used simple 2 x 4 boards to construct the legs and support boards for the shelving. Each end leg had two adjoining boards, and the two center legs were just one board each.
Another board, the same depth as the cabinet, will be affixed to each leg and the back wall to provide support for the open shelves.
In addition, four 12-inch wide boards were used to create the open shelving. The shelves consist of two boards placed side by side and rest on the support 2 x 4 board.
To complete the project, you will need three 2 x 3 boards that match the length of your open cabinet. These boards will be affixed to the back wall and serve as supports for the cabinet side shelving.
To assemble the legs, you will need wood screws and 2-inch L brackets.
Additional Tools and Materials for Assembly
- Miter Saw
- Biscuit Joiner
- Joining Biscuits
- Clamps
- Rotary Tool by Ryobi
- Ryobi Cordless Drill
- Ryobi Cordless Jig Saw
- Screws for wood
- L brackets
- Glue for wood
- Wood Filler
- Gray Stain
- Pine Stain
- Food Grade Matt Sealer
- 220-grit sanding block
- Safety glasses
- Ear Protection
How to Assemble the Open Kitchen Cabinet
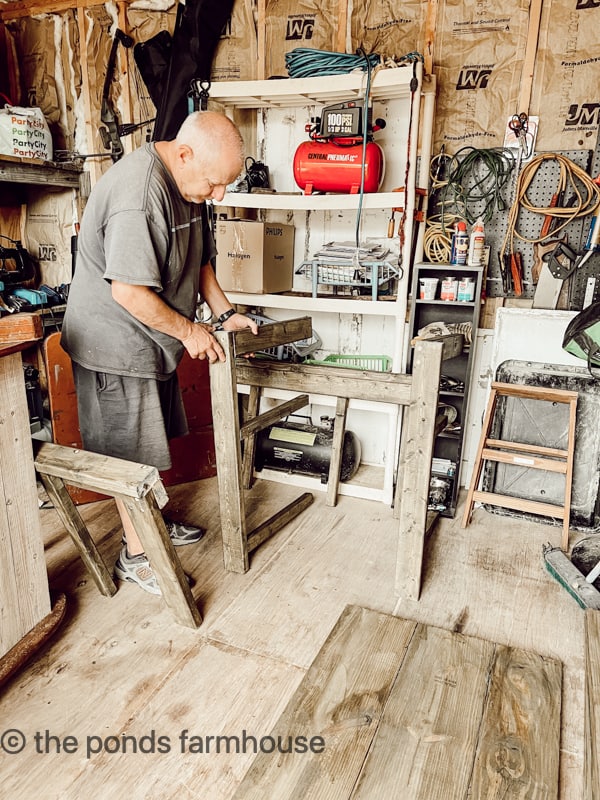
Due to the cramped working conditions in our beach house, Brad had to build some of the components of the Rustic Open Kitchen Cabinet in his home workshop.
This required careful measurements of the space for the cabinet.
To begin, he assembled the 79-inch wooden countertop. He used a biscuit joiner, wooden biscuits, wood glue, and clamps to connect the 10 and 8-inch boards.
The biscuit joiner cuts a groove in the connecting boards to provide a secure connection.
Use wood glue along the inside of the connecting boards and wooden biscuits. Add the clamps to hold the boards in place until the glue sets, approx. 1 hour. Then allow the glue to cure for approximately 24 hours before moving.
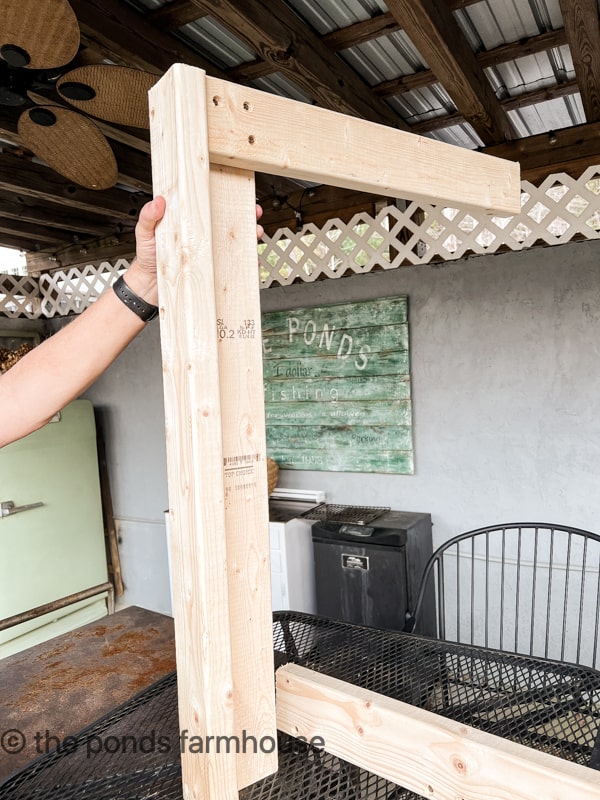
We designed the cabinet with four front legs and a countertop with two lower shelves.
To pre-assemble the kitchen cabinet legs, use L brackets to secure the legs to the cabinet support pieces. At this point, they will not feel sturdy; however, once installed correctly, they will be secure.
To finish the pre-assembly, stain all the pieces using an old reclaimed barn wood technique.
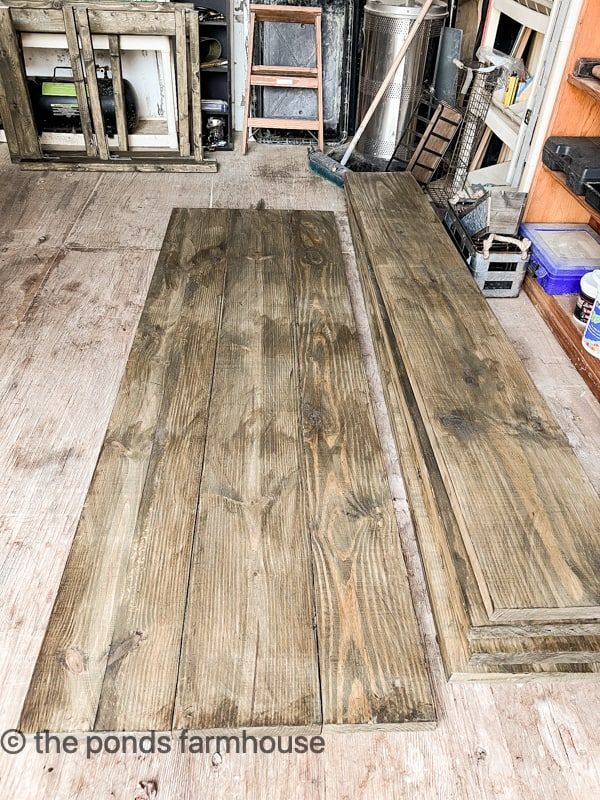
Once the assembly is completed, they are ready to be transported and installed in the beach cottage.
How To Install Open Kitchen Cabinets
You can see more details if you missed the sneak peek of the kitchen renovation.
Allow me to provide a brief summary to bring you up to speed.
- Both windows have been replaced.
- New Beaded Board Paneling has been installed.
- New Flooring Installed
- All the walls and trim work have been painted white.
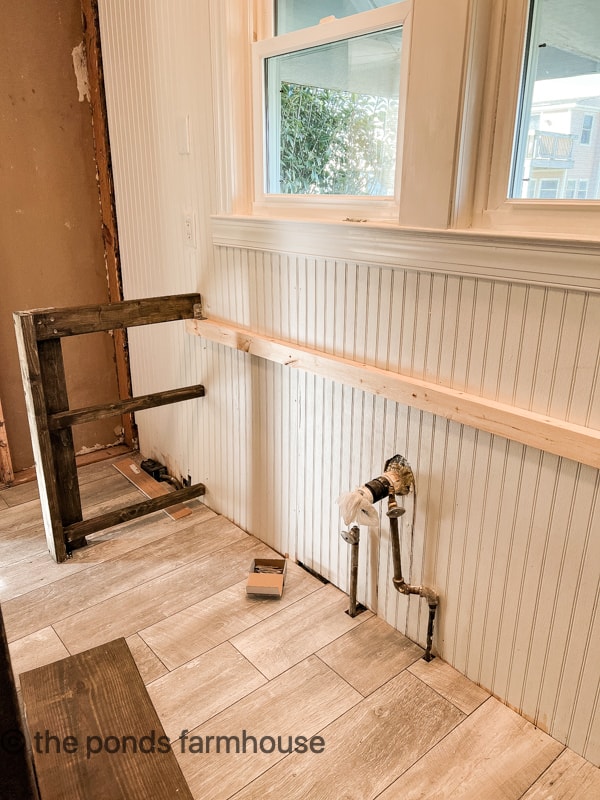
The first step was to attach back support pieces to the exterior wall of the beach cottage.
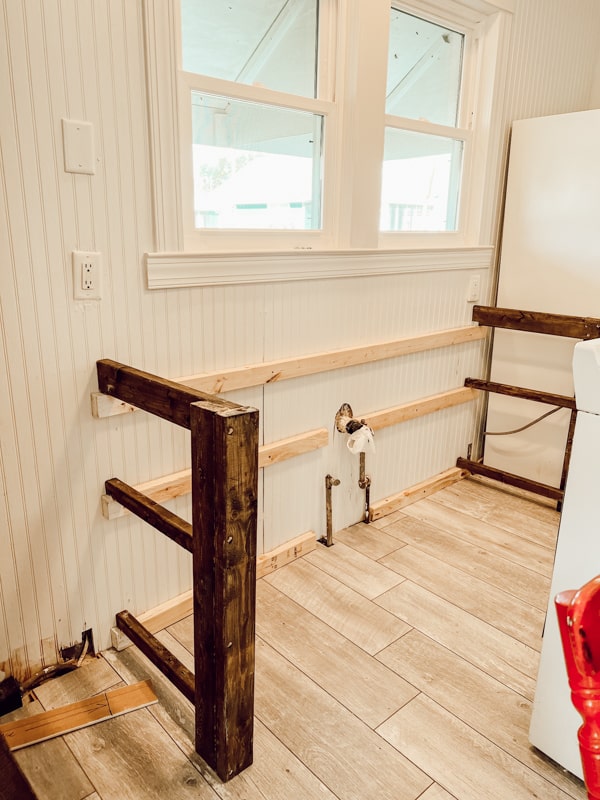
Adding the back support pieces was a space-saving option. The three 2 x 3 support boards enabled us to attach the side support pieces to the wall. We temporarily positioned the two end-leg pieces to ensure their correct placement.
To guarantee the stability of the cabinet, the side pieces of the shelving unit need to be positioned on top of the support beams. Afterward, L brackets are securely attached to both pieces using wood screws. This ensures a solid connection between the two.
Sink Installation
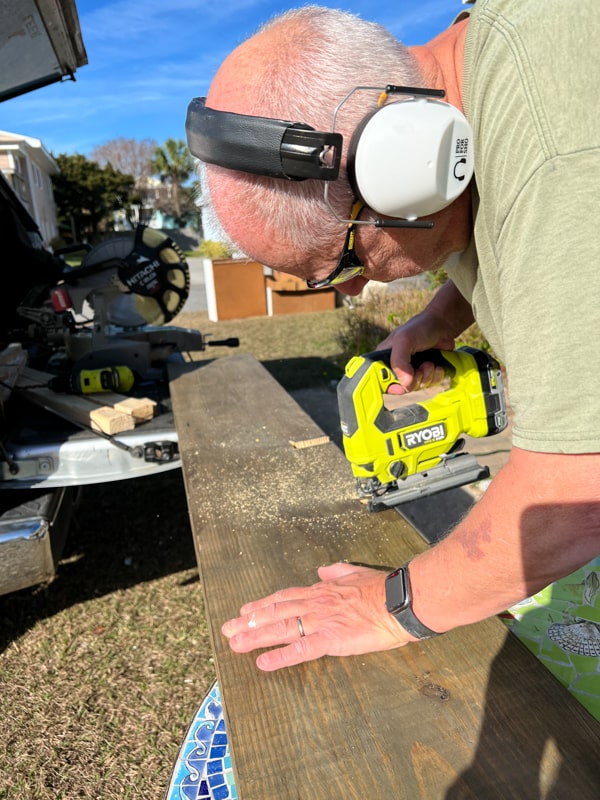
Brad cut the countertop using a Ryobi Cordless Jig Saw to install the farmhouse-style stainless steel apron front sink. It was a simple process to follow the template provided with the sink.
Next, Brad proceeded to install the sink by following the instructions provided by the manufacturer. We choose a budget-minded sink from Amazon.
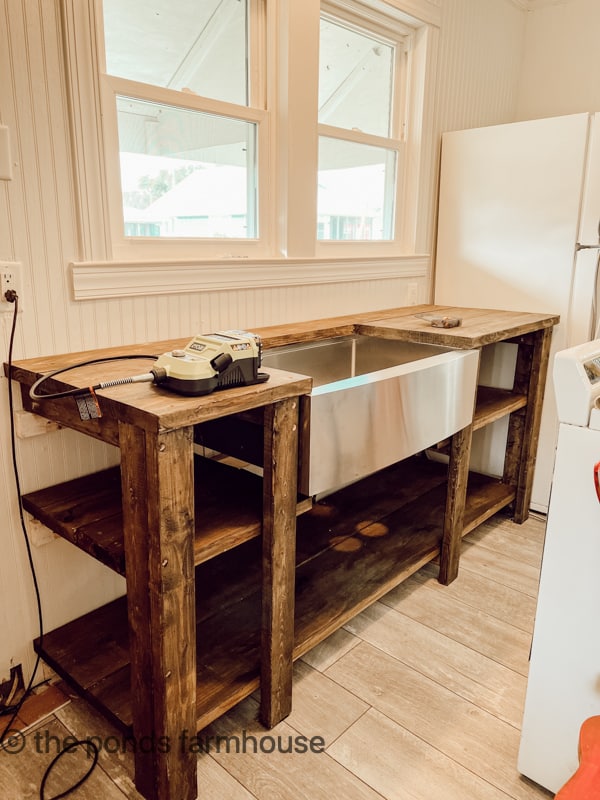
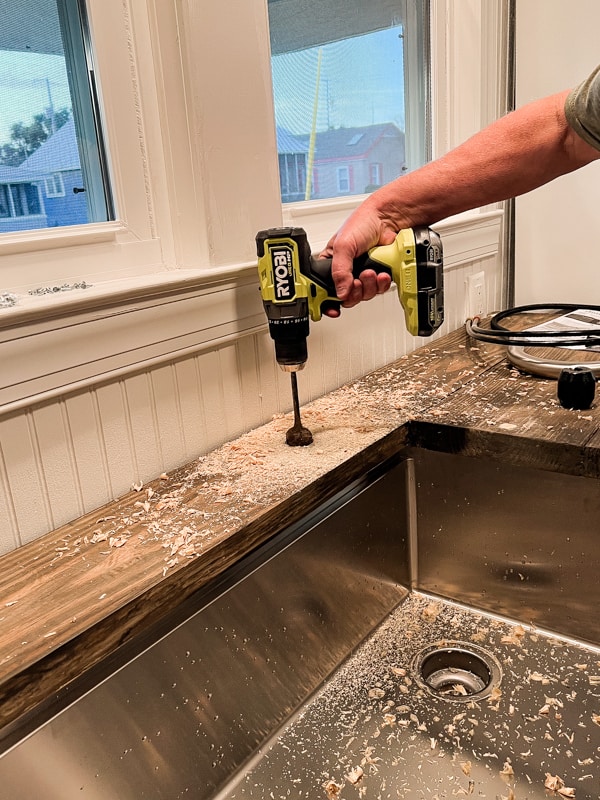
Afterward, the support legs are attached to the countertop using wood screws that are countersunk with a drill bit. The result is a secure and sturdy connection.
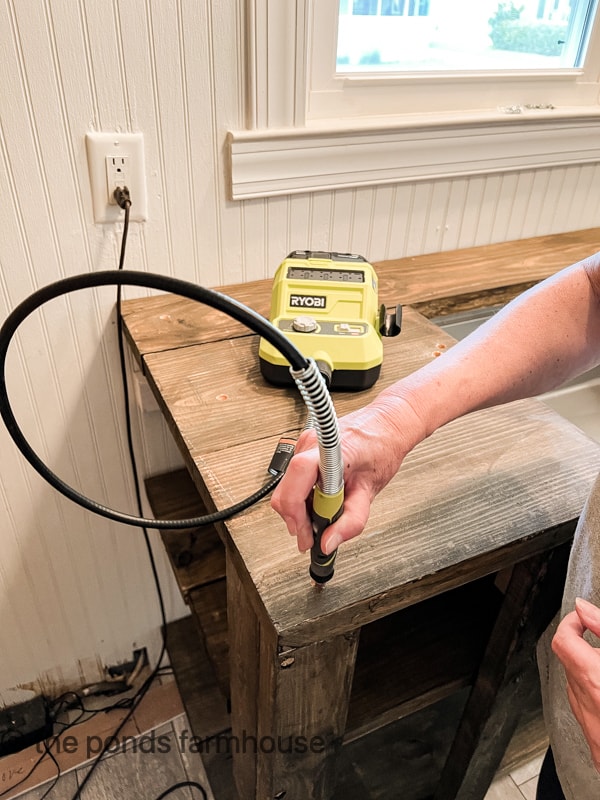
The Ryobi rotary tool is used to smooth the jagged edges.
After smoothing the edges, apply wood filler to the counter-sunk hole. You should allow the filler to dry thoroughly. Then sand the area smooth with a 220-grit sanding block.
Finally, the wood filler should be stained to match the countertop to effectively hide the holes.
How To Secure The Rustic Cabinet In Place
Next, it’s important to secure the new open kitchen cabinet to the floor to avoid movement. To secure the legs to the floor, use a 2 Inch long L bracket on the backside of each leg.
As with most projects, some adjustments to the shelving were necessary.
First, we didn’t realize how close the sink would be to the shelf, so we cut a section from the middle of the shelving to allow for the sink.
In addition, the lower shelf needed some adjustments to accommodate the plumbing pipes. Brad used a jigsaw to cut a few notches so that the pipes could fit properly.
Faucet Installation
Next, it was time to install the new faucet.
Begin by drilling a hole in the countertop for the Pfister Faucet. Installing the new faucet is a breeze and takes only about 5 minutes. You can find more information about the installation process here.
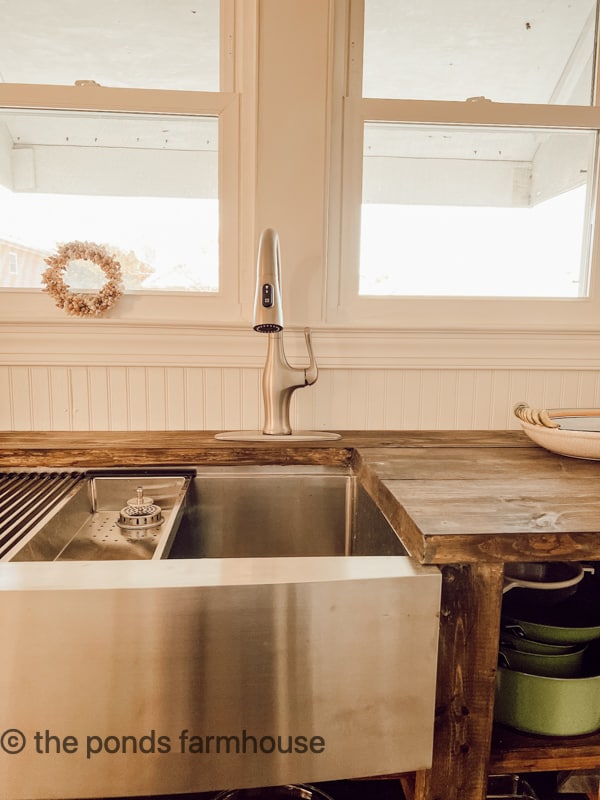
Finally, the Rustic Open Kitchen Cabinet, which features no doors, is nearly complete and awaiting its final styling touches.
How To Safely Seal The Cabinet Countertop
The final step was the seal the cabinet countertop to protect it from water damage. When using your countertops for food preparation, it is advisable to apply a food-grade sealer that is non-toxic for safety purposes.
You can begin by applying a thin coat of sealer with a sponge roller. Then lightly sand with 220 grit sanding block once it is dry.
Finally, after the sealer dries, apply a second light coat. In addition, I like to apply a third coat within the next few weeks for extra protection.
Be extra careful to apply a good coat of the sealer around the edge of the sink, up against the sealant applied to the sink during installation.
You may also want to reapply the sealer approx. once a year if needed.
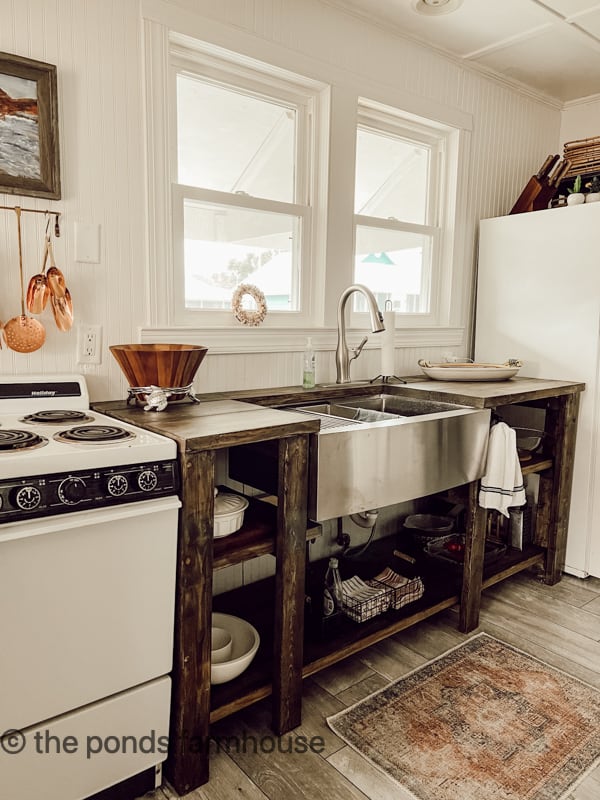
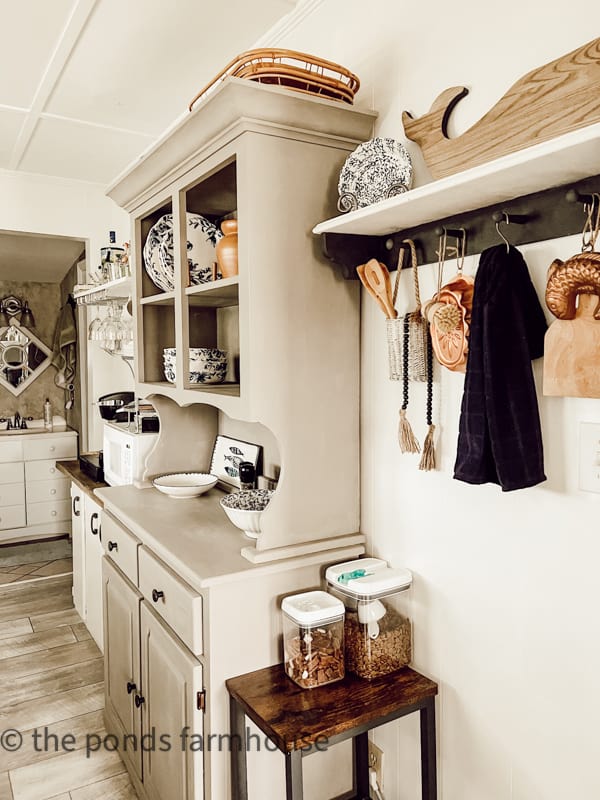
Open Kitchen Cabinet, No Doors
The new rustic open kitchen cabinet with no doors makes the room feel much larger, and I love seeing all the bowls and kitchen tools. The white backdrop makes everything very visible and easy to find.
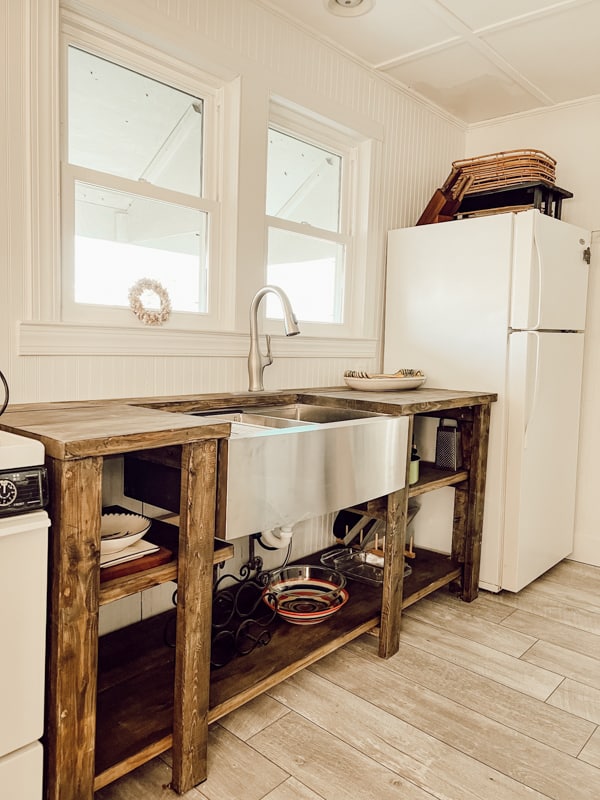
And since the cottage is solely for vacation purposes, only essential kitchen supplies will be required. Therefore, the open cabinet is a perfect budget-friendly solution.
I’m beginning to decorate and have added a few touches. I added the rug by Boutique Rugs, and these Copper Measuring Scoops are so fun.
Don’t miss How To Decorate with Open Shelves and Ideas for Decorating Above Kitchen Cabinets for more kitchen decorating ideas.
Resources
More Kitchen Ideas
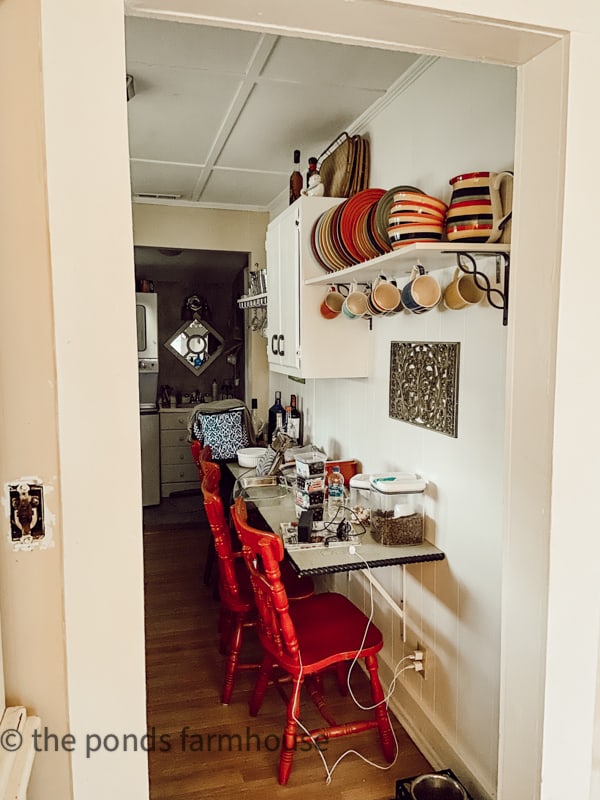
In addition, we transformed the wall across from the new kitchen cabinet as well.
Looking for more Kitchen inspiration? Here are some other articles you may enjoy.
- How To Decorate Above Kitchen Cabinets
- 11 Ways To Add Vintage Charm To a Modern Farmhouse
- Christmas Ideas for a Farmhouse Kitchen
- Best Modern Farmhouse Kitchen Ideas
- How To Add Open Shelving
- How To Build A Kitchen Island
More Beach Cottage Remodeling Ideas
Links To Beach Cottage Renovation and DIY Projects
- Tiny House Ideas for Beach Cottage Before & After
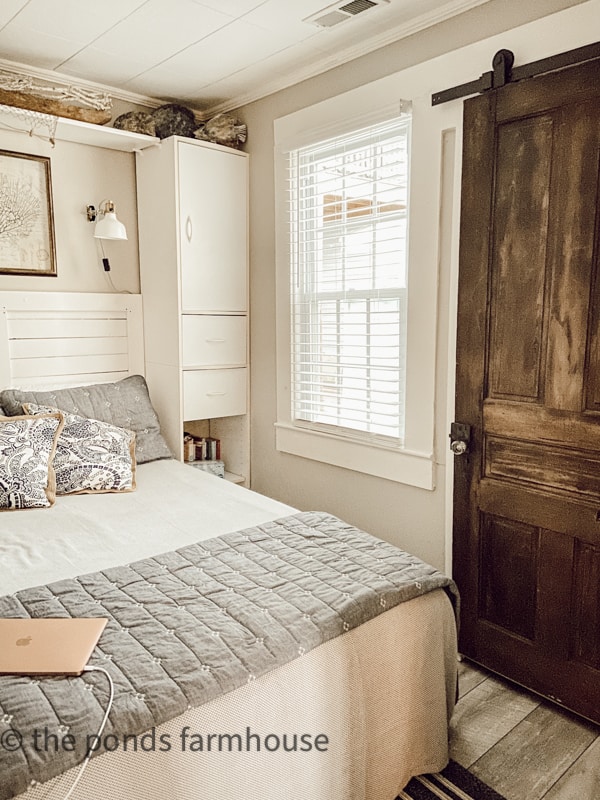
- Creative Small Bedroom and Budget Storage Ideas
- How To Add A Wood Accent Wall
- How To Build An Open Kitchen Cabinet
- Thrifted Coastal Farmhouse Decor on a Budget
- How To Use Wall Stencil To Create Faux Wallpaper
- Budget-Friendly Small Bathroom Remodel for under $500
- Clever Ways To Add Lighting Without Wiring
If you are needing an easy budget-friendly kitchen cabinet weekend project, this Open Kitchen Cabinet No Doors project is for you.
Thanks so much for stopping by today. I look forward to sharing more adventures with you soon.

Pin It To Remember It
Did you find some great ideas you’d like to save for future reference? Hover over the images you’d like to save and pin to your favorite Pinterest Boards when you see the PIN button.


I love the open cabinets! I know you will be glad to get finished before spring to enjoy your cute little cottage 😀
Margie,
You are right. I’m ready for spring and want all the work to be finished. Thanks for stopping by.
The open cabinets were a fantastic idea Rachel!
Ann,
I’m loving them. Thanks so much.
The open cabinets look great! I love how the kitchen is coming along!
Stacy,
Thanks so much.
I am loving this kitchen renovation!
Briana,
I’m so glad you like it. Thanks so much for stopping by.
Your kitchen is really coming along. What a transformation.
Renae,
I really appreciate this.
Stacy,
I appreciate you for sharing my kitchen cabinet
This was such a great idea Rachel. You have done such an amazing job!
Kim,
Thanks for stopping by.
What a great transformation Rachel, love the new look. It is perfect for your small space. Enjoy the beach.
Wendy,
Thank you so much! I’m so glad you like this project.