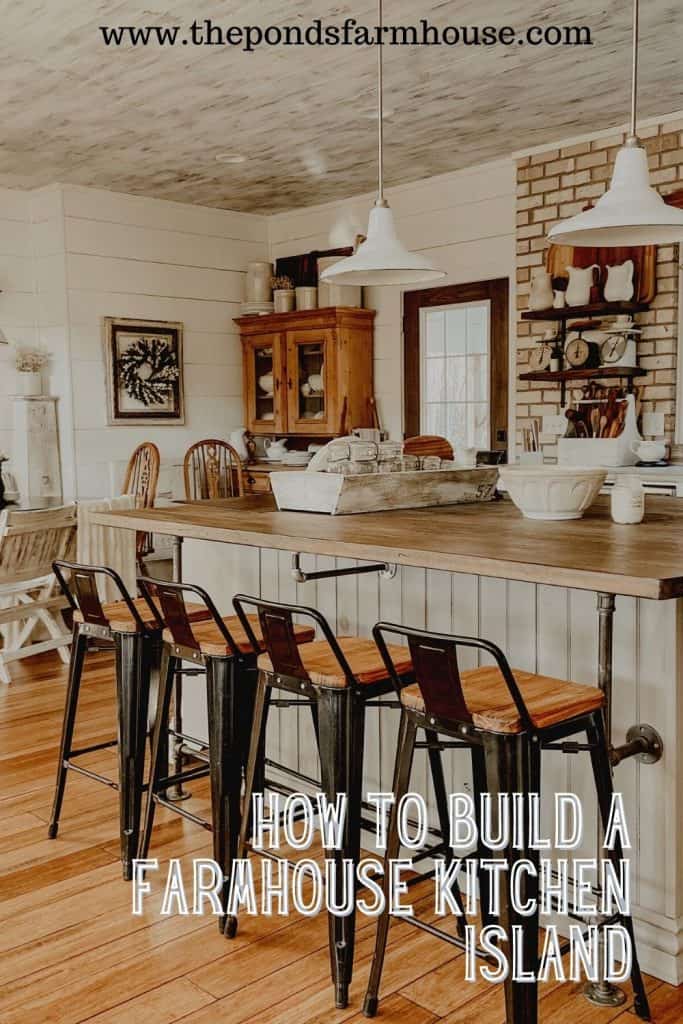
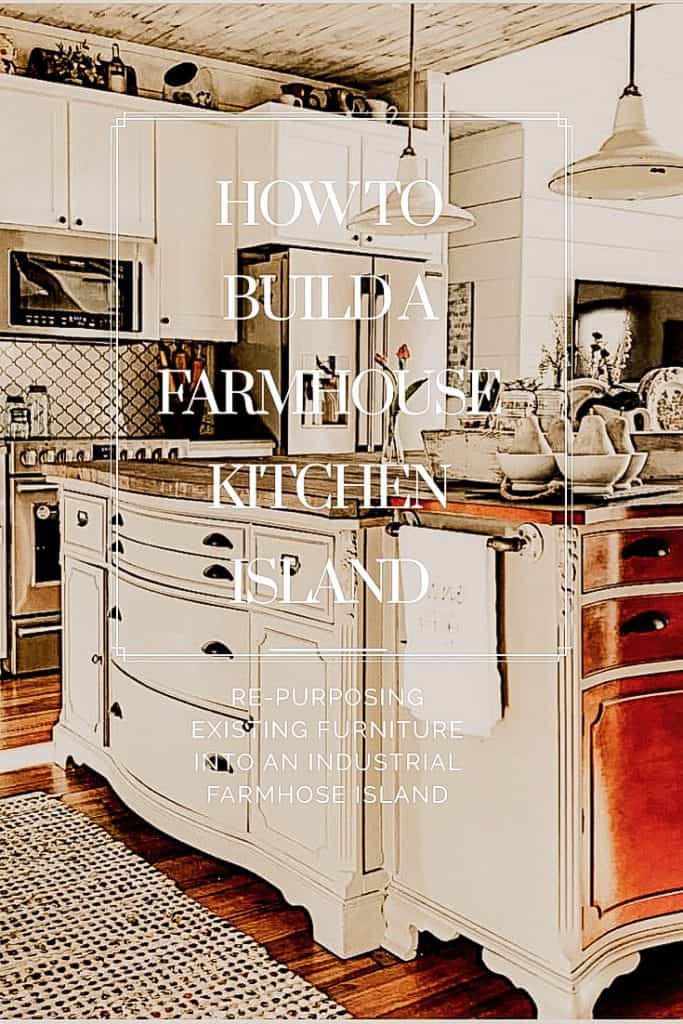
Stunning DIY Farmhouse Kitchen Island: Repurposed Furniture Tutorial
Have you ever had a piece of furniture that no longer worked for your home but that you loved and didn’t want to get rid of? That happened to me when we downsized to a smaller home. Instead of selling the piece, we repurposed the vintage sideboard and built a farmhouse kitchen island. Today, I’m sharing our journey of planning and creating the DIY island with a few mishaps along the way and how we overcame them. I can’t wait to share our journey with you.

(Posts on The Ponds Farmhouse may contain affiliate links. As an Amazon Associate, I earn from qualifying purchases. See the full disclosure details here.)
Why We Built A Kitchen Island With Repurposed Furniture
Once we decided to downsize from a 3400 sq. ft. home to a 1900 sq. ft. farmhouse, some hard choices had to be made. Namely, what to keep and what to sell.
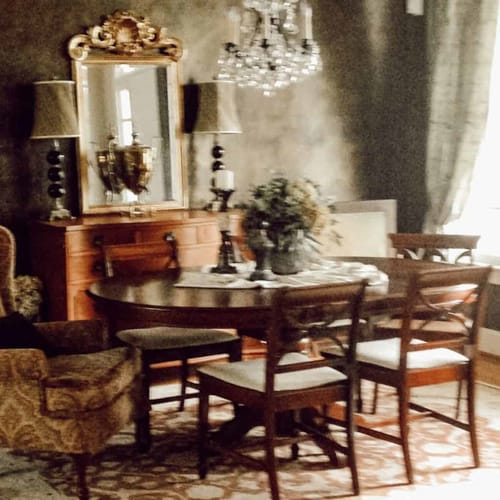
Several pieces of furniture would have to go, but one of my favorite thrifted rescues was a bow-front sideboard. I had used it in our formal dining area, but since the farmhouse would not have a formal room, finding a new use for the sideboard would be necessary if we kept it. Ultimately, we kept and stored it while our new home was under construction.
Here is a glimpse of the sideboard in my previous home. As you can tell, I had no photography skills at that time. LOL
Planning To Use The Thrifted Furniture
As construction began, plans to create a kitchen island using the sideboard were tossed around. We were unsure how it would work, but I knew we would find a way.
You’ll never guess what happened next!!! While on vacation, we went thrifting and found another sideboard, similar to my rescued one. I immediately imagined them placed back to back to create our farmhouse island. They both had a similar design, and I was convinced the two cabinets were the same size. So we purchased it and loaded it into the car.
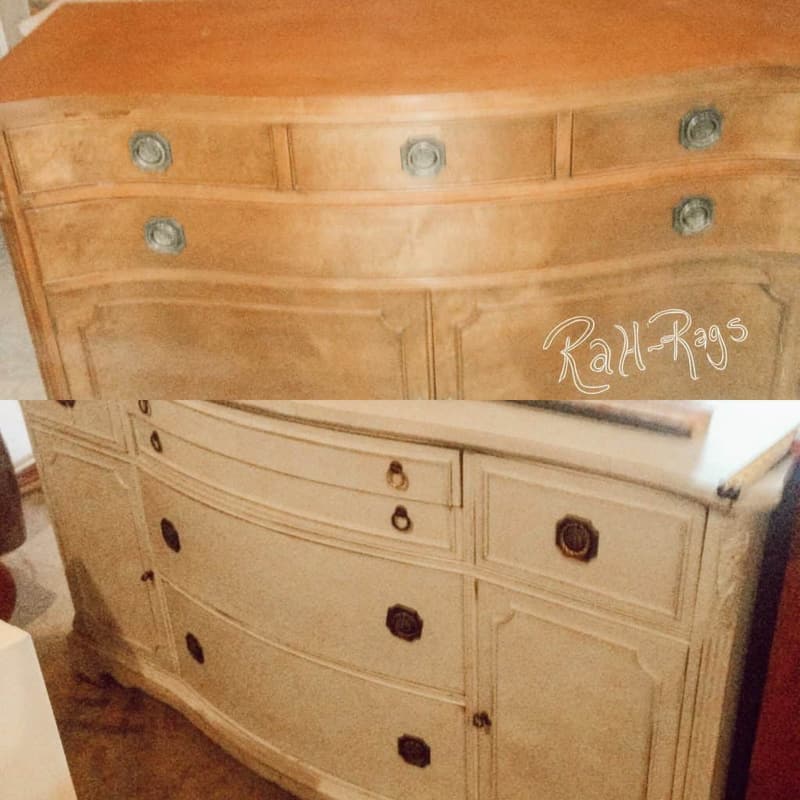
Note: I apologize for the poor quality of these photos. All “before” captures we made before I started this blog.
Oh NOOOOO…… It’s not the same size or height, so now what?
Once back home, I visited our storage unit and got the dimensions of the originally rescued sideboard. Oh, NO, I was wrong! They were not the same size at all. This piece was wider and, unfortunately, shorter.
Let me tell you, it was such a disappointing discovery! Many thoughts were going through my mind, such as “maybe they can be used for bathroom vanities,” or maybe we will sell the new purchase. However, I wasn’t willing to give up my dream. In addition, I had just received the cabinet shop’s quote for a large kitchen island, and it was a little staggering. So I began to make a new plan.
The Solution To Using Two-Sized Cabinets
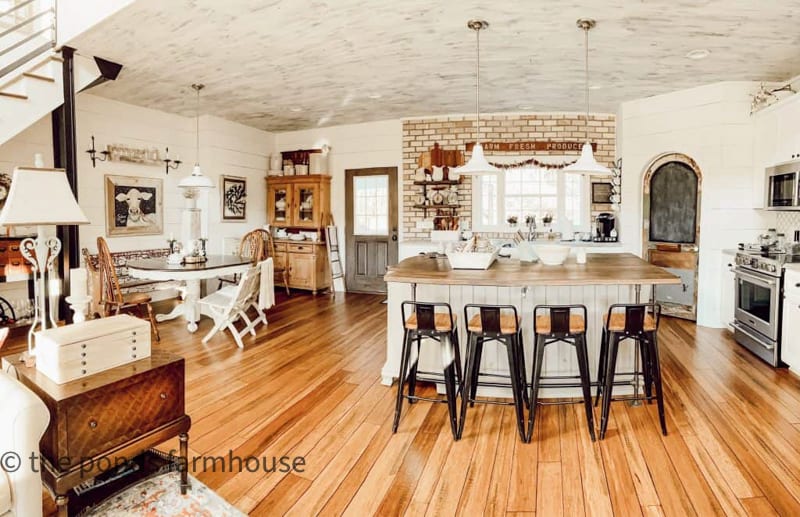
Not to be outdone, we devised a solution that would include using both pieces of furniture. We would need to raise the height of the short cabinet, and since they were different widths, placing them back to back would no longer be an option. Instead, we could put them in an L shape. We used the original cabinet as the focal point, facing the dining area, and the second one facing the sink. This would allow a work station with shelving facing the stove and an eat-in bar along the side facing the living room.
Overall, the island would be 6 x 7 feet with plenty of storage.
How To Make The Cabinets The Same Height?
One of the biggest problems was making the cabinets the same height.
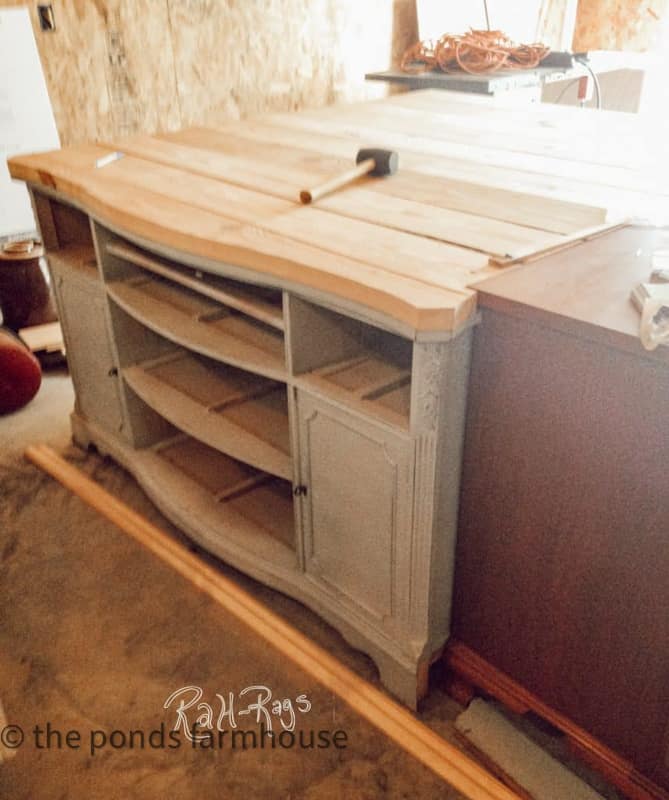
The solution was to use 2-inch-thick boards over the top of the lower piece and leave the original top on the taller piece. I would have loved to use reclaimed barn wood for the island top, but sourcing the materials and cost were prohibitive. Instead, we chose 8-inch-wide pine boards for the project. They would cover the remaining surface of the island, including the work space and bar.
Another issue was that the new sideboard’s front edge was curved, so one of the boards had to be cut to match the curve. We also removed the original top and trim so the two pieces would fit snugly together.
To construct the top with the 8″ x 2″ boards, we used a biscuit joiner, wood biscuits, and wood glue to join them snugly together. Clamps held the panels together until the glue dried. The boards were cut to length, forming a full countertop.
Other Materials Used To Build the Kitchen Island
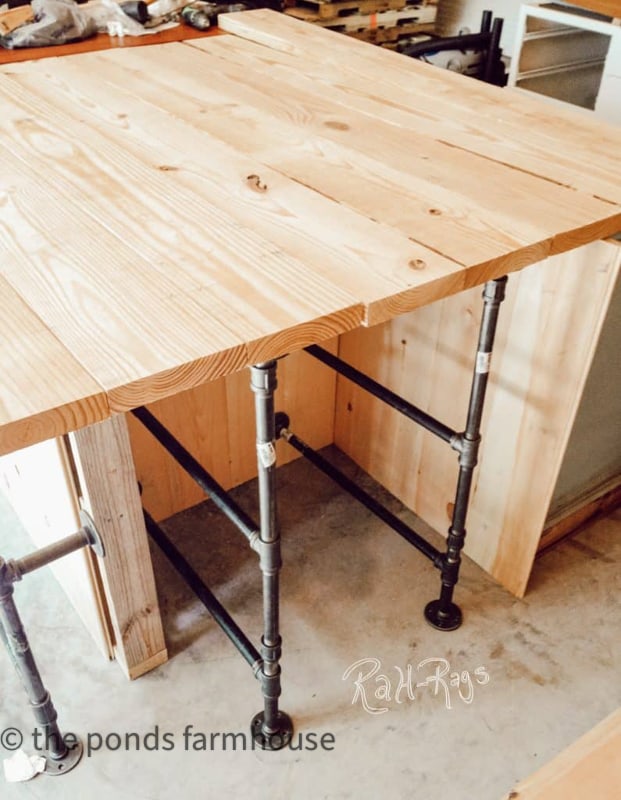
Additional lumber was needed to fill in around the base of the island. Since we had several tongue-and-groove boards left over from our ceilings, we used those to construct the island’s walls. Another concern was what we would use to support the overhang for the island bar. Since the farmhouse has an industrial vibe, we chose simple plumbing pipes for the bar area and created an area to add open shelving. We tried to utilize as much of the space as possible.
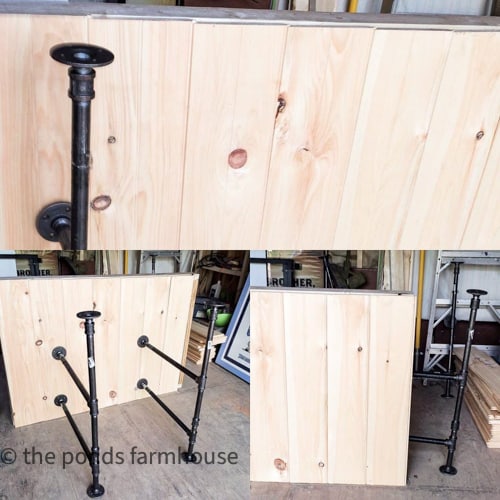
Here are some photos of us playing around with the plan in the garage.
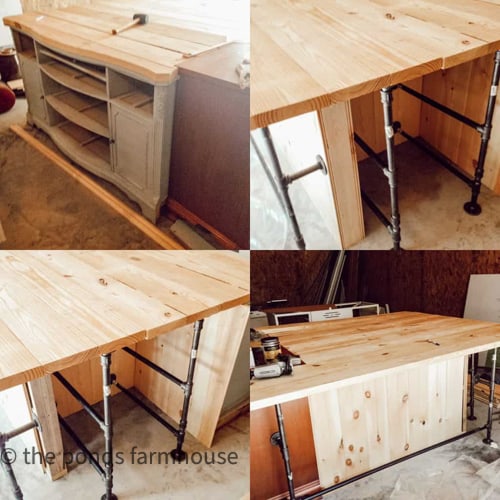
Bar seating was created along one side of the island by allowing a slight overhang and placing the pipes as support.
Open shelving was constructed at the end of the island using the same pipe style. This allowed for extra storage without wasting space within the kitchen island.
How To Assemble The Industrial Farmhouse Island?
Since the farmhouse was still under construction, we did all the preliminary work in my brother’s garage. The island was so large that it would need to be assembled once it was moved to the house. This was a stress point, as we could not see exactly how everything would look. My biggest fear was, “it would look like we made it,” LOL.
However, it all worked perfectly. Once we moved everything into the house, we attached all the pieces. Then, trim molding was used to secure the tongue-and-groove edges to the floor, giving the island a custom-built appearance.

How To Finish The Island
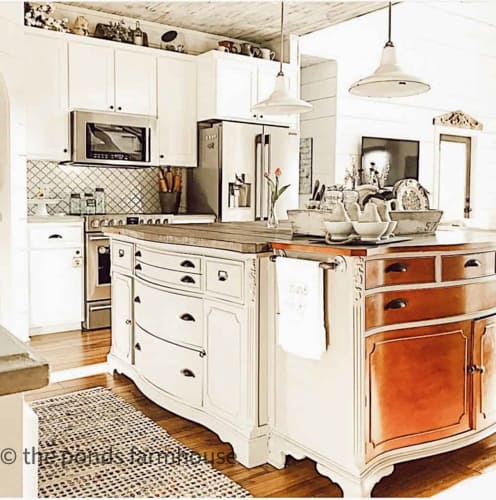
Once everything was assembled in the kitchen and the island was secured in place, the refinishing process began. We painted the newly purchased cabinet and the tongue-and-groove boards with Annie Sloan’s French Linen Chalk Paint and sealed them with clear wax. I also painted the sides and around the doors of the original cabinet.
I left the original finish on most of my previously rescued piece, so the doors, drawer fronts, and top received a fresh coat of stain. Everything was finally coming together.

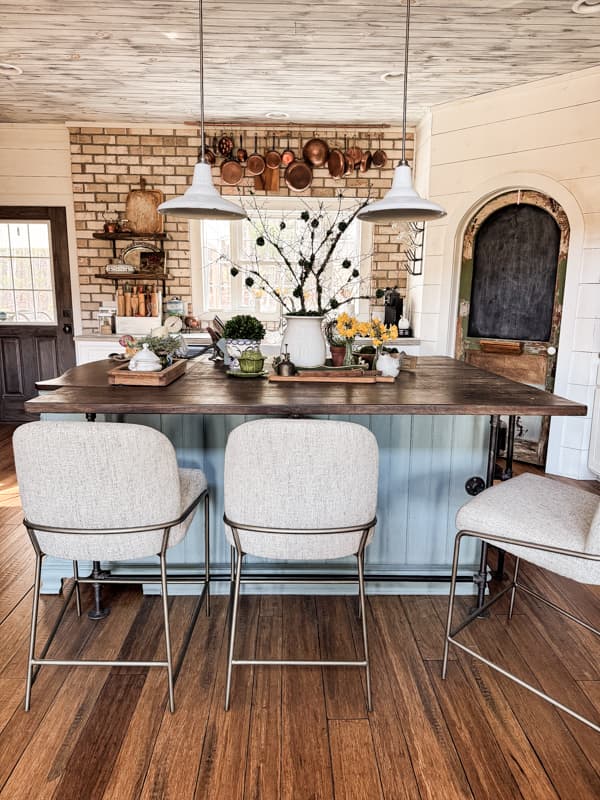
We purchased low-back bar stools that work perfectly with the design.
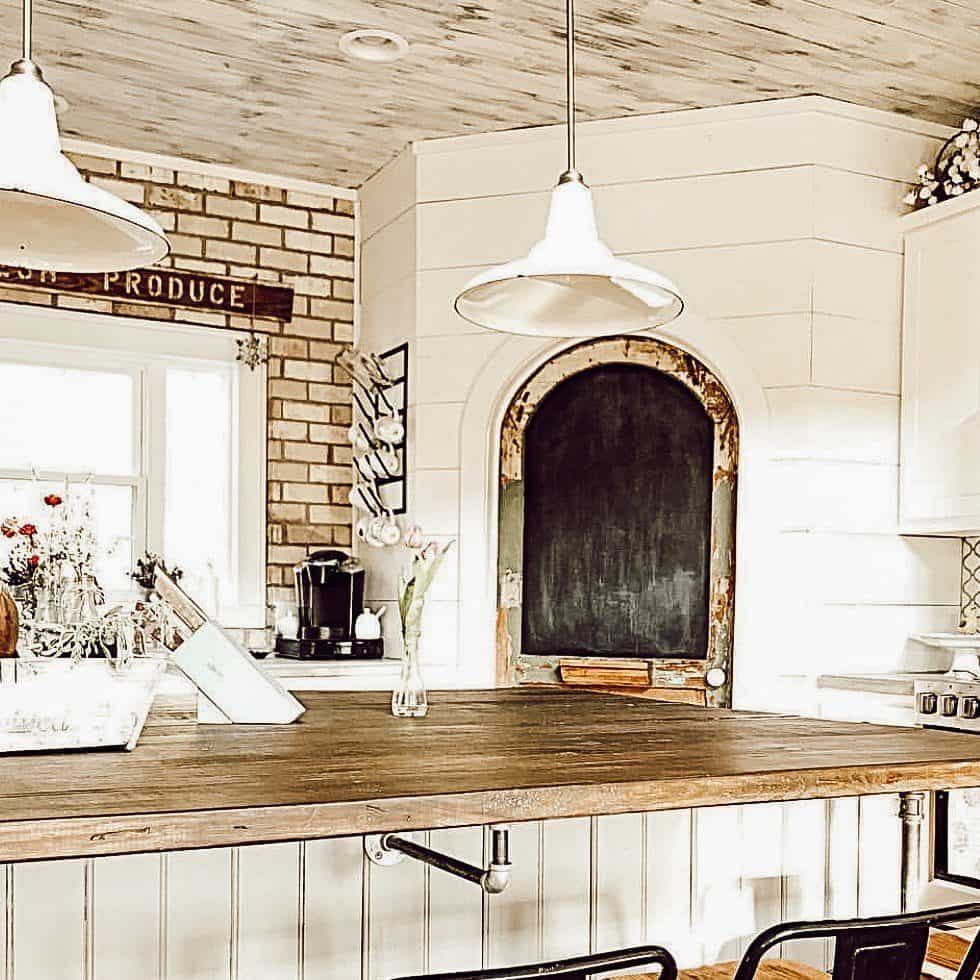
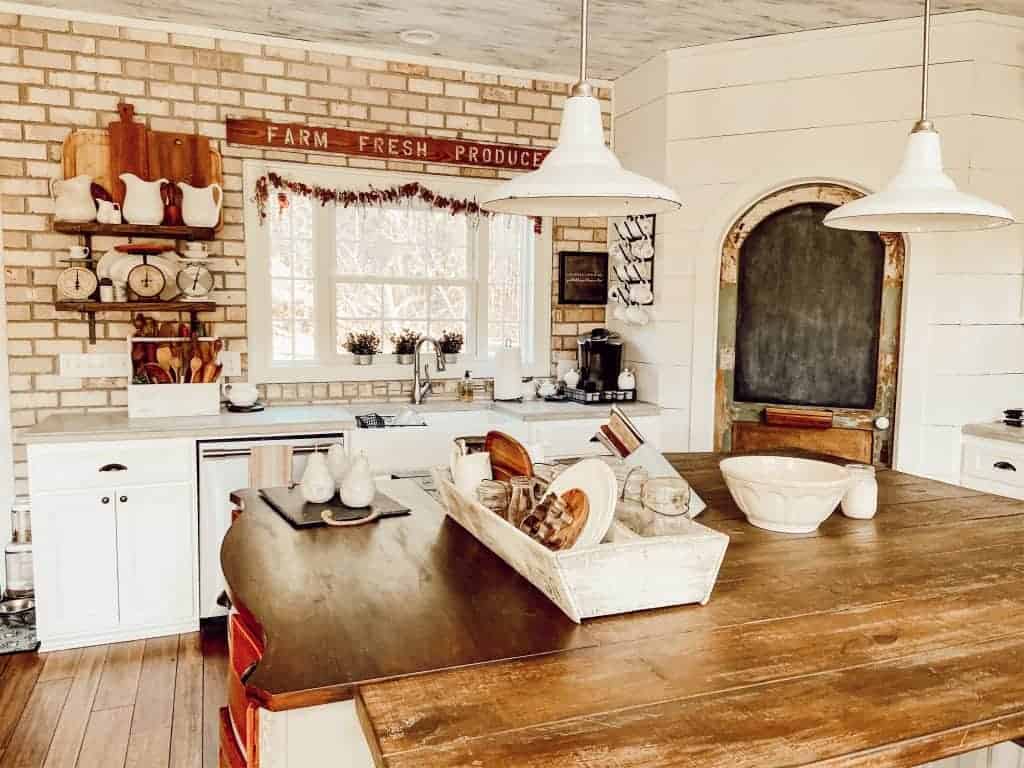
Because salvaged barn wood wasn’t within our budget, we used a faux technique to make the new island top look like old barn wood.
This technique was repeated for the island shelves as well. You can read more about this technique here.
Replacing Hardware
Finally, I replaced most of the hardware with cup and label holder pulls.
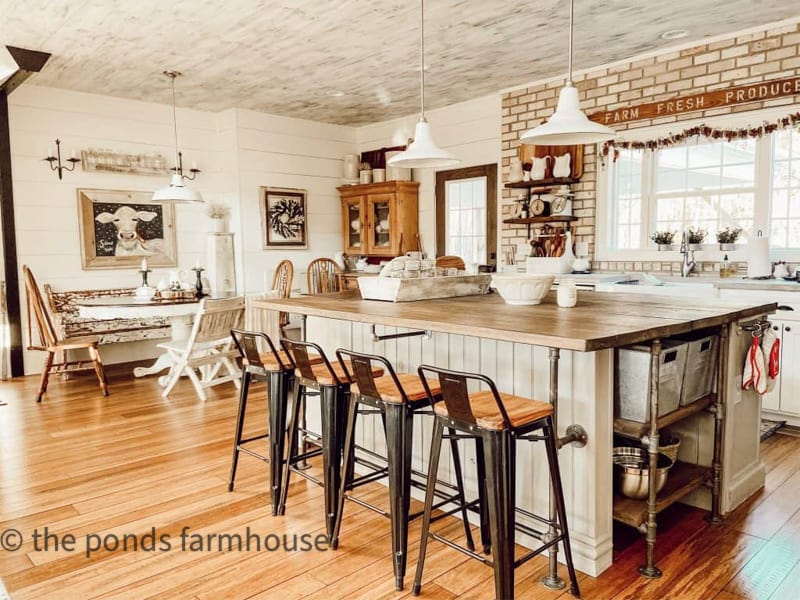
Adding industrial bins to the open shelving created additional storage but with a clean look. They work well with industrial pipes.
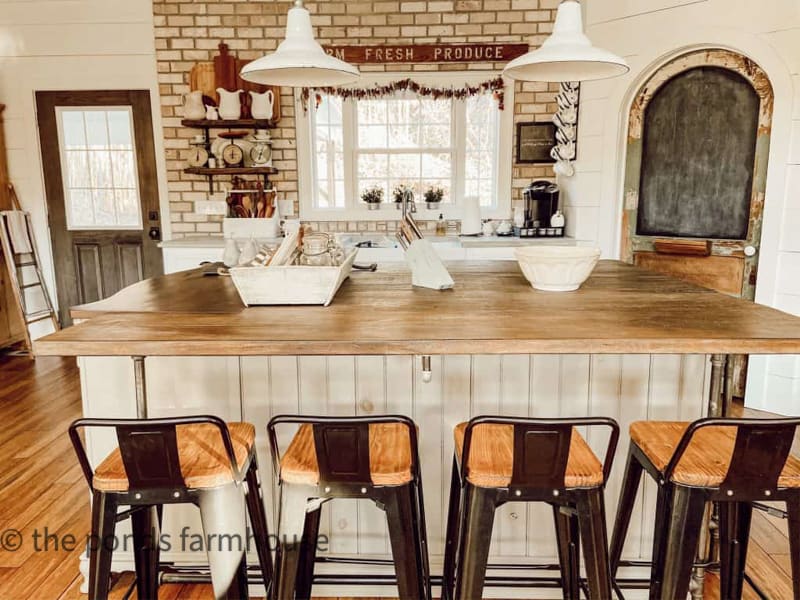
And to avoid hiding the details of the island, a low-back industrial-style bar stool was chosen for the seating.
To enhance the industrial style, we added vintage industrial-style light fixtures salvaged from an old gas station.
So, how do you like it? The eclectic mix of styles makes the island special; each side has a unique quality.
Please don’t hesitate to ask questions in the comments below.
Updated Farmhouse Kitchen Island
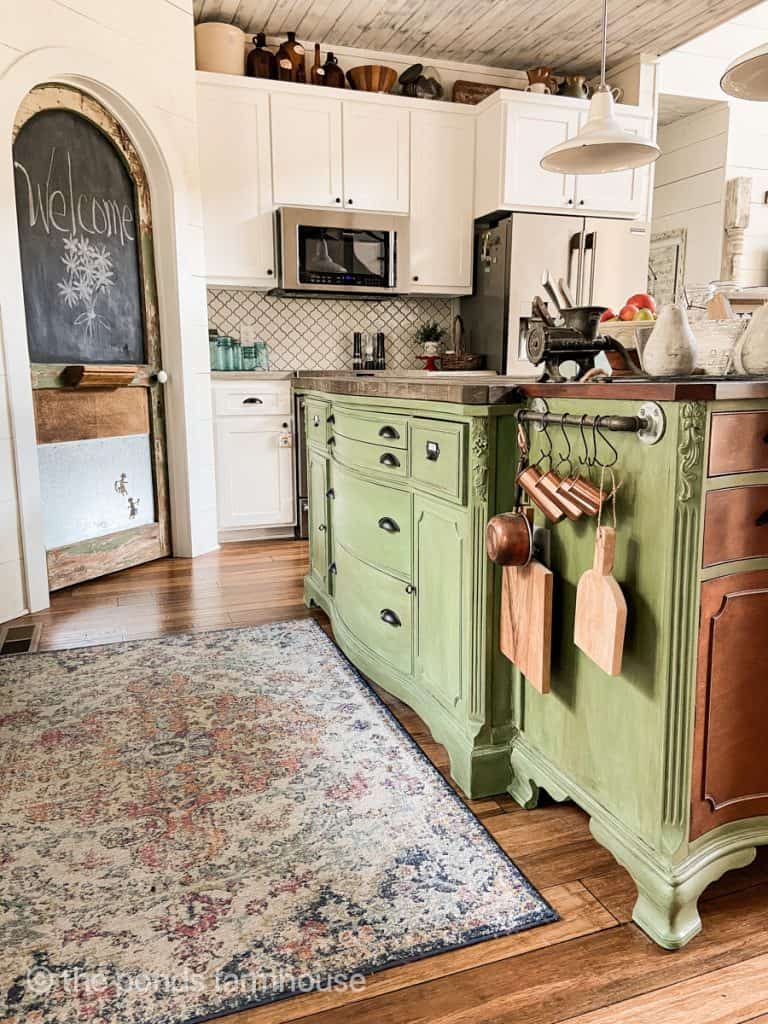
After living with the neutral gray island for almost five years, I decided a change was needed. I painted the areas that were previously grey with a vintage green color. I mixed several colors before I was happy with the results. I shared some of the details about the paint update, on Dirt Road Adventures.
After living with the green island for a few years, I wanted another change, so I updated the island with Duck Egg by Annie Sloan.
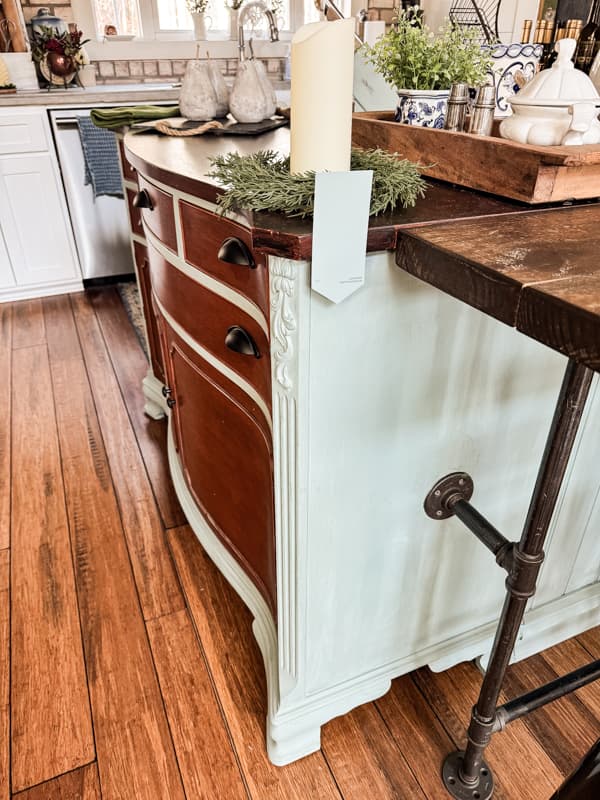
It was time for new bar stools, and we got lucky with these high-end ones. They are brand new and retail for over $600 each, but we purchased them at a thrift store for only $45.00 each. It pays to shop secondhand. Now the kitchen island has a completely different feel. It’s amazing what a little paint can do to transform a space.
Resources: Shop This Post
More About The Modern Farmhouse Kitchen
Look at these posts if you’d like to see more modern farmhouse budget-friendly decorating ideas.
- How To Decorate Above Kitchen Cabinets
- 11 Ways To Add Vintage Charm To a Modern Farmhouse
- Christmas Ideas for a Farmhouse Kitchen
- Best Modern Farmhouse Kitchen Ideas
- How To Add Open Shelving
- How To Build Open Cabinets for a Cottage Kitchen
Thanks so much for stopping by. Hopefully, these pages will inspire you to create your DIY projects. This was our most challenging DIY Project until we built a Greenhouse. You can see the DIY Greenhouse details here.

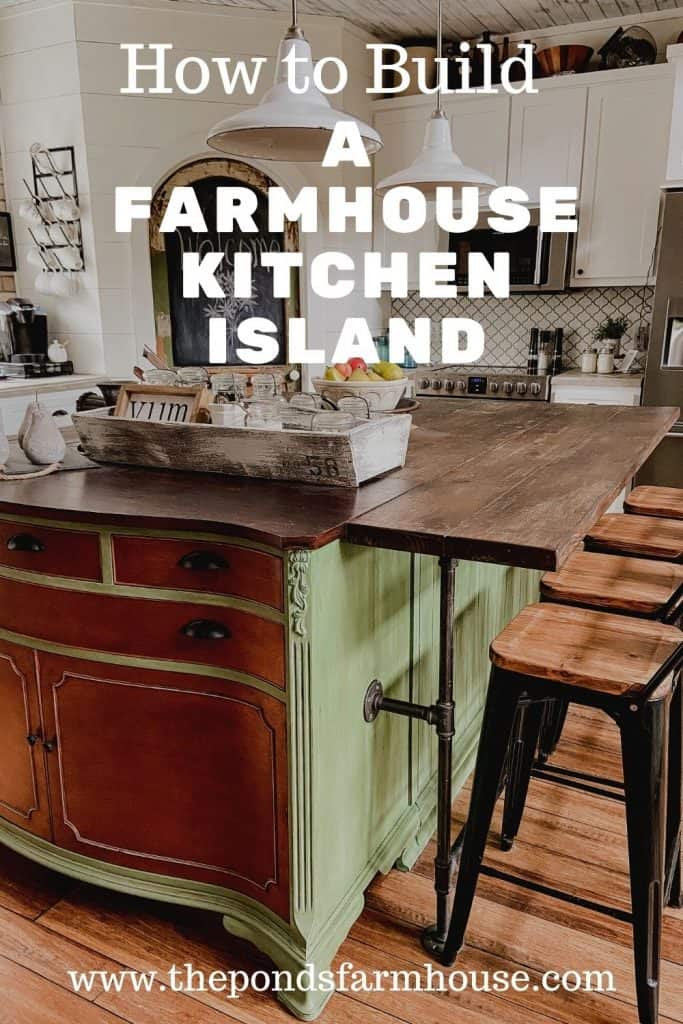
Pin it to remember it


Wow, what a statement piece in your farmhouse kitchen! I’m so impressed by your creative vision for repurposing the sideboard(s) into an amazing island.
Marie,
Thank you so much for this compliment. I appreciate you for taking the time to comment.
Rachel
Great marriage of 2 pieces! I have a sideboard at the foot of my kingsize bed (right length!) for extra clothing and cloth storage. Plus I have one as a room divider between my kitchen and living room. They are such versatile pieces of furniture with so much storage space. Mine are the old mahogany color–they go with my 2 china cupboards and my late m-i-l’s bedroom set which I use. It is easy to find them cheaply as no one wants that old color–but oh, the joys of solid wood construction!
Thanks so much Kathy. I appreciate your input. Thanks for commenting.
Rachel
Congrats on persevering through to make your vision come to be!!! It looks perfect in your kitchen 😍😍. Well done my friend 👏
Diane,
I really appreciate this. I’m so glad you stopped by and took the time to comment. It really means a lot to me. Have a great day.
rachel
Gorgeous!!!
Virginia,
Thanks so much for stopping by. I appreciate your comments.
Rachel
What a great idea. It works beautifully in your kitchen. I’m very sentimental & hate rating with furniture so this is a win-win in my book! TFS.
XO- MaryJo
that’s “parting” not rating.
MaryJo,
Thanks so much for this sweet compliment. I appreciate you for taking the time to comment.
Rachel
Your farmhouse island is lovely! And what a smart way to create lovely statement piece! Pinned! Hope to see you at Tuesday Turn About!
Julie,
Thanks for this compliment. I will check it out. I appreciate this.
Rachel
This is amazing! Love your kitchen and love this! Great idea. Your bowed front buffet looks very similar to the one I just refreshed and put a sink into for our bathroom remodel. Love using old furniture in new ways!
Lora,
Thank you so much for these kind words. I appreciate you for stopping by.
rachel
Your vision and talent created a beautiful piece. I love your entire kitchen.
Elizabeth,
Thank you so much for stopping by.
I appreciate your encouragement.
Rachel
Thank you for the inspiration. I have been looking for kitchen islands or ideas for 2 years, but never found anything I liked or could afford. This makes perfect sense and I have a sideboard to start the DIY project.
Johnnye,
Oh that’s great. We are so happy with ours. Best of luck and thanks for stopping by. Your comments mean alot to me.
Rachel
So creative, keep up the fabulous work.
Diana,
Thank you so much for the encouragement and for stopping by.
Rachel
You have made a beautiful piece of furniture out of something that is no longer used and fits perfectly in your kitchen.Beautiful job.
Jack,
Thank you for stopping by and commenting. This means so much to me.
Rachel
Rachel, I love the dream you had for your kitchen island. I have always loved seeing pictures of your island plus all your lovely decor on top. It was so interesting to read how your kitchen island came about. Your island is so unique and the two antique pieces you used are lovely. You and your dear hubby have done a wonderful job in building your gorgeous home.
Mary-Ann,
I’m so glad you like it. We have been so happy with how it turned out. Thank you for your kind words.