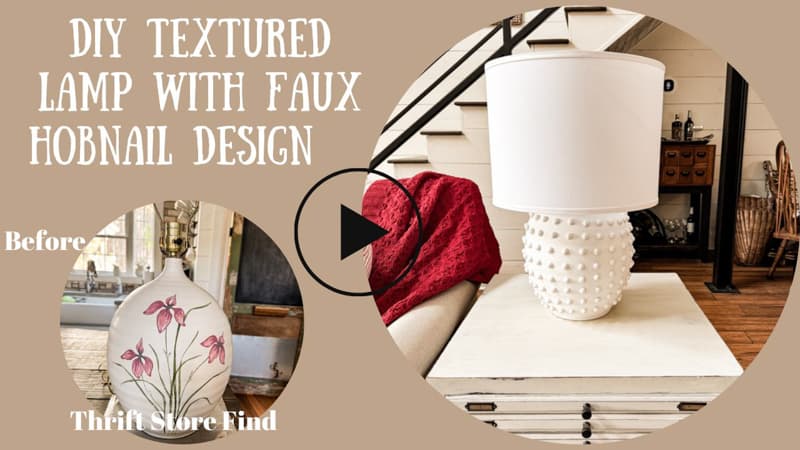
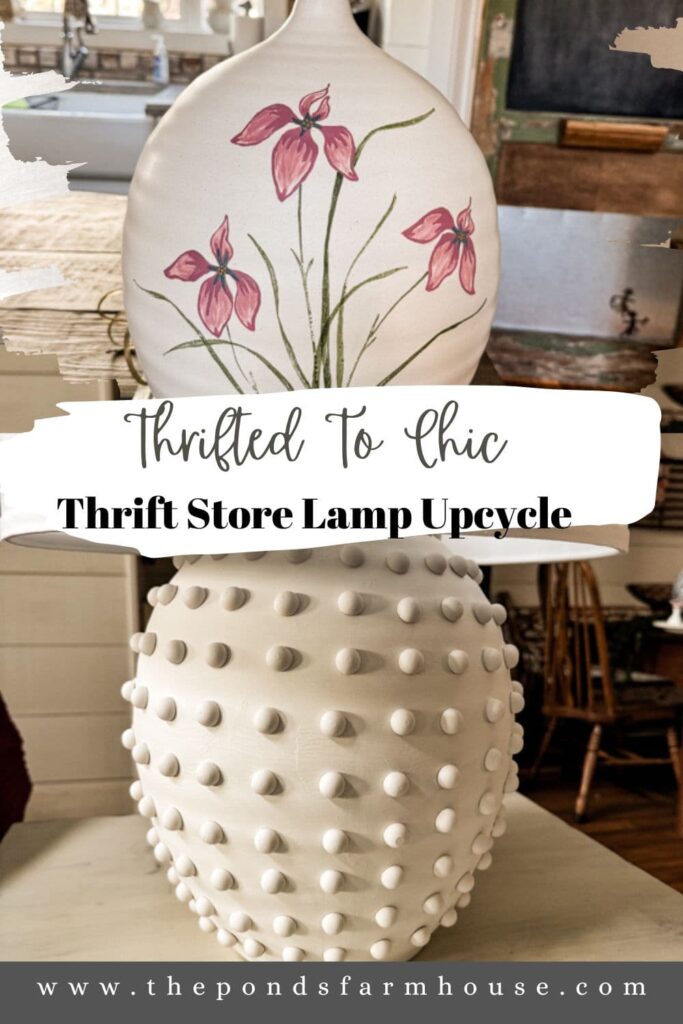
Thrifted to Chic: Create a Textured Lamp with Faux Hobnail Design
Want to create a designer textured lamp for less? See how to repurpose a thrift store lamp with a DIY faux hobnail design. This inexpensive upcycled lamp looks exactly like the Ballard Designs pricey, designer lamp and costs a fraction of the price. If you like hobnail milk glass, wait until you see this updated modern lamp style and I’ll show you how easy it is to make.
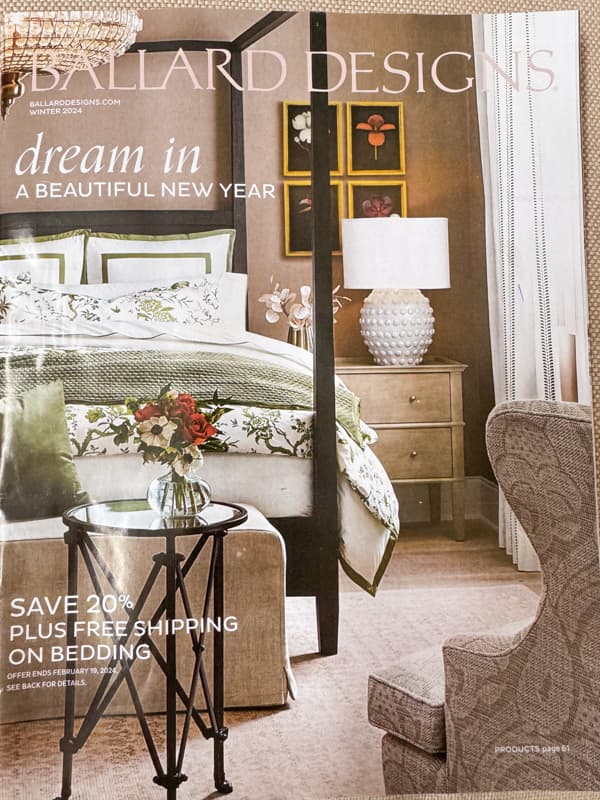
I wanted the lamp featured when I saw the cover of Ballard Designs Spring Catalog. I quickly flipped through the magazine, looking for the price, only to receive sticker shock. $409.00 was way out of my budget. Therefore, I did what any savvy thrift store shopper would do: I went thrifting.

(Posts on The Ponds Farmhouse may contain affiliate links. As an Amazon Associate, I earn from qualifying purchases. See the full disclosure details here.)
What is Hobnail Milk Glass?
Vintage Hobnail Milk Glass has raised bumps over the surface, similar to polka dots. The pattern is attributed to the Fenton Glass Company. However, you will find pieces from other manufacturers with a similar pattern.
Hobnail is considered one of the most desirable patterns of milk glass. It adds a whimsical, fun feel to simple vases and more.
You will see that many designers use the raised polka dot design when creating modern pieces of earthenware, vases, lamps, platters, and more.
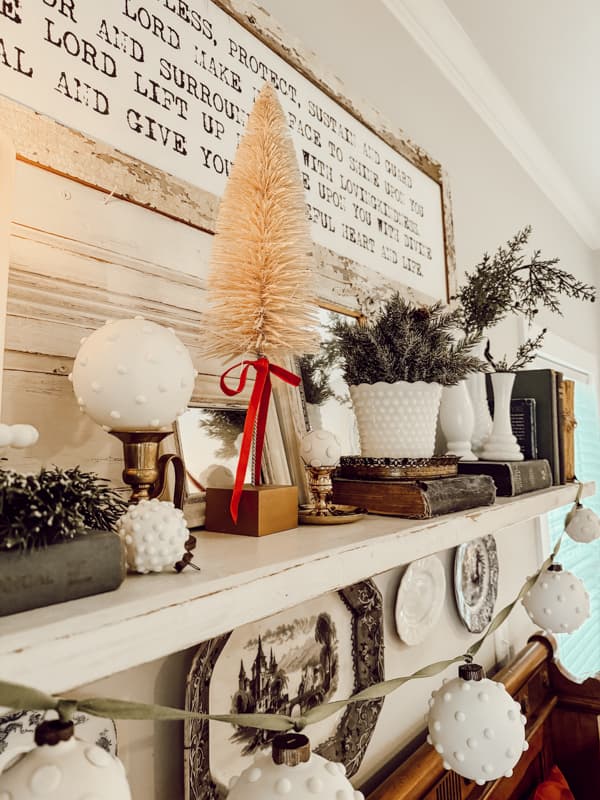
For the holiday, I made faux hobnail ornaments to style with the authentic milk glass hobnail vase.
How To Find The Right Thrift Store Lamp To Repurpose?
If you are like me and want to get the look for less, begin by checking out the thrift stores. Begin by taking a screenshot of the inspiration lamp and jot down the details. Consider the shape, height, and diameter when searching for a suitable thrift store lamp for your project.
Also, consider the quality. Make sure the lamp is in working order and has no broken parts.
Don’t worry if the shade is damaged; you will likely replace the lampshade. You may remember the lamp I found a few weeks ago. It’s a great-quality lamp, but I left the shade behind.
Thrifting with the Gals
Today’s post is part of our monthly series, Thrifting with the Gals.
If you are new to our series, we are friends who share a love for vintage and thrifted decorating.
We all live in different parts of the country, but we come together once a month to share thrift store shopping ideas and how to decorate with your treasures.
Here are the Gals:
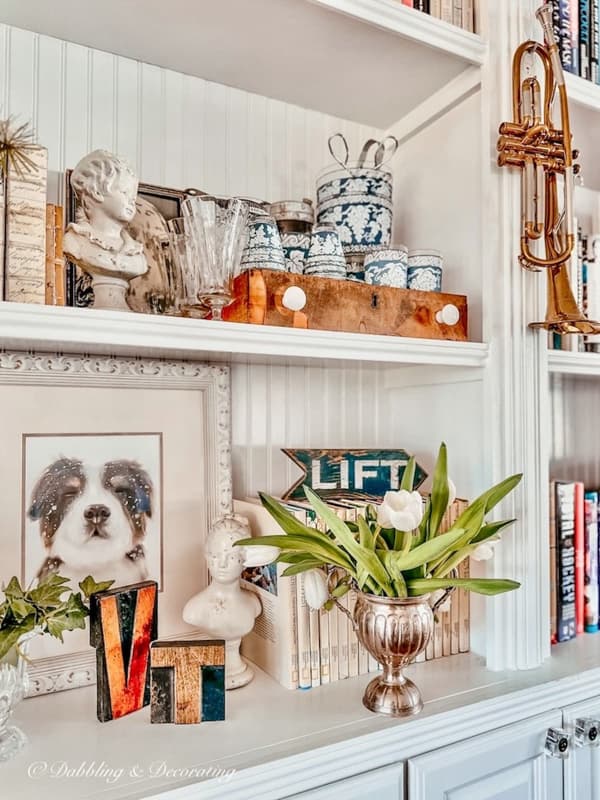
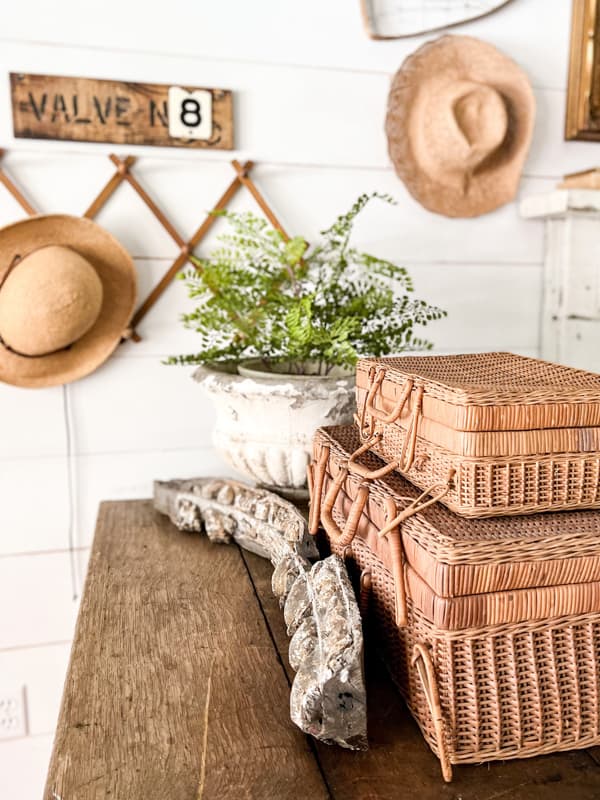
- Ann from Dabbling and Decorating finds her treasures as she travels between Vermont and Maine. She decorates both homes with so many vintage treasures.
- Kristin from White Arrows Home loves thrifting in Minnesota and adds some of her finds to her vintage store.
- Robyn from Robyn’s French Nest loves to travel and bring her vintage treasure to her lovely Florida Home.
- I am from North Carolina, and I love filling my farmhouse and beach cottage with thrift store finds. I focus on budget-friendly decorating and DIY projects.
- This month, our guest host is the talented Renae at Peacock Ridge Farm. You’ll find Renae thrifting across the country in Washington.
How To Prepare To Upcycle Lamp?
Now that you have found the perfect lamp for your project begin by cleaning the lamp to remove any oils or wax residue.
Next, gather all your supplies to upcycle the lamp. You only need a few items to give your thrift store lamp a high end look. You can find these inexpensive split wood balls on Amazon. Then grab some e6000 glue and chalk paint, and you’re ready to begin.
I already had some Annie Sloan Chalk paint on hand, but I’ve used this brand of chalk paint with success.
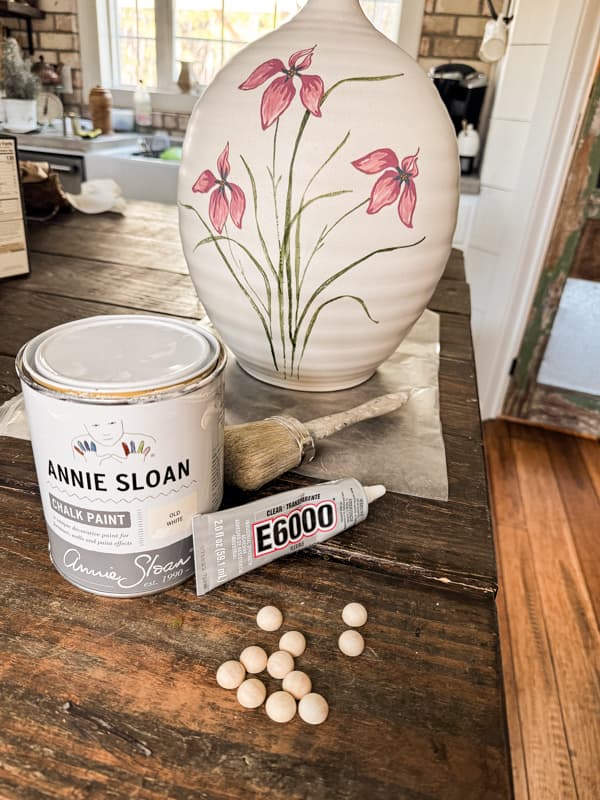
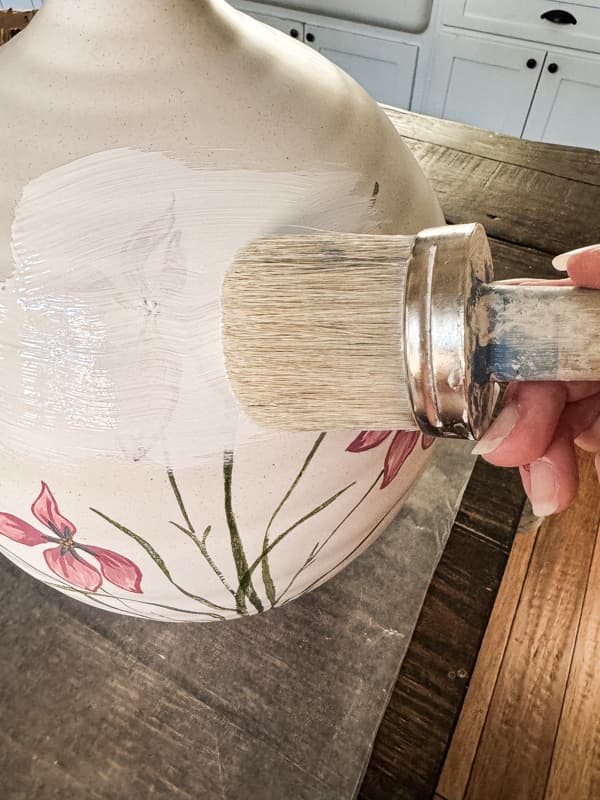
First, paint the entire lamp with chalk paint. The chalk paint will adhere well to ceramic and glass to ensure that the split wood balls will be secured properly to the lamp base.
You don’t need but one coat of paint, as you will be painting again once the hobnail design is attached.
How To Attach The Hobnail Design
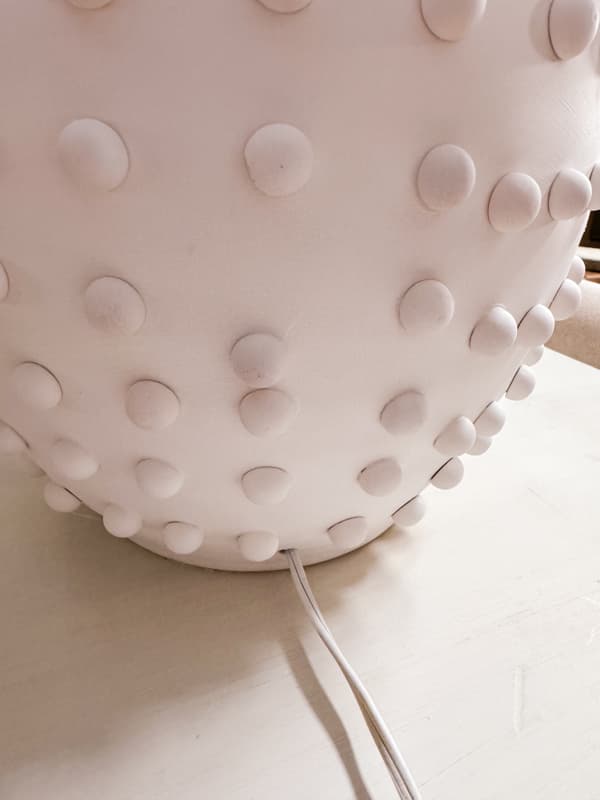
Once your paint is dry, you will need to determine the placement of the faux hobnail milk glass design on the upcycled lamp.
I recommend beginning in the middle of the lamp. Measure from the bottom up to the center and mark the spot for your first dot. Then, measure across for the next dot. Continue to measure from the bottom upward as you circle the lamp base.
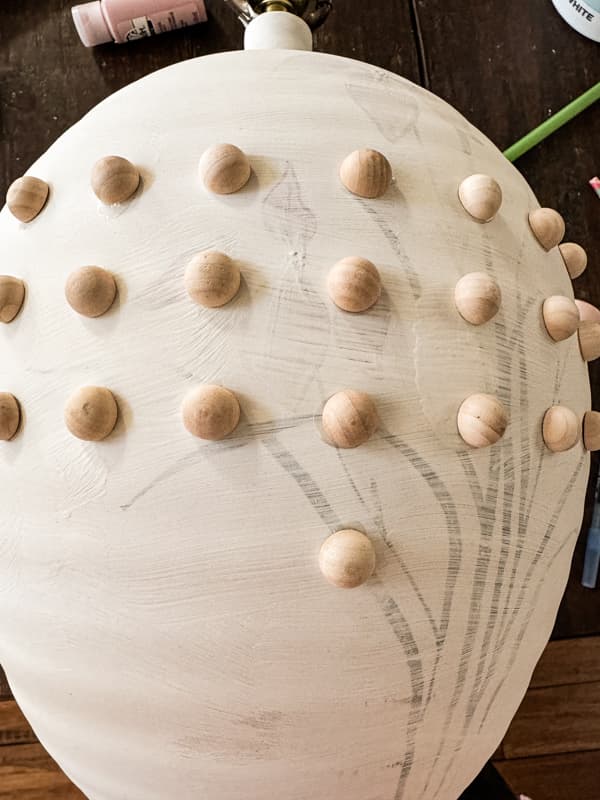
Once you have circled the lamp, begin to measure above and below the original dot placements. Work on the front side of the lamp first. Try to align the split-wood balls both vertically and horizontally.
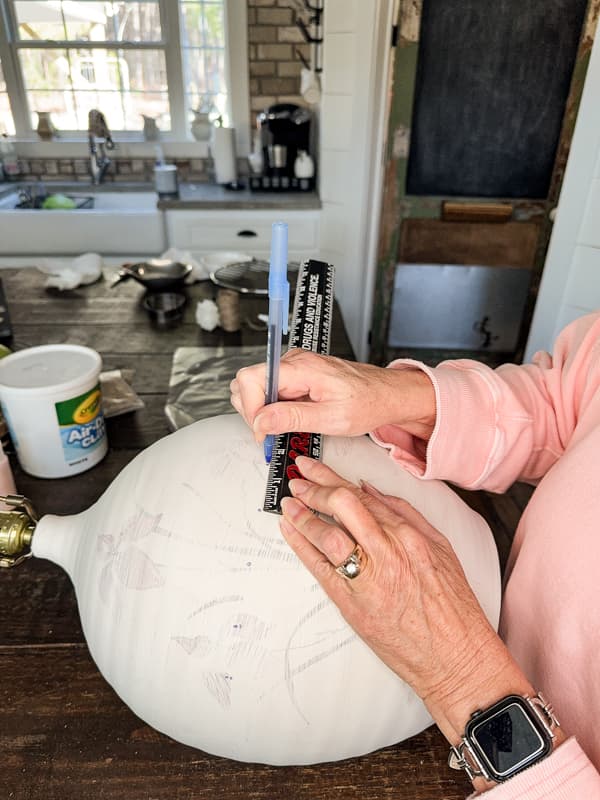
I only measured the first couple of rounds and because I could follow the pattern from that point. Because the lamp is smaller at the top and bottom, the hobnail design will be closer together as you go along.
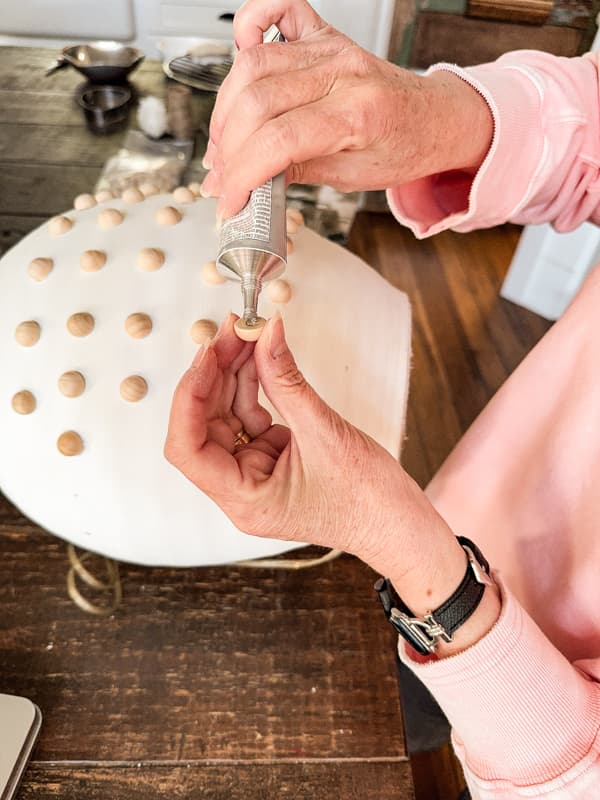
To apply the hobnail design, add a drop of e6000 to the flat side of the wooden ball. Then press it to the lamp base.

Insider Tip
I recommend working in small sections at a time. The e6000 glue will set fairly quickly, but not immediately.
Lay your lamp on it’s side and work at the top side. The hobnail wood bead will slide if you are not careful. Allow the section to dry before moving to another area.
You can place the lamp in a bowl or tray to keep it from rolling as you work.
Once you get to the backside of the lamp, you may find that all your hobnails are not perfectly aligned. Don’t worry! Once the lamp is painted, minor imperfections will not be noticeable to anyone but you.
I actually had one ball slip out of position and didn’t catch it until it was dry. I decided to leave it instead of possibly damaging the finish. Most of my projects have imperfections that only I’m aware of until now. LOL
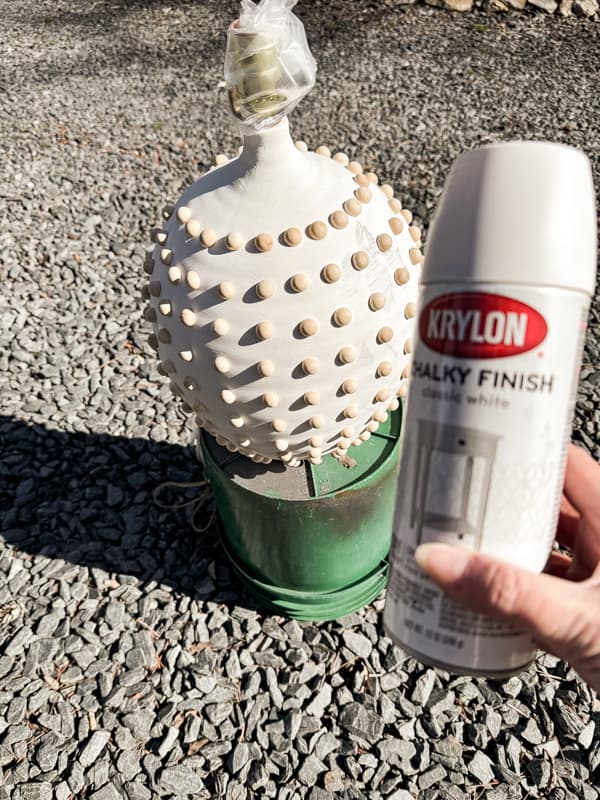
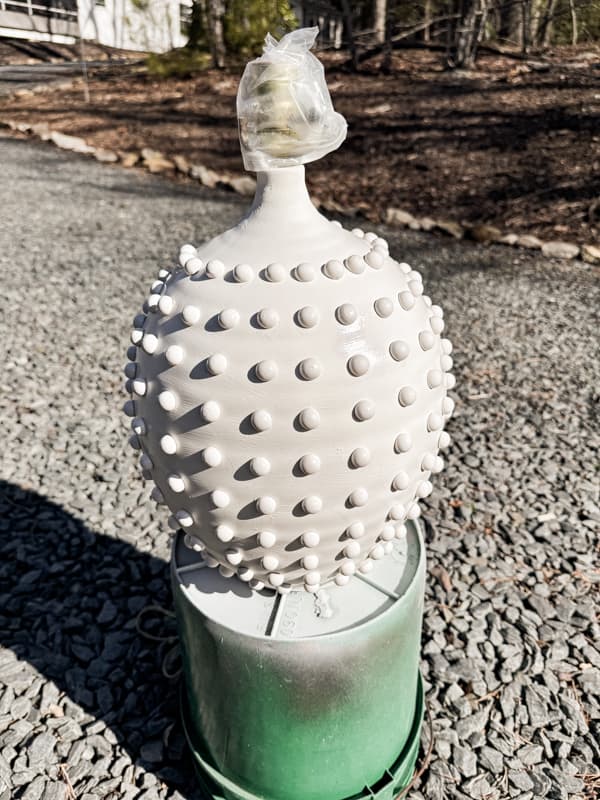
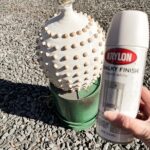
Paint The Faux Hobnail Lamp
Once all the glue is dry, you are ready to paint your new lamp. For this step, I choose Chalky White Spray Paint. I prefer a matte finish; however, a gloss white would look lovely as well.
Place the lamp outdoors or in a well-ventilated area and add the spray paint. Cover the electrical cord and hardware with plastic before painting. Spray with a light coverage, being sure to angle the spray to cover all sides of the hobnail design.
It’s better to apply 2-3 light coats than one heavy coat. Because my lamp had a painted design, I used three coats on the front of the lamp.
How To Replace The Lampshade
The lampshade that came with my thrift store lamp was nothing like the inspiration lampshade. Therefore, I needed to purchase a new shade. The first shade was completely wrong; it was way too narrow.
So, I carefully analyzed my inspiration photo and found this lampshade with the appropriate dimensions. Another issue was the harp was 14 inches, which was too tall for this lampshade. Therefore, I replaced it with an 8-inch harp. This allowed the new shade to sit perfectly on the hobnail lamp.
Upcycled Lamp
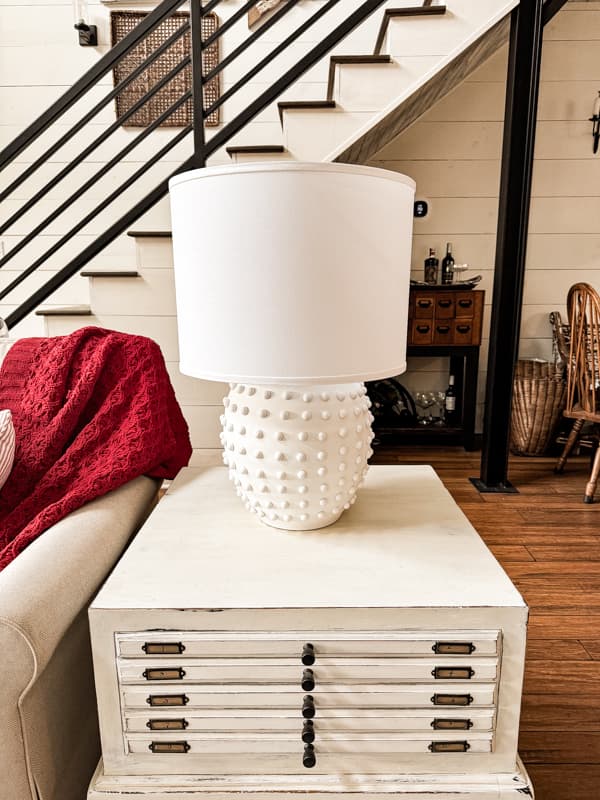
The upcycled lamp is finished, and I couldn’t be happier with the style and unique design.
The shade is proportionately the same as the inspiration lamp, and I love it in the living room. The total cost of this project, including the lamp and new lampshade, was $78.00. It only took approximately 2 hours to update the lamp (not including stops for drying time). It’s a bargain compared to the $409.00 inspiration lamp.
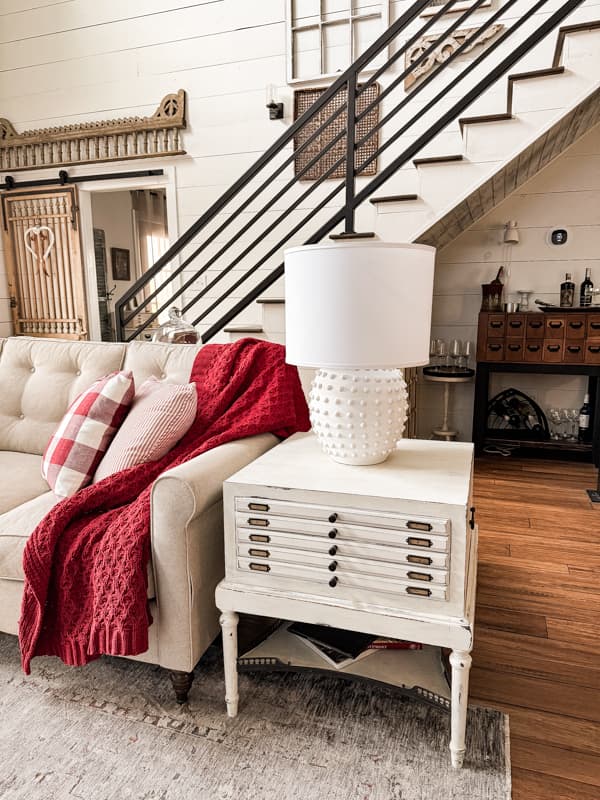
I am in the middle of updating this space for early spring, and the upcycled lamp adds a fresh touch.
I look forward to sharing the updated living complete with a new rug and pillow covers. Plus, restyled tables and mantel.
You might also enjoy How to make Hobnail Christmas Ornaments.
Resources:
Scroll and click items for more details.

Thrift Store Lamp Makeover
Equipment
- B6000 Jewelry Glue Clear Rhinestone, Inlay Glue, Pendant Adhesive, HOLIKA 25g Craft Adhesive Glue with Precision Tip Multifunctional Fabric Glue
- 200 Pieces Half Wooden Beads Unfinished Split Wood Balls Half Crafts Natural Balls for Paint DIY Christmas Ornament DIY Projects Crafts Arts (Natural Wood Color)
- Shabby Chic Chalk Furniture Paint: Luxurious Chalk Finish Craft Paint for Home Decor, DIY, Wood Cabinets – All-in-One Paints with Rustic Matte Finish [Chalky White] – (8.5 oz Covers 32 sf)
- FenchelShades.com 16″ Top Diameter x 16″ Bottom Diameter 12″ Height Cylinder Drum Lampshade USA Made (Linen White)
- Lamp Harp 8 Inch, Saangseon Light Duty Antique Brass Lamp Shade Holder Replacement with Finial and Detachable 3/8 Saddle Base, Set of 2 DIY Lighting Accessories
- Chalk Paint Brush Set – 3 Pcs Chalk Paint for Furniture Natural Bristle Painting & Waxing Brushes, Painting Stencil, DIY Furniture, Home Decor, Card Making, DIY Art Crafts
- Lamp Finials 2-Pack (Wood Ball, 1-3/8″ Tall), Secure Lampshade to Table/Floor/Pendant Lamps, Paintable Decorative Natural Pine Replacement Finial Set, 1/4-27 IPS Pipe Compatible, American Business
- Krylon K04101000 Spray Paint, 12 Ounce (Pack of 1), Classic White, 12 Oz
Materials
- Thrifted Lamp
- Split Wood Balls
- e6000 Glue
- Chalk Paint
- Chalky Spray Paint
- Replacement Lampshade
- Repalcement Lamp Harp
Instructions
- Clean and paint lamp with chalk paint
- Measure for faux hobnail placement at center of the lamp
- Mark placement around the center of the lamp approximately 1 1/2 inches apart.
- Measure above and below the center line the same distance.
- Use e6000 glue to attached the split wood balls to the lamp base where marked.
- As you begin to work above and below the center of the lamp, try to keep the balls aligned and spaced the small.
- The closer to the top and bottom, you will need to bring them closer together to keep them aligned.
- Work in sections to avoid the balls slipping. Lay the lamp on it's side and work at the top. Once the glue is partically set, you can more to another area.
- Once the lamp based is covered, use Chalky White Spray Paint to cover over all the wood balls. Cover the harp and other hardware before spraying.
- Add new lamp shade and new harp.
Video
Other Lamp Makeovers
Here are some additional lamp makeovers for additional inspiration.
- Thrift Store Ginger Jar Lamp Update
- Easy Thrifted Lamp Makeover
- Give An Old Lamp A New Look – Nautical Lamp
- Napkin Decoupage $1.00 Thrift Store Lamp Makeover
More Thrifting With The Gals
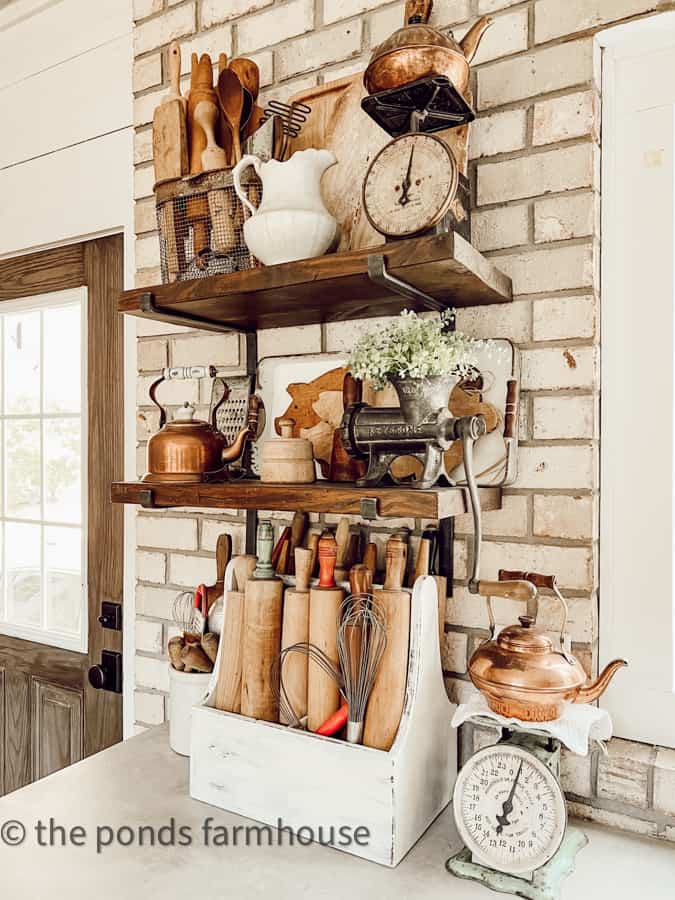
Now, let’s see what my thrifting friends have been up to this month. First, let’s check out our guest host Renae’s Updated Living Room with Vintage and Thrifted Finds.

Renae’s Family Room Makeover With Vintage & Thrifted Finds / Kristin’s Decorating with Vintage Marshmellow Tins
Ann’s Best Vintage Finds For Winter Collections / Robyn’s 10 Thrifted Finds For Spring Decor
Thanks for stopping by. I look forward to sharing my next adventure with you.

Pin It To Remember It
Did you find some great ideas you’d like to save for future reference? Hover over the images you’d like to save and pin to your favorite Pinterest Boards when you see the PIN button.


What a cute idea. The lamp came out amazing loved it👍🏻
Ann,
Thank you! I was thrilled with the results.
Your lamp looks gorgeous! I love it. You amaze me.
Renae,
You are so kind. Thank you and so glad you joined us today.
I love how this turned out Rachel! So creative!
Michele,
I’m so glad you like it. I’m happy with the results as well.
It looks fantastic! I need to go thrifting more often. But even if I did, I wouldn’t come up with the stuff your brain does. Love it! pinned
Cindy,
I really appreciate you for saving and pinning. Thank you for your encouragement.
totally adorable, Rachel. What a fun and creative save!!
Debra,
Thank you for your sweet comment. I’m glad you like it.
This project is amazing!! You rock!!
Jennifer,
You are so sweet. I did love this one too.
I went thrifting with friends in Wilmington this week. We used your list of stores as a guide. It was fantastic! We also ate at Indochine. Fantastic food!
Thank you!
Beth,
I’m so glad you found my post helpful. Indochine is such a fun and unique restaurant. Glad you liked it.
This is such a great idea! I love hobnail!
Kristin,
I’m so glad you like it. Thanks for stopping by.
How do you come up with these creative ideas time after time? I would have never thought of reusing a lamp like this. Thanks for the inspiration.
Kim
I appreciate your kind compliment. I appreciate you for stopping by.
Love to know where you got that sofa?
Susan,
The sofa came from Klaussener Furniture The Trish Yearwood Collection. The company closed suddenly last summer so I don’t know that you’ll find one.
Thanks so much for sharing this idea and the steps for how you achieved the look as a DIY. I was inspired and took a $5 yard sale lamp as my project. I am really pleased with the finished product! Your instructions made it an easy one and kept the cost low for having a look that is upscale.
Beverly,
Oh I’m so glad you found this helpful. So glad you found a lamp for a steal. That is always exciting. I’d love to see your lamp. I like to include other peoples projects on my Dirt Road Adventures on Sundays.