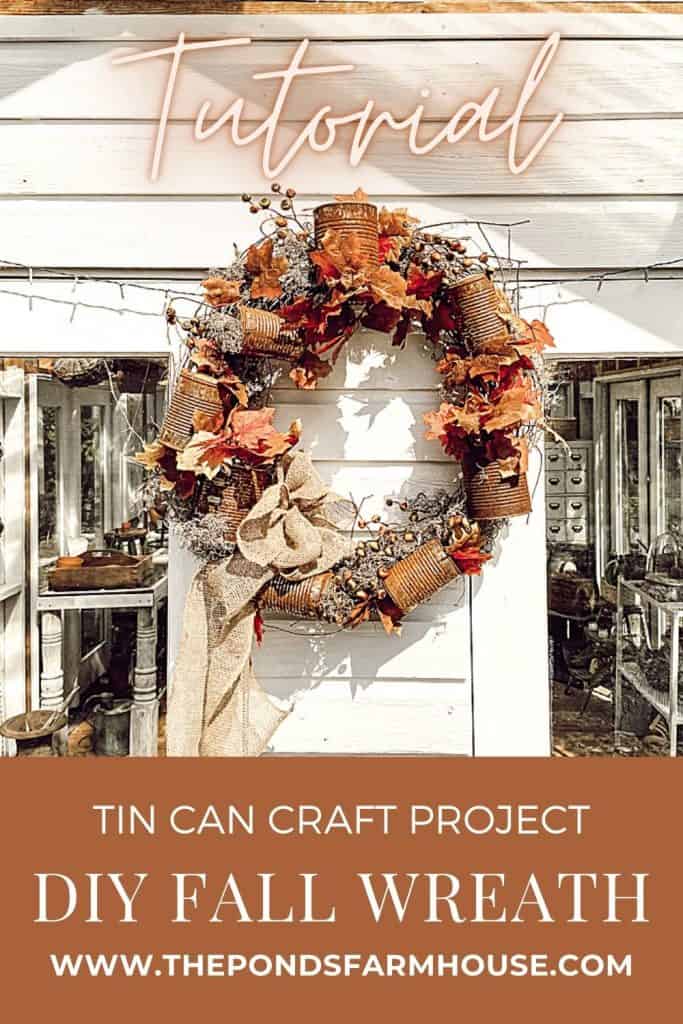
DIY Fall Wreath: Cheap & Easy Tin Can Craft with Dollar Tree Florals
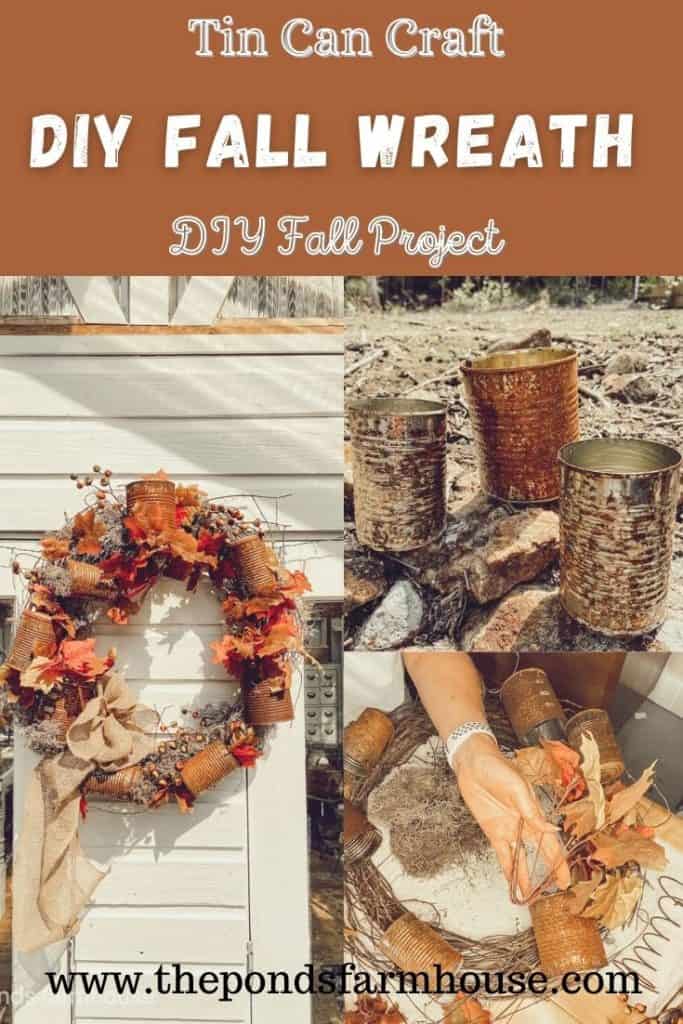
Are you ready for a cheap and easy Fall wreath tutorial? Welcome to making a DIY fall wreath with rusted tin cans. You can create this easy and inexpensive recycled tin can craft using inexpensive Dollar Tree materials. All you need is tin cans, a wreath form, and fall decorations. I’ll show you step-by-step how to create this rustic and beautiful wreath that will add a touch of fall to your home.

Do you remember the wreath I added to my Greenhouse for Spring? It was constructed using terra cotta pots and Dollar Tree florals. Well, it was time to take that wreath down since fall is rapidly approaching, and I wanted a fun replacement. You’ll be surprised at how lovely rusted tin cans look on this project. Let me show you how easy it is to put this wreath together.
DIY Rusted Tin Can Craft
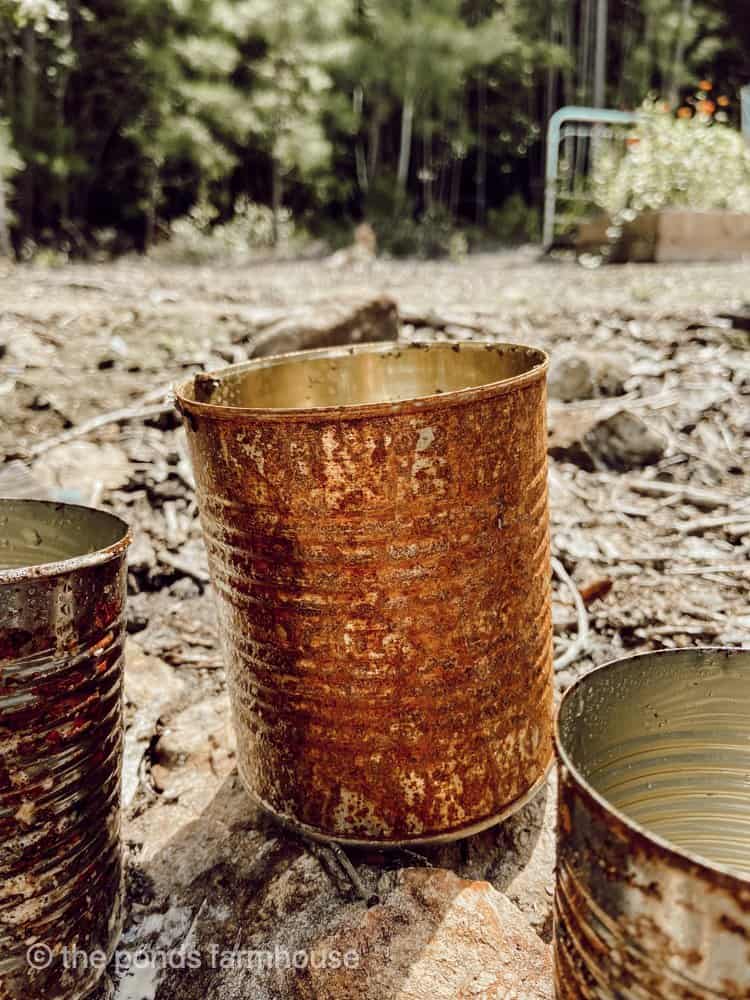
First, you will need several rusty tin cans. As you know, I save a lot of my cans. However, most still need to be rusted. If you plan your project well in advance, you can leave your tin cans to the elements. Wash them to remove any oils or food and let nature take its course.
However, if you are like me and want to start right away, you are in luck because you can quickly add some rust with the How To Rust Metal Fast tutorial.
(Posts on The Ponds Farmhouse may contain affiliate links. As an Amazon Associate, I earn from qualifying purchases. See the full disclosure details here.)
DIY Fall Wreath Materials
After I rusted a few additional cans, I was ready to gather my supplies.
- Large Grapevine wreath – I made my wreath by pulling grapevine from the trees around our property. However, here is a link for one a similar size.
- Approx. 7 – 8 Rusted Tin Cans
- Fall Leaf Stems – I found my leaves at Dollar Tree, which were perfect for this project.
- Spanish Moss – you only need a small amount, and it’s available in small quantities at Dollar Tree.
- Hot Glue Gun and Glue
- 30 gauge wire
- One large nail
- Hammer
I have several wreaths that I have made from foraged grapevine, which I previously shared in this post: 10 Tips for Free Fall Decorations.
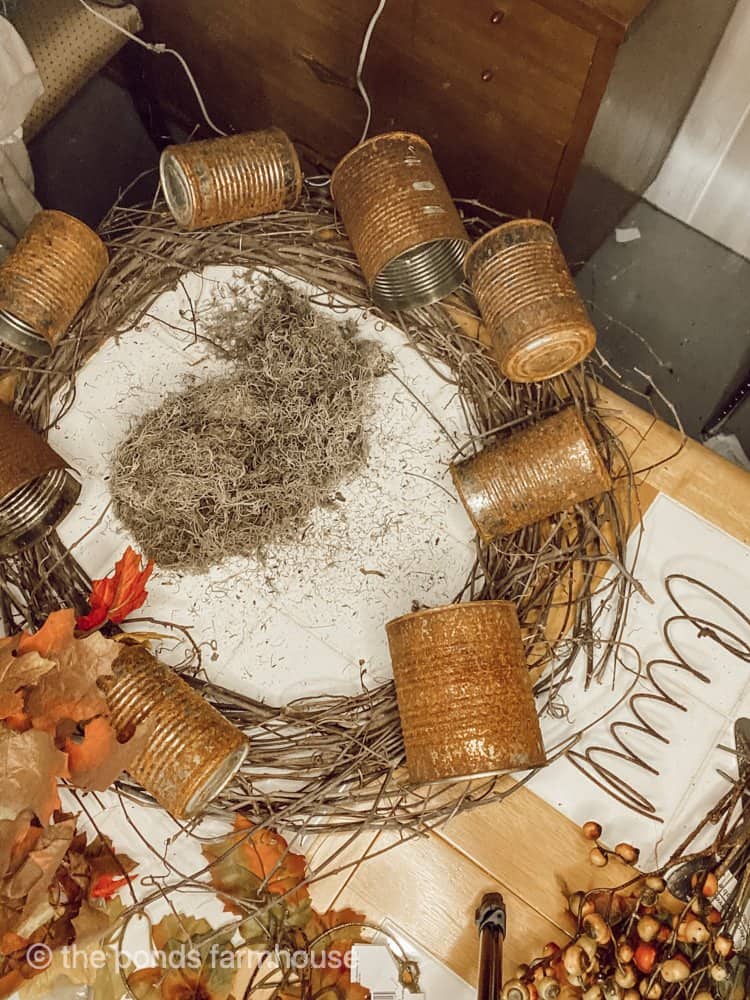
Prepare Tin Cans
First, you want to prepare your tin cans to easily attach to the wreath. Fill each can approx. 1/2 full with water and freeze. Then, using a large nail and hammer, drive 2 holes into the center of the can, side by side. The frozen water will prevent the can from denting.
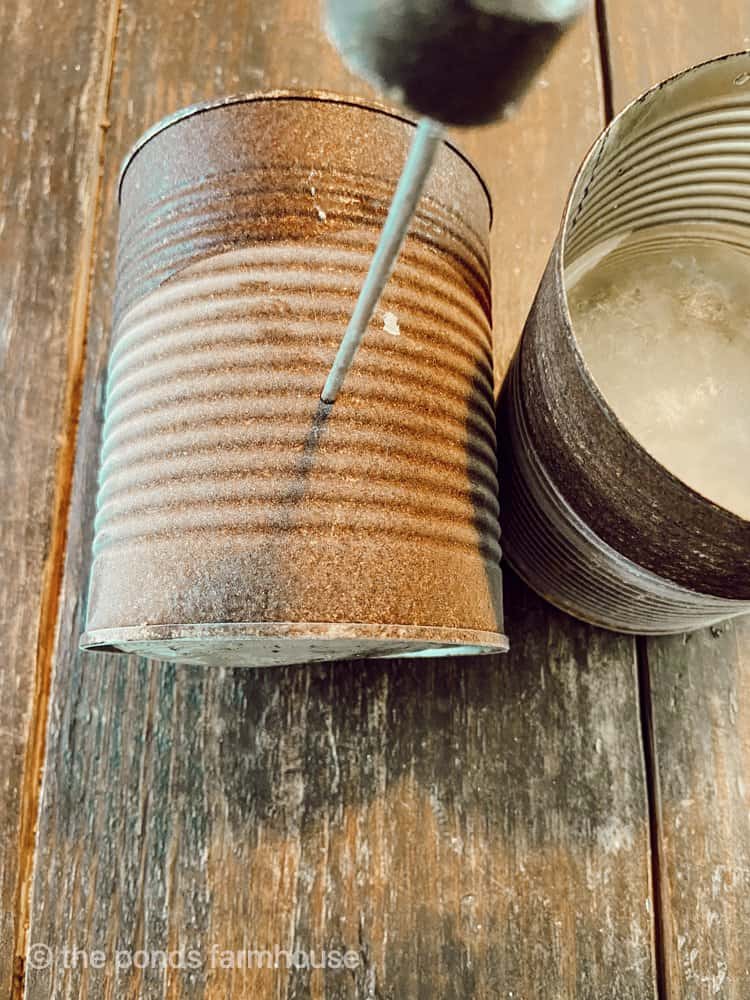
Allow approx. 2-3 inches between the nail holes. After you have all the holes, melt the ice and dry your tin cans.

How To Assemble DIY Fall Wreath
To assemble the DIY Fall Wreath, begin by adding a length of galvanized wire to each tin can by pulling it through the holes you created in the cans. I allowed approximately two feet for each can, and you want both ends of the wire to be evenly extended outside the can.
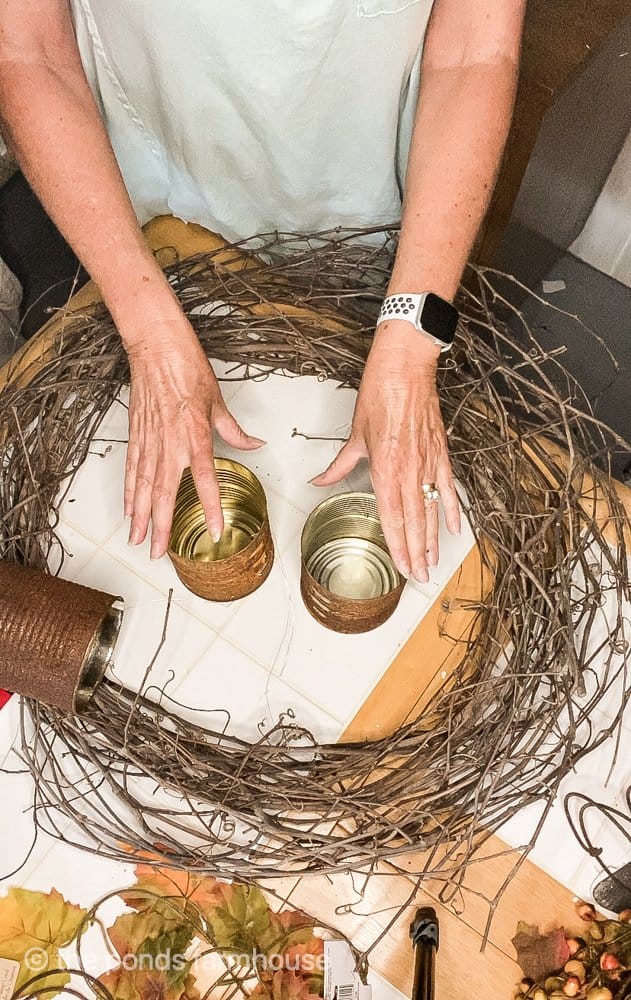
Tin Can Craft
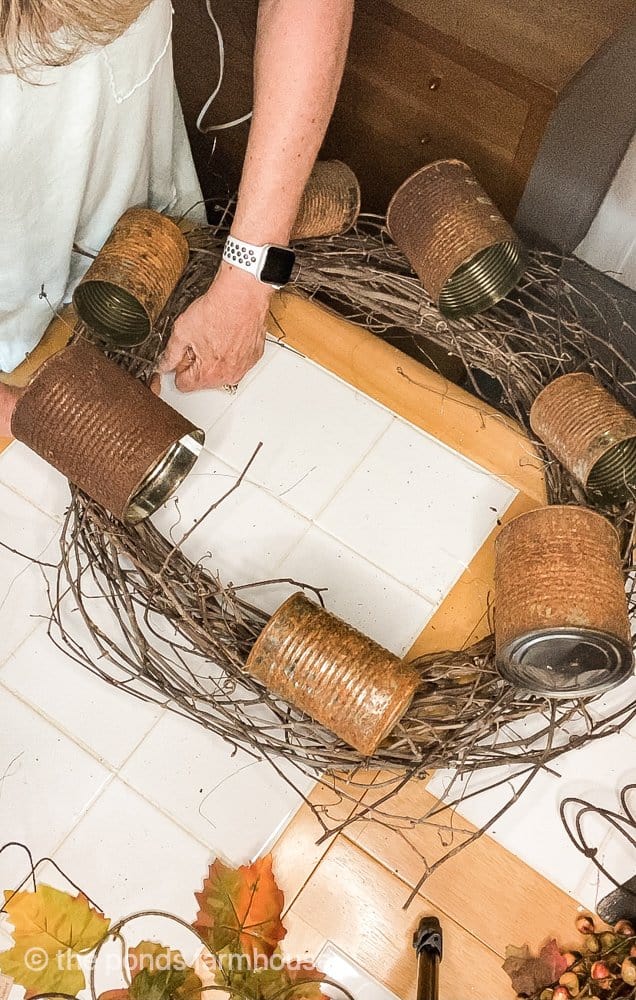
Next, determine the placement of each can for this tin can craft. Lay out your cans before securing them to achieve the desired arrangement. Then, using the wire, firmly wrap it around the grapevine wreath until the cans are securely in place.
In addition, to create some variety, place some cans facing upward, some downward, and some sideways.
How To Add Spanish Moss & Fall Leaves
Once all the tin cans are attached to your fall wreath, heat up the hot glue gun, and let’s begin adding some Spanish moss between the cans.
You will also use the hot glue to add your floral leaves and berries.
I purchased these fall leaf stems at The Dollar Tree, and I had some berry stems from last year that I decided to add to the fall wreath.
For the three larger cans, I used a whole stem. I folded up the excess stem and used hot glue to secure it to the tin can.
Then, begin to fill inside the smaller cans with a combination of Spanish moss and individual floral leaves. Attach with hot glue.
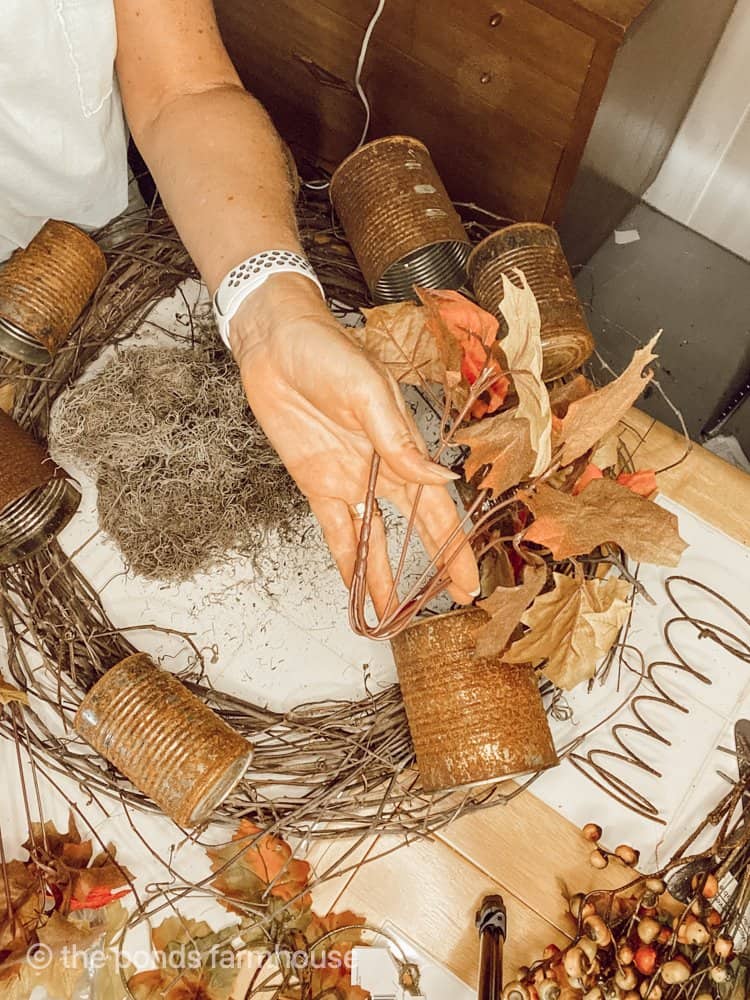
Note: The tin cans don’t have to be completely full. I let the leaves appear to be falling from the cans.
Continue to fill with Spanish moss, berries, and leaves until you achieve the desired fullness.
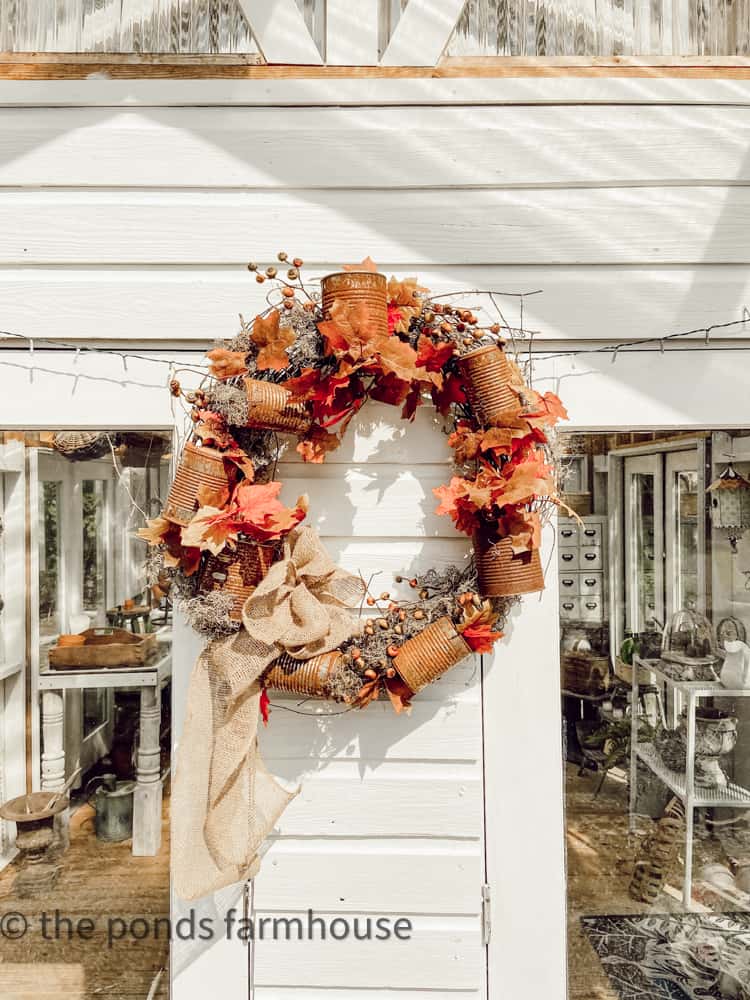
Add a bow if desired. One spot called for a bow. I purchased some ribbon from The Dollar Tree and attempted a bow without great success. However, I had some burlap ribbons from another project and easily created a simple bow. You can see tips on making a bow here.

DIY Fall Wreath – Rusted Tin Can Craft
Are you surprised at how good this cheap wreath turned out? Many people expressed surprise, and I understand why they feel that way. Maybe the idea doesn’t sound appealing, but I love this look for fall, and it’s perfect for a front porch, an entry door, or an outdoor shed.
I originally placed the wreath on our rock column because the colors looked so pretty compared to the natural rock.

However, the Rusted Tin Can Craft Fall Wreath was destined for the greenhouse, and I look forward to adding more fall touches to it soon.
Video Tutorial
You can also watch this video tutorial on how to make the Rusted Tin Can Craft.
Additional Wreath Ideas
- DIY Sunflower Wreath with Pinecones
- DIY Neutral Star Wreath
- Trendy Metal Flower Wreath – Anthropologie Hack
- The Secret To Making A Magnolia Wreath with Fresh Leaves
- How to Make A Corn Husk Wreath
- How to Make A Fall Wreath With Dollar Tree Burlap Leaves
- The Secret To Making a Fall Wreath With Preserved Leaves
- Terra Cotta Pot Spring Wreath
The new wreath is perfect for fall and was so inexpensive to make. I hope you will give this tin can project a try.
Thanks so much for stopping by, and I look forward to sharing my next adventure with you!

Pin It To Remember It
Did you find some great ideas you’d like to save for future reference? Hover over the images you’d like to save and pin to your favorite Pinterest Boards when you see the PIN button.


That is so adorable, I love it!! Your creativity amazes me!
Corine,
You are so kind. I’m so glad you liked it.
When it rained, did the rust run down onto the wall?
Starr,
No, the area where the wreath is located is covered. You can spray the rusted cans with a Rustoleumn Clear Sealer Matt Finish if that is a concern.
What an awesome craft!!! The DIY wreath is awesome!
Stacy
I really appreciate this.
Rachel, your wreath is beautiful, and it looks perfect on the greenhouse. I love it.
Miche,
I’m so glad you stopped by and thanks for the compliment.
That’s a great idea! Thanks for sharing it!
Margie
Thanks so much for stopping by.
Hi Rachel! Who would have ever thought to make a fall wreath with your rusty cans! It looks amazing! I’ve just found your blog and I know I’m going to enjoy visiting.
Be a sweetie,
Shelia 😉
Shelia,
Welcome! I’m so excited you found me. I hope you enjoy my adventures.
Absolutely love this idea!! Great job and thanks for sharing!!
Hugs,
Deb
Debbie,
I’m so glad you like this. Thanks for stopping by.
How fun, I would have never thought of this, It’s perfect for fall and your gorgeous greenhouse!!
Debra,
I’m so glad you like it. It even surprised me how cute it turned out.
Loved this…perfect for fall!
Oh I’m so glad you like it. Thanks for stopping by.
I do not believe I have recently commented on any of the projects on blogs, but THIS ONE IS A WINNER! I plan on trying it. In future, I will be saving some of my tin cans but for now, I need to make soup or something to collect my cans. Thank you for this project, I love it!
Margaret Ann,
I’m so glad that this is a comment worthy post. I appreciate you for sharing your thoughts with me. I will strive to continue to post comment worthy posts.
For a minute, I thought tin cans really but, it is so stink’n cute, you are amazing!! It’s perfect for Fall.
Marlene,
I’m so glad you like it and that it surprised you. Actually, I was surprised at how cute it turned out. Thanks so much for your support.
You made rusty tin cans look amazing! Absolutely love it!!
Rebekah,
Thanks so much.
This is so fun! Thanks for sharing at Vintage Charm–pinned!
I really appreciate this.
This is such a cute idea, Rachel. Love it!
Jen,
Thanks so much.
It’s adorable Rachel and what a great way to repurpose something. Your wreaths always amaze me!
Shawna,
Thanks so much.
I love this wreath!! It’s so cute!!
Jennifer,
It was a fun project.
I adore your rusty can wreath. I have to make one too.
Happy Fall,
Kippi
Kippi,
I’m so glad you like it.
Rachel, who’d thought rustic tin cans would be the core element of a beautiful fall wreath — you! What a clever, unique and fabulous DIY project!
Debbee,
I appreciate this so much. Your encouragement means so much to me.
Oh my soul I love this wreath! Only you could turn real trash into a beautiful treasure like that! Featuring it on Farmhouse Friday LP today! Thanks for linking up. Pinned
Cindy,
You are so sweet.
This is the best fall wreath EVER! I really want to make one of these Rachel, thanks for the great idea.
It’s so easy Kim. Go for it.
OMG I am soooo in love with this wreath!! I love tin cans and I have hundreds of them waiting for me to use. I’ve made several things already as well as a tin can wreath a few years back but who woulda thought to add more than cans. I know what I’ll be doing with mine from here on!🙃
This is simply awesome for fall!
Shirley,
I’m so glad you liked this tutorial. I was actually amazed at how good it looked. I appreciate your support.
This is so gorgeous! I didn’t know where it was going at first, lol, but it turned absolutely amazing!
Christin,
Thanks so much for your kind words.
What an adorable idea Rachel. I love the old rusty cans, they add such character to your wreath.
Wendy,
I really appreciate this. Thanks for stopping by.
@Rachel, I finally found your fall wreath with rusty cans and now will try to do something for the Christmas holiday using the rusty cans…Poinsettias and berries and few pine cones and red and green bow??? Whatcha think?? HAPPY HOLIDAYS TO ALL OH! MERRY CHRISTMAS!!! I’m old school
Emma,
That sounds so lovely. I hope you’ll share it when you finish it. Can’t wait to see.
Oh my goodness! What you do with tin cans is amazing! You are so creative. Hugs to you.
Thank you so much. I was amazed at how good it looks. LO>