Easy DIY Thrift Store Basket Upcycle Tutorial for High-End Coastal Style
Hey friends, I’m back with another easy, high-end coastal-style tutorial to continue the updates on our beach cottage. In addition to the Serena & Lily-inspired vases and rattan candlestick holder dupes, I wanted to add a fun seashell basket to the mix. With just a few shells and paint, I turned a damaged thrift-store basket into boutique-worthy coastal decor.
If you’d like to add a breezy beach touch to your home, follow along with this simple step-by-step tutorial. I promise you will be amazed at the transformation.
Let’s get started!
(Posts on The Ponds Farmhouse may contain affiliate links. As an Amazon Associate, I earn from qualifying purchases. See the full disclosure details here.)
Budget-Friendly Coastal Basket Makeover Inspiration
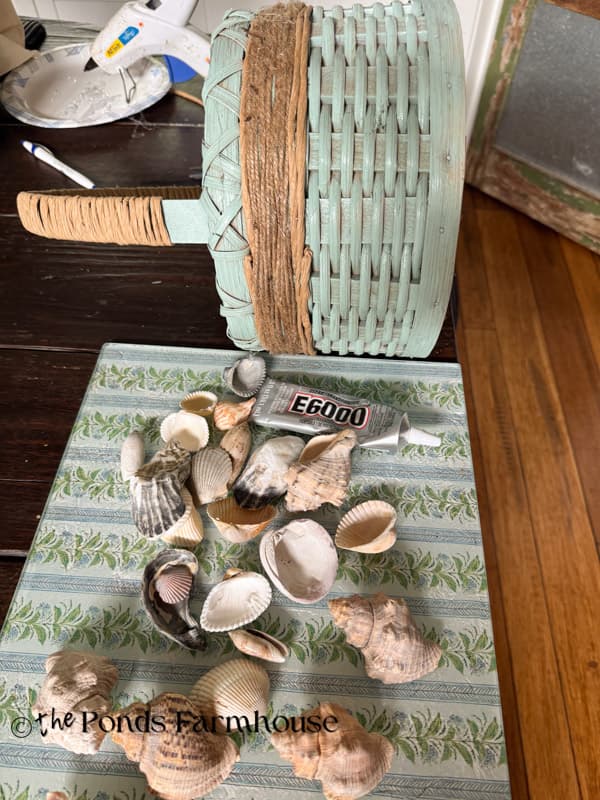
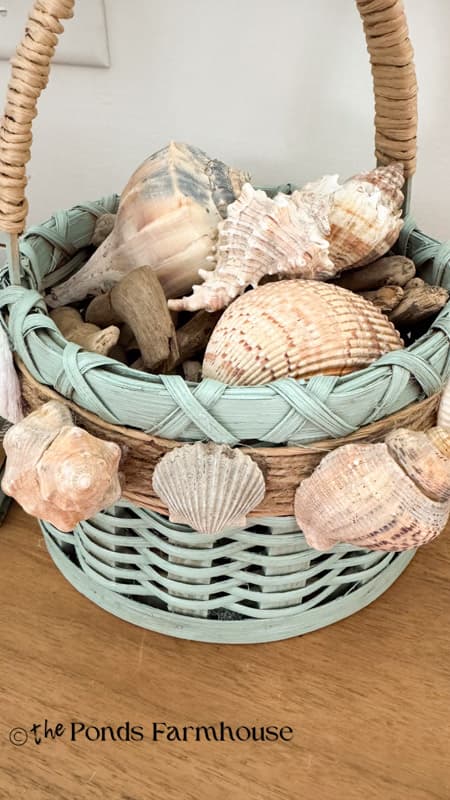
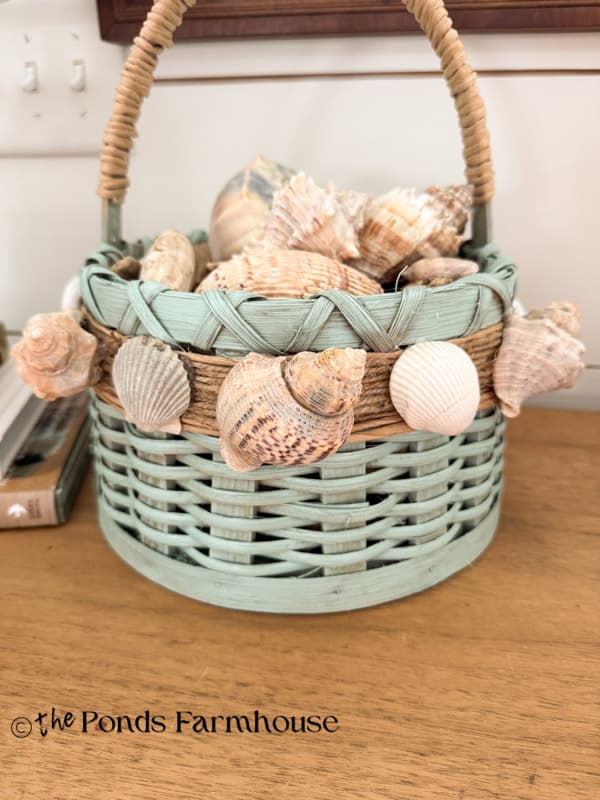
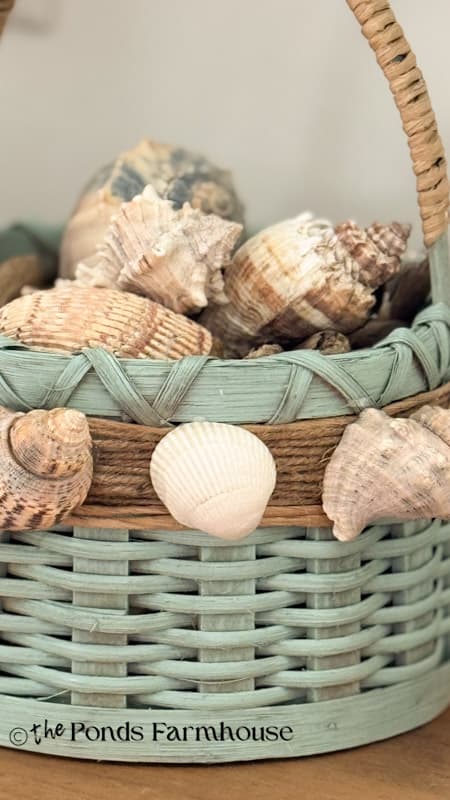
I was inspired to create this fun coastal basket when I found a damaged basket and some seashells at a thrift store. Both of these items were inexpensive, and I only spent $6.00. Since the handle was broken and the basket had some stains, I knew I’d need to make some repairs. I decided to paint the basket a seafoam green to match our new beach cottage bedding. First, I’ll share the supplies and then show you exactly how I upcycled this damaged basket.
Supply List
- Old Basket
- Several Seashells – If you don’t have a supply, you can check out these seashells.
- Jute Twine
- 1 Roll of Floral Vine Bind Wire
- Light Green Spray Paint
- Hot Glue Gun
- E-6000 Glue
How To Upcycle a Damaged Thrifted Basket
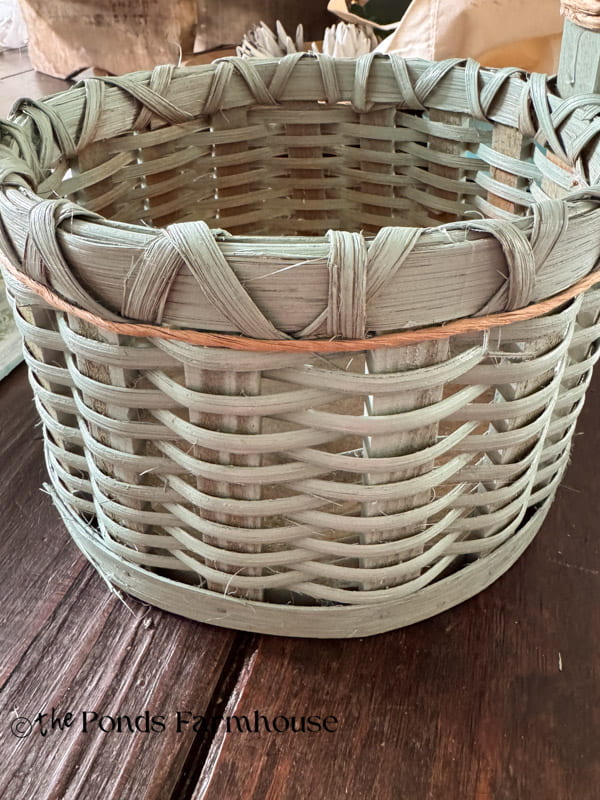
Since the basket I’m using is a less-than-perfect thrift store find, I decided to paint it to cover some stains. The handle was broken, so I also needed to do some repairs. Let’s get started with my step-by-step process.
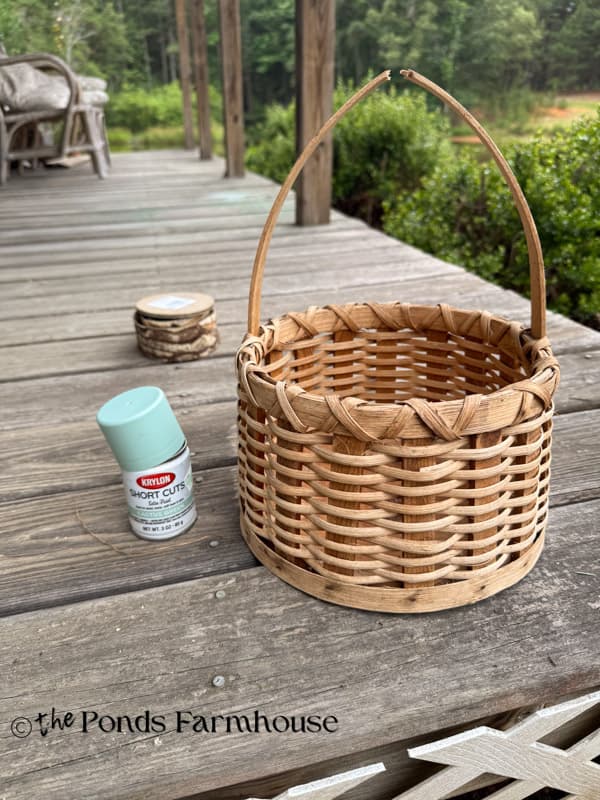
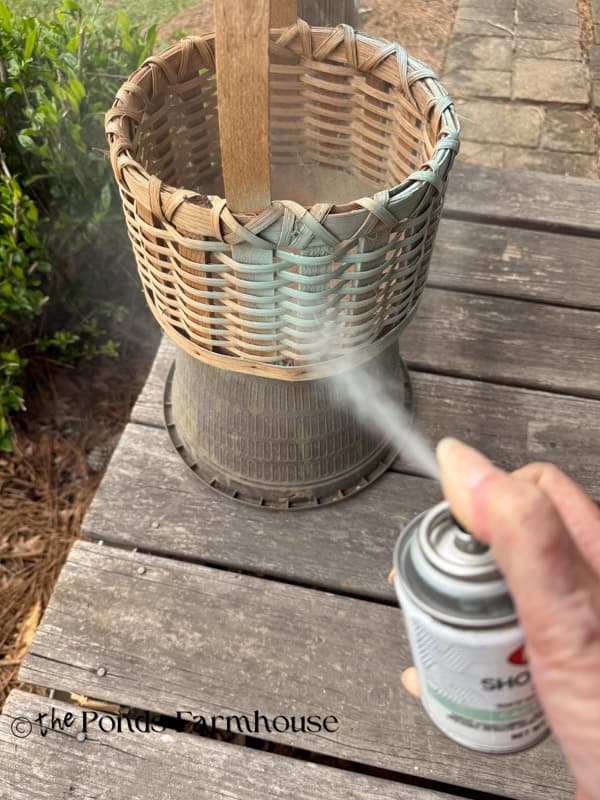
Step 1 – Paint The Basket
Since I’ve been updating the beach house decor, I decided to paint the basket a light, beachy green. I used cactus green because I had some leftover from a previous project. You know I’m a waste-not kind of girl, and the color will look great with our new updated bedding.
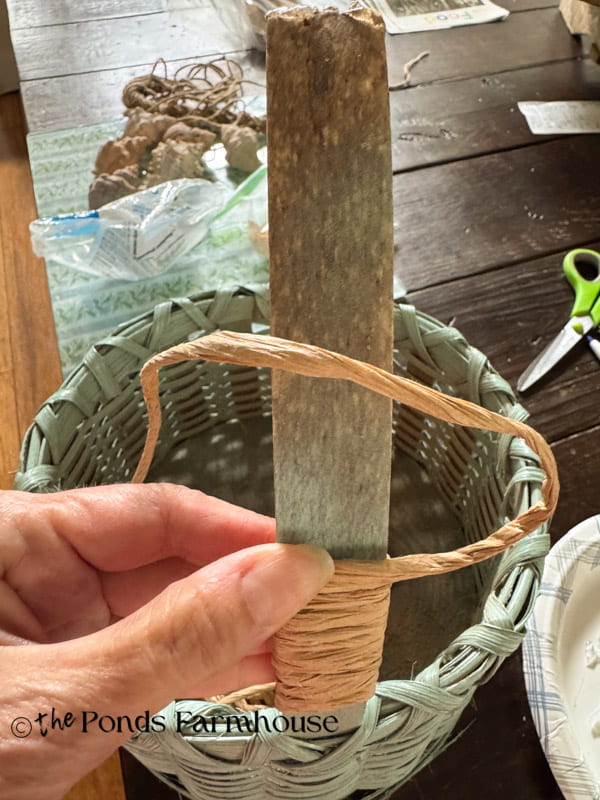
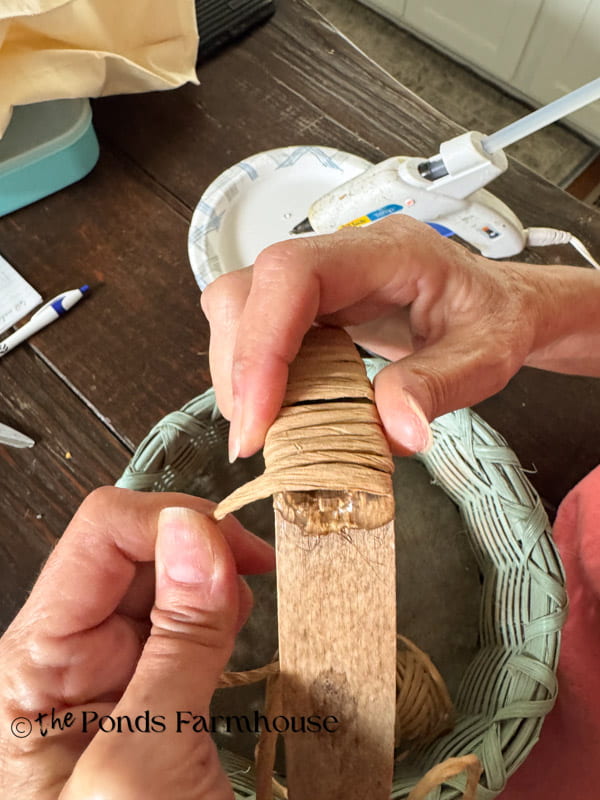
Step 2 – How To Repair a Broken Basket Handle
The biggest challenge in this upcycle is repairing the broken handle. I knew that just gluing the handle together would not hold up for the long haul, especially if I added anything to the basket. So I had some of the floral vine bind wire left over from the Serena & Lily candlestick holder dupe and decided to use it to wrap the basket handle.
- I began with a little hot glue to hold the broken handle together until I could get it wrapped.
- Then I added a drop of hot glue where the wrap begins to hold it in place.
- Next, I wrapped the floral vine bind wire around the handle, covering it tightly.
- I added more hot glue around the broken area while wrapping the wire.
- Continue wrapping until the same amount of handle is showing at the end.
- Finally, I added more hot glue to secure the end of the wire.
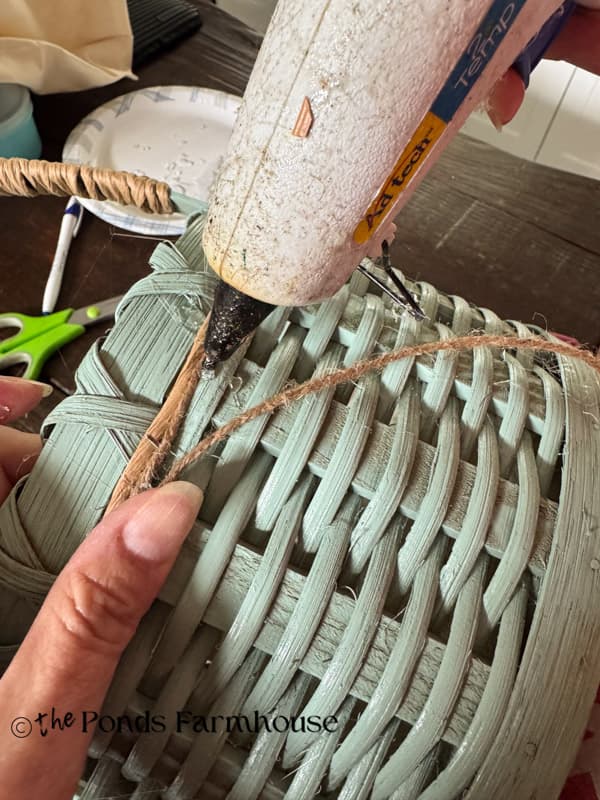
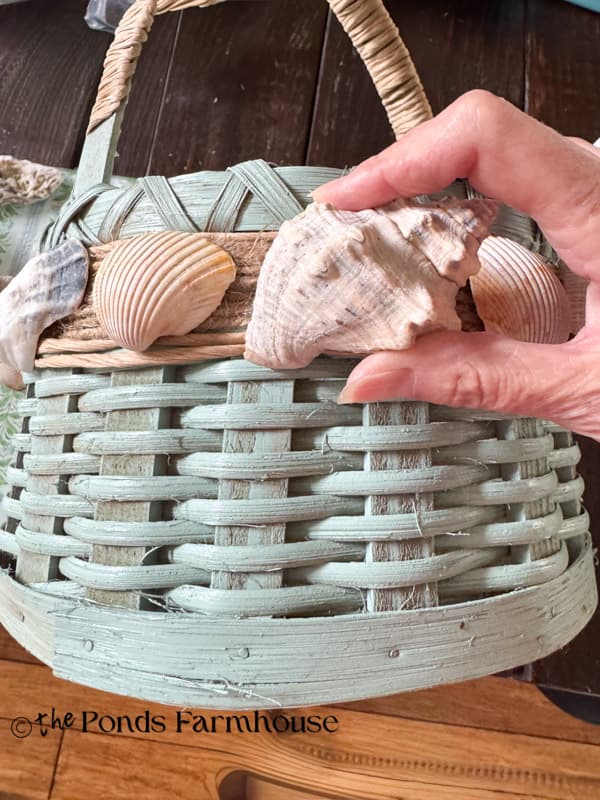
Step 3 – How To Add Wire & Jute Twine To Basket
I knew that attaching the seashells directly to the basket reed would be difficult and most likely not hold. Therefore, I added one row of the Floral Vine Bind Wire just under the basket’s rim. I used a small dot of hot glue randomly to secure the wire in place.
After adding the vine wire, I then began adding the jute twine in the same manner. I secured it with hot glue at the beginning, and as I wrapped it around the basket, I applied small amounts of glue to adhere the twine to the basket.
After I had the desired width of twine, I added two more rounds of vine wire to finish the area where the shells will attach. I secured the ends with hot glue.
Step 4 – How To Adhere Seashells To The Upcycled Basket
Even with the jute twine as a base, I knew that the heavier shells would be difficult to adhere. They don’t have a flat surface, so only certain areas will touch the basket where the glue is applied. Therefore, I decided to use E6000 glue along with the hot glue.
First, lay out your shells and determine your placement. Have both glues ready to use.
- Apply E6000 to areas where you expect the shell to touch the basket.
- Then apply a layer of hot glue over the same areas.
- Press the shell to the jute twine and hold until the hot glue dries.
- Continue working around the basket until all the shells are attached.
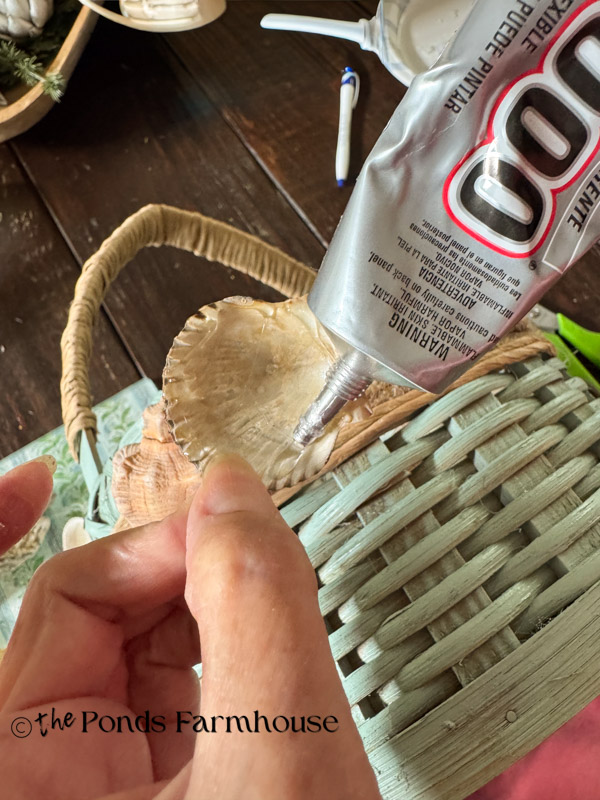
Insider Tip
When working with materials that need a strong permanent bond, I like to use E6000 glue. However, this glue requires a longer drying time. So to speed up the project, I also use hot glue. The hot glue will dry quickly and hold the item in place, allowing the permanent glue time to dry as you move on to the next step.
Ensure that the hot glue is dry before proceeding to ensure a good bond.
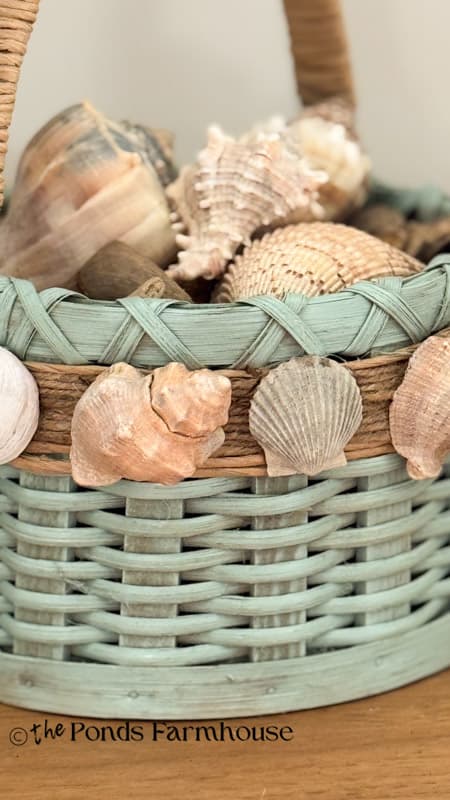
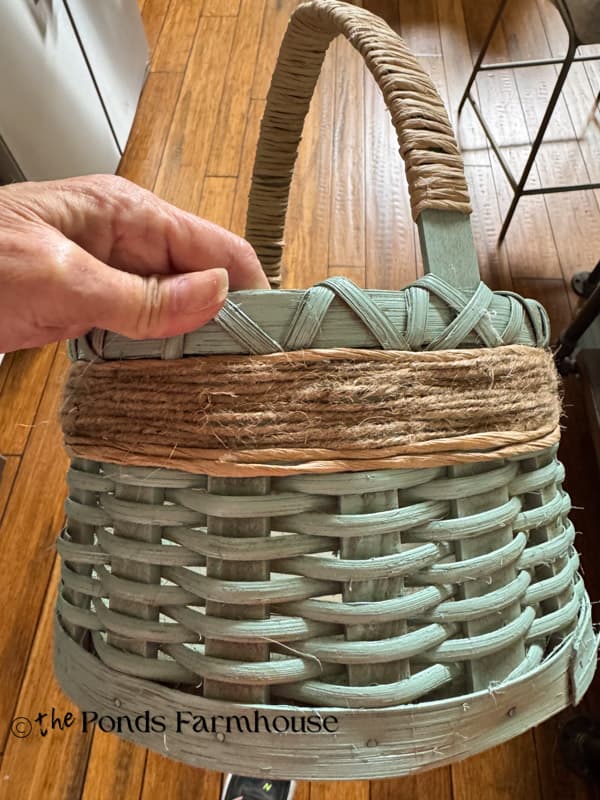
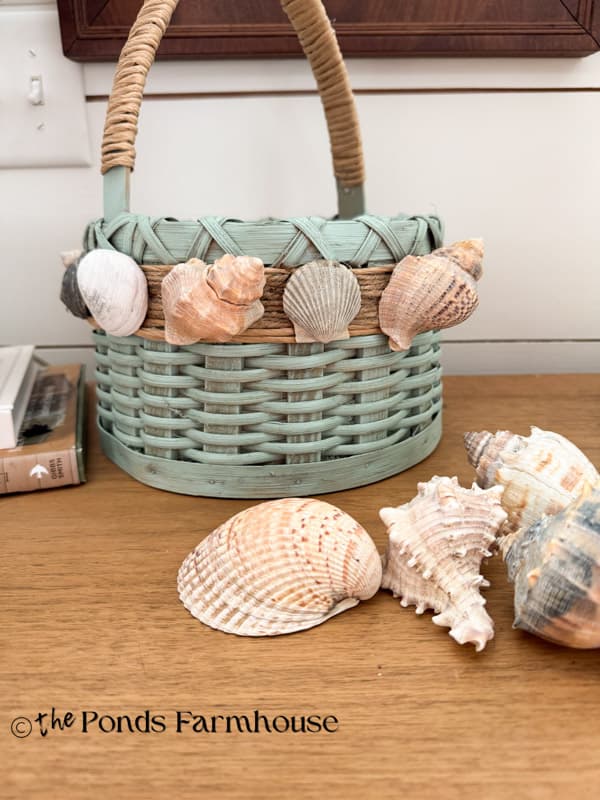
Upcycled Basket With Seashells
I’m loving the look of the upcycled basket. The seashells and paint give the thrifted basket a high-end, fresh coastal feel and cost less than $10.00 to make.
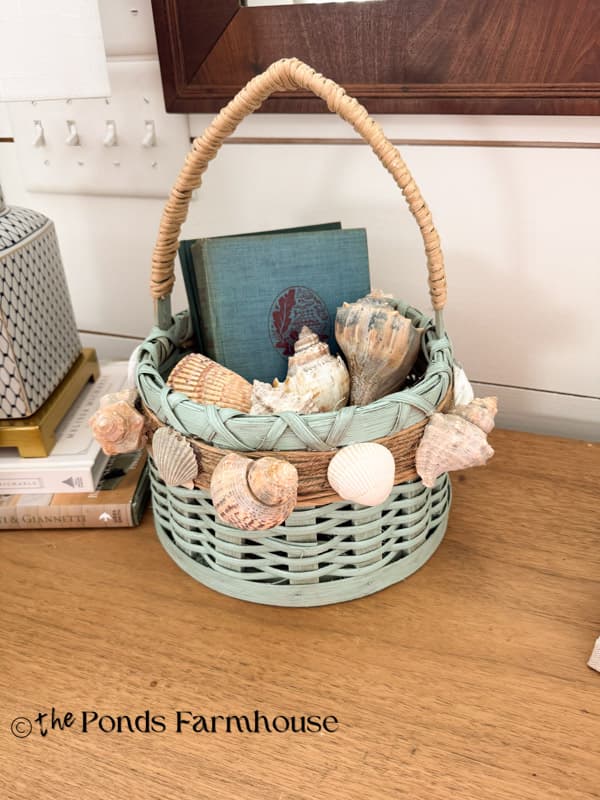
How To Decorate with a Coastal Seashell Basket?
I plan to use this basket in our beach cottage. I’ll be adding the new bedding and some other updates to the bedroom and will be sharing soon. However, in the meantime, let’s look at some ways you can use your coastal seashell basket to create a beachy feel in any home.
Here are a few ideas for decorating with a seashell basket.
- Add a floral arrangement or greenery to the basket.
- Fill the basket with seashells and/or driftwood.
- Add books or magazines to the basket.
- Use the basket to hold kitchen utensils.
- Fill with moss balls or other bowl filler materials.
- Add architectural elements to fill the basket.
- Leave the basket empty and add it to a bookcase or cabinet top.
A combination of books and seashells adds a touch of coastal flair to the entry table. If I were using the DIY basket in the farmhouse, I might paint it a neutral color instead of the beachy green that I used for the beach cottage.
FAQ
Reasons To Start Collecting Seashells
My upcycled basket is a combination of thrifted shells and ones I’ve picked up along the beach. However, after completing the project, I thought it would be so fun to make a basket or something similar with shells that the kids collected or some from a special beach trip. Creating a memory basket that everyone will cherish for years to come.
I recently made decoupage shell art featuring coastal maps with special meaning. You can see more at DIY Decoupage Seashell on Canvas: Custom Coastal Map Decor. Check out these coastal DIY projects.
Thank you for stopping by, and I look forward to sharing my next adventure with you!