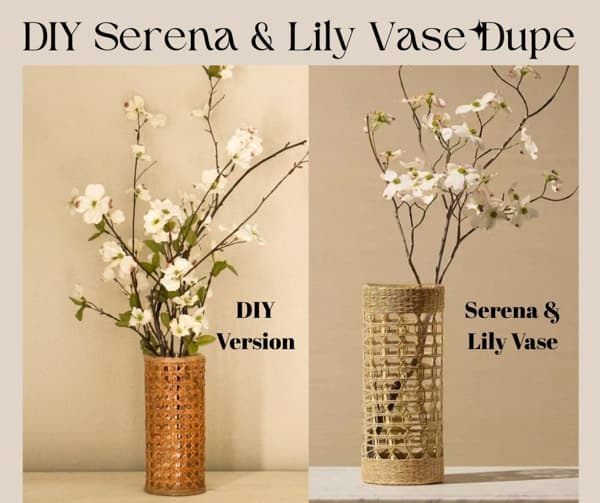
How To Make Serena & Lily Inspired Vases: High End Look On Dollar Tree Budget
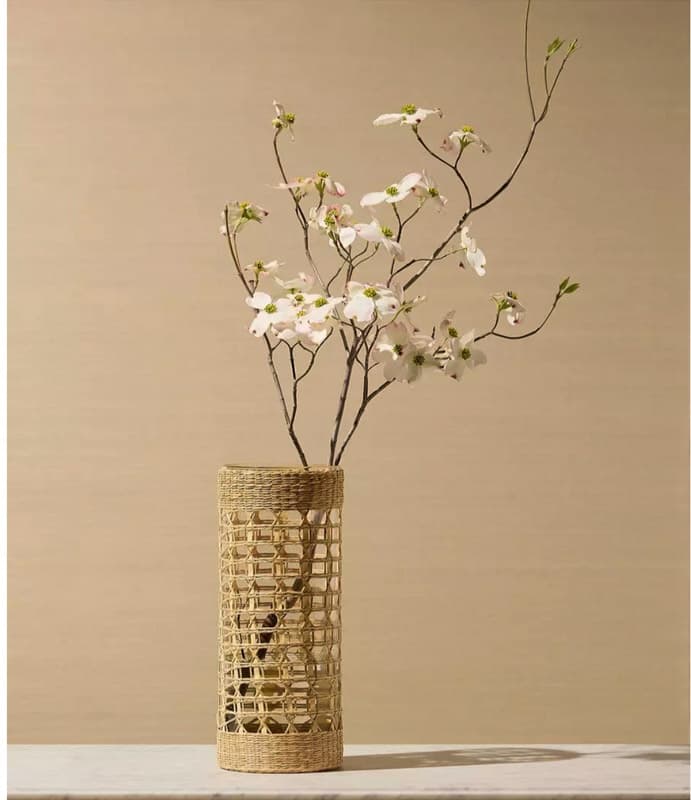
I just returned from a weekend in Charleston, SC, where I visited the gorgeous new Serena & Lily Showroom. It was filled with so much high-end inspiration, but I was immediately drawn to their coastal seagrass vases. They had a variety of sizes ranging from $78.00 to $148.00 each!
I snapped a few photos for inspiration, then came home to see if I could recreate the look. I managed to make two similar versions for less than $25.00 total. It was incredibly easy to copy this designer look, and today I’m sharing exactly what materials I used and the step-by-step instructions so you can make your own.
(Posts on The Ponds Farmhouse may contain affiliate links. As an Amazon Associate, I earn from qualifying purchases. See the full disclosure details here.)
Supplies for Serena & Lily Vase Dupe
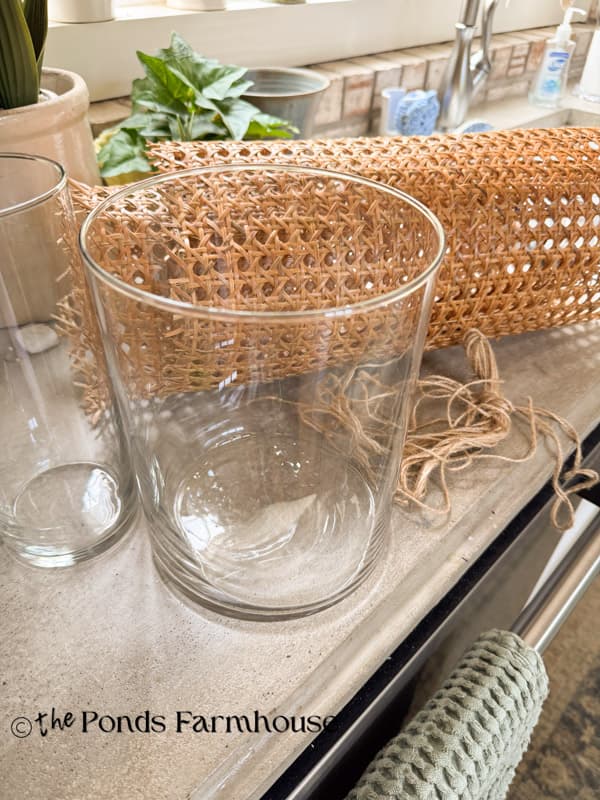
You only need a few supplies and a hot glue gun to make this easy dupe. I already had a couple of Dollar Tree Clear Vases that I used during the holidays, so I didn’t need to purchase more. However, when I purchased them, the largest was $5.00, and the slim one was $1.25. The cane webbing comes in a roll, and I have enough to make at least two more vases. I plan to look for a couple more vases while thrifting over the next few weeks.
- Cane Webbing
- Clear Glass Vases or Candleholders
- Jute Twine
- Hot Glue Gun
How To Make Coastal Vases
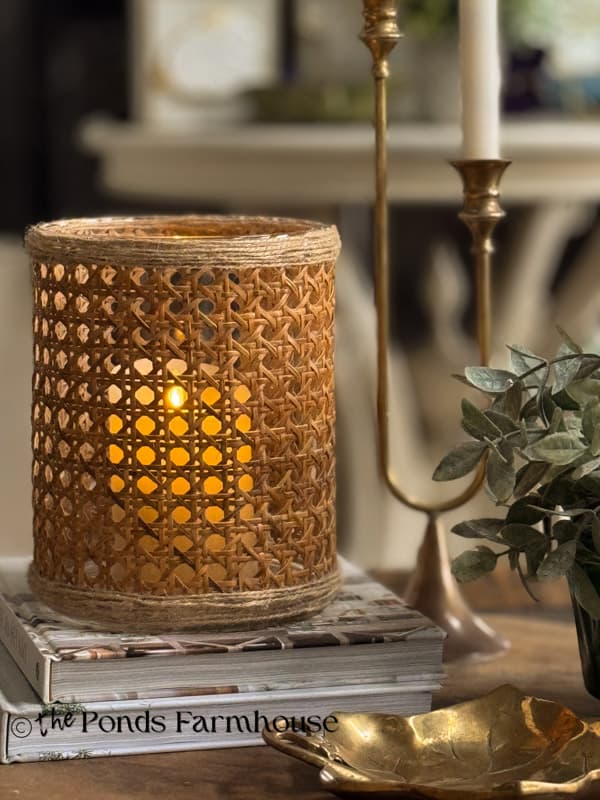
These coastal vessels can also be used as candleholders. They are quick and easy to make, making them a great project for beginners and those who say they aren’t crafty.
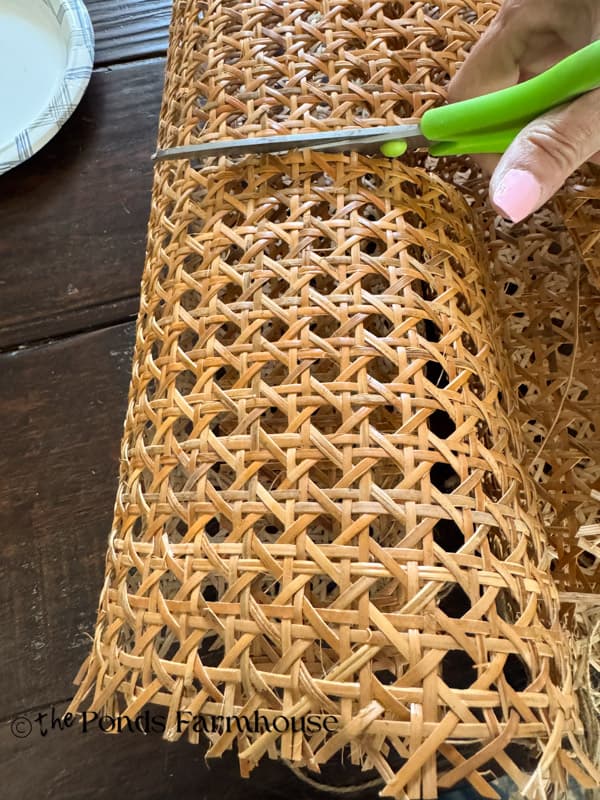
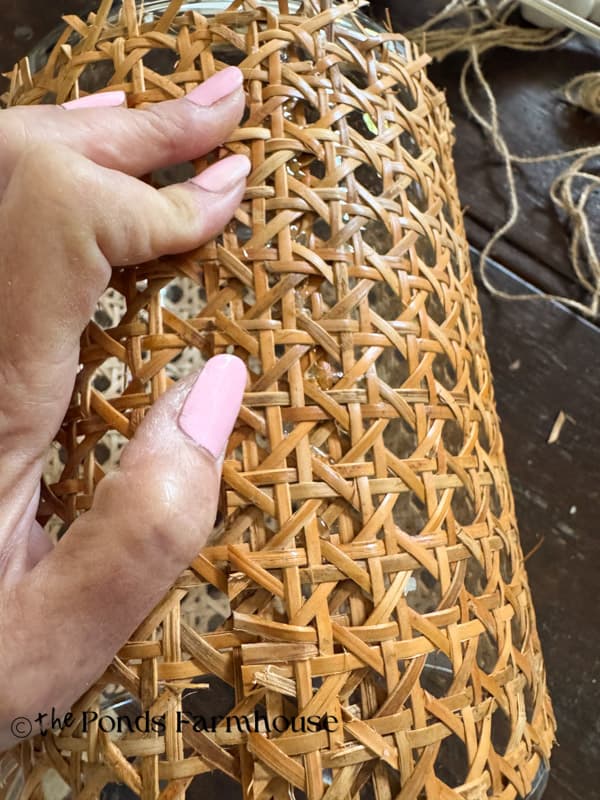
Step 1 – Preparing The Cane Webbing
Begin by cutting the cane webbing to fit around the vases. Allow enough for the cane to overlap slightly. In addition, cut the webbing so there is approximately 1/4 inch of space on the vase at the top and bottom to apply the jute twine. Trim any excess to ensure that the webbing fits evenly around the top and bottom of the vase.
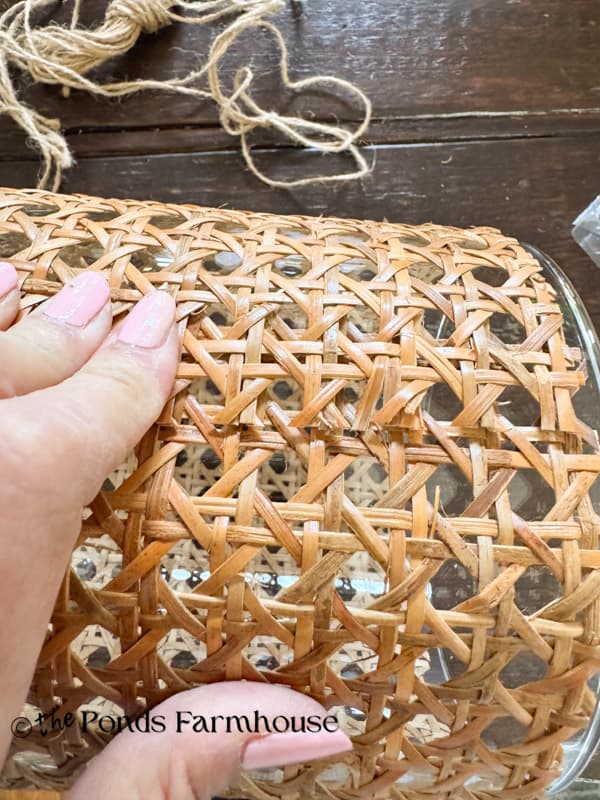
Step 2 – How To Attach Cane Webbing
Next, hold one side of the webbing in place and apply hot glue to the entire length. Then wrap tightly and press the other side into the glue. Hold in place until the glue dries. It only takes a minute or so.
Insider Tip
The cane webbing is very stiff and you want to ensure that it is curved in the direction you intend to apply it. So, when you receive your cane webbing, be sure to roll it with the right side facing out. Secure by wrapping paper around it and use tape to hold in place. My webbing had been rolled for several days before I used it and it wrapped easily and snuggly around the vases.
You can also soak the webbing in water to soften, but you will need to allow dry time with this technique and will still need to roll it so that wraps easily around the vases.
Step 3
Finally, wrap the top and bottom of the vase with the jute twine. Add hot glue to secure the twine, then wrap it tightly. Apply additional glue in areas to keep the twine in place. Wrap several rows overlapping onto the cane webbing to secure.
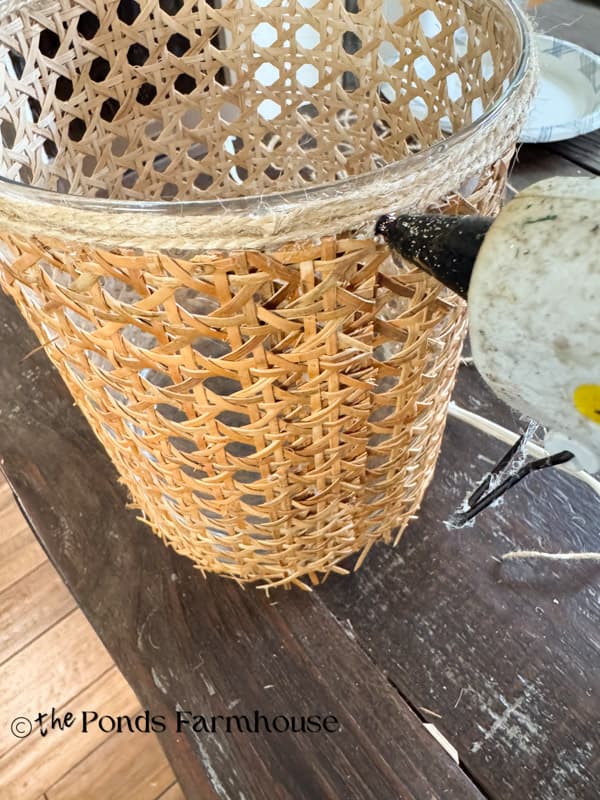
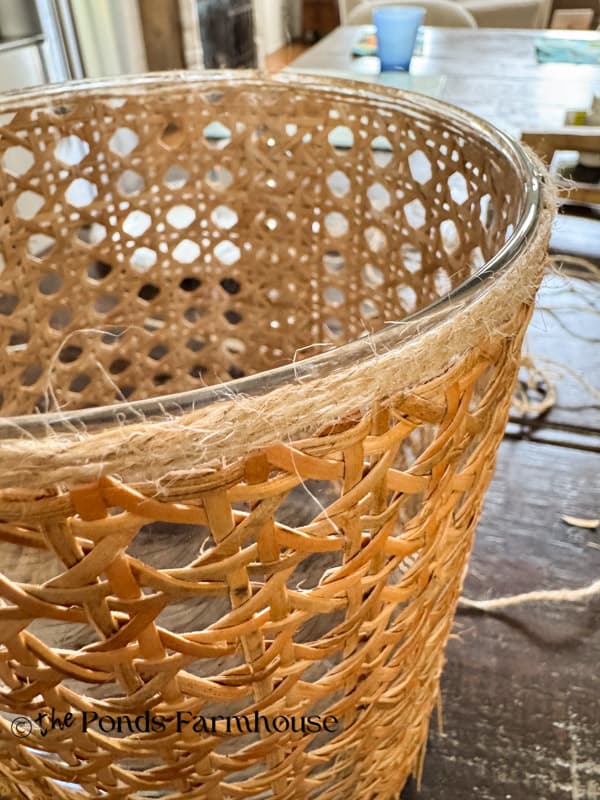
Wrap both the top and bottom of the vase, securing the ends of the twine with hot glue to prevent them from unraveling.
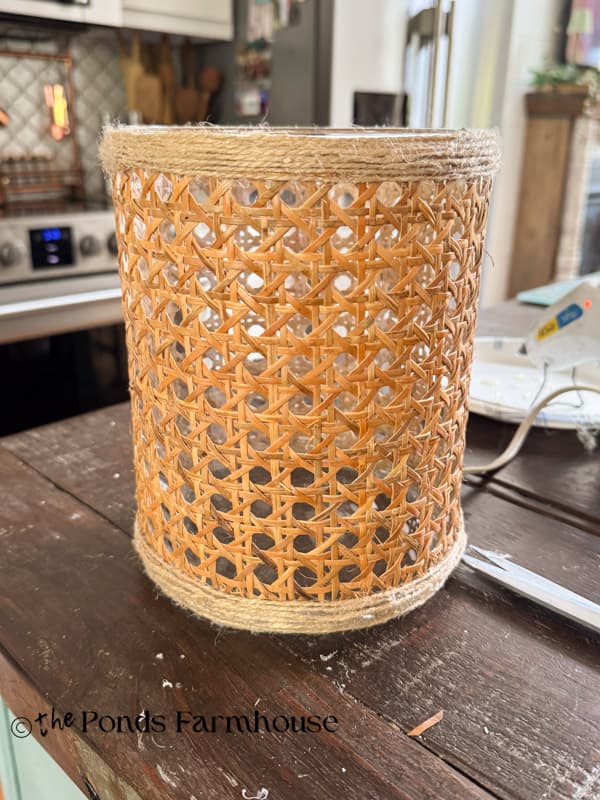
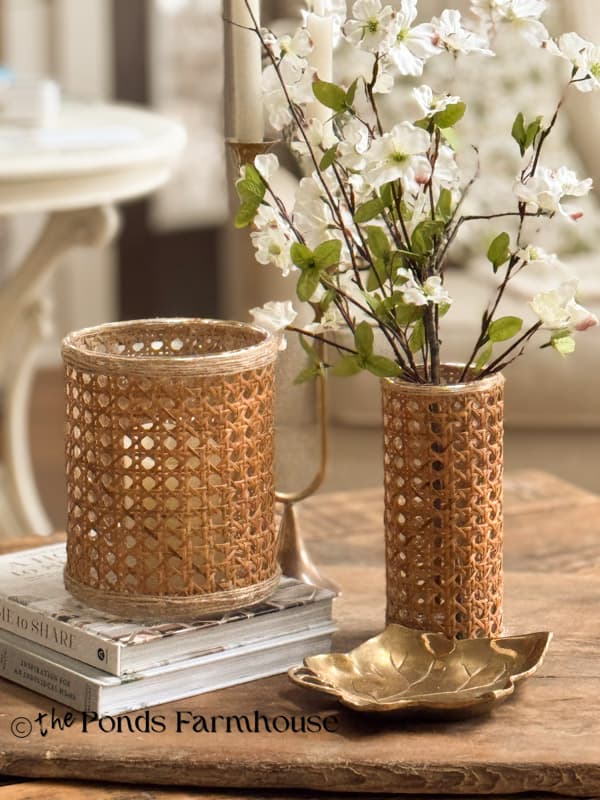
Decorating with Serena & Lily Coastal Vase Look Alikes
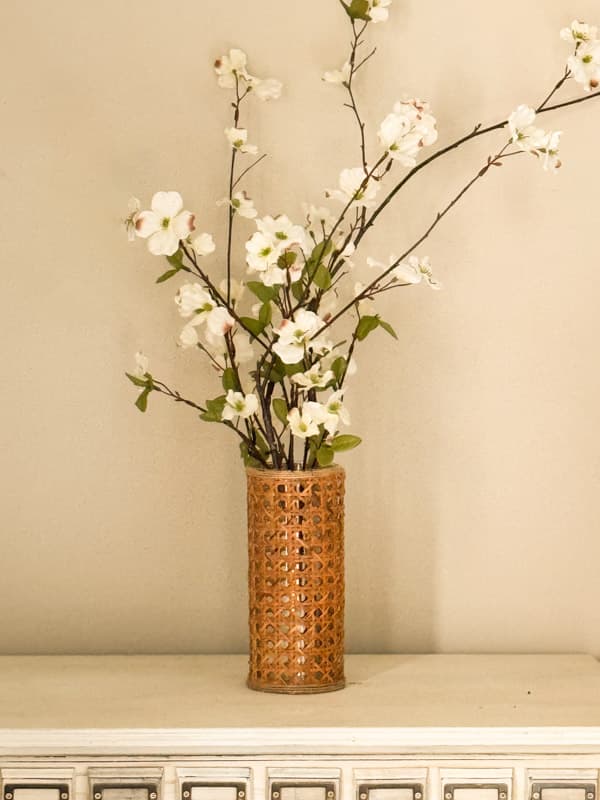
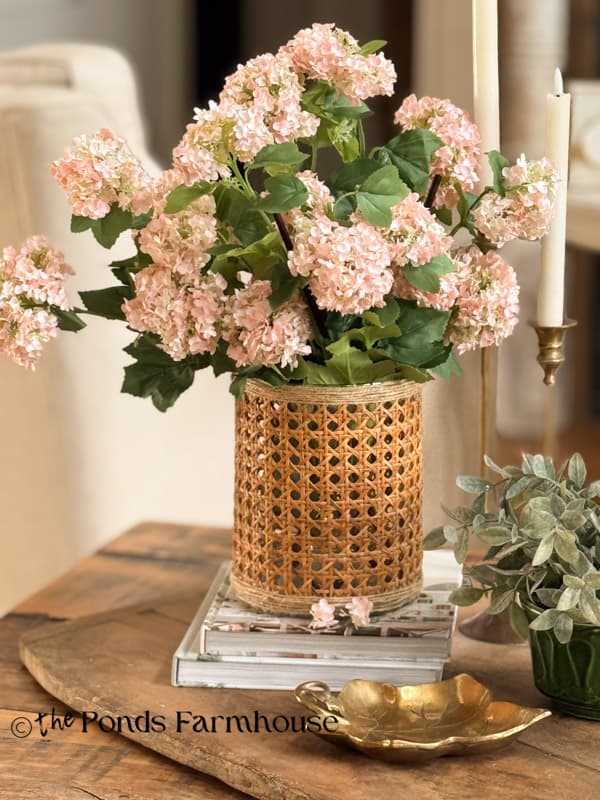
I plan to take these vases to our beach cottage, but in the meantime, they don’t look out of place in the farmhouse. For the slim vase, I duplicated the look of a similar one by Serena & Lily by adding dogwood stems. Who wore it best? LOL
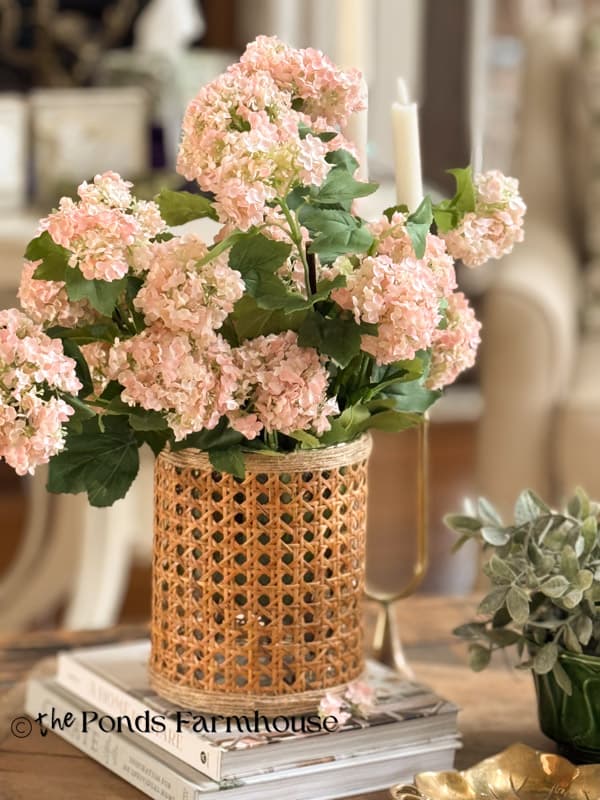
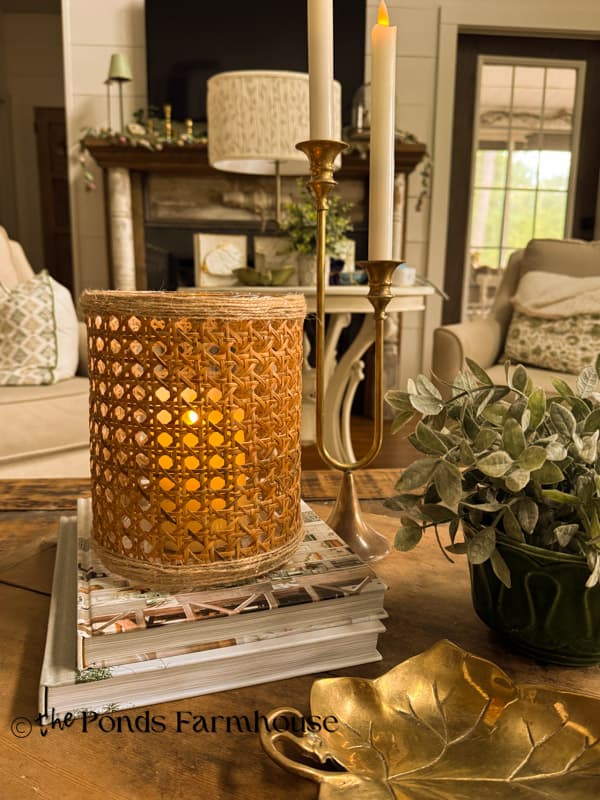
My larger vase is a wider version of theirs, but I really like the flexibility of using it as either a vase or a candleholder. Below, it looks lovely with the flicker of candlelight.
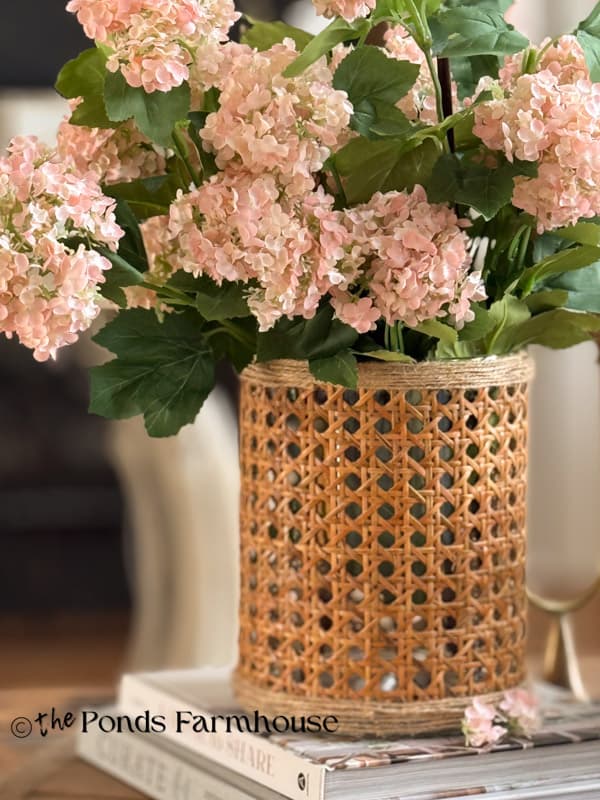
However, it is stunning with some faux flowers!
Although the texture is a little different from the high-end version, I’m loving this coastal look.
DIY Vs High-End Vases & Candleholders
So was the DIY project worth the savings? I estimate that the two vases of a similar size would run approximately $175.00 at Serena & Lily. I made two vases for approximately $25.00, and it only took about 1 hour to make both. So you can be the judge!
Although they look lovely on my coffee table, I can’t wait to add them to our beach cottage. I feel the coastal vibe of the cane-covered vases will coordinate well with the DIY Cane Upgrade on Cheap Cabinets. I’ll share some additional photos after our next visit.
FAQ
Thank you for stopping by, and I look forward to sharing my next adventure with you!


Love it! You are so talented and creative. My husband has over 50 old/antique wood and wood canvas canoes so we have plenty of caning. (He had a canoe buying problem! Haha!). Gotta do this soon!
Cindy,
Oh wow, what a collection! Glad you have plenty of supplies and I hope you will share your finished vases with me once you are done. Thank you for stopping by and for your sweet compliments. Have a blessed day.
I think your vase turned out beautifly! In fact I prefer it over the Serena and Lily version. I wonder how it would look to crochet light weight twine to cover a vase also?
Linda,
What a great idea. I’m loving everything crochet these days and I didn’t think of that. I feel it would look lovely. You can also get raffia yarn and that would work good. Let me know if you make one. Thanks for your suggestions and your compliments. Have a blessed week.
Lovely! I have done the same thing using woven and wood beaded placemats that I find at the thrift store. You are limited by size of course. The mats are often taller than the vase, but it still looks great with flowers in the vase with taller flowers and stems. I usually find the vases at a thrift store as well making it an inexpensive project.
Diana,
I’ve used placemats, twigs and other materials in the past. Shopping at thrift stores is the way to go. Glad you stopped by and I hope you have a blessed week.
Your vases turned out lovely! I actually prefer your finished vases to Serena & Lily’s. The price difference is phenominal – I’m too frugal to spend $175 on a couple of decorator pieces. Might give this idea a try.
Hey, I’m right there with you. They have some beautiful pieces but it’s way over priced in my option. Glad you like my version, and I hope you will give it a try. It’s so easy, and I’m thrilled with the finished look. Have a blessed day, and thank you for stopping by.
Hi Rachel
I agree with previous comments. I like your version better than the Serena and Lily version! Have a blessed weekend!
Marilyn,
I”m so glad you liked this project. I’m loving the look! Can’t wait to get them to my beach cottage. Have a wonderful weekend.
I like yours SO much better! They look great…
Debbie,
Oh thank you! I’m so glad you like them. I’m so happy with the results and for the price you can’t beat it. I appreciate you for stopping by and I hope you have a blessed week.