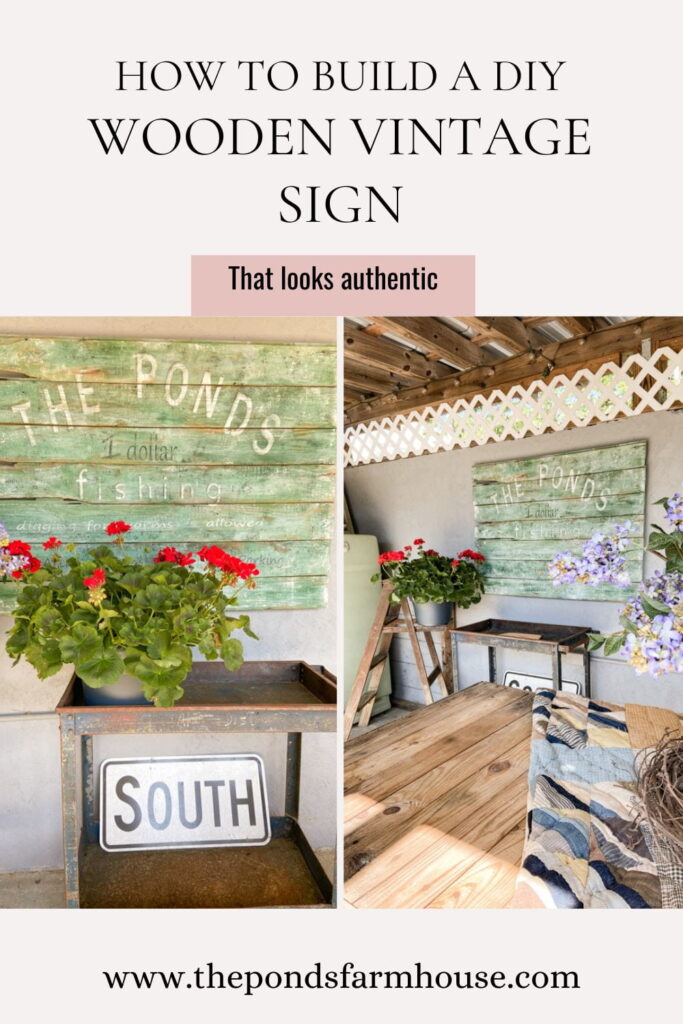
Vintage DIY Wood Sign: Easy Guide For An Authentic Old Sign
Don’t you just love old vintage wood signs? They are hard to find in good shape. However, you can recreate the look with this easy, authentic old sign step-by-step guide. You’ll be amazed at how easily this DIY wood sign project comes together. Let’s start planning your DIY vintage sign today.
(Posts on The Ponds Farmhouse may contain affiliate links. As an Amazon Associate, I earn from qualifying purchases. See the full disclosure details here.)
Table of contents
Inspiration for DIY Wood Sign
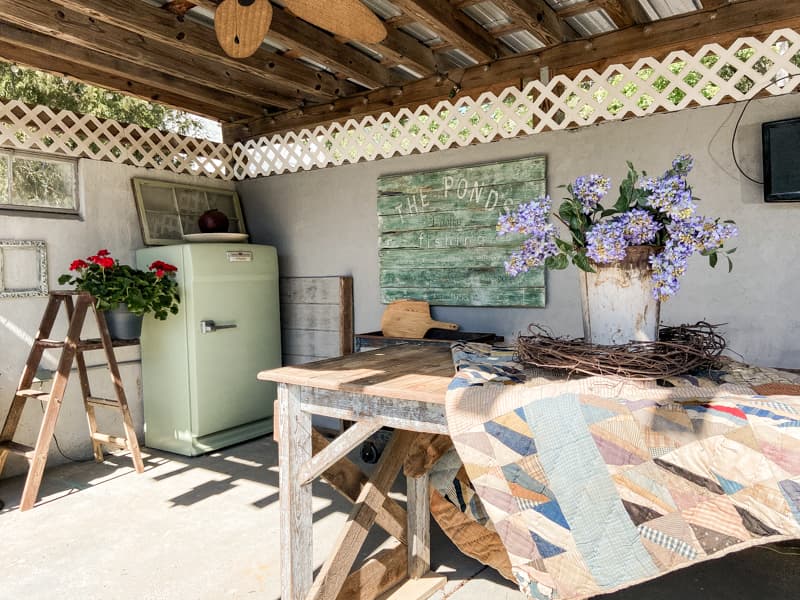
Do you like old vintage signs? I especially like those used to advertise roadside produce or old country stores. Unfortunately, these were usually made of wood and are no longer in existence. I love vintage business signs, but they are hard to find, so I decided to build my own DIY Wood Sign.
Because I was starting from scratch, the options were unlimited. The sign I wanted may never have actually existed. I’ve asked my brothers, but they don’t remember there being an actual sign directing traffic to The Ponds.
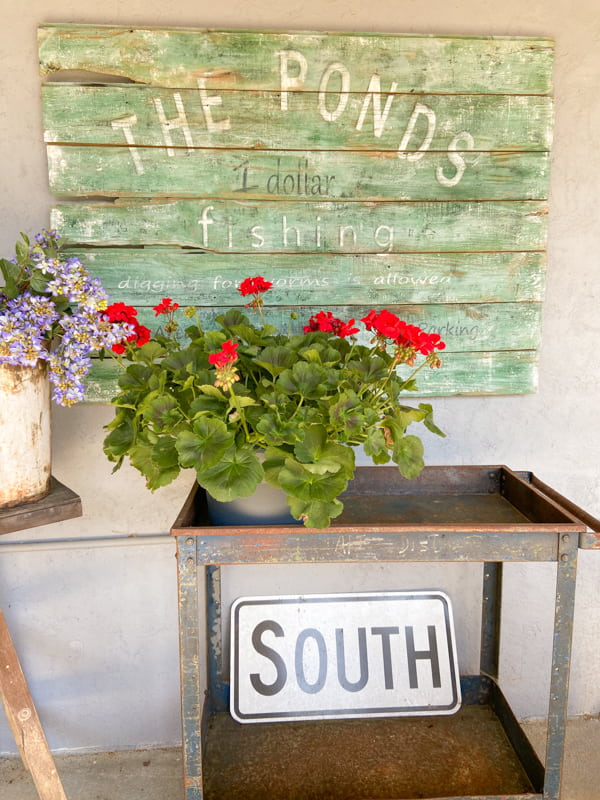
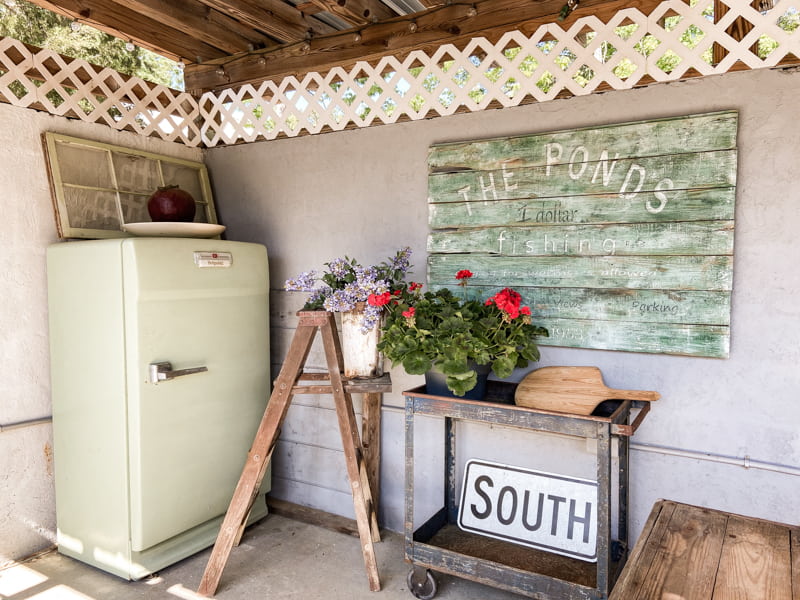
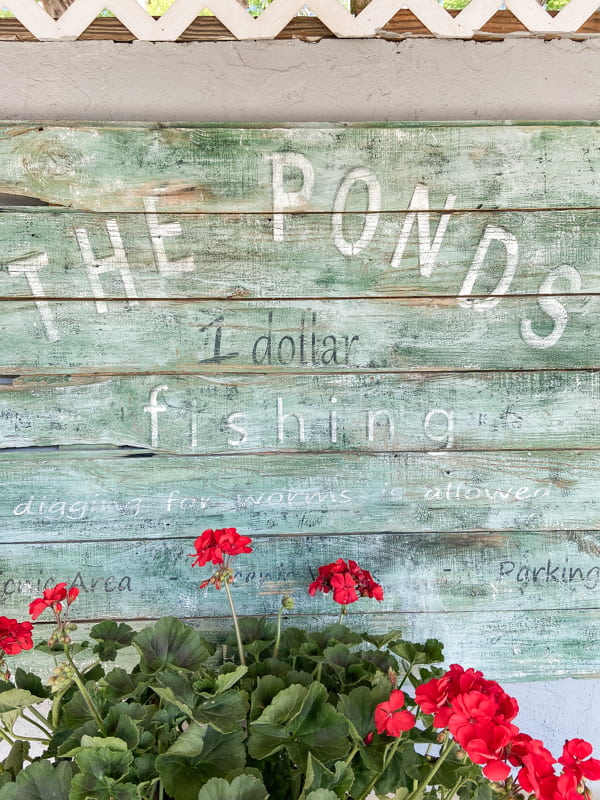
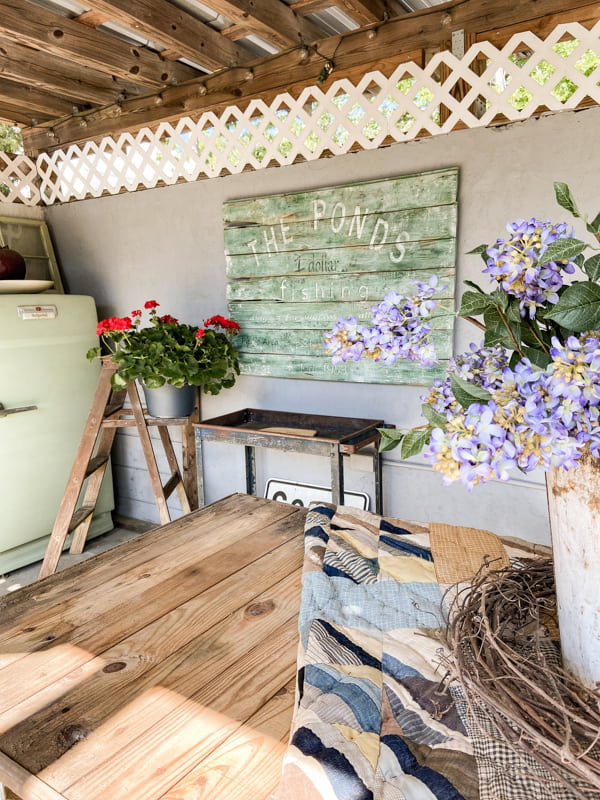
Fish All Day for $1.00
My dad built these three ponds and for a few years, had them open to the public for fishing. He charged just $1.00 to fish all day.
My memories of fishing there as a little girl are strong, but to be honest, I don’t remember when they were open to the public for fishing. As we have been refurbishing The Ponds, I’ve dreamed of what a sign might have looked like all those years ago. So, I decided to make a sign to look like a vintage roadside sign from 50 years ago.
How To Build An Authentic Old Sign
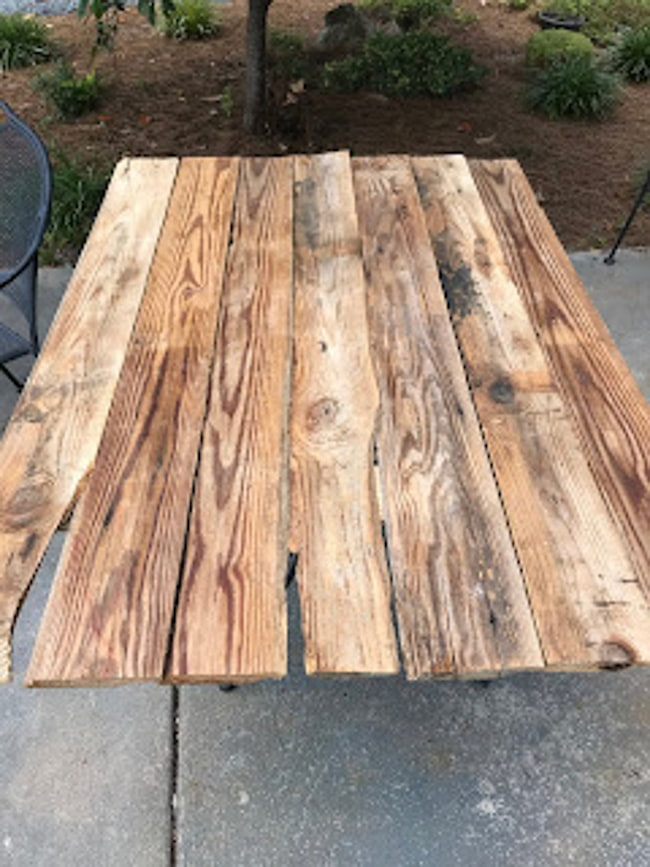
Since most authentic old signs from that era were made of wood, imperfections were important. Using old wood added to the authenticity of a real vintage sign.
Fortunately, this old shiplap was stacked in my dad’s old building. After we cleaned the boards, we cut them to the desired width for the vintage sign we were making. These boards will be perfect to build a vintage-inspired sign.
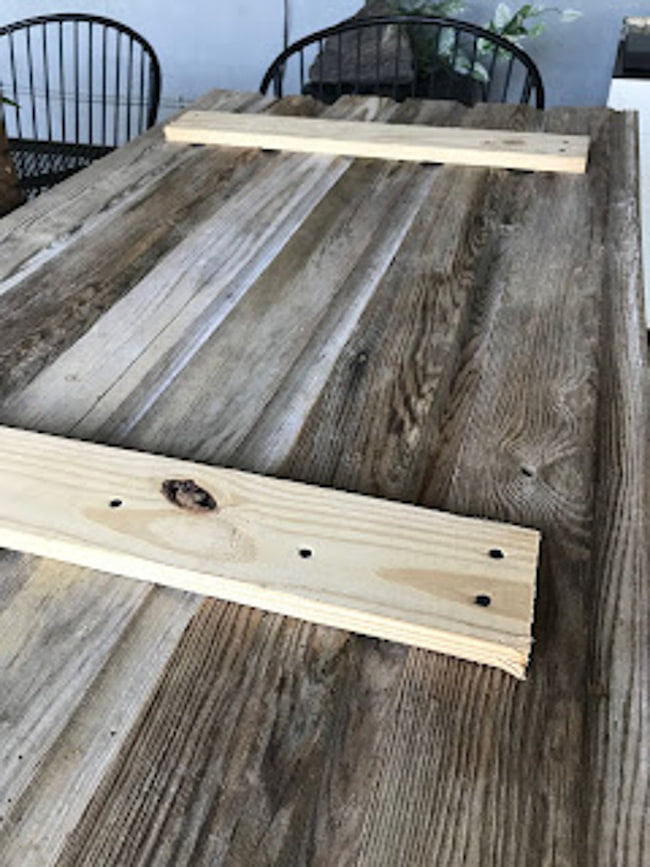
Next, we cut a couple of 1×4 boards slightly shorter than the height of the sign. We attached them to the back of the shiplap to hold the boards together using wood screws. Be sure your screws aren’t too long. You want them to attach the two pieces of wood without puncturing the wood in the front of your sign.
What If I Don’t Have Old Wood
Don’t worry if you don’t have old or reclaimed wood. You can use new wood and distressing techniques like these to make your DIY wood sign look like an old authentic sign.
The Vintage Sign Design
Once you have the size of your sign determined, draw out your design. I like to use graph paper to draw the design to scale.
This step is very important in determining where each letter will go. Each square on the graph paper equals an inch on my board. Therefore, I know exactly where to place each letter and how large to cut it.
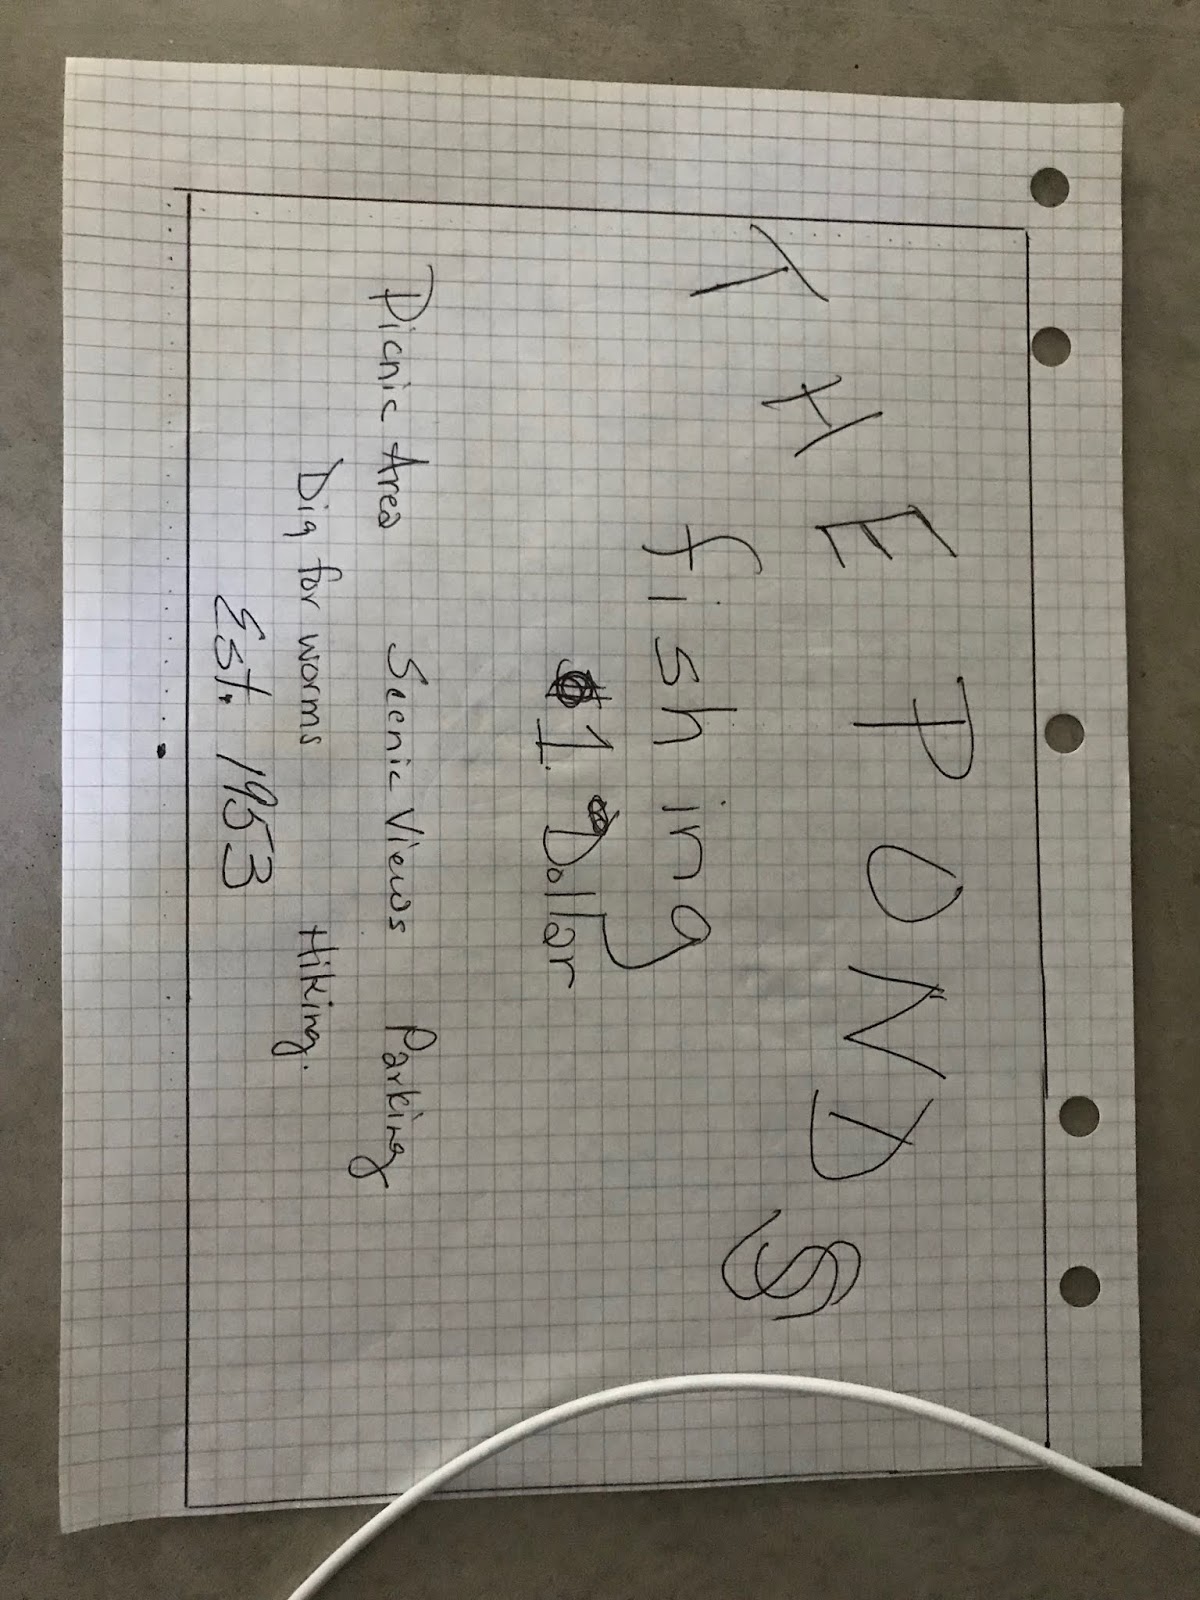
Next, I used my Silhouette Cameo 3 to design and cut a stencil for the sign. For this project, I used card stock to cut the stencils. I knew this was a one-time project, so I used stencil material instead when cutting stencils to be used multiple times.
Insider Tip
If you don’t have a Silhouette or Cricut for cutting a stencil, you can use individual letter stencils to create your design. I’ve made signs in the past with this method with success. It’s just important to carefully position each letter to ensure they create the design you desire.
Paint To Create Vintage Wood Sign
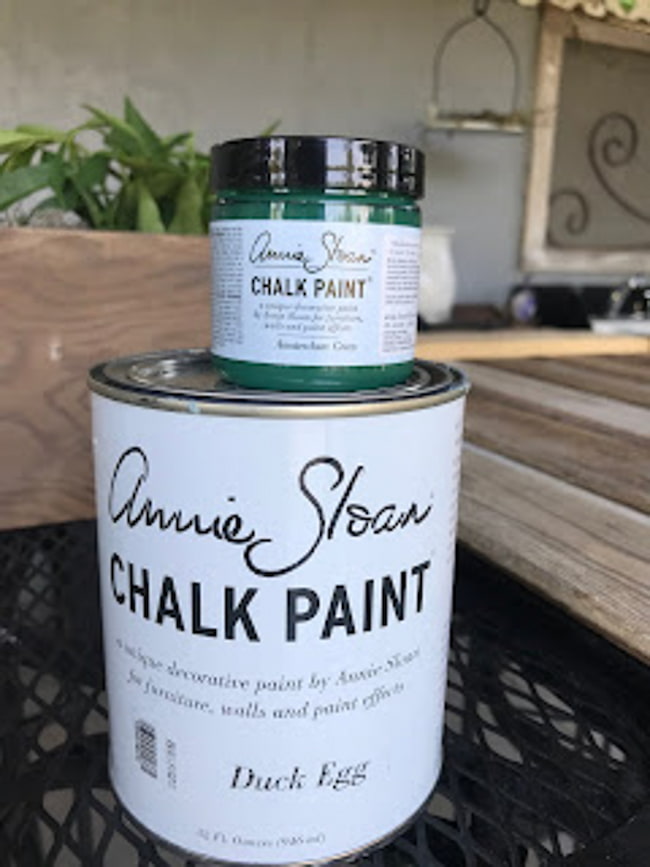
My go-to paint for most projects these days is Annie Sloan Chalk Paint. For this project, I chose Amsterdam Green and Duck Egg. I also used black craft paint.
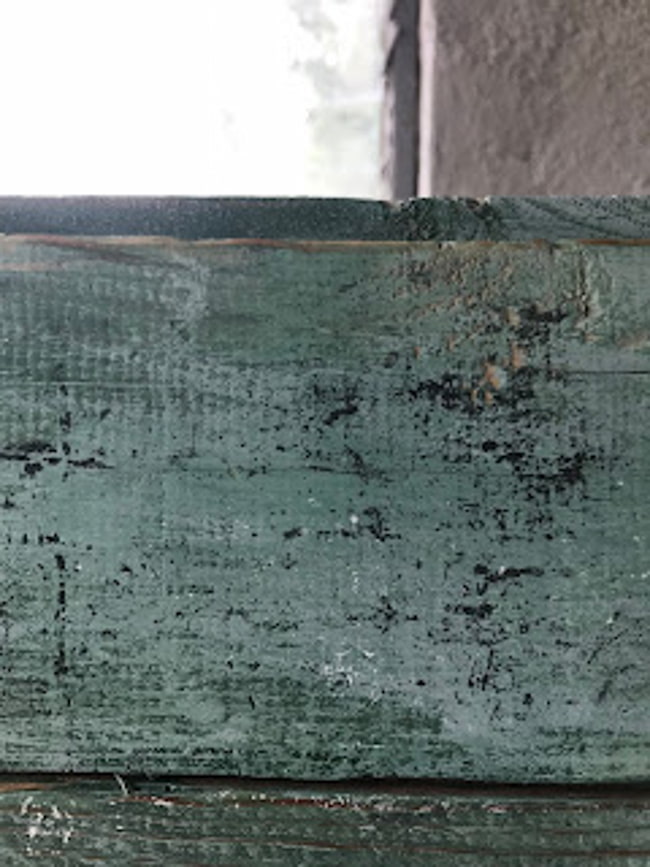
First, mix Amsterdam Green with 50% water to paint your first coat. This will make the paint appear to be faded with age. This DIY vintage sign technique is quick and easy to apply and dries fast.
Let the green paint dry for a few minutes until dry to the touch. Then using a dry brush technique, add Duck Egg over the top, leaving a lot of the green peeking through. If some of the paint isn’t completely dry it’s okay to let the colors mix in places.
Using an iron orchid decor large distress stamp, you can add some black craft paint to give the surface a distressed look. These are so cool. You just roll a small amount of paint onto the stamp, gently lay it on your piece, and lightly press. It leaves perfect distress marks on the boards.
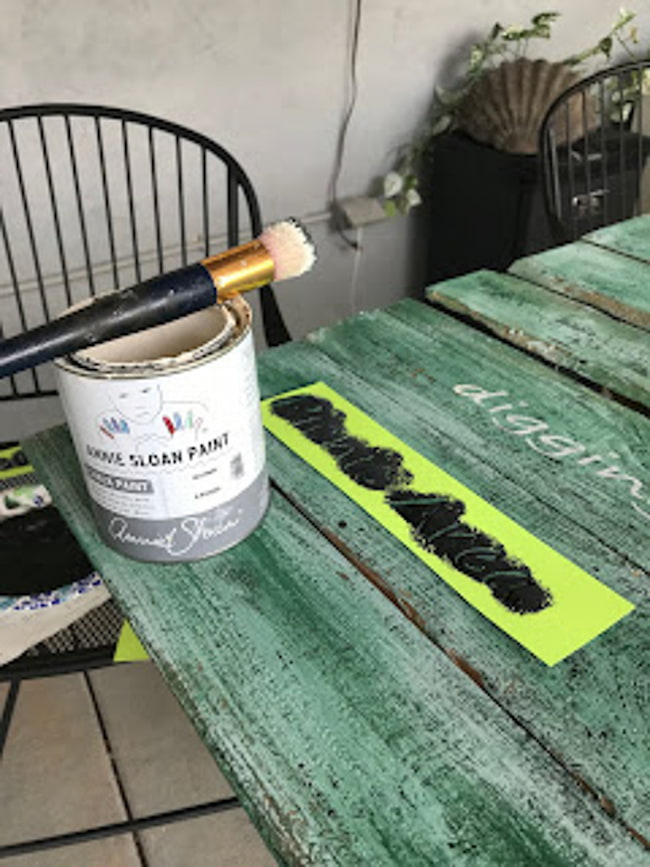
Stencil Graphics On DIY Wood Sign
Using the Old White Chalk paint and the black craft paint to stencil the DIY wood sign. Carefully attach your stencils to the board following the pattern you made on graph paper. Use painter’s tape to hold your stencils in place Using a stencil brush, carefully apply the paint to the boards.
You may want your DIY wood sign to show more signs of age! So, once the stencil is dry, sand the entire board, removing more paint. Next, use the Iron Orchid Distress Stamp to add a layer of Old White Paint distressing. This will give it an authentic old sign feel.
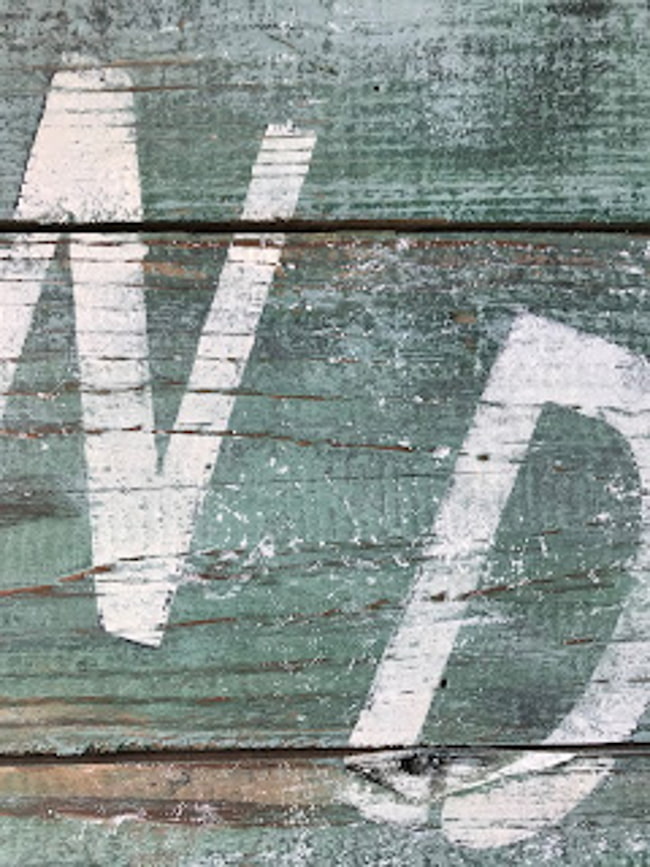
Because I still felt my lettering was too rigid, I did some shading to the left of each letter with the black craft paint. You can accomplish this by placing the stencil over the letter again and sliding it off to the left slightly. Then, use a small brush with a dry brush technique to add the black paint. Now, sand the surface once again lightly.
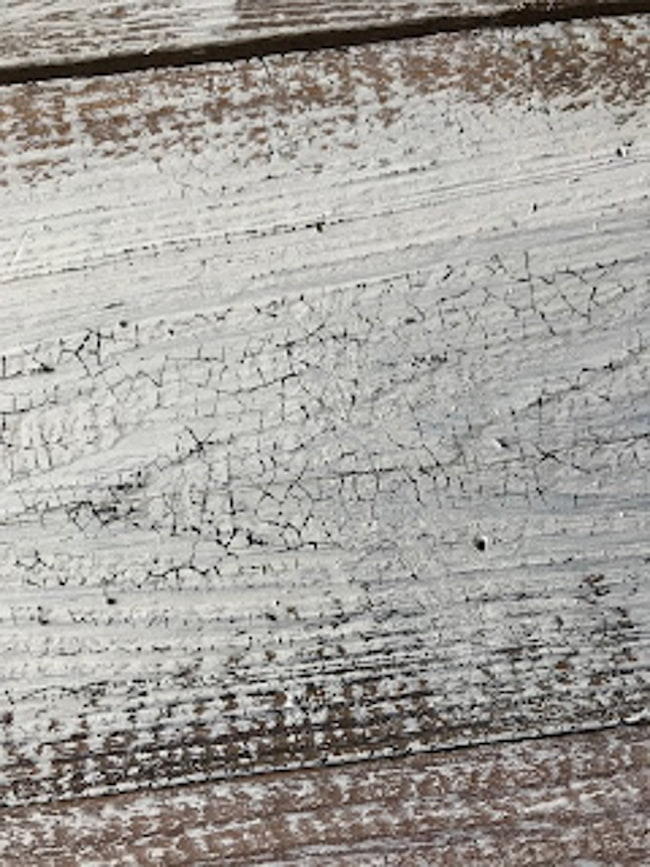
Add Some Crackle
Paint that is over 50 years old will crack. If you want an authentic vintage DIY wood sign, add a crackle effect to the piece using another stamp. I used the Iron Orchid Craquelure Stamp and black craft paint to help create an authentic DIY vintage sign.
Note: I am not affiliated with Iron Orchid, but I do like these reusable stamps.
Below is a close-up of the craquelure stamp. Isn’t that great?
How do you like it? I can truly believe this authentic old sign stood on our property over 50 years ago!!!
If I close one eye!!! LOL
Click to see the Before and After of the DIY Outdoor Kitchen here at the Ponds.
Insider Tip
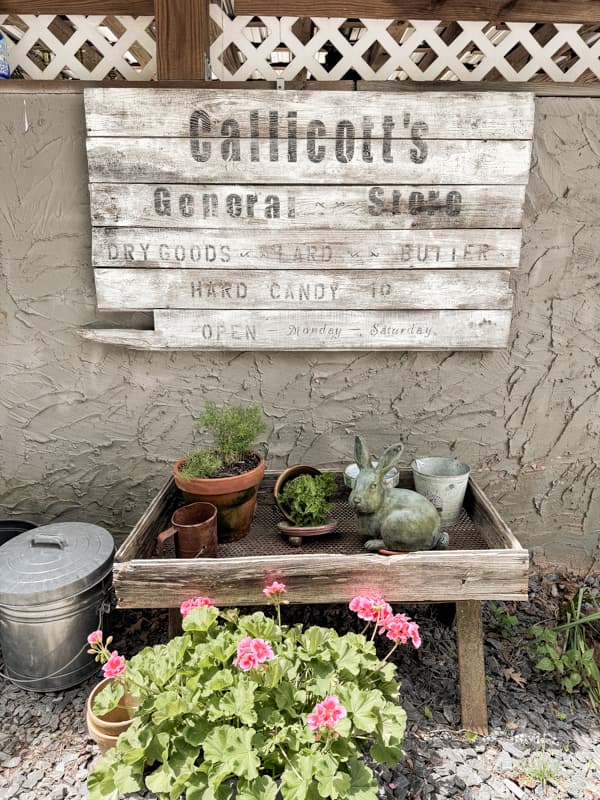
If you have a lost piece of family history, this is a great way to recreate a lost treasure. After I made the Ponds sign, I recreated my version of my great-grandfather’s old country store. The store and my great-grandfather were long gone before I was born, but I found an old picture taken outside the rustic building. I didn’t see a sign on the building, but surely there was one. This is my version of what it would have looked like. It hangs on the backside of the outdoor kitchen, next to my potting bench.
Thanks for stopping by! I hope you enjoyed a little of The Ponds’s history. This DIY wood sign is a way to preserve some of the memories that will begin to fade with time. Hopefully, this authentic old sign will remind future generations of what once was happening here. If you’d like to know more about our life here at The Ponds and how it all began, click here! Please feel free to ask any questions.

Pin It To Remember It
Did you find some great ideas you’d like to save for future reference? To save, hover over the images and pin to your favorite Pinterest Boards when you see the PIN button in the upper left-hand corner.
That looks fantastic! Thanks for the “how to” and use of the stencils. What a great project to commemorate your family’s history at the ponds.
Traci,
Thanks for stopping by. I’m so glad you liked this project. I appreciate you for taking the time to comment.
Rachel
This sign is absolutely gorgeous and I love the story behind it! I need to look into the stencils you talk about, they REALLY add to the character of the sign.
Pamela,
I really appreciate you for stopping by.
Rachel
FAN-TAB-U-TASTIC 🤍🤍🤍
Cheryl,
Thank you!
What a sweet way to honor your memories-very charming. You always share the coolest projects 🙂
Susan, I’m so glad you think so. I try! LOL
Hi Rachel! I love these signs you made. I have these stamps from IOD. I am an IOD Junkie to be honest but i just hang on to the products until i get inspiration from bloggers or Creatives like you. Thank you! The signs look legitimate old.
Cheryl,
I’m so glad you like them. Get those stamps out and use them. LOL