How to Make a DIY Beaded Mirror (High-End Look With Thrifted Finds)
Did you, by chance, see that set of thrift store mirrors I recently found for $4.00? Well, wait until you see them now. If you are a fan of the beaded mirror trend, you will love how easy it is to transform inexpensive thrift store finds into beaded wood frames. Beaded frames are all the rage; you don’t have to be a craft wizard or spend a fortune to create these beaded ideas.
With a handful of inexpensive split wood beads and a little paint, you can turn your thrift store finds into adorable, budget-friendly home decor. This project only took about an hour to complete, not including drying time. And with the $4.00 mirrors, I only spent $9.00 to create these gorgeous beaded mirrors. So grab an old mirror or picture frame, and let’s get started.

(Posts on The Ponds Farmhouse may contain affiliate links. As an Amazon Associate, I earn from qualifying purchases. See the full disclosure details here.)
What Are Some Ideas For Adding Beads To Home Decor?
Home decor with beads is very on-trend for all design styles. The good news is that it’s easy to add this beaded idea to thrift store finds to create budget-friendly yet stylish decor. Beaded wood mirrors are extremely popular, but you will also see beads on picture frames, clocks, lampshades, vases, and more. Here are some items to look for in thrift stores to update with beads.
- Trays
- Picture Frames & Mirrors
- Lampshades
- Vases
- Clocks
- Large Plates or platters
- Candlestick Holders
- Large Bowls
The Popularity of Hobnail and Bobbin
One reason beaded decor is having a moment is the resurgence and popularity of the milk glass hobnail and bobbin styles. Hobnail milk glass has a pattern of raised knobs over the surface of the vase, bowl, etc. Bobbin furniture is also having a moment. Bobbin furniture, also known as spool furniture, comes in many forms, from candlesticks to bedposts.
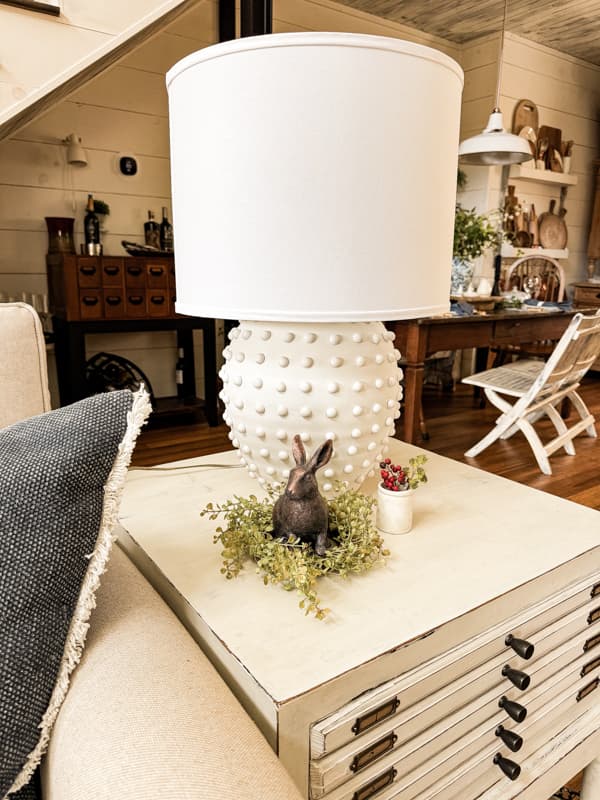
For another beaded idea, I recently added these same beads to a lamp base for a Ballard Design Lamp knock-off. The full tutorial is at Thrifted to Chic: Create a Textured Lamp with Faux Hobnail Design.
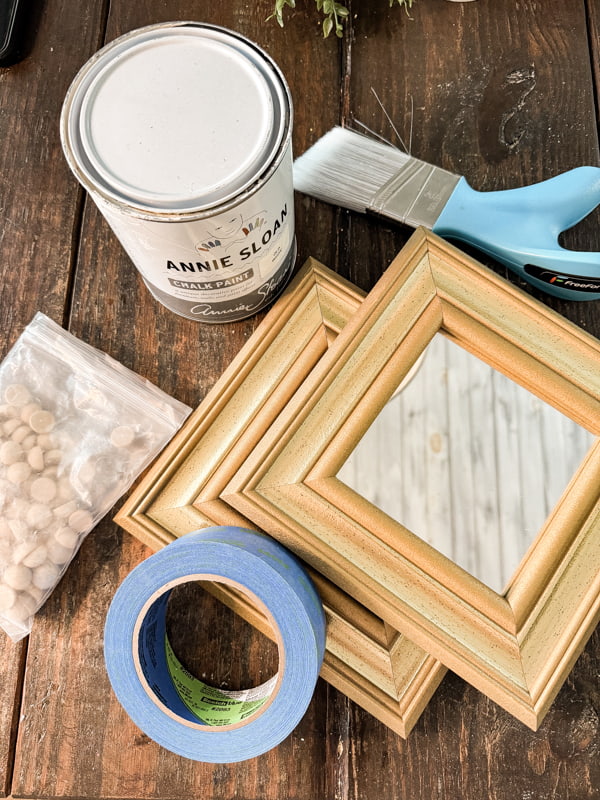
Supplies For Beaded Mirror Makeover
- Old Mirror or Picture Frame – Mine has a gold finish.
- Split Wood Beads
- E6000 Glue
- White Chalk Paint
- Antique Gold Rub N Buff (optional)
- Small Paint Brush
- Painters Tape
How To Prepare Thrift Store Mirrors
First, you need to prepare your thrift store mirrors for the update.
- Clean to remove any oily residue, and remove the mirror if possible, or cover it.
- The mirrors I purchased have a professional backing, and I didn’t want to damage it, so I used painter’s tape to cover the mirror.
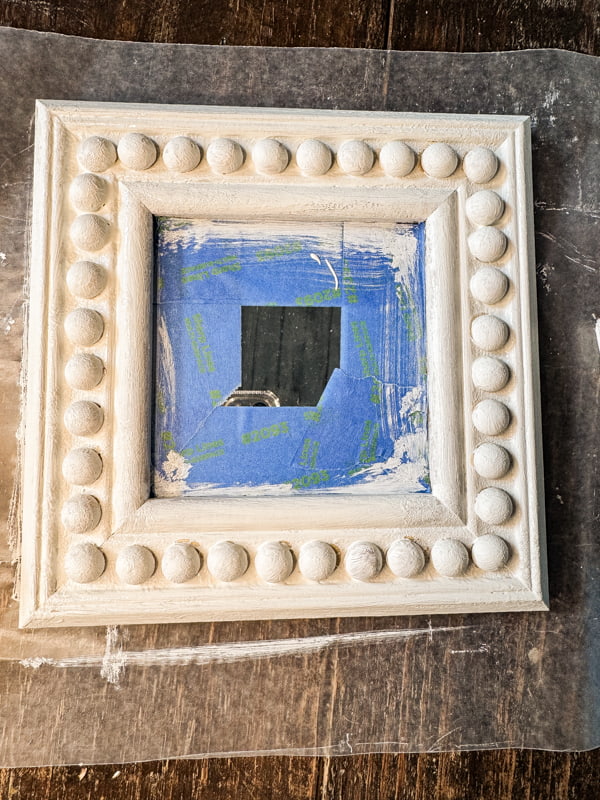
- Next, paint the frame with a coat of white chalk paint. (You may choose any color you desire.)
- I recommend painting at least one coat of paint before applying the beads. After the beads are attached, it’s harder to paint around them.


How To Add Beads To Wood Mirror Frame
Once the paint is dry, you can apply the split wooden beads to the frame using glue. This beaded idea can vary depending on the shape and design of your frame.

Begin by laying the beads on the frame to determine the spacing and number of beads per row. Then add glue to the backside of the bead and press it onto the frame. Continue until you have the desired coverage.


Paint The Beaded Area
Follow the glue instructions for drying time, and then paint the beads with a small brush. Be sure to get in between and around the beads on all sides.


You don’t need heavy coverage on the beads; one coat should be sufficient. Allow the paint to dry before proceeding.
How To Wax and Distress The Beaded Frame
Although I wanted white frames, I did want to expose some of the original gold color. I used clear wax and rubbed it onto the frame. Rubbing the wax vigorously helps to remove some paint and expose the original gold paint & natural wood on the beads.
How To Add a Touch of Gold
To enhance the frames with a touch of gold, I used Rub n Buff antique gold.
- Apply a small amount of Rub N Buff to a paper towel.
- Press the towel to distribute the material evenly.
- Lightly rub over the tops of the beads.
- You can add some of the antique gold to other areas of the frame if you want more gold exposed.
Finishing Touches
When you have added the desired amount of gold, use a soft cloth or a dry paper towel to buff over the gold and clear wax. Rub over the entire surface of the frames until you have a matte shine.
Finally, remove the tape from the mirror and decorate it with your new beaded mirrors.


Frequently Asked Questions
- Why did you paint the frames white if you want the gold to be exposed?
Although I wanted some gold to show through the paint, I didn’t want solid gold frames. This technique of painting and then rubbing away allows the frame to appear distressed over time, as if time were wearing away the white paint, exposing the older layer.
- Why didn’t you remove the mirror before painting the frame?
I would have normally removed the mirror or art when painting a frame. It makes the job easier. However, these mirrors were professionally framed, and I didn’t want to destroy the backing.
- Why didn’t you use hot glue to attach the split beads?
You could have easily used hot glue to attach the beads. However, I am cautious when using hot glue on items that need a strong bond. Hot glue can become brittle over time, and the bond may not hold. These frames were not 100% flat, and I was concerned that the beads might become loose without a more permanent bond.
In addition, it’s easy to use a permanent glue when working on an item you can lay flat to dry, so, aside from the drying time, it felt like a good option.
- Could I put the beads around the outside edge of the frame?
Yes! I considered doing that as well. However, because of the width of my mirror frames, the beads looked lost along the outer edge. But for a narrow frame, I would definitely add them to the outer edge.
- Do I have to use a split wood bead? Can I use a round bead?
Yes! Absolutely, that would work. A full bead would look great around the outside edge of a frame. I had these split wood beads left over from my hobnail lamp knock-off and decided to use them.
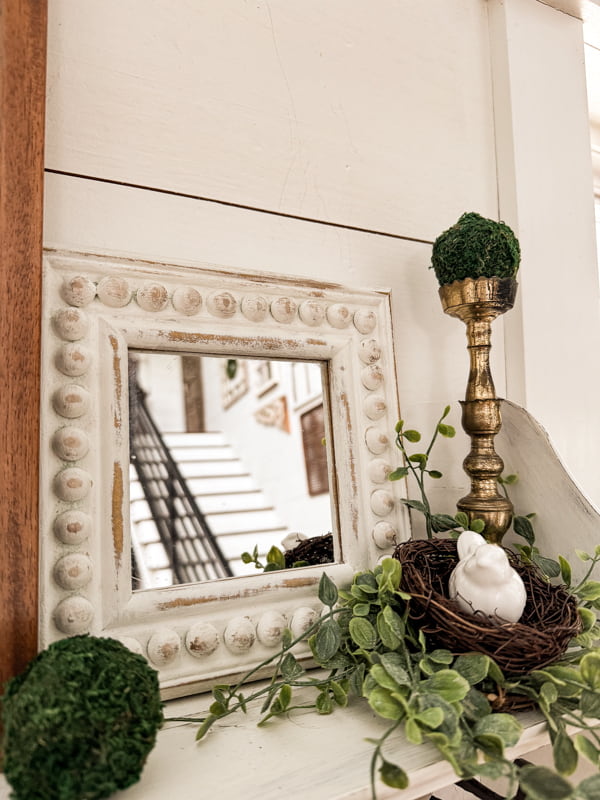
How To Decorate With Small Beaded Wood Frame Mirrors
I love collecting small thrift store mirrors to decorate with. They are perfect for adding to shelves, creating small vignettes, and so much more. Here are a few ways to use these decorative beaded wood frame mirrors.
First, I added both of them to the entry table.

This beaded idea has one frame hanging on the wall, while the other serves as a base for a vintage candlestick holder.

They also look stylish grouped together on the wall or hanging from a pegboard.

You can also tuck them into a tray or a cabinet, as in this bathroom vignette. If you look closely, you can see the mirror inside the cabinet.
You can also add interest to a wall-hanging display by adding a mirror to the shutter, which is filled with vintage milk glass bud vases.


Tuck a decorative beaded wood-frame mirror behind a grouping to reflect light all around, drawing attention to your shelf vignettes.
These two mirrors were only $4.00 at the thrift store and cost less than $5.00 to update. Not bad for only $9.00. I’ll be tucking them into my decor for years.
Thank you for stopping by, and I look forward to sharing my next adventure with you!
Related Articles
- How to Style Shelves Like A Pro
- Simple Chalk Paint Furniture Makeover
- 3-Step Flea Market Flip
- Paint It! Thrift Store Flips For Beginner’s
- How To Chalk Paint Furniture
- Thrifted to Chic: Create a Textured Lamp with Faux Hobnail Design

Pin It To Remember It
Did you find some great ideas you’d like to save for future reference? To save, hover over the images and pin to your favorite Pinterest Boards when you see the PIN button in the upper left-hand corner.


You have such a creative eye as to how to use thrift store finds into lovely home decor. And your tutorials are so clear to follow. I just love the beaded mirrors!
Mary,
Thank you for your sweet compliments. I appreciate you taking the time to stop by and I appreciate you for following along.
Rachel, you are so amazing with all your ideas! I always enjoy seeing your DIY’s — and your instructions are always so easy to follow.
I love what you did with your mirror! It’s so pretty! Now, I have to look for a mirror at a thrift shop so I can make one of these pretty mirrors!
Thanks, again, for your post! Hope you are having a wonderful weekend!
Mary-Ann,
I wish you luck in finding the exact mirror you want. I appreciate you for following along.
Your beaded mirrors look lovely in each of the places you have photographed them. Thank you for your tutorial.
Angie,
I am so glad you like them. They will be showing up all over the farmhouse for years. Have the best weekend.
These look amazing, Rachel, and I love that you can use them in so many different places too. Big hugs, CoCo
CoCo,
I really appreciate this. Thanks for stopping by.
Rachel, this mirror looks so much better! I’m sharing it with my project loving readers this weekend!
Cindy,
I really appreciate this. Thank you!
Rachael, where did you find the beautiful side table with the skinny drawers? I have been looking for one like that
Kimberly,
It’s one of my favorite upcycle projects. The link is -https://www.thepondsfarmhouse.com/my-1-industrial-farmhouse-transformation/
KariAnne,
Thank you for sharing.