3 Step Thrifted Furniture Transformation: Easy DIY Makeover
Want an easy way to update old or thrifted furniture? See this 3-Step Furniture Transformation for a quick and easy DIY makeover. Using only Chalk Paint & Wax, this tired chest has an updated finish and great farmhouse style.
Y’all, I finally got my Christmas Present in January! LOL!!! I had wanted a new piece for our bedroom, but couldn’t find one. A few weeks ago, I found a small chest that was the right size at a Flea Market Thrift Shop. It just needed an update, and it would be perfect!
(Posts on The Ponds Farmhouse may contain affiliate links. As an Amazon Associate, I earn from qualifying purchases. See the full disclosure details here.)
The Thrill of The Hunt
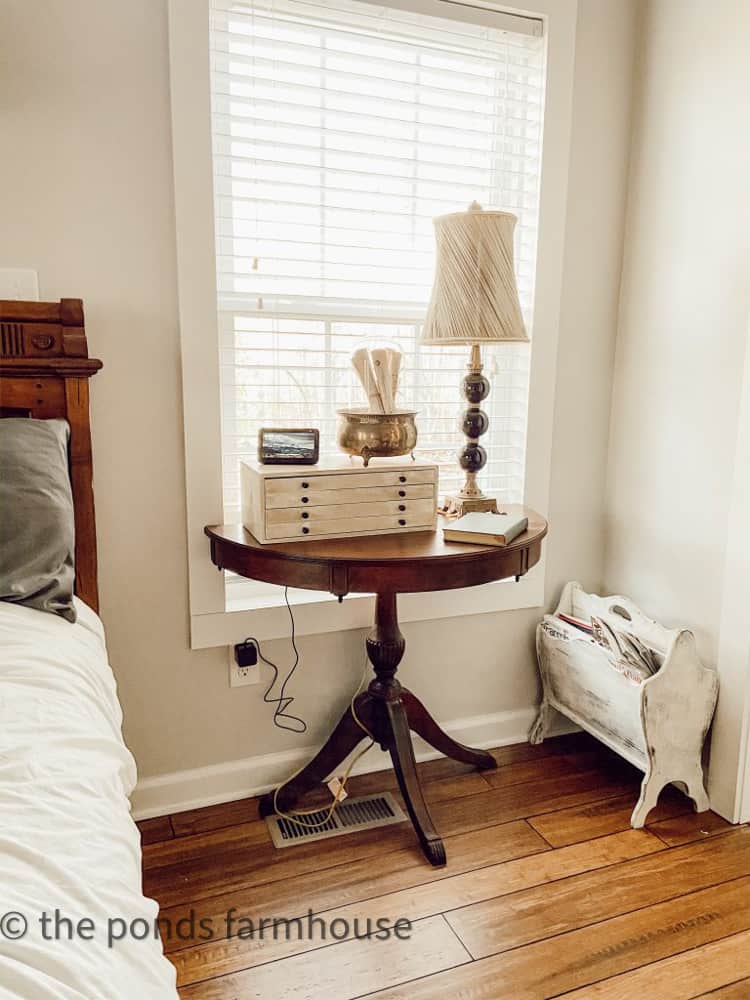
This space beside our bed has been filled with this cute little table since we moved here. It was a leftover piece from our previous home, and although I love the table, it isn’t working for me any longer.
The table is too small for this space and provides no storage. So, we’ve been looking for the perfect piece to fill this spot.
Before Christmas, we were scouring the thrift stores without any luck.
The Flea Market Thrifted Find
A few weeks ago, I was traveling back from Virginia and couldn’t resist stopping at a flea market I had spied on the way up.
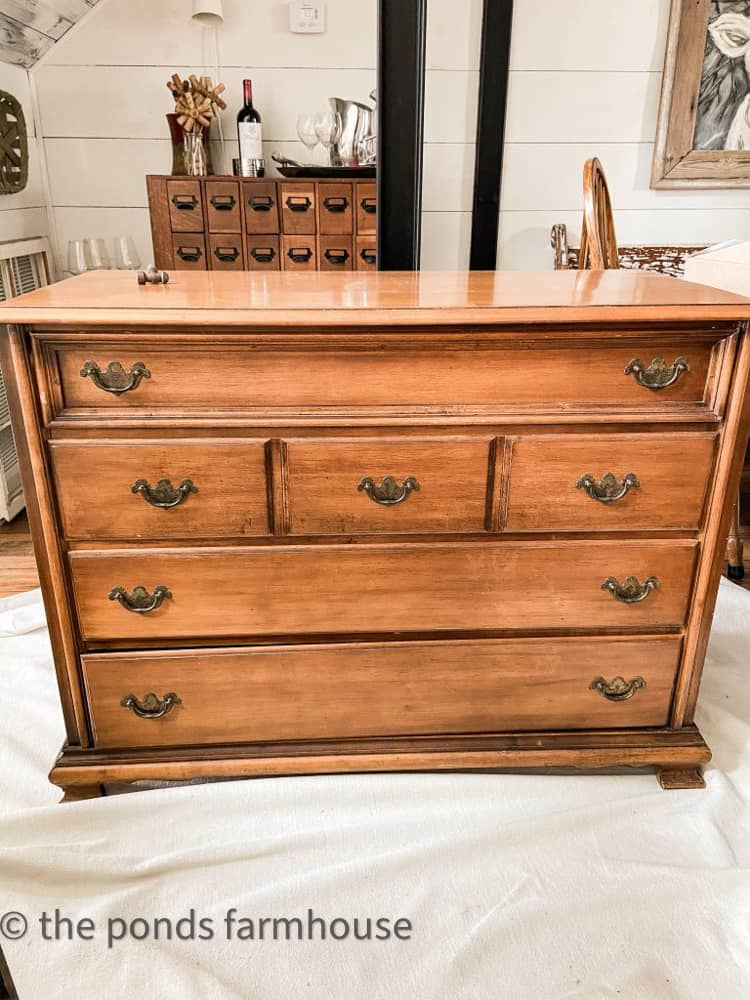
As luck would have it, I found a great solid wood chest at a great price. In addition, my husband was traveling back later that afternoon in a truck we had just purchased, so I knew it was meant to be.
After a quick phone call, he picked up my new treasure and brought it home.
(Posts on The Ponds Farmhouse may contain affiliate links. As an Amazon Associate, I earn from qualifying purchases. See the full disclosure details here.)
3-Step Furniture Transformation
Although the chest was in great shape overall, some scuffs and nicks needed to be repaired. Although the wood matched our pine bed, it felt heavy and dark when placed in the room.
Therefore, adding white chalk paint to the exterior of the chest created the perfect balance.
Step 1 – How To Clean The Thrift Store Find
The first step was to clean the piece thoroughly. Although it was in good condition, I gave it a good cleaning with Pledge furniture cleaner.
When cleaning an old piece of furniture, be sure there are no sticky areas on the wood. Clean the inside of the drawers and cabinet as well as the exterior.
Step 2 – How To Paint Used Furniture
The second step of the furniture makeover was to paint the chest’s exterior. This was an easy process when using Annie Sloan Chalk Paint. It’s so fast and straightforward to use.
After thoroughly cleaning the chest, remove the drawers and paint two coats of Old White Chalk Paint.
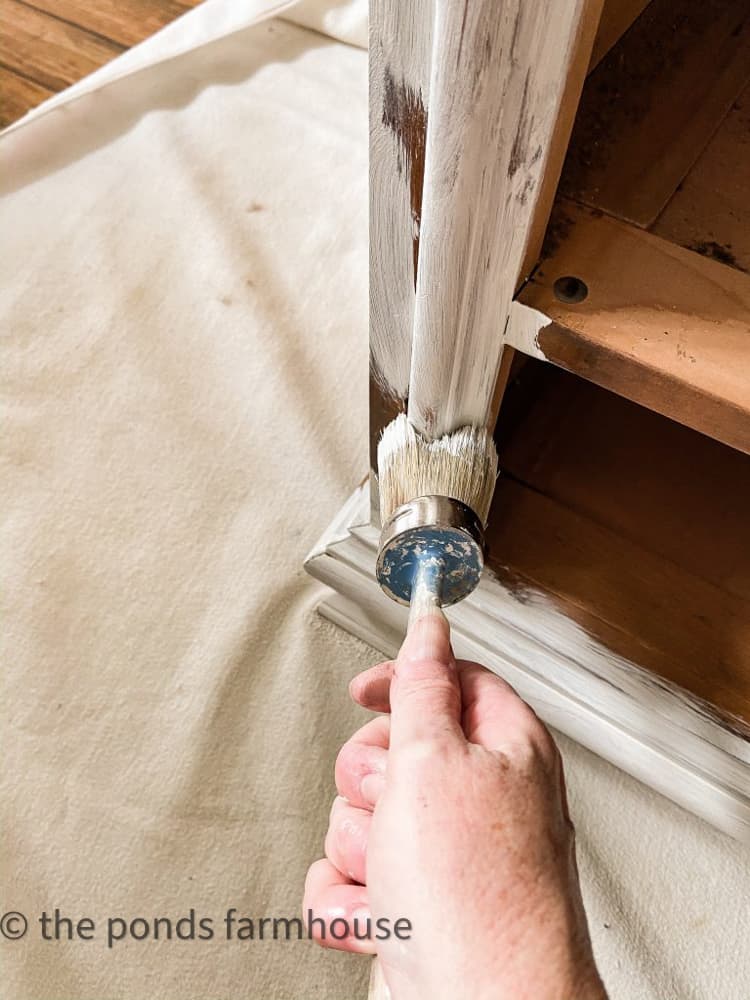
It took less than 30 minutes to finish the painting. I love using chalk paint for most projects, and you can learn more about how to use Chalk Paint here.
If you plan to use a product other than Chalk Paint, you will need to sand the surface to remove any shine and then remove any saw dust from the piece with a tack cloth.

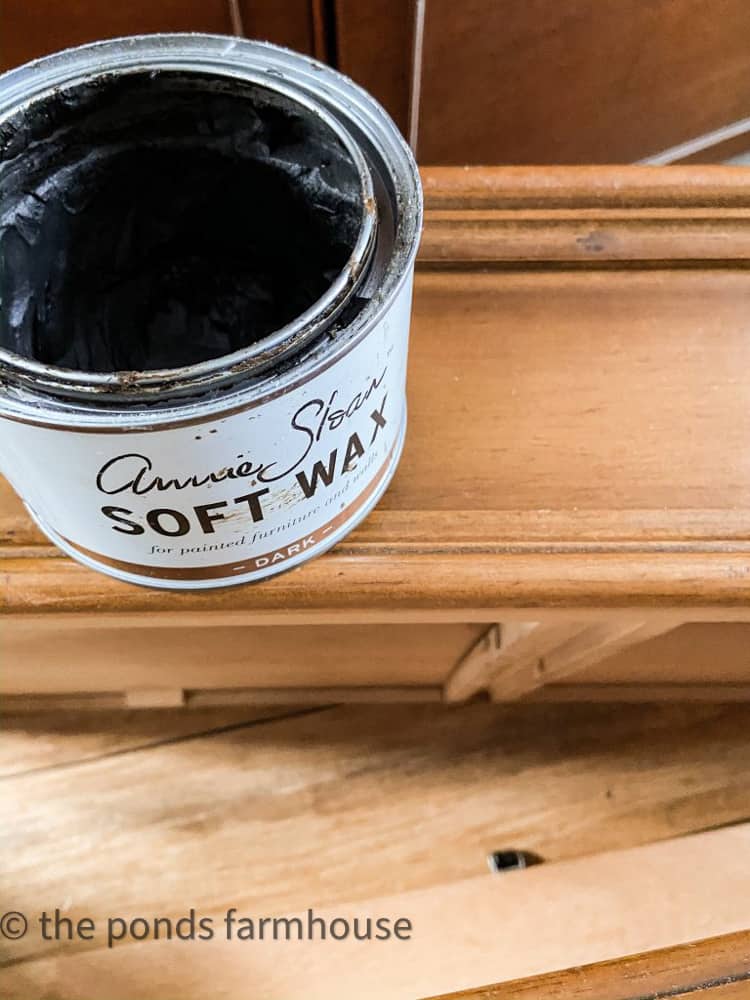
Step 3 – How To Add A Wax Finish
To finish and seal the painted surfaces, I used a combination of clear and dark wax.
In addition, I added mineral spirits to the wax. This helps to distress the finish while waxing. All of these techniques are detailed in How to use Chalk Paint!
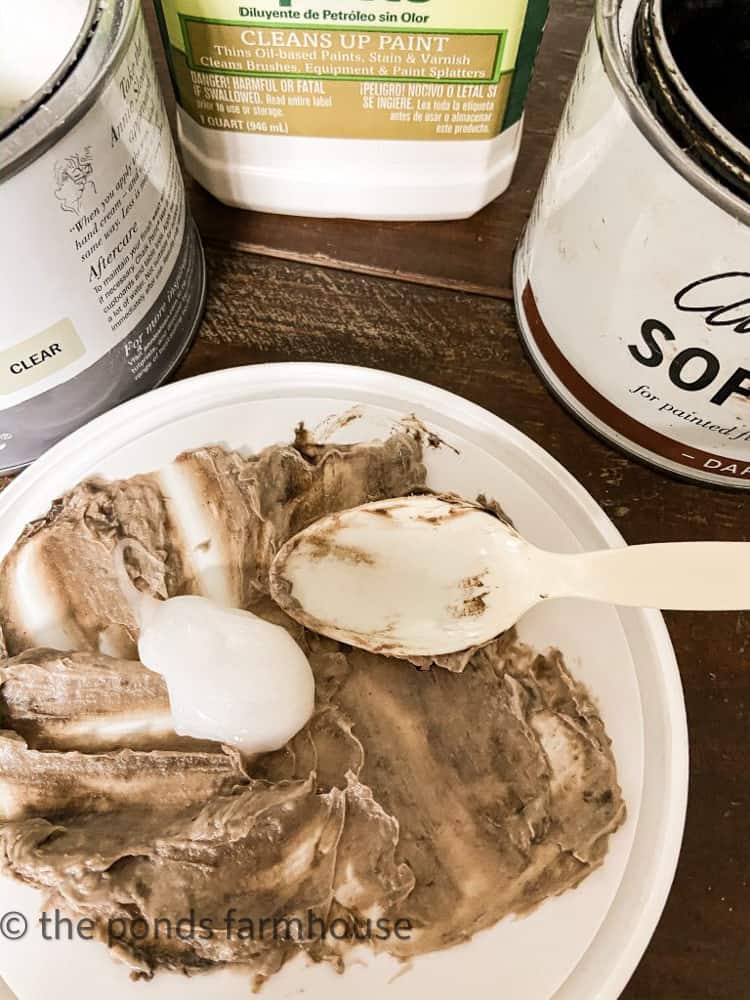
Using the mineral spirit mixture, you can see how some painted areas are distressed.
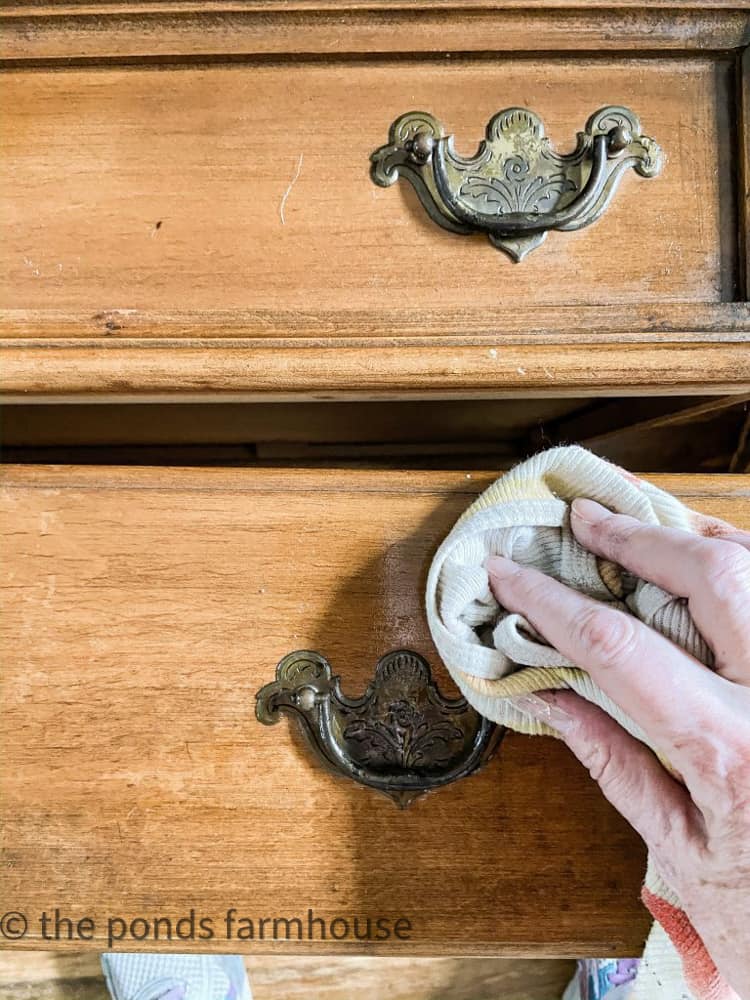
How To Update Natural Wood Drawers and Hardware
At this point, I decided to leave the drawers their natural finish. In addition, the hardware looked good, so there is no need to replace it.
Therefore, everything just needed a little sprucing up. I initially thought about staining the drawer fronts to remove the scuffs and dings.
Instead, use Annie Sloan Dark Wax because it works like a charm to remove any sign of the scuffs. Plus, it brought the rich beauty of the wood back to life. So easy.
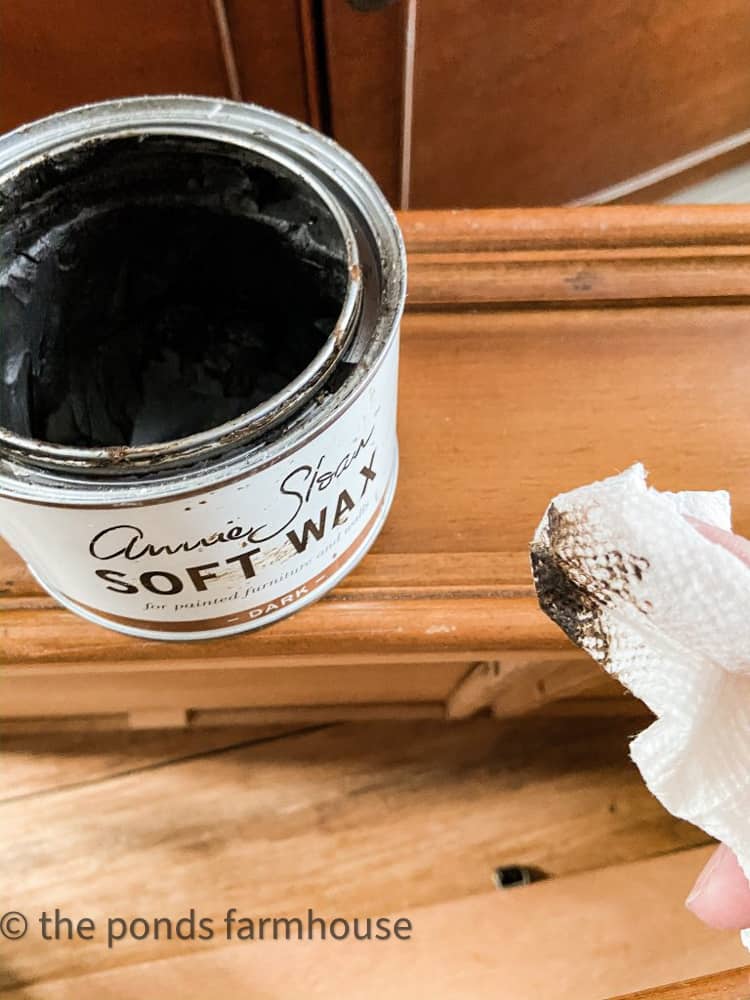
Also, the dark wax brought the dull hardware back to life.
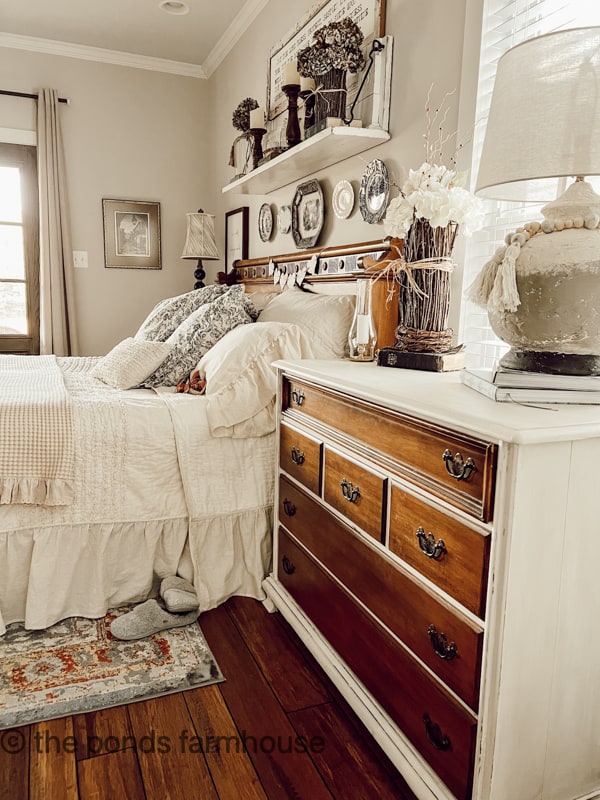
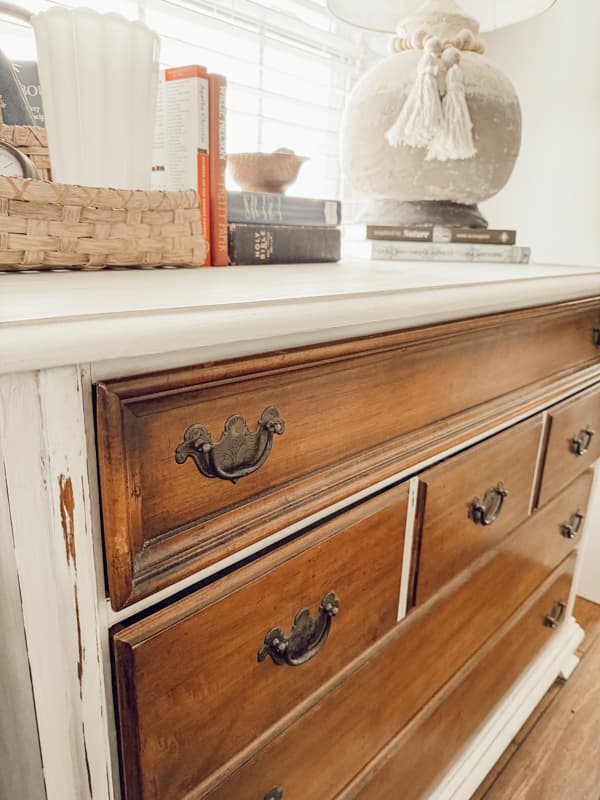
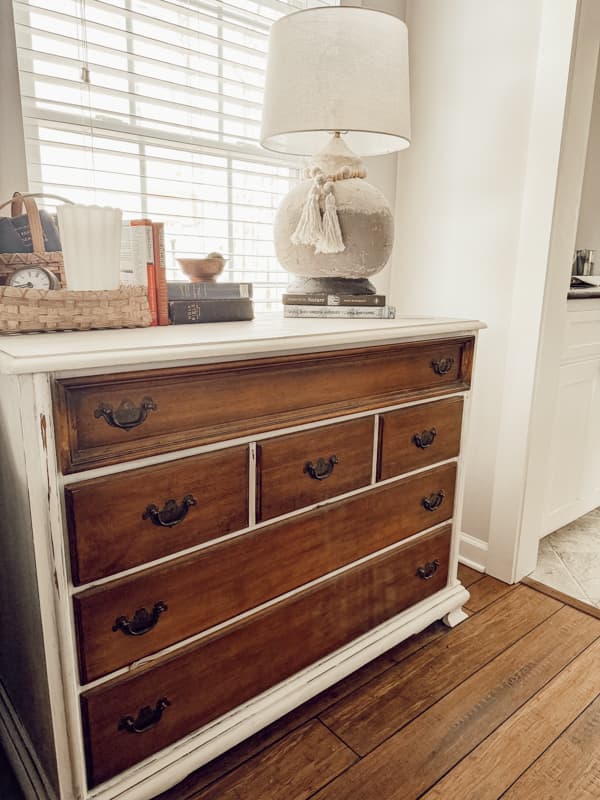
The 3-Step Furniture Transformation – Finished Chest
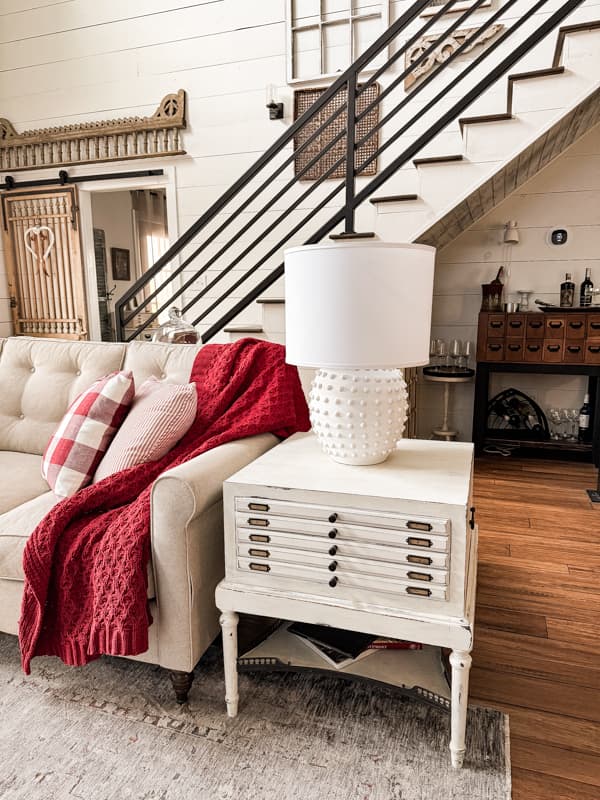
I love a wood-and-white combination, and I’m thrilled with how this inexpensive chest looks beside the bed. This has inspired me to refinish the chest on the other side of the bed.
See that lamp? It was a $7.00 thrift store find. It’s now had a makeover and looks like a Pottery Barn or Anthropologie Hack. You see this easy lamp transformation tutorial.
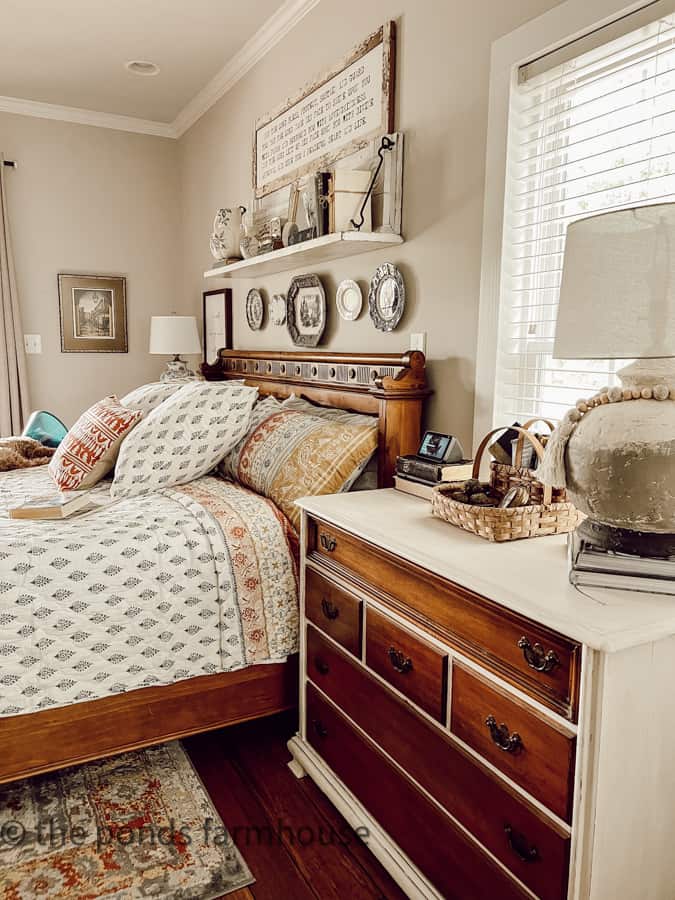
A Surprise Match
The bed frame’s natural wood is almost a perfect match for the drawer fronts. After checking the manufacturer of the chest, we found that it is the same as the bed. I told you it was meant to be. LOL
I hope you enjoyed this simple project and that it encourages you to look for used pieces when redecorating your spaces. It’s a great way to recycle, and it feels good to create something yourself.
More Furniture Makeover
If you’d like to see more makeovers, check out these tutorials.
- Simple Chalk Paint Makeover for Vintage Furniture.
- Amazing Furniture Transformation
- How To Make A Jewelry Cabinet from an old TV Cabinet.
You may also like to learn more about how to Shop Thrift Stores successfully.


Such a fun makeover Rachel. Luv how you left the wood on the drawers. Pinned👏🏻👏🏻
Ann,
Thanks for stopping by.
Love the makeover Rachel! It looks great!!!
Stacy
I really appreciate this.
Beautiful, it came out awesome!! Great job!
Carmen,
Thanks so much.
Rachel I think this was the same as my moms bedrooms set. Drexel and it was made from 5 different woods including pear wood. I also recognized the brasses. My parents bought it back in 1964 and they only made this collection for a couple of years because it was so expensive to produce. Good eye and good find.
Oh wow! Thank you so much for sharing. My bed is Drexel and I said that the wood looks so much alike. That’s why!
I appreciate this information Shelley!
Rachel
That was a great find, and you did an amazing job revamping it. It looks awesome in your bedroom. Thanks for sharing.
Miche,
You are so welcome and thank you for your encouragement.
So lovely! Love the chalk paint and wax technique! Thank you for sharing all the great tips on how to use the product!
Cynthia, You are welcome and thanks for stopping by.
Rachel
Wow Rachel, it turned out beautifully! I don’t have the patience for this and wish I did. Love it!
Cindy,
This was so easy, I know you could do it.
Hi, there! I live in Central Virginia! Can you give the name/location of the flea market you purchased the chest from? Thanks in advance…Sandra
It’s in NC but close to the Virginia border. It’s Stokesdale Flea Market. I think I have that right.
Just beautiful! Meant to be there!
Rebekah,
I agree. Thanks so much for stopping by.
Hi Rachel,
Great piece you found. I love working with ASCP and different techniques.
Pinned to my painting techniques board.
Great job!
Cindy
Cindy,
I really appreciate your encouragement. Rachel
Rachel what a great find! I love how it turned out…leaving some of the wood on the drawers was brilliant! Thanks for breaking down the process:)
Kelly,
I appreciate your encouragement.
You found a gorgeous piece and made it even more gorgeous! I am a huge fan of furniture transformations. Love the wood and painted look too! Thanks for sharing Rachel!
Cindy,
I really appreciate this.
I love your new chest Rachel. The makeover turned out beautifully!
Jen,
Thanks so much.
What a great transformation! Love how you combined the painted finish with the wood finish!
You did a great job. It turned out so pretty! Love the lamp you found too!
Rachel I love this! The contrast of the white with the original wood is stunning! Pinned!
Beautiful chest of drawers Rachel. I’m so excited to share your post this week at the Tuesday Turn About Link Party. Hope to see you there!
It’s so beautiful and I love how you highlighted some of the natural wood!
Shawna,
Thanks so much.
Wowza Rachel, it looks fab-u-lous!!! A great tutorial too — pinned! Do envy you going to a flea market. My current project is potty training a Scottie puppy, a challenge in this arctic weather lol!
Oh my gosh. But how fun to have a puppy.
I love how this turned out Rachel! And it looks perfect in your bedroom. Thanks so much for sharing it at Farmhouse Friday – we’re featuring you in tomorrow’s party!
Michelle,
I really appreciate this. Thanks.
Love this project….have a piece I want to try the chalk paint on…..I have never painted furniture before so thank you for the step by step instructions. I am not a crafter by any means so your posts are such a delight for me. So many things I want to try! Keep the posts flowing.
I appreciate you for saying this. You are so sweet to constantly lift me up. Thanks so much.
I love this. It’s gorgeous!
Thanks so much Renae,
So simple but has such an impact! Love it and pinned!
Cheryl,
I’m so glad you like it.
Thanks for sharing your technique for this chest upcycle! It looks inspiring!
Angie,
I’m so glad you found it helpful. Thank you for stopping by.