Are you good with houseplants? I do much better with outdoor plants but love the look of greenery topiaries for indoor decor. This grapevine topiary is an easy DIY project, and you can make it in about 30 minutes. You only need a few supplies, and you will love the results. Best of all, you don’t have to worry about killing it. LOL
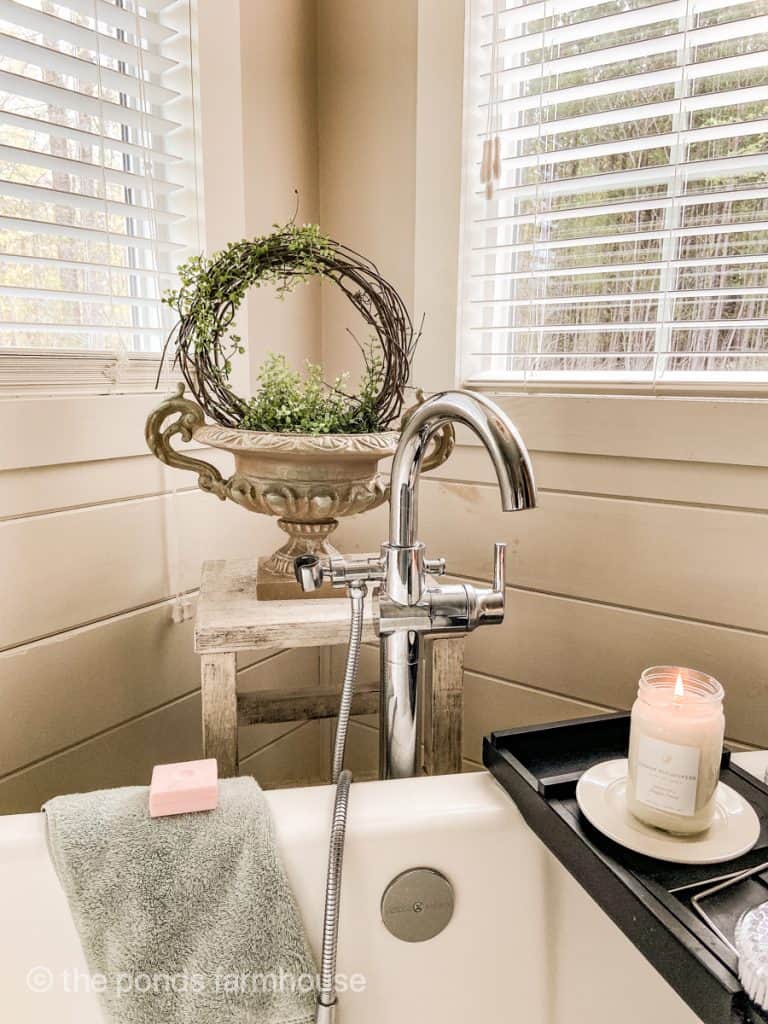
I love climbing plants, so I decided to make a faux climbing topiary for my bathroom. Since I’m not good with houseplants, I thought I might be able to keep it alive. LOL
(Posts on The Ponds Farmhouse may contain affiliate links. As an Amazon Associate, I earn from qualifying purchases. See the full disclosure details here.)
How To Make A Grapevine Topiary
Depending on your chosen container, this easy tutorial can be made with large or small grapevine wreaths.
You can use purchased grapevine wreaths, thrifted wreaths, or foraged wreaths. With an abundant supply of wild grapevine, I decided to make some simple wreaths from the foraged grapevine.
It’s best to wrap the vine into a wreath while it is fresh. Otherwise, you may need to soak the vine in water before making the wreaths.
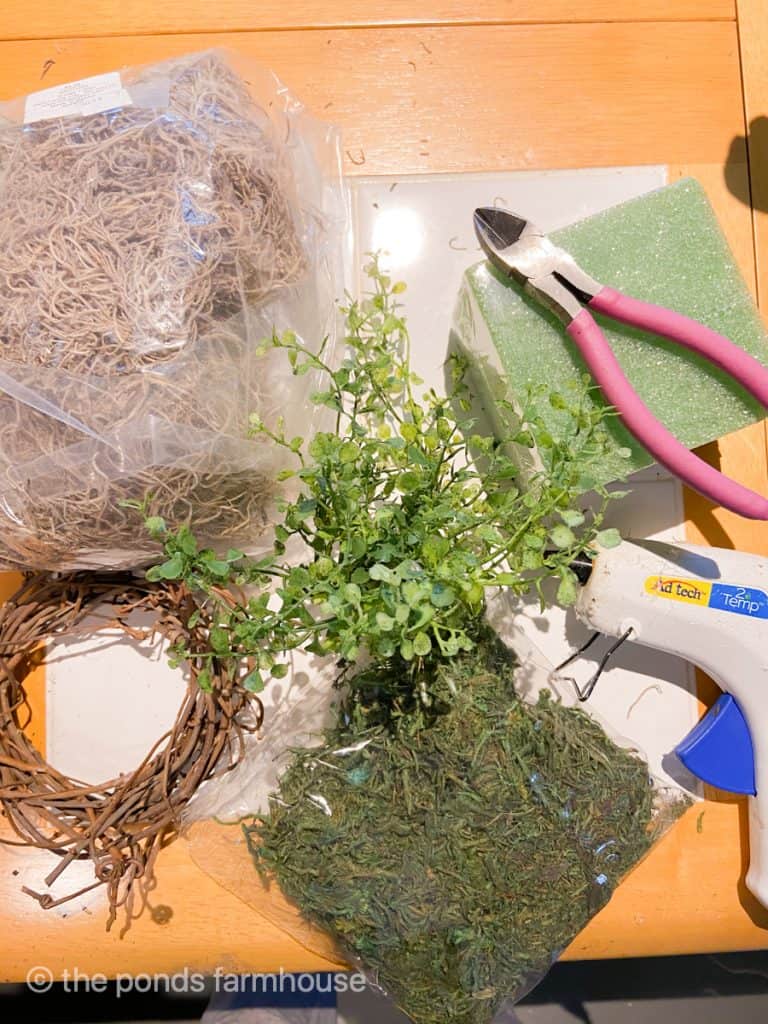
Supplies for Grapevine Topiary
- Container
- Grapevine wreath – approx. the same diameter as your container.
- Greenery Stems
- Hot Glue Gun
- Styrofoam block
- 2 sticks ( or dowel rods) Cut slightly longer than the depth of your container.
- Spanish Moss
- Green Moss
- Floral Wire Snips

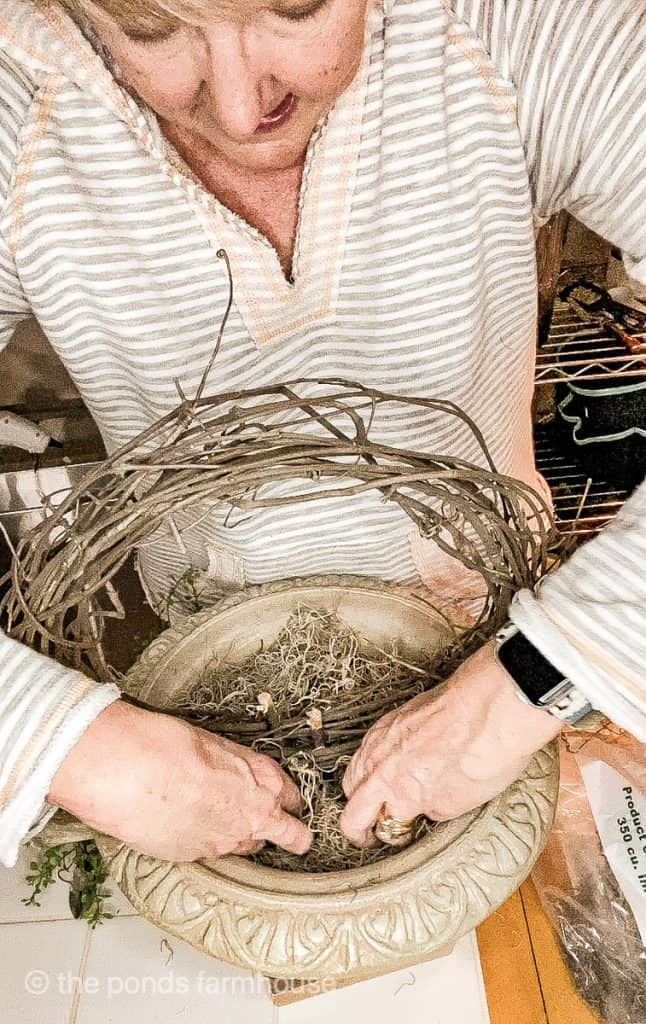
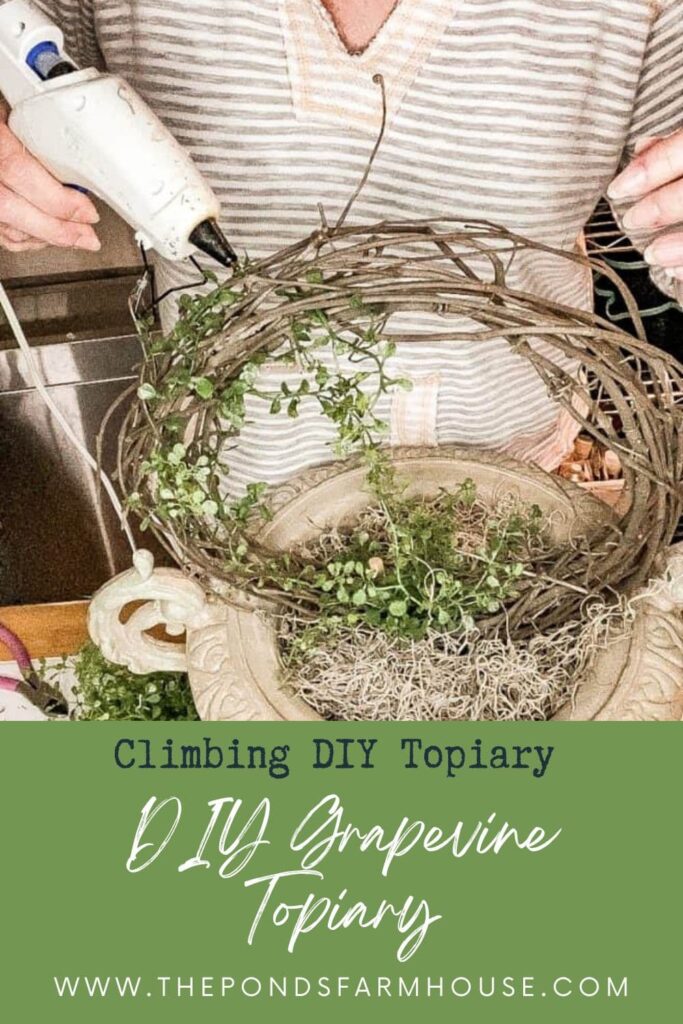
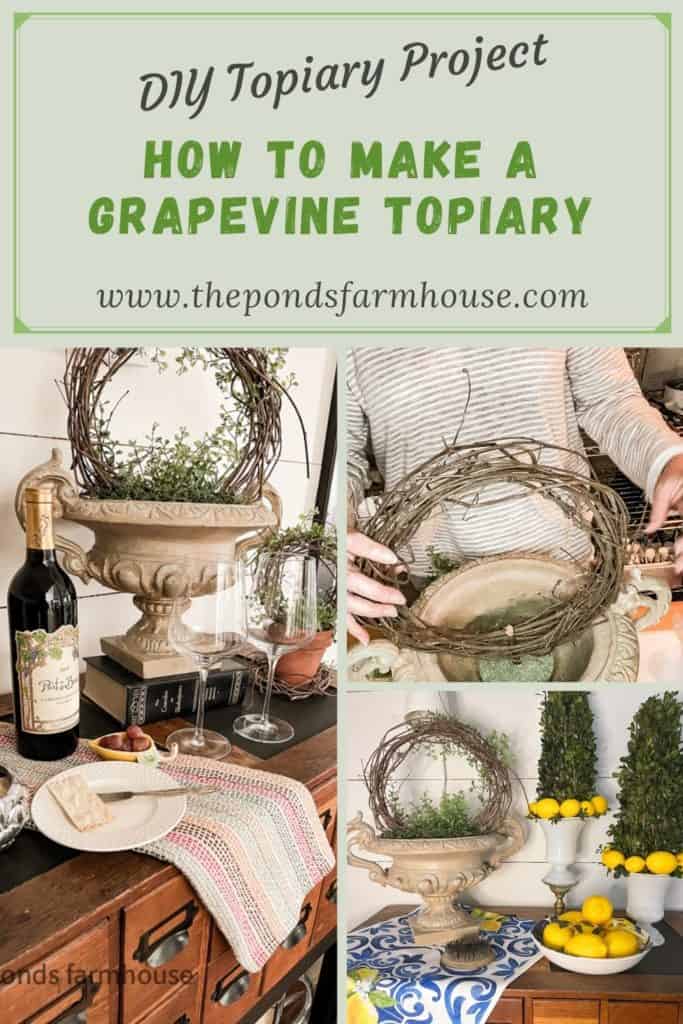
Step 1 – Secure the Grapevine to Container
Begin by pushing one of the wooden sticks into the styrofoam in order to secure the grapevine to the container,
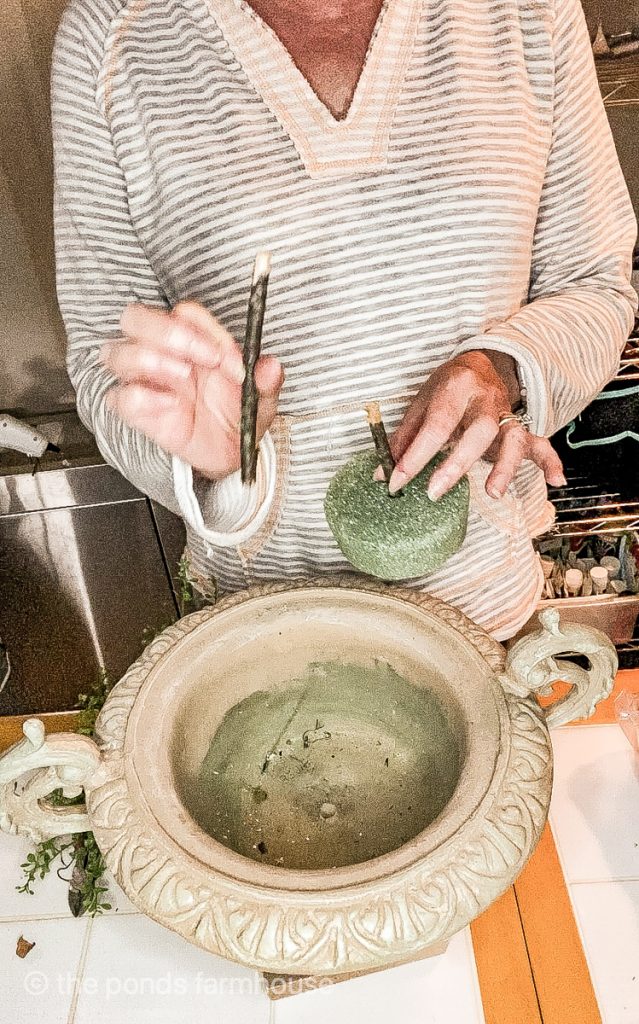
Apply hot glue to the bottom of the styrofoam and press into the bottom of the container. Hold until secure.
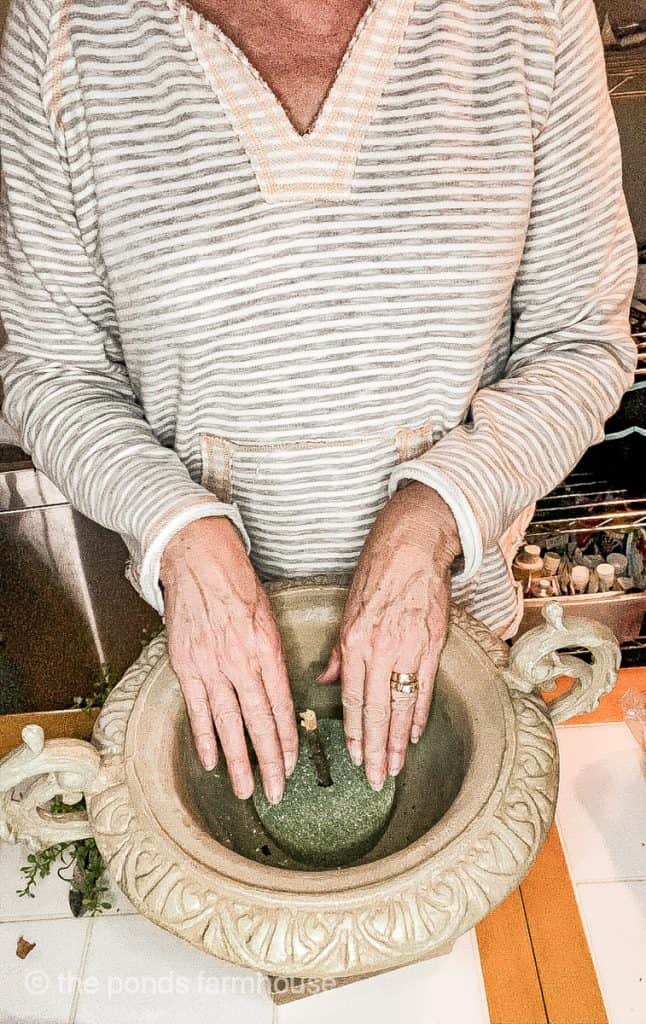
Next, separate a section of the grapevine wreath to allow the stick to be pushed through. Then use the second stick to push through another section of the grapevine and into the styrofoam. Using two sticks will hold the grapevine more securely.
In addition, add a few drops of hot glue around the sticks for extra stability.
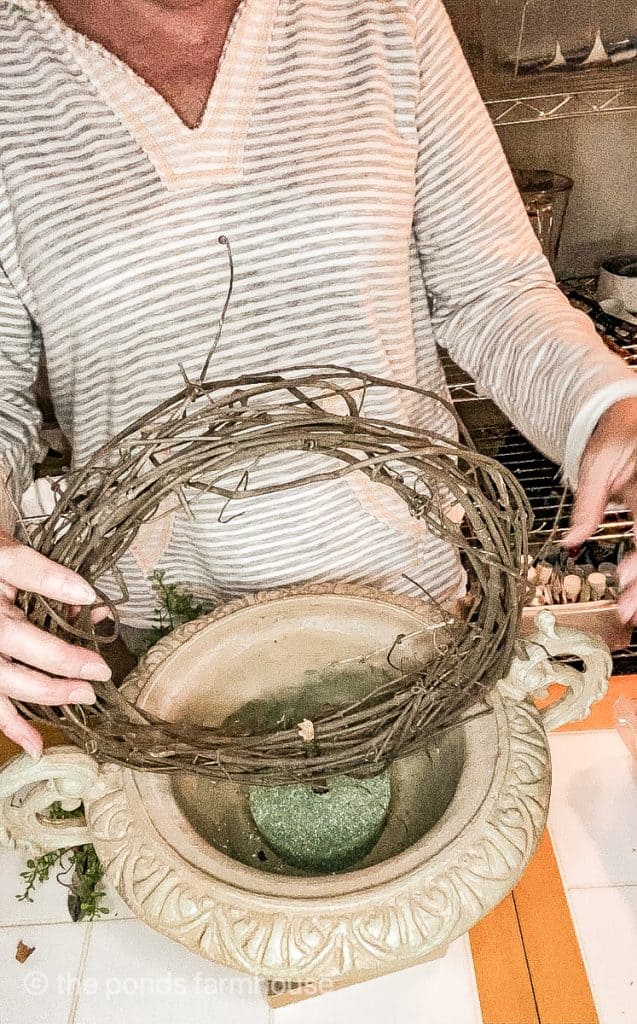
Lastly, fill in around with spanish moss to hide the styrofoam.
I love making topiaries and here is one I shared last spring called Easy DIY Topiaries You Can Make Yourself. In addition, if you are looking for a container, you might like this tutorial on How to Age Clay Pots.
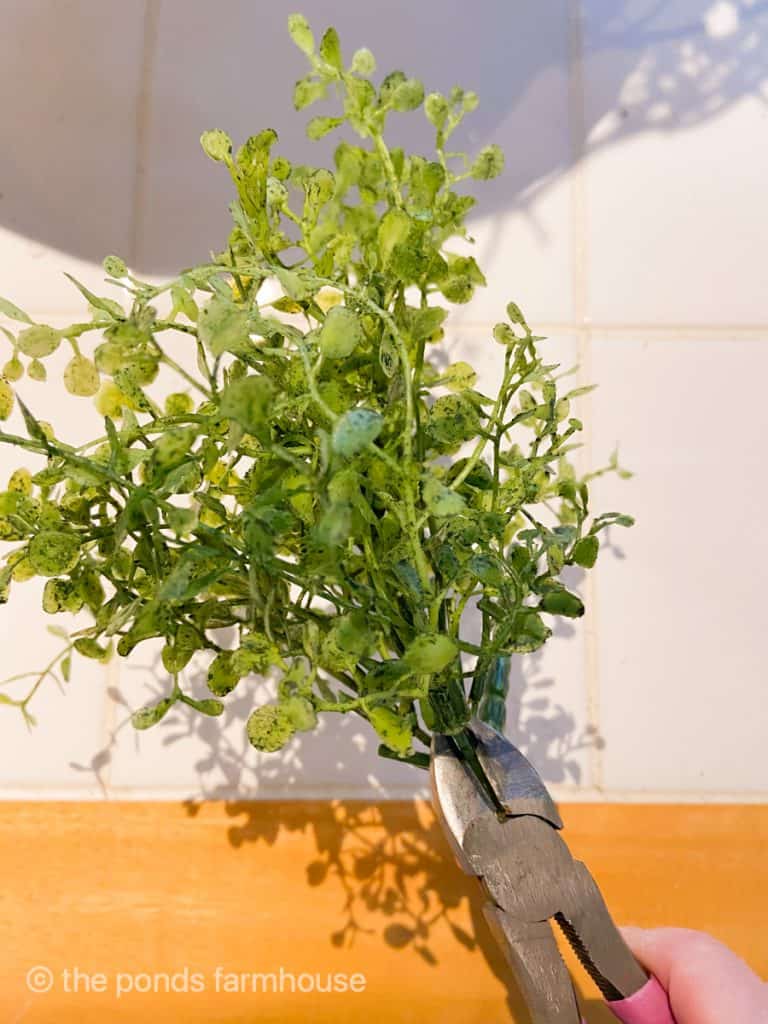
Make The Topiary
To create the climbing topiary, begin by cutting several pieces of the faux greenery stem.
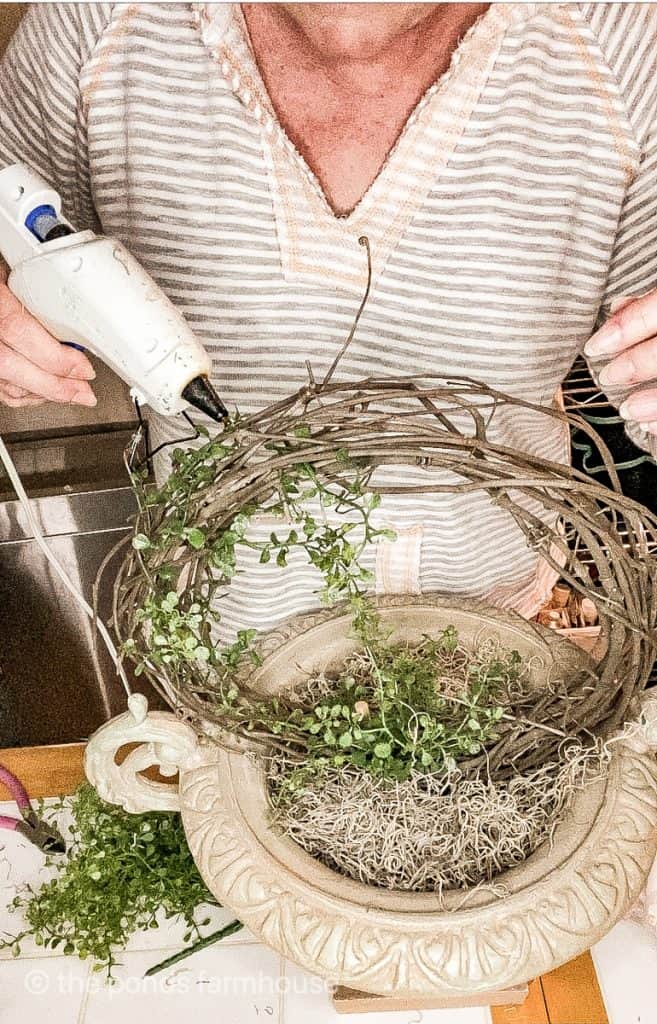
Apply a generous bundle at the base of the grapevine to cover the sticks that are exposed.
Then, apply the smaller cuttings by weaving them into the grapevine as though they are climbing up.
Use small amounts of hot glue to secure the cuttings in place.
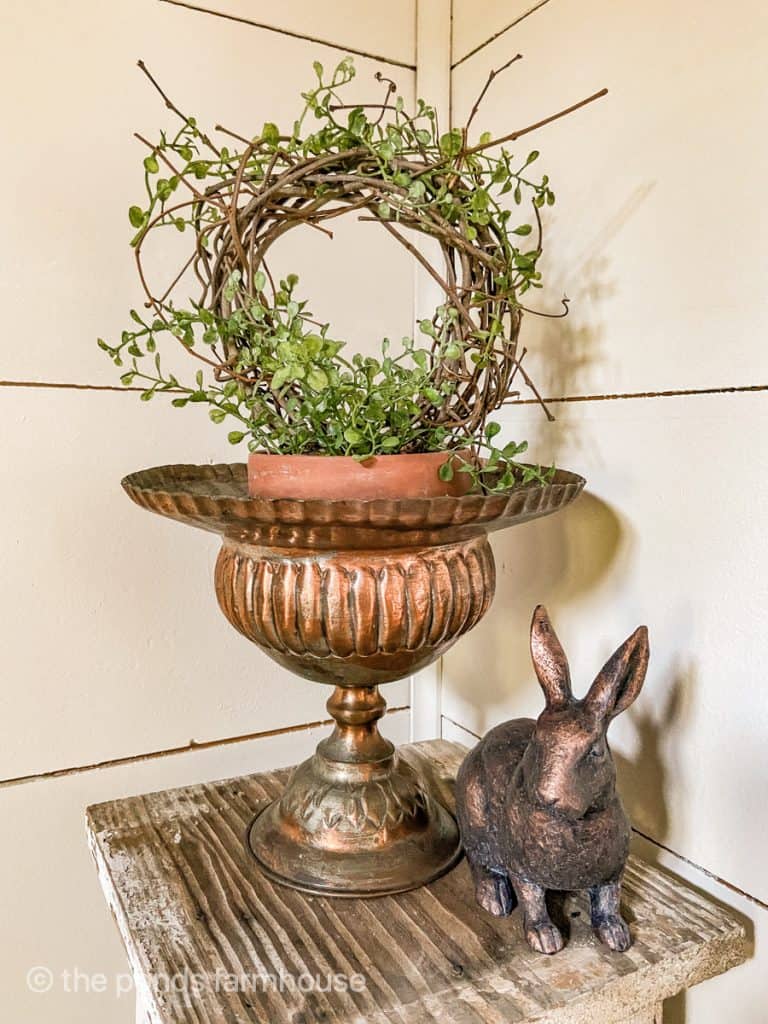
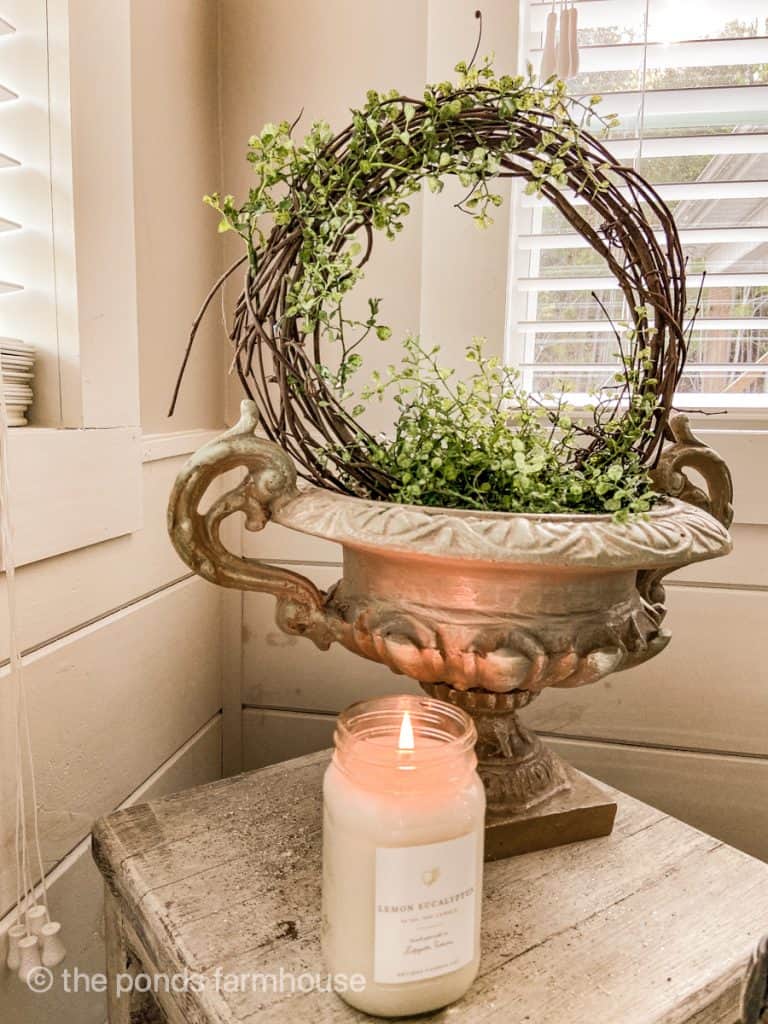
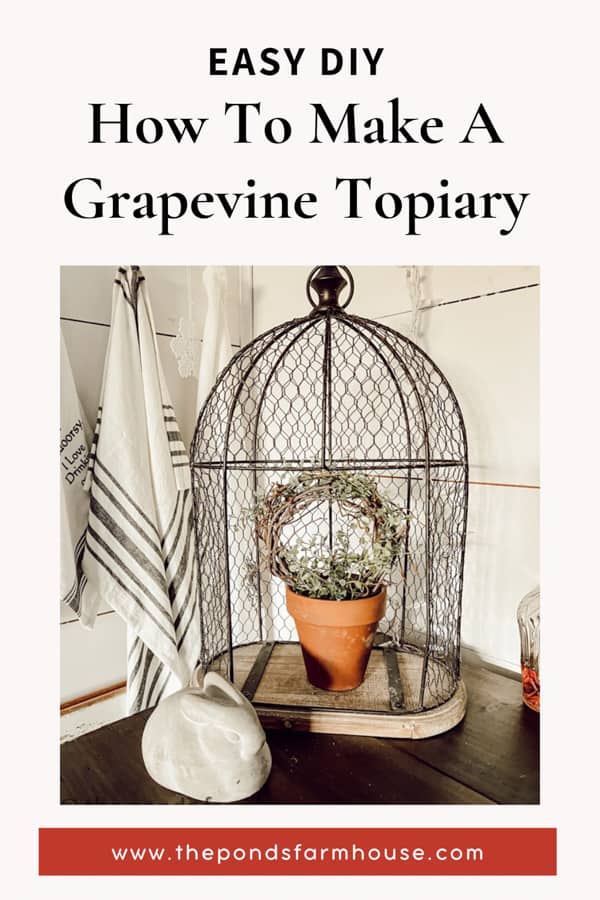
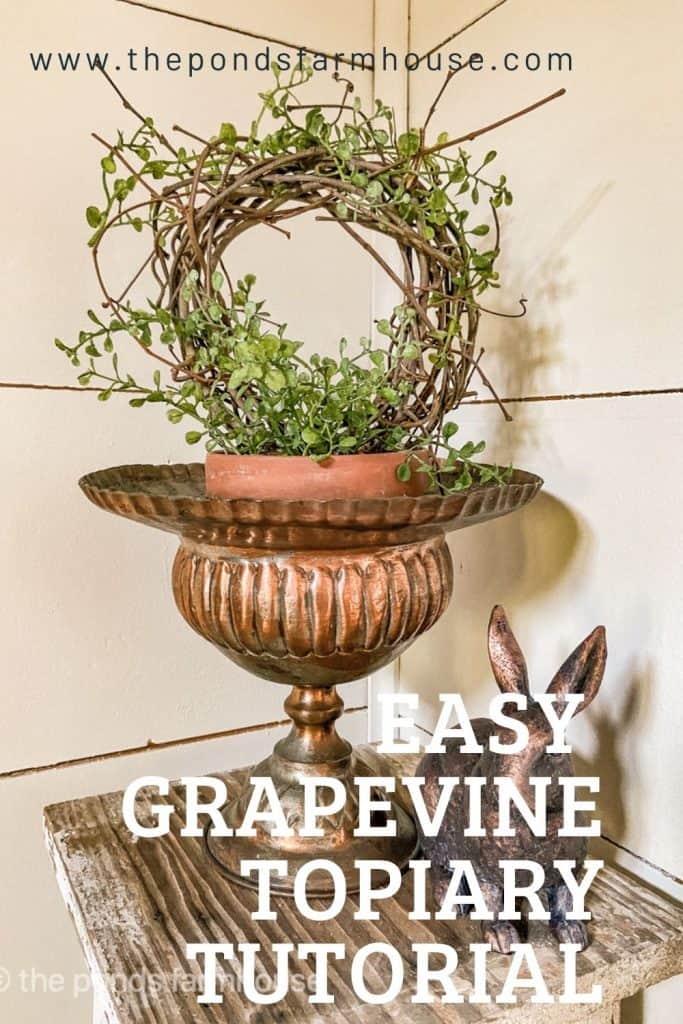
Finished Grapevine Topiary
Ta Da! See how easy that was. This project took less than 30 minutes to complete and I love the greenery in my master bathroom.
More DIY Topiary Tutorials
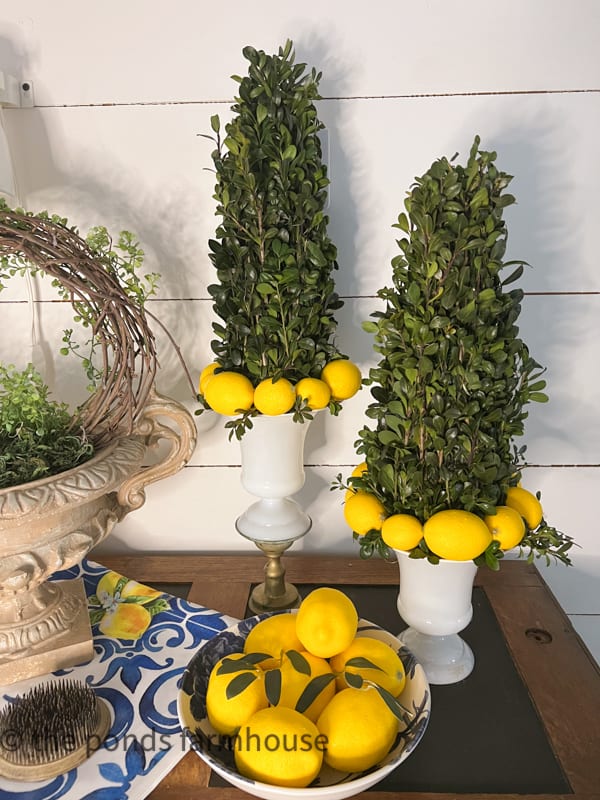
I have used the Grapevine Topiary all around this farmhouse. Here it is grouped with these DIY Fresh Boxwood & Lemon Topiaries.
Topiaries are so much fun, especially for spring. I have several tutorials on How to make a Topiary and if you click on any of the highlighted links it will take you to the other options.
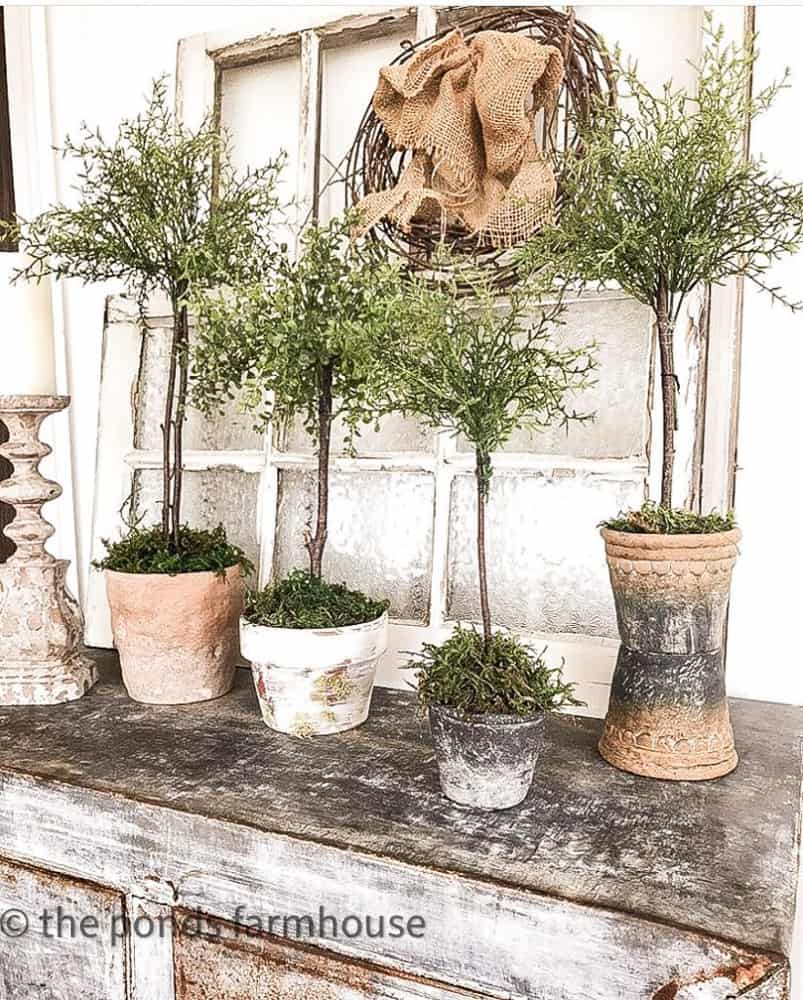
Here is a smaller version that I made previously. It was the inspiration for the larger one I’m sharing today. You can get creative and use any type of greenery for your climbing topiary. I’d like to try ivy next!
Did you see the wreath I made using Terra Cotta Pots? This easy tutorial is a great Spring project.
It looks perfect in this vintage copper container.
I love using vintage and you can learn more about my thrift store shopping here.
Be sure to see my original instructions for these DIY Topiaries.

I hope you enjoyed this easy DIY Grapevine Topiary Tutorial. Please feel free to ask any questions and your suggestions are always welcome.

Pin It To Remember It
Did you find some great ideas you’d like to save for future reference? Hover over the images you’d like to save and pin to your favorite Pinterest Boards when you see the PIN button.
Click to Shop
Frances Brown
Tuesday 2nd of April 2024
Love this idea, Rachel. I have a thrifted vase sitting in the closet that needed a job... it will have one later today!
Rachel
Tuesday 2nd of April 2024
Frances, I'm so glad you like this one. Thank you.
Jennifer Howard
Monday 17th of April 2023
This is so cute!! I noticed my real ivy topiary looks a little sad, I may have to try the faux route. Clever idea using the branch to hold the grapevine in place.
Rachel
Tuesday 18th of April 2023
Jennifer, I appreciate this. It's an easy and fun project.
stacy
Sunday 16th of April 2023
This turne out amazing! Love it!
Rachel
Sunday 16th of April 2023
Stacy, Thanks for stopping by.
Anne from Simply2Moms
Saturday 15th of April 2023
Love how this turned out! We're sharing it on Simply Stated tomorrow. Happy weekend!
Rachel
Saturday 15th of April 2023
Anne, I really appreciate this.
KariAnne
Friday 14th of April 2023
This is such a great project! Thanks so much for sharing!
Rachel
Friday 14th of April 2023
KariAnne, Thank you for stopping by.