Rustic Patriotic Decor: DIY Red, White, & Blue Burlap Flowers
Hey friends, and welcome back to The Ponds Farmhouse. As summer approaches, I begin to add patriotic decor for Memorial Day and the 4th of July celebrations. If you’d like to add a little rustic or primitive farmhouse style to your summer decorating, you’ll love these easy-to-make red, white, and blue flowers. I’m using burlap for a rustic touch and fabric scraps for the centers. They are individual flowers that can be displayed as a flower arrangement in vases, added to wreaths, or displayed individually in bud vases. Let me show you how easy they are to make.

(Posts on The Ponds Farmhouse may contain affiliate links. As an Amazon Associate, I earn from qualifying purchases. See the full disclosure details here.)
Supply List
- Burlap Fabric – Stiffened – I used both brown and white burlap.
- Scraps of red, white, and blue fabrics.
- Poly-fil
- Large sewing needle
- Quilting Thread
- Hot Glue Gun
- Bamboo skews or gathered twigs
- If you prefer use colored buttons instead of scrap fabrics. These Star Buttons would be fun.
How To Stiffen Burlap Fabric
I have made several projects using stiffened burlap fabric. It’s an easy process, and once you have several pieces dried, the possibilities are unlimited.
- Cut burlap fabric into manageable pieces. This project is small; if you don’t want to save any fabric, cut it into small strips.
- Mix Elmer’s glue with an equal amount of water and stir well in a disposable aluminium baking pan.
- Add the burlap fabric strips to the glue mixture and saturate thoroughly.
- Squeeze or twist to remove excess glue and smooth the fabric as much as possible to avoid excess wrinkles.
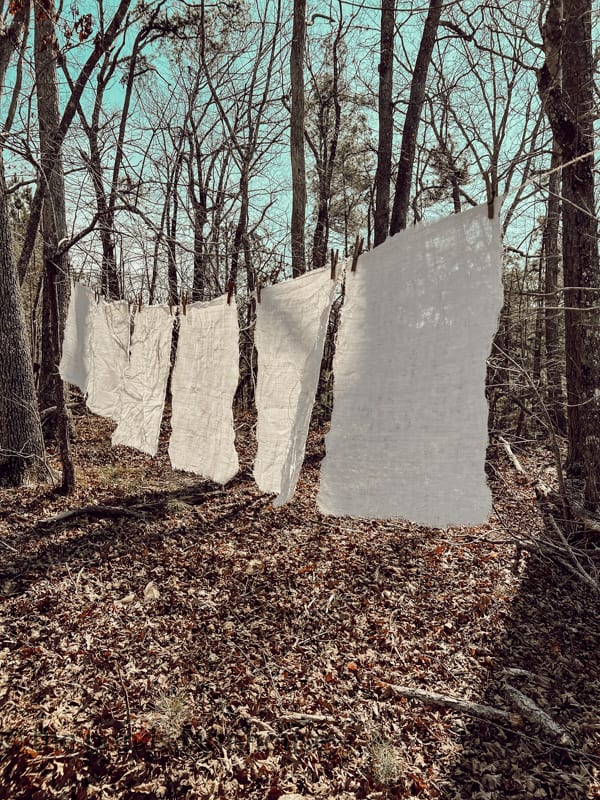
- Hang the burlap fabric and allow it to dry. The fabric may drip glue, so if it is not outdoors, protect the area with plastic or other disposable material.
Recommended Article
If you’d like more details, my original post—How to Make DIY Placemats with No-Sew Burlap—has them. You may also like these adorable DIY Burlap Napkin Rings.
Step 1 – How To Cut The Burlap Flowers, Centers, and Leaves
To create the burlap flowers, you will want to cut the fabric into a circular shape. I used a tin can and a Sharpie pen to trace a circle on the fabric. You can make the flowers different sizes if you want. I used a small vase for the scrap fabric centers and drew the leaves freehand.

Step 2 – Fold The Burlap Into A Flower Shape
The first step is to fold the burlap circle in half. Press with fingers to form a crease. Then open the circle and fold the opposite way. Press to crease.
Next, I opened the circle, pressed the centers of the creased edges inward, and pressed with my fingers to secure the shape.


Below, you can see all the crease lines after folding. The folds that face the center of the flower will be cut at an angle. I used my scissors to trim and shape the petals.


Below is what the flower looks like after cutting the angles off. If necessary, you can press with your fingers again to shape them.

Step 3 – How To Create The Scrap Fabric Flower Centers
For a patriotic touch, I used scrap fabrics to make red, white, and blue flowers. However, you can use any colors and create flowers for all seasons. I used a small vase to trace the circle and cut it with pinking shears to make the centers. Next, I used a needle with quilting thread to run a gathering stitch around the edges of the fabric. Gather the fabric into a cup-like circle by pulling the thread.


Next, I filled the fabric cup with a tiny amount of poly-fil and gathered the thread tightly. Stitch the opening with the needle and thread until the opening is secured. You will have a round button-like finish.


Insider Tip
There are a few other options for making the flower centers. I love to upcycle my scrap fabrics, so this was a fun way to do so. However, you can use ready-made buttons for your centers. You can also use a DIY Fabric Button Kit, which will allow you to create your centers using scrap fabric or any fabric you choose.
Step 4 – How To Add Red, White, and Blue Flower Centers
Now you can add the red, white, and blue flower centers to the burlap.
Just had a drop of hot glue in the center of the burlap and press the stitched side of the scrap fabric into the glue. Hold until set.


Insider Tip – Use Flowers For A Patriotic Wreath
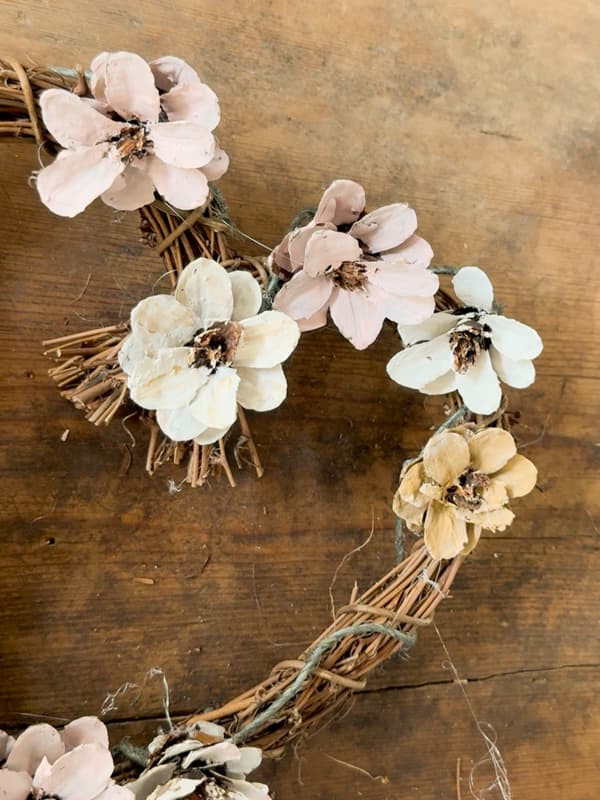
If you didn’t want to make flower stems, you can use these burlap flowers on a wreath. You can add them to a grapevine or straw wreath by hot gluing them together in a section of the wreath. It would be adorable with a patriotic bow or some raffia to enhance the flowers. There are many options for using these fun designs.
Step 4 – Add Stems & Leaves To Burlap Flowers
I decided to use gathered twigs for a more rustic burlap flower arrangement. However, you can use bamboo skewers or floral wire if you choose.
To attach the twigs, I used hot glue along the flower center’s backside and one of the folded creases. This ensured that the flower would be securely fastened. Then I folded the burlap leaves in half and attached a couple to the twig with more hot glue. I placed my leaves close to the flower because I planned to arrange them in bud vases.


Insider Tip
After you assemble the flowers, you can shape the leaves and flower petals to give them a more natural and authentic look. The stiff burlap makes this easy.
How To Decorate With Rustic Burlap Flowers
Once I had all the burlap flowers assembled, I was ready to style them. There are so many ways you can use them around your home. Here are a few of my ideas. Let me know which is your favorite.
I originally planned this whimsical arrangement in a large milk glass bud vase, but since I had more flowers, I decided to experiment with different arrangements.

This larger raku pottery vase accommodated all the burlap flowers I made.

For a more rustic style, I added the red, white, and blue flowers to a vintage milk bottle and displayed it on the kitchen countertop. I like the twigs visible in this arrangement.

Seeing the twigs exposed inspired me to bundle a few of the flowers for a flat lay on my side table.

More Whimsical Patriotic Flower Ideas
For another whimsical arrangement, I added the individual stems to milk glass bud vases to create a patriotic touch to the guest bedroom. Adding the vases to a sugar mold adds a charming vintage touch. Aren’t they fun?


And my final idea was to add the patriotic flowers to a container of greenery. Don’t they look adorable with their faces peeking out? This is faux eucalyptus, but you can add the stems to live ferns, boxwoods, or even flowers on your porch.

So, which was your favorite arrangement? Can you guess where I decided to use them for Memorial Day? I liked them all, but one was a clear winner. I’ll be interested to see if you agree.
Resources: Shop This Post
Video Tutorial

Have a blessed day!