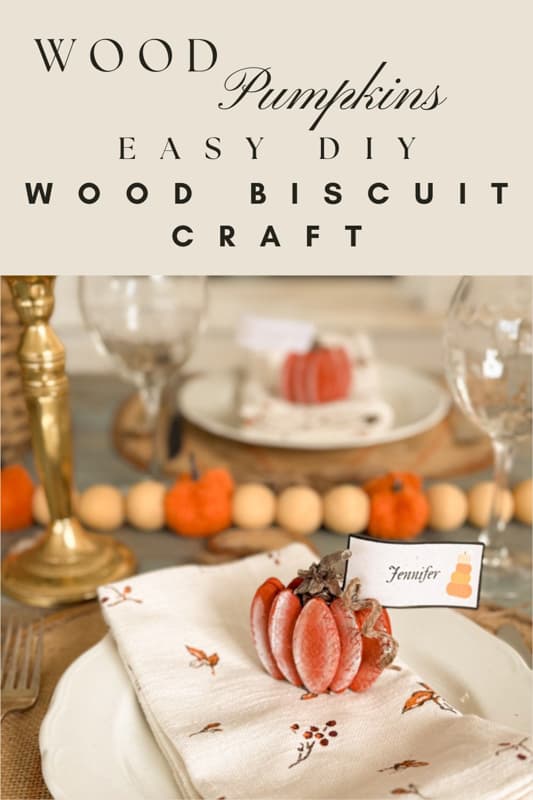
Easy DIY Wood Pumpkins & Place Card Holders with Wood Biscuits
Hey friends, are you looking for a fun and easy fall DIY project? Get ready to make the cutest DIY wood pumpkins! I was searching for unique pumpkin place card holders and discovered that wood biscuits are the perfect material for this project. These easy-to-make wood pumpkins are not only adorable for your fall vignettes, but they also make perfect place card holders for your fall tablescapes. So run to the hardware store for some wood biscuits and let’s get started!
(Posts on The Ponds Farmhouse may contain affiliate links. As an Amazon Associate, I earn from qualifying purchases. See the full disclosure details here.)
Supply List
- #20 Wood Biscuits
- Hot Glue Gun
- Toasted Terra Cotta Craft Paint & Other Craft Paint Colors of your choice
- Vintage White Craft Paint
- Jute Twine
- Mod Podge or Elmer’s Glue
- Plastic Straw
- Pine Cone Stem or cinnamon stick
DIY Wood Pumpkins
With just a few simple supplies, you can craft the cutest wood pumpkins to decorate your home for fall. I’ll show you how to make these easy wood pumpkins using wood biscuits that are primarily used in woodworking projects. I began the project to make pumpkin placecard holders, but got carried away and made a few extra ones for simple fall decorating.
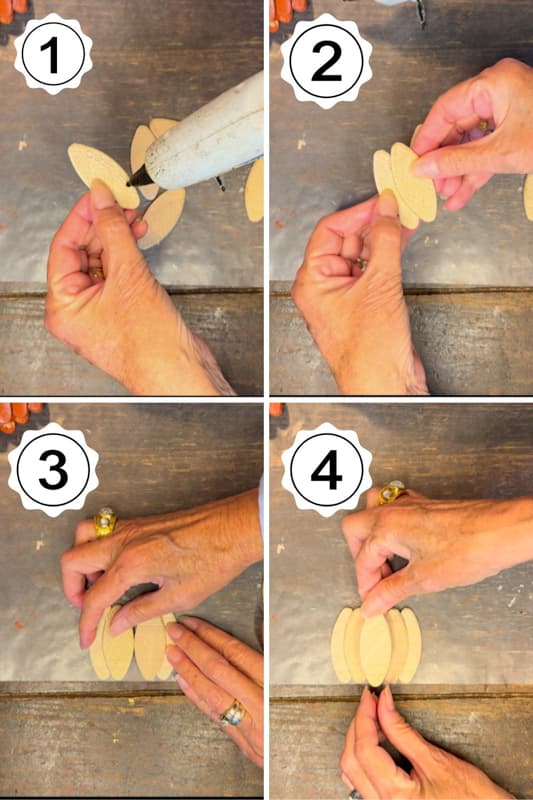
Step-By-Step Wood Pumpkin Assembly
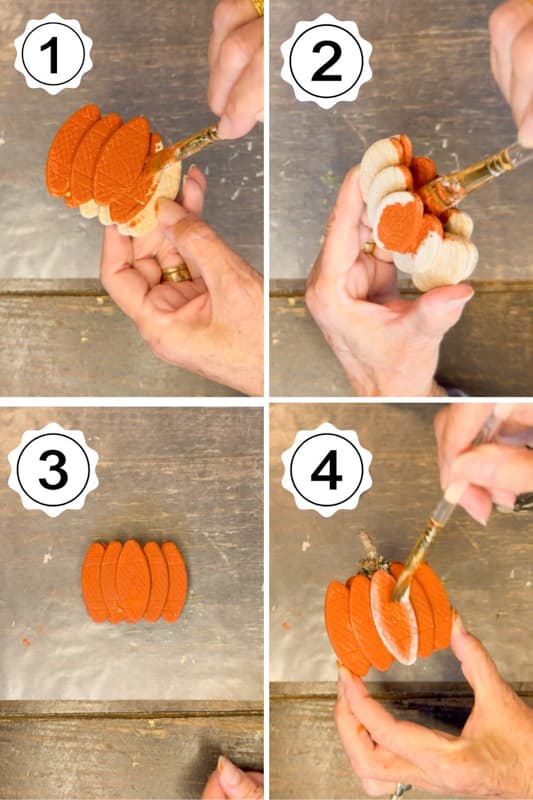
First, ensure that your hot glue gun is heated and ready to go. Gather five wood biscuits to make one side of the pumpkin. See the images below for better clarification.
- Add hot glue along one long edge of the wood biscuit
- Attach the second biscuit to the glue, overlapping slightly. Hold until dry. Repeat step 2.
- Align the two sets of wood biscuit with the raised edges touching and the bottoms even across.
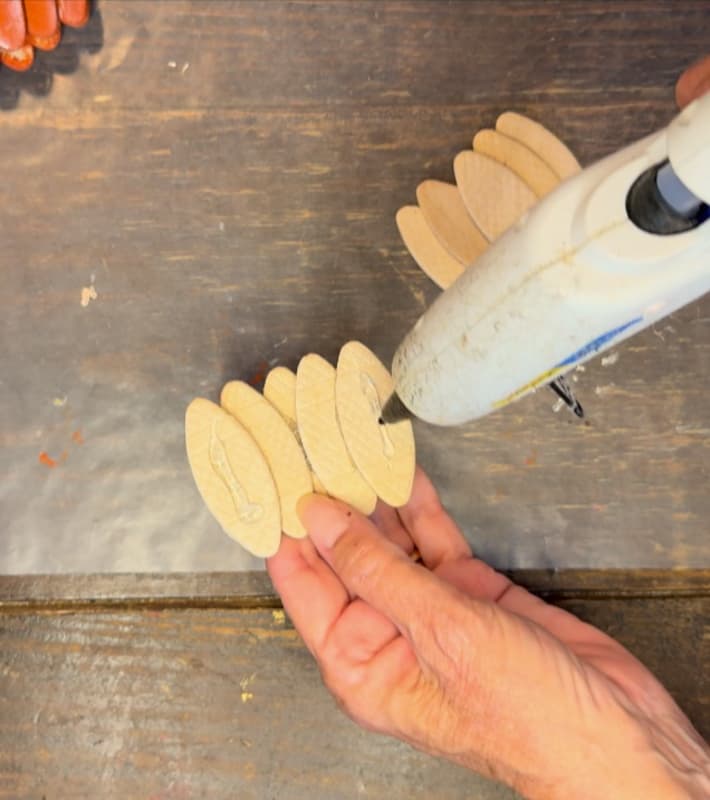
- Add hot glue to the center of the 5th biscuit and place it at the center of the aligned biscuits. Hold the center biscuit until the glue dries.
Now you have completed one side of your pumpkin.
Gather 5 more wood biscuits and repeat all 4 steps to make the back side of your pumpkin.
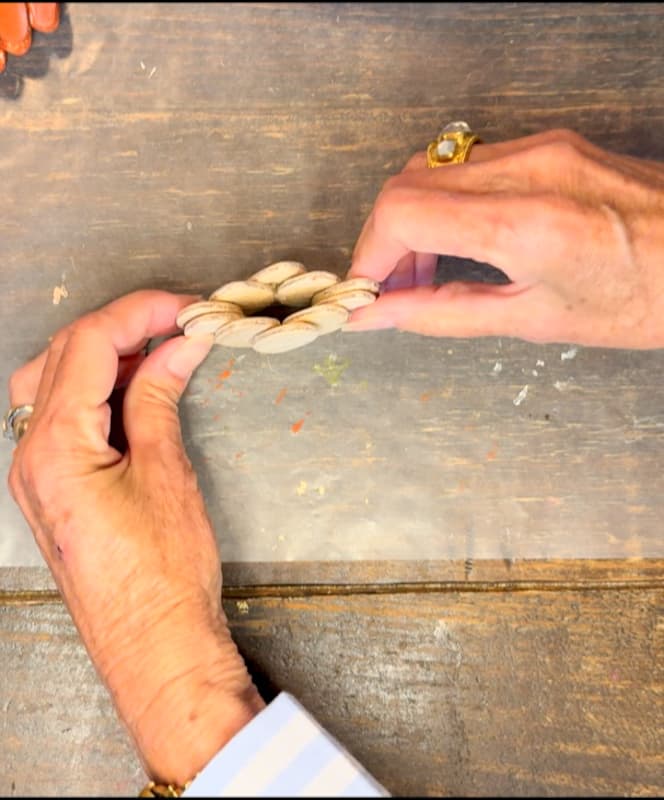
Attach Pumpkins To Create A Standing Pumpkin
Once you have your two sides assembled, add hot glue to the two end biscuits and press the two sides together. Hold in place and ensure that the bottoms are even so that the pumpkin will sit evenly on the table.
Painting Wood Pumpkin
Once your pumpkins are completely assembled, begin to paint each one.
- I used toasted terra cotta for the majority of my pumpkins.
- Ensure that you add enough paint to the inside of the wood biscuits, especially at the top, where it may show when using on a table.
- Allow paint to dry
- Use vintage white craft paint to highlight the edges of wood biscuits. Use a semi-wet brush and apply the white paint to only one edge of the brush.
Add Stem To DIY Pumpkins
There are several options for adding stems to your wood pumpkins. Here are a few options.
- Gather a wooden stick
- A piece of a cinnamon stick
- Make a stem out of glue-stiffened jute rope or twine
- Pinecone stem
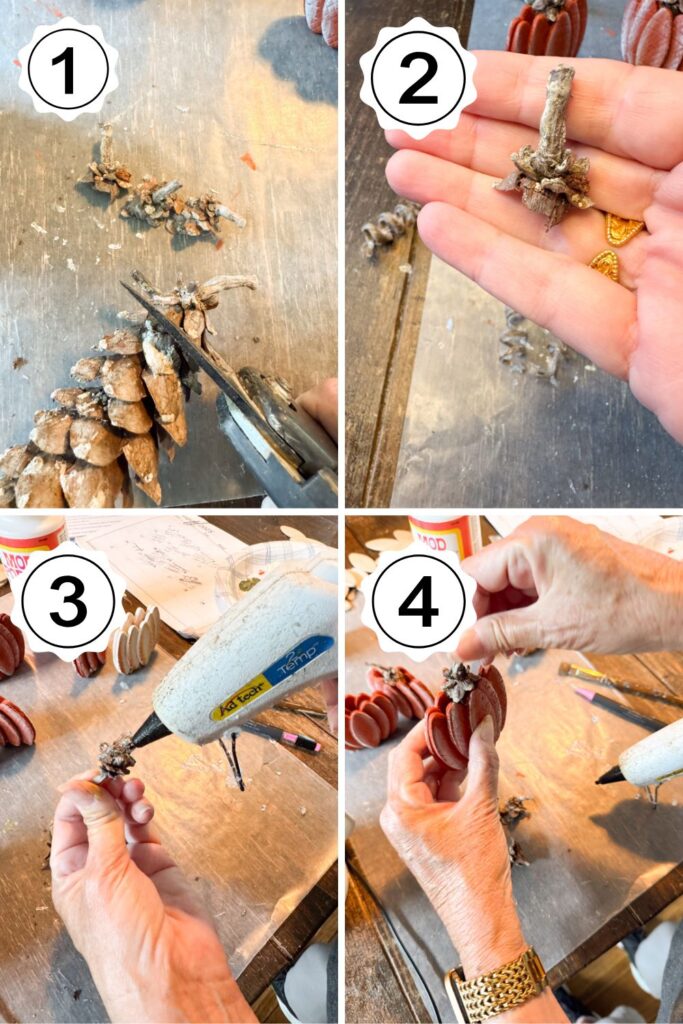
I used the stems of pinecones for a realistic curved stem.
- Cut the stem from the pinecone using pruning shears.
- Trim away any excess scales so that it will fit into the opening at the top of the pumpkin.
- Add hot glue to the pinecone stem
- Insert into the top of the pumpkin.
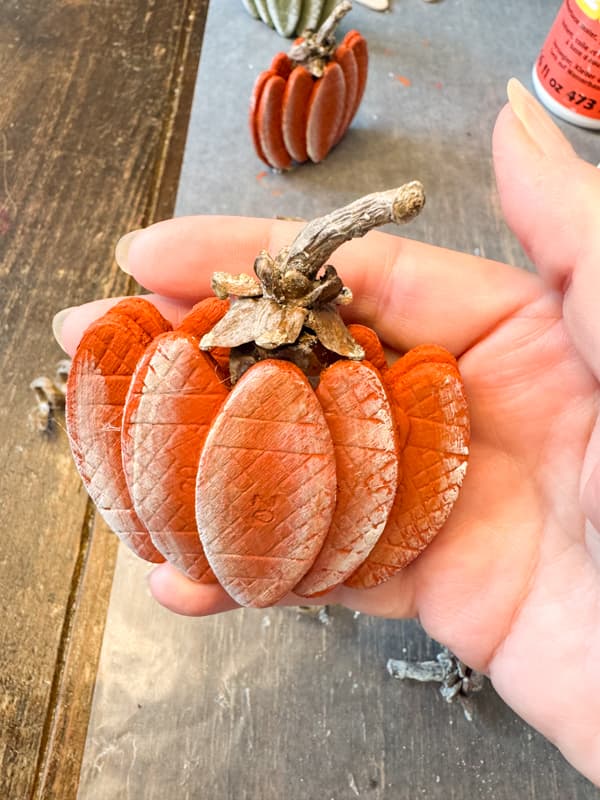
Each pumpkin stem will look different, just like a real pumpkin.
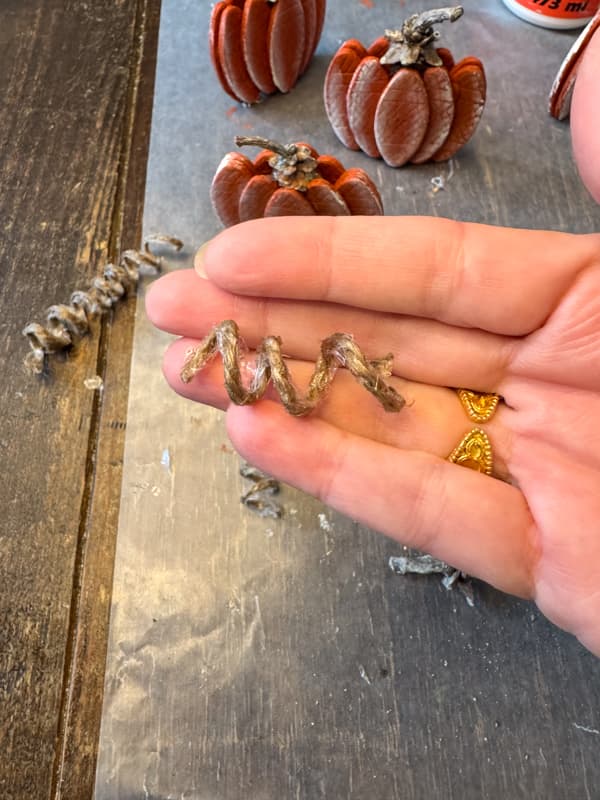
Add A Pumpkin Curl (Optional)
I decided to add a pumpkin curl or (tendrils) to my DIY wood pumpkins. To make the curls, I used jute twine and Mod Podge. Soak the twine in glue and then wrap it around a plastic drinking straw. Set aside to allow time for the glue to dry.
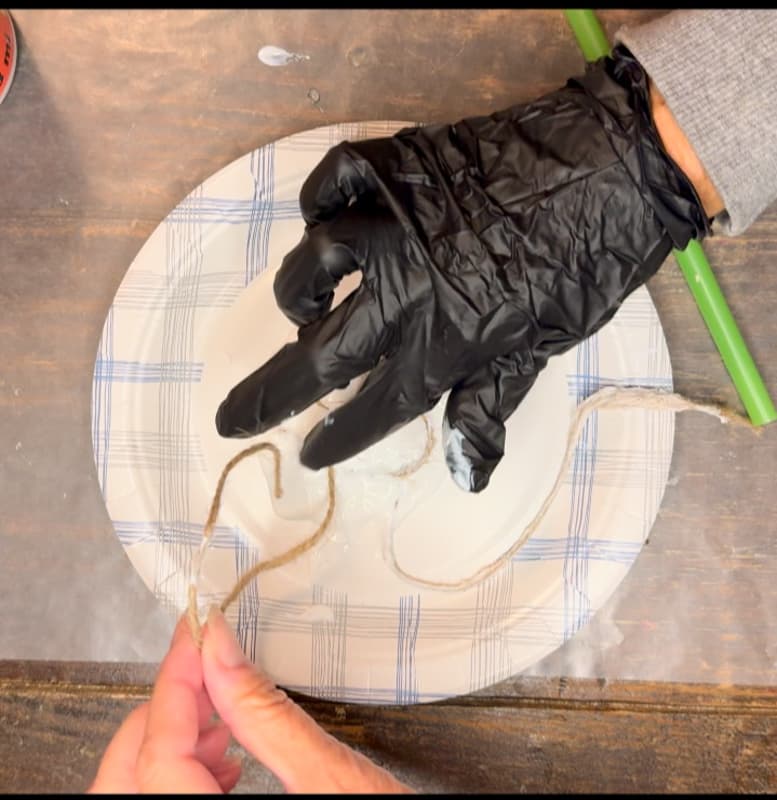

Once the glue dries, you can cut the curls into small sections. Use hot glue to attach the pumpkin next to the stem. Don’t they look cute with the curls?
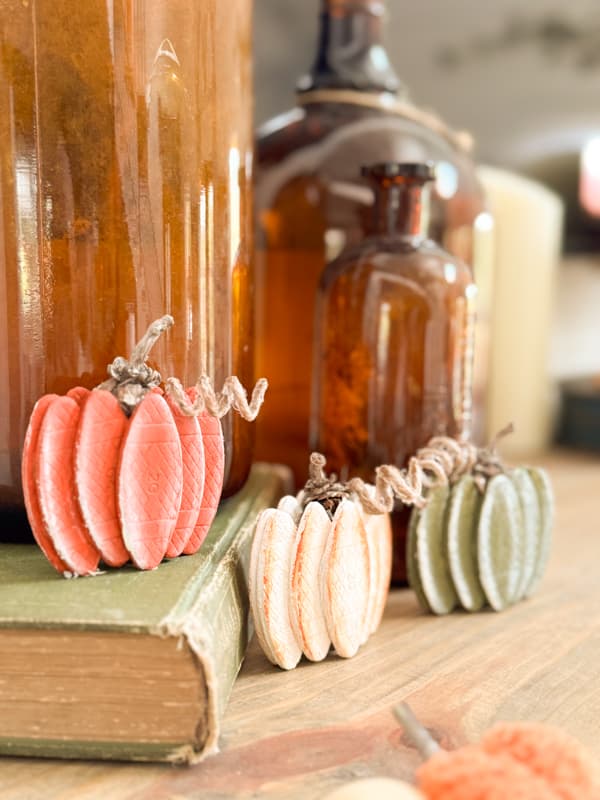
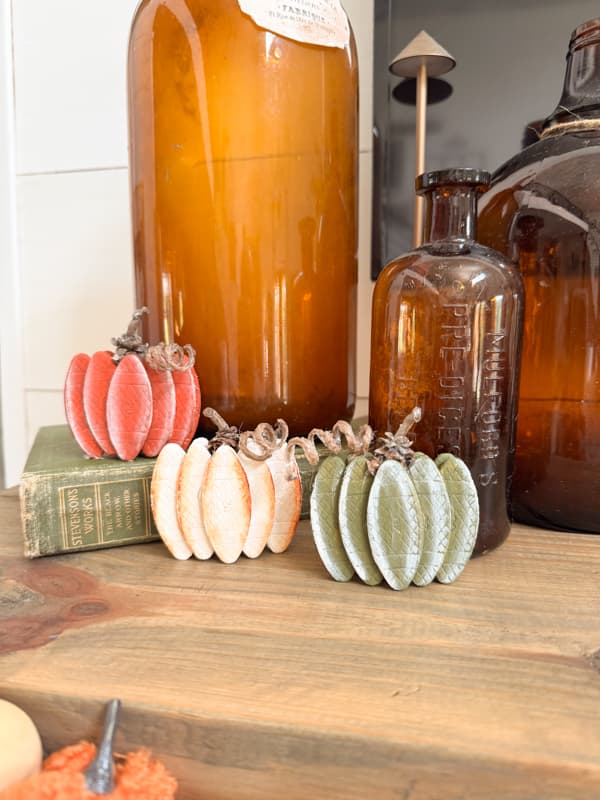
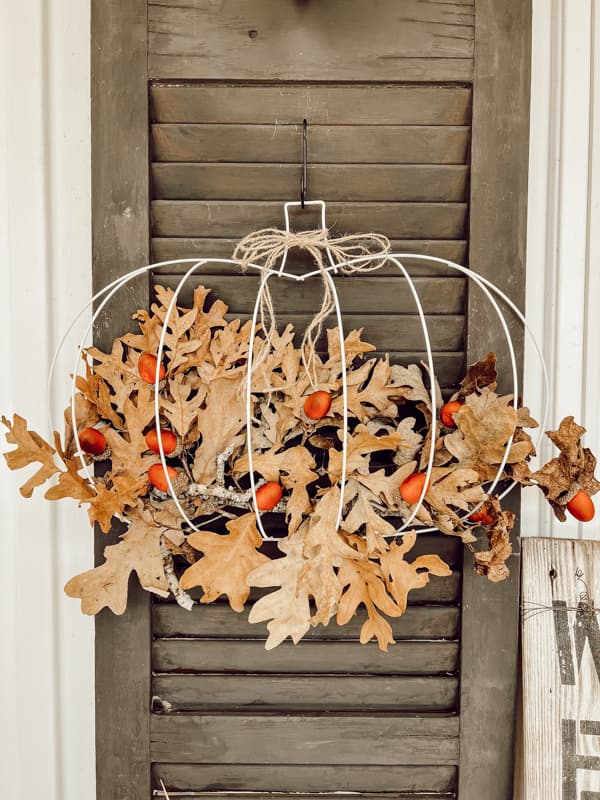
DIY Wood Pumpkin Decor
There are many ways to use these adorable wood pumpkins for fall decorating. Here are three multi-colored pumpkins used to decorate my fall mantel.
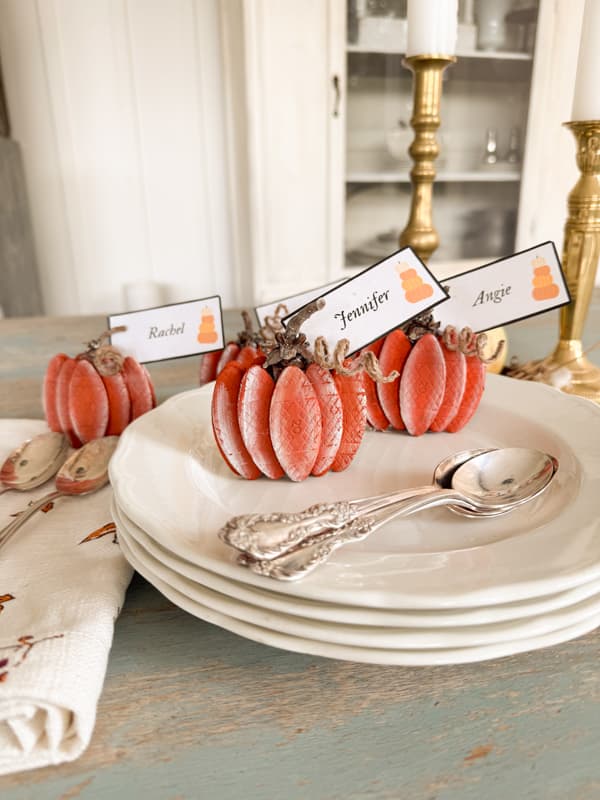
Pumpkin Placecard Holders
My original idea to make wood pumpkin placecard holders also worked out perfectly.
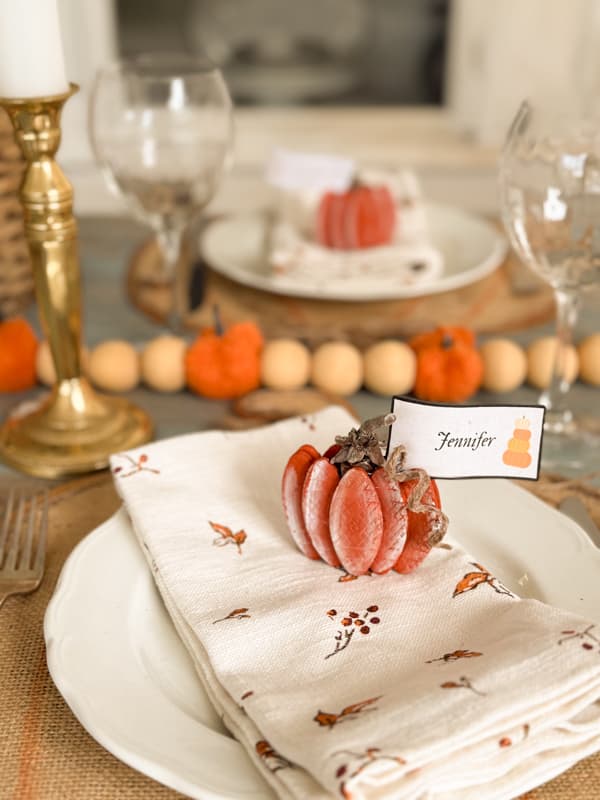
The size #20 wood biscuits create the perfect size pumpkin to sit on a place or beside a place setting.
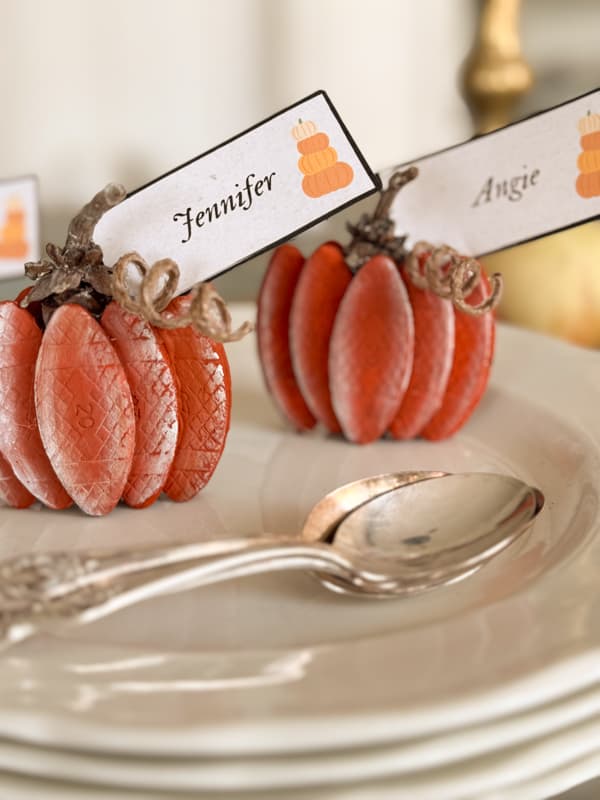
You can easily add the placecards in the opening at the top of the pumpkin. This inexpensive wood project is quick and easy to make, and it’s so much fun to see the finished pumpkins.
See Video Tutorial
I hope you enjoyed today’s easy and budget-friendly wood pumpkin craft. I look forward to sharing more fun projects soon.


The pumpkin name tag holders are so adorable! You are very creative. Will give it a try.
Hope you are hanging in there with your cancer battle. Stay strong!🙏
Deana,
I’m so glad you like this one. They are so easy to make. Please share if you make some. I love to share them on my DRA. Have a blessed day.
This is the sweetest project! I love that you also did the pumpkins in various colors. I have been following your healing journal updates. I read your recent story about Brad and the Salvation Army. It brought tears to my eyes 🥹! Sending hugs, prayers an healing thoughts 🙏🏻🫶🏻.
Barb,
I’m so glad you like this idea. Thank you for following along on my journal and I appreciate all your prayers and healing thoughts. Have a blessed day.
Very cute!! 😉 I love anything pumpkin… and can’t wait to give this a go. Thank you for your never ending inspiration….
Dotte,
Thank you so much for your sweet compliment. Please share with me if you make them. I love to share on my Sunday DRA. Have a blessed day.
Rachel, these are super cute! What fun to make…I will share this when I start posting fall things in September. Many thanks to Brad for the updates.
Mary,
Thank you for sharing.