How To Make Easy & Unique DIY Coasters With Burlap Fabric
If you’re looking for a creative, easy way to dress up your table this summer, why not try making DIY coasters from burlap fabric? This tutorial will teach you how to create unique, one-of-a-kind coasters, perfect for parties, special occasions, or just a fun craft project.
They are also great for hostess gifts, showers, and housewarming gifts. One thing is for sure: your guests will love these easy-to-make drink coasters.
Let’s get started!
(Posts on The Ponds Farmhouse may contain affiliate links. As an Amazon Associate, I earn from qualifying purchases. See the full disclosure details here.)
Why Are Drink Coasters A Good Idea?
When you decorate your home with fine wood furniture or antiques, the last thing you want is to discover a water ring left from a cold beverage.
Most homeowners keep drink coasters handy to protect their furniture from water rings and scratches.
Decorative drink coasters have become popular because they can decorate your room and provide much-needed protection for your furniture.
How Can You Use DIY Drink Coasters
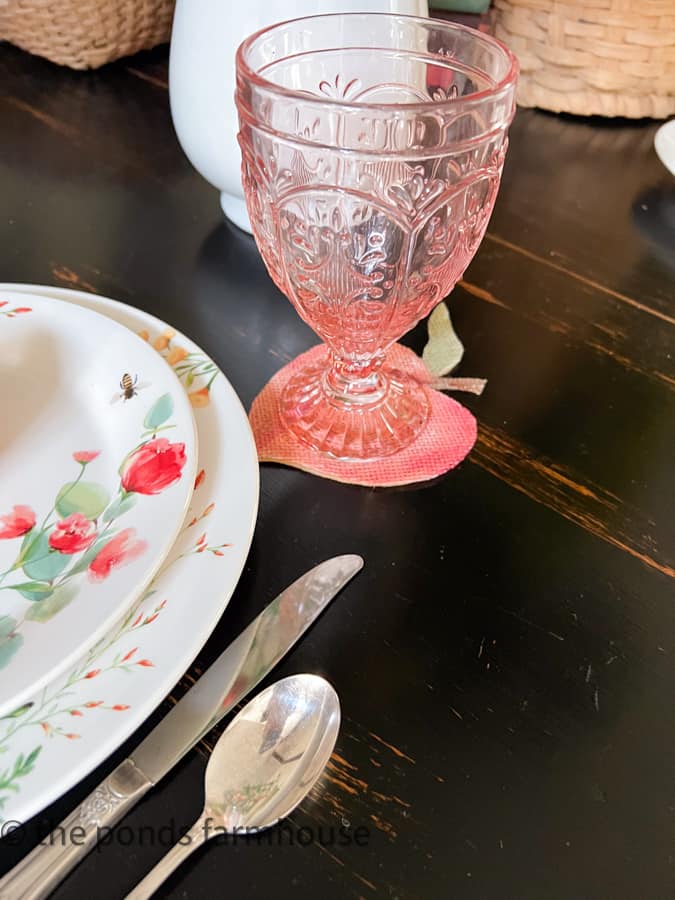
You can place drink coasters on coffee and side tables for easy access when serving beverages. In addition, they work great to protect your dining table and tablecloths from damage.
DIY Drink coasters also make great gifts because you can customize the designs to match the home decor style or personality.
They make great hostess, housewarming, and bridal gifts. I’ll list other DIY Coaster options at the end of this tutorial.
Budget-Friendly DIY Coasters
Making drink coasters is a fun and budget-friendly DIY project. The options are as unlimited as the material choices.
Today, we are making easy coasters using inexpensive burlap fabric.
Step-by-Step – How To Make DIY Coasters with Burlap Fabric
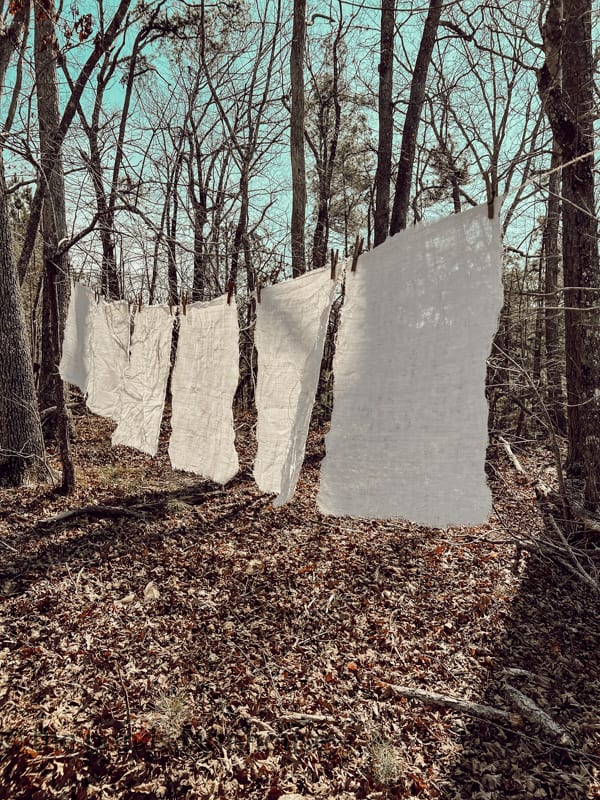
First, this project requires stiffened burlap fabric.
You may remember some previous burlap fabric crafts, such as the Tropical Round Placemats, Easy Burlap Napkin Rings, and DIY No Sew Flower Placemats.
This tutorial includes how to stiffen the burlap fabric for all these ideas. This tutorial is done with scraps left over from some of the above projects.
What You’ll Need
Each coaster only requires a small amount of burlap fabric, and I was able to use scrap pieces left over from previous projects.
If you purchase yardage, I recommend 1/4 to 1/3 of a yard, depending on how many coasters you plan to make.
- 1/4-1/3 yard of cream or white stiffened burlap fabric. (see this tutorial)
- 1/4 – 1/3 yard heavy felt fabric (color will depend on your design colors)
- Craft Paints – I used Raw Sienna, White, Red, Orange, Pink, Sage Green, and Burnt Umber.
- Elmers Glue
- Small Paint Brushes
- Sharpie Pen
- Sharp Scissors
- NeverWet for Fabric
- Optional Adhesive Cork Backing
How To Make Coasters
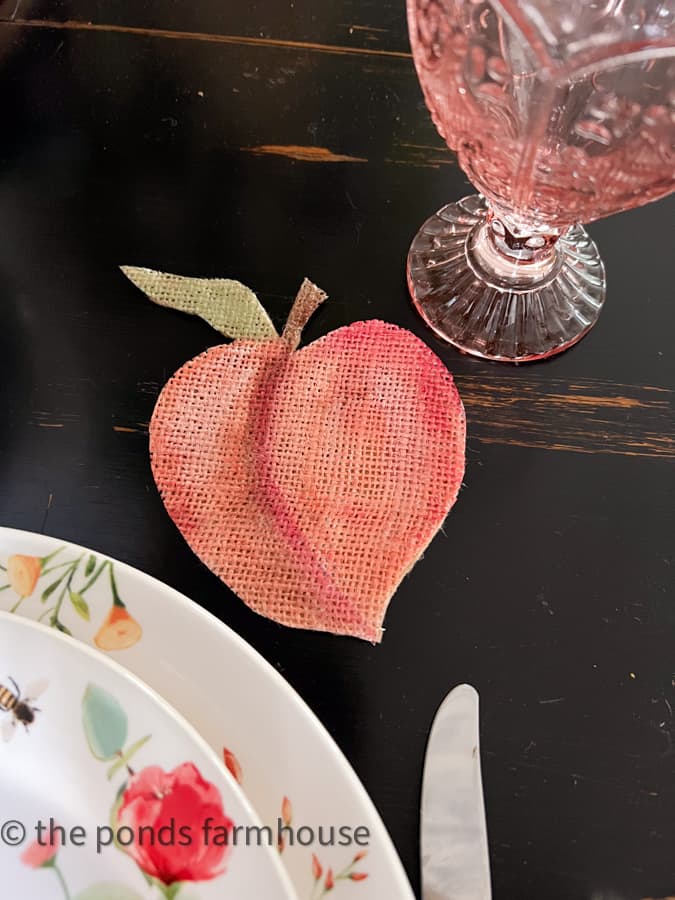
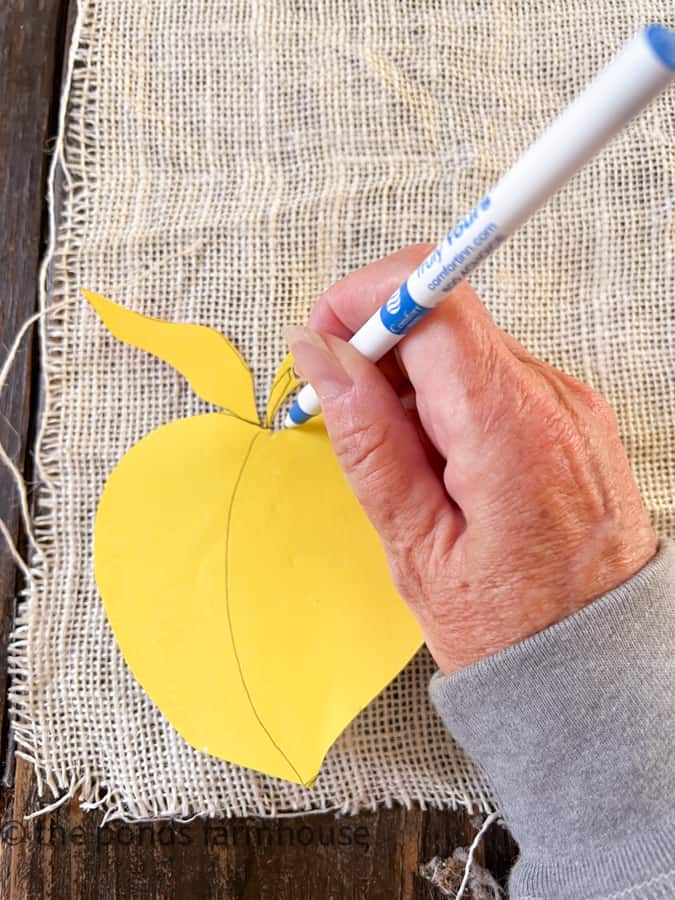
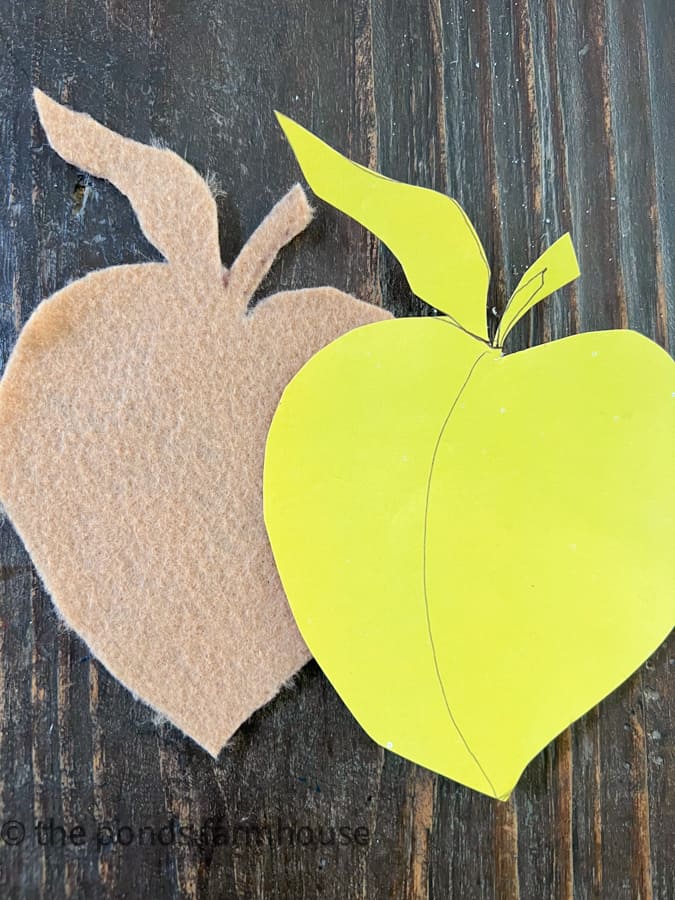
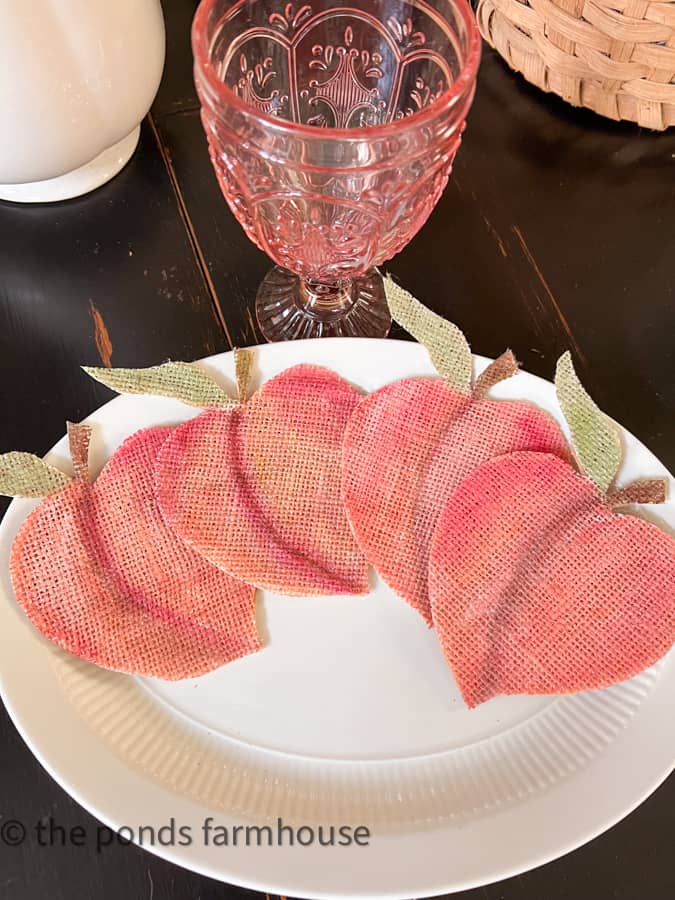
First, make a template of your chosen design. Today’s design is a peach, and I used cardstock to make the template. Now, let’s take a look at how to make coasters.
Step One: Trace Design
Begin by tracing the design onto the stiffened burlap fabric. Use sharp scissors to cut the design details.
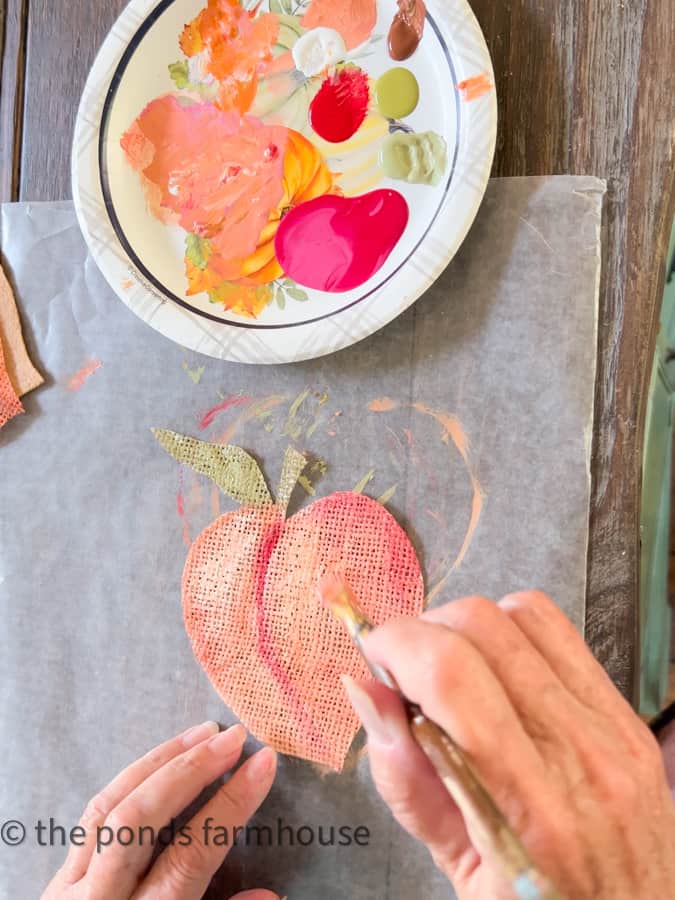
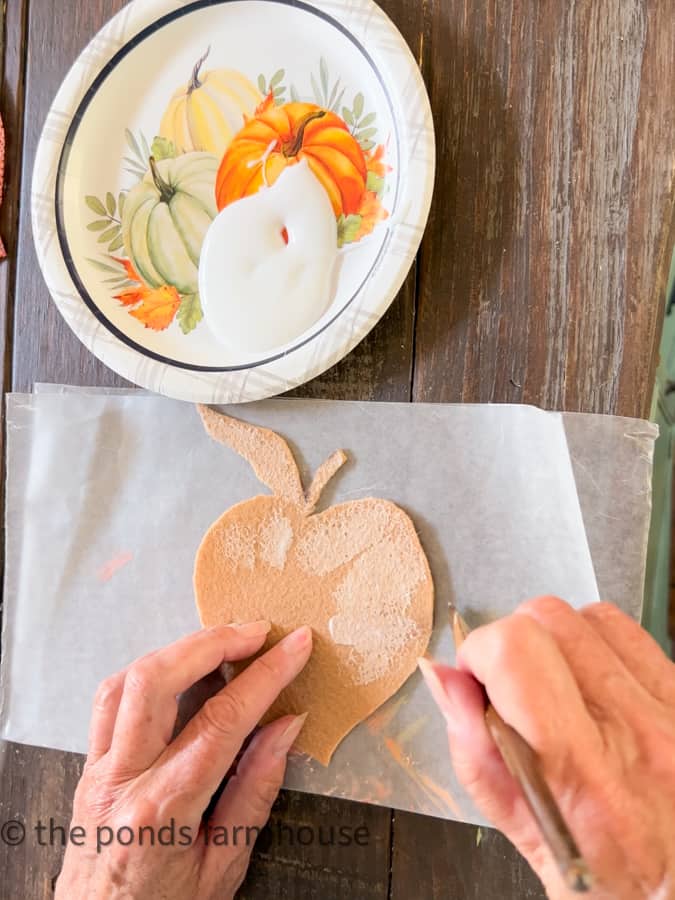
Step Two: Paint The Coasters
Draw any shading areas with a pen or Sharpie.
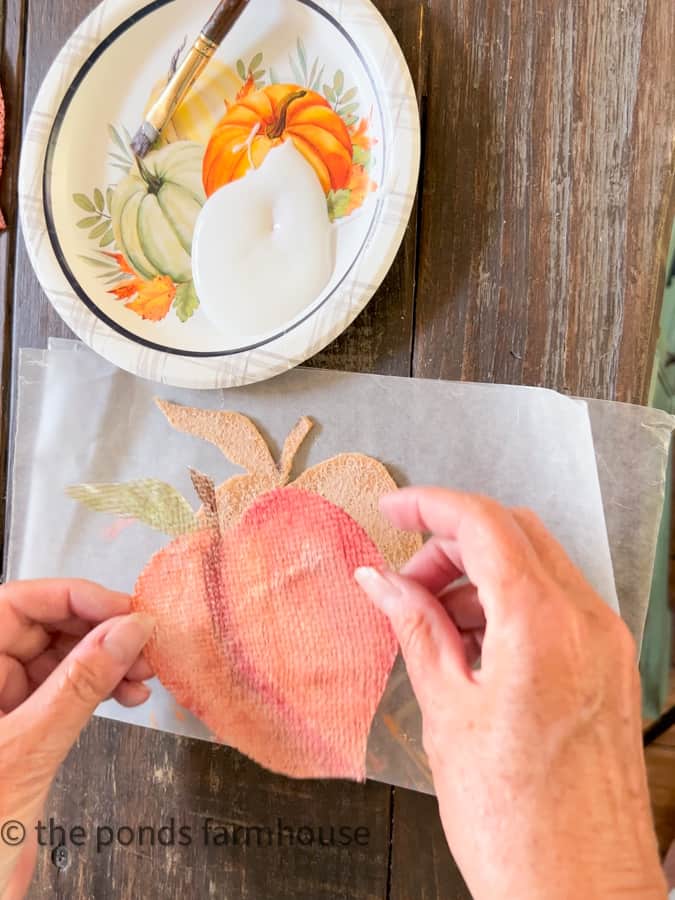
Using craft paints, paint the burlap to look like a peach. You can easily mix the colors as you go to achieve a natural-looking peach color.
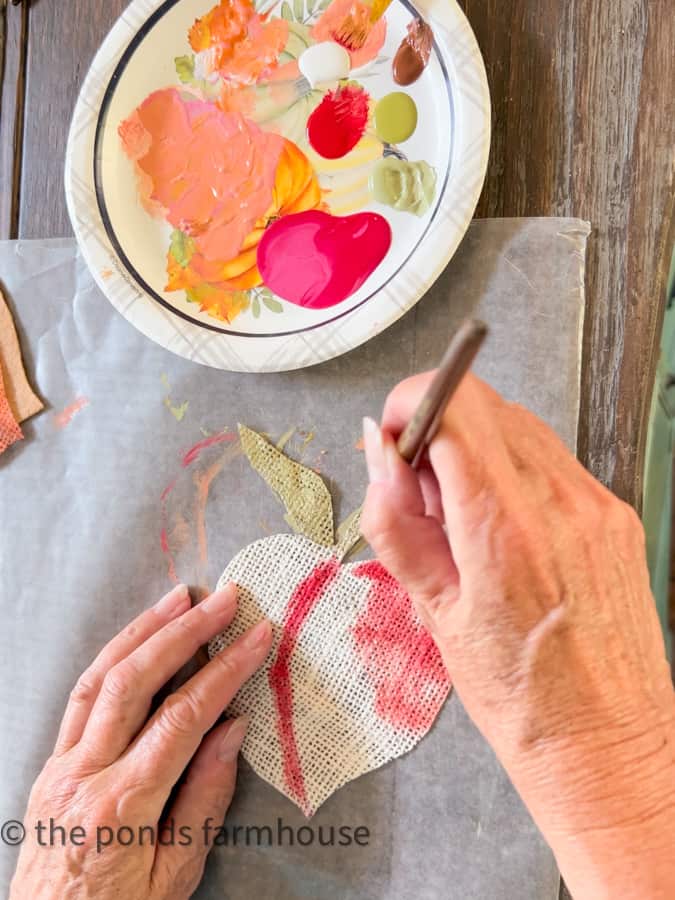
Paint the peach with red, pink, orange, and yellow mixtures. Add burnt umber to shade and define the peach shape. The sage green and burnt umber are combined for the leaf and stem.
Step Three: Cut Felt Backing
Next, using the same template, trace and cut the design from the felt fabric.
Step Four: Add Glue To Felt Backing
Once the DIY Coaster is dry, apply the glue to the top of the felt peach.
Brush the glue evenly over the entire surface.
Step Five: Adhere The Burlap To The Felt
Once the felt is fully coated with glue, quickly attach the burlap peach. Carefully align the design so that no felt is revealed from the top.
Press the two pieces together firmly until dry. I used wax paper on both sides of the peach and added a heavy book.
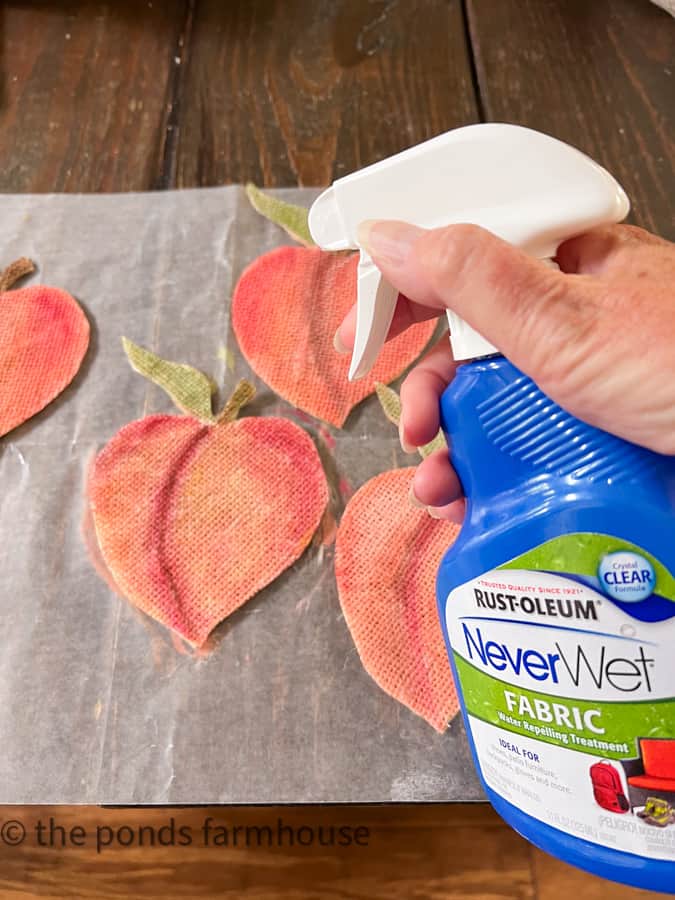
Step Six: Waterproof Protection
I recommend sealing the finished DIY Coaster with a light coat of NeverWet Fabric Protection.
This will protect the coasters from excess water absorption.
Optional
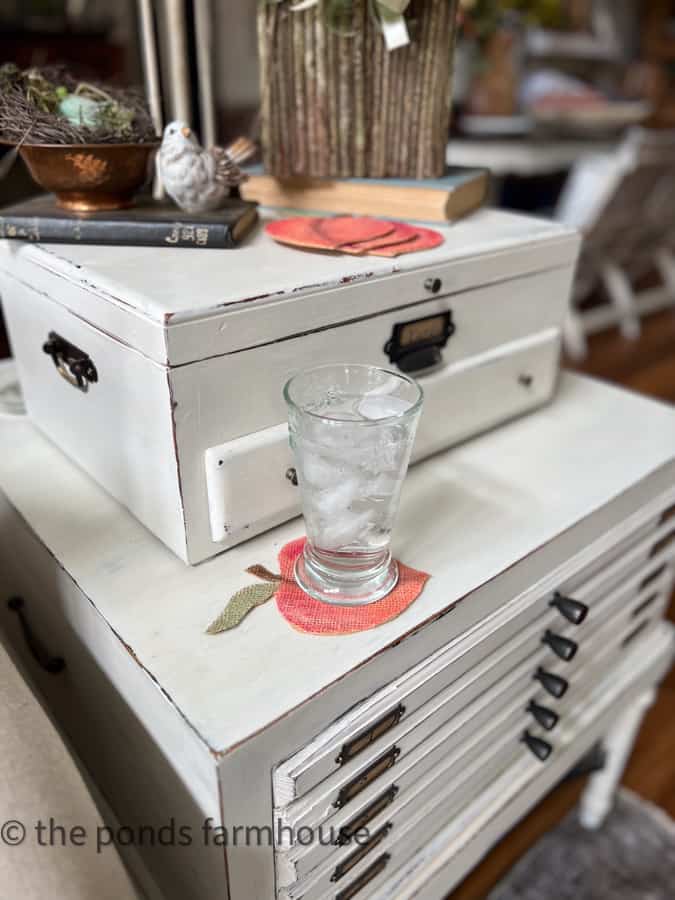
Another option is to add an adhesive cork backing to the coasters for added protection.
Easy & Unique DIY Coasters
Don’t you just love these cute DIY Coasters?
They will be so fun for an upcoming Peach Supper Club Theme Table. Our monthly Supper Club Series is the 3rd Thursday of each month, so stay tuned.

DIY Drink Coasters With Burlap Fabric
Equipment
- Scissors
- Paint Brushes
Materials
- 1/4 yard White Burlap Fabric
- 1/4 yard Felt Fabric
- Craft Paints
- Elmer Glue
- NeverWet
Instructions
- Stiffen Burlap Fabric with glue and water mixture
- Hang to Dry
- Create a template for your peach
- Trace the design on burlap fabric
- Cut the design with sharp scissors
- Paint the design with craft paints
- Cut the same design with felt for a backing
- Add glue to felt backing
- Press the burlap peach to the felt and allow it to dry
- Spray the finished coasters with NeverWet Waterproof Protection Spray.
- Optional – For added protection you can also add an adhesive cork backing.
Video
Notes
More Design Ideas
Once you learn how to make burlap coasters, you can go crazy with your designs.
The sky’s the limit, and there are so many possibilities, from flower shapes to animals to more fruit designs.
Warning: making drink coasters is possibly addictive. I’m already thinking of new ideas.
Once I finished the peaches and realized how easy they were to make, I added a couple of flower coasters.

Another great coaster idea is to use a napkin decoupage. Check out this Napkin Decoupage Gift Idea.
I hope you enjoyed today’s tutorial and that you’ll subscribe to my newsletter. I have more budget-friendly ideas to share soon.

Pin It To Remember It
Did you find some great ideas you’d like to save for future reference? Hover over the images you’d like to save and pin to your favorite Pinterest Boards when you see the PIN button.


Really cute & creative!!! Love how you painted them.
Jennifer,
I’m so glad you like them.
These are super cute! You did such an amazing job of painting them. I love them.
Renae,
I’m so glad you like them. I’m thrilled with how they turned out.
Rachel, these coasters are so cute! You are really creative!
Kim,
You are so sweet and I appreciate the share.
So great and customizable!
Stacy,
Yes, so many options.
Thank you for sharing these with us on Farmhouse Friday. I Love them all! Featuring your talent tomorrow. pinned
Cindy,
that is so kind of you. I appreciate you so much.
I love your peach coasters! Pretty and practical!!
Michelle,
I’m so glad you like them. They are fun and easy to make.