Add Handcrafted Charm with a DIY Vintage Doily: An Easy Nostalgic Craft Tutorial
Hey friends, do you remember those cute doilies your grandma had scattered over every table in her home? Well, guess what’s back in style? Everything old is new again, and vintage-style crochet doilies are currently enjoying a lovely resurgence that blends seamlessly into a collected, modern-heritage-decorated home.
You can display your heirloom doilies or, better yet, make some with a modern twist to match your home aesthetic. This easy, handcrafted crochet doily pattern is perfect for beginners and costs pennies to make. Today, I’m sharing the pattern and taking you through the process step by step. You’ll be protecting your tabletops and creating nostalgic charm in no time. Let’s get started!
(Posts on The Ponds Farmhouse may contain affiliate links. As an Amazon Associate, I earn from qualifying purchases. See the full disclosure details here.)
A Brief History Of Doilies and What They Are Used For?
Believe it or not, the word “doily” actually comes from a person! In the late 17th century, a London draper named Mr. Doiley ran a famous clothing shop specializing in affordable, fringed fabrics. By the 18th century, the term shifted to describe the decorative linen napkins used during dessert.
Functional Doilies During The Victorian Era
Doilies became more than just decorative during the Victorian era, when they became essential “armor” for the home. They were used to protect furniture from scratches and upholstery fabrics from damage. During this era, men used Macassar oil on their hair, so doilies were pinned to the backs of chairs to protect the fabric from stains.
A Symbol of a “Refined” Home During The Depression & World War II.
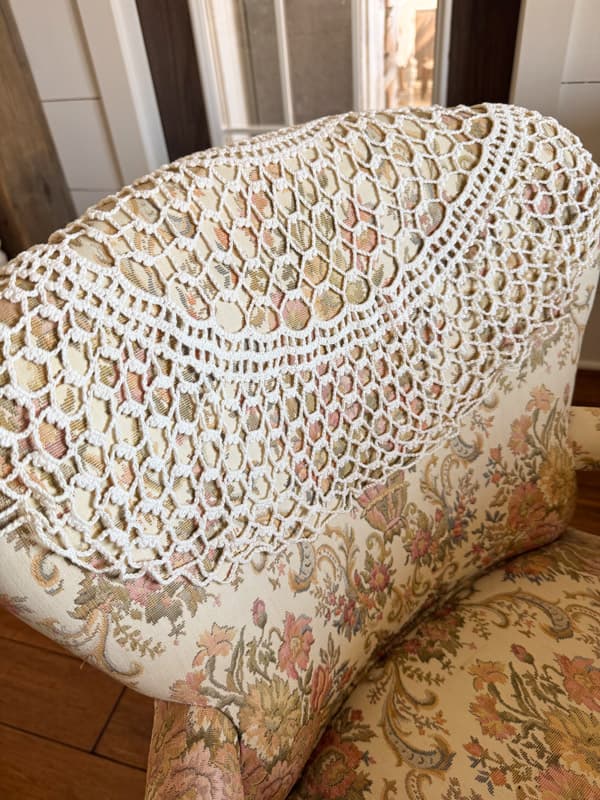
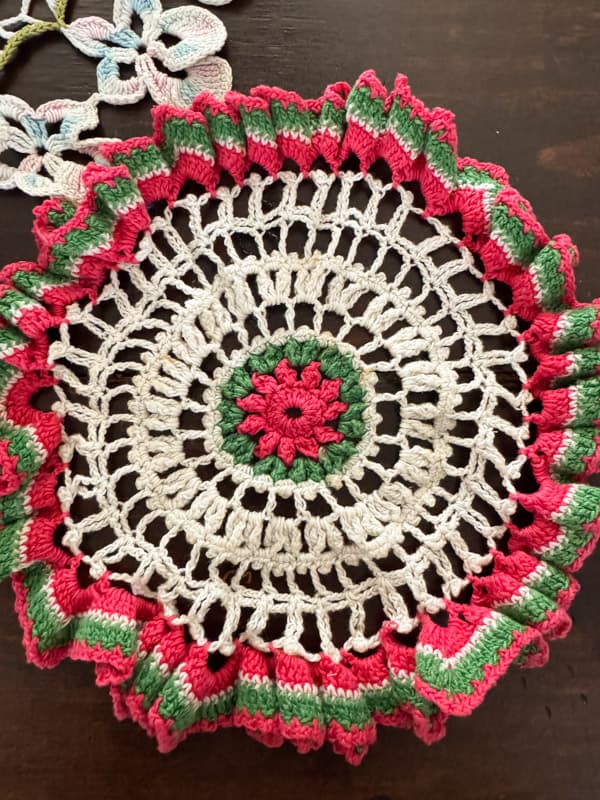
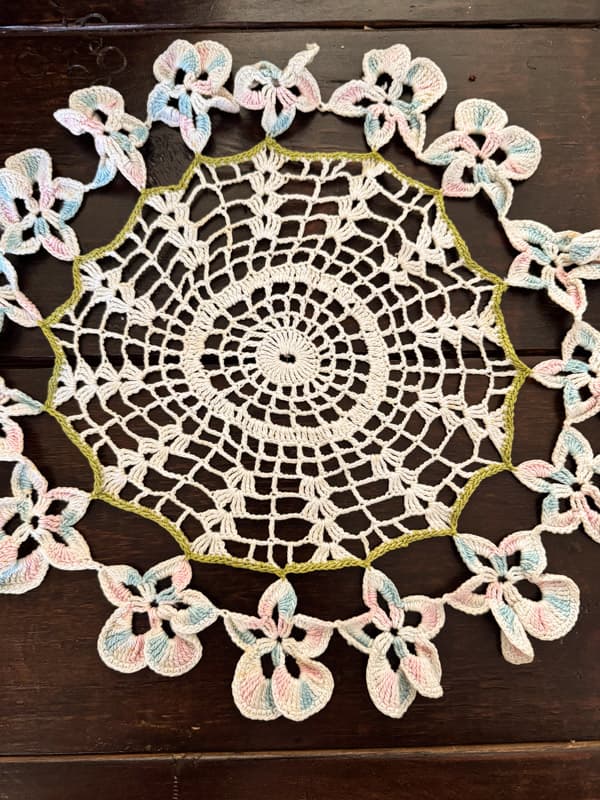
Budget-Friendly Beauty: Because they only required a small amount of thread and a hook, women could create intricate decor even when they couldn’t afford new furniture or fabric. Plus, doily-making was a portable skill. Women could crochet while socializing or resting, turning scraps of thread into heirlooms. Here are a couple of my husband’s grandmother’s doilies. Notice how delicate and intricate the details are.
The Fall and Modern Resurgence of The Doily
As we moved into the mid-century and dark ages of the 80s and 90s, they fell out of favor and were considered fussy! They were associated with the older generation and represented a formal, rigid way of living that the younger generation was trying to move away from.
Doilies are having a massive comeback today. In 2026, Modern Heritage decor represents a return to “slow living” and the “collected” look. We no longer use them just to hide stains; we use them to honor the handiwork of the past and add that essential layer of texture that makes a house feel like a home.
In addition, those old-school crafts like crochet are once again popular for their meditative and stress-relieving benefits, as well as creating lovely tableware and other home decor accessories. You can easily create stunning doilies for your home decor.
How To Crochet A Simple Doily
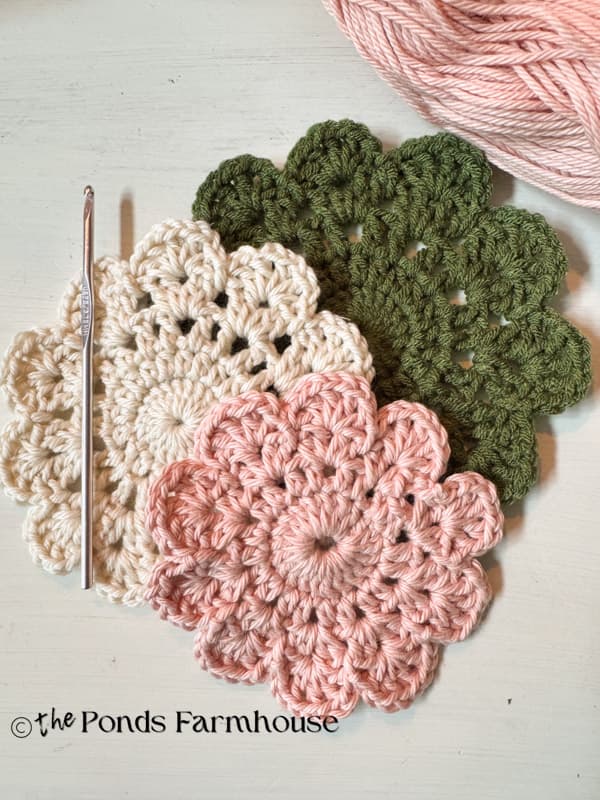
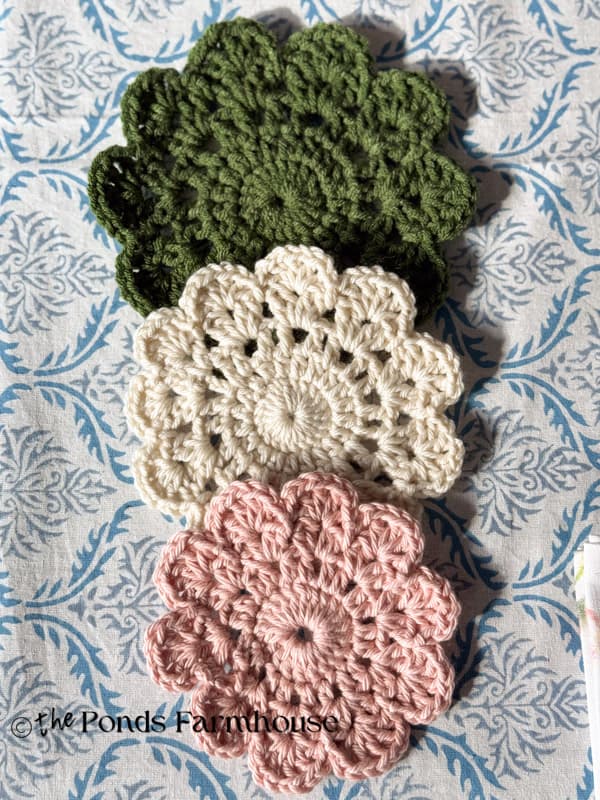
Although I love the intricate details of my heirloom doilies, we are going to start simple. I’m excited to share this easy doily pattern with you today. Using simple crochet stitches, you can whip up cute doilies in minutes. The choice of colors is unlimited, and you can adjust sizes and shapes to meet your needs.
Supply List
- Crochet Hooks – I used a 3.75 MM hook for most of these examples, however a larger hook will make a larger doily so you are not limited to the size of the hook.
- Medium weight yarn in choice of color. My examples are made with the following colors:
- I Love This Cotton Yarn – Warm Blush
- Yarn Bee Kale
- Yarn Bee Frosting
- Large Embroidery Needle
- Needle Threader
Stitches Used for a Simple Doily
- Ch – Chain
- Sl St – Slip Stitch
- HDC – Half Double Crochet
- DC- Double Crochet
- Magic (or Slip) Loop
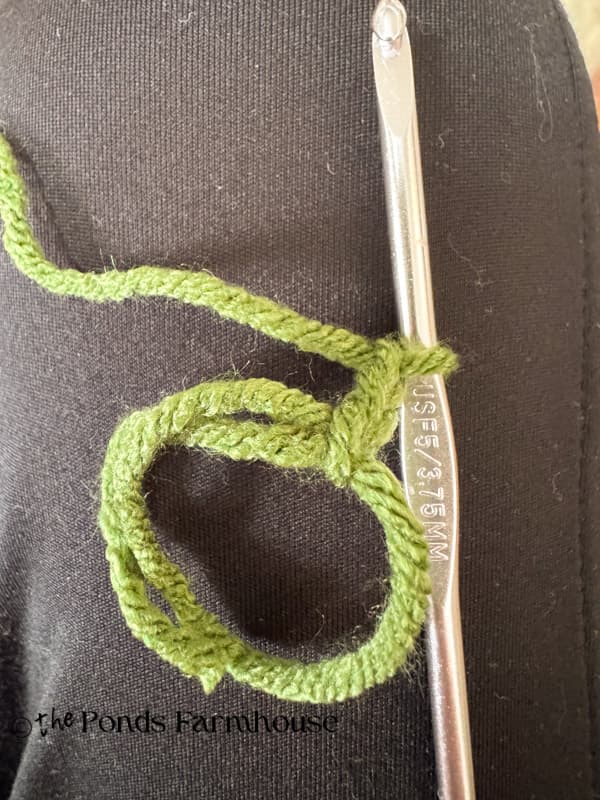
Round 1 – Magic or Slip Loop and Double Crochet
Begin with a magic loop. I referred to this loop when making the Crochet Eyeglass Holder.
Here’s a quick reminder and then the first round of stitches.
- Wrap the yarn around your fingers to create a loose loop.
- Insert the crochet hook under the loop and wrap the yarn over the hook. Pull the yarn back through the loop and chain to secure. Then chain 3. Tighten the loop slightly if needed.
- Double Crochet in the loop 19 times and with the chain 3 – 20 Stitches around the loop.
- Pull the loose end of the loop tight to create a small circle.
- Sl St at the top of the chain 3 to join the circle.
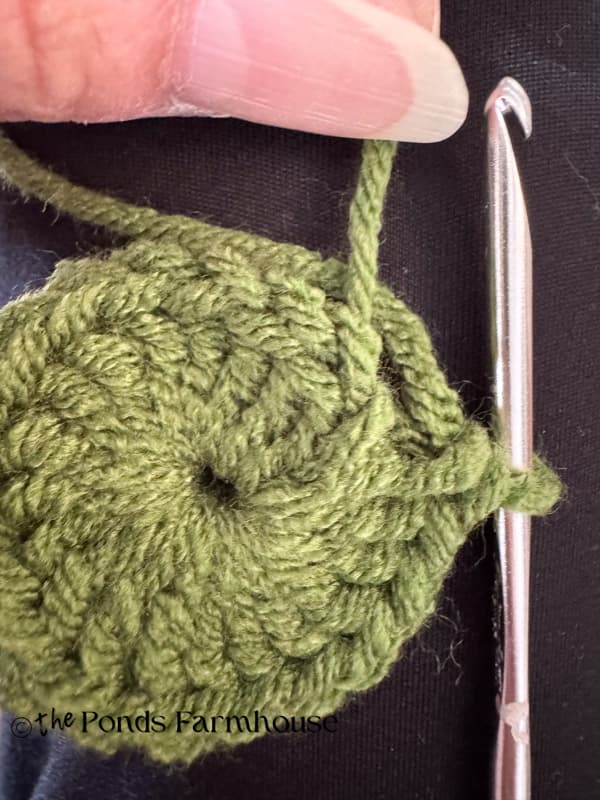
Round 2 – Half Double Crochet
- ch. 2
- hdc in first stitch
- ch 1
- hdc in next stitch
- Ch 1
- Continue pattern of hdc, ch1 in each st. around (End with 20 hdc counting the ch 2)
- sl st in the 1st chain 1 space.
If you need a reminder, below are instructions for a half-double crochet stitch.

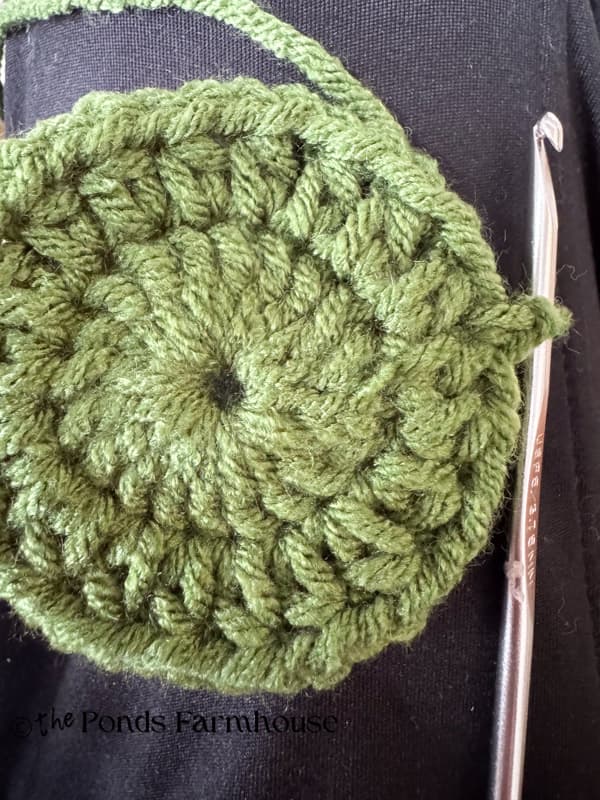
Round 3 – Double Crochet
- Ch 3
- dc in next ch 1 space.
- chain 1
- dc in next ch 1 space
- chain 1
- Repeat pattern of dc, ch 1, in each chain-1 space around.
- sl st. in first ch 1 space
Round 4 – Double Crochet
- chain 2
- 1 dc back in the same space
- chain 1
- 2 more dc in the same space
- Skip one space
- In the next ch 1 space, add 2 dc, chain 1, 2 dc.
- Repeat pattern of 2 dc, chain 1, 2 dc in every other chain 1 space around.
- sl st to join
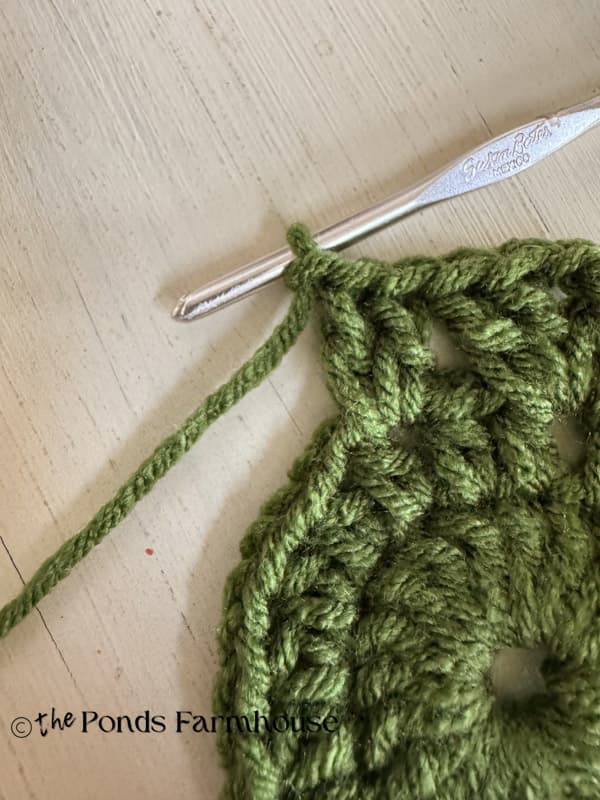
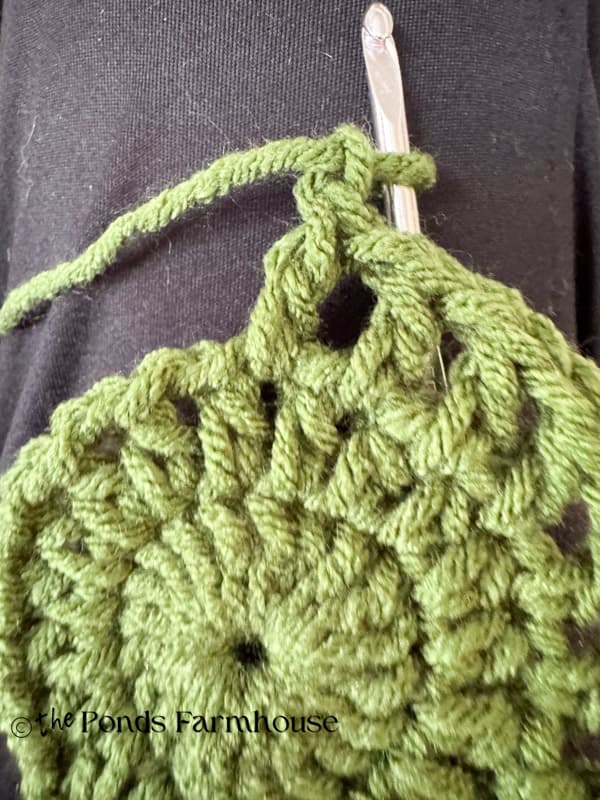
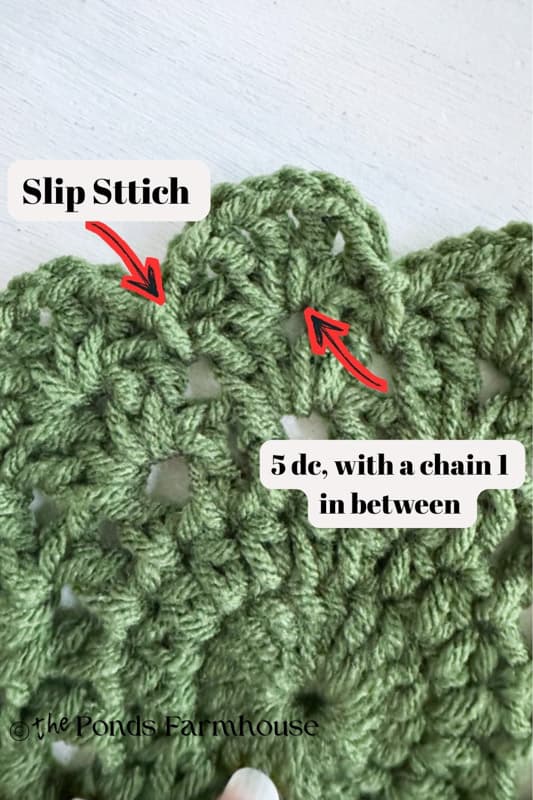
Round 5 – Scallop
- Begin the first ch 1 space between the two dc
- Add 5 dc, ch 1 between each one in the first ch 1 space. Don’t chain 1 on the fifth dc.
- Sl st in the triangle space between each set of double crochet.
- So the pattern is – work in each ch 1 space – (dc, ch1, dc, ch1, dc, ch1, dc, ch1, dc) – slip stitch in between.
- Repeat around the circle. You should end with 10 scallop edges. Sl st. to close.

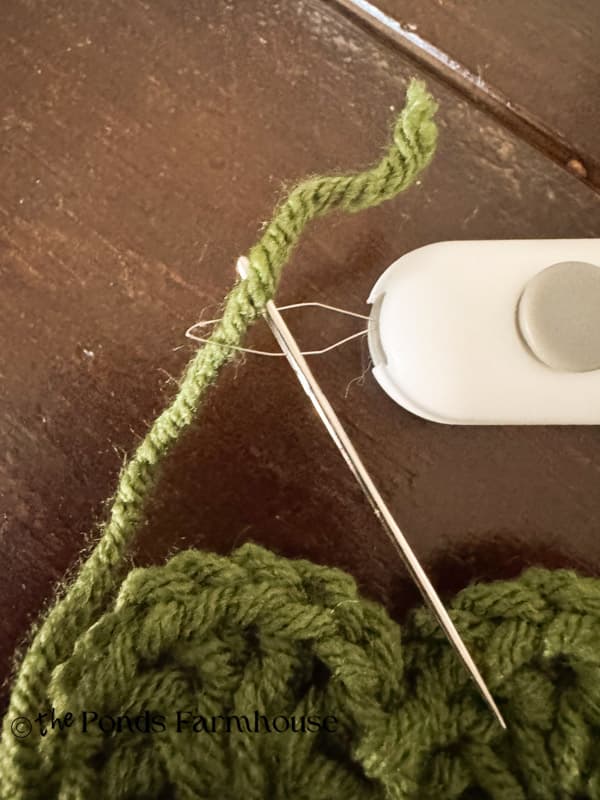
How To Finish The Doily
To finish the doily without leaving any loose threads, you will need an embroidery needle and a needle threader. (If you can thread the needle with a thick piece of yarn, successfully skip the needle threader.)
- Cut yarn, leaving a tail.
- Thread the yarn onto the needle and run it back into the doily from the back until it is secure, then cut the yarn close to the finished doily.
- Repeat with any other loose threads.
- The back side of the doily should be as smooth as the front side.
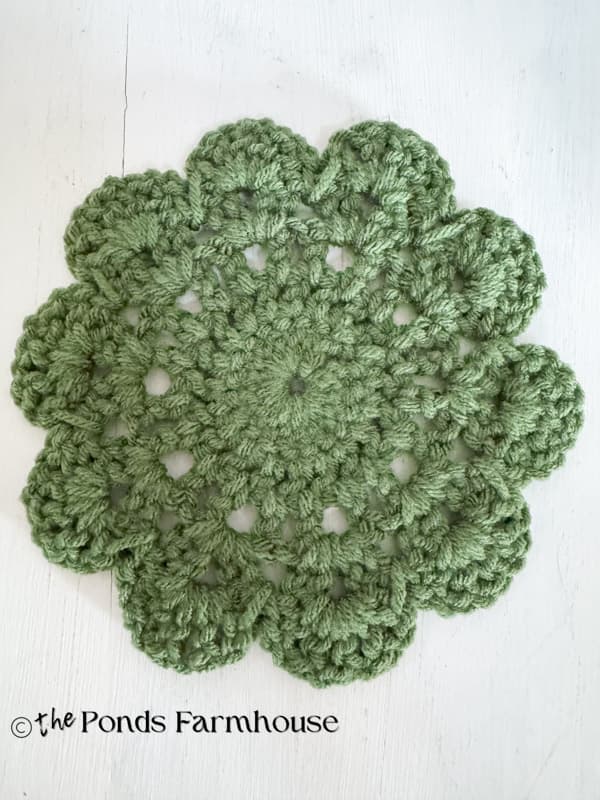
The doilies will be larger when using heavier yarn or a larger crochet hook. If you want to make a smaller doily, like the pink one below, eliminate round 3.
How To Decorate With Crochet Doilies
The modern way to use crochet doilies is very similar to how your grandmother used them. They are a great way to protect tables, countertops, and dressers from getting scratched.
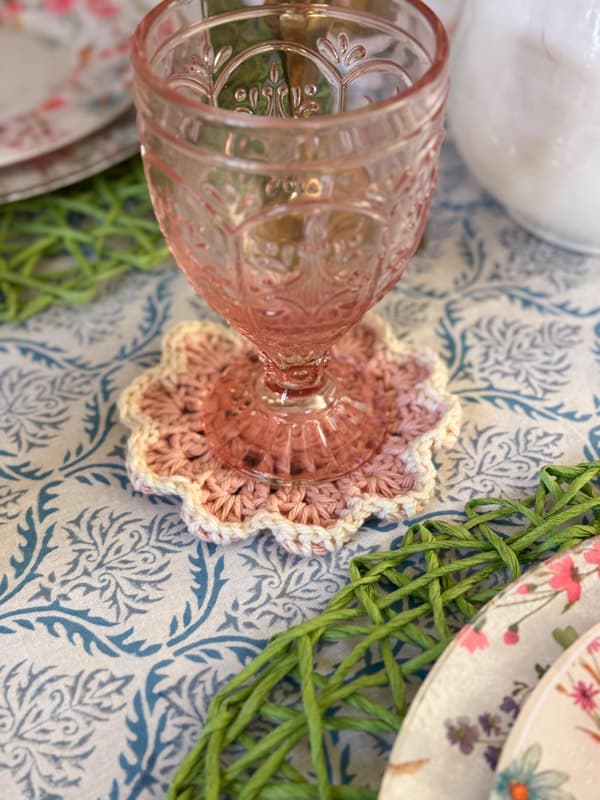
Dining Table Accessory
A perfect spot to showcase your crochet doilies is on the dining table. Keep moisture at bay with adorable coasters, or protect the table from hot bowls with larger doilies.
Create all sizes to add textural layers to your place settings. A larger doily would make your dishes pop as a placemat.
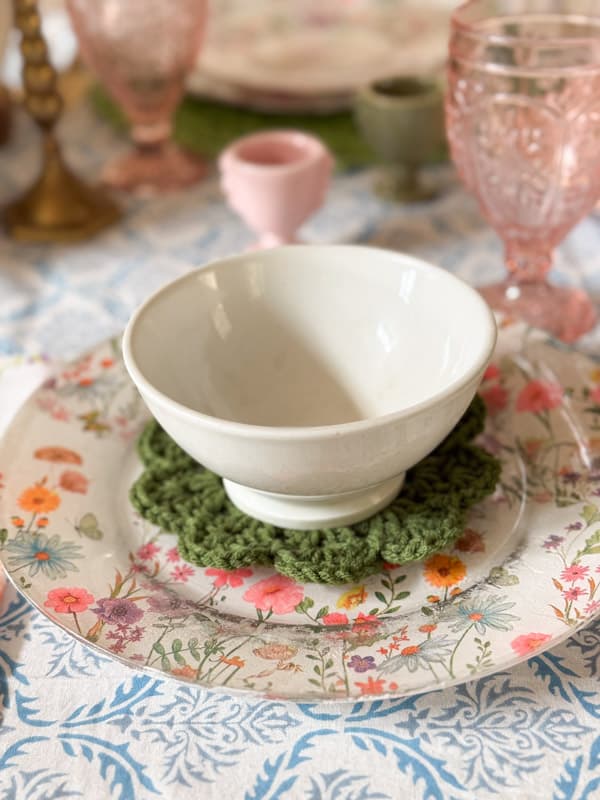
The Layered Look
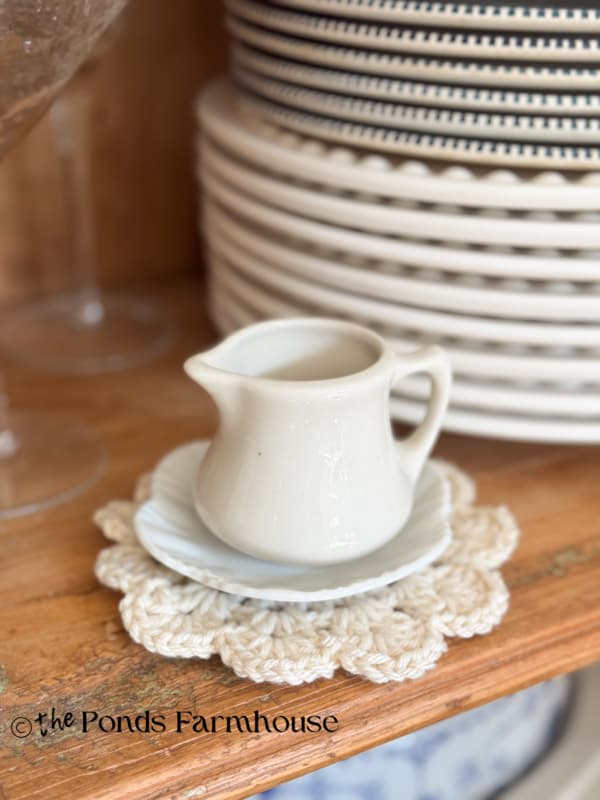
A doily can create a focal point with your everyday collections. Ironstone dishes, creamers, or other collected whites will stand out in your cabinets when sitting on a neutral or colorful doily.
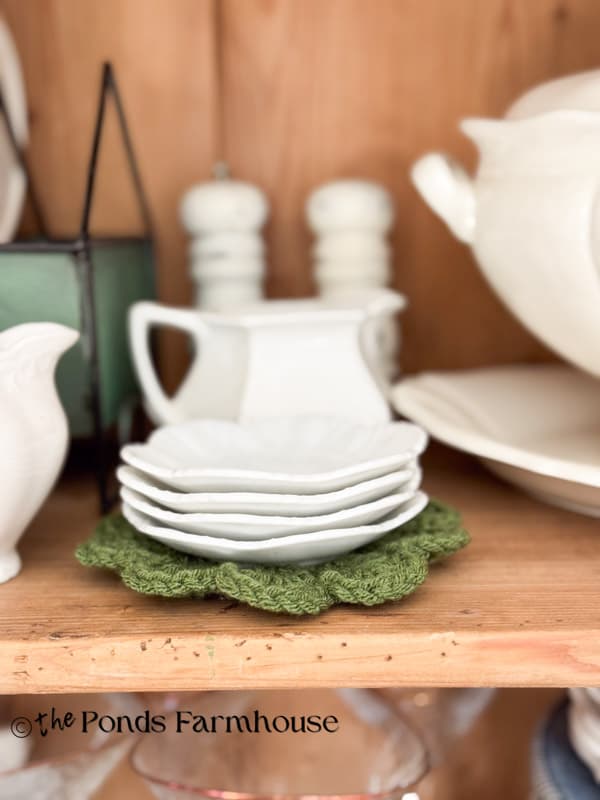
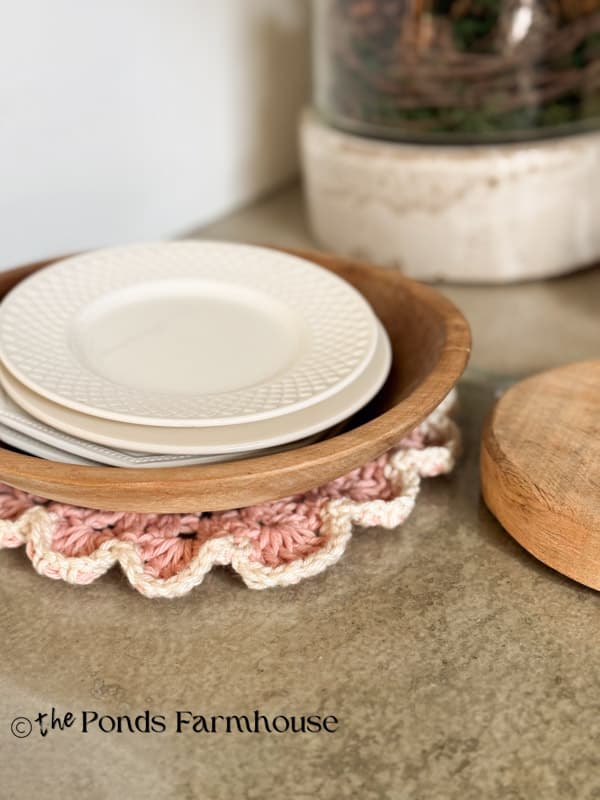
Make a stack of wooden bowls or ironstone plates shine with a cute doily underneath.
Creative Decor: Tabletop & Wall
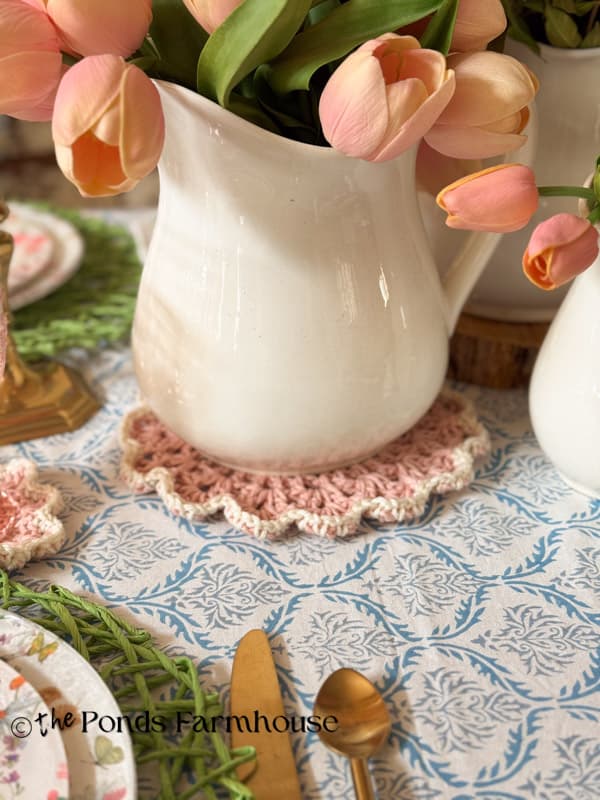
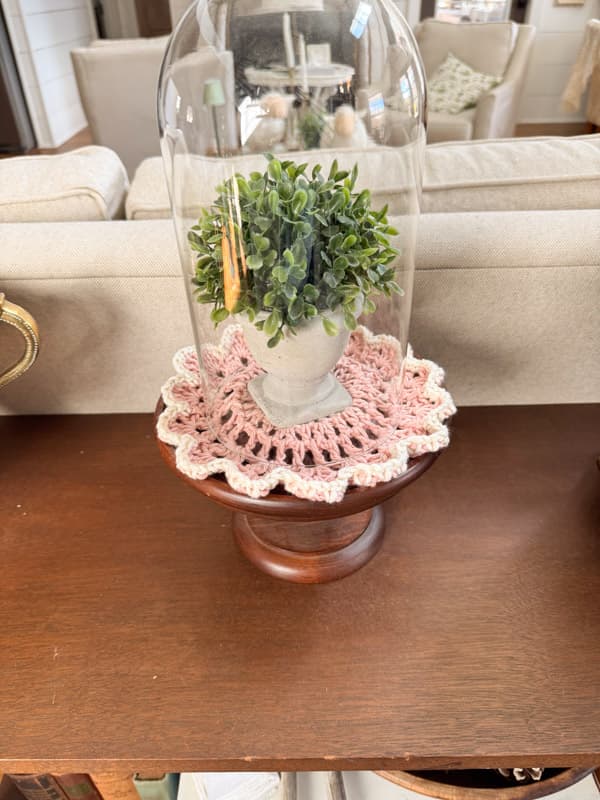
Layer doilies under vases, plants, and lamps not only to protect the tabletop but also to add a splash of color.
Frame individual doilies in modern, thin black or gold frames with a dark linen background. It turns a “craft” into fine art. Or stretch them inside embroidery hoops in various sizes and hang them in a cluster.
Unexpected Functional Styling
Place doilies under glass decanters or wine bottles on a metal bar cart. It prevents clinking and protects the metal from moisture rings while looking incredibly chic.
Use a doily on a nightstand under a carafe of water or a stack of books. It creates a peaceful, “slow living” vibe for any bedroom.
Place a doily beside your bed or bathroom countertop for a soft spot to hold your everyday jewelry.
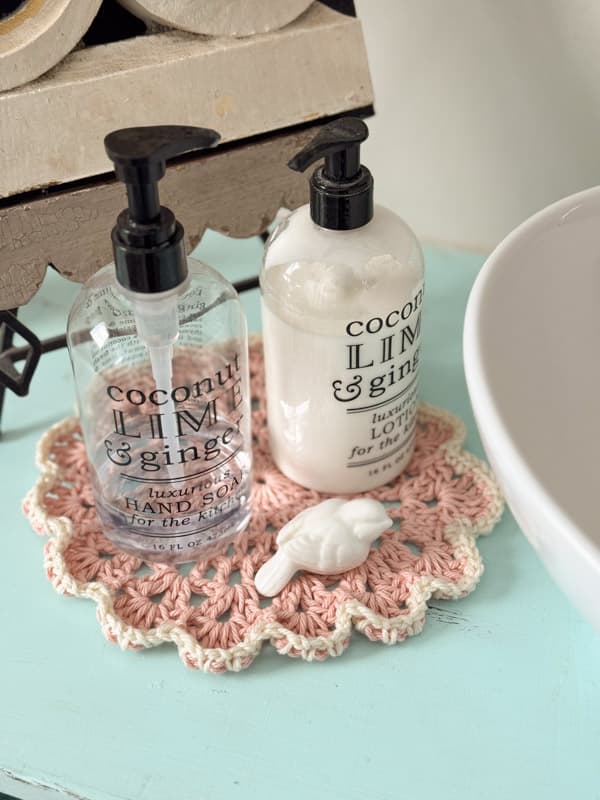
Keep your countertop clean and less cluttered by gathering your hand soaps, lotions, and other bathroom accessories together on a fun doily.
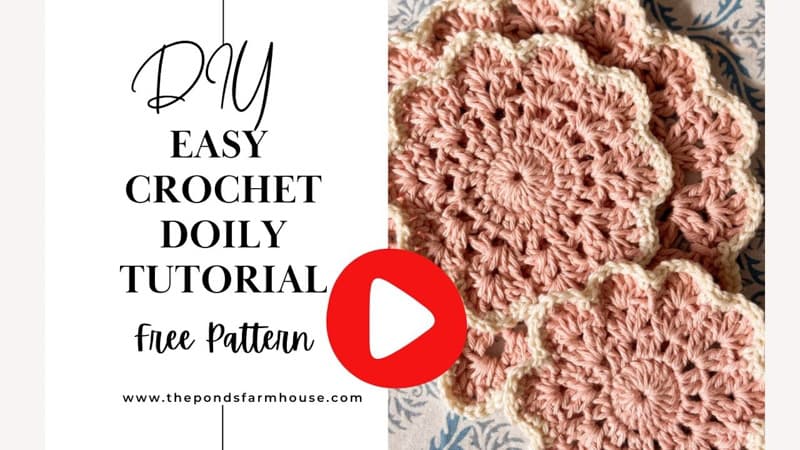
Video Tutorial

Lifestyle Of Love

Welcome to this month’s Lifestyle of Love blog hop hosted by Cindy at County Road 407. Also joining us today is Cindy at DIY Beautify, Rachel at The Antiqued Journey, and Lora at Lora Bloomquist Create & Ponder. Be sure to click below to follow along and see their creative ideas for decorating with doilies.

Hooray for Mr. Doily! And hip hip to you Rachel! I have always wanted to learn to crochet so I hope I can find some time to get started.
I love all the added information today and had no idea people used a separate linen napkin to dessert. Maybe it’s just me but I don’t want people to use another napkin that I have to wash and iron. Hmmm… Maybe that’s why we use paper so often. 😉
If you ever get a wild hair and decide to sell some of your doilies, I would (probably- LOL) pay big bucks to have 6-8 doilies to use as placemats. But in the meantime, I guess I’ll keep on hunting. Great post today. Loved it! pinned
Cindy,
If you decide to start, begin with my dishcloth tutorial and then, I bet you can make the doily placemats yourself. Did you see the placemats I made. They are rectangular but oh so chunky.