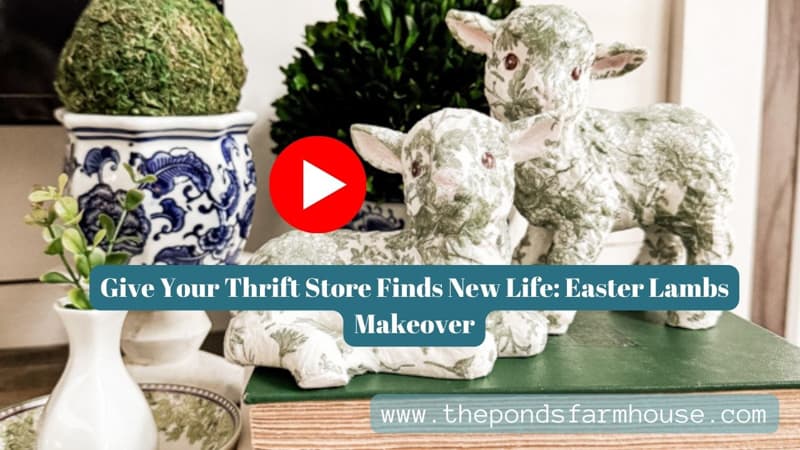
Easter Lamb Makeover: Give Your Thrift Store Finds New Life
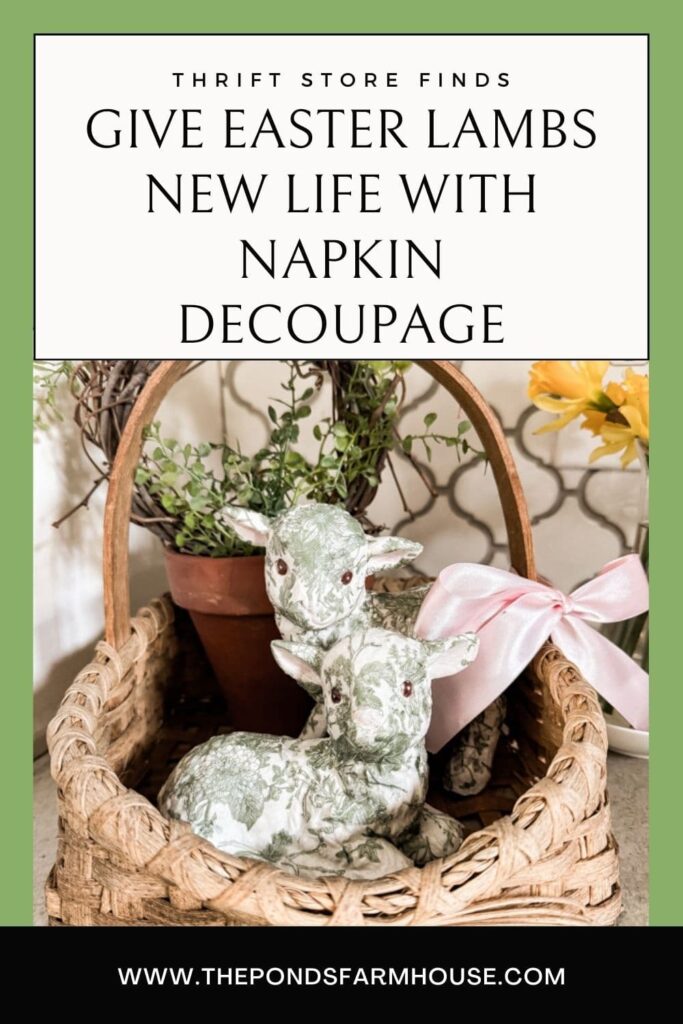
While out thrifting, don’t overlook cute seasonal decor just because it doesn’t work with your home’s aesthetic. You can easily give thrift store finds new life, like these cute boutique-worthy Easter Lambs. Create stunning Easter Lamb decorations with an easy napkin decoupage makeover. I love using Easter Lamb decorations for Spring, but the inexpensive thrifted lambs were not my decor style. Learn how you can easily update your thrift store finds into high-end Easter decor.
I purchased these green and white floral napkins to copy a vase I saw on Magnolia’s website. I was searching for the vase shape I needed when I saw these cute little lambs. They were only $2.00 each, and I knew they would be perfect for Easter with a bit of an update.
(Posts on The Ponds Farmhouse may contain affiliate links. As an Amazon Associate, I earn from qualifying purchases. See the full disclosure details here.)
Table of contents
Why Use Paper Napkins To Decoupage?
Paper napkins come in so many unique designs, and they’re a great way to give new life to an outdated piece of decor.
In addition, if you have damaged or broken items such as vases, lamp bases, figurines, etc., you can easily cover the damage with this decoupage method. Napkins are more easily molded around small, delicate pieces than heavier paper decoupage.
One of my favorite ways to use napkin decoupage is to copy a high-end decor item.
If you see an item online or in a boutique, take note of the size and shape of the expensive decor. Then, look for something similar at the thrift stores. Find a napkin in a pattern similar to the inspiration piece, and you can easily save money by creating a knock-off of the original.
Here are a few of the items I’ve made knock-offs of that look as good as the boutique versions.
- Decorative Boxes
- Lamp Bases
- Vases or Flower Containers
- Ginger Jars
- Decorative Easter Eggs or Decorative Balls for Bowl fillers
I’ll share links to all my projects at the end of this post.
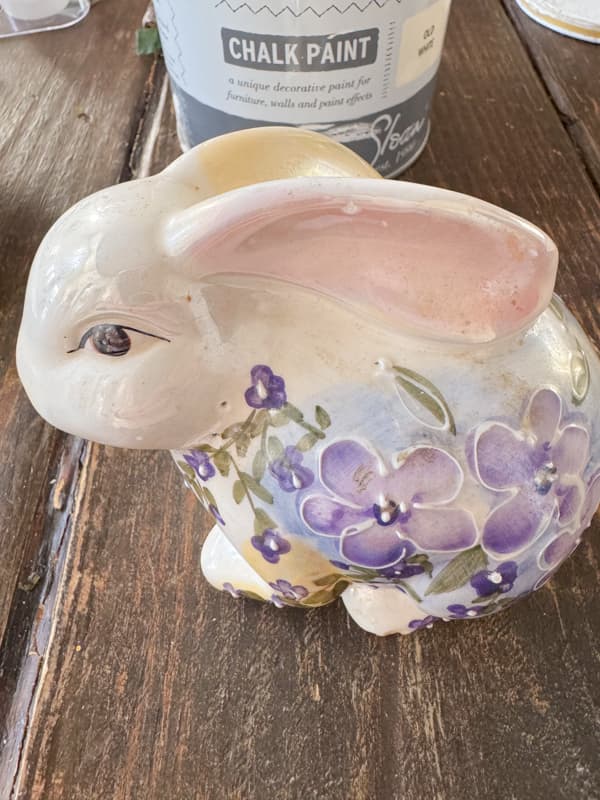
Thrift Store Easter Lambs
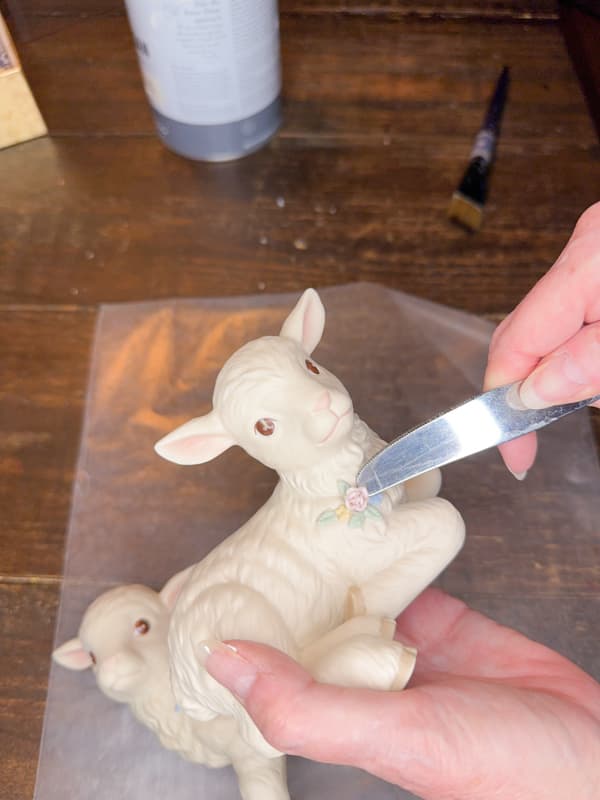
First, the thrift store Easter lambs needed some preparation to create the design.
The lambs have a raised rose attached to their necks. If you need to remove a design, carefully slip a knife under it to pop it off. You want to be careful not to break the figurine.
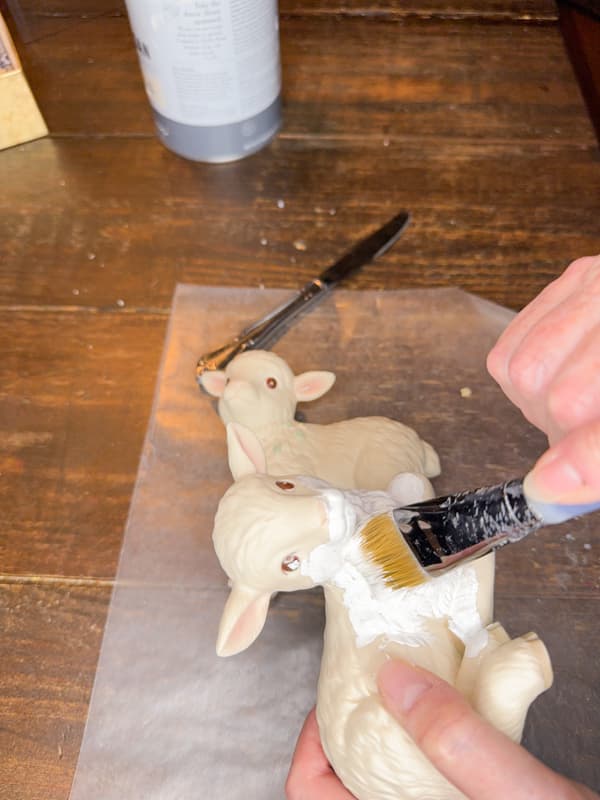
If the design can’t be removed easily, you can cover it with napkins. If your napkin has a heavy pattern, you will probably never notice a raised design.
After you’ve removed the design, paint the lambs white. For this project, I left the eyes and pink ears exposed. You can decide whether to cover your figurines completely.
Napkin Decoupage Easter Lamb Decorations
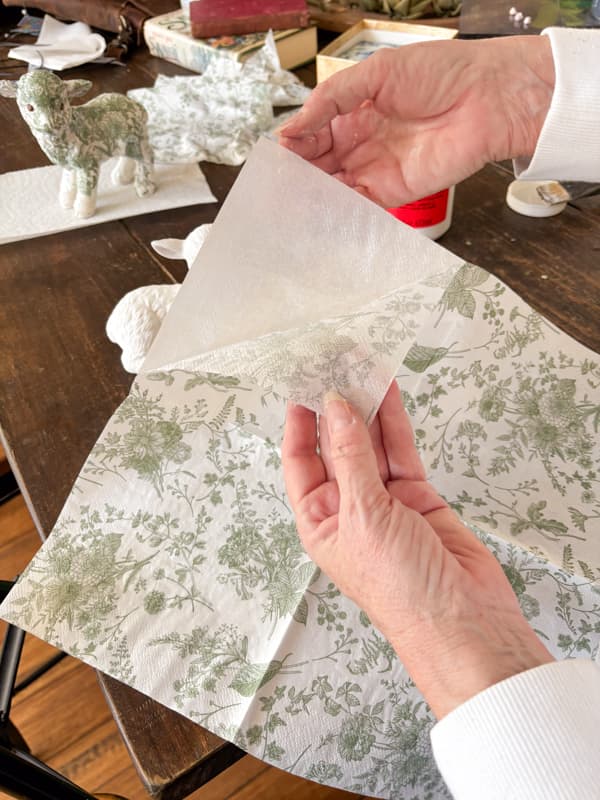
Once the paint is dry, you can napkin decoupage the Easter lamb decorations.
Begin by separating the napkin layers. You only need the top decorative layer.
Next, cut the napkin into smaller sections. You can cut out the flower patterns to create smaller pieces to work around the curves of the lambs.
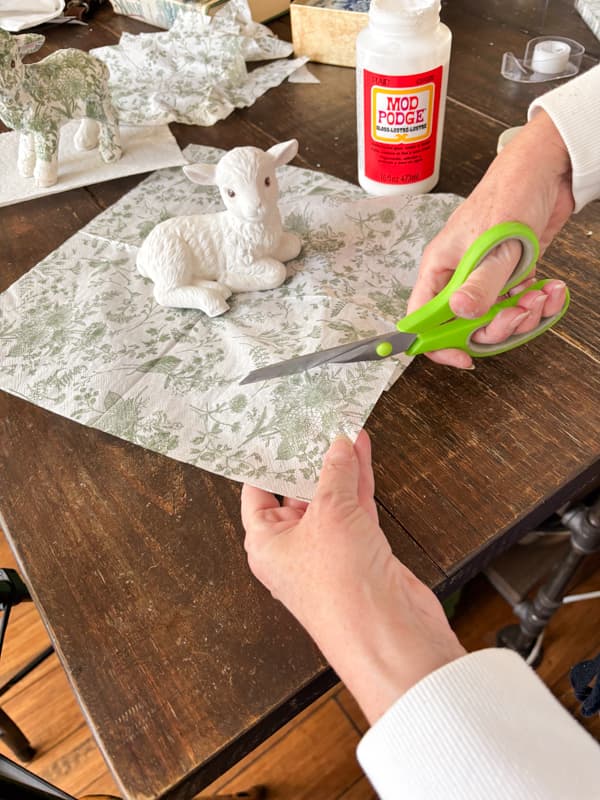
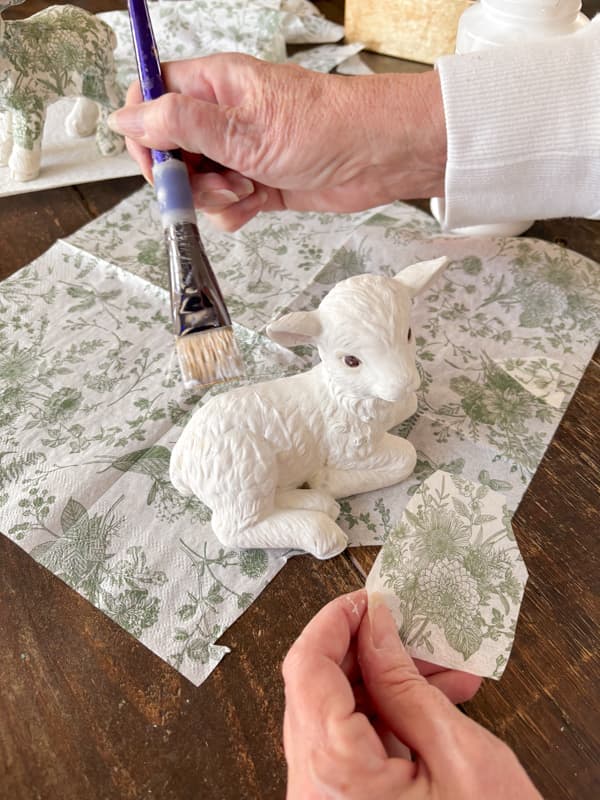
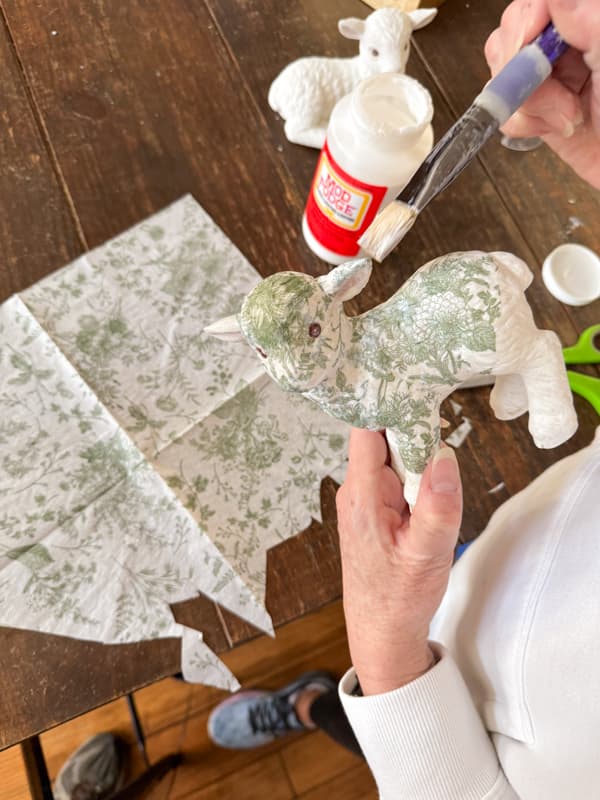
Apply Mod Podge to the area where you are placing the napkin, press the piece of cut napkin in place, and smooth it with the brush. Be gentle, as it’s easy to tear the napkin.
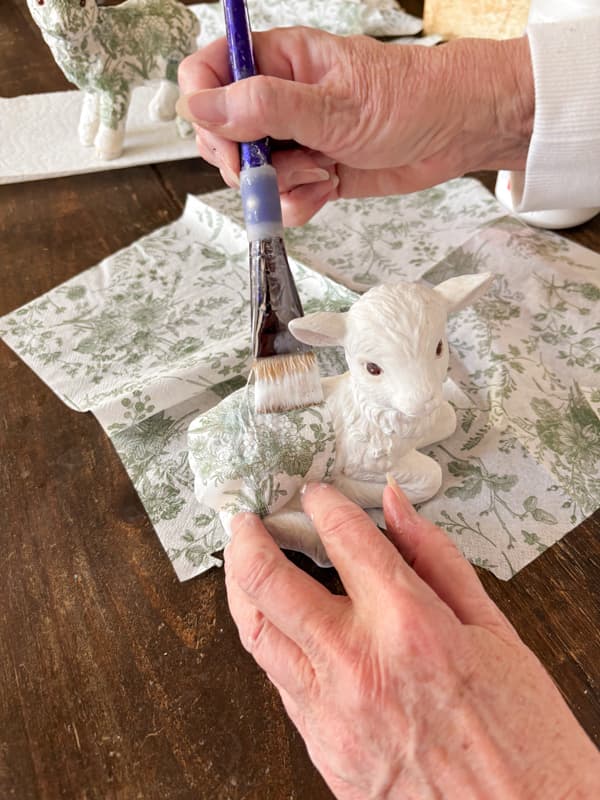
Apply napkin pieces until you have entirely covered the Easter lamb.
Insider Tip
When working with a small object such as the Easter lamb decorations, you may need to allow some drying time before completely covering the figurines.
You will damage the finish if you touch the areas before the Mod Podge is dry.
Since I was working with two lambs, I partially finished both lambs and set them aside to dry. Once the glue was dry, I completed the napkin decoupage.
If you have any other projects, it’s a good time to complete them while the Mod Podge dries.
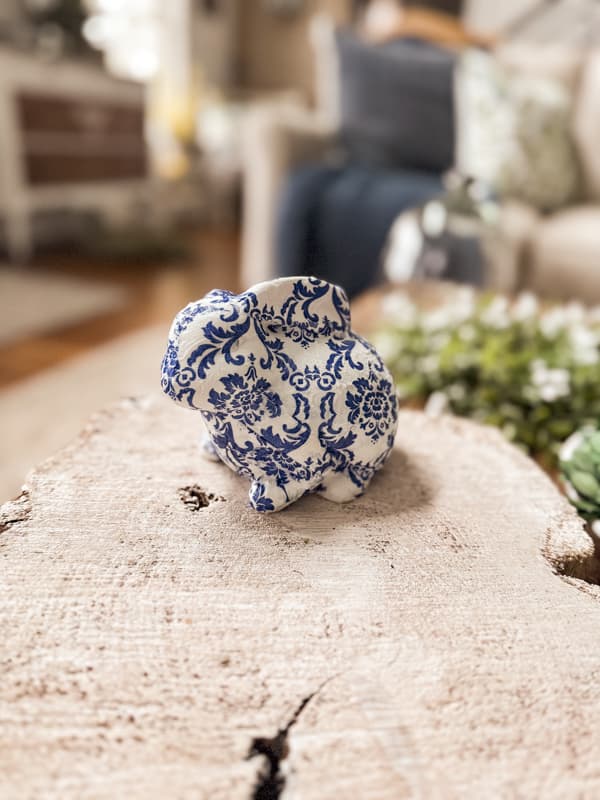
Decoupage Easter Bunny and More While Lambs Dry
I also found this Easter Bunny while thrifting and decided to add a napkin decoupage to it. While the Easter lambs were drying, I painted the bunny and began preparing to add a different napkin decoupage to it.
In addition, I added napkins to some styrofoam balls for my Chinoiserie Tablescape and a clay pot to hold a grapevine topiary.
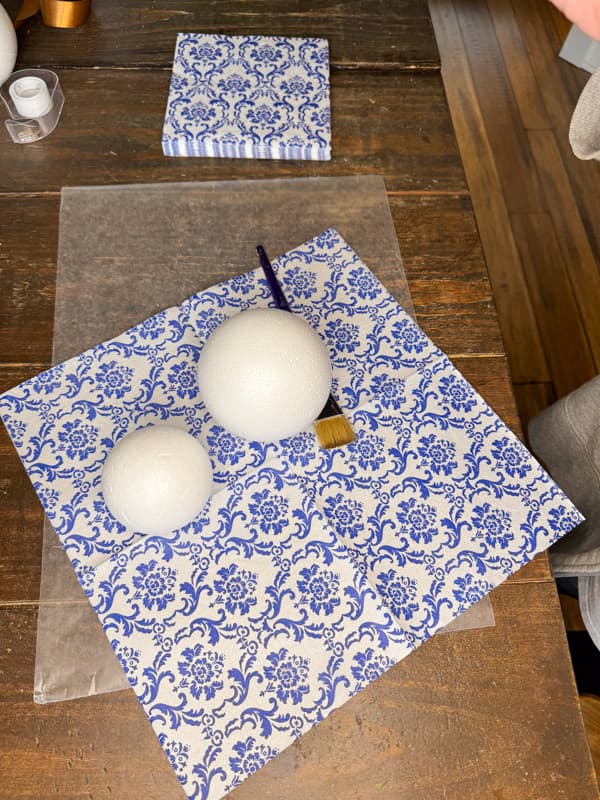

All of these projects were completed using the same technique: cutting the napkins into smaller, easier-to-handle pieces. They are part of my Early Spring Home tour.
Napkin Decoupage Easter Lamb Decorations
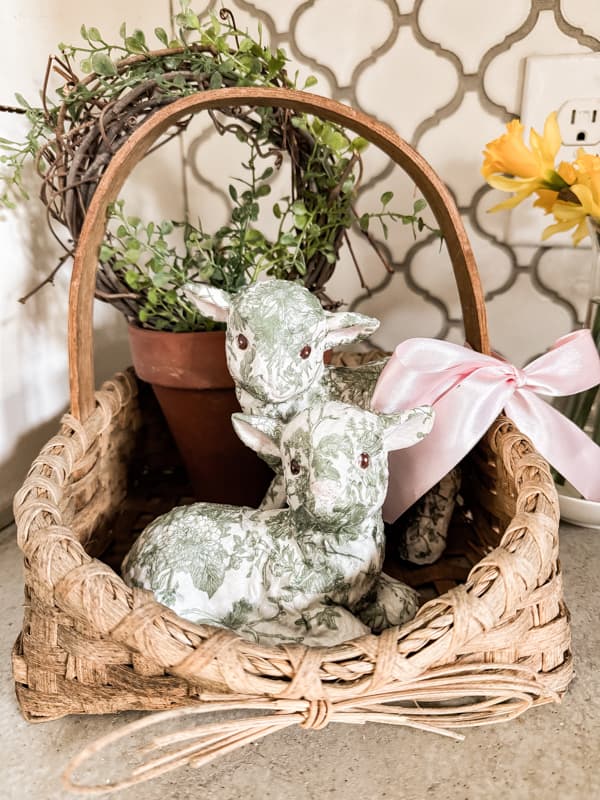
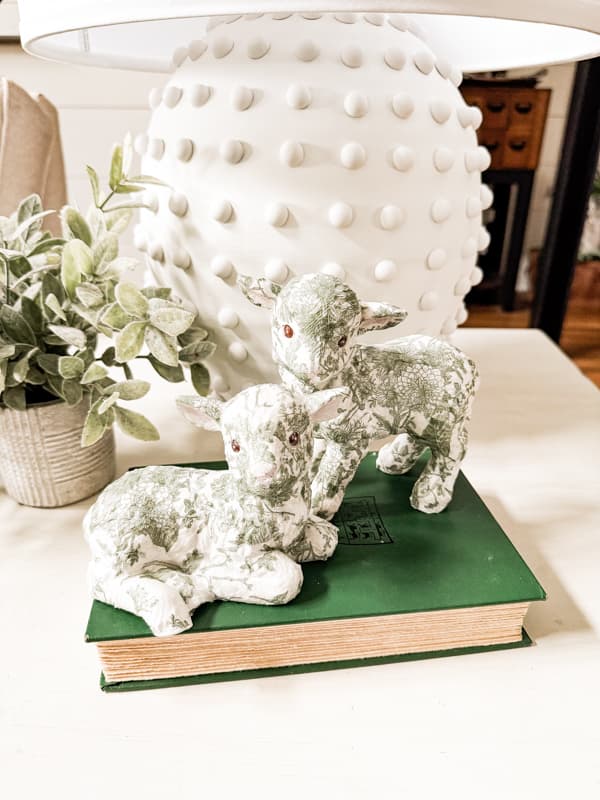
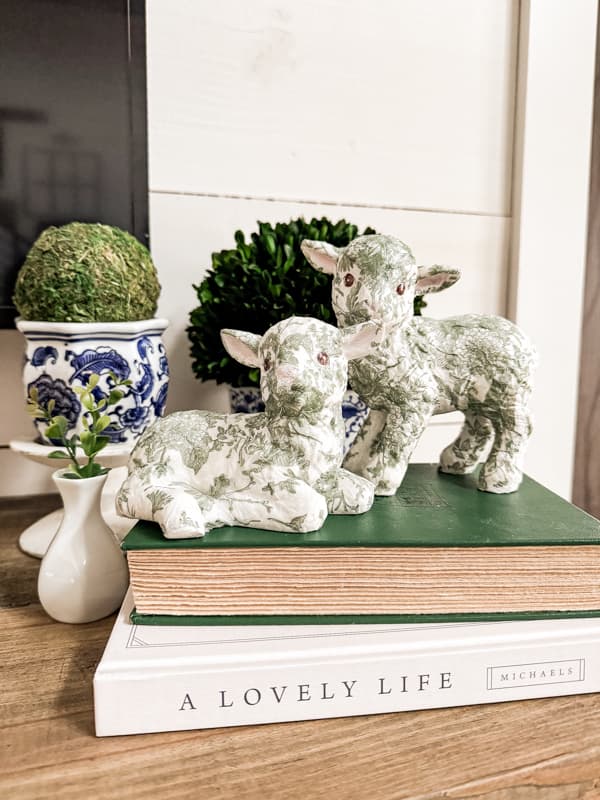
I am so happy with how the Easter lamb decorations turned out.
I’ve been moving them around the house to decide where they look best.
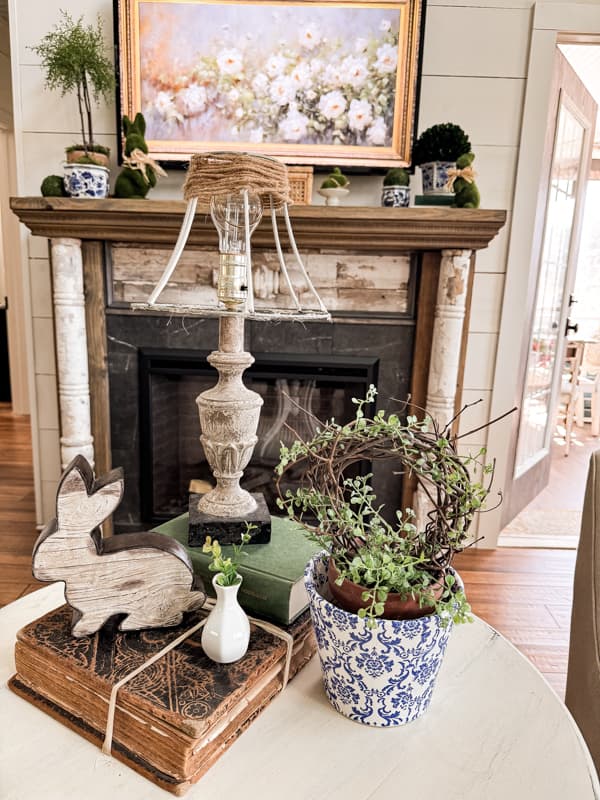
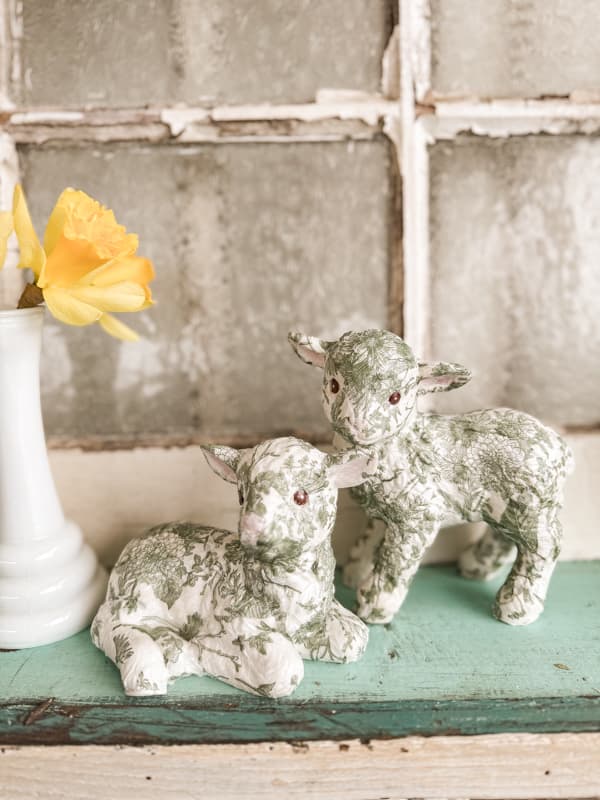
First, I added them to the side table in the living room.
Next, they looked really cute on the mantel.
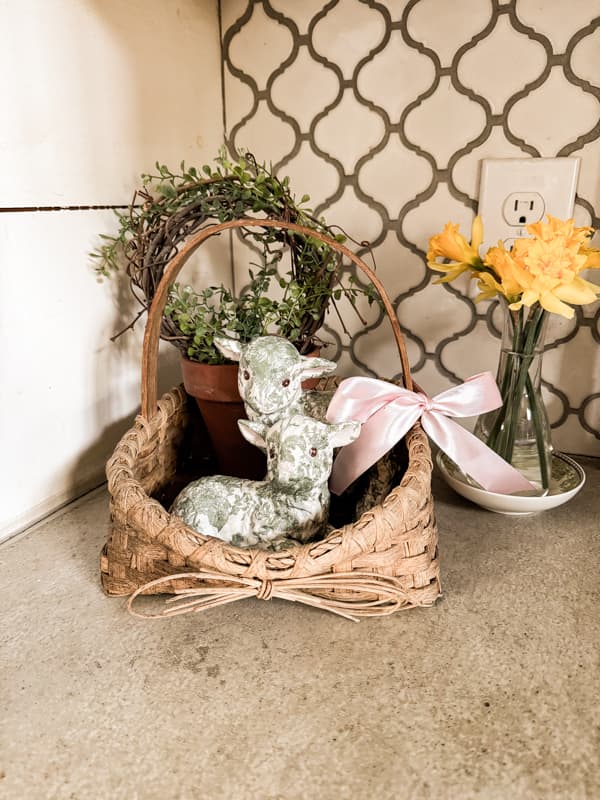
Then I thought they would make a cute Easter basket decoration. Where do you think they look best?
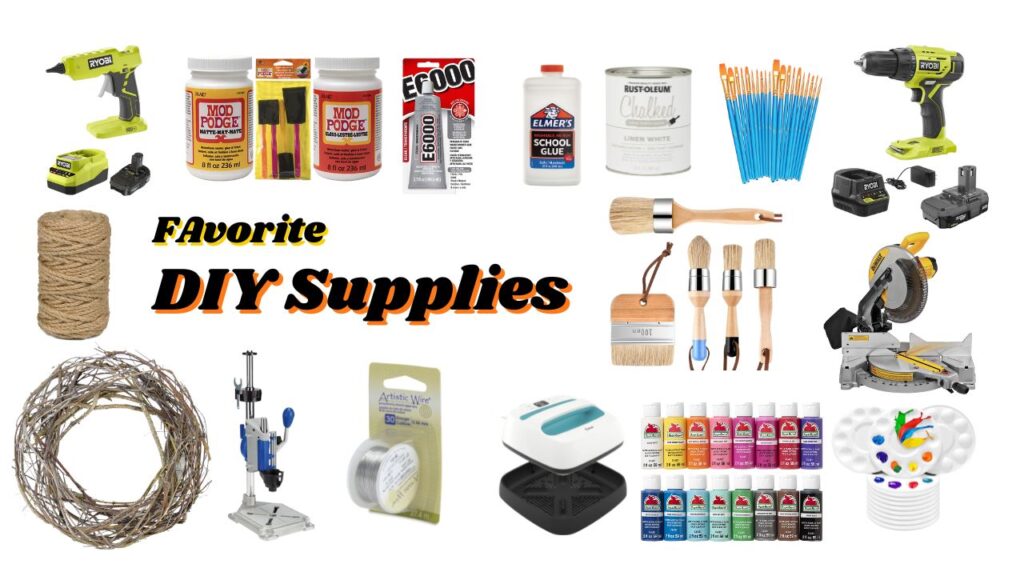
Resources
See the latest craft supplies and favorites here.

DIY Napkin Decoupage Easter Lamb Decoration
Equipment
- Small Paint Brush
Materials
- Thrift Store Lambs
- Green and White Napkins
- White Paint
- Mod Podge
Instructions
- Paint Lambs White
- Separate Napkins using only the top layer
- Cut napkin into small pieces that will fit areas on the lambs
- Add mod podge to small areas and press napkin pieces onto the lambs
- Use small brush to gently smooth the napkin into place.
- All to dry.
Video
Notes
Video Tutorial
You can see the lamb makeover video here.
Napkin Decoupage Projects To Inspire You
Here are some of my previous napkin decoupage projects.
- A Distressed Decoupage Lamp
- Updated Thrift Store Ginger Jar
- Chinoiserie Blue and White Napkin Rings DIY
- Recycle Tin Can Decoupage Decor
- How To Make A DIY Decorative Box
- Decoupage Eggs for Easter
- Napkin Decoupage Christmas Ornaments
- Decoupage Coasters for Gift Ideas
- Decoupage Dollar Tree Pumpkins
Thanks for stopping by.

Pin It To Remember It
Did you find some great ideas you’d like to save for future reference? Hover over the images you’d like to save and pin to your favorite Pinterest Boards when you see the PIN button.

Oh those lambs are too cute!!!! I can see that you are having fun with them, moving them all around.😉 I like them near your Hobnail lamp on the green book the best.The green book cover highlights the lambs and shows off your Lamp.You are always creating such lovely items and they make your home so comfy and inviting.💕Love your style.
Lorri,
I’m so glad you like them. Thanks for your input. I appreciate all your encouragement.
Your little lamb’s turned out so cute! Love that you can see past the original and make it amazing! Going to try this on a bunny I have.
Ally,
I’m so glad this inspired you. Thanks for stopping by.
Rachel, your precious lambs are absolutely adorable! You did a wonderful job! I am going to find some lambs and decorate them like you did! I’m a blue and white gal so will probably do some chinoiserie lambs — and I might even do some of the green ones, too, as your green lambs are just so cute. Thanks for another wonderful DIY! Have a great day! I always enjoy your posts, Rachel!
Mary-Ann
Thank you so much. Yes, I was torn between the green and the blue. Both would be adorable.
Those lambs are so dang cute!! I loved them in the basket…as if they had their own little bed to get warm! I’ve got some lambs with their Mama that I usually place in my garden in the Spring time, but I think I’ll decoupage them and keep on my enclosed porch where I can see them every day!! Thanks for sharing with us…have a great Spring!
Karolyn,
I’m so glad you found this helpful and I can’t wait to see your decoupaged lambs.
These lambs are just precious Rachel. You chose the perfect napkins to give them a refreshed look. And the bunny is so cute too. I will share it on Saturday. XO
Wendy,
Thank you. I appreciate this.
I can’t get over the way these came together, Rachel! I would have never a million years thought to do this and I’m always thankful that you share ideas like these with us. They’re totally genius! In fact, my Mom is still talking about it – I don’t blame her one bit though – they’re fabulous! Big hugs, CoCo
CoCo,
You are just so sweet and your comments are so appreciated. I’m glad you and your mom found this one interesting.