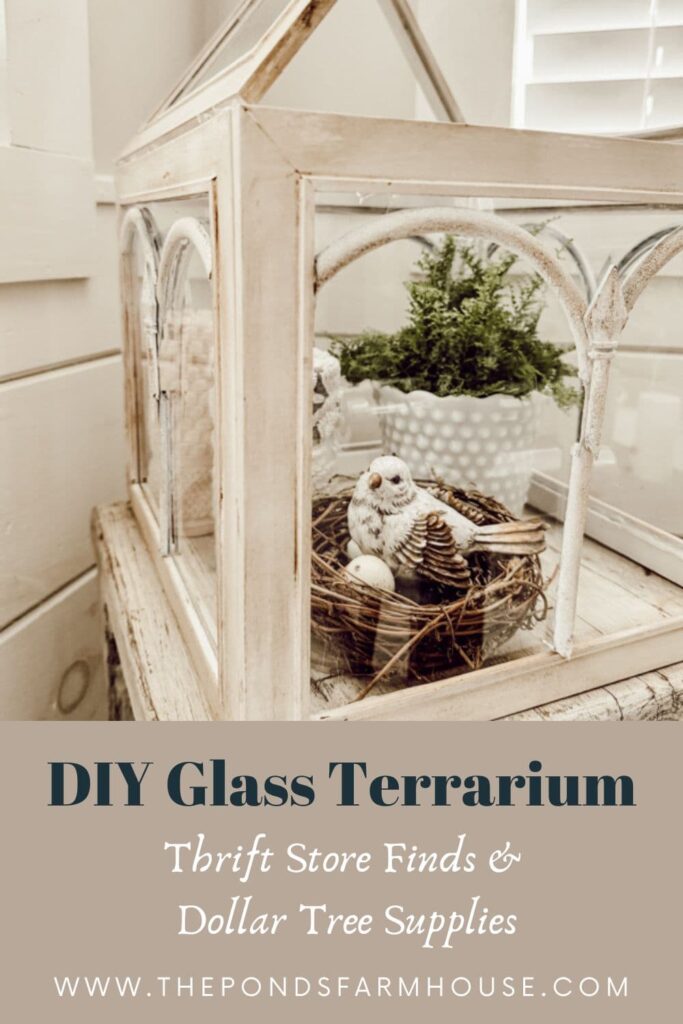
DIY Dollar Tree Glass Terrarium: Upcycled Bar Stool Project
Looking for a budget-friendly but creative way to display your plants and more? See how to transform a thrifted bar stool into a unique standing terrarium! This easy DIY terrarium project is perfect for plant lovers on a budget. Get creative by using Dollar Tree supplies and create a beautiful glass terrarium with plants for your home.
I love the look of a glass terrarium for displaying plants and other unique items. I recently saw one that captured my attention because it was a terrarium with a stand. I thought it would be perfect for our screened porch, but the price set me back. I recently found a tall wooden bar stool at a thrift store for $10.00 and decided it would make a great base. Then, off to the Dollar Tree I went to find more supplies.
Let’s take a look at what I found and how it came together so easily.
(Posts on The Ponds Farmhouse may contain affiliate links. As an Amazon Associate, I earn from qualifying purchases. See the full disclosure details here.)
What Is A Glass Terrarium?
A glass terrarium is a mini greenhouse or glasshouse for plants or other garden decor. It helps retain moisture and is excellent for plants that thrive in humid environments, such as ferns and mosses. This decorative standing glass DIY terrarium is designed to hold plants, but is more decorative than a closed terrarium. It’s not 100% enclosed in glass and, therefore, will not lock in moisture.
If you are looking for a greenhouse terrarium, consider purchasing one that is completely enclosed in glass. However, if you are like me and just like the aesthetic of a glass terrarium, this project is for you.
How Can I Use A Terrarium For Decor
Although terrariums are considered garden essentials, many people, like me, enjoy their design aesthetic. So, if you would like a terrarium for more than just humidity-loving plants, here are a few ways to decorate with them.
- Use a terrarium as a table centerpiece. Fill it with plants, flowers, or other decor to create a themed tablescape.
- Add to your kitchen countertops. Fill them with herbs or other plants for easy access.
- Use them on your countertops to display unique kitchen decor, such as vintage salt and pepper shakers or other small vintage tableware.
- Place them in a bathroom and include soaps, bath linens, and other bathroom essentials along with your plants.
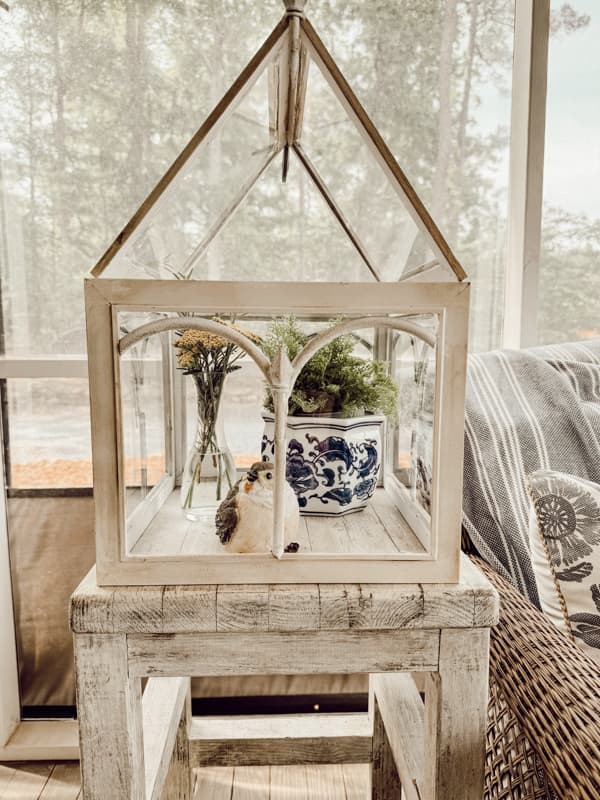
- I plan to add mine to my screen porch, and with my current birdhouse theme, adding a bird to the mix is likely. LOL
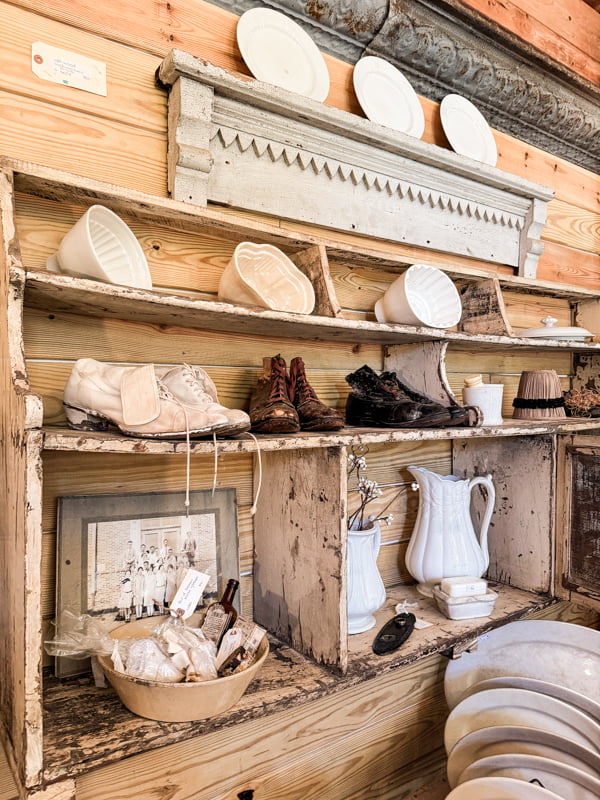
You can add items such as photos, bird nests, and collectibles like vintage thimbles, needlework, and figurines. They can display almost anything that will fit inside. Let your imagination soar.
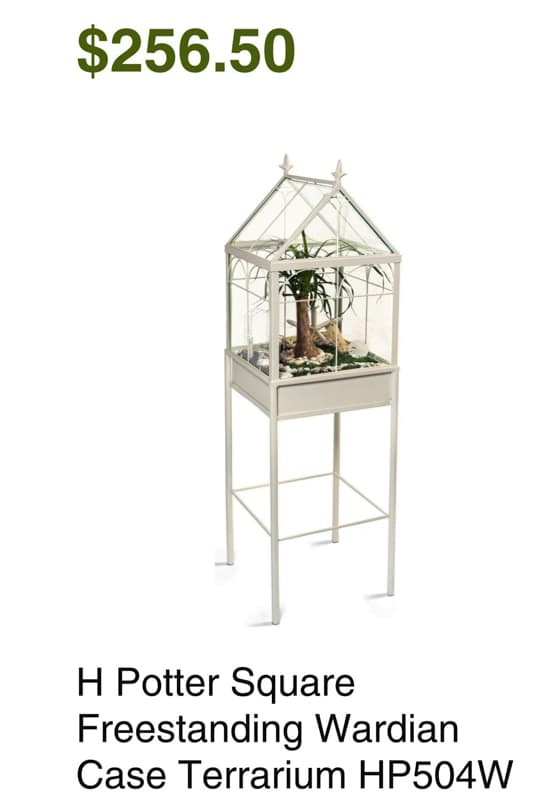
Inspiration for DIY Terrarium
I was looking through H. Potter’s website’s collection of arbors and planters when I saw this adorable terrarium. Since I didn’t want to spend $256.50 on it, I thought I’d try to make one.
Supplies For DIY Glass Terrarium
First, look for an inexpensive stand for the base of your standing glass terrarium. If you plan to use 8×10 picture frames, you will need a stand that is 11 or 12 inches square.
I had recently found this tall wooden stool at a thrift store for only $10.00. I distressed it by using a dry-brush technique with old white chalk paint. After seeing the inspiration piece, I felt the stool would make an excellent base for the standing terrarium. All I needed was the glass and the architectural design. Here’s what I purchased from Dollar Tree.
- 2 Garden Fences
- 6- 8×10 wooden picture frames
I also used these other items to complete the project.
- Chalky Finish Class White Spray Paint
- Dark Wax
- Hot Glue Gun
- E-6000 Glue
- Wire Snips
- Garden Snips
- Windex
How To Build A Glass Terrarium
Once you have your stand, do any necessary work to make it match your design concept. I had already painted my thrift-store find, so all that was left was to coordinate the Dollar Store supplies.
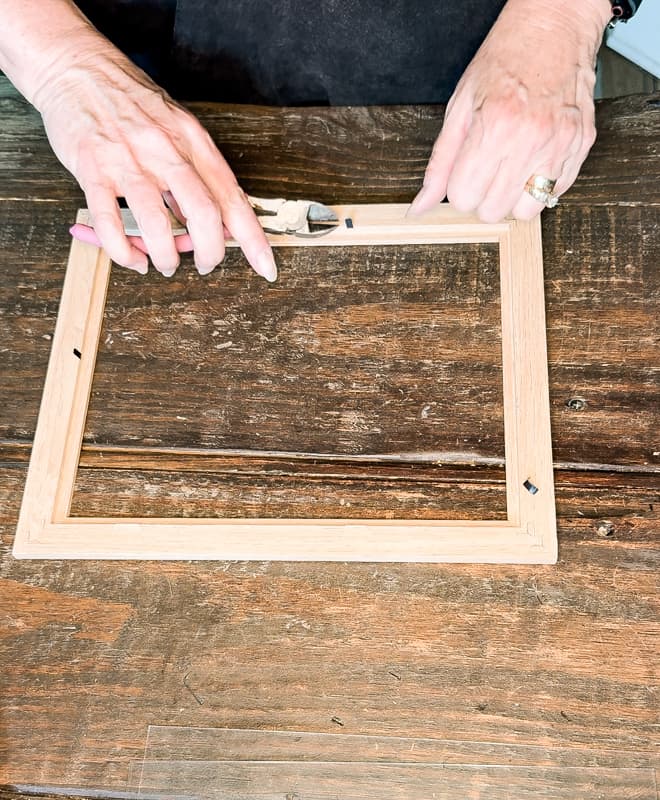
Deconstruct Dollar Tree Picture Frames and Garden Fence
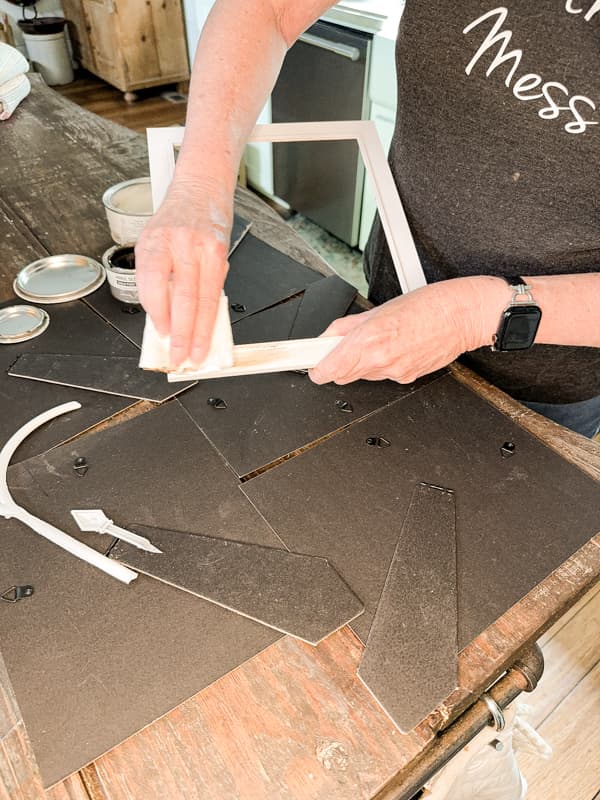
First, deconstruct the picture frames. Remove the backs and set aside the glass from each frame. Then, use your wire snips and remove all the metal holding tabs from the frame.
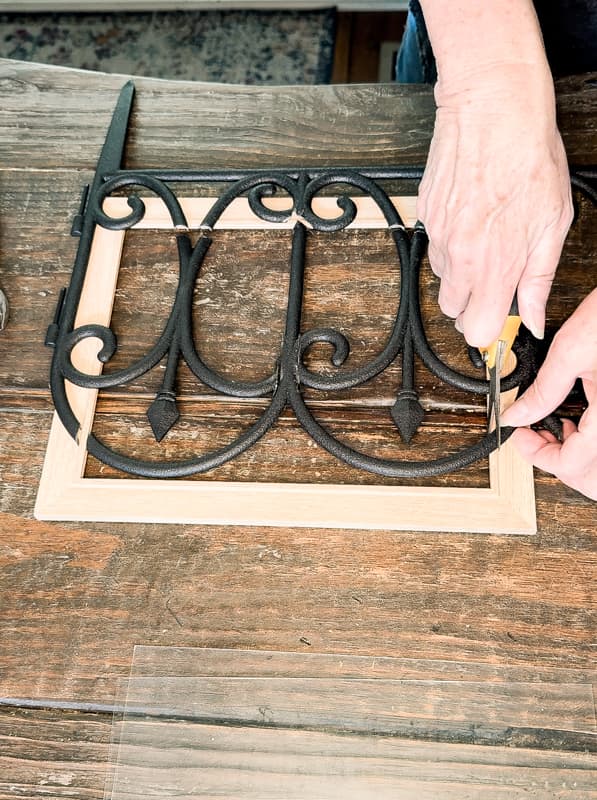
Next, begin to deconstruct the garden fence. If you are using 8 x 10 frames, you will need to cut the center section, remove the curled side pieces, and cut the bottom of the centerpiece just above the bottom curls.
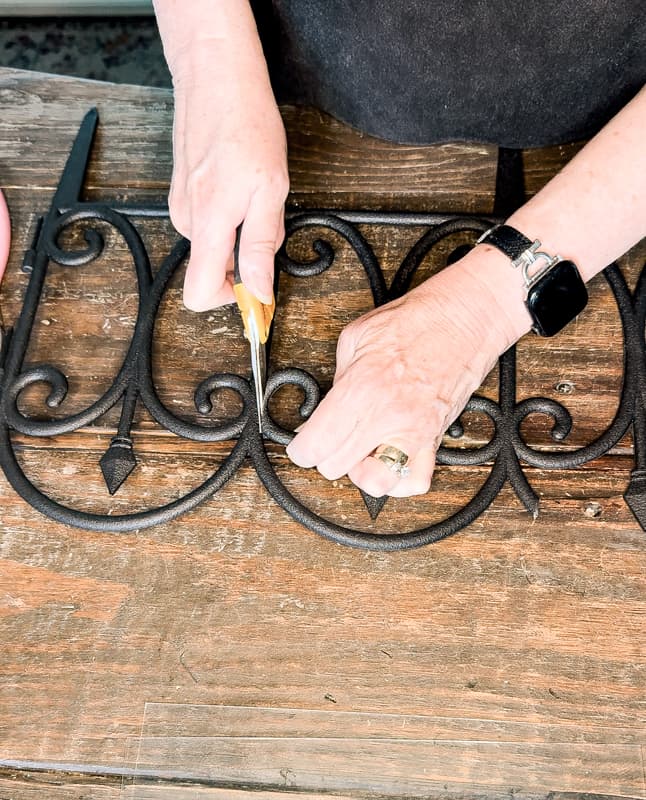
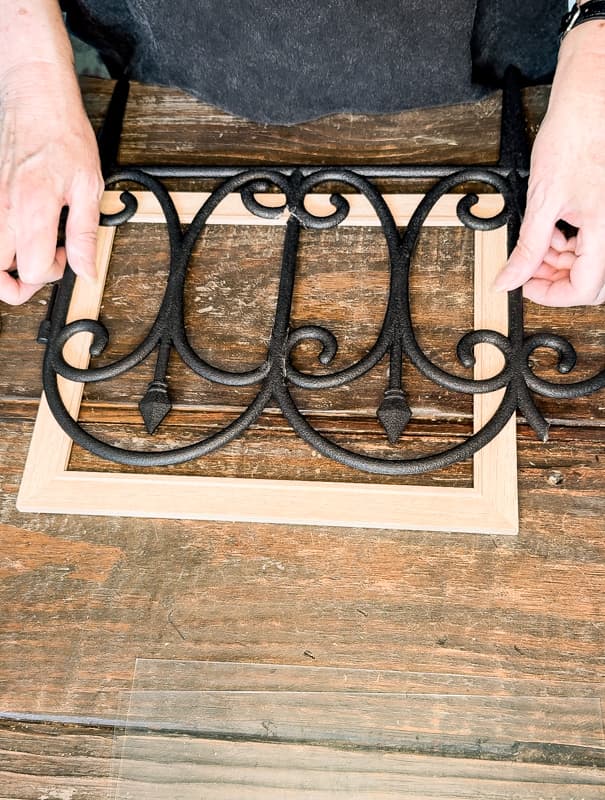
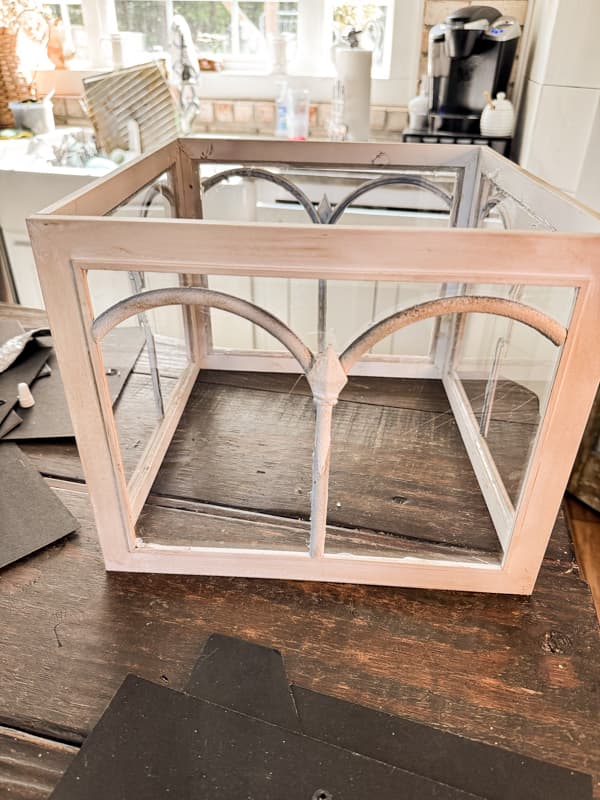
Place the fence over the frame to ensure that you are cutting at the appropriate spots. When finished, you should have two arches connected at the center.
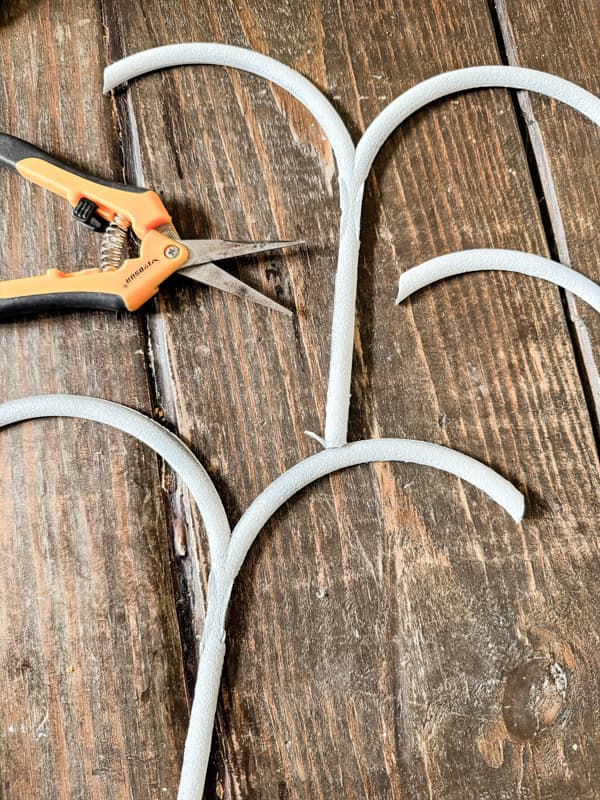
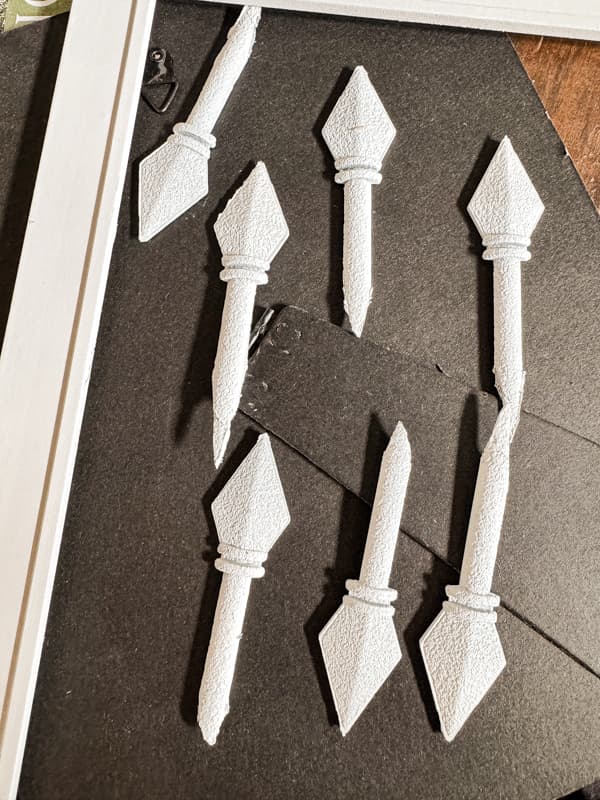
Four arch pieces will look like these below. They should fit inside the picture frames. You will also want six of the decorative arrows cut from the fence. Try to remove them, leaving a point at the bottom of each arrow.
(Note: These have already been painted. I failed to get a good photo before painting.)
How To Paint Picture Frames and Fence Pieces
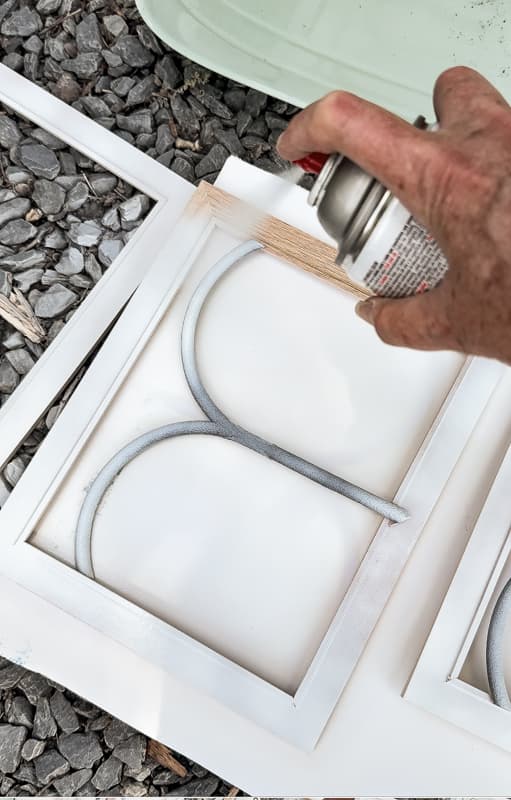
Place all picture frames and fence pieces in a well-ventilated area to paint. I used Chalky Finish Classic White to paint all the pieces. Once the paint is dry to the touch, turn over all the pieces and paint the backside as well. Since these are being attached to glass, the backside of the pieces will be visible.
Insider Tip
I used spray paint to quickly cover all the pieces that needed painting. However, you can paint each piece with a paintbrush. This is slightly more budget-friendly, as the spray paint is more expensive. I already had the paint, and it took only about half the can to cover the pieces. I felt the extra cost was worth the time saved.
How To Add Dark Wax To Distress Terrarium Frame Pieces
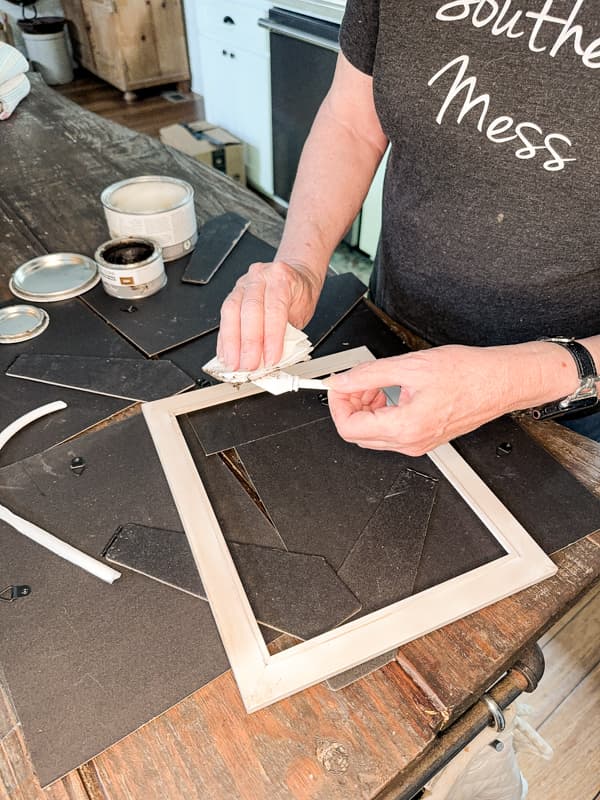
Once all the paint has dried, begin to add dark or brown wax to the painted pieces. I waited until the next day to ensure the paint was completely dry. A quick application is necessary to give them a distressed appearance. Buff away any excess wax.
Make Window Panes
To make the window panes for the DIY terrarium, begin by cleaning the glass with Windex. Clean both sides and set aside to dry.
Next, add a bead of hot glue to the inside rim of the picture frame. Then, replace the glass and press firmly until dry. Then, apply a bead of hot glue to the top of the glass at the edge of the wooden frame. This will ensure that the glass is secure inside the frame.
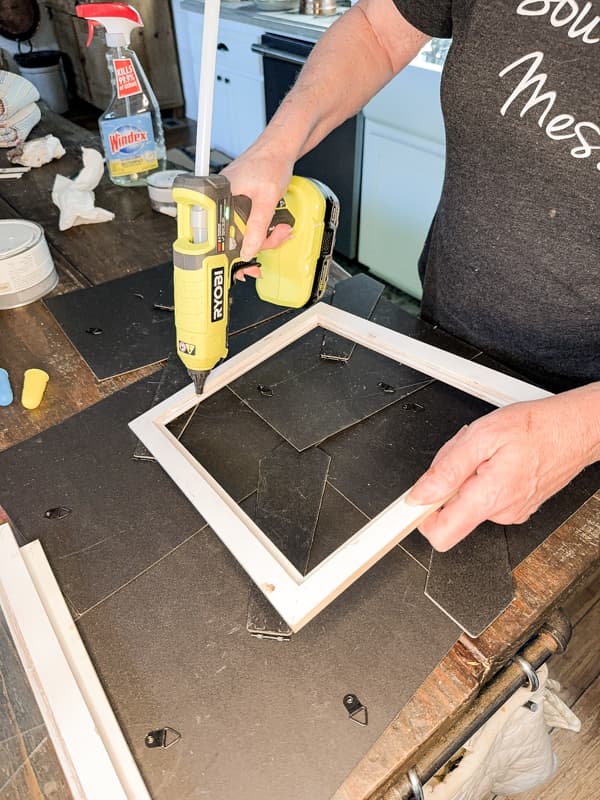
Once the hot glue is dry, turn the frame over with the front facing up. Apply hot glue to the back of the arched fence piece, then place it in the center of the glass. Be sure the edges align with the frame’s edges.
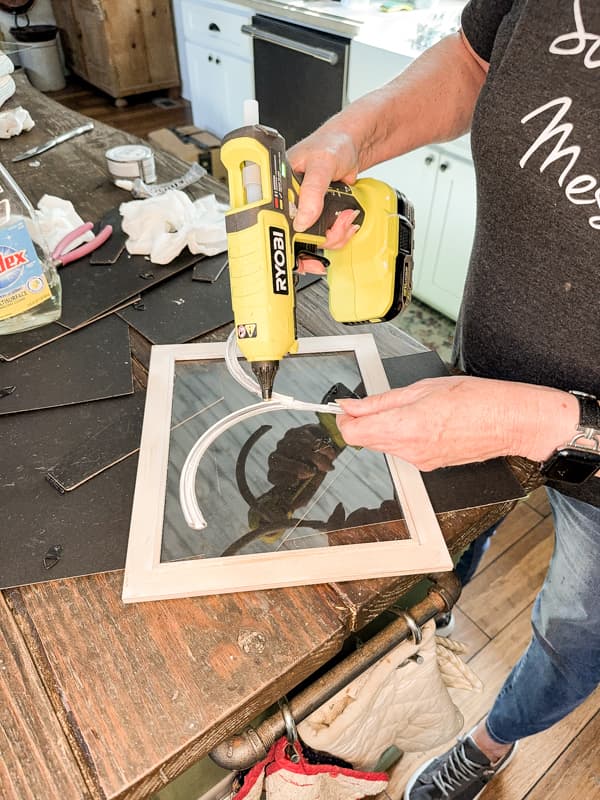
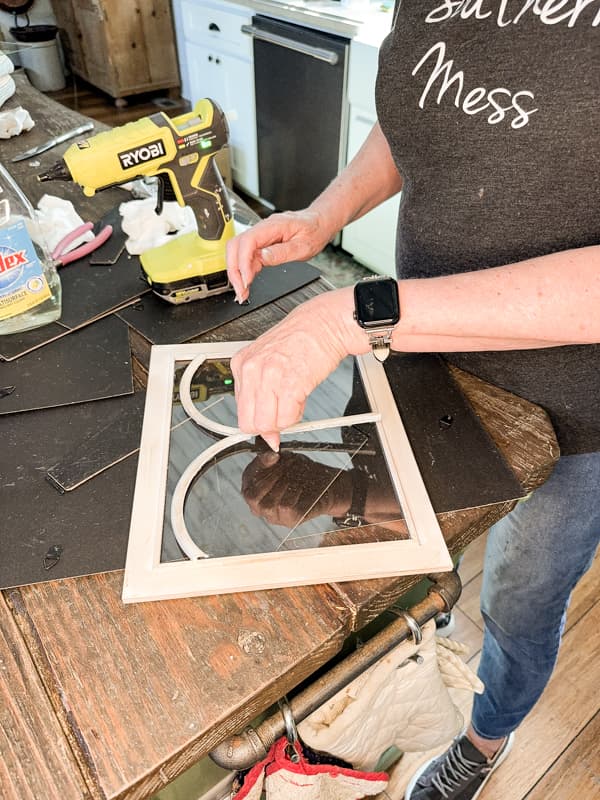
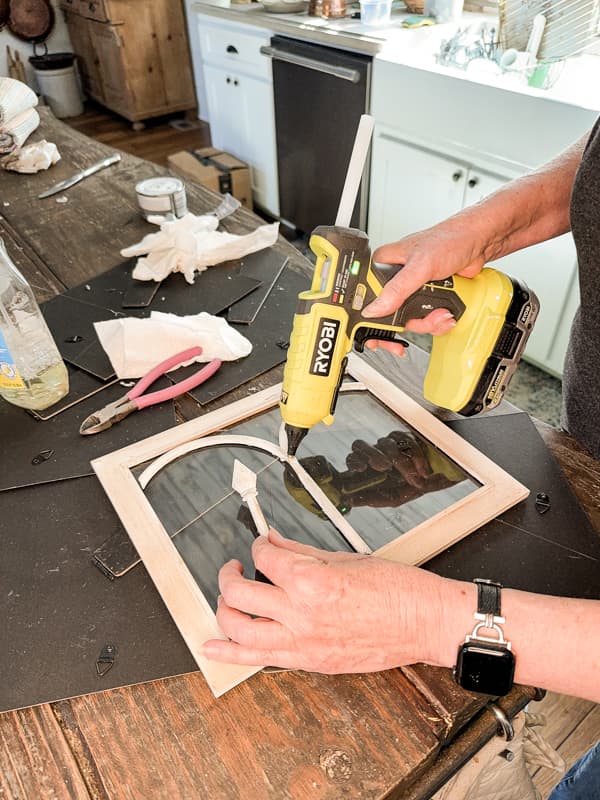
Finally, add hot glue to the center of the arch and one of the fence arrows. You will apply the embellishments to four picture frames, leaving two for the roof.
How To Build a Terrarium With Picture Frames
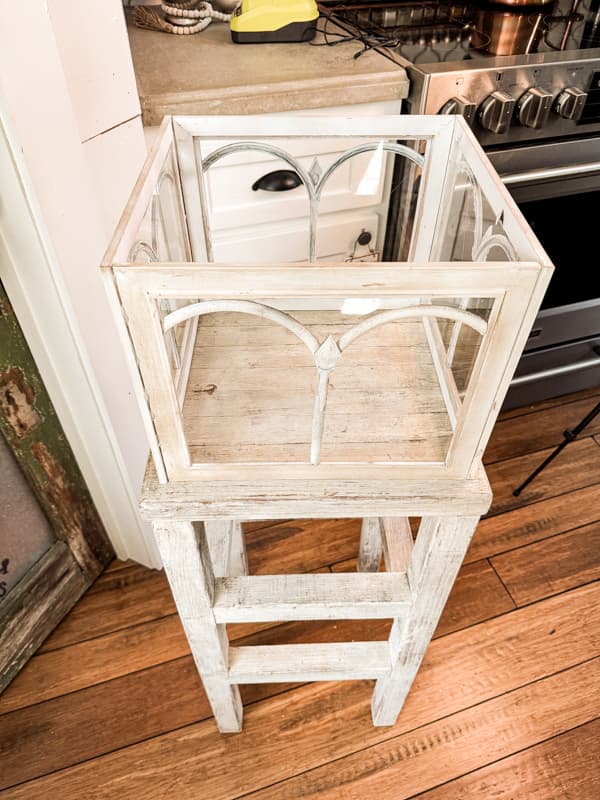
Now, you are ready to attach the picture frames. I used the 10-inch side as the base, making the terrarium 8 1/2 inches tall on the sides. Add a bead of permanent E6000 glue along the edge of the 8 1/2-inch side. Quickly apply another bead of hot glue in the same area to set quickly. Place a second frame on the glue and hold it at a 90-degree angle. Once the glue sets, add the next frame, being careful to keep everything intact. Finish with the last frame to form a box.
Be sure that the glue has dried, and then place the box on your base.
Insider Tip
I find that hot glue alone will become brittle and doesn’t withstand heat and sunlight well. If you are moving your terrarium around, the frames will become stressed. Therefore, I feel it’s important to use a permanent bonding glue to ensure the glass frames hold tight together. The hot glue dries very quickly, allowing you to complete the project, and the E6000 glue ensures that it stays together. I only used hot glue to hold the glass within the frame because it’s unlikely to be stressed like the structural frame. If you are concerned about the glass falling out, I recommend also adding a layer of permanent glue to that area.
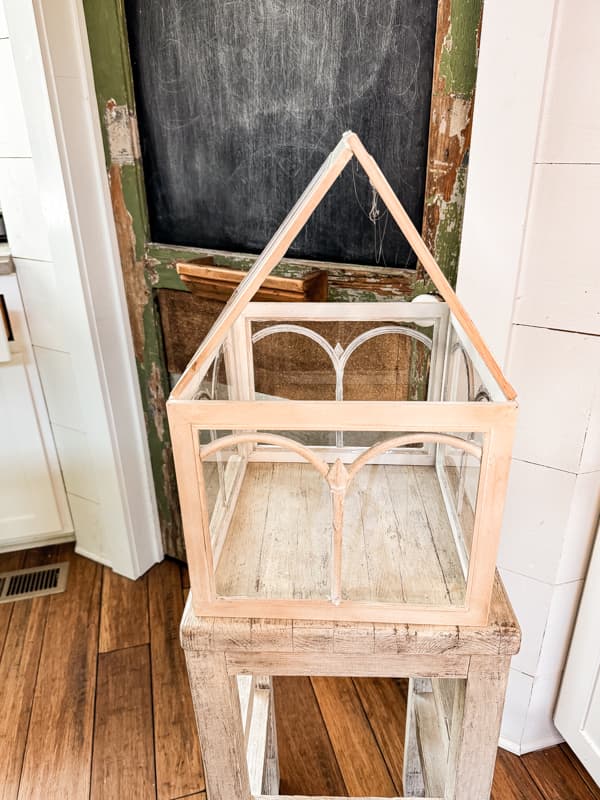
How To Add Roof to a Glass Terrarium
Now, let’s add the roof. Quickly apply a bead of E6000 glue to the top edge of one picture frame. The to the top of the frame, directly across from it. Go over the top of the E6000 glue with hot glue. Apply as quickly as possible. Then, add E6000 glue to the 10-inch edge of one picture frame, and then add a bead of hot glue on top. Place the two frames on the edges with the glue. This will be the 10-inch sides without any glue on them. Then, bring the tops of the frames together to form a peak. Be sure that they overlap where the glue was applied. Hold everything in place until it feels secure.
Insider Tip
This next part can be tricky, and you might want an extra set of hands. However, if you make sure everything is within reach and work quickly, you should be fine.
Be sure you have your two remaining picture frames (without the embellishments), your hot glue gun, and E6000 glue all within reach and ready to apply.
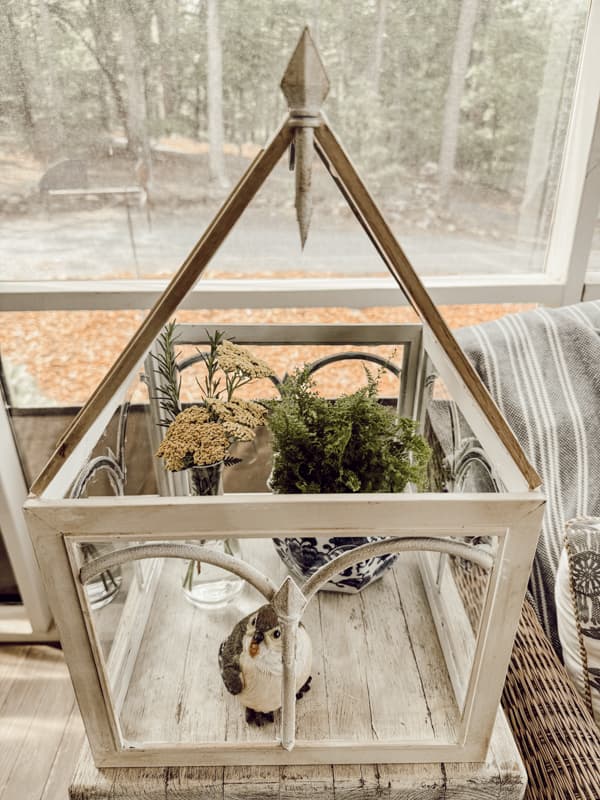
Finally, to complete the roof line, let’s add a decorative arrow here as well. Just add hot glue along the edges of the frames where they join, and press the fence arrow in place. Hold until dry.

How To Decorate a Glass Terrarium with Plants
Now, it’s time to decorate the glass terrarium with plants. The top of the DIY terrarium has a large opening that you can use to place items inside. The opening will also allow the plants to be watered as needed.
Since I didn’t add a door or hinge, I did not attach the terrarium to the base.
When adding large plants to your terrarium, you can easily remove them from the base, add your decor, and then replace them. If you plan to move your glass terrarium frequently, I strongly recommend using a strong bonding glue to ensure a permanent bond.
The wooden bar stool is sturdy and can safely hold the glass terrarium with plants without worry of tipping over.
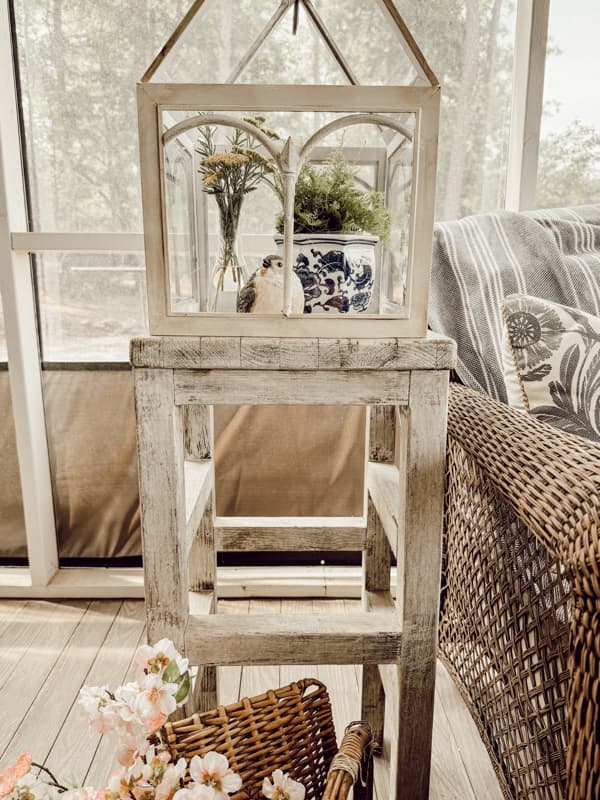
All the plants and decor look amazing inside the mini glass structure, adding a stylish decorative touch to the screen porch.

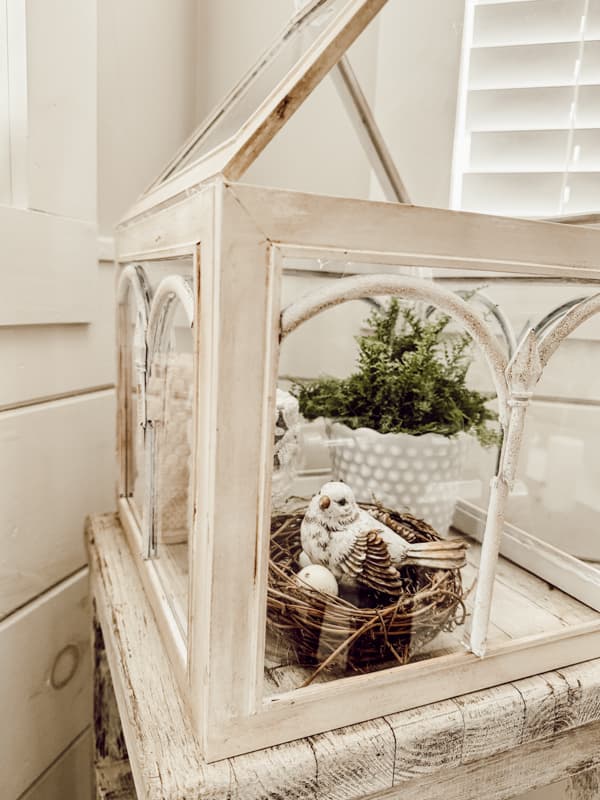
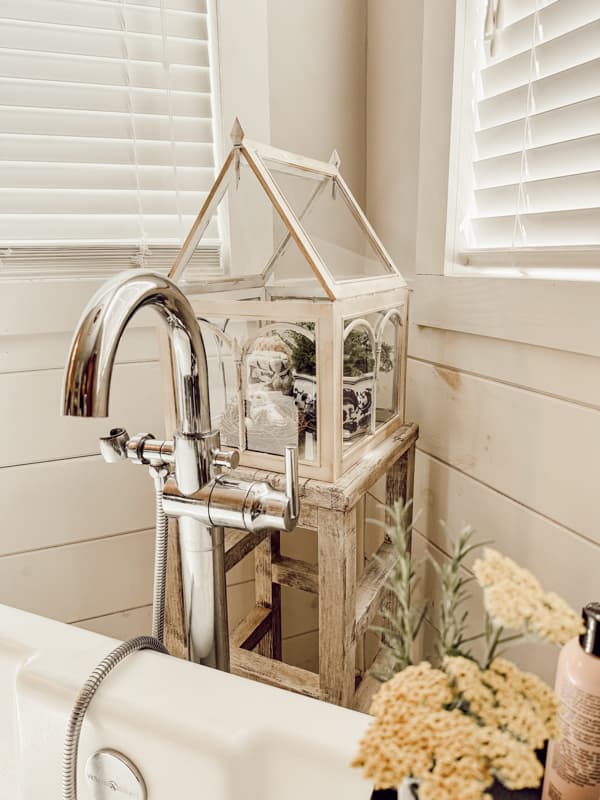
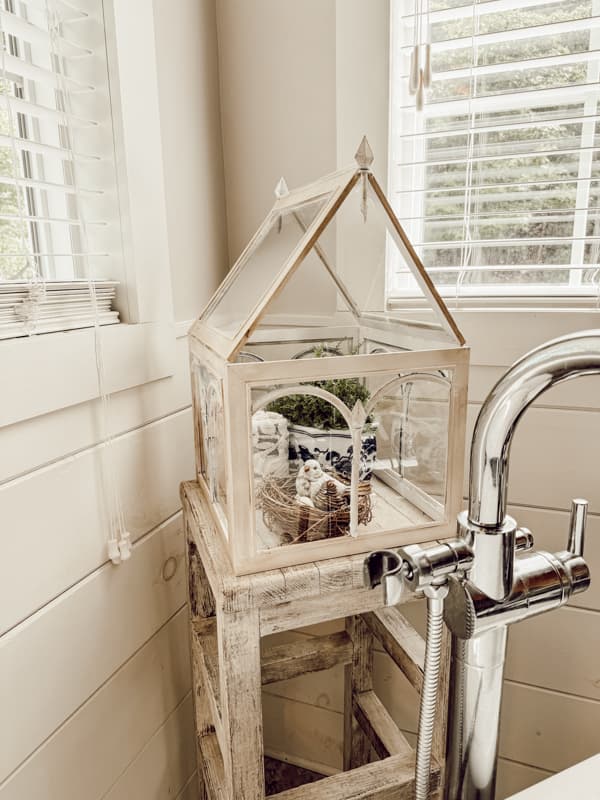
However, if you don’t want to use the DIY terrarium on a porch, it also looks great inside. I decided to try it in the bathroom and love it here as well. I tucked a few bath towels in with the fern and a bird nest.
The total cost of the DIY terrarium was only $25.00, much better than the $256 inspiration piece. Due to drying time, the project took two days to complete, but the total work time was only 2 1/2 hours. That’s not bad considering the savings, and I think I like my version better than the original. What do you think?
Related Articles
- Rustic Candle Lantern: Easy DIY Dollar Tree Project Under 3.00 – Ballard Design Knock-off
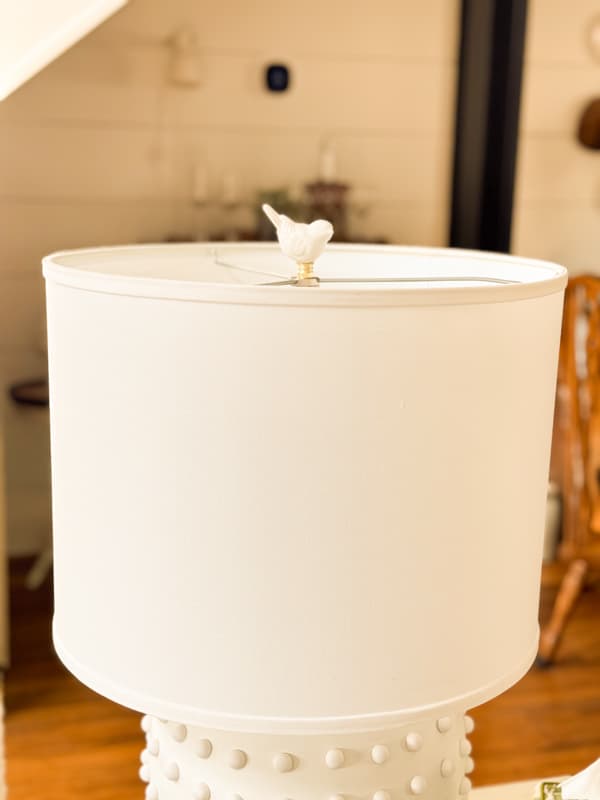
- Create a Textured Lamp with Faux Hobnail Design – Ballard Design Look Alike
- DIY Anthropologie-Inspired Decorative Trays On A Dollar Tree Budget
- Craft Your Own Blooming Spring Wreath: Rustic Upcycled Charm – Anthropologie Knock-Off
- How To Make A DIY Metal Wreath: A Trendy Anthropologie Hack
- Cheap and Easy DIY Pottery Barn-Inspired Basket Tray Tutorial
- How To Make DIY Tropical Napkin Rings Dupe For Less Than $5.00
- DIY Leaf Napkin Rings Pottery Barn Style
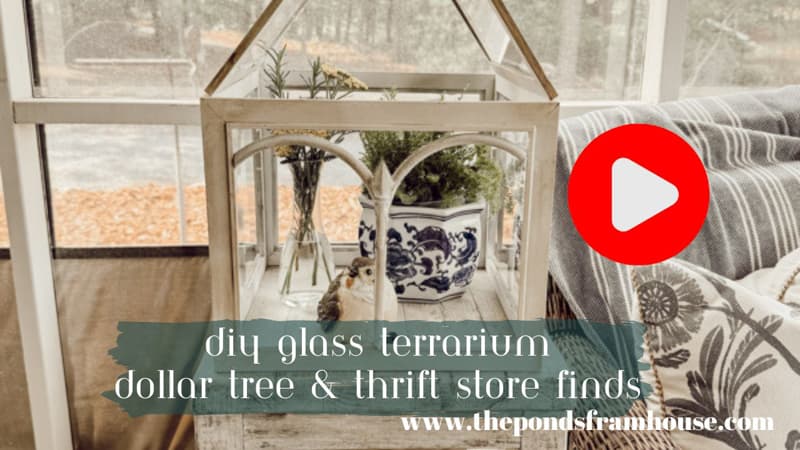
Video
Resources
Click the image below to see the craft supplies used for this project.

Pin It To Remember It
Did you find some great ideas you’d like to save for future reference? To save, hover over the images and pin to your favorite Pinterest Boards when you see the PIN button in the upper left-hand corner.


Rachel you are so creative. Your terriaum is lovely, just think of all the decorating possibities.Im thinking of your cute reindeer from Christmas…Endless..lol.
Lorri,
I know! They would be great inside the terrarium. Thanks for thinking of that. have the best weekend.
Rachel what a cool idea!
Stacy,
I’m glad you like it.
I love this! I’ve been wanting to do something like this for awhile & this is inspirational. Pinning! Have a great day. XO- MaryJo
MarJo,
Oh thank you so much. I’m so glad you like it.
Rachel, this is gorgeous!!! Pinned
Cindy,
I’m so glad you like it.
This looks like something straight out of Pottery Barn. Actually, it’s way cuter! Thank you for sharing it with us on Farmhouse Friday. Featuring it tomorrow. Love it! pinned
Cindy,
You are so generous with your features. Thank you so much.
This is brillant! Love it!
Sherry,
I’m so glad you like it. Thanks for your sweet comment.
Rachel, I love your glass terrarium! You are so amazing with all your DIY’s! Thanks, so much, for sharing. By the way, I like the one you made so much better! I love the one you placed behind your antique tub. That little bird in its nest is so cheery — just makes you happy when you look at it. Now I just have to pick up a few more supplies and then get to work. I hope my glass terrarium turns out as cute as yours, Rachel! I don’t think I can do anything wrong with the wonderful instructions you gave us.
Mary Ann,
You are so kind and I hope your’s turns out stunning. Have a blessed Sunday.
Hello Rachel. I’ve been following you here and absolutely love all of the “goodness” that you share. Thank you. I’m also so sorry to hear about your cancer. You don’t deserve what’s been placed in front of you. You give to everyone weekly with your kind words. I will pray for you and know that you will always be in my heart.
Taina,
Thank you for your kind words. I appreciate you for following along and appreciate your prayer and well wishes. I plan to be sharing more ideas for years to come. I am blessed with many prayers and support from so many like yourself. I hope you have a blessed week.
Thank you for the inspiration! I made one but all black. Fun and easy project! It matches my hoop and spear real fence!
Leah,
That sounds beautiful. I’d love to see it. If you send me a photo, I’ll share it on my DRA on Sundays! You can email it to [email protected]. Thank you for sharing. Have a blessed week.