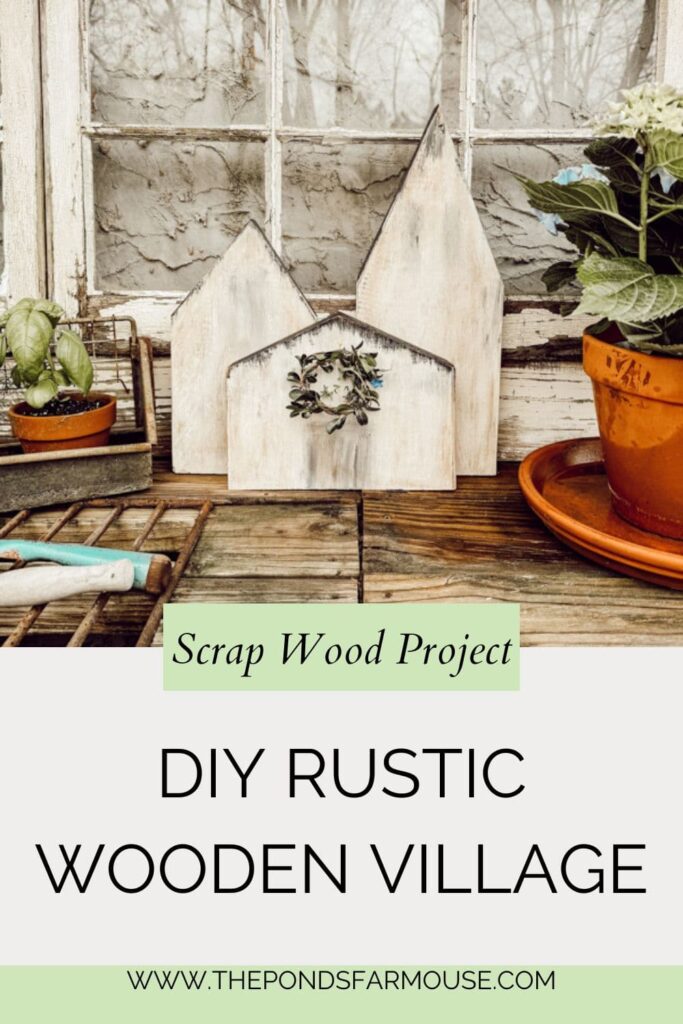
DIY Scrap Wood Rustic Village: Budget-Friendly Craft
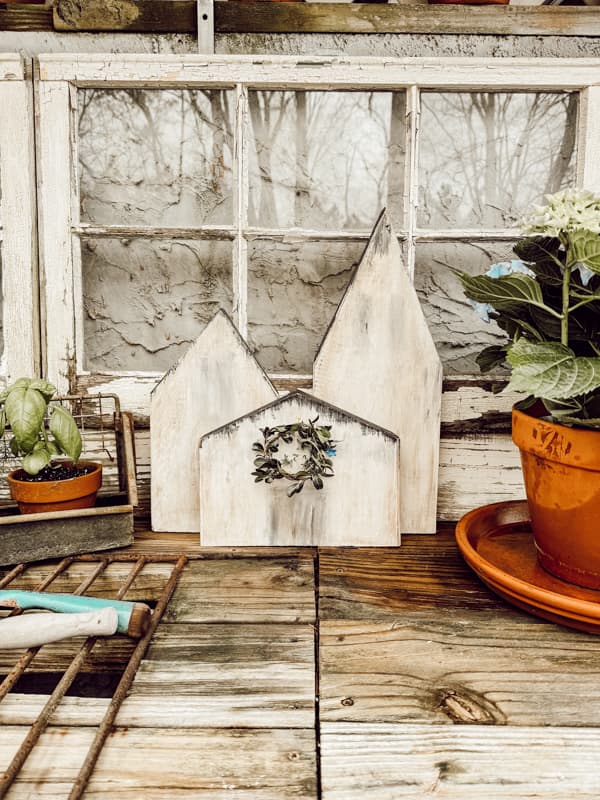
Looking for creative ideas to upcycle that pile of scrap wood taking up space in your garage? Wait until you see how you can turn that stash into a rustic wooden village. Free up your storage space with this easy-to-follow, budget-friendly tutorial. The primitive village is perfect for spring and summer decorating on porches, potting benches, or garden tables. Then, bring it inside for fall and winter decorating. It’s a simple craft project that you can make in an afternoon and decorate with it year-round.
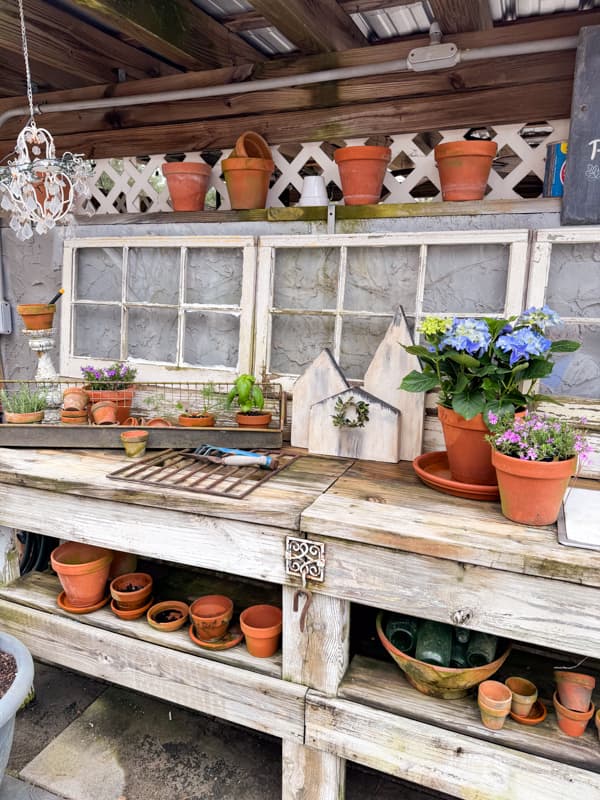
My vision was a rustic garden village to decorate the potting bench. However, after completing the project, I can see this fun village used to style vignettes all around the farmhouse.
Even a beginner can make this easy DIY project, so grab some scrap wood, and let’s get started.
(Posts on The Ponds Farmhouse may contain affiliate links. As an Amazon Associate, I earn from qualifying purchases. See the full disclosure details here.)
Table of contents
Scrap Wood Rustic Wooden Village
The great news about this DIY scrap wood wooden village is that you can make it any size you desire, and there is no limit to the number of pieces you add. Use any scrap materials you have on hand.
I’ll share the items I used to create the village but keep in mind anything goes.
Supplies
- Scrap Wood: I used 2-inch thick boards that were left over from another project.
- Black Craft Paint
- White Chalk Paint
- Dark Wax
- Clear Wax
Tools
- Miter Saw (however, for smaller wood pieces, you can use a jig saw, bandsaw or circular saw)
- Sanding block
- Paint Brush
- Ruler
- Marker
- Tack Cloth
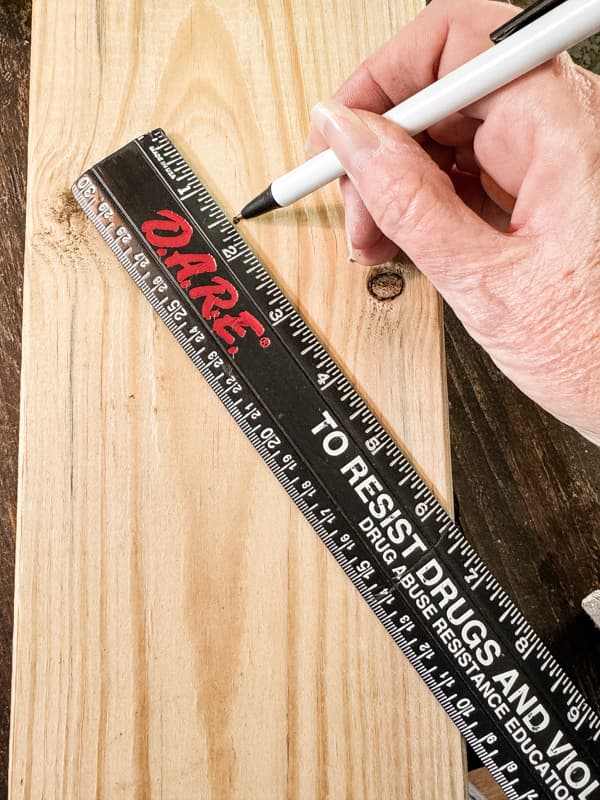
Trace Your Designs
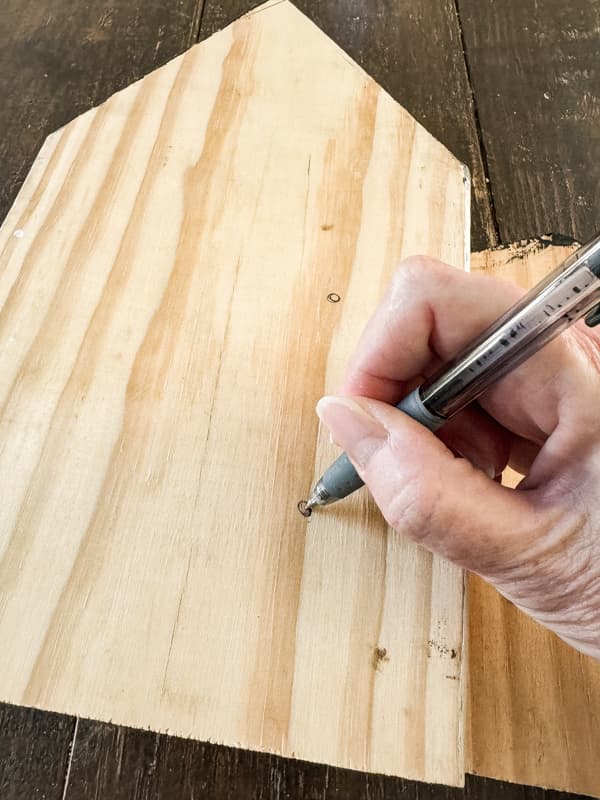
Begin by tracing the roof lines of each house. I recommend beginning with a board that is cut straight across at the bottom. Then, measure up from the bottom to determine the height of the house.
First determine the center of your roof. Then use a ruler and marker to draw the roof line. Measure from the bottom and mark where the end of the roof line will be on both sides.
I recommend using different heights and roof pitches to make your village more interesting.
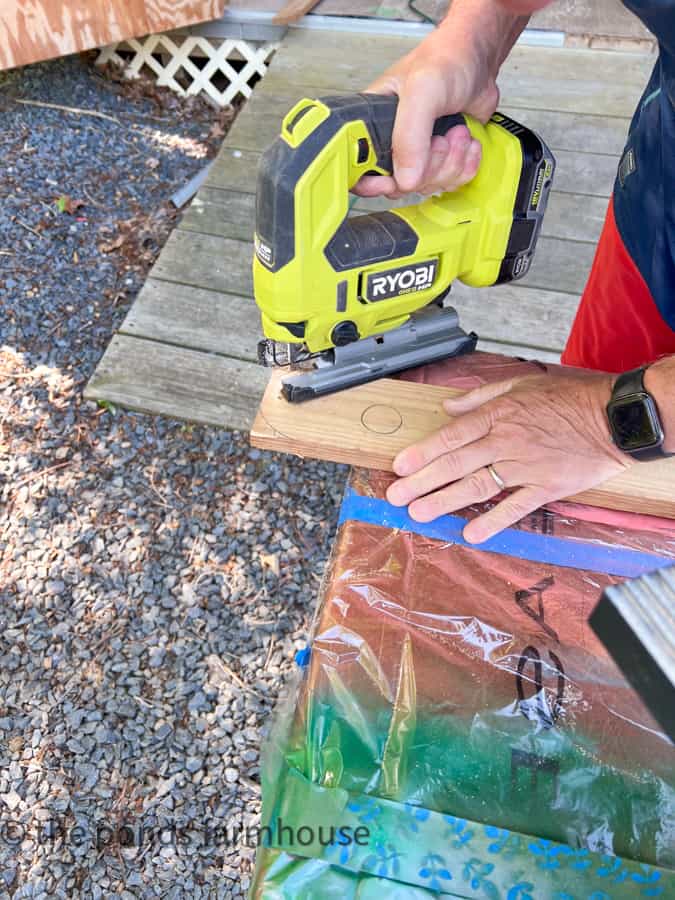
Cut Roof Lines
We used a miter saw to cut the roof lines because it was quick and easy. However, if you plan to add a chimney, you will need a jig saw, circular saw, or bandsaw to cut more intricate details.
Sand the edges until smooth. Remove any sawdust with a tack cloth.

How To Paint Rustic Wooden Village
Now you are ready to paint your wooden village. There are many options, from staining the wood to painting details on the houses. However, I wanted a primitive village, and here’s how I painted the scrap wood village.
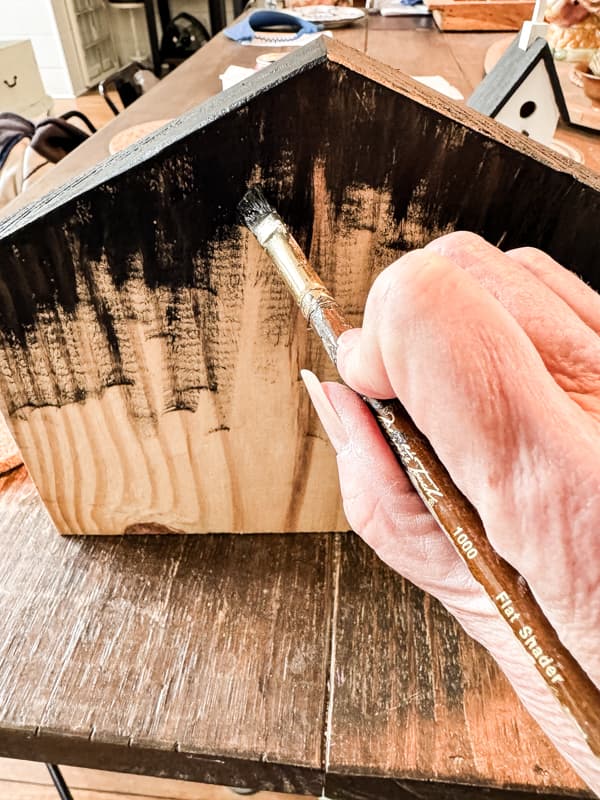
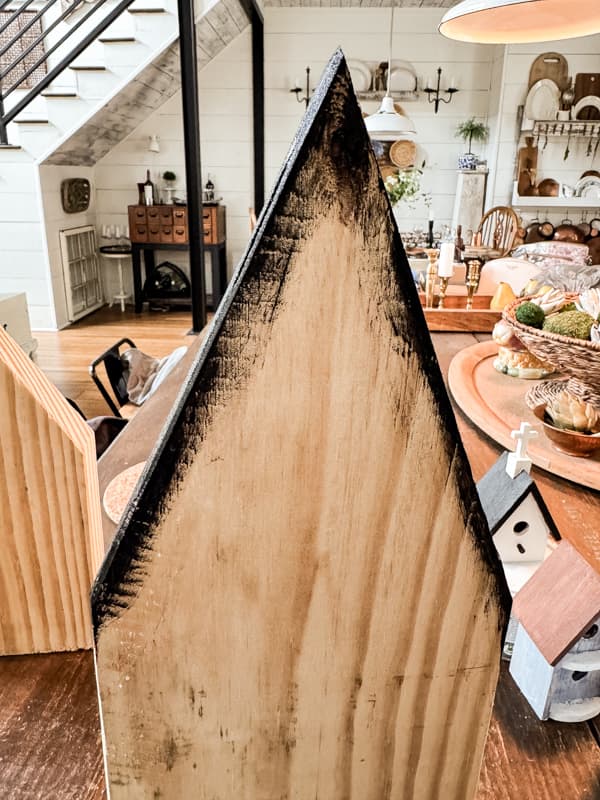
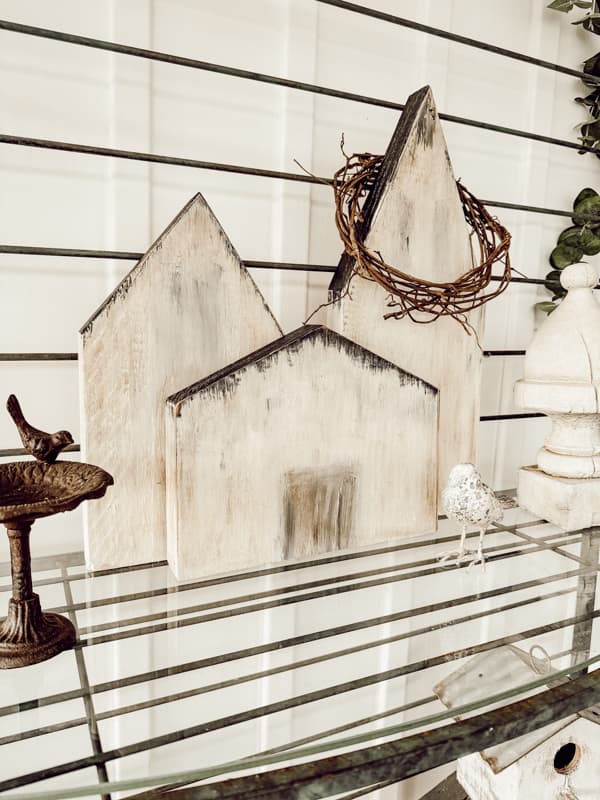
First, paint the tops or roofs with black craft paint. Allow the paint to bleed down from the roof onto the front of the wood.
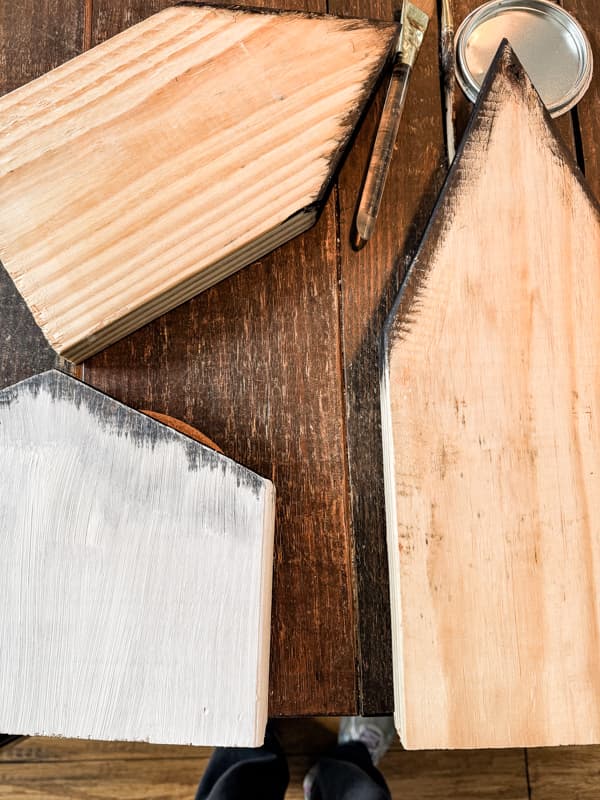
Use your imagination to create a primitive paint finish. I added more black paint to one of the roofs than the others. In addition, I added the illusion of windows and doors by applying small amounts of paint where they might have been.
Next, paint the front of the wooden village with white chalk paint. Begin at the bottom of the boards and allow the paint to thin as you get to the top.
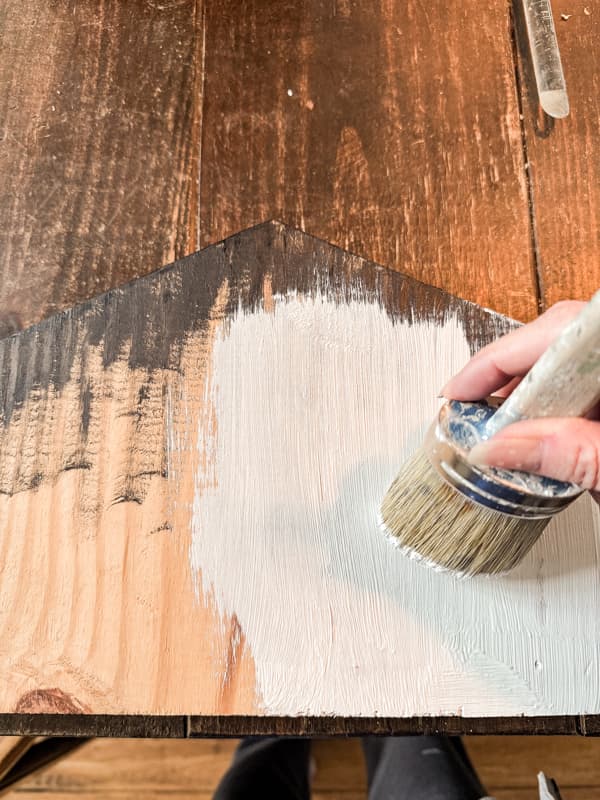
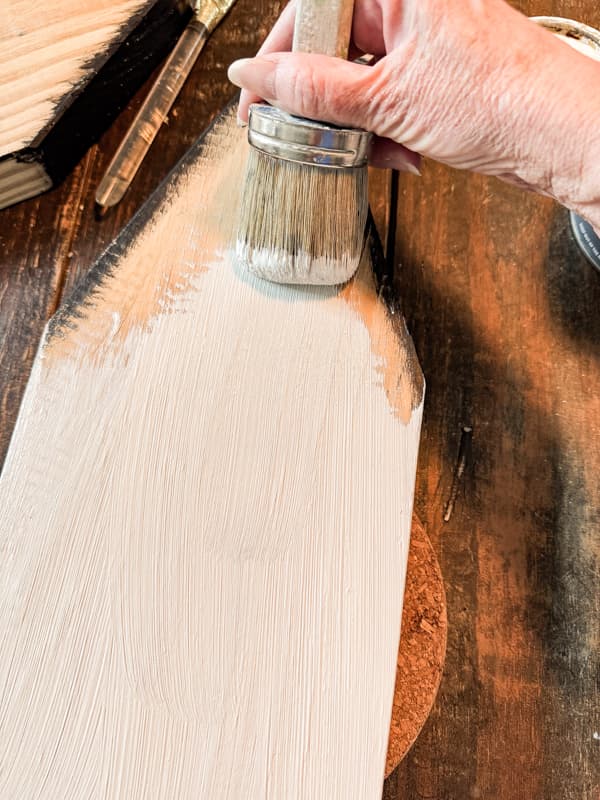
When the paint is dry, use a fine-grit sanding block to rub away more of the white paint from the houses’ edges. Remove any dust with a tack cloth.
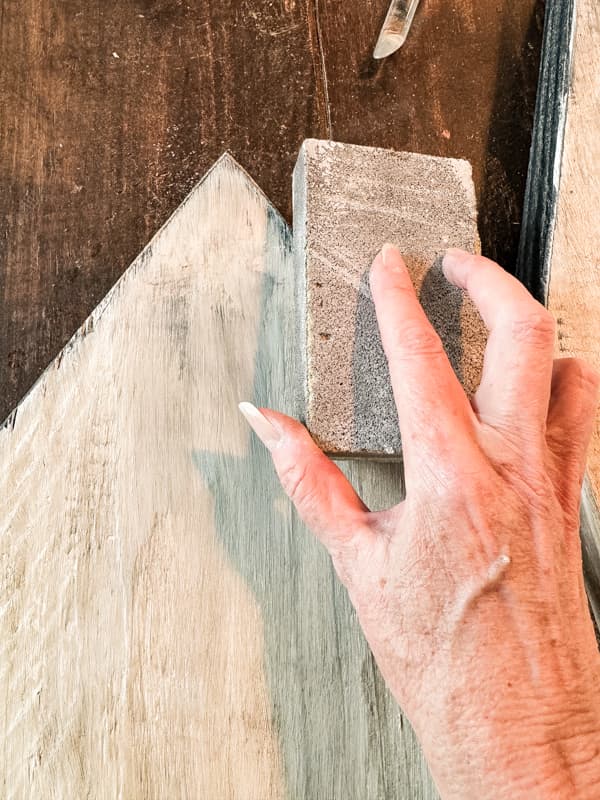
Finally, apply a mixture of clear and dark brown wax to the village pieces’ surfaces. Buff the wax for a matte, smooth finish.
Insider Tip
If you plan to display your wooden village in the center of a table, you will want to finish both the front and back sides of the houses.
I plan to display this scrap wood village against a wall or the back of the table, so I left the backside bare.
How To Display Your Scrap Wooden Village
How you are ready to display your scarp wooden village. You once again have some options.
Connect Village Pieces (Optional)
If you used thin boards, you should connect the village pieces together. Arrange your village the way you want to display it. On the backside, trace around the pieces so that you know the position of each. Determine where the screws should be placed and mark those areas also.
Use short wood screws to attach the wood pieces where they overlap. Be sure to use the correct screw length to avoid damage to the fronts of your village houses.
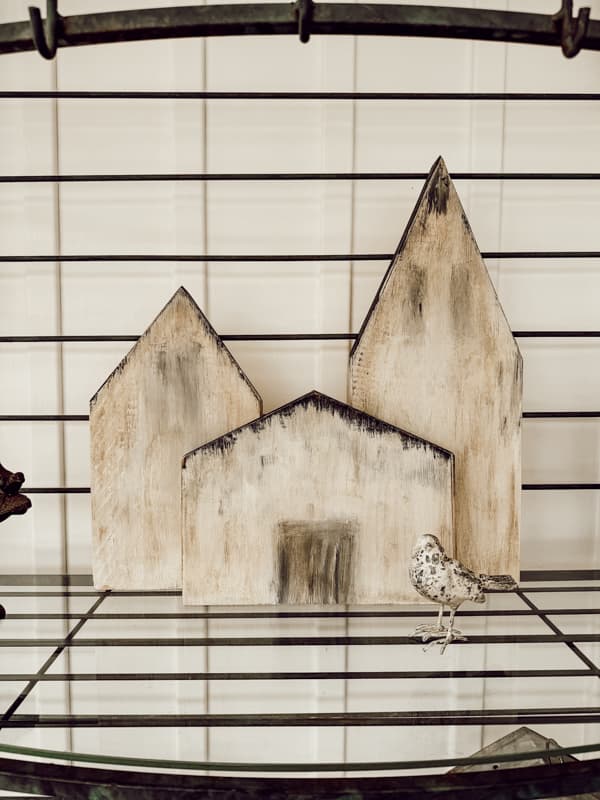
Because I used two-inch thick boards, they will stand without being attached. This allows more flexibility because they can be arranged to fit any area. In addition, more scrap wood houses can be added if desired.
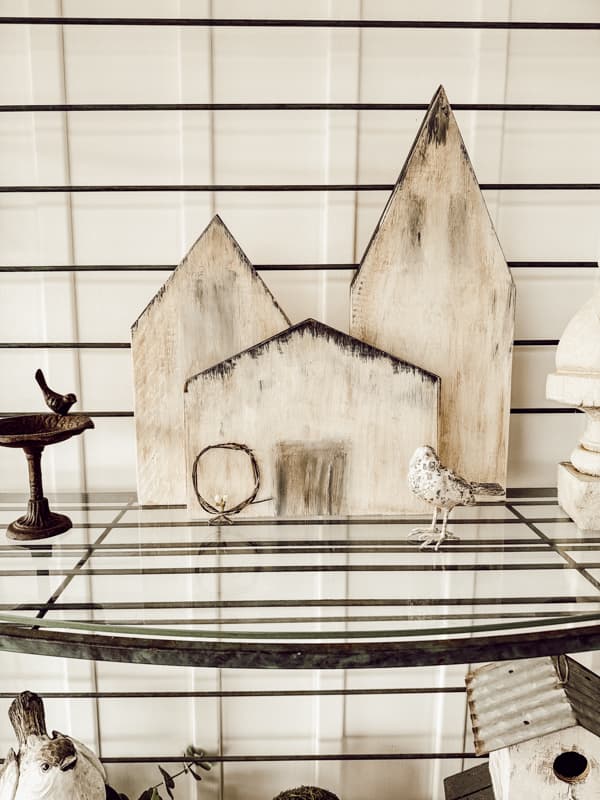
I played around with several styling options, from adding a wreath to the front house to tossing a grapevine wreath around the tallest house.
The village looks great on the screen porch baker rack, so it may stay here for a hot minute.
It also enhances the potting bench, so who knows where it will end up. LOL
Resource
Here are some of the resources used for this project.
Additional Projects You May Enjoy
In case you missed some of my other DIY projects, here are a few you may enjoy.
- Reclaimed Wood Herb Drying Rack
- Easy Flower Press from Scrap Wood
- 9 Best Upcycled Project Ideas
- Repurposed Shelf Accent Wall
- How to Upcycle Old Book Pages for Magical Christmas Village
I hope this gave you some ideas for upcycling and repurposing old scrap wood.

Pin It To Remember It
Did you find some great ideas you’d like to save for future reference? Hover over the images you’d like to save and pin to your favorite Pinterest Boards when you see the PIN button.


I love this idea, Rachel! I have a space above my fridge that used to be a cabinet (that nobody could reach to make it actually usable). I took off the doors and installed lights in the back of it that come on at dusk on a timer. This would be a GREAT way to decorate it, as the backlighting would create a silhouette effect. I’m on my way to the scrap pile right now!
Frances,
I’m so glad you found this useful. Let me know how it turns out.
I use some of my scrap wood with napkins and decoupaged rabbits and Easter eggs from napkins on to them set them up in my kitchen cabinet with glass where the glass it shines through the glass I wish I knew how to take pictures and send to you but I don’t
Eva,
That’s wonderful. I’d love to see them. Thanks for sharing.
I adore all things that are like houses or small villages so this is fantabulous in my book! And the paint is perfect. Love it! pinned
Cindy,
I am so glad you like this. Thank you.
Rachel,so you are saying my hoarder tendencies for all my pieces of wood is perfectly fine? Lol!! I love this idea and will be doing this with some of my scrap wood. I love your greenhouse and drool everytime you post puctures of it.
Lorri,
Yes! You can always find a use for even the smallest pieces. Although my husband disagrees. LOL