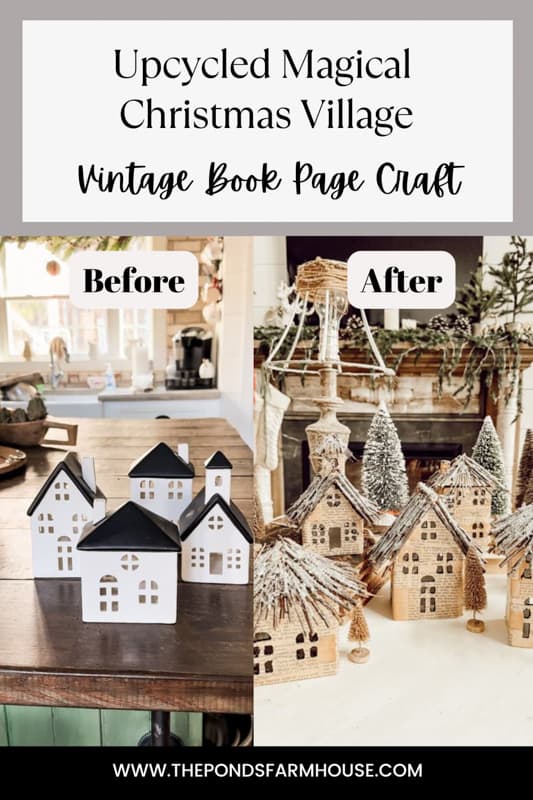
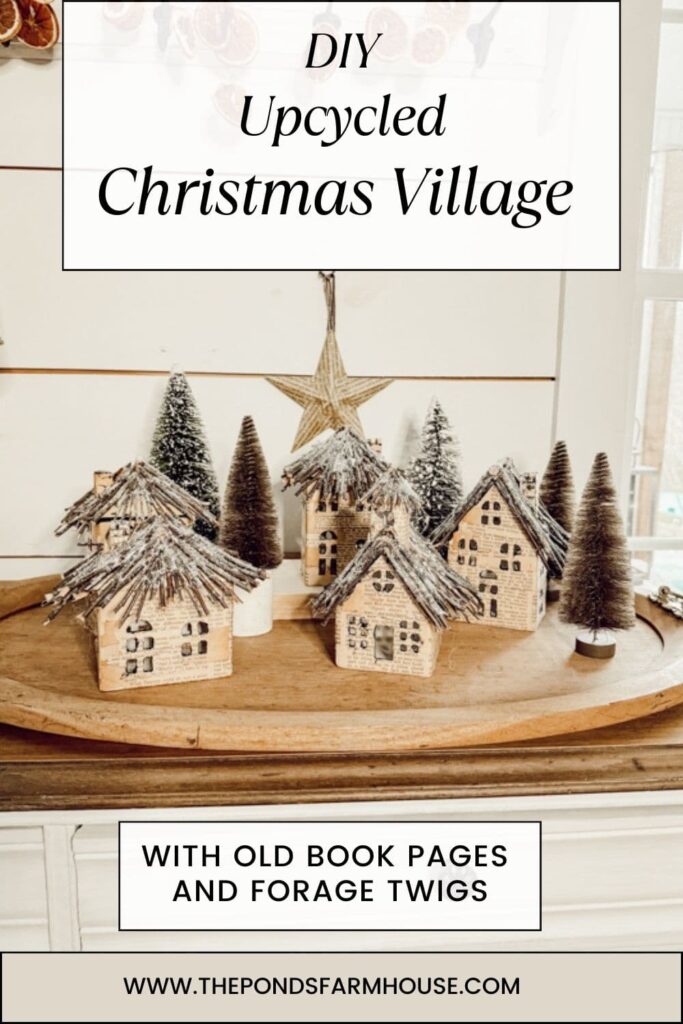
How To Upcycle Old Book Pages Into A Magical Christmas Village
Do you love a magical Christmas Village displayed for the holidays? If so, you will love this idea for Upcycling Old Book Pages into a unique, vintage-style, old-world DIY Christmas Village display. You’ll never believe it’s made from inexpensive ceramic Christmas houses from Target. I know you will love this fun old Christmas decor transformation.
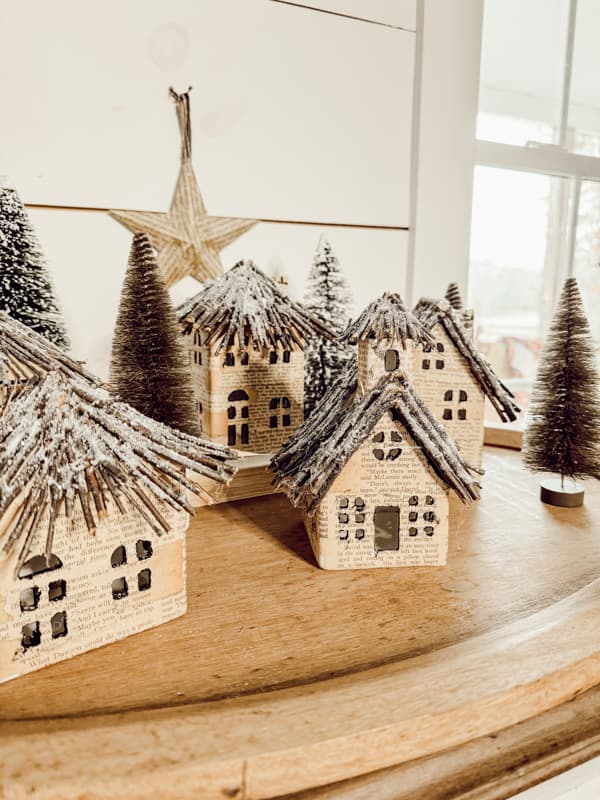
Instead of the shiny ceramic Christmas Village, I envisioned thatched-roof homes with tattered siding nestled in a snowy English countryside.
I hope you like my old-world DIY Christmas Village Display.
(Posts on The Ponds Farmhouse may contain affiliate links. As an Amazon Associate, I earn from qualifying purchases. See the full disclosure details here.)
What is A Christmas Village Display?
The tradition of displaying miniature Christmas Villages began in the 19th century. FW Woolworth began selling paper houses and other items from Germany. Now, there is a wide array of ceramics and porcelain available to collect and create festive Christmas Village settings around your home.
Cardboard, paper, wood, and metal mini-houses are also popular materials, especially for DIY Christmas Village Displays.
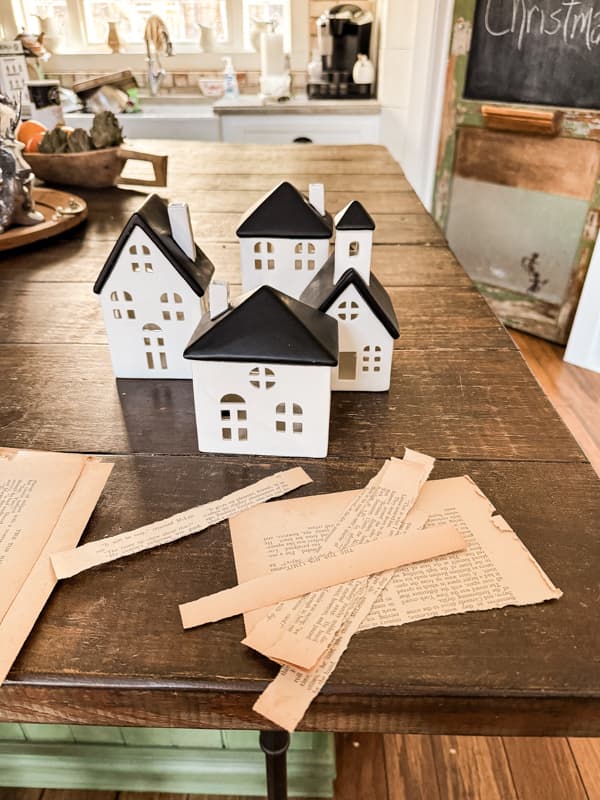
Ceramic Christmas Village
Several years ago, I purchased several ceramic Christmas village houses and buildings from Target. With a more rustic, vintage style this year, I felt the white and black mini-houses didn’t work with my decor. Wishing I had an old-world vintage-style village, I began to reimagine the inexpensive ceramic houses, and here’s what I did.
DIY Upcycle Old Book Page Christmas Village
Y’all know that I love to upcycle old books into unique styles of home decor. As I was packing the ceramic village away, I realized they could be repurposed by decoupaging them. I knew that by using old book pages and gathered twigs, I could create the cozy English countryside village of my dreams.
Gather Supplies
First, you will need some old book pages that are yellowed with age. If you don’t have a book that’s falling apart, you can use new pages and age them with coffee or tea. I thought about using pinecone scales for the roof but later decided that twigs would give the houses a thatched roof appearance.
Here are the supplies I used to transform these plain ceramic houses.
- Several old book pages
- Gathered Twigs ( small twigs will work best)
- Mod Podge
- Exacto Knife
- Hot Glue Gun
- Finger Protectors
- Pruning Shears
- Small Paint Brushes
- Black Craft Paint
- Elmer’s Glue (optional)
- Scissors
- White Glitter (optional)
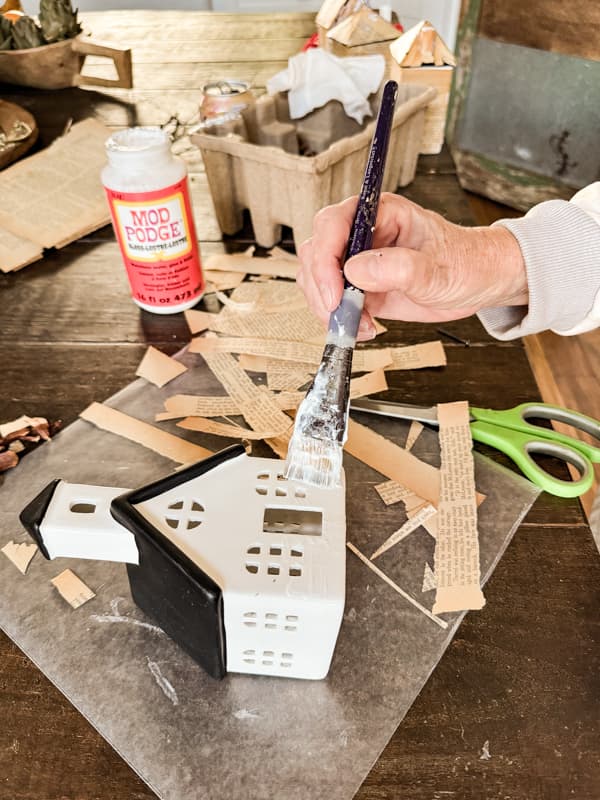
Decoupage The Mini-Houses
The first step is to decoupage the mini-houses with Mod Podge and the old book pages.
Begin by tearing the old pages into strips approximately 1/2 – 1 inch wide. You should determine the width based on the size of your house.
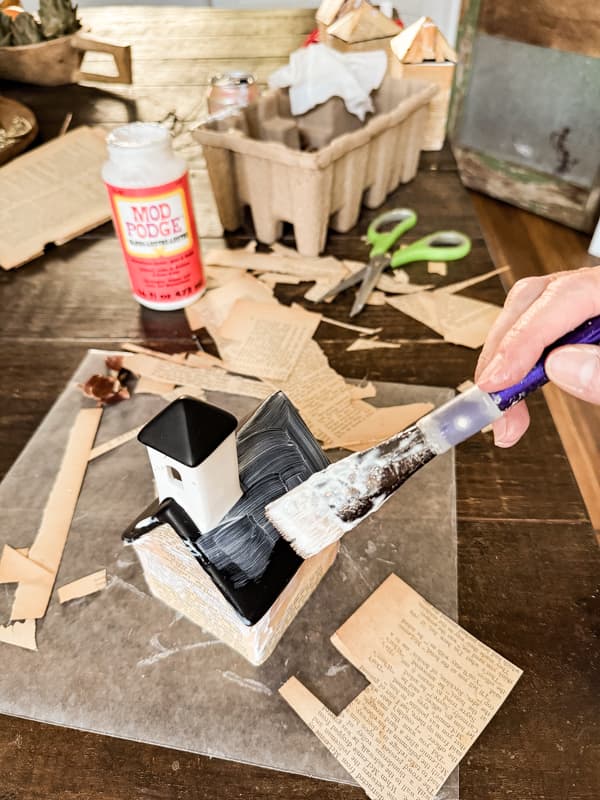
Apply using a small paint brush to the houses and buildings in small sections at a time. Place the strips of old book pages on the glue area to adhere. Add another coat of Mod Podge over the top of the paper.
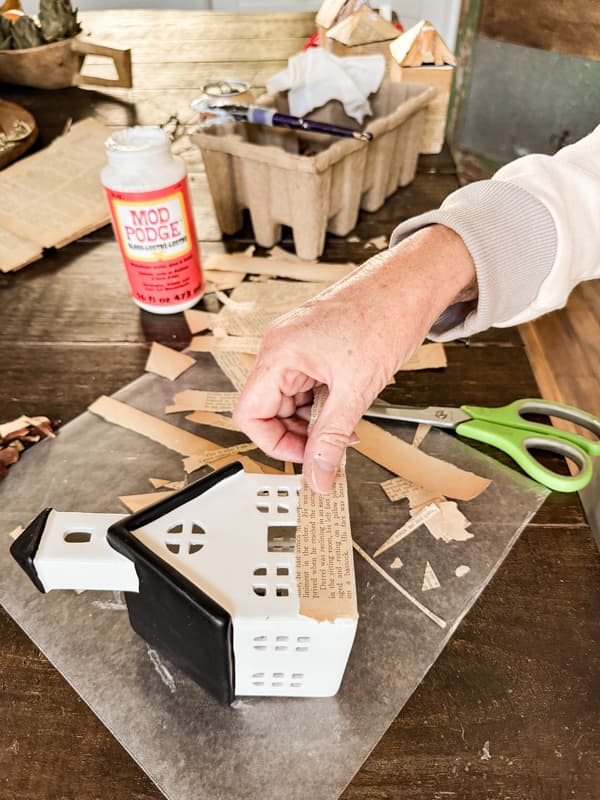
Continue to layer the strips of paper, allowing each layer to overlap until the houses are covered.
Note: You will be covering the windows and doors, so take a photo of each building before adding the book pages so that you can locate the openings.
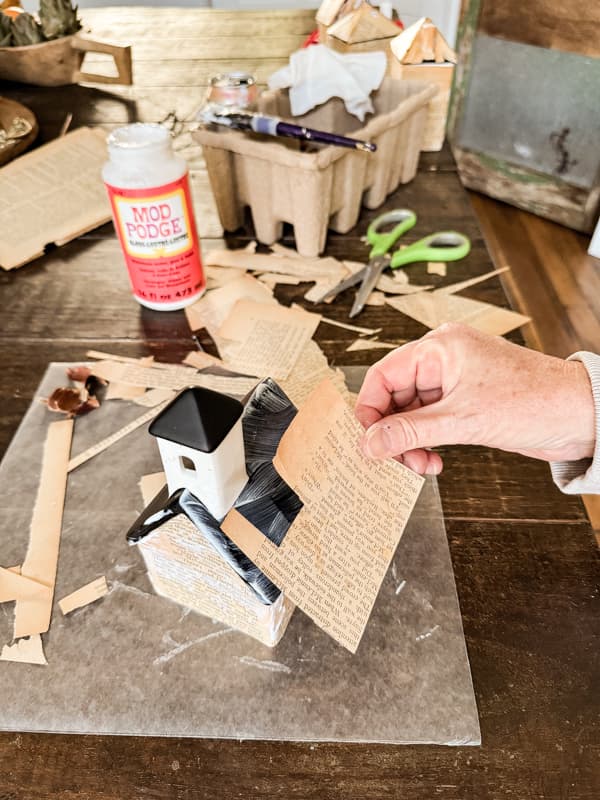
How To Cover The Roof
Now, you are ready to cover the roofs of each Christmas Village mini-house with the same old book pages.
Begin by adding a coat of Mod Podge to the roof and cut the roof shape from the pages.
Brush another coat of glue over the top of the paper after it is applied.
Insider’s Tip
When decoupaging with old book pages, I found that you want to saturate the pages with lots of Mod Podge. Apply a liberal coat on the surface of the tiny houses, and then apply another generous coat over the top. You want the paper to absorb a lot of glue so that it doesn’t peel away from the village houses.
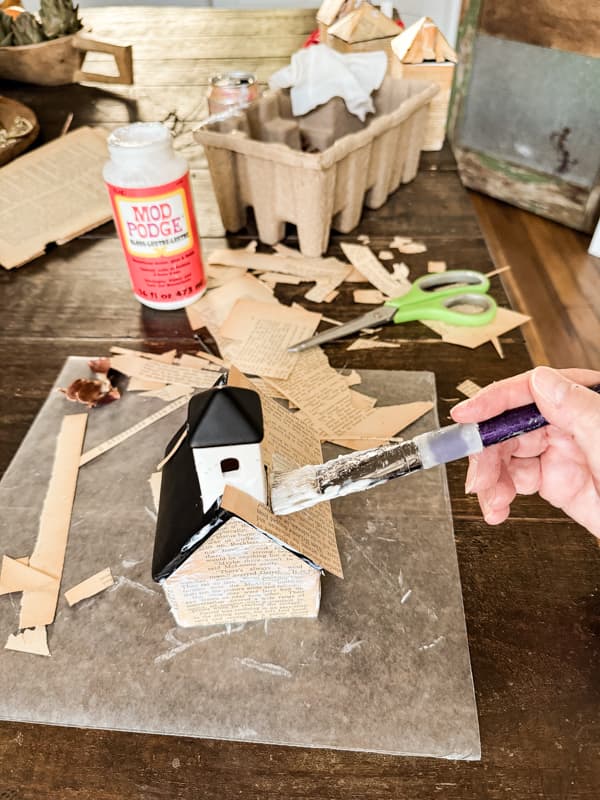
Be sure to cover all surfaces, including the chimneys and church steeple, with the decoupage.
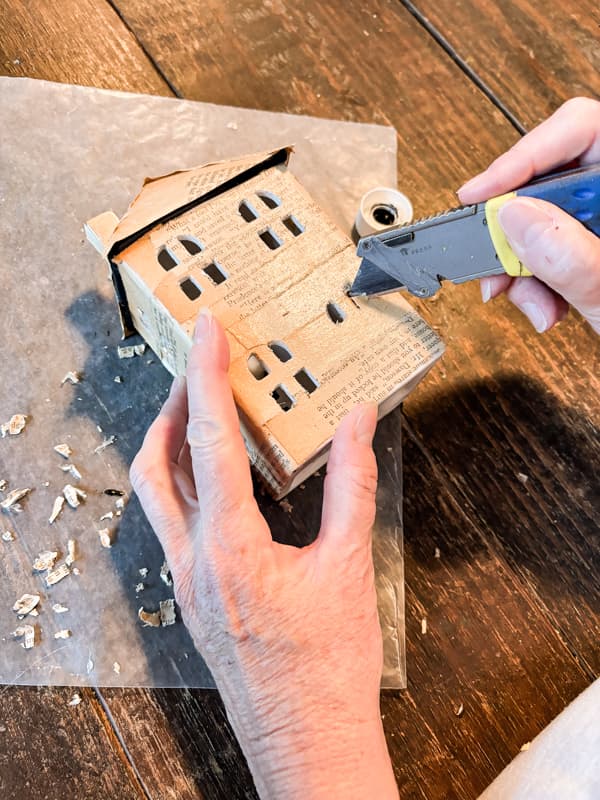
How To Cut Out Windows and Doors
Once you have all the pieces covered in decoupage and the paper is dry, you can begin to cut out the doors and windows.
This was a trial and error-process for me, and I tried two different techniques. Plus, I had a little problem.
First, I couldn’t find my exacto knife, and I was ready to open those doors and windows. So, I found a sharp utility knife in Brad’s stash and used it. I think the project would have gone much better if I had used an exacto knife, but as I’m very impatient, the box cutter did the trick.
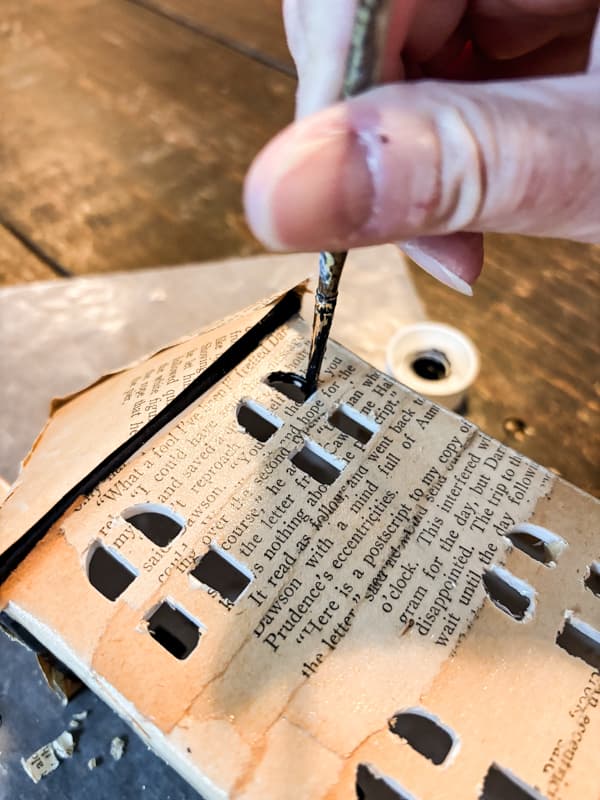
The second issue was the excess glue got into the openings as I was brushing the Mod Podge. Although the outside of the Christmas Village was dry, the areas inside were still filled with wet glue.
Using the box cutter, I opened the areas while the glue was wet. It was very messy, and I had glue all over my hands.
After a few were finished, I decided to let them dry overnight.
The next day, I began with the utility knife and found that although it wasn’t as messy, it was actually harder to cut the openings with the glue dry. With the Mod Podge dry, it was necessary to scrap the insides of the openings to remove the build-up.
However, it all worked, and I really wish I could find my exacto knife. LOL
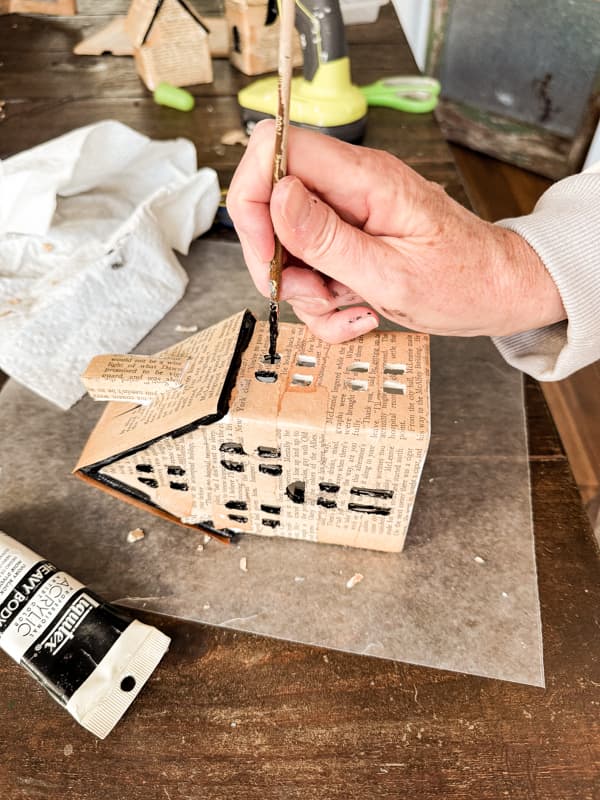
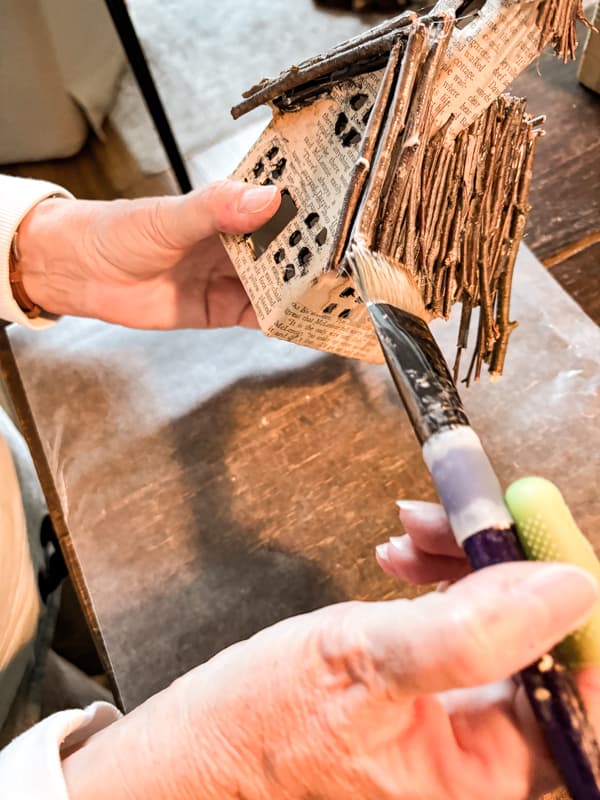
Add Paint To DIY Christmas Village Display
You may or may not need to complete this next step for your DIY Christmas Village Display.
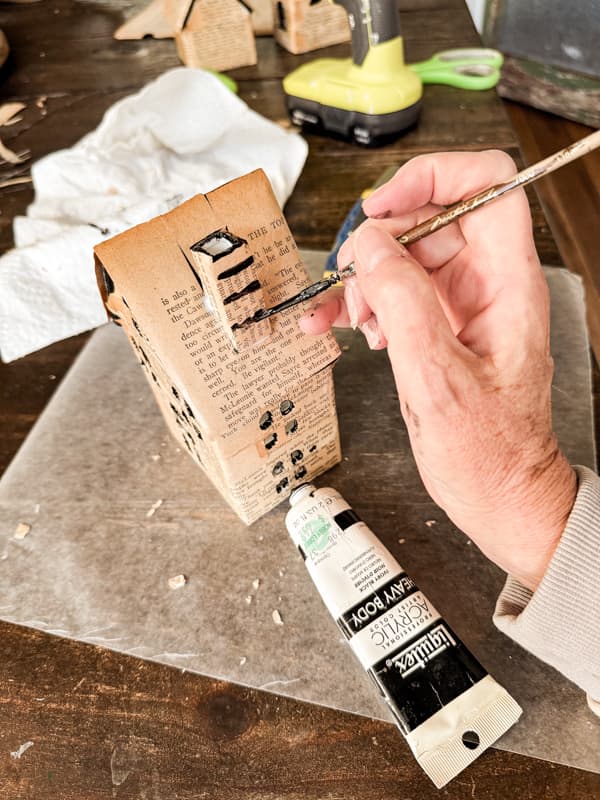
The ceramic Christmas Village is white, and once the doors and windows were open, I didn’t like the white with the old book pages. Therefore, I used black craft paint to cover the white area just inside each opening.
Using a very small paintbrush, apply black paint. Since the Christmas Village is rustic, I didn’t worry if the paint got on the paper.
In addition, you can add paint to the chimney top and paint lines to look like brick if you choose.
How To Add A Thatched Twig Roof
Finally, you are ready to add the twig roof to the DIY Christmas Village Display.
Gather several twigs in a variety of sizes. You will want to cut them to size as you go.
I wanted the roof to have a good overhang, so I let the twigs extend beyond the roof edge.
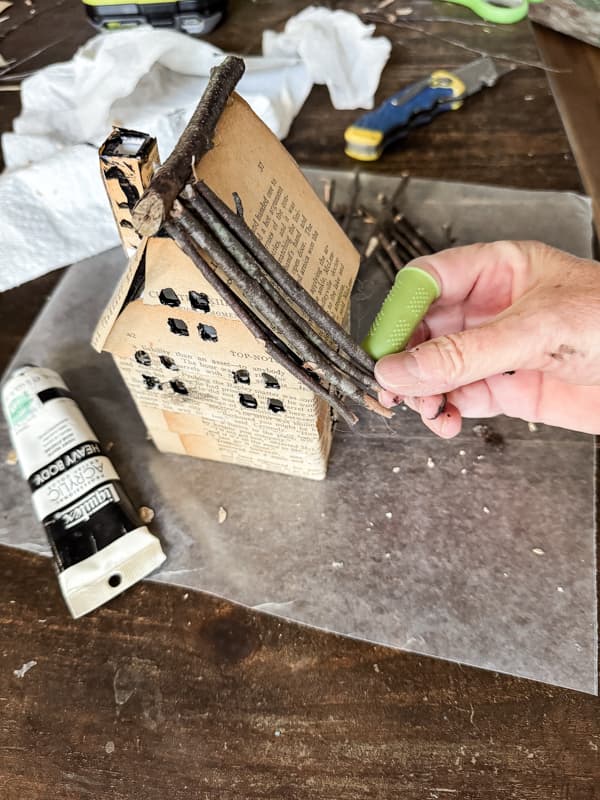
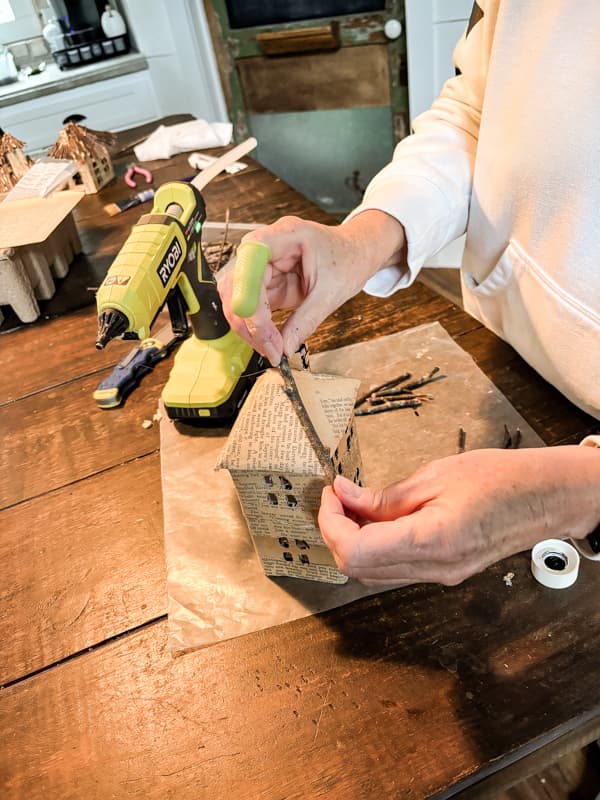
To apply, add a bead of hot glue to the area where you are adding the twigs. It’s best to apply the glue one piece at a time, as it dries very quickly.
To avoid injury, I recommend wearing finger protectors.
Continue adding twigs until the roof lines are covered. Save some of the smaller twigs to fill any gaps between the twigs.
Optional Snowy Roof
If you would like to give your DIY Christmas Village Display a snowy look, add some white glitter.
First, brush the twig roof with Elmer’s Glue, then sprinkle it with glitter.
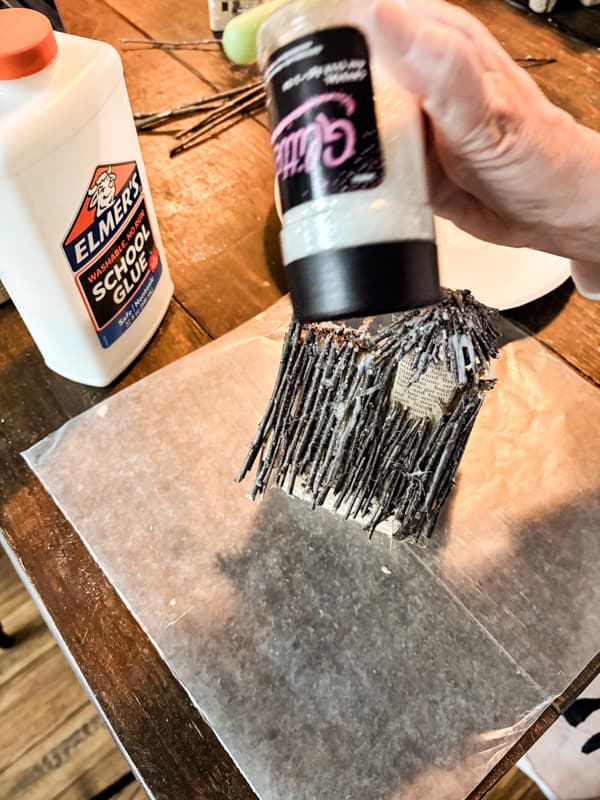
You can add as much glitter as you desire. Once you are finished sprinkling glitter, turn the houses over and shake the excess onto your prepared surface. You can add the excess glitter back to the container.
Another option for adding snow is to use this DIY Faux Snow Technique.
Christmas Village Display Ideas
Now that you have your magical Christmas Village upcycled, let’s look at some display ideas.
Where would be the perfect spot for your transformed Christmas Village setting? Here are a few Christmas Village Display Ideas and places where I tested my rustic village.
First, I added a few bottle brush trees and added the village to an oval wooden tray on my entry table.
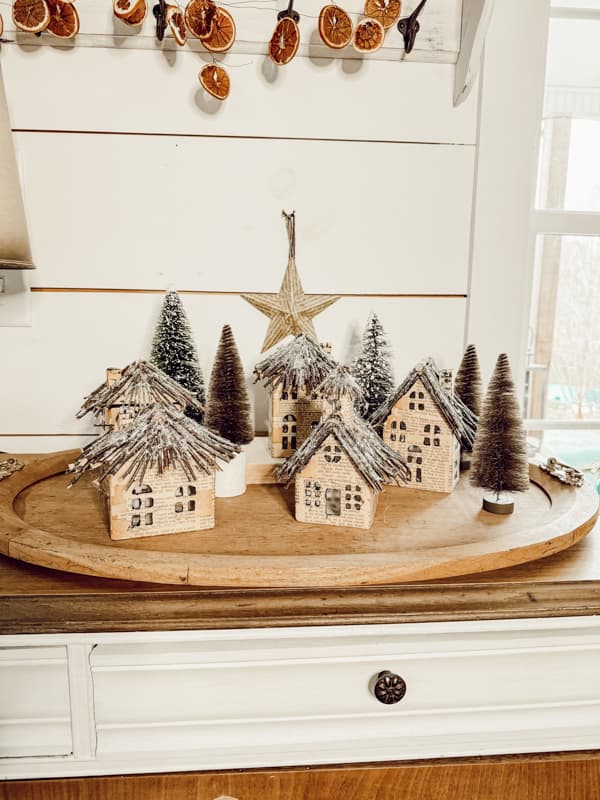
The Christmas Village turned out just as I imagined it. However, when I tried to add snow to the tray, it wasn’t working for me.
I love the display’s simplicity without the snow and considered leaving it here.
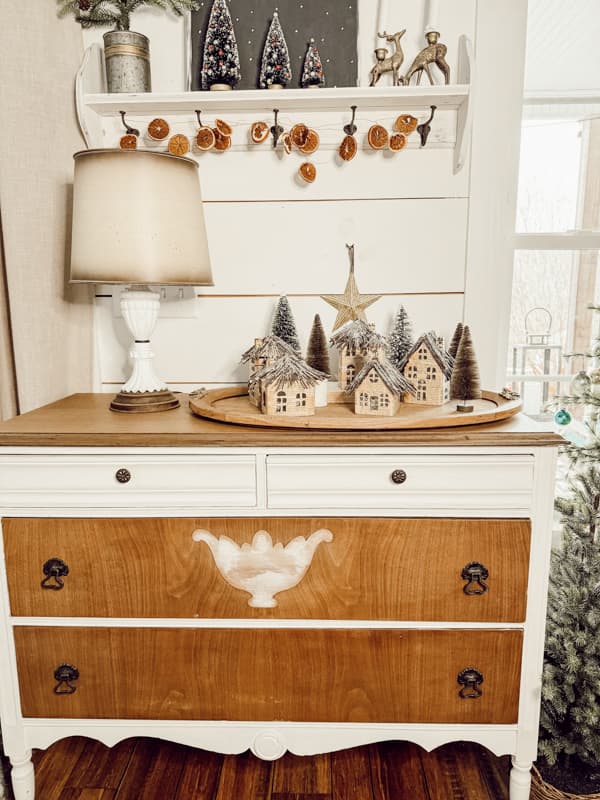
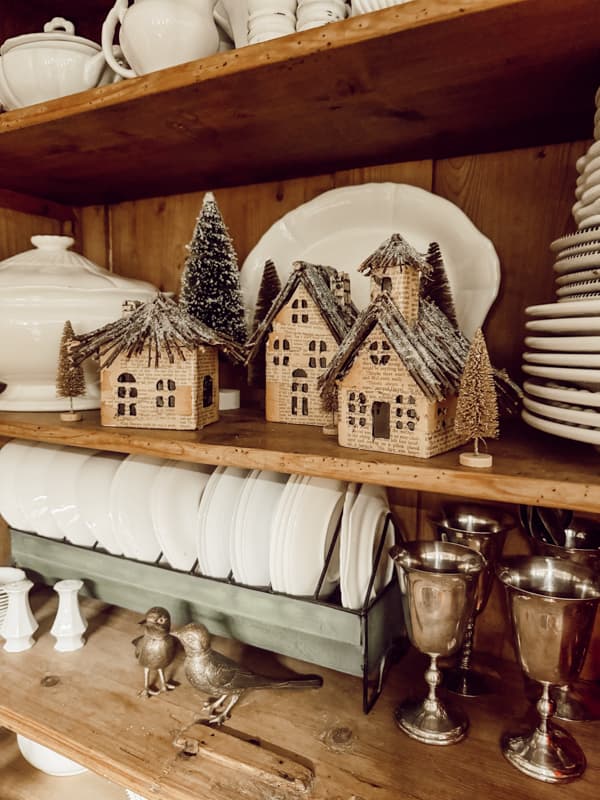
DIY Christmas Village Display in a Cabinet
Next, I thought the village would look lovely in my dining room cabinet. Mixed with vintage ironstone, I knew it fit right in.
However, the space was a little tight, and the visibility was low in this corner of the house. I didn’t want the Christmas Village to disappear this season.
A Small Table Christmas Village Setting
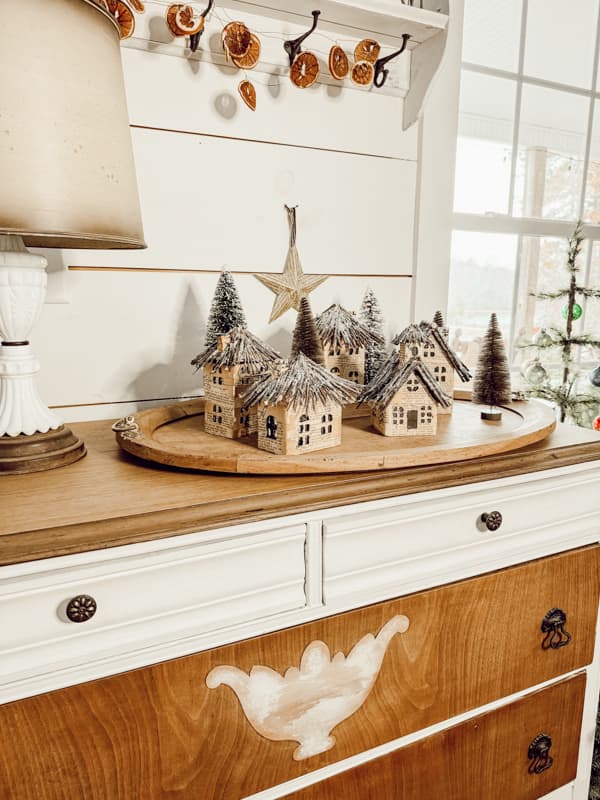
So, I brought the Christmas Village front and center in the living room, right in front of our new DIY faux fireplace mantel.
What better place to show off this fun new project?
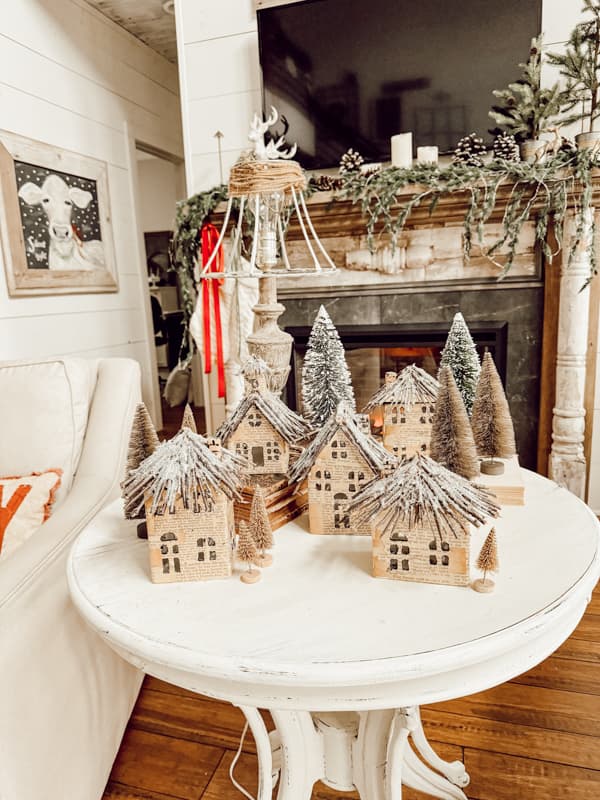
The table is a perfect size for the DIY Christmas Village Display, and it’s sure to get all the attention it deserves in this spot. So what do you think? Would you leave it here?

I hope you enjoyed seeing this transformation, and I look forward to sharing my next adventure with you.

Upcycle Old Book Pages for A Rustic Christmas Village Display
Equipment
- Exacto Knife
- Hot glue gun
Materials
- old book pages
- twigs
- ceramic houses and buildings
- glitter
- mod podge
- black craft paint
Instructions
- Cover ceramic houses with decoupaged old book pages
- Cut the windows and doors out with exacto knife
- Paint insides of windows and doors with black craft paint
- Use hot glue to attach twigs to the roofs
- Add glue to twigs and sprinkle with glitter for a snowy effect.
Video
Related Articles
- Stunning Christmas Bells With Old Book Pages and Dollar Tree Bells
- Big Christmas Ornaments with Old Book Pages
- DIY Paper Flowers with Old Books
Resources
See all my favorite craft supplies, plus gift guides for everyone on your list. Click the images below.


Other Old Book Page Craft Ideas
Here are some additional Old Book Page Crafts you may enjoy.
- DIY Flowers Made With Old Book Pages
- Large Christmas Ornaments From Dollar Tree Repurposed with Old Books
- Upcycled Pumpkin Craft
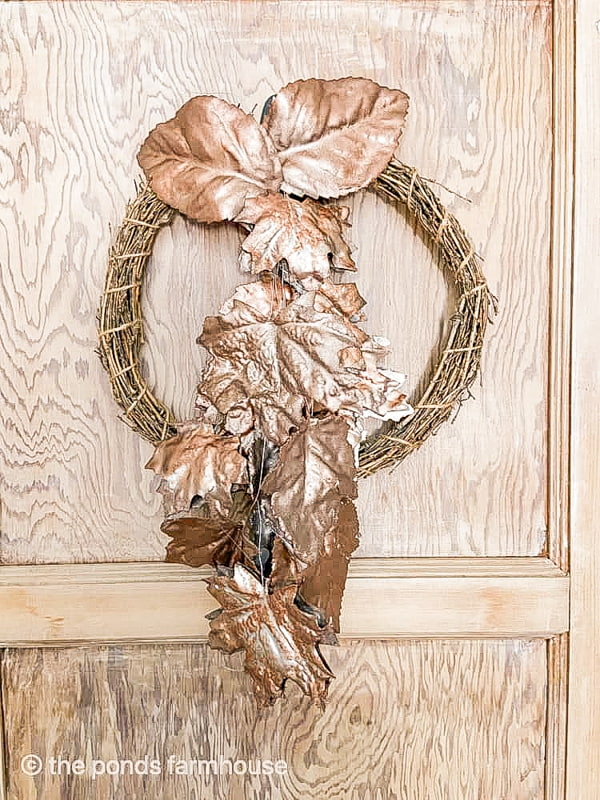
- Old Book Leaf Craft

Pin It To Remember It
Did you find some great ideas you’d like to save for future reference? Hover over the images you’d like to save and pin to your favorite Pinterest Boards when you see the PIN button.

Love these!
Cyndi,
I’m so glad you like it. Thanks for stopping by.
Oh Rachel, another great DIY I can’t wait to try! Merry Christmas to you & yours!
Pam,
I’m so glad you like this.
What a fabulous project! As always, your creativity is amazing!
Sherri,
Thank you so much. I appreciate the encouragment.
Such a unique idea for the village, and you can use it after Christmas in another setting. Wow! love this idea, and looks great on the white table. Awesome! You are a wonderful crafter!
Dee,
I really appreciate your comment. Thanks for the encouragement.
Brilliant!
Susan,
I appreciate this.
They are great! At first I didn’t think I would like them but when I saw the finished project…wow! You are very creative and always come up with some great ideas. I’ll bet you dream of projects while sleeping. Have a wonderful holiday.
Deb,
I do some times. LOL. Thank you for your comment and I appreciate your encouragment.
What a great combination… book pages and little houses! Love it!
Debra,
I’m so glad you like it.
These are so darn cute! you are the crafting Queen!
Wendy,
Thank you. That is a real compliment coming from you.
Adorable!
Miche,
Thank you so much for stopping by.
These are super cute. I love them.
Renae,
I’m so glad you like them.
Oooooh!! I love these, Rachel!! As we say up here…that’s a wicked good idea!
Jennifer,
I’m so glad you like them. I’m thrilled with them.
These little houses are so cute. They would work year round in a little fairy village as well.
LeeAnne,
I really appreciate your comments.
Rachel as always your village is thought provoking and “Why didn’t I think of that!” It’s charming and I love it on the white table. Sprinkle the table with a bit of cinnamon. It will smell good and create just a bit more contrast.
Shelley,
Thank you and I appreciate the idea.
This is such a great project!
Kristin,
I’m so glad you like it. Thank you.
I just signed up. Can’t wait to see what’s in store for me. I did spell my name wrong. I don’t know how to fix that. It’s supposed to be spelled Elsie. It got spelled Else instead. So sorry. Can it be fixed?
Elsie,
I’m showing it as Elsie so no worries. Welcome, I’m so excited to have you following along.
@Rachel, ok, thank you
You are welcome.
This is so cute Rachel! The directions and tips look easy to follow. Although I’m set for this year I pinned this for my, “must do next year.” Hoping to find some little villages on sale after the holidays to give me a head start! Merry Christmas from “near the pier” in Kure Beach.
Terri,
I’m glad you like them. We are coming down after Christmas for New Years. Hoping to hang out near the pier for the beach ball drop.
This is pretty amazing. Pinned!
Cheryl,
I’m so glad you like it. Thanks for stopping by.
Rachel,
What a lovely idea….you are so talented. Just wish I had the time to make all the wonderful things you have created. Keep up the good work….I look forward to your blog every day! 😊
Cindy,
What a sweet compliment. I appreciate you for following along on my adventures and all your encouragement. Have a blessed holiday season.
Your ideas are amazing
Up take things a step up and WOW…….Happy Thanksgiving
Rachel……always look forward to what your doing next…
Eva,
I’m so glad you like this one. Have a wonderful Thanksgiving my friend.
I love this rustic village..soo cute. I have done something on the same line but I used those little wood houses you get at Dollarama here in Canada. I used the scales of a pine cone for the roofs and used twigs for some of the houses.
Lorri,
That sounds amazing. I love the idea of the pinecone scales. I’ve used those on other crafts. Thank you for your suggestions and I’m glad you liked my village. Have the best week and Happy Holidays!