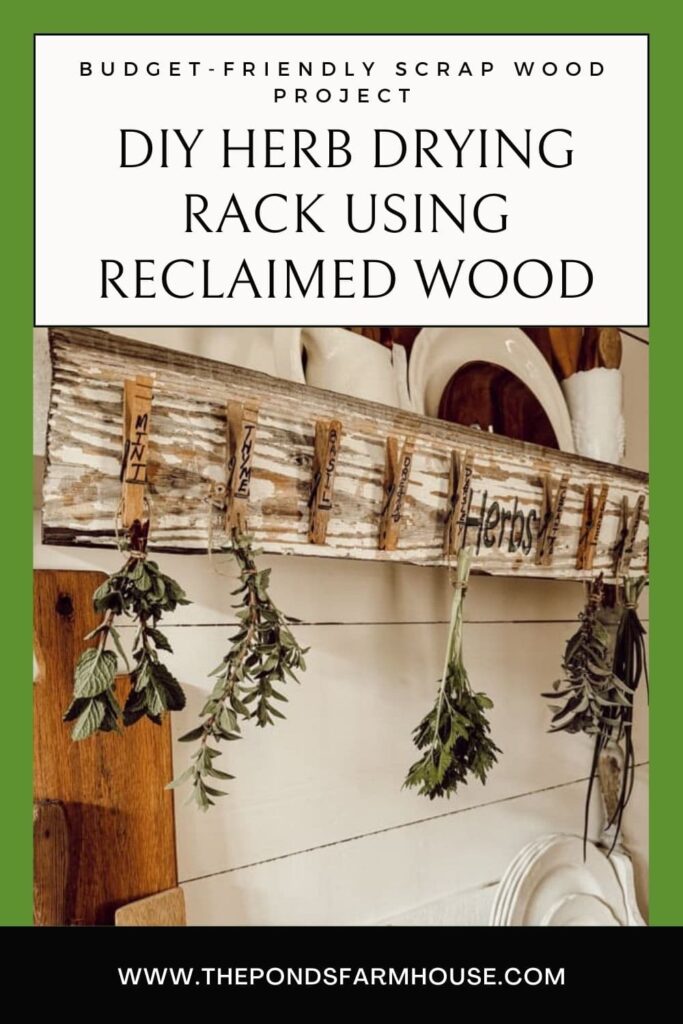
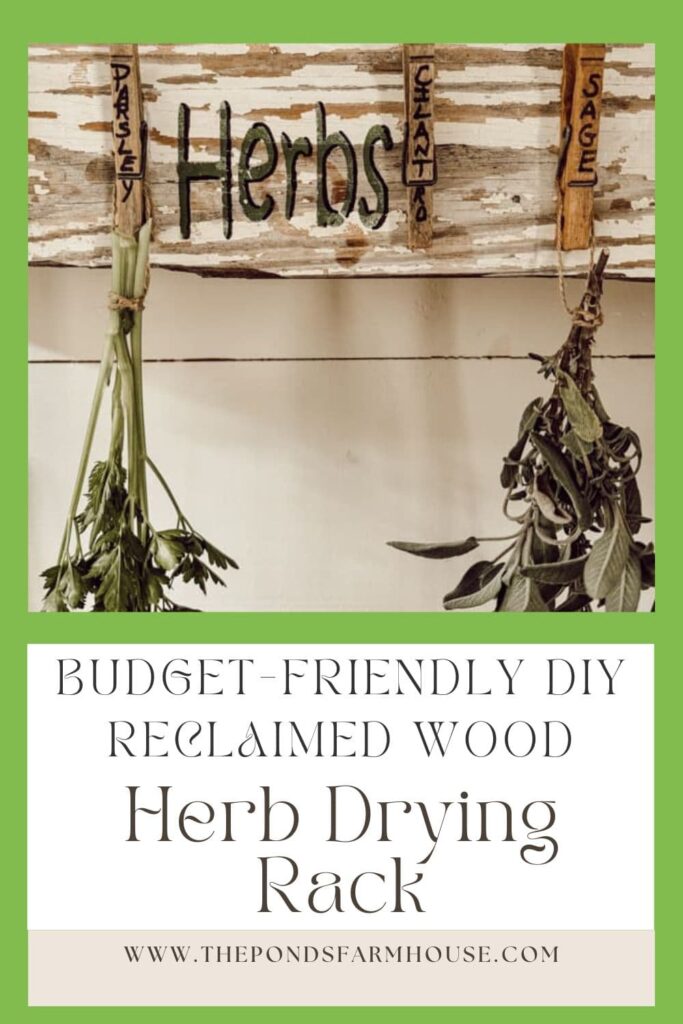
Rustic Reclaimed Wood Easy DIY Herb Drying Rack
Love fresh herbs but hate wasting them when the season ends? This easy DIY herb drying rack, made from reclaimed wood, is the perfect solution! In less than an hour, you can quickly build this budget-friendly hanging rack and begin preserving your homegrown herbs or flowers. The rustic reclaimed wood will add charm to your kitchen while allowing you to enjoy herbs year-round.
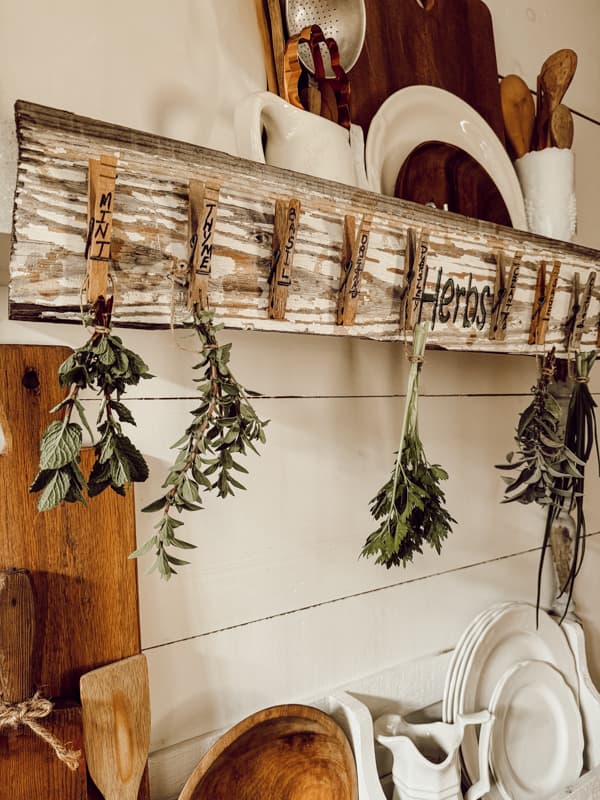
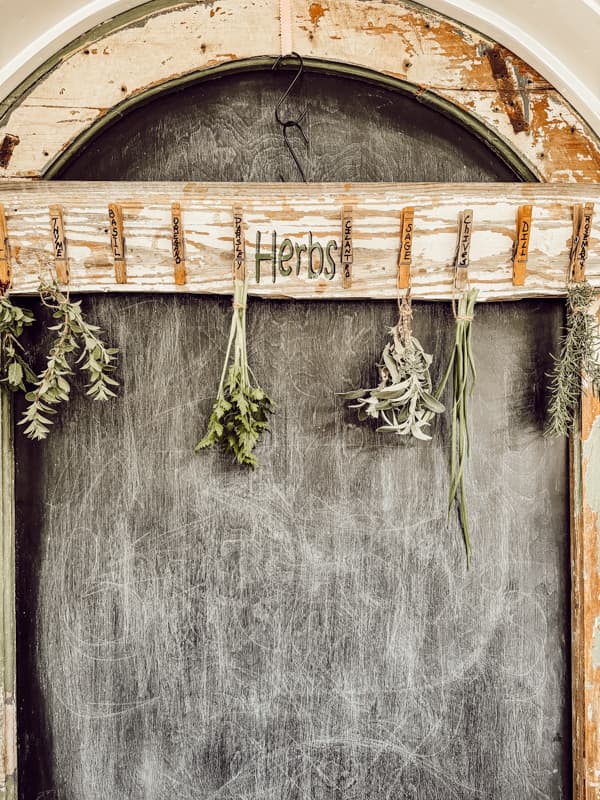
You can customize your DIY herb drying rack to fit any area of your home, and the finishing options are unlimited. I collected several vintage clothespins and used them to hang the fresh herbs. However, you can choose other methods depending on your budget and aesthetic.
In addition to drying herbs this same drying rack can be used for hanging flowers to dry.
(Posts on The Ponds Farmhouse may contain affiliate links. As an Amazon Associate, I earn from qualifying purchases. See the full disclosure details here.)
Table of contents
What Are The Advantages of Hanging Herbs to Dry Naturally?
There are several advantages to drying herbs naturally by hanging them compared to other methods like dehydrators or ovens:
- It helps preserve the flavor. Hanging allows for slow, gentle drying at room temperature. This helps maintain the fragrant oils in the herbs, which are responsible for their strong flavor and aroma. Dehydrators and ovens can use higher temperatures, which can damage these delicate oils, leading to a less potent final product.
- Herbs will maintain their natural color. Since hanging uses natural light and air circulation, the drying process is less harsh on the herbs. This helps retain their vibrant green color, making them more visually appealing when dried.
- Hanging requires minimal equipment – just string, twine, or even clothespins, and a well-ventilated space. This makes it a very budget-friendly way to preserve your herbs.
- Hanging herbs utilizes vertical space, allowing you to dry larger quantities without needing a lot of counter space. You can use wall space for drying.
- Herbs drying while hanging are easily visible, allowing you to monitor the drying process and adjust airflow or location if needed.
- Great for farmhouse aesthetics. Hanging herbs to dry provides a natural fragrance to your home and old-time farmhouse aesthetic.
Here are some additional things to keep in mind:
- Some herbs are more delicate and may not dry as well. Delicate herbs, such as dill, may begin to drop pieces and need to be transferred to a bag or flat surface after a few days.
- Proper air circulation and a cool location are crucial for successful drying by hanging. Avoid excess light and definitely keep out of direct sunlight.
Overall, hanging herbs is a time-proven and effective method that preserves the best qualities of your herbs when done correctly. With this DIY drying rack, you can preserve your herbs and enjoy the aesthetic and fragrance at the same time.
How To Build A Herb Drying Rack With Reclaimed Wood
First, you will want to find the wood that you want to use for your herb drying rack.
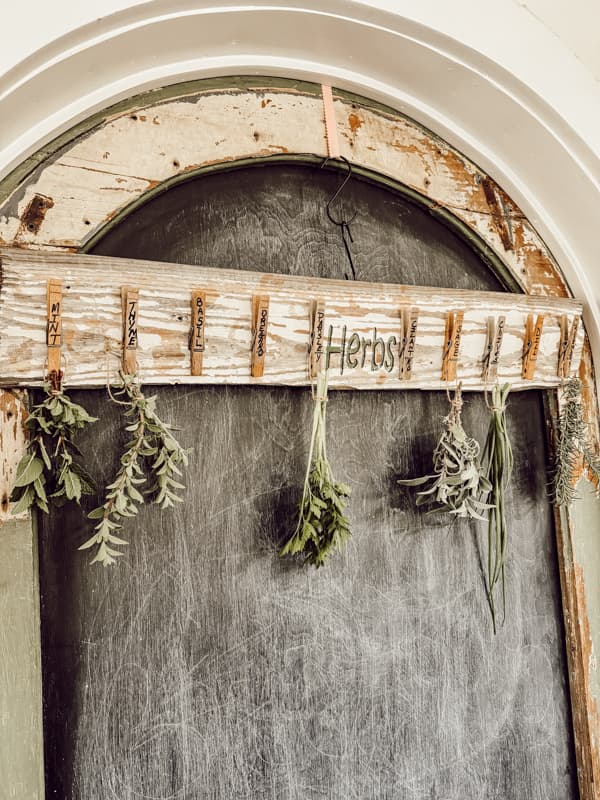
You can use new or reclaimed wood for this project. I had a piece of salvaged shiplap with the original chippy white paint that I decided to use. The board is 28″ long, but you can customize the size of your rack to work within your home.
If you are using new wood, you may consider painting or staining your board.
In addition, I used some vintage clothespins to hold the herbs.
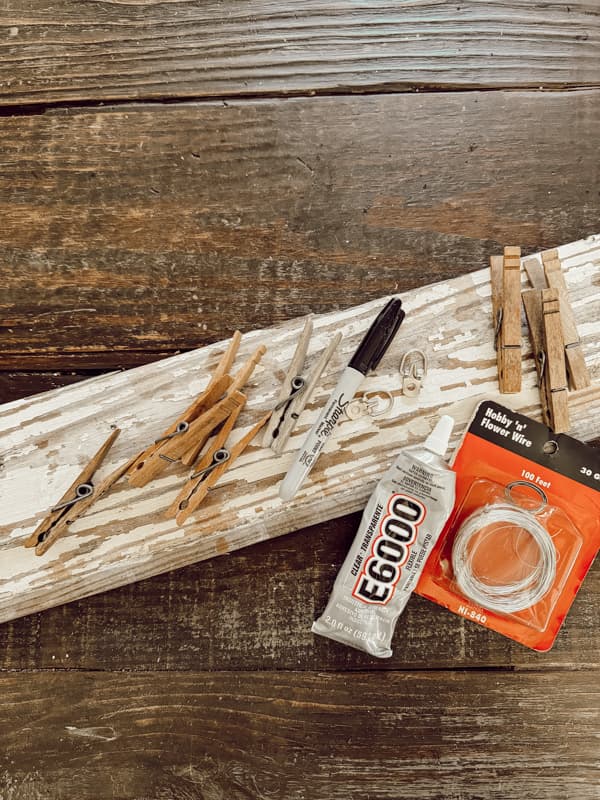
Supplies
Here are the supplies I used to create the rustic herb drying rack. However, there are several options for creating a unique rack for your home.
- 1 – flat board approximately 6 inches wide. The length can vary.
- 10 – clothespins (other options are cup hooks, shaker pegs, decorative hooks, etc.)
- e6000 Glue
- Sharpie Pen
- D-Ring Picture Hangers
- Wire for hanging (optional)
- Tape measure or ruler
Prepare Reclaimed Wood
Before you start to assemble your drying rack, clean the wood and prepare for hanging.
Attach Hangers To Reclaimed Wood
Before beginning your project, attach the hangers to the back side of the reclaimed wood. You can use the D-rings alone or attach a hanging wire between the rings.
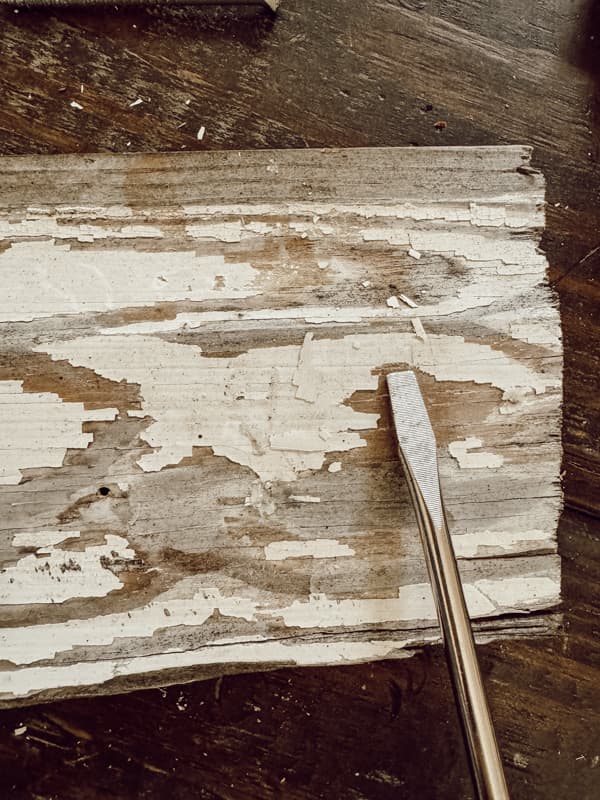
Clean and Remove Chippy Paint
If you are using reclaimed wood for your DIY herb drying rack, you will want to remove any loose paint. In addition, you need to remove the paint from the area where you plan to glue your clothes pins.
Begin by measuring the placement of each clothespin and then use a flat-head screwdriver to scrape away the paint. This will allow the bond of the glue to be more secure.
If you are painting a new board and using clothespins, you should leave the area unpainted where you are attaching the pins with glue.
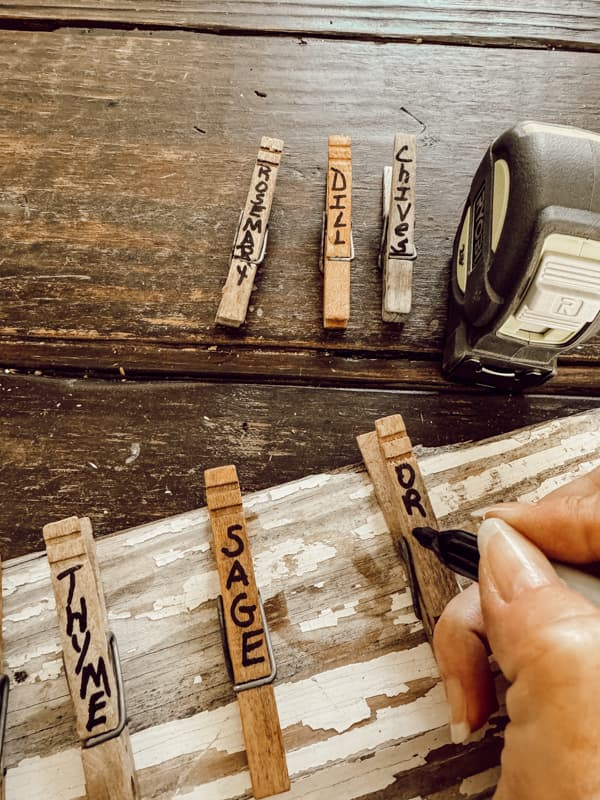
Prepare Clothespins For DIY Herb Drying Rack
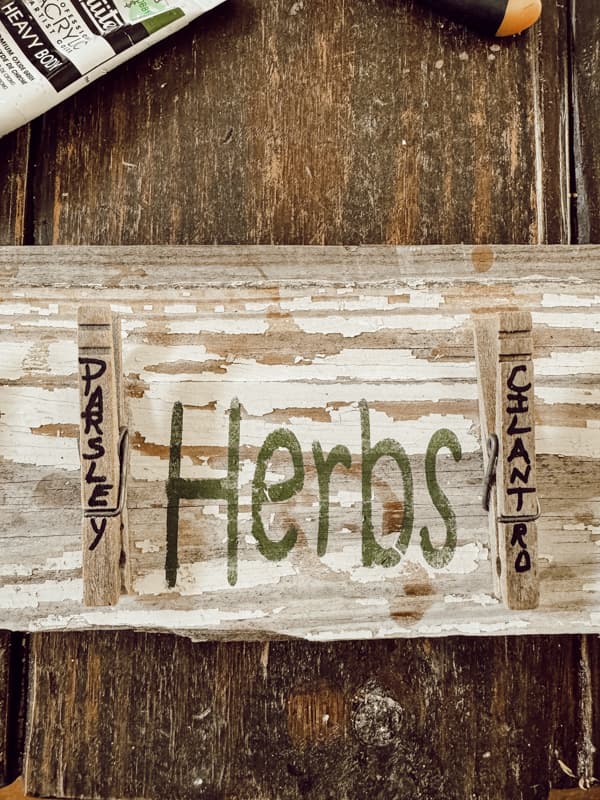
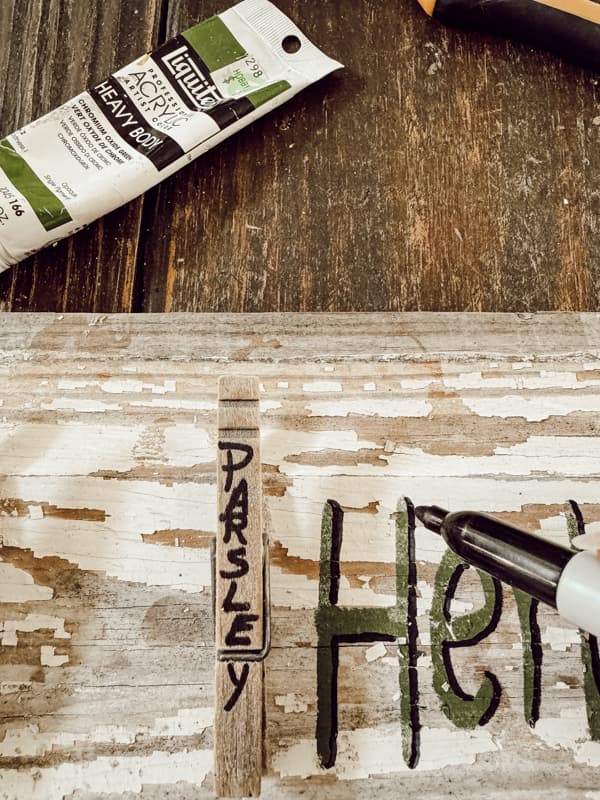
Next, use a Sharpie pen to add herb names to the clothespins.
If you are using cup hooks or something other than clothespins, you can write the herb names on the wood.
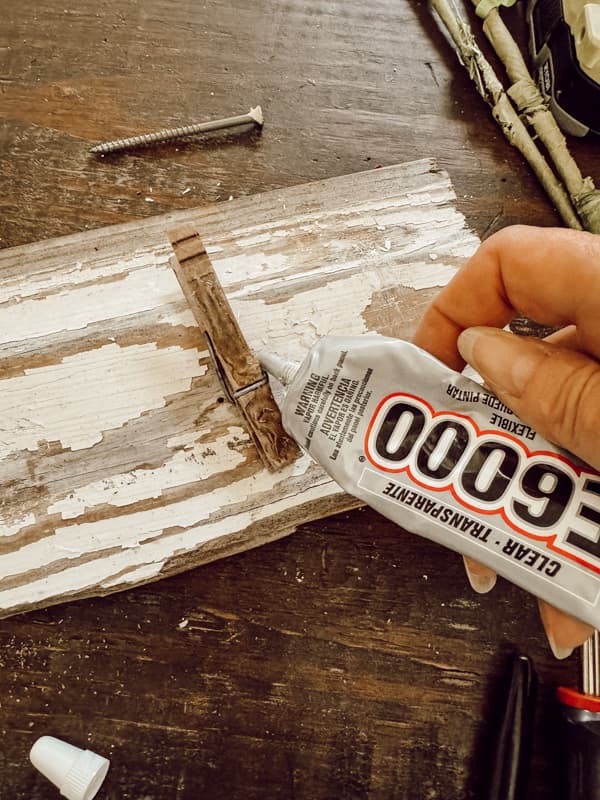
Assemble Herb Drying Rack
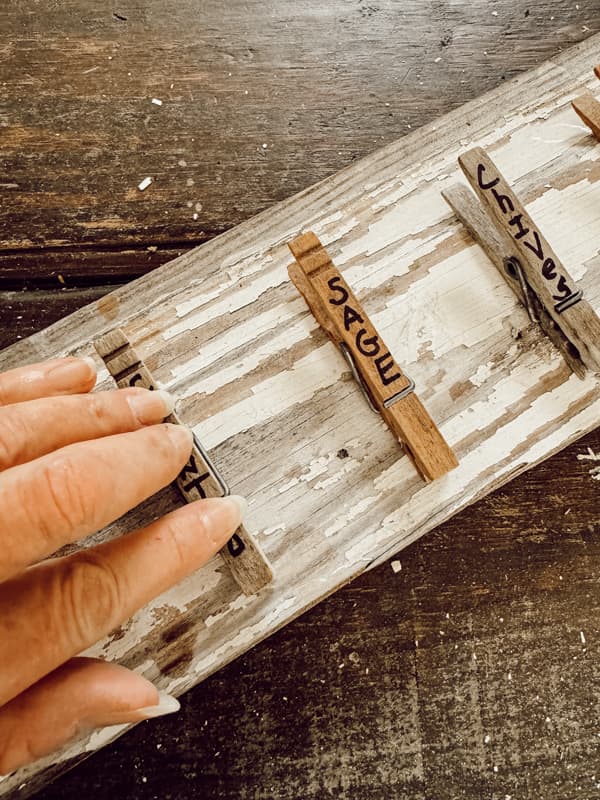
Now, you are ready to assemble the drying rack. If you have not already done so, determine the placement of each clothespin or hook.
Be sure to position the pins evenly across the board. You don’t want them too crowded, and it’s best to allow space for airflow between the plants. I also left a gap in the center of my board to add a stencil. This is an optional step.
Apply a generous amount of glue to the backside of the pins and press them in place. The E6000 glue will set quickly, but allow it to dry before moving the board.
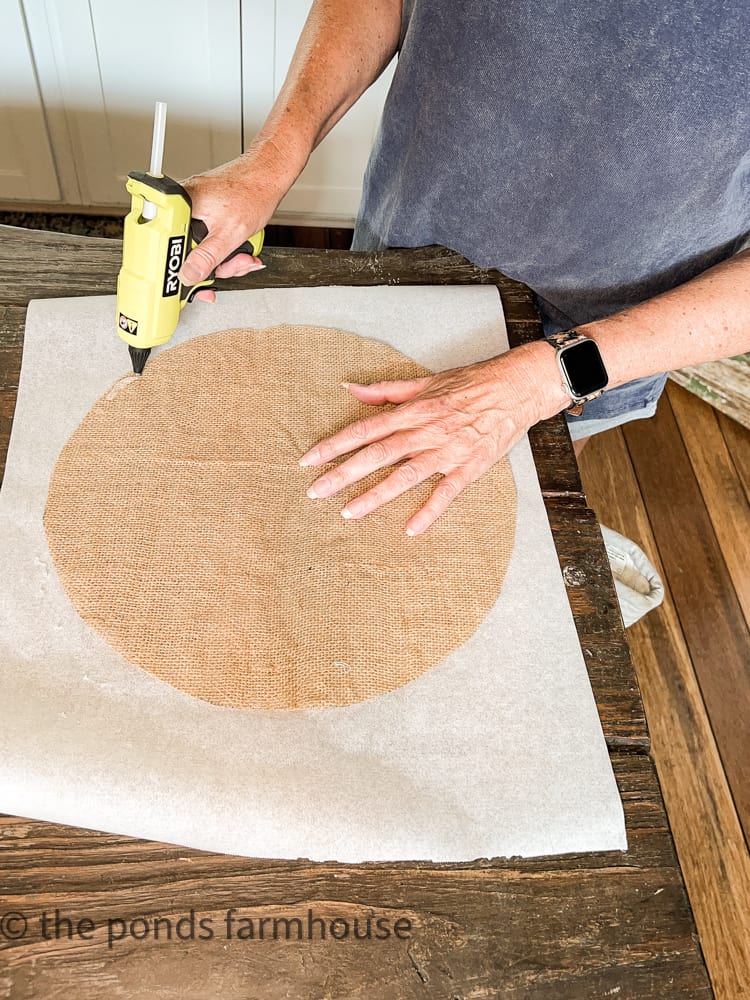
Optional Stencil
To dress up the DIY Herb Drying Rack, I decided to add a stencil, “HERBS,” to the center of the board. This is an optional step, but I like how it turned out.
You can use precut stencil letters to create your design or paint the design free-hand. I used my Silhouette Cameo to cut the stencil on cardstock.
Then, tape the stencil to the board, and using a stencil brush, apply your paint color. I used a dark green “herb” color.
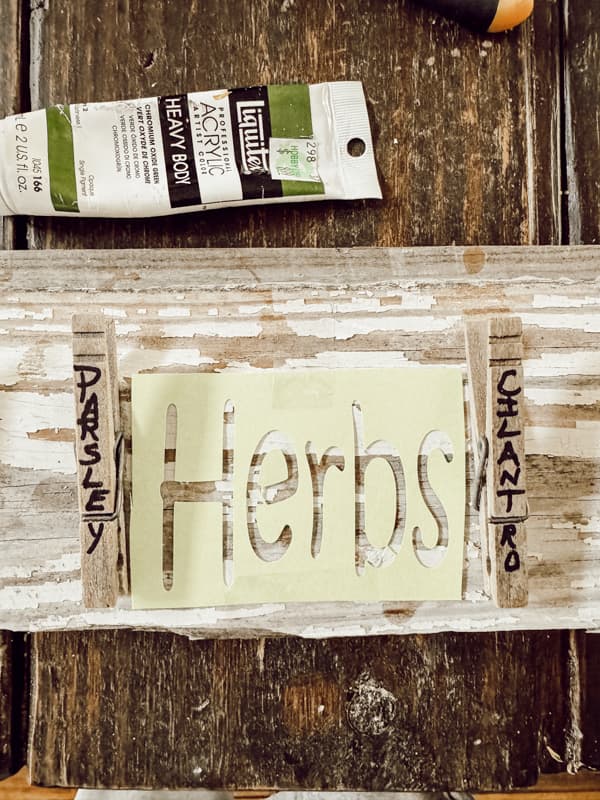
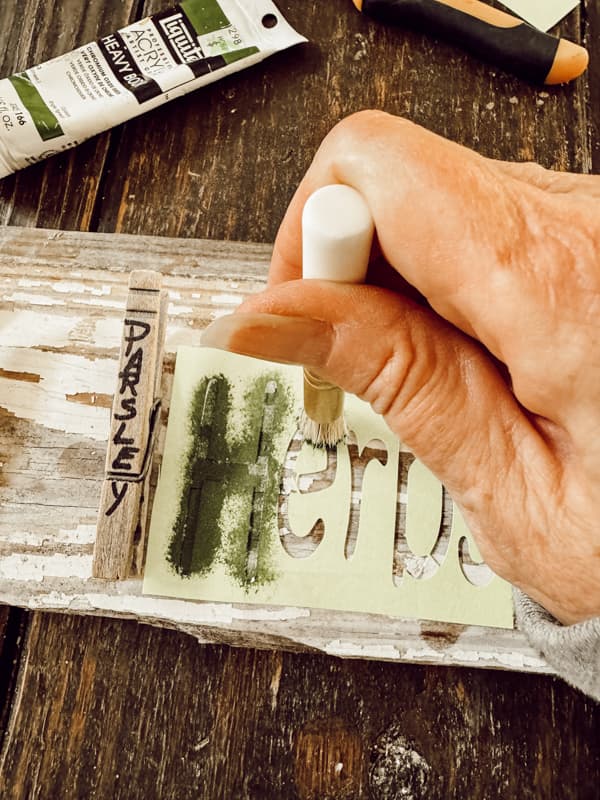
Because the reclaimed wooden board has a chippy finish, the stencil wasn’t as bold as I would have preferred. Therefore, I used the black Sharpie marker to highlight the letters.
Hang Reclaimed Wood Herb Drying Rack
Finally, once the paint and glue have dried, you can gather your herbs for drying. Tie bundles of herbs at with jute twine and add them to your drying rack. Hang the herbs upside down for best drying results.
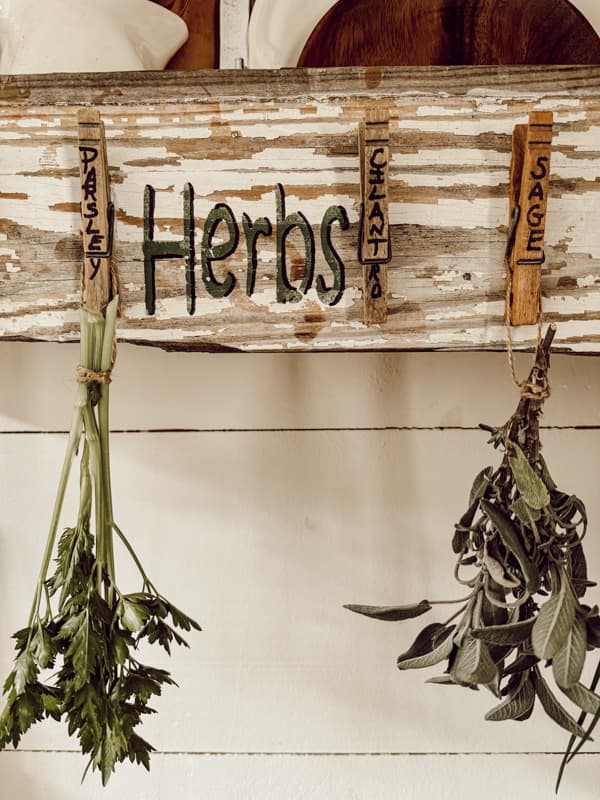
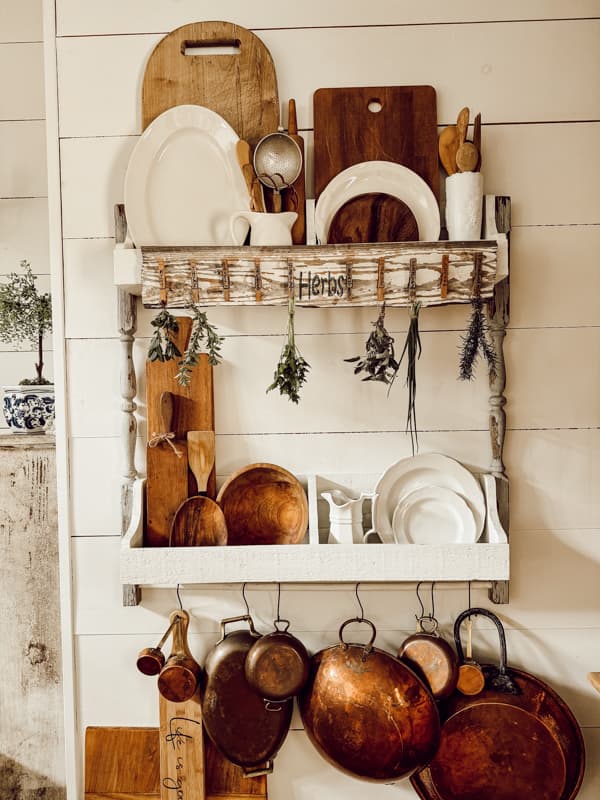
You can hang the herb drying rack in your kitchen, pantry, or laundry.
You should not hang the rack in direct sunlight. It’s best to place it in a cool, dry, and dark area of your home, with plenty of airflow around your herbs.

The reclaimed wood herb drying rack looks good on the plate rack in my kitchen and smells amazing. However, I plan to move it to my pantry to avoid excess light.
Frequently Asked Questions
- Can this rack be used to dry flowers? Absolutely! However, you may consider building a larger rack as flowers tend to take up more space while drying.
- How long does it take for herbs to dry? Generally, one to two weeks. Once the leaves are brittle, they are good to store.
- What do I do with the herbs after drying? I recommend placing the herbs in a brown paper bag first. If they are not 100% dry, the bag will help to absorb any moisture. After a few weeks, the herbs can be transferred to airtight containers.
- Are there other methods for preserving herbs? Yes, and I have utilized several methods. You can read The Best Way To Preserve Herbs By Drying And Freezing.
Similar Articles
- Easy Flower Press: Upcycle Scrap Wood To Preserve Botanicals
- The Best Way To Preserve Herbs By Drying And Freezing
- How to Press Herbs for Botanical Art
- How To Start An Herb Garden In Winter
Resources
I hope you enjoyed today’s easy tutorial, and I look forward to sharing my next adventures with you.

Pin It To Remember It
Did you find some great ideas you’d like to save for future reference? Hover over the images you’d like to save and pin to your favorite Pinterest Boards when you see the PIN button.
What a great way to display your dried herbs, Rachel!
Kim
Thank you!