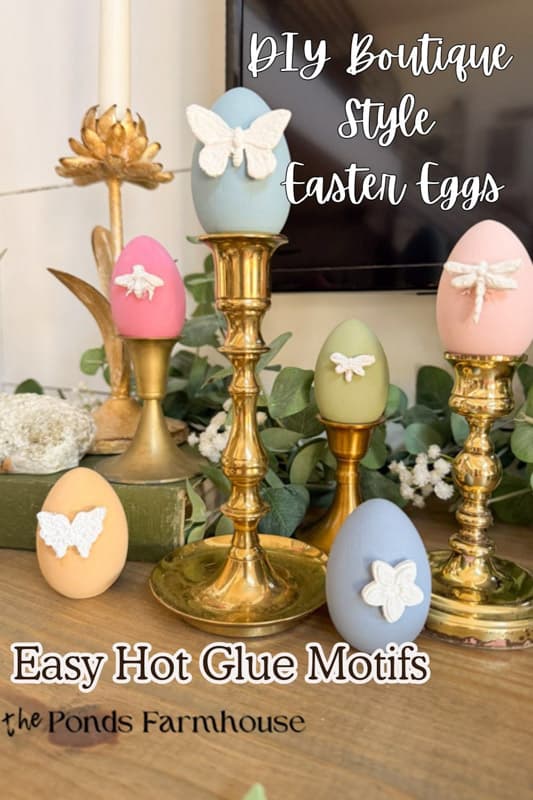
Create DIY Boutique Style Easter Eggs: Budget-Friendly Bug Designs with Hot Glue
You know that I love a good boutique-style knock-off, and these DIY Wooden Easter Eggs are so easy to make. With a little hot glue, a bug-themed silicone mold, and paint, you can create these stunning insect-motif eggs in minutes. They look just like the high-end versions for a fraction of the cost. I’m sharing all the supplies and instructions so that you can decorate your home in style this Spring. So heat up the glue gun and let’s get started.
(Posts on The Ponds Farmhouse may contain affiliate links. As an Amazon Associate, I earn from qualifying purchases. See the full disclosure details here.)
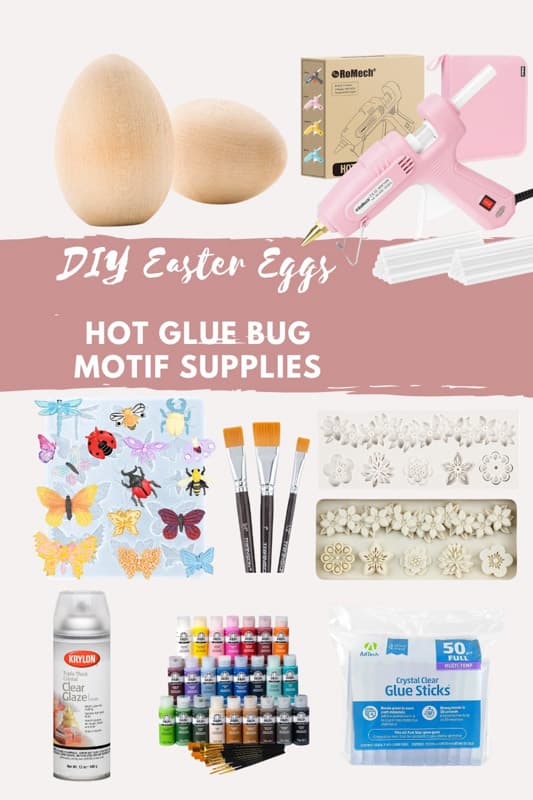
Supplies To Make Bug-Themed Easter Eggs
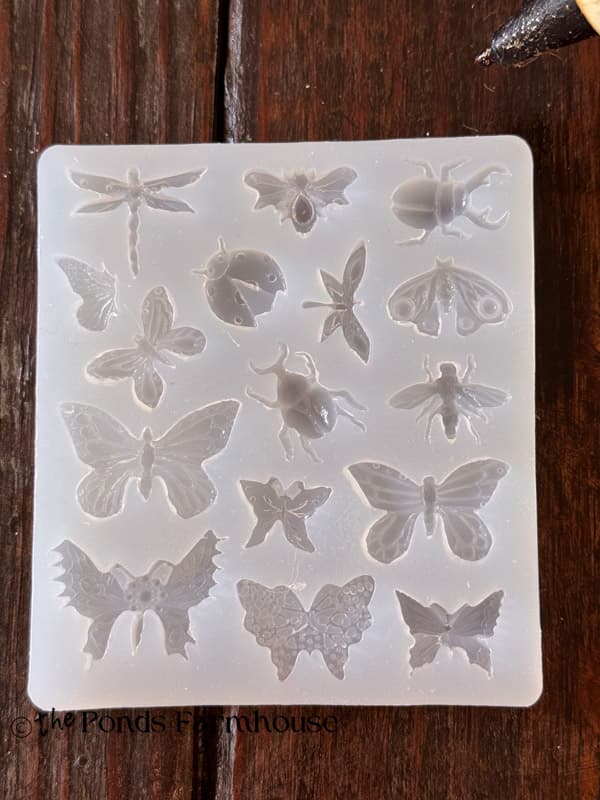
With just a few supplies, you can create these boutique-worthy Easter eggs in just a few minutes. You can customize the designs using the many silicone molds available. I decided to use this bug mold that includes bees, butterflies, a dragonfly, and more. I also have a flower mold that I used to create these DIY Decorative Flower Pots with Hot Glue. Here are the exact items I used to create these lovely eggs. Click the items to link.
- Butterfly & Insect Silicone Mold
- Flower Silicone Mold – (Optional)
- Wood 2 1/2 inch eggs
- Hot Glue Gun
- Clear Glue Sticks
- Small Paint Brushes
- White craft paint
- Basil craft paint
- Shell Pink paint
- Fuchsia Pink Paint
- Sky blue
- Medium blue
- Yellow ochre
- Optional – Clear Sealer
How To Create Insects With Hot Glue & Silicone Molds
The first step is to create your hot glue motifs. Gather your favorite silicone mold and heat up your hot glue gun. I recommend using crystal-clear hot glue sticks for the best results.
Wait until your glue is hot, then begin filling the chosen silicone molds. Ensure that the glue is reaching every corner and that the entire mold is full and even. Leave the mold sitting until the glue is dry. Once dry, carefully remove the bugs from the mold.
Insider Tip
When adding the glue to the mold, begin on the outter edge of the design and ensure that all the corners a completely filled.
When you remove the bug from the mold, you may have some excess glue around the edges. If so, either cut away with small scissors or pinch off the glue.
Painting & Finishing Easter Eggs For High-End Look
Now it’s time to paint and finish your Easter Eggs. While the glue is drying, paint the wooden eggs with craft paint and a small paintbrush.
Painting the Eggs and Motifs
I applied two coats and used a different color for each egg. Allow the paint to completely dry before applying the second coat.
While the eggs dry, paint your bug motifs white. I found that the first coat was spotty looking so I applied two more coats to get the coverage I desired. Ensure that you also paint around the outer edges. Some of the designs I used have small details and it’s easy to miss an area with the paint.
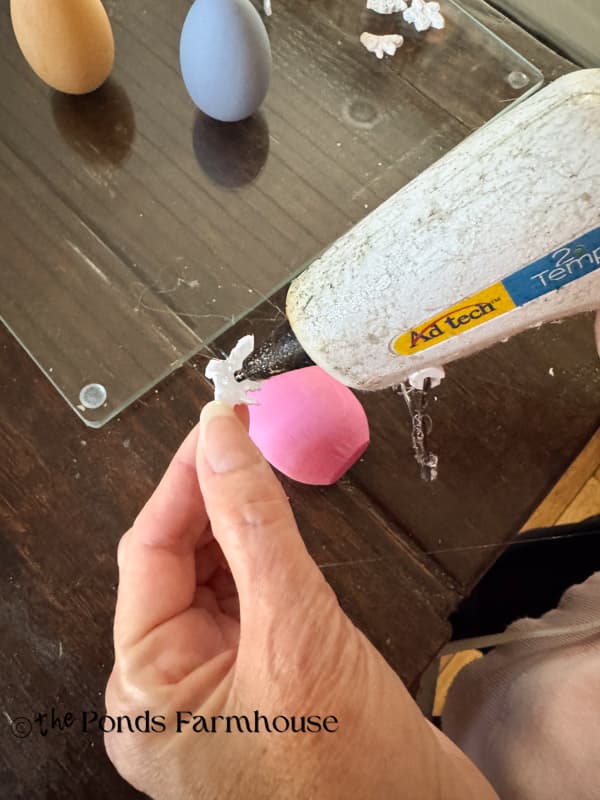
How To Attach Bugs To Eggs
Now, for the easy part: attaching the bugs to the eggs. Just heat up the glue gun and apply a small dot to the center back of the bug. Don’t add too much, as it will seep out from under the design. (This happened to me on a couple of the first ones I added. Yikes!)
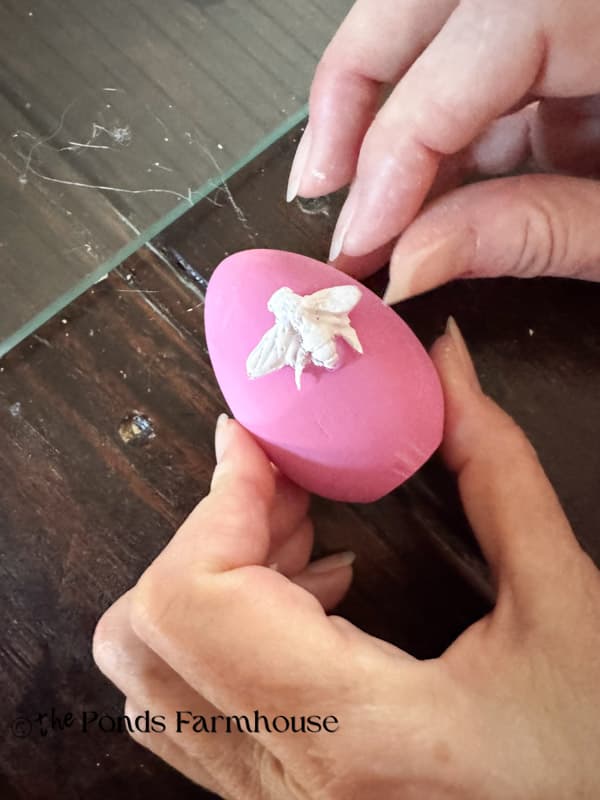
Press the bug to the center of the wooden egg and hold until dry. It only takes a few seconds.
Optional: How To Seal Eggs With Protective Spray
The eggs will have a soft matte finish unless you want to seal them. If you prefer a shiny finish, you will need a gloss sealer. If you plan to use the eggs in baskets where they are touching each other or other decor, I also recommend using a spray sealer to prevent scratches or paint damage. You can use a matte, satin, or gloss sealer to achieve the finish you desire.
How To Style Your Bug-Themed Easter Eggs
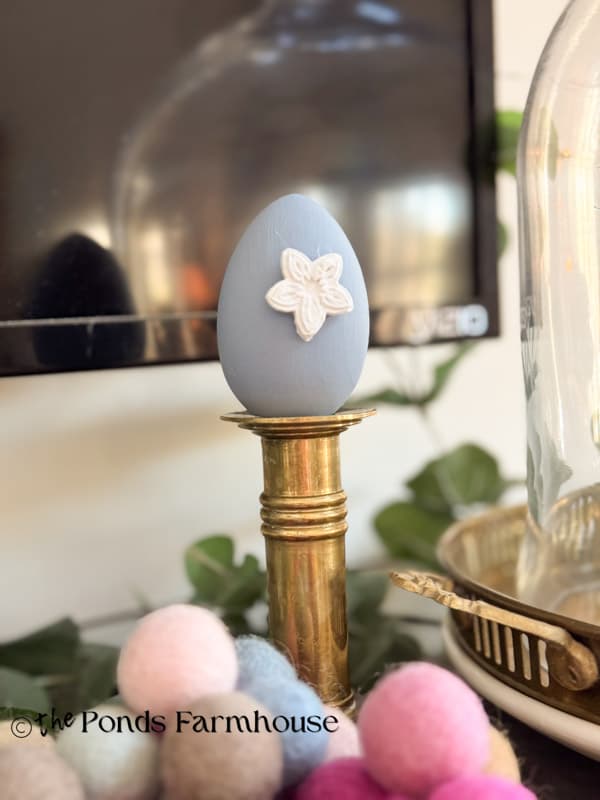
I knew before I made the chic bug motif Easter eggs that I wanted to style them on my mantel for Spring. However, there are so many ways you can use your colorful eggs in your decor for Easter and beyond. Below are five of my six eggs perched at different heights on vintage brass candlestick holders.

Here are some of my favorite ideas for displaying the eggs.
- Display the Bug Motif Easter Eggs on vintage candlesticks. Group several together or display individually on….
- Mantel
- Shelves
- Bookcases
- Coffee table
- Entry Table
- Dining Table
- Countertops (kitchen or bath)
- Use them as hostess or guest gifts.


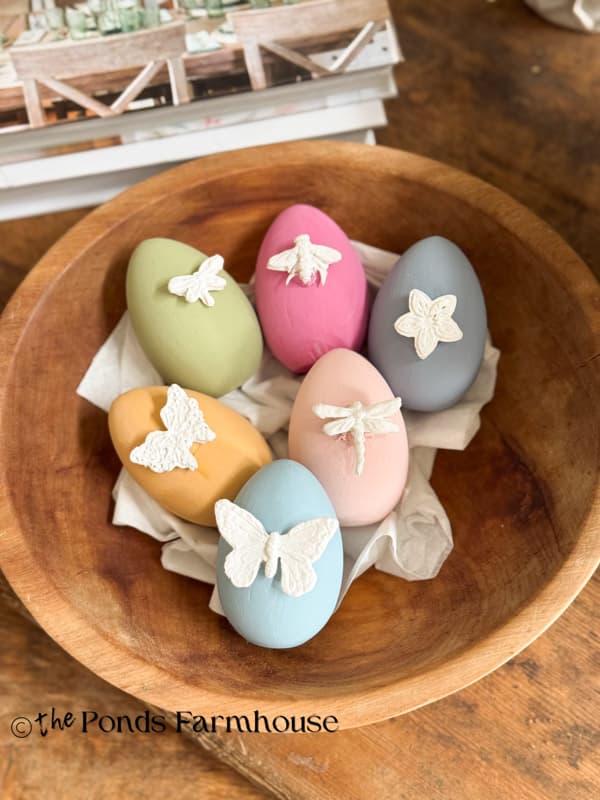
You can also add them to baskets or bowls to add a pop of color to any area of your home. I added several eggs to a vintage wood bowl for the coffee table. You can add fake grass or an Easter basket filler to cushion the eggs and add more color.
They also look adorable, nestled in greenery with towels, in this wall-hanging basket in the bathroom.

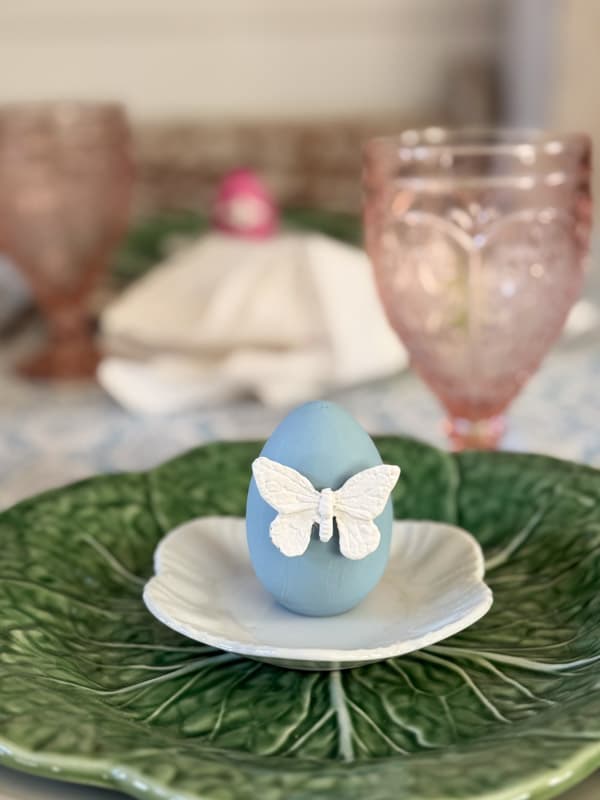
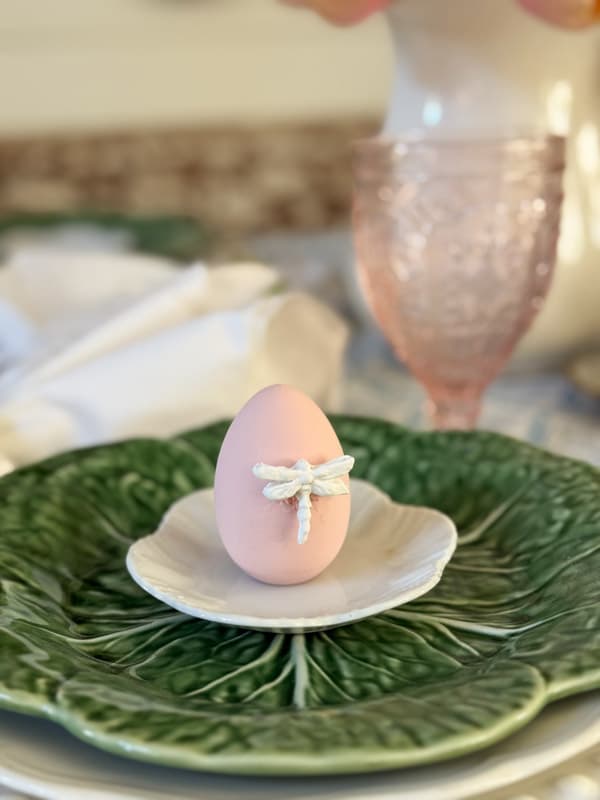
The eggs I used have flat bottoms, so they can stand on their own on flat surfaces. You can add them to book risers, shelves, or tabletops without a holder. I added mine to each place setting on this fun Spring tablescape.
Another way to use them is as placecard holders or allow guests to take theirs home after your dinner party.
FAQ
Resources: Click Below
Thank you for joining me today and I look forward to sharing my next adventure with you!


Just saw these on your Easter tablescape and had to find out more about them! They’re amazing. I love that you can use them throughout the entire spring season and into the summer season as well. They make your tablescape so festive. Can’t wait to try this too! Hugs, CoCo
CoCo,
Thank you for sharing and I’m so glad you liked this one.