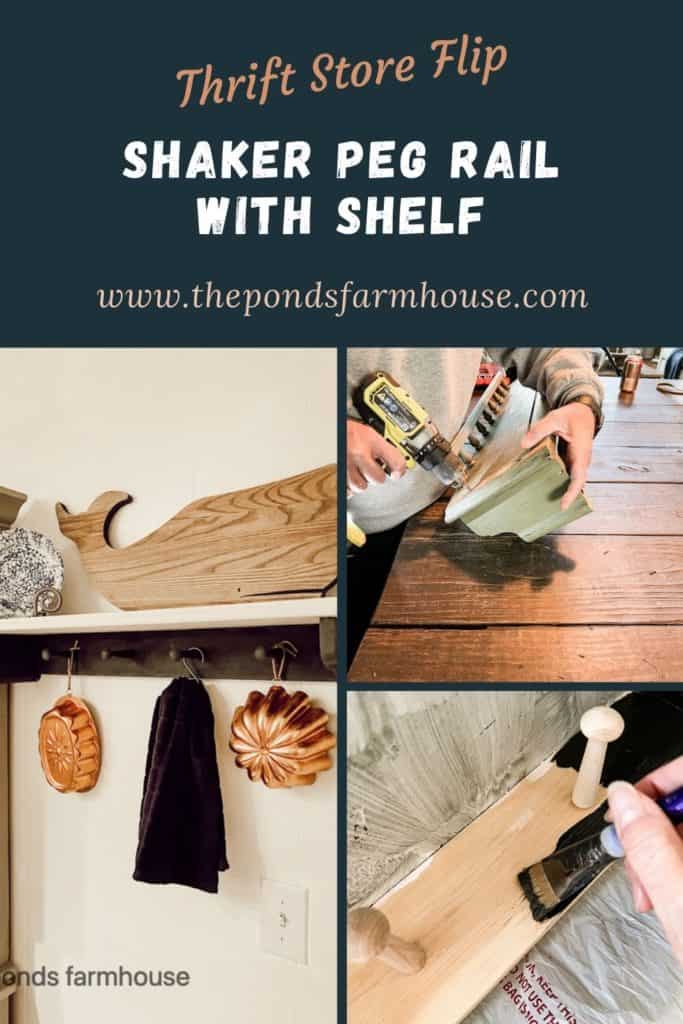
Peg Rail Shelf Thrift Store Flip
Thrifting with the Gals
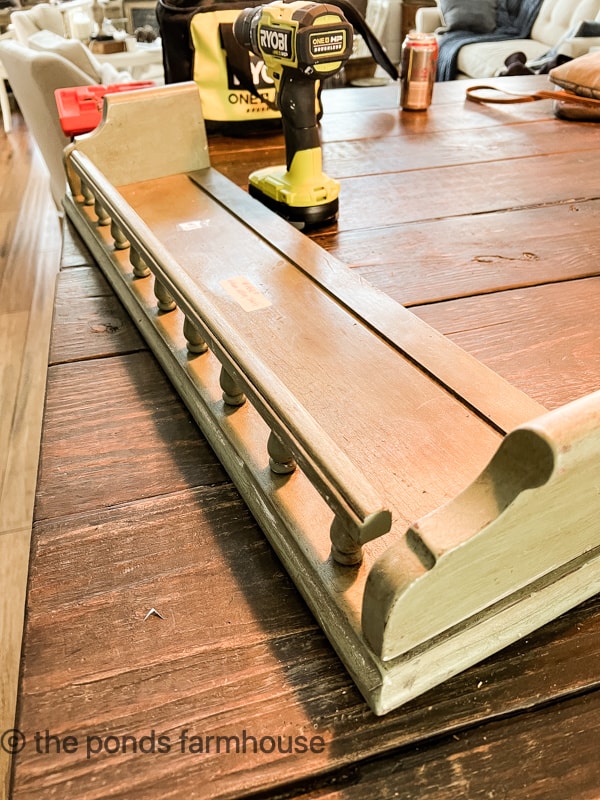
Since I needed a Peg Rail Shelf for our beach cottage, I decided to flip an Ethan Allen shelf I found at a thrift store and make it a Shaker Peg Rail with a Shelf.
I’ve probably had the shelf for at least 2 years.
It was such a good deal, I knew I’d eventually find a use for it. Do you ever do that?
Did you know that Shaker Peg Rails are very popular right now?
Well, with my husbands help, we literally flipped the thrift store shelf and made it into a Shaker Peg Rail with a Shelf.
Thrifting with the Gals
My post today is part of our monthly Thrifting with the Gals blog hop. Each month we all share vintage and thrift store ideas with you.
Each month I am joined by my co-hosts, Ann from Dabbling and Decorating, Kristin from White Arrows Home and Robyn from Robyn’s French Nest. We all live in different parts of the country but have connected through our love of vintage decor.
We are so happy to welcome our guest blogger this month, Renae from Peacock Ridge Farm. If you are joining me from Renae, I’m so glad you stopped by. Can you believe those amazing vintage finds she shared?
How to Make a Peg Rail Shelf
Here are the items we used to make the Peg Rail Shelf from a $5.00 Thrift Store find.
- Ryobi Drill
- 1 x 2 board the length of the existing shelf
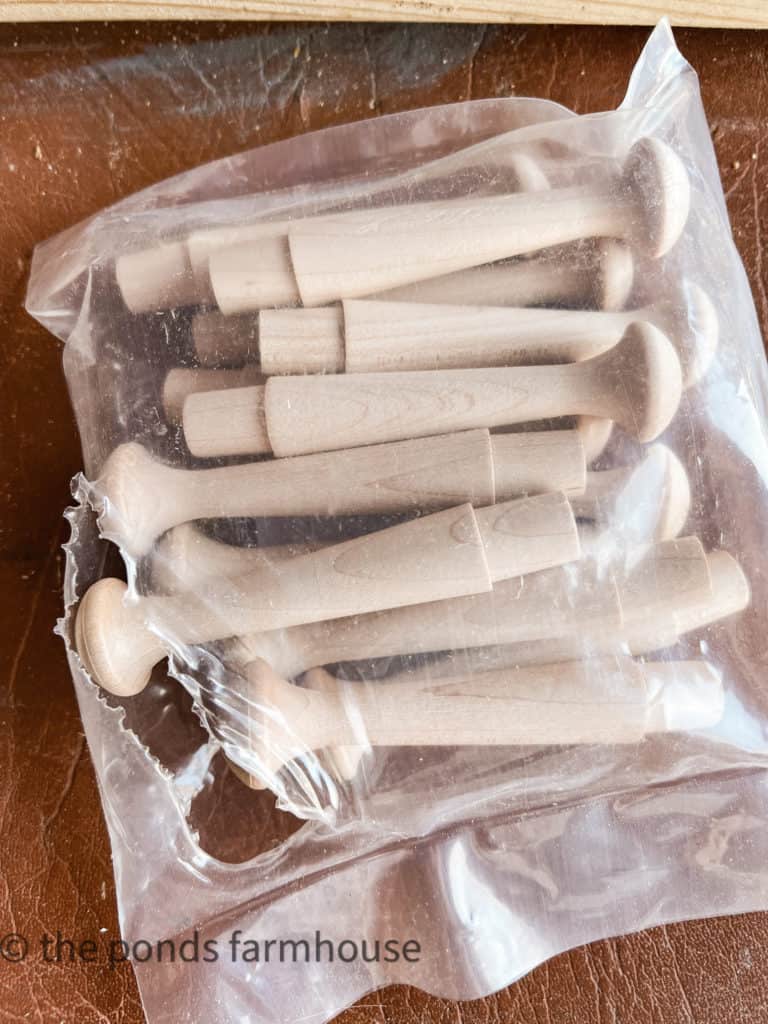
- Shaker Pegs
- Wood Glue
- Wood Screws
- Filler for Wood
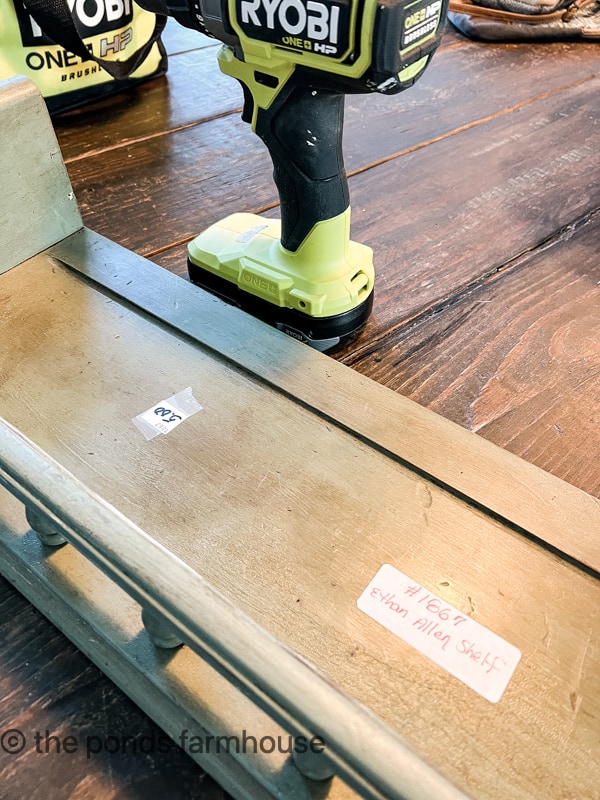
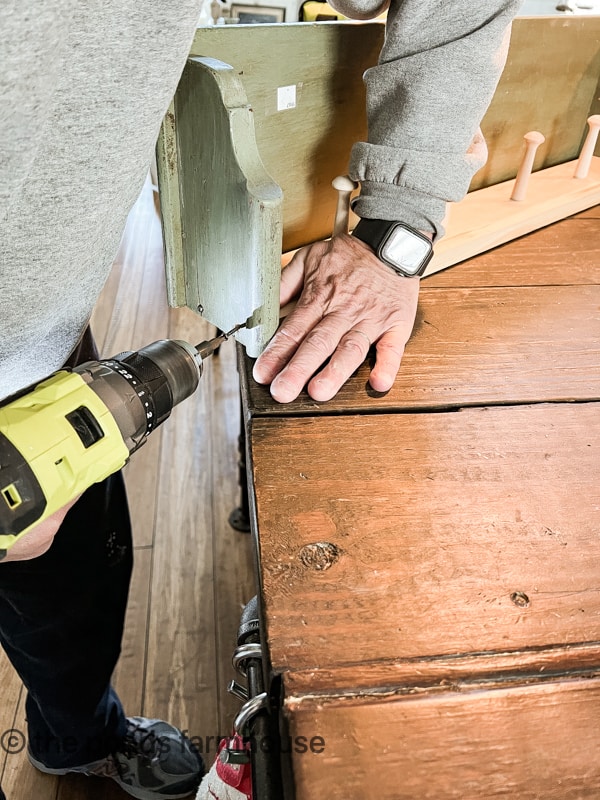
Deconstruct the Thrift Store Shelf
First, the side brackets were removed to allow the shelf to be flipped over.
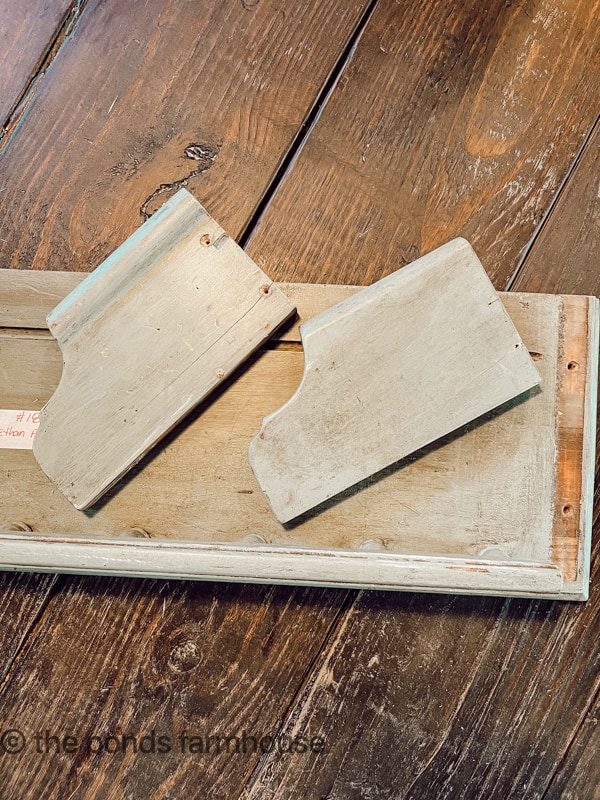
It was easy to re-attach the side brackets using the same screw holes but from the other side.

Now we are ready to add the shaker pegs to the new board or rail.
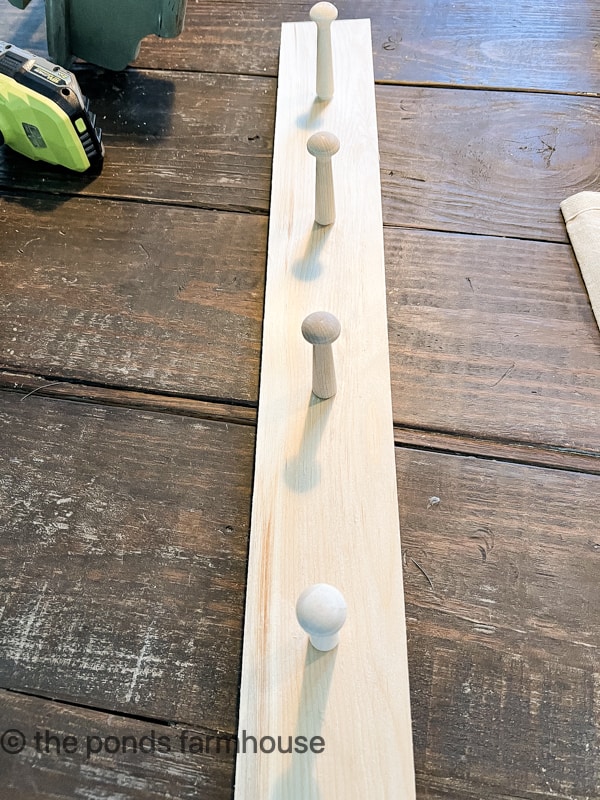
Build the Shaker Peg Rail
Brad helped me by drilling the holes for the shaker peg rail.
First, we measured the distance between each peg and marked the board accordingly.
Then, using a drill bit the size of the pegs and a cordless drill, he drilled all holes for the pegs to fit into.

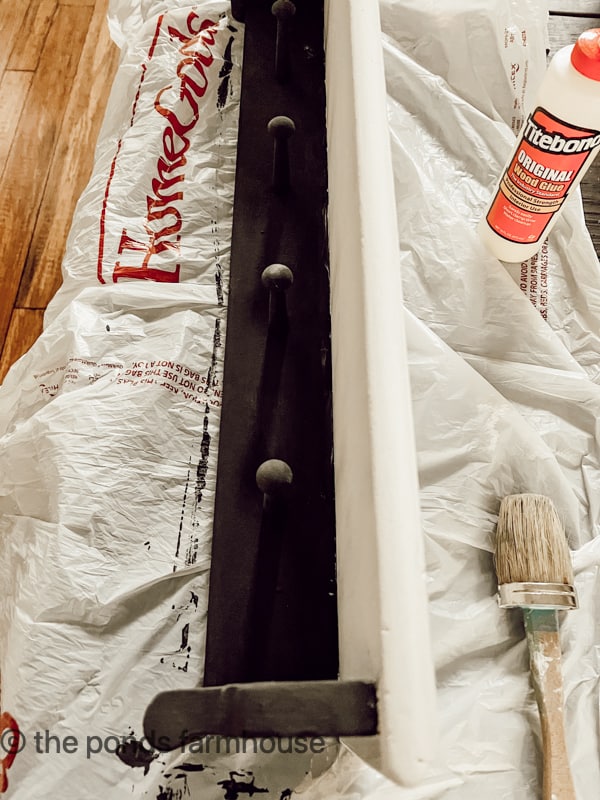
Next, using a touch of wood glue, we added the shaker pegs to the rail.
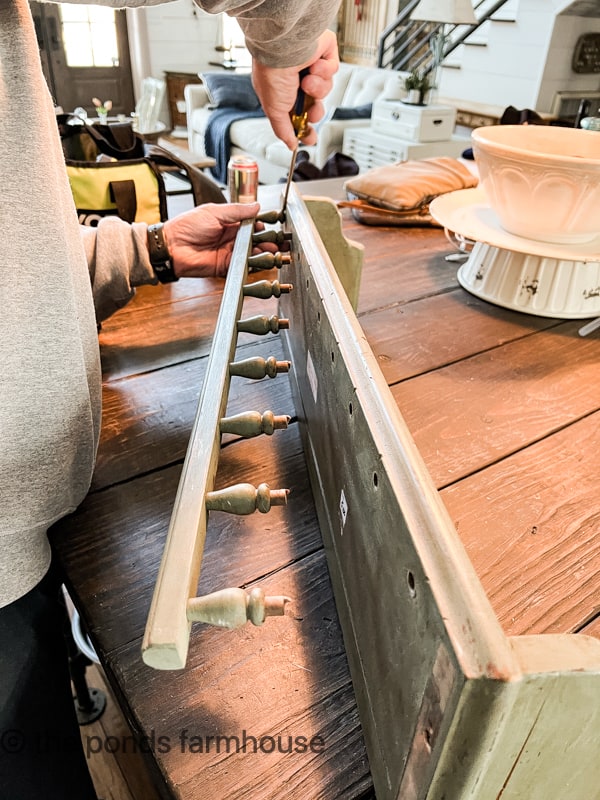
Add Shake Peg Rail to Shelf
The peg rail was cut to fit exactly between the side brackets on the existing shelf.

Begin by drilling two pilot holes in the side bracket and then using wood screws, attach the rail to the shelf at the side.
Remove trim
I couldn’t decide about the decorative trim on the shelf but after attaching the peg rail, I knew it had to go.
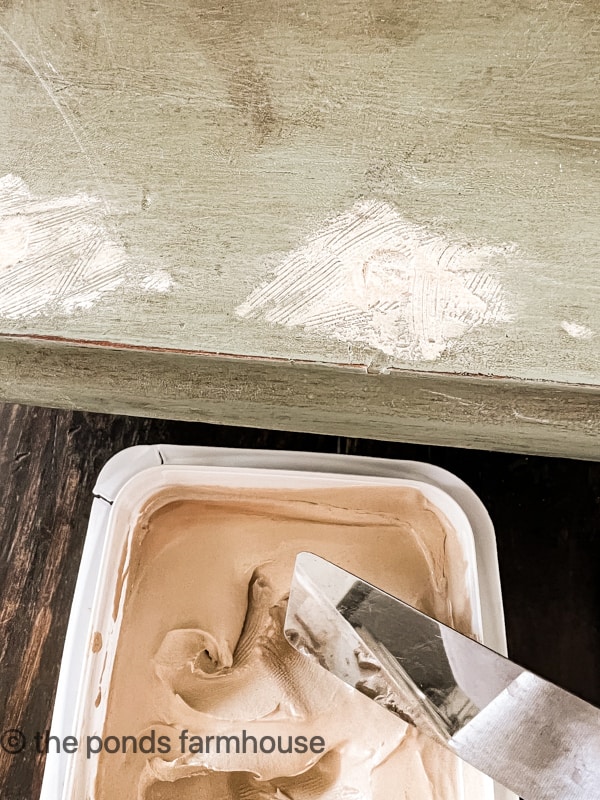
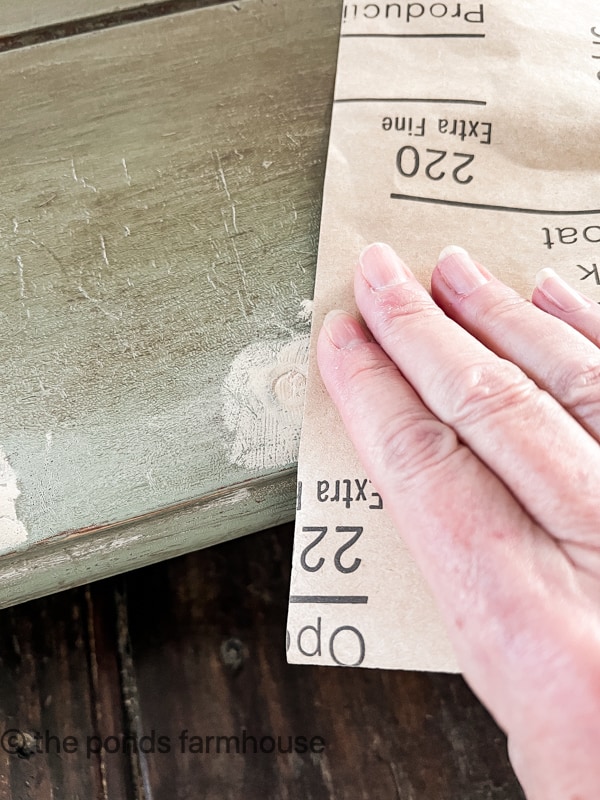
With the trim removed, several holes needed to be filled with wood filler.
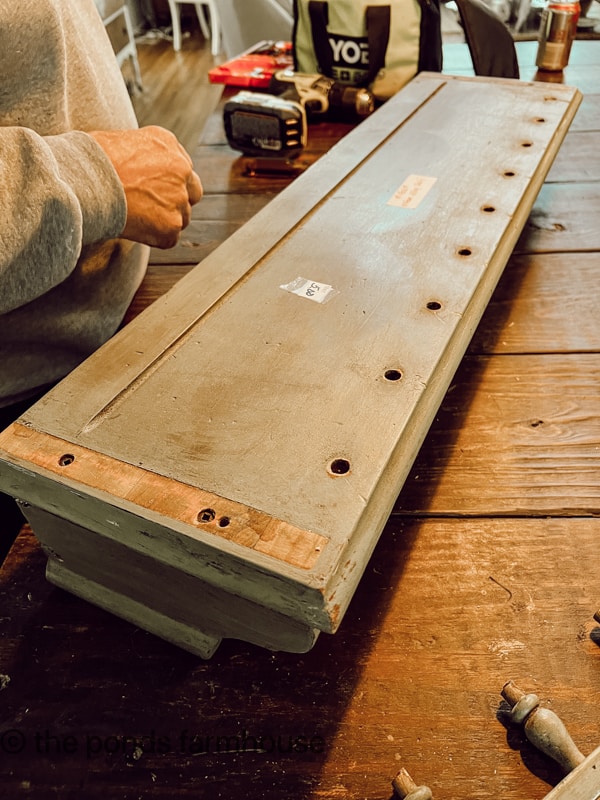
Next, wood filler was added and allowed to dry. Then using an extra fine 220 grit sand paper the holes and surrounding area was polished smooth.
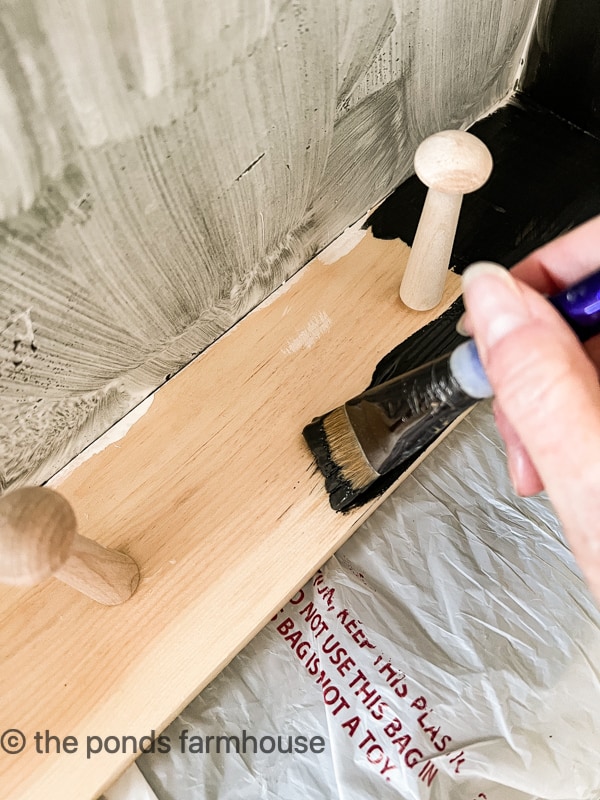
Paint Peg Rail Shelf
Next it was time to paint the project.
First, removed any dirt or grit from the sanding with a tack cloth before adding paint.
In order to give a little contrast, I decided to paint with two different colors of Chalk Paint.
Therefore, the shelf was painted with Annie Sloan Old White Chalk paint and the shaker peg rail with Graphite also by Annie Sloan.
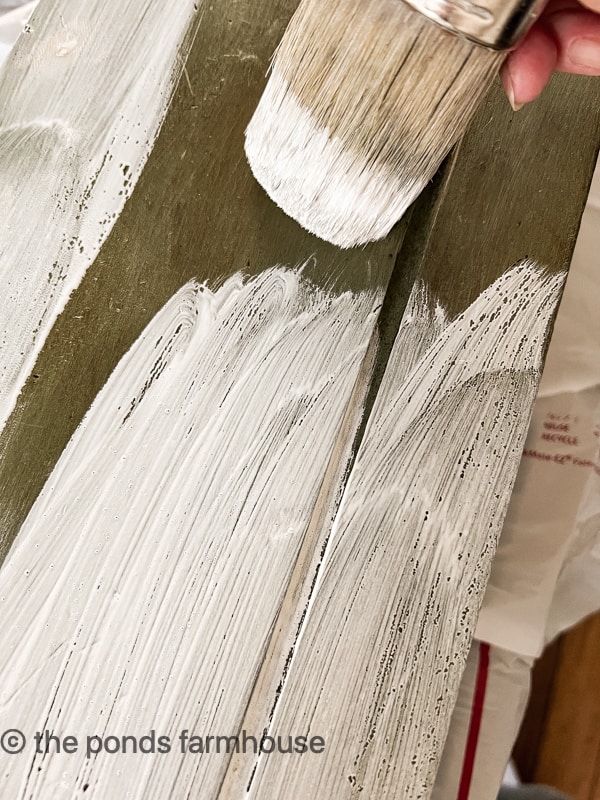
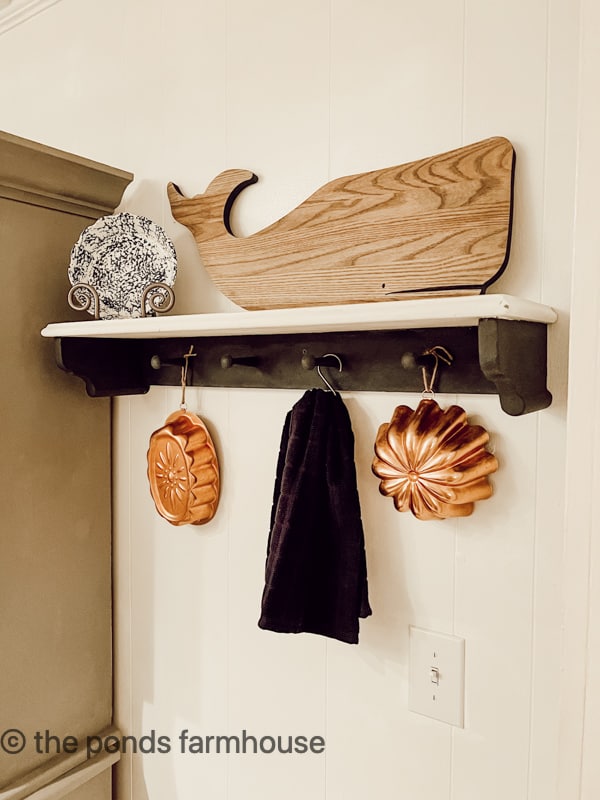
Once the Shaker Peg Rail and Shelf is dry, a clear wax was added to seal the paint.
Install the Peg Rail Shelf
There was a deep sigh of relief when we arrived at the beach cottage and the Peg Rail Shelf fit the space I had planned it for.
I had failed to measure before we left the beach and was really hoping the shelf would fit.

Once the shelf was secured to the wall, I quickly began to add decor.
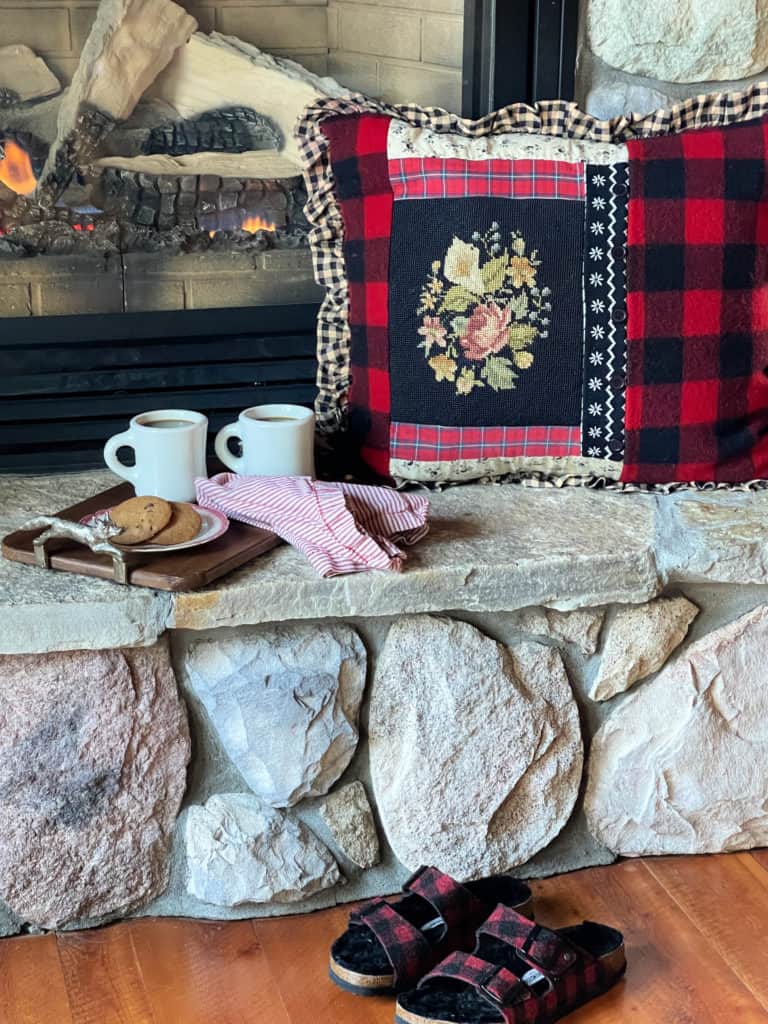
We have been remodeling the 1940’s, 460 sq. ft. beach cottage and with limited space, I knew a Peg Rack with a shelf would be a perfect addition.
If you’ve missed the Kitchen Remodel Sneak Peek you can see it here and you can see how we built our Open Kitchen Cabinet here.
I’ll be revealing more of this wall and probably rearranging the decor as we finish the project. I can’t wait to show you the full reveal.
Thrift Store Tips
I have several posts about How To Shop Thrift Stores and post such as What I’m Shopping for this year.
However, today I wanted to speak to wooden items.
Any items made of solid wood will be something to take a few minutes to explore. Hardwoods are very expensive at this time and if you are a project person, you can save a lot of money by repurposing solid wood pieces.
Here are a few wooden things that I take a second look at when the price is right.
- Solid wood shelves (surprise!!)
- Candle Sticks and Wall Scones – Remove the finish or paint.
- Art Frames – even if the art is ugly – custom frames are expensive. Remove the art and reuse the frame.
- Trays, Bowls, Bread Boards – all great for building vignettes and tablescapes.
- Wooden Plaques or signs – repaint and add a new slogan.
- Furniture that can be repurposed, disassembled, repainted, etc. It’s hard to find new quality furniture today.
In closing, one rule to follow – if you have a project that requires wood, check the thrift stores first and keep an open mind.
Example: Here was one project where I stumbled across a cheap thrift store item which was perfect to made a Corn Hole Score Board that I had been planning.
See finished project here.
I have another project coming up and I can’t wait to share my next thrift store shelf flip with you.
Don’t forget to link below to see more vintage inspo
Up next is Ann from Dabbling and Decorating and she’s sharing a This Seasons Thrifting Trends.
Dabbling & Decorating –This Seasons Thrifting Trends / White Arrow Home – Adding Beautiful Decor wThrifted Finds
Robyn’s French Nest – 3 Favorite Thrifted Finds / Peacock Ridge Farm – Vintage Finds that You Wont Believe
Thanks so much for stopping by today. I look forward to sharing my next adventure with you.

PIN IT TO REMEMBER IT


Love the shelf Rachel. My dad used to make these. They remind me of him💗💗
Your peg board looks amazing! Such a great idea. Thank you so much for inviting me to join you. It’s an honor. I would love it if you would share this on The Fabulous Friday Link Party this Friday. https://www.peacockridgefarm.com/category/fabulous-friday-link-party/
Hugs to you.
Love the shelf! It looks great!
Thanks so much.
This is such a good idea and it turned out so super cute!
Robyn,
I really appreciate your encouragement.
This turned out so great Rachel and is so perfect for the cottage! I love how you styled it when it was finished! So inspiring!
Kristin,
I appreciate this so much.
I love it!! Peg rails are so useful as well as pretty. I’m looking for one for my bathroom right now but may make one if I can’t find any for a steal. It looks great with all your cute decor on it…thanks for sharing!
Rachel,
They are actually easy to make and you can make them look vintage with a few tricks and tips.
You know I love a good repurpose project so I love this flipped shelf! Great tutorial Rachel! Pinned 🙂
Cindy,
I really am glad you liked this project. Thanks so much.
It turned out sooo cute Rachel! Thanks for sharing at Fabulous Friday Link Party
Diane,
You are welcome.
Yay! Thank you so much for sharing on Fabulous Friday Link Party. We sure appreciate you. Hugs and blessings to you.
You are welcome Renae
Thanks so much for sharing.
Looks very nice…I have one, already made and very vintage and recently {after trying to sell at garage sale, for $1.00} use it to cover a space on my pier and beam house, to deter critters from crawling under. Really could not find a suitable place for the shelf in my limited space old school house. lol
Emma,
That sounds like a great piece. Wow an old school house, how cool. Thanks for stopping by.