How to Make a DIY Rustic Wood Slice Christmas Tree: Charming Holiday Decor
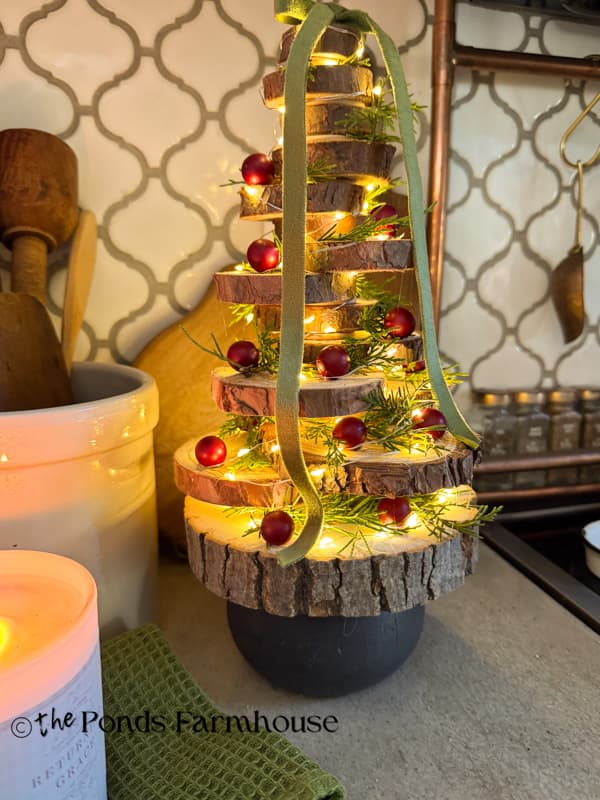
Hey friends! If you’re looking for cozy holiday tabletop decor, this easy DIY rustic wood slice Christmas tree is the perfect project. I wanted a small Christmas tree to style on my kitchen countertops, so I gathered a bag of craft wood slices, a dowel rod, berries, and twinkle lights to bring it to life. After Brad helped me drill holes through the wood slices, the assembly came together quickly. I can’t wait to show you how to make this charming wood slice tree step-by-step and share how I styled it in our holiday kitchen!
(Posts on The Ponds Farmhouse may contain affiliate links. As an Amazon Associate, I earn from qualifying purchases. See the full disclosure details here.)
How To Make A Rustic Wood Slice Christmas Tree
I wanted a small tree, so here is what I decided would work for my space. Originally, I planned to have Brad cut the slices from a fallen branch. But I realized that it would be very labor-intensive to cut that many small pieces. So I purchased a bag of small 1/4″ thick wood slices ranging from 1/2″ to 4″ and 1 larger 8″ slice as the base. I had some old recycled furniture feet, so I used one as the stand. I wanted to add some space between the slices to allow for decorating, so I realized that gluing them together would not be optimal. Therefore, I referred to our DIY Shiplap Tree tutorial, and we drilled holes to add a dowel rod to hold the slices steady.
Where I could, I used items that I already had on hand to keep the project budget-friendly. I realize that if you need to purchase in bulk, it can be costly. Below is a list of the supplies I used, but be creative and use what you already have in your craft stash. This is a rustic craft, and unique materials will make it more creative.
Supply List
- Small Bag of Multiple Sizes of Wood Slices
- One 8″ Wood Slice
- Dowel rod
- Wood Washer Spacers
- Battery-operated fairy lights
- Small Drill Press or cordless drill
- Berry Stems
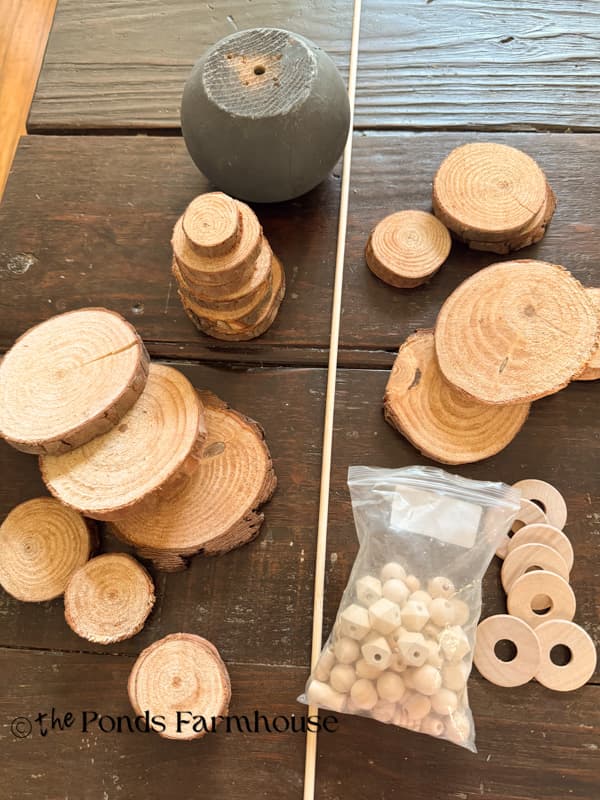

How To Prepare the Wood Slices
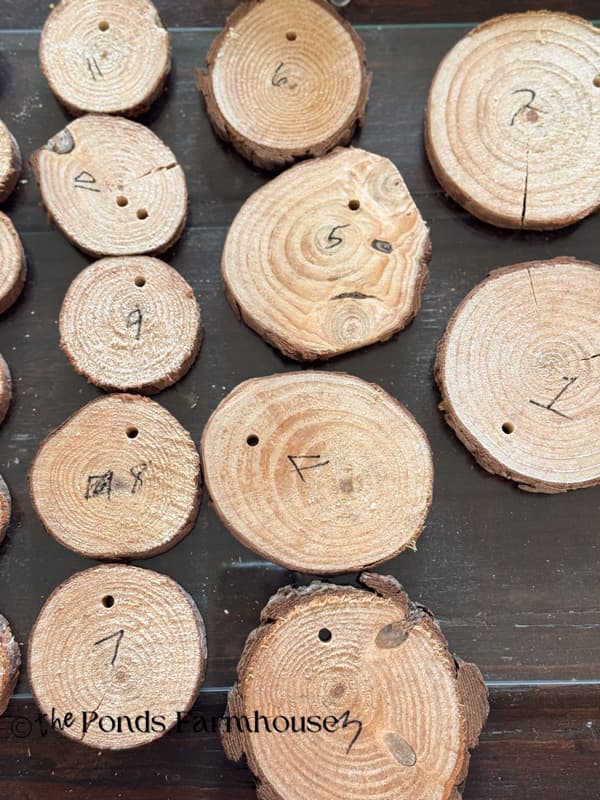
To prepare the wood slices for assembly, I stacked them from largest to smallest to determine approximately where to drill the holes.
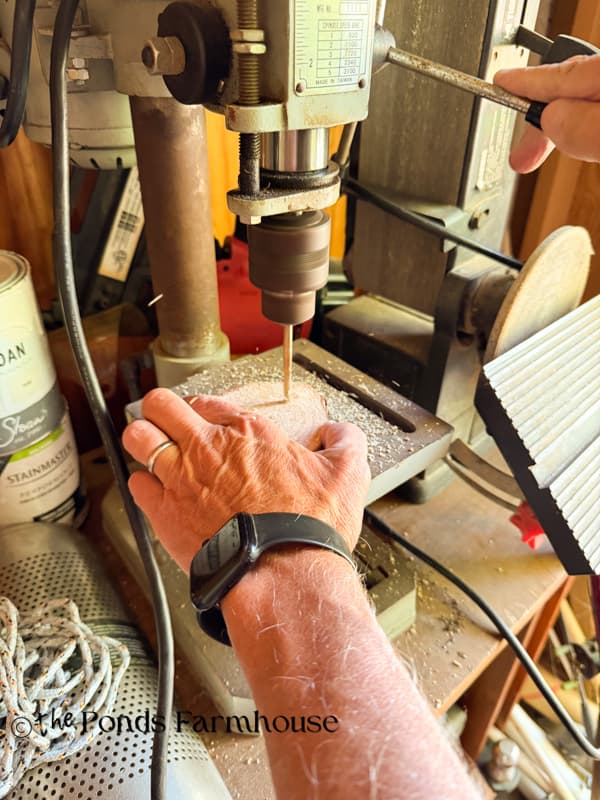
We used a drill press to drill a hole slightly larger than the dowel rod in diameter.
Then I did a test run, adding the slices to ensure that the holes were in the correct place.

As I removed the slices, I numbered them on the back side to ensure I arranged them in the same order.
How To Assemble The Wood Slice Tree
Begin assembling the wood slice tree by adding the dowel rod to the wood furniture foot. If your base needs a hole drilled, use a drill bit that is approximately the same size as the dowel rod, so it’s secure in the base.

Insider Tip
Don’t cut the length off your dowel rod before assembly. You may find that you need some extra length after adding spacers and decorations. I cut mine to size after the tree was completely assembled.
Begin adding the wood slices and adding the spacers where needed. You will be able to adjust the position of the slices to give the tree balance.
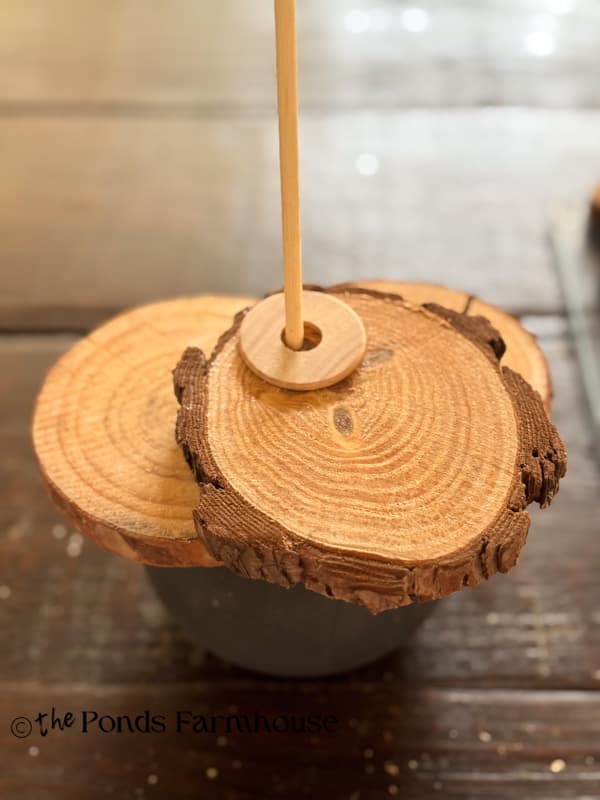
Continue adding from largest to smallest to achieve the appearance of a Christmas tree.

How To Decorate A Wood Slice Christmas Tree
There are several options for decorating your wood slice tree. I wanted to keep mine simple, so I decided to use twinkle lights and red berries with small sprigs of natural cedar. Here are some options for decorating your tree.
- Fairy Lights
- Add faux berries
- Making a small garland with jute twine and miniature ornaments.
- Add dried orange slices
- Using greenery stems to fill in gaps.
- Small Wooden Star topper
- Add a bow as the tree topper.

Easy Tree Trimming Idea
First, I wrapped the fairy lights around the tree, tucking them in between the slices as I went.
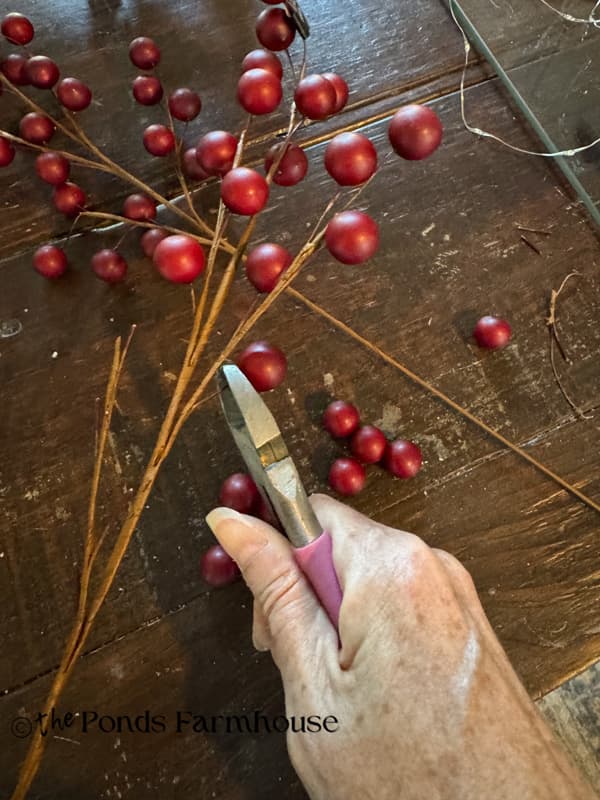
Then I cut the red berry stems into small pieces and used hot glue to secure them to the tree. I also added some fresh cedar stems
How To Decorate With DIY Wood Slice Tree
As I said, I made this tree specifically for my kitchen countertop. There are several areas where you could use a small tree of this type.
- It’s small enough to fit in a bookcase or shelving unit. Plus, open kitchen cabinets.
- In addition to the kitchen countertop, consider a bathroom countertop.
- Add to a tray vignette on a coffee table.
- It would be a good size for a side table grouping.
- Place it on your desk.
I placed the tree on my living room side table and love how it fills the space.

Another area in my home is the pedestal old porch post in the corner of my dining area. The wood slice Christmas tree also looks good in this location with my rustic table setting.


However, the best spot for my tree is still the kitchen countertop. Maybe next year I’ll use it elsewhere.

Resources: Shop This Post

Video Tutorial

I hope you enjoyed today’s easy DIY Wood Slice Christmas Tree Tutorial. I look forward to sharing more easy DIY projects with you.

Pin It To Remember It
Did you find some great ideas you’d like to save for future reference? To save, hover over the images and pin to your favorite Pinterest Boards when you see the PIN button in the upper left-hand corner.