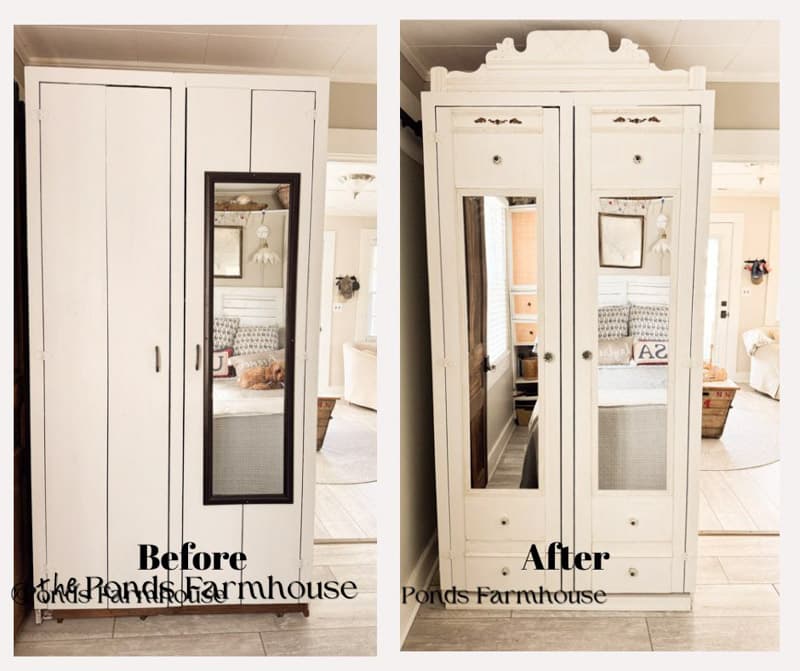
How to Make a Plain Wardrobe Look Like an Antique Armoire
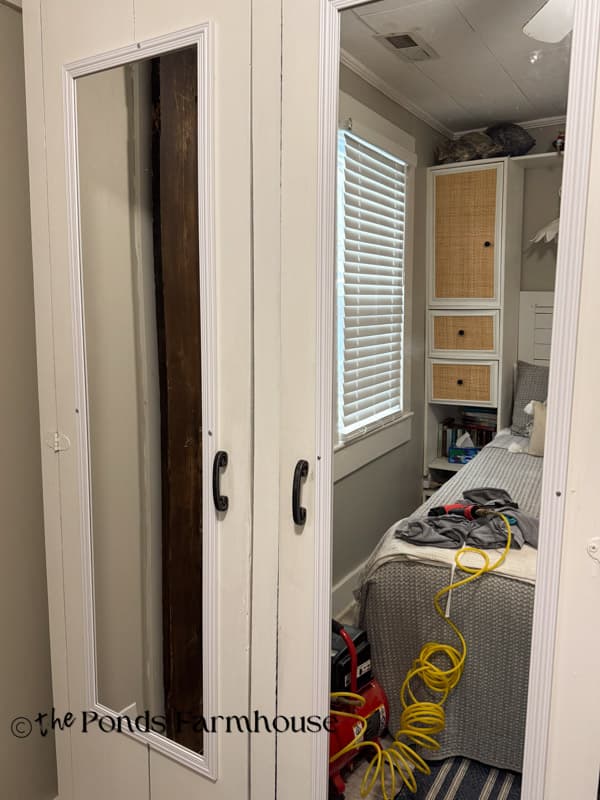
Hey Friends, we have had a plain, large, handmade wardrobe in the beach cottage bedroom for several years. I wanted to replace it, but since it provides much-needed storage, I began exploring makeover options. The results of this makeover turned the plain wardrobe into a stunning antique armoire look-alike. By adding full-length mirrors, faux drawers, a pediment, and new vintage-inspired hardware, we now have all the storage, but it still appears to be a rare antique piece.
Let me show you how we made this transformation.
(Posts on The Ponds Farmhouse may contain affiliate links. As an Amazon Associate, I earn from qualifying purchases. See the full disclosure details here.)
Preparing for Wardrobe Makeover
Once I had a vision of what the wardrobe could look like, I began sketching a plan. Because there was a large seam in the middle of each door, I felt it would be best to cover the fronts of the doors from top to bottom.
I also looked at images of antique armoires for inspiration. I wanted to add a pediment to the top, and I considered several possibilities, including searching for one at antique stores or making one ourselves. But then we remembered an old bed frame that we have had in storage for years. The width of the headboard turned out to be the perfect size. Now that we had this major piece, we were ready to purchase all the supplies. Here is what we used.
Supply & Tool List
- 2 Full-length mirrors with white frames.
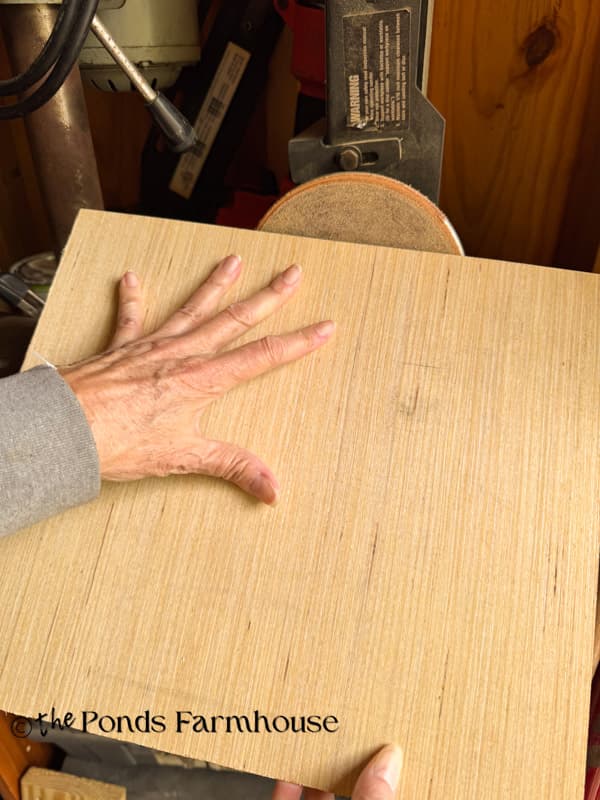
- 2 sheets of – 1/4-in x 2-ft x 2-ft Birch Sanded Plywood
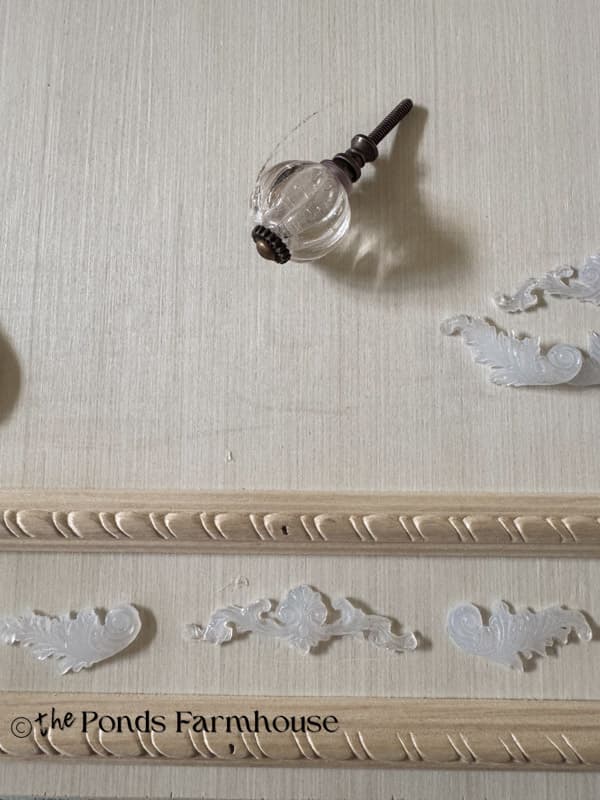
- Two Antique-Inspired Door Knobs
- 6 Antique-inspired drawer pulls
- 1 piece of decorative trim – Rope Chair Rail Molding
- Decorative Silicone Molds
- Hot Glue Gun
- Wood filler
- Nail Gun
- Air Compressor
- Cozy White Paint
- Dark Wax
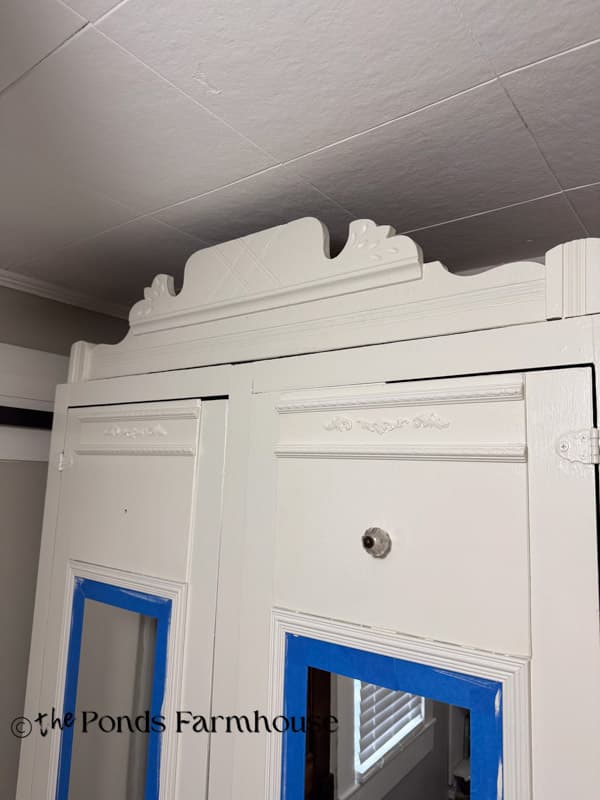
How To Make A Pediment From a Bed Headboard
We have had this antique single bed in storage for several years. We kept thinking we’d find a use for it. As we began to explore ideas for a pediment to attach to the top of the wardrobe, Brad remembered the old bed. The size was perfect, so we decided to use it for this project.
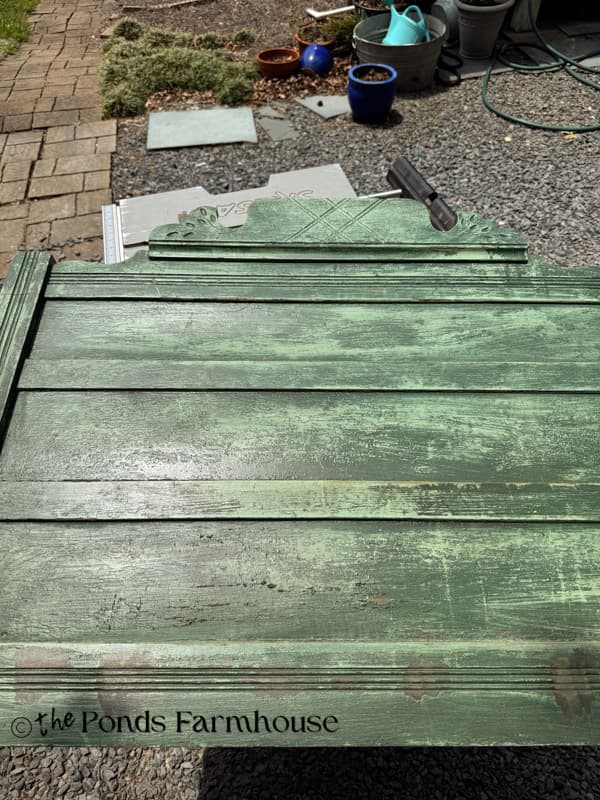
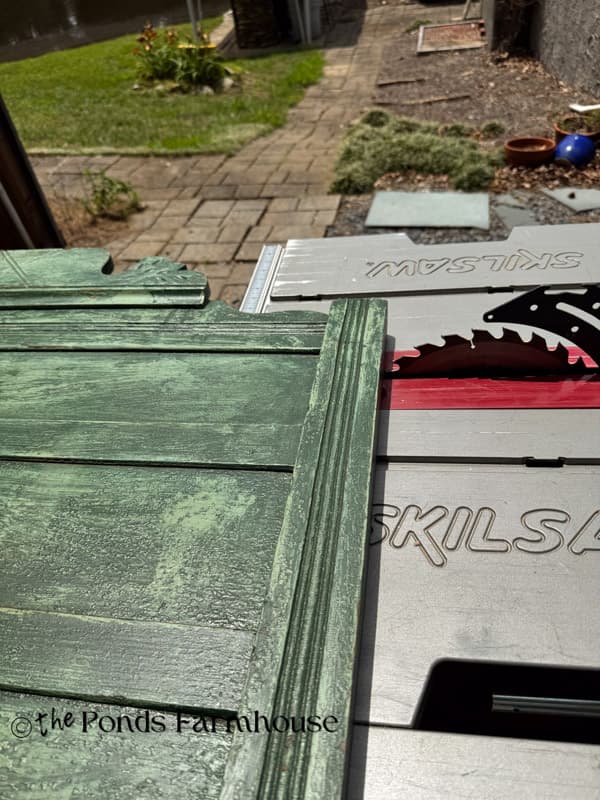
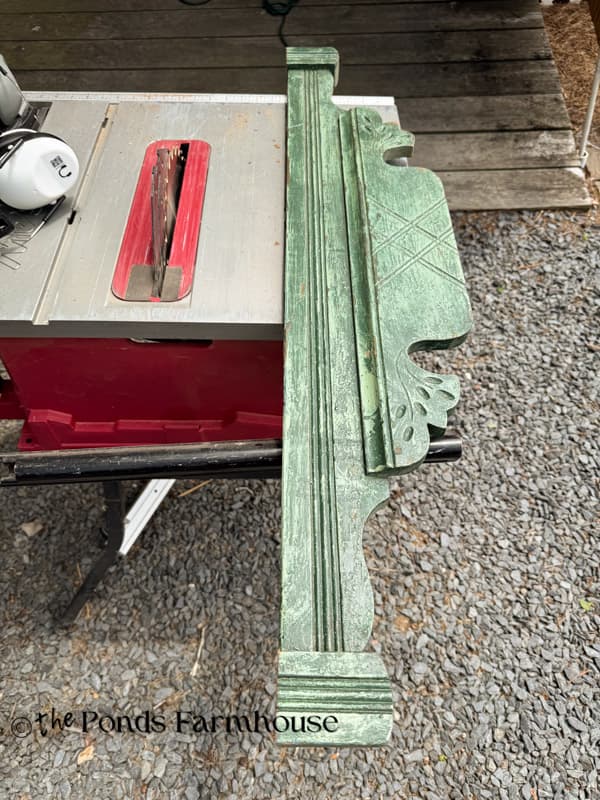
How to Turn the Headboard into a Pediment
To turn the headboard into a pediment, Brad used his table saw to cut off the top. It is perfect as a pediment for the top of the old wardrobe and to create an antique-looking armoire.
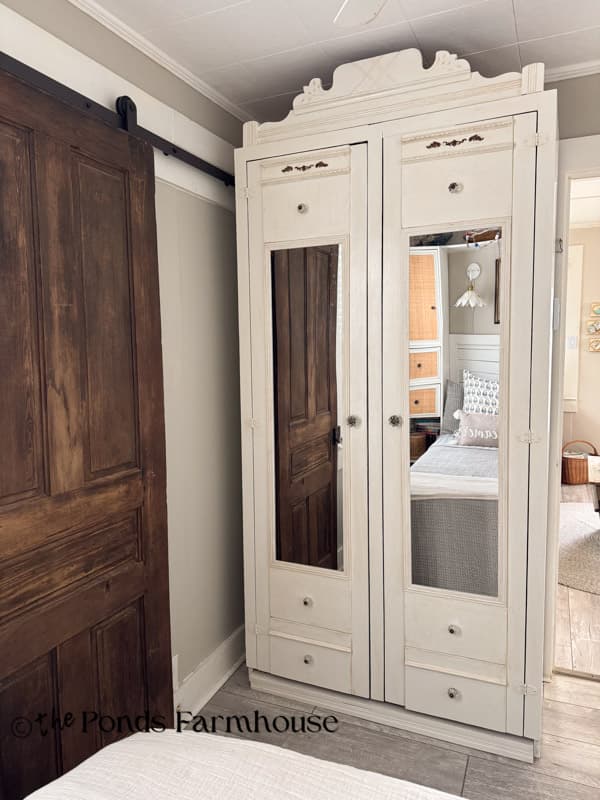
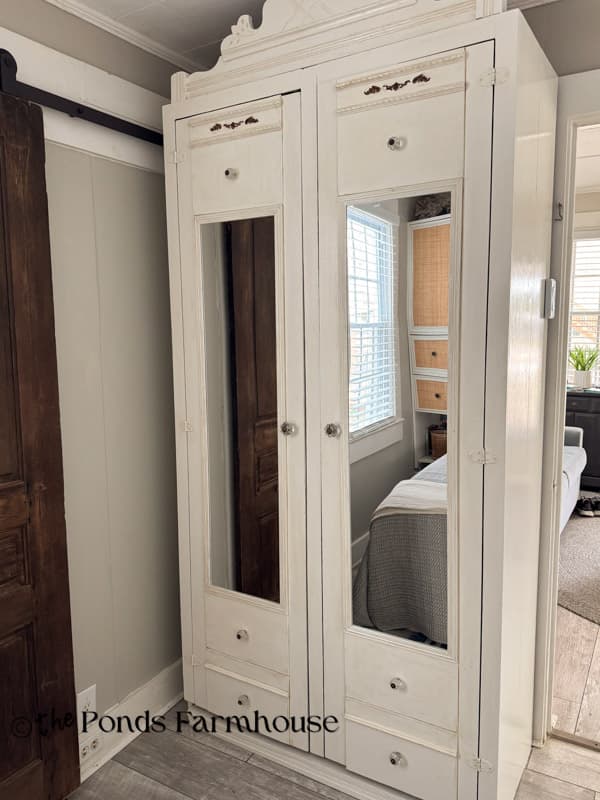
Add Mirrors to the Wardrobe Doors
The next step was to add mirrors to the wardrobe doors. We had originally had one full-length mirror on the door, but to create the look of an armoire, I needed two mirrors to mimic the mirrored doors I’ve seen on antique pieces.
We replaced the original mirror with inexpensive ones with white frames. The mirrors were attached with screws and nails.
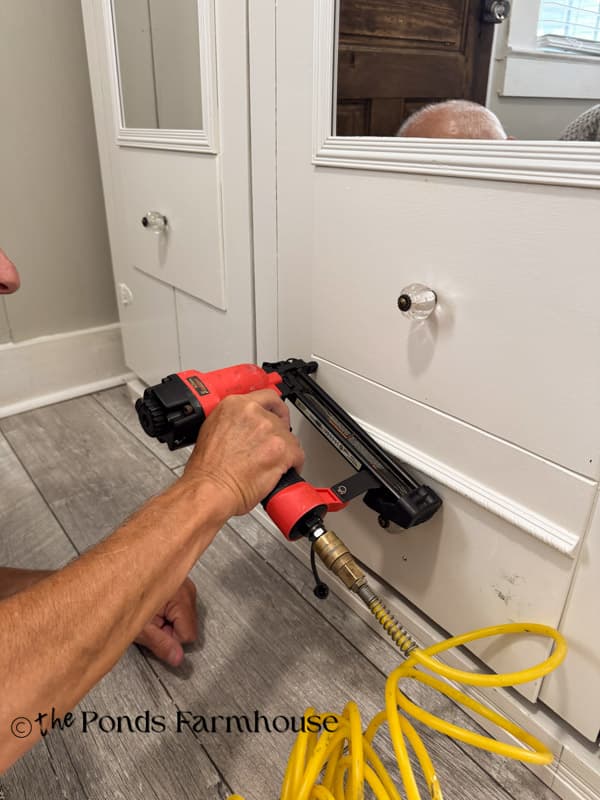
How to Add Fake Drawers to the Wardrobe
The mirrors covered a good portion of the wardrobe doors, but we needed something at the top and bottom. I decided to create fake drawers like you might see in an antique armoire. We used thin 1/4-inch smooth plywood, as we did on the Faux Apothecary Cabinet Makeover, to create 3 drawers on each door. This would be the appearance of one above the mirror and two drawers below the mirror. Here’s how we made them.
- First, measure the space that needs to be covered.
- Cut the plywood to size.
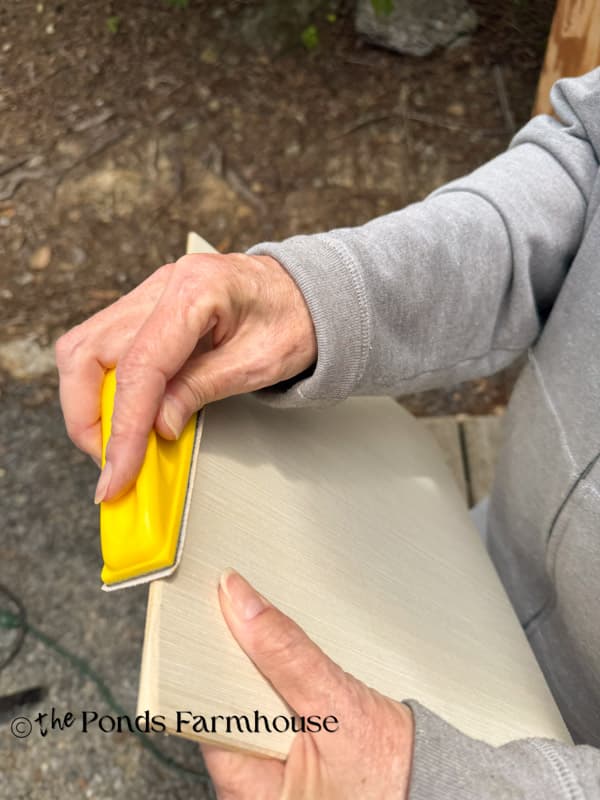
- Use a belt sander to bevel the edges of the plywood.
- Then use a hand sander to further smooth the edges.
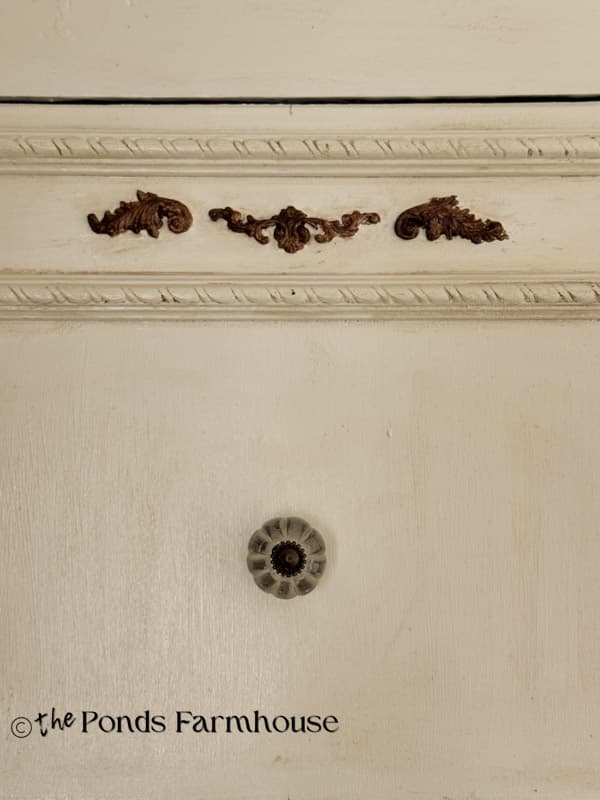
We also wanted to add decorative trim to achieve an antique feel on the drawers. So we used some rope trim, and I made additional trim with silicone molds and hot glue.
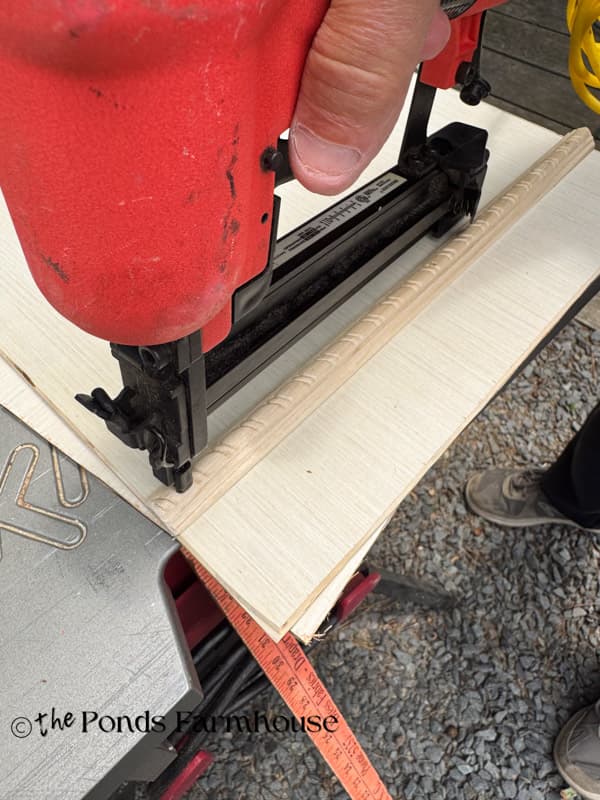
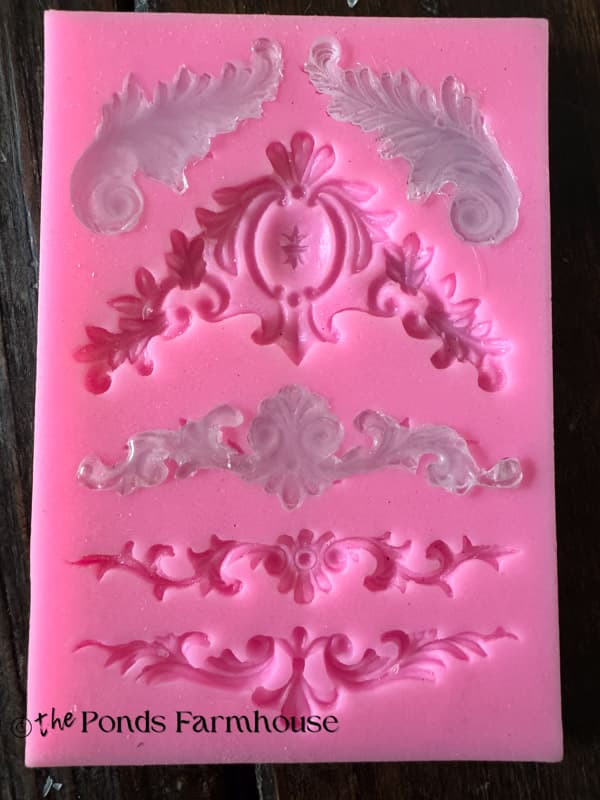
The rope trim was added with a nail gun, and the hot-glue decorative accents were affixed to the drawer fronts with E-6000 glue.
How To Add The Pediment and Fake Drawer Fronts
Now, we are ready to start the construction of the Antique Armoire.
To create an antique-style armoire, I felt that adding a pediment, decorative trim, and drawers would enhance its authenticity.
Adding the Pediment
First, we added the pediment to the top. We used L brackets attached to the pediment and then used screws to attach it to the top of the wardrobe.
Adding Fake Drawers
Since the fake drawers were already cut to fit the space, the construction was simple. We placed the plywood faux drawers in position and used the nail gun to attach them. Brad added approximately six nails to ensure there were no gaps.
Painting the Added Armoire Additions
We added two coats of white paint to the fake drawer fronts and the pediment before installing them to speed up construction. This allowed us to only paint one coat after installation to cover any wood filler and scuffs.
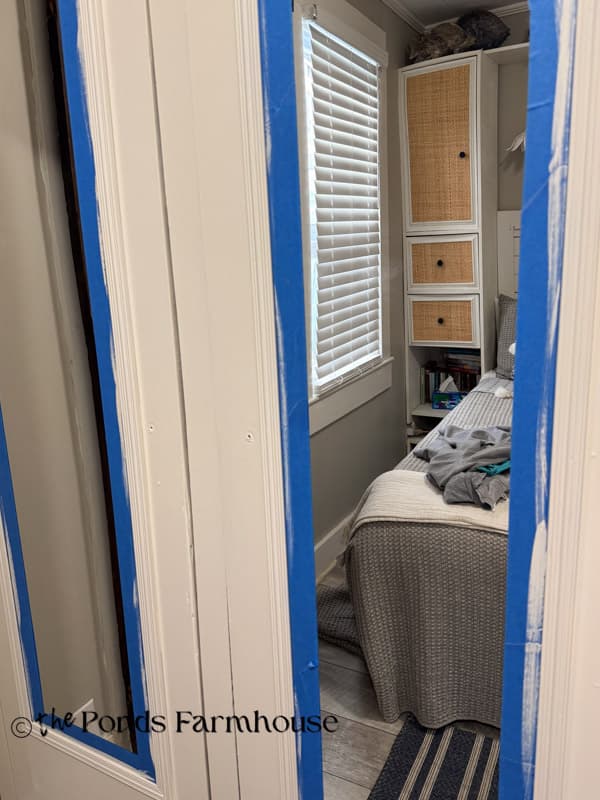
To ensure the mirrors remain paint-free, I used painter’s tape to protect them.
We used wood filler to cover the nail holes and allowed it to dry. Then we painted a single coat of white paint over the entire armoire.
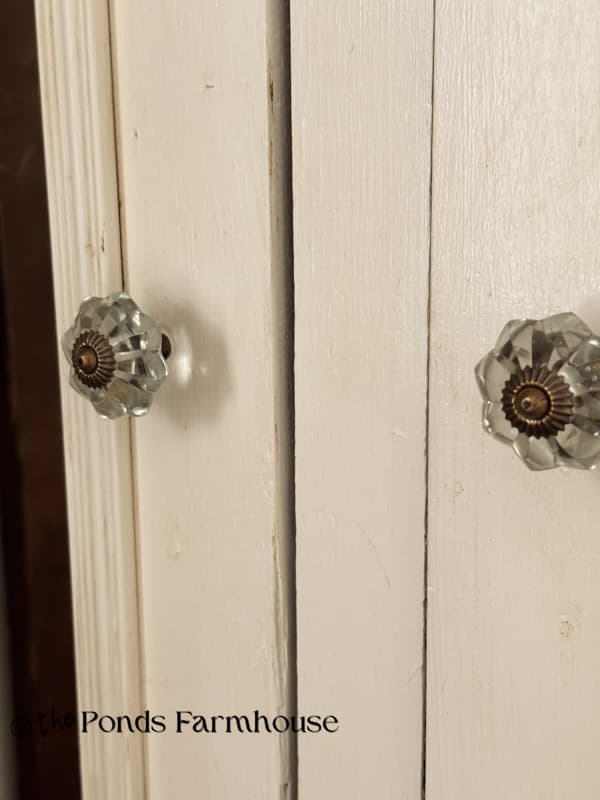
How To Add Vintage-Inspired Hardware
I found some vintage-inspired glass door knobs and drawer pulls to use on the armoire transformation. We established the center of the drawer front, and Brad drilled a hole for the drawer pulls. The old drawer pulls were removed, and the glass door knobs were added.
Adding Finishing Details
Once everything was painted and the hardware was installed, I still felt something was lacking. The hot glue decorative trim was barely visible, as were the details on the pediments. In addition, the drawer fronts disappeared against the cabinet doors. So here’s what I did.
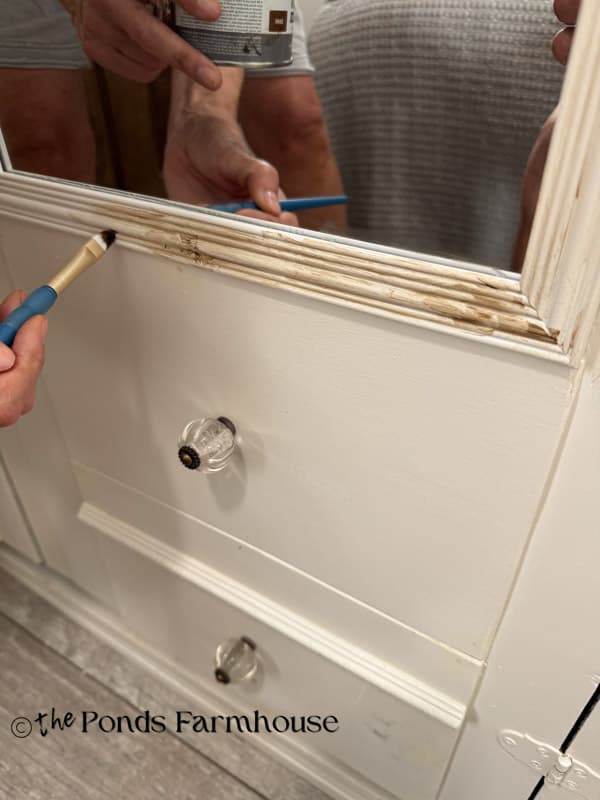
First, I used some bronze craft paint to enhance the decorative trim to match the hardware. In hindsight, I wish I had painted this trim before adding it to the fake drawer fronts. I would have been able to cover them more thoroughly. However, it turned out fine.
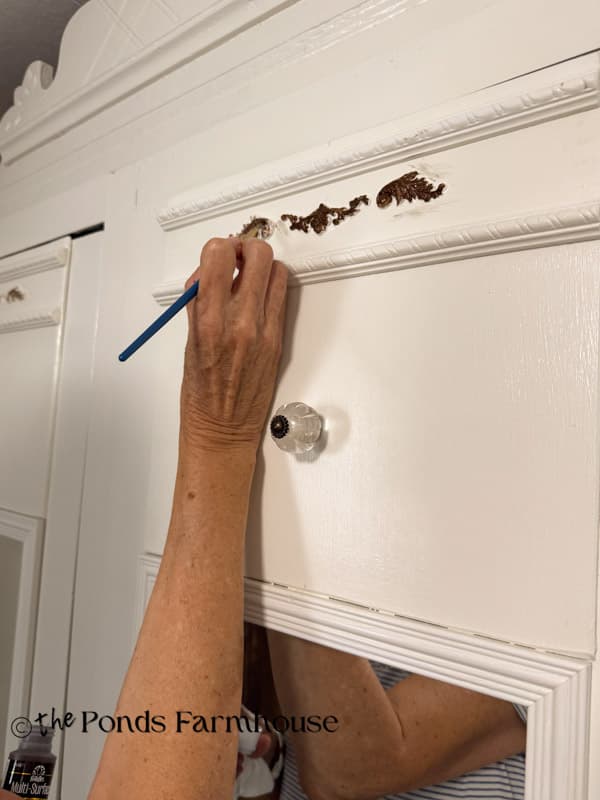
Next, I added a dark brown wax to enhance decorative areas and around the edges of the drawer fronts. I brushed the wax onto the areas that I wanted to enhance and wiped away the excess. Then I rubbed the cloth over the flat areas of the armoire to lightly coat them with wax.
You can see how the wax and paint helped enhance the armoire’s architectural details and give it an antique style.
The Antique-Inspired Armoire Transformation
The old, handmade wardrobe is now hardly recognizable. With all the added details, it can easily pass for a coveted antique armoire. We still have plenty of storage, but now in a more stylish package.
The entire transformation cost less than $50.00 and only took a few hours to complete. The most time-consuming part was adding the dark wax and waiting for the paint to dry. With Brad’s help, the project was a breeze to complete.
So what do you think? Would you attempt a makeover such as this?
Resources
Click to see all tools and supplies used in this transformation HERE.
Thank you for stopping by. If you have a furniture transformation you’d like to share, send me a photo, and I’ll share it on my Dirt Road Adventures on Sundays.