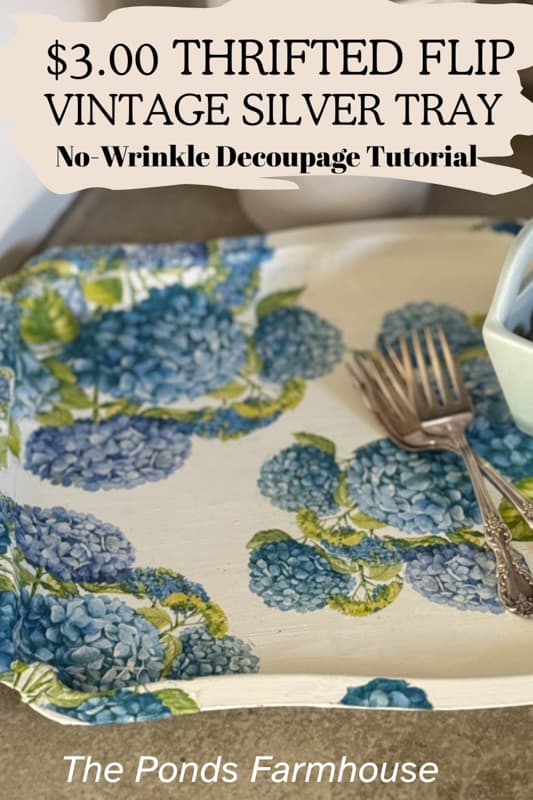
$3.00 Thrifted Flip: Vintage Silver Tray Gets a Modern Decoupage Twist Makeover
I love using trays in my home decor, but let’s be honest—high-end versions from stores like Pottery Barn can come with a hefty price tag. When I spotted a vintage silver tray for only $3.00, I knew it was the perfect candidate for a makeover. The original finish was a bit underwhelming, but with a little paint and a modern napkin decoupage technique, I was able to create the floral motif I’d been eyeing. You won’t believe the transformation! Here are the easy steps to turn a dull thrifted find into a stunning modern decorative tray.
(Posts on The Ponds Farmhouse may contain affiliate links. As an Amazon Associate, I earn from qualifying purchases. See the full disclosure details here.)
How To Spot A Thrift Store Deal
I’m always looking for decorative trays, and many have great shape, but the color or finishes leave a lot to be desired. But I don’t let that discourage me. Some of my best decor pieces were inexpensive finds that just needed a little tender loving care. Here is what I look for…
- Size – larger trays are hard to find, and when I do, I’m always drawn to them.
- Great shape – I’ll stop for square and rectangle trays, but one with a unique shape is always an exciting find.
- Has potential for a makeover. I’ve not found many trays that I couldn’t envision a makeover with paint, rub n buff, or napkin decoupage. Picture the item in a different color or with a decorative napkin design.
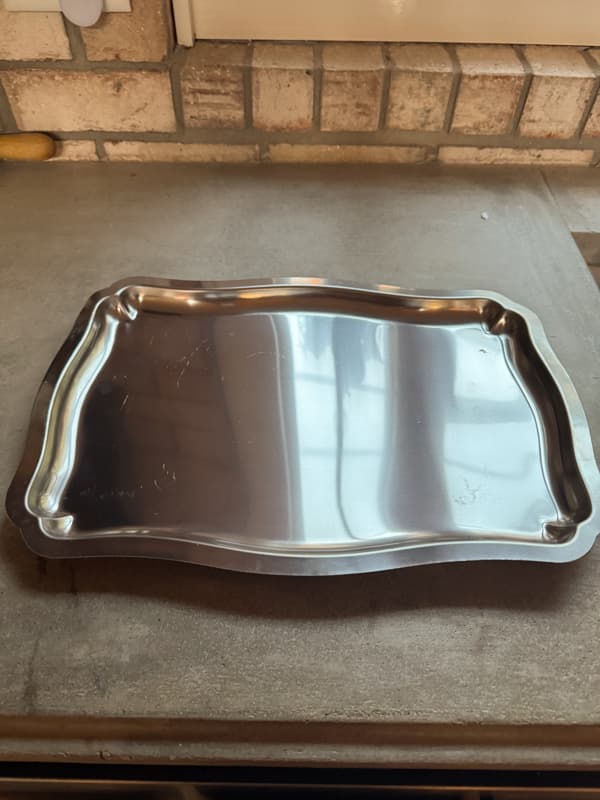
Here is the tray I purchased for only $2.99 at my local Goodwill Thrift Store.
Supplies You’ll Need for This Silver Tray Flip
Here are the supplies I used to create this modern tray.
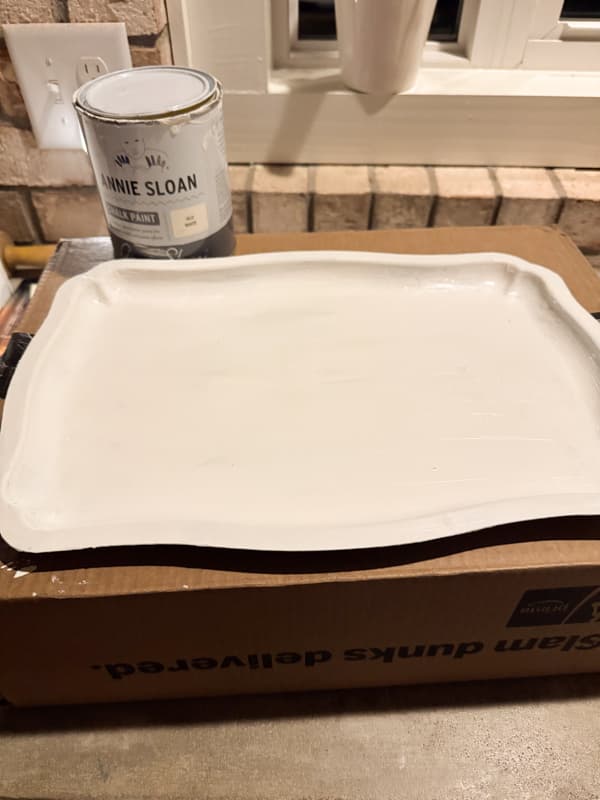
- Old White Chalk Paint (Annie Sloan)
- Hydrangea Napkins – Another Hydrangea Napkin option
- Mod Podge
- Small Heat Press (handheld)
- Small paintbrush
- Waterproof Clear Glaze Spray Sealer (optional)
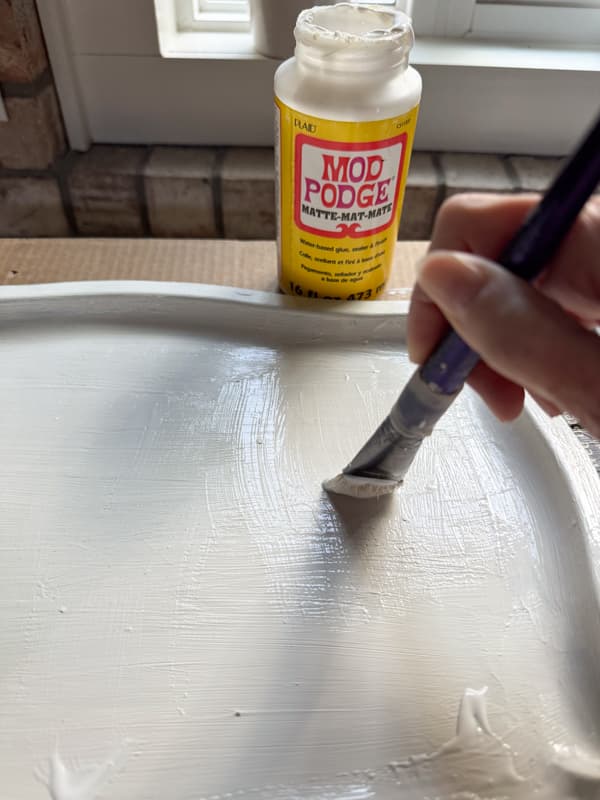
Preparing the Vintage Silver Tray to Paint
First, prepare the thrifted vintage silver tray for the makeover.
- Wash the tray to remove any oils or grease.
- Sand any rough spots or rust. Remove dust.
- After the tray is completely dry, paint it with chalk paint on both sides.
- I used two coats of paint for solid coverage.
- Allow to dry for several hours before proceeding.
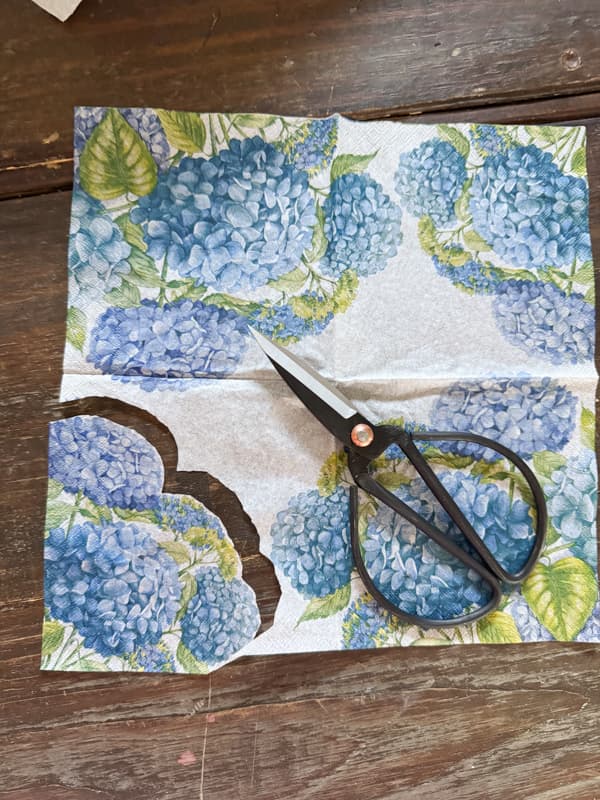
Prepare the Napkin
While the paint is drying, you can prepare the napkin.
- Remove the back layers. Most paper napkins are 3 ply, so you will want to remove the 2 back layers.
- I use a piece of tape to help separate the layers.
- Work gently, as the top layer is fragile and prone to tearing.
- Cut the decorative pattern that you plan to use from the top of the napkin.

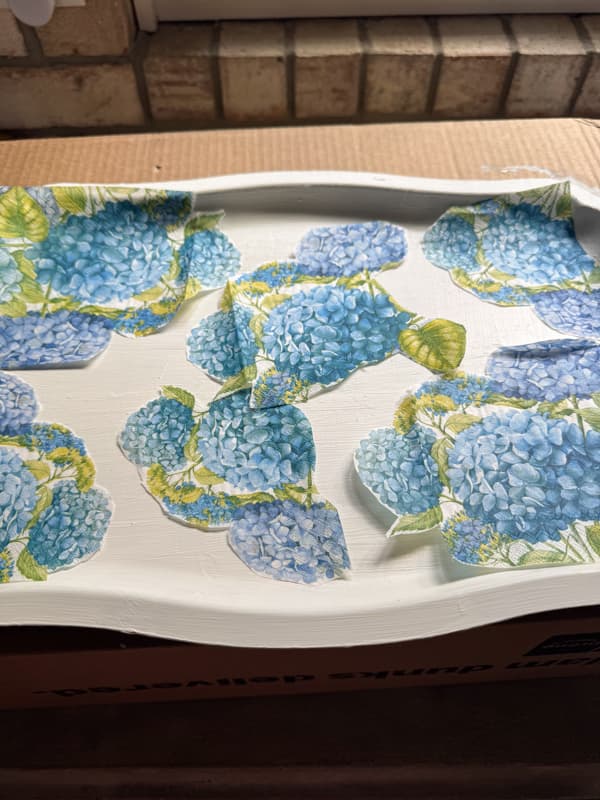
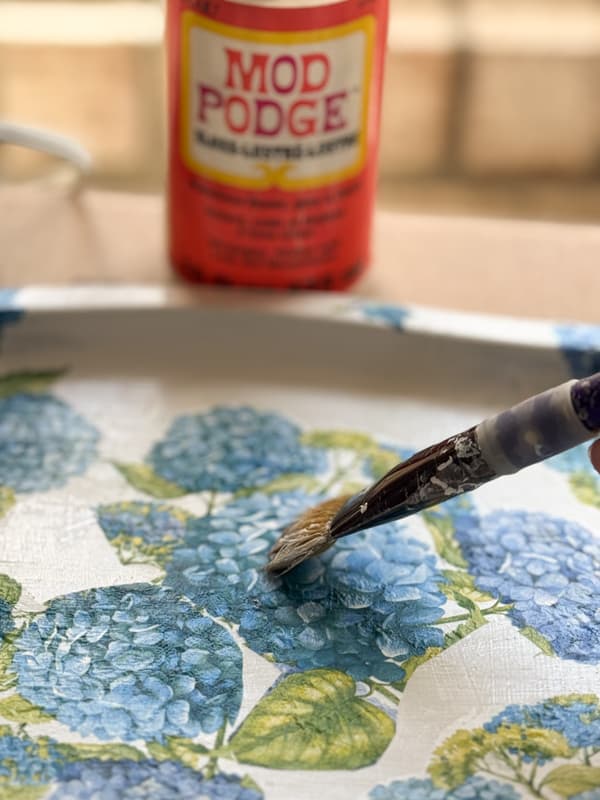
How to Apply Napkin Decoupage Without Wrinkles
I love using this decoupage technique because it doesn’t cause wrinkles like napkin decoupage. However, this technique only works on flat surfaces.
- Apply a heavy coat of Mod Podge to the tray.
- Allow it to dry completely. Don’t begin applying the napkin to wet or damp glue.
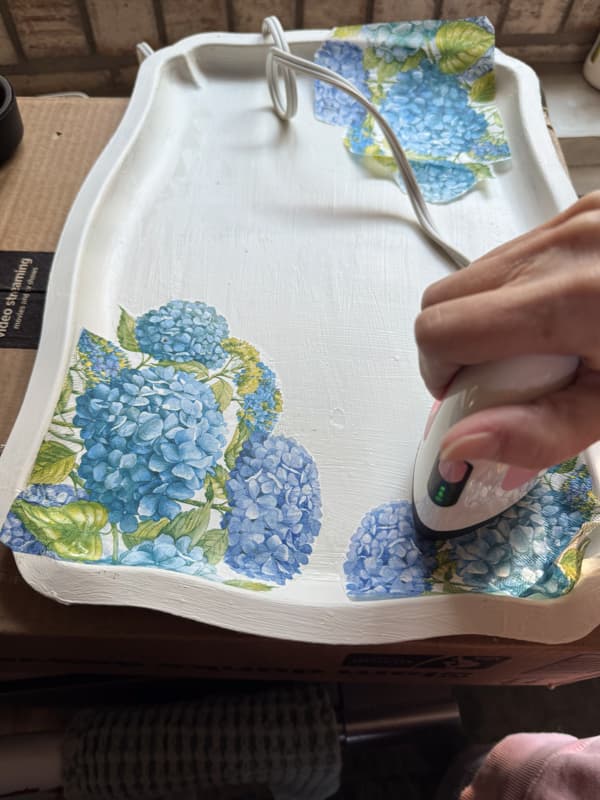
- Plug in the mini-heat press and heat it.
- Position napkin pieces in the areas of the tray you wish to apply them to.
- Use the mini-heat press to adhere the napkin pieces to the tray.
- Although the glue is dry, the heat will activate it, and the napkin will adhere.
- Smooth the heat press gently over the napkin until it adheres.
- You can work the napkin around the curve of the tray and use the edges of the heat press to adhere. Just use a light hand and don’t press to hard as it’s easier to tear when working on the uneven surface.
- I also added some pieces of napkin to the top edge by cutting out the design for a natural look.
- Stand back and admire your creativity.
Sealing the Tray for a Durable Finish
There are a couple of options for sealing the tray after the napkins have been applied. First, determine what you plan to use the tray for. If you plan to add food or beverages that can be wet or damp, you will want to use a waterproof sealer. This can be sprayed or painted on. If you plan to serve food on the tray, you will also want to ensure it is food-safe.
If you are only using the tray for decorative purposes, you can apply another coat of Mod Podge over the top.
Insider Tip – Successful Napkin Decoupage Sealing
- Don’t apply a heavy coat of sealer on the napkins. They can still wrinkle,
- Apply 2 – 3 light coats of sealer instead of one heavy coat.
- Allow the sealer to completely dry between each coat.
- If using a spray sealer, hold the can a good distance from the napkin tray and mist the first coat.
- Continue to add light coats of spray until you feel it is sealed properly.
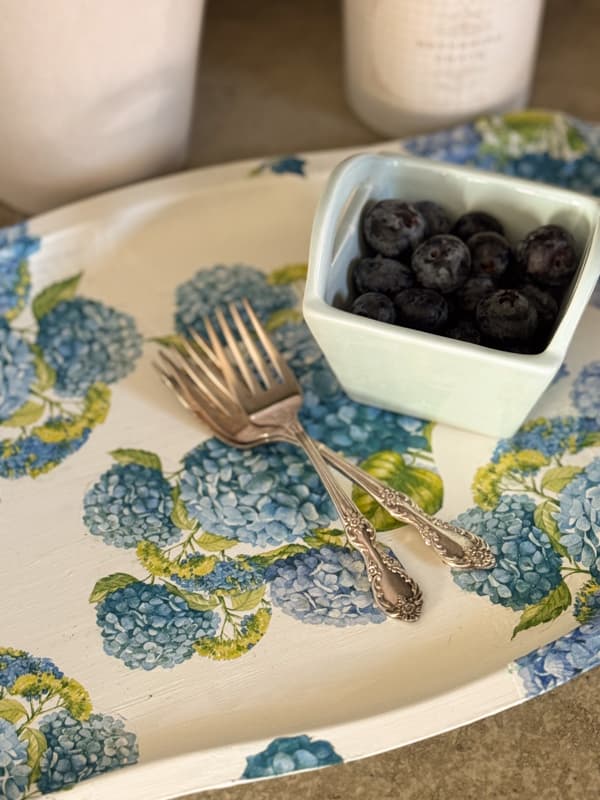
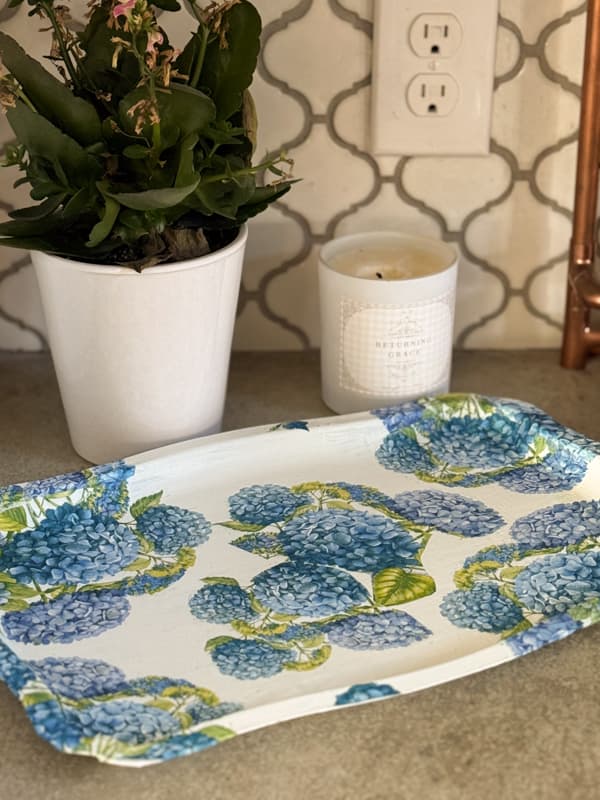
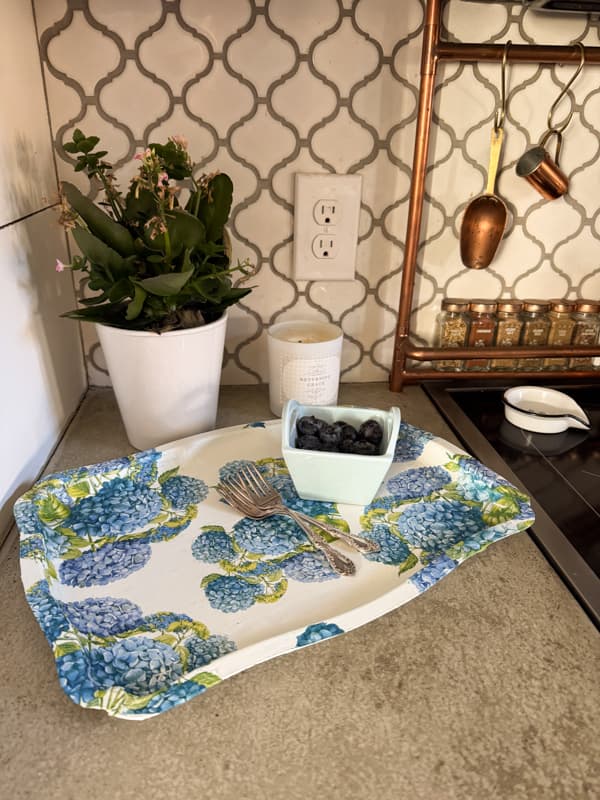
How To Use $3.00 Transformed Thrifted Tray
Wow, can you believe this is the same tray? Provided you have properly sealed the tray as described above, you can use it for many purposes, such as…
- Serving Food or Beverages.
- Enhancing your countertops.
- Use a decorative tray to create coffee table or side table vignettes.
- Add to a dining table for serving or as a table centerpiece holder.
- Place it on a plate stand or plate rack to display.
- Hang it with other dishes or photos to create a gallery wall.
I plan to use my tray on my kitchen countertop as a decorative tray. I can fill it with serving pieces when entertaining, or it may hold a flower arrangement, candles, or other decorative kitchen decor.
Optional Enhancements For Thrifted Tray
You can further enhance your tray with these creative tips.
- Add antique gold Rub N Buff along the edges of your tray.
- Attach wood 1/2 ball feet to the tray. Purchase these small balls and paint them to match the tray, or use the gold Rub N Buff to color them. Attach with E6000 Glue.
- Paint the rim of this tray with a contrasting color, such as green or blue.
- Use any one of these optional napkin designs to create a completely different designer style.
Resources: Shop This Post
FAQ


Well I’m adding a thrifted tray and napkins with gorgeous big flowers to my list! Love the look and it’s sooo much more affordable. Love it! pinned
Cindy,
Thank you and I’m glad you like it.
Call me crazy but I feel like you could have an entire book dedicated to the most amazing decoupage projects, Rachel. I love this one so much because it feels like the perfect way to welcome spring. Plus, it would make a fabulous gift which means we can start on Mother’s Day or Christmas presents early too! Hugs, CoCo
CoCo,
I really appreciate this. I love how versatile napkins are.