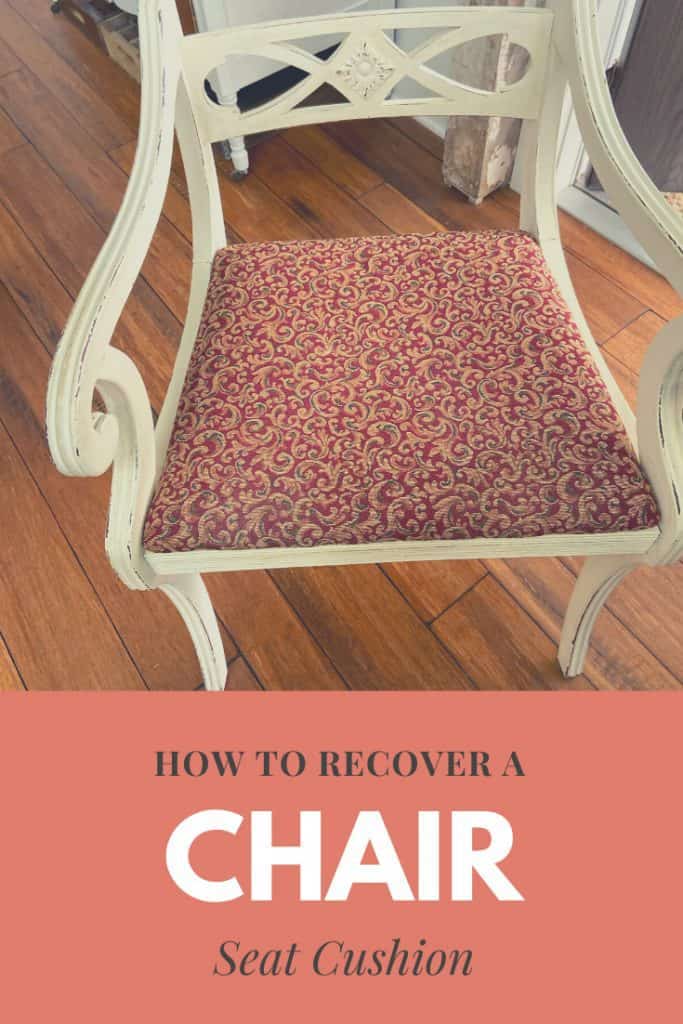
How To Reupholster A Chair Seat Cushion: Easy No Sew Method
If you have a chair or dining chair with damaged or outdated upholstery fabric, you can easily reupholster it with no sewing required. This step-by-step guide will teach you simple tips to update your chairs in minutes.
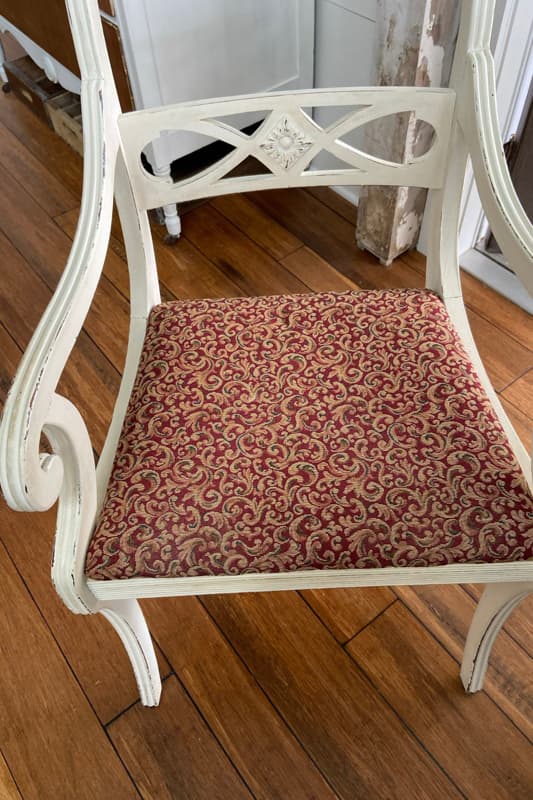
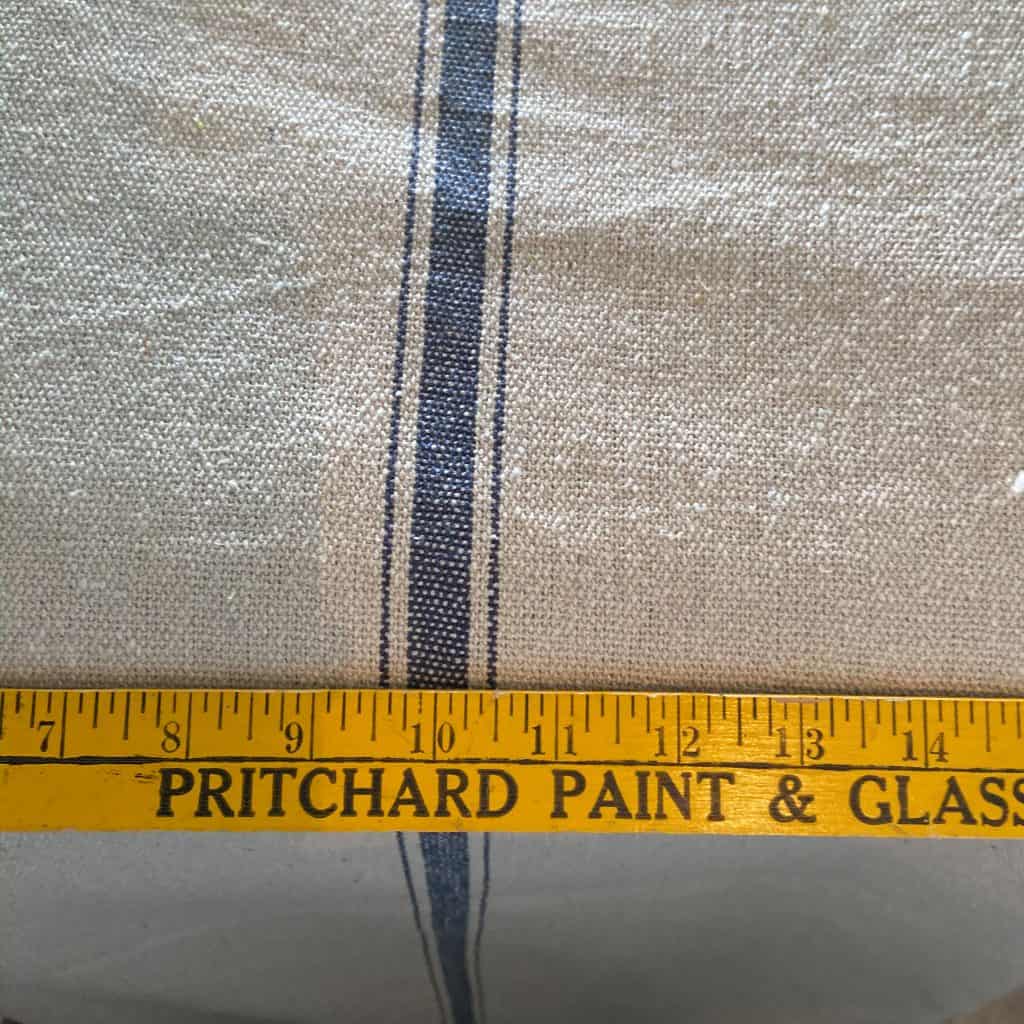
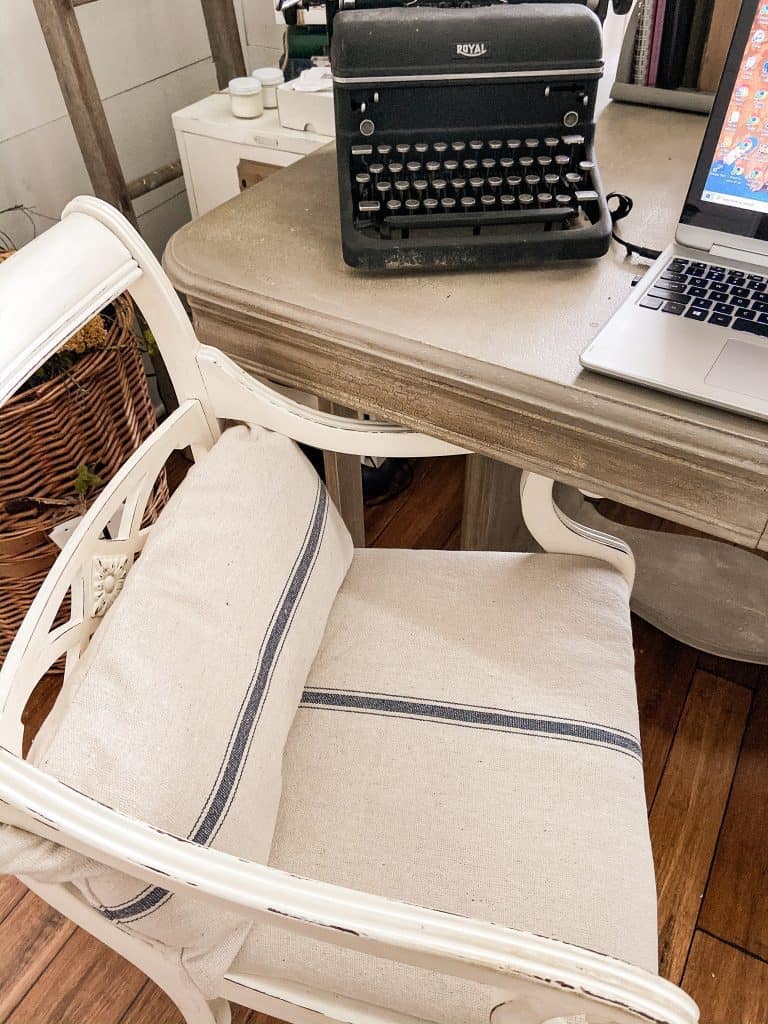
My desk chair has been reupholstered several times, and I decided it needed another update. Since I had some farmhouse-style stripe fabric left over from another project, I decided to give the chair some farmhouse flair.
Here’s how easy it is to do.
(Posts on The Ponds Farmhouse may contain affiliate links. As an Amazon Associate, I earn from qualifying purchases. See the full disclosure details here.)
Table of contents
How To Reupholster A Chair Cushion
To reupholster a chair cushion, begin by purchasing the fabric you desire. You will need approximately 1/2 yard per chair. If you desire an exact measurement, wait until you’ve removed the original fabric.
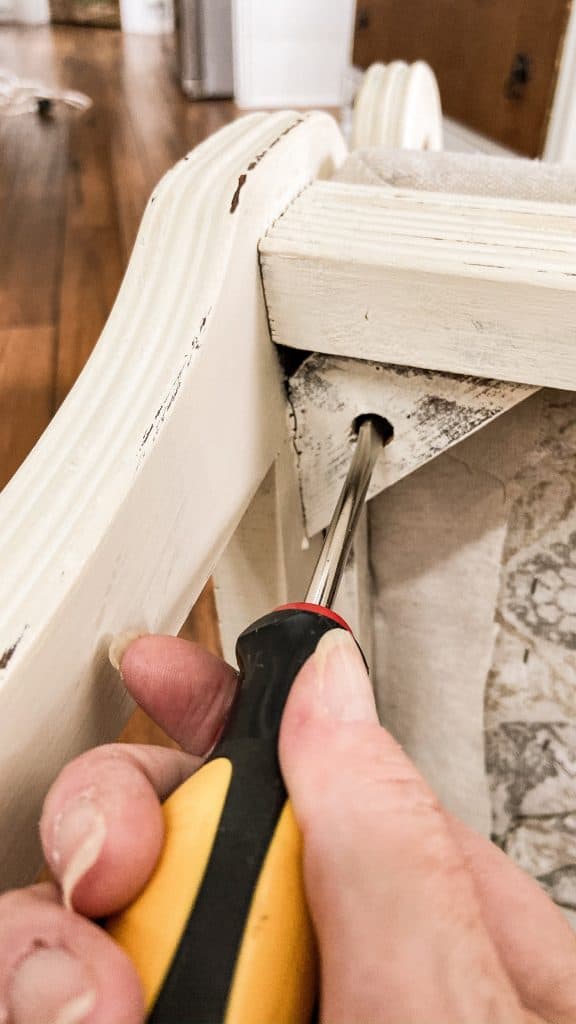
How To Remove the Chair Seat Cushion
Most chairs of this type have a wooden chair bottom that is screwed from underneath and easily removed with a screwdriver.
You can remove all the fabric from the seat if desired. However, to increase the cushion’s softness, I left the original material and batting in place.
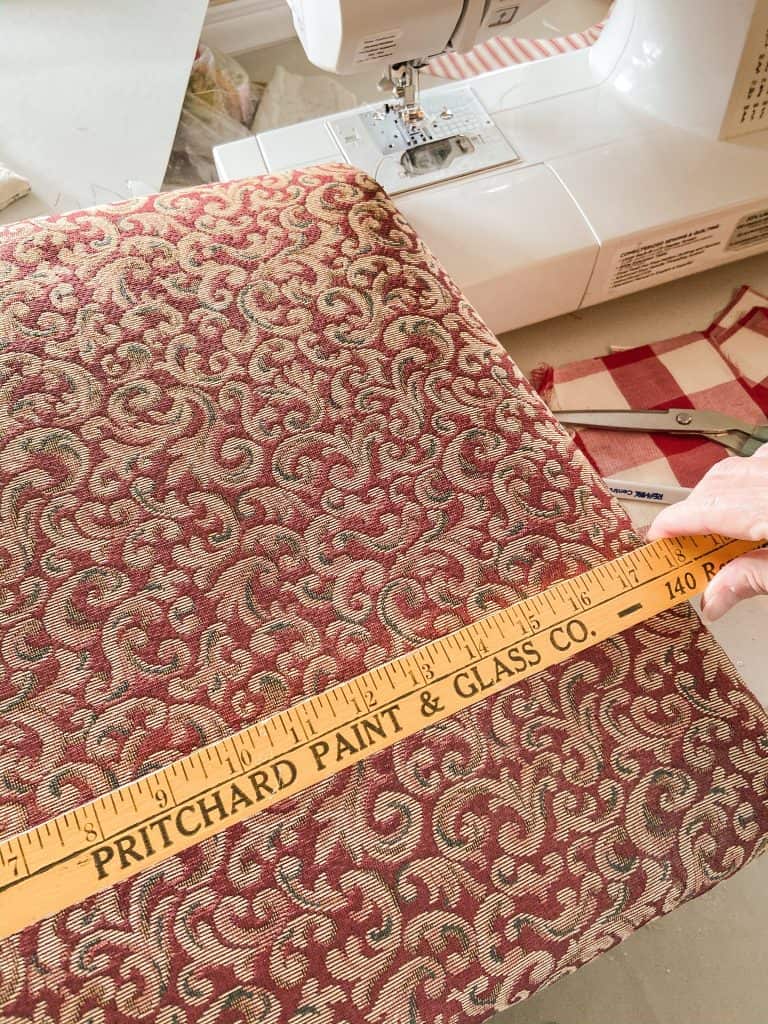
Measure & Cut Fabric
Next, measure your seat bottom and allow approximately three inches additional for all edges. This seat bottom is 20 inches at the widest point, so I cut the fabric 26 inches wide. Do the same for the depth of the seat bottom.
In addition, be sure to allow for any pattern. Since the fabric has a stripe, I ensured the line would be in the center of the cushion once attached.
Gather Supplies to Reupholster A Chair
Here are the supplies I used to reupholster my chair.
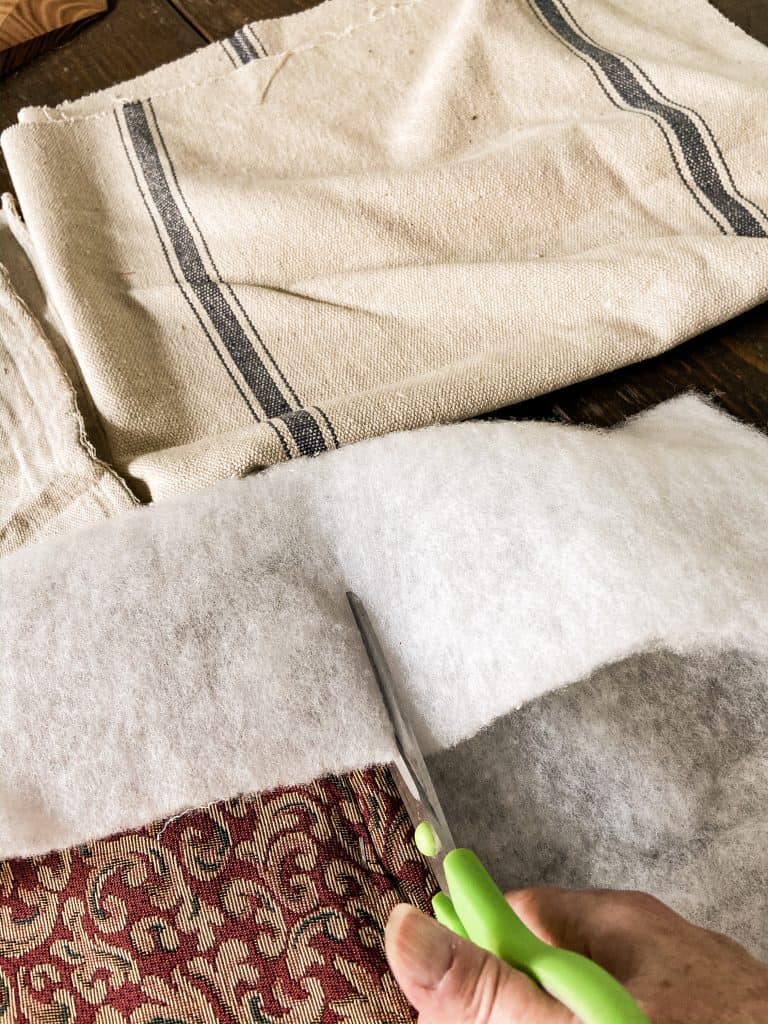
- High Loft Batting Material
- 1/2 yard of desired fabric
- 1/4 yard of drop cloth fabric or use the same fabric as the top.
- Staple Gun & Staples
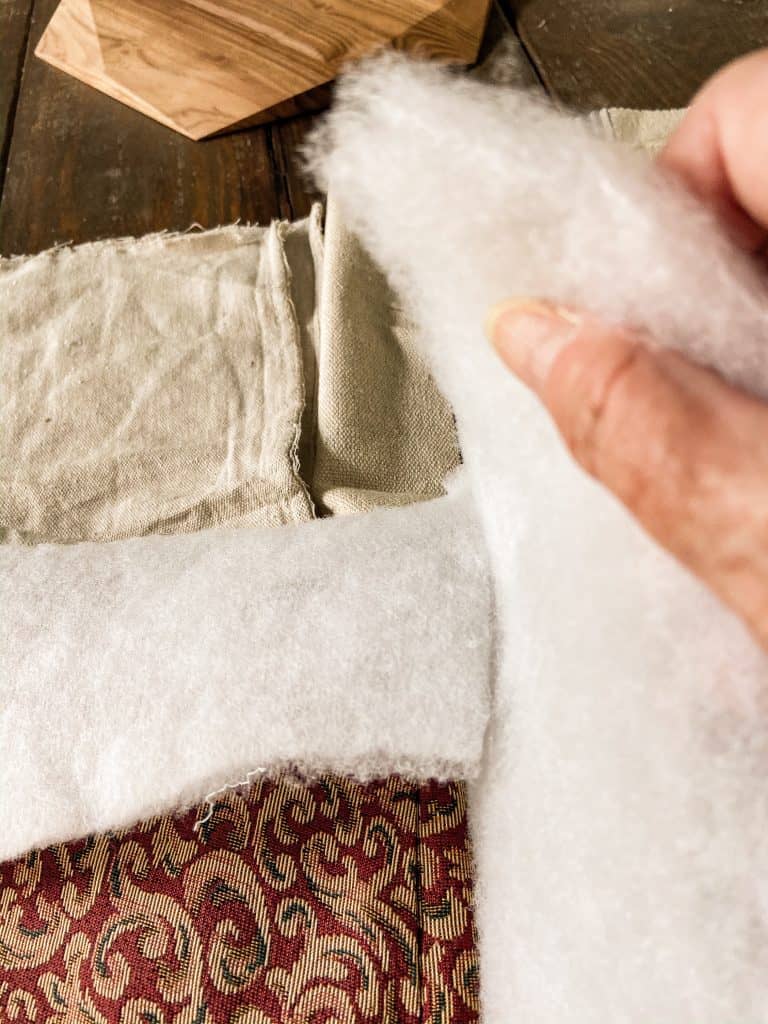
How To Attach Batting Material
I chose to add a layer of batting to the chair to add extra volume and softness. If you are happy with the softness, you may skip this step.
Begin by wrapping the batting material around the top of the seat bottom and pulling tightly as you staple. Cut off any excess fabric at the corners.
Add Fabric To The Chair Seat Cushion
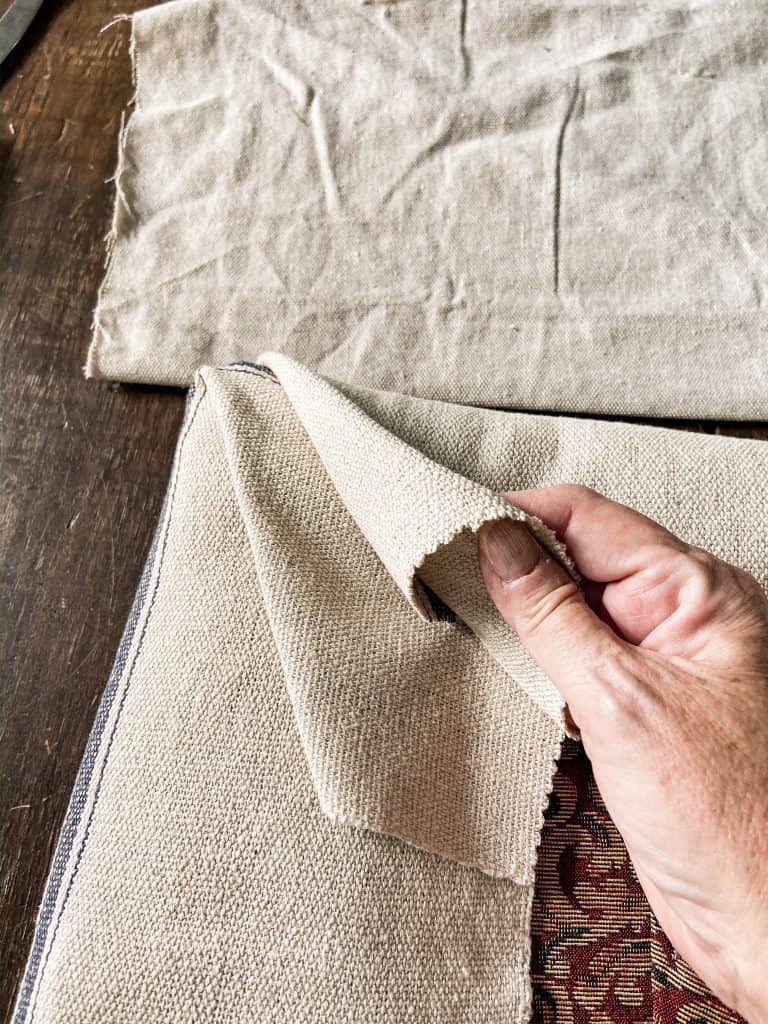
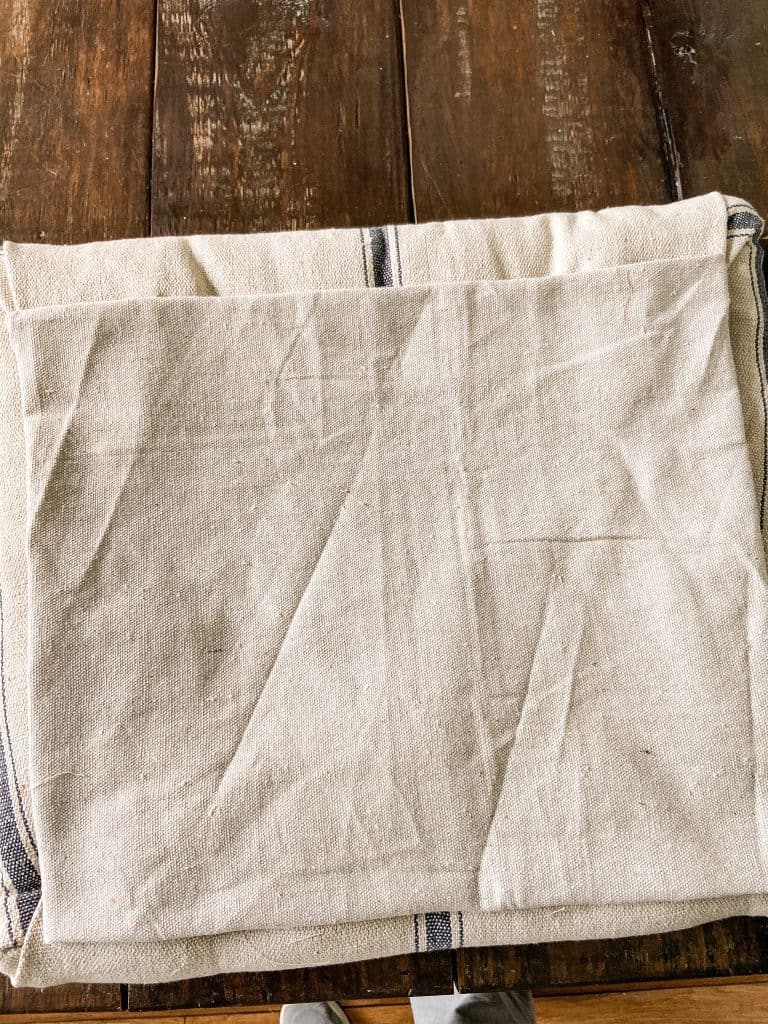
Next, do the same with the desired fabric. If there is a pattern to consider, be sure to align the material correctly.
Once again, pull the fabric tightly around the edges to ensure that it is smooth once it is turned over and attached to the chair. Also, be sure to tuck the material at the corners.
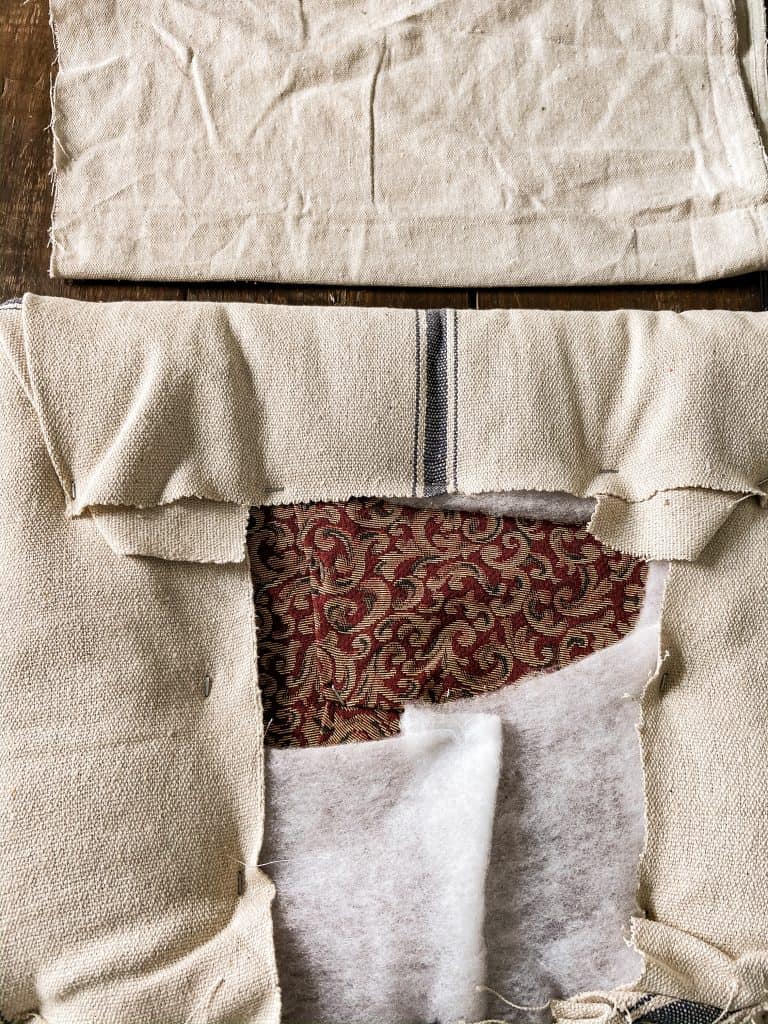
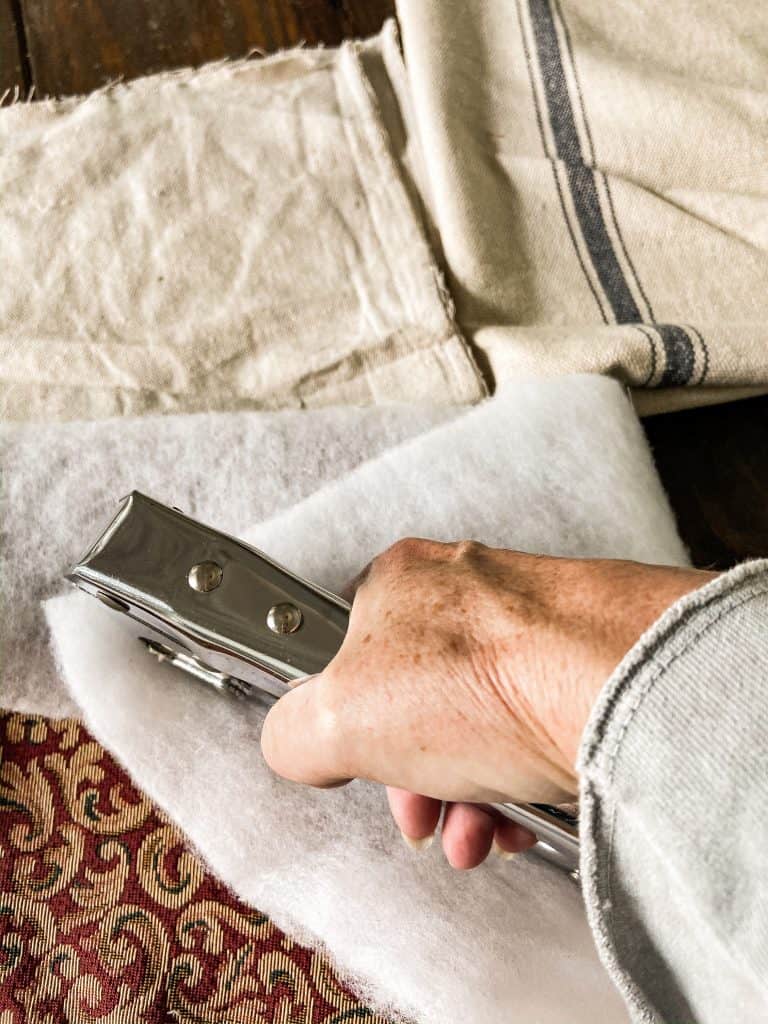
Finish with Drop Cloth Fabric
The last step is to cover the raw edges of the fabric and batting with another material. I chose to use drop cloth fabric because I have plenty of scraps on hand, it’s cheaper, and it’s a similar color to the fabric I used for the top of the seat cushion.
You can also see this DIY Hand Painted Drop Cloth table runner project.
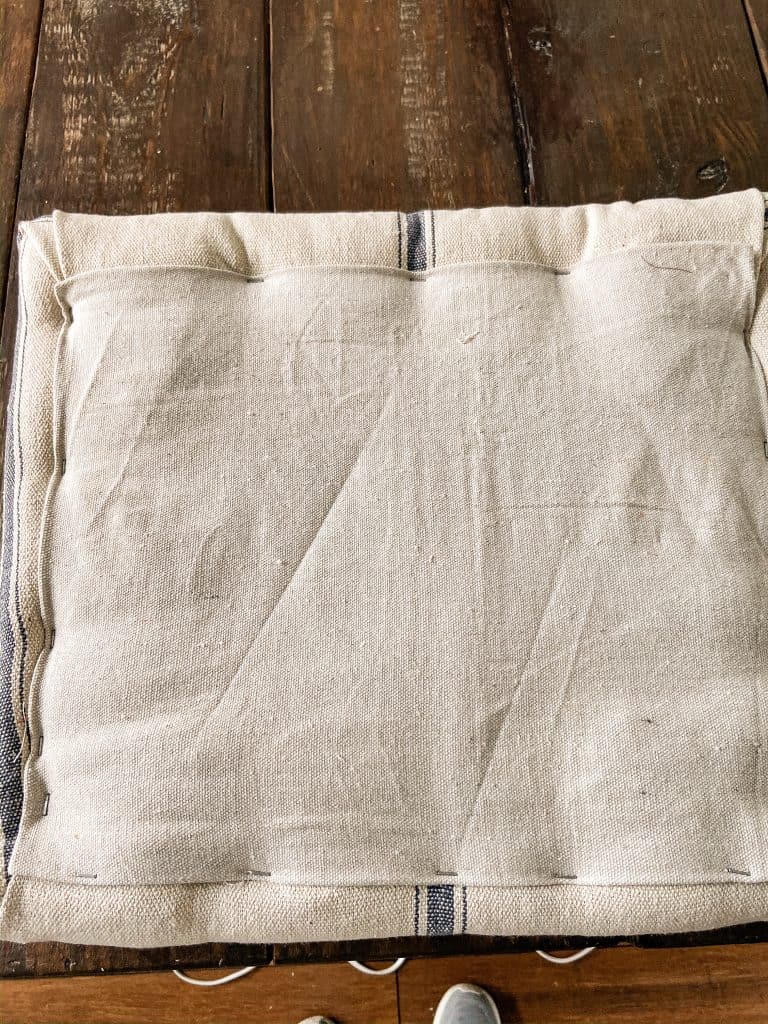
Re-Attach Seat Cushion
Now, you can re-attach the seat cushion to your chair frame.
Screw the seat cushion back into the chair frame, ensuring that the screw goes through the new material into the wooden frame. If the screws are too short, purchase a slightly longer screw of the same diameter.

The Reupholstered Chair Cushion
I love the Farmhouse feel of the new chair cushion. It’s perfect to use at my desk.
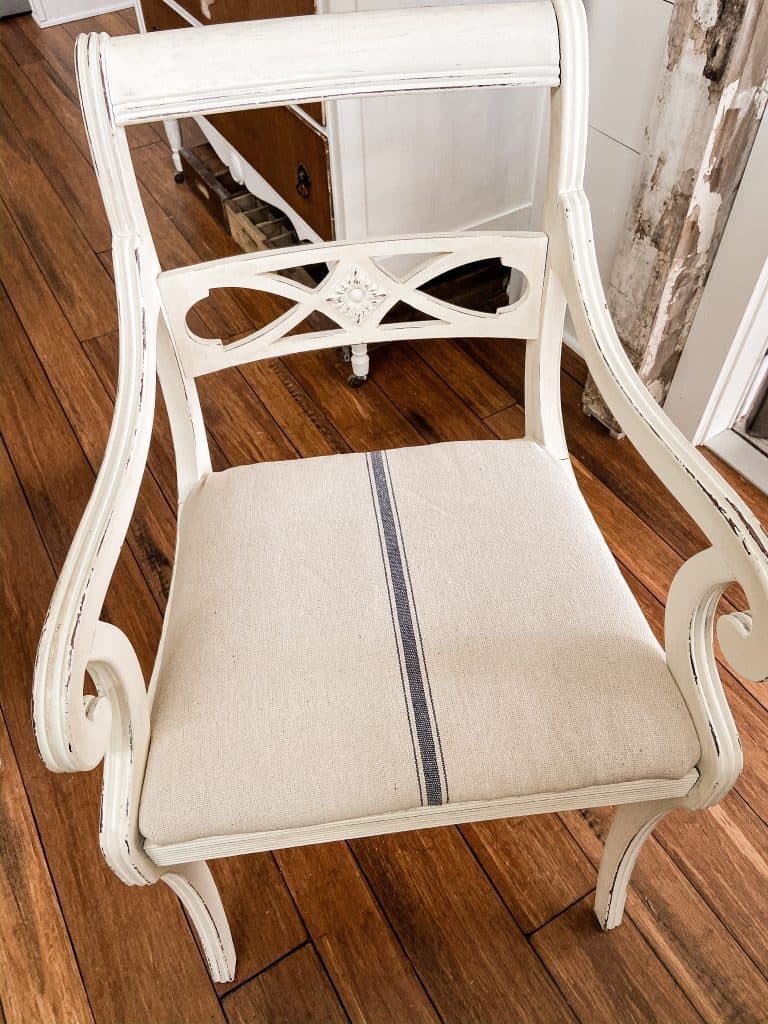
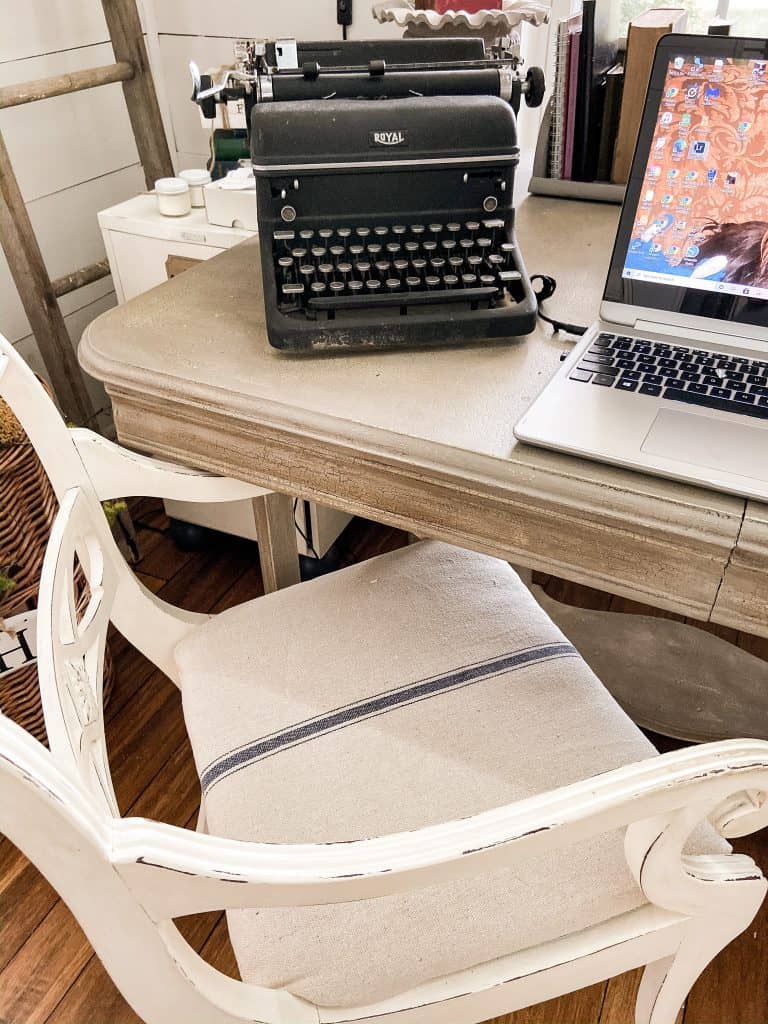
The chair feels brand new and goes from trash to treasure within less than an hour.
Check out this deconstructed chair tutorial to see other chair makeovers.
How to Recover a Chair Seat
Ingredients
- ½ yard high loft batting
- ½ yard Fabric Of your choice
- ¼ yard Drop Cloth Fabric
Instructions
- Detach Seat Cushion from chair by unscrewing from the bottom of the chair
- Remove existing fabric from the seat if desired
- Measure and cut batting, fabric and drop cloth fabric to size
- Staple the batting to the seat by wrapping the batting around the top and stapling to the backside of seat to secure. Cut any excess off of the corners and pull tightly as you staple.
- Cover the batting with the fabric being sure to align so that any pattern is placed correctly. Then staple the fabric to the back side of seat tucking the corners.
- Place the drop cloth fabric over the raw edges of the fabric and batting to completely cover and fold raw edges of the drop cloth fabric under.
- Then staple the drop cloth fabric over the raw edges of the fabric for a clean finish.
- Place the newly covered seat cushion back on the chair and re-attach with the screws.
I had enough fabric to make a small lumbar pillow to make the desk chair super cozy.
Thank you so much for stopping by, and I look forward to sharing my next adventures with you.

Pin It To Remember It
Did you find some great ideas you’d like to save for future reference? Hover over the images you’d like to save and pin to your favorite Pinterest Boards when you see the PIN button.


Rachel luv the fabric you chose and that pillow with it is adorable!
Ann,
Thank you so much. I’m glad you like it.
Rachel
That looks great. I love the style of the chair. Good job.
Miche,
Thank you so much. I always appreciate you sweet comments.
Rachel
Love both chairs and great tutorial. My husband has recovered chairs many times. In fact he’s going to be doing a few again soon.
Cindy
Cindy,
These are so easy. I appreciate you for stopping by.
Rachel
Great project! Love the After!
Stacy,
Thank you so much.
Rachel
You always share such nice ideas-THANKS !!!
Sue,
I’m so glad you like my ideas. I appreciate you so much.
What a great idea they look amazing! I’m going to recover mine this winter.
Stacy,
Thanks so much.
Beautiful! I love it
Renae,
Thanks so much.
Love the choice of fabric you have we thinking about changing mine…..lol
Eva,
Thank you for stopping by. I love fabrics and I’m always wanting to change. LOL