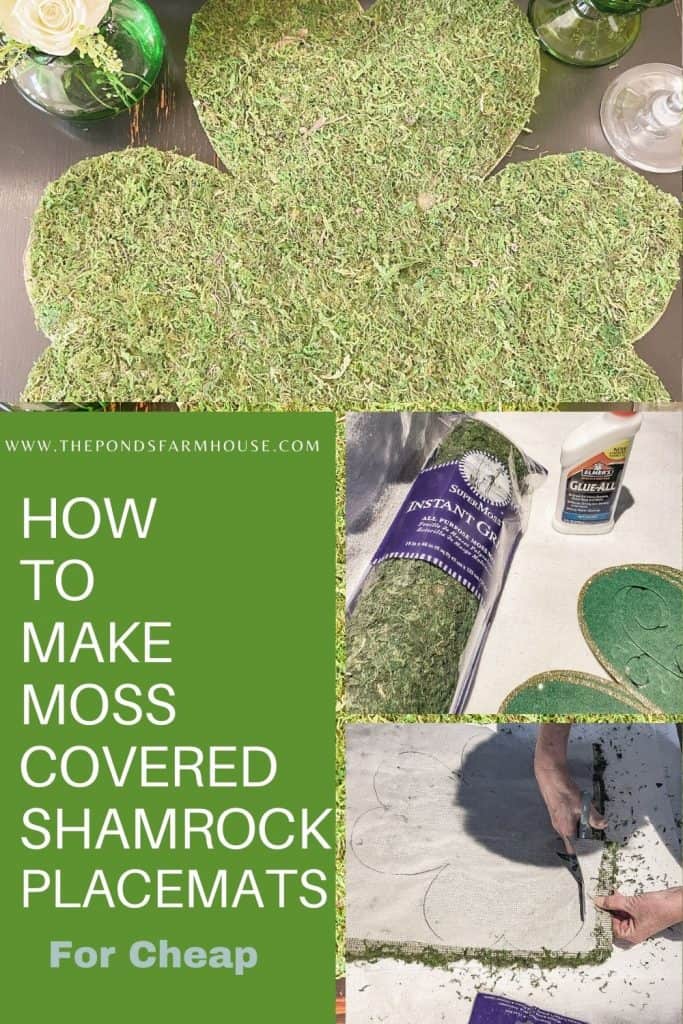
How To Make Moss Shamrock Placemats
Here is how to make moss shamrock placemats on a budget with Dollar Tree. Use the inexpensive items listed below to save over $10.00 each on these cute placemats. They are perfect for a St. Patrick’s Day Theme Party or Dinner.
Y’all, I’m so excited to share these cute placemats with you. They cost $3.00 each to make and were very easy to make. I saw similar options for $14.99 each and decided to try this project.
I’m using them on this St. Patrick’s Day Supper Club Tablescape.
(Posts on The Ponds Farmhouse may contain affiliate links. As an Amazon Associate, I earn from qualifying purchases. See the full disclosure details here.)
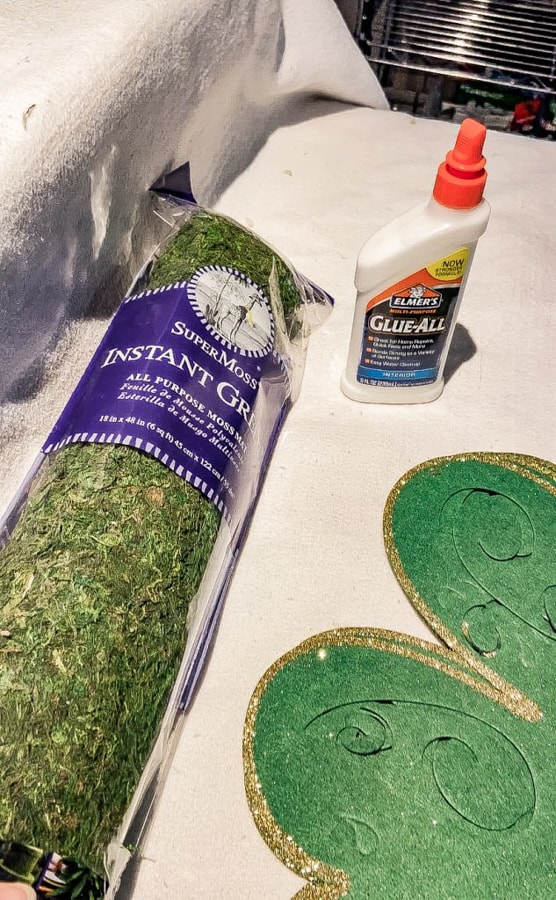
Materials Needed for Moss Shamrock Placemats
- 4 – Dollar Tree Felt Shamrock Placemats
- 1 Roll of Moss Mat
- Glue
- Scissors
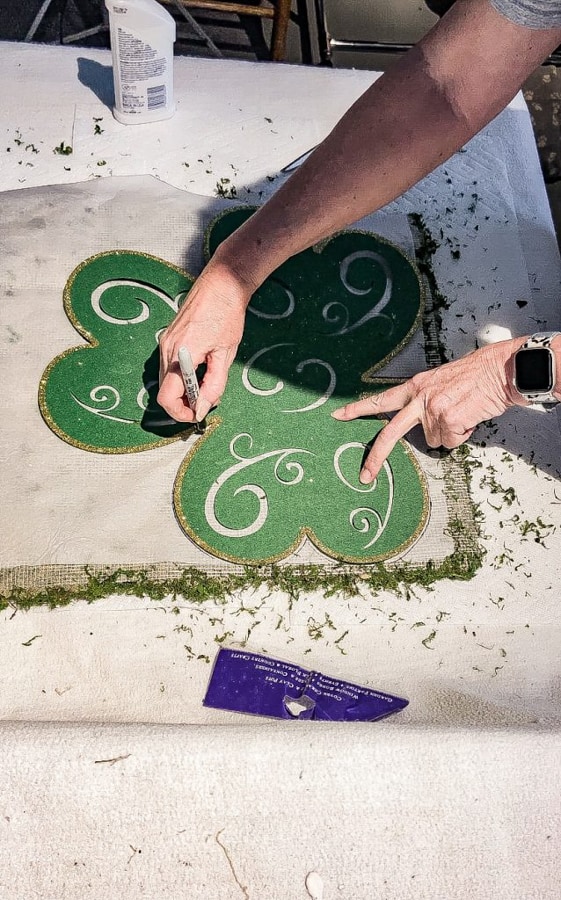
Step 1
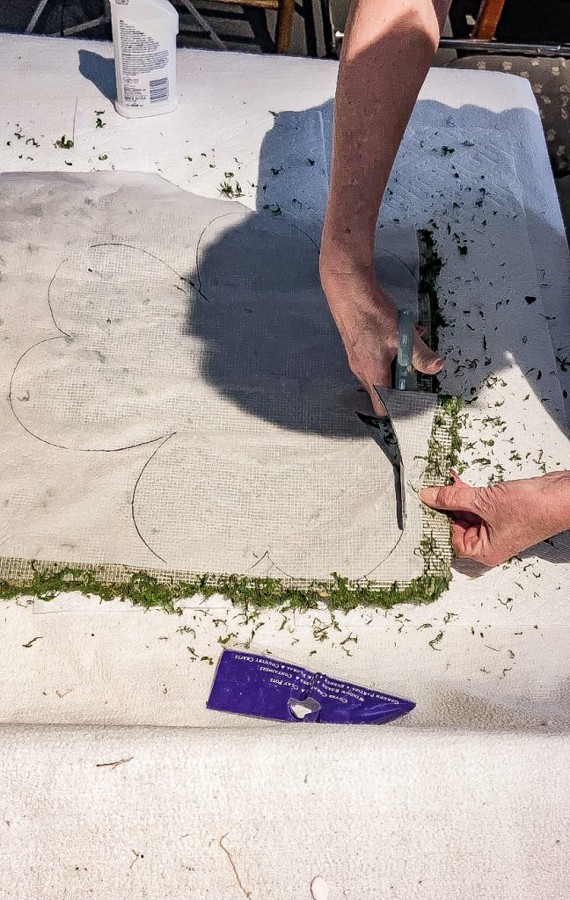
Roll out your moss mat with the backside up. Then lay your Dollar Tree Felt Shamrock on the sheet moss and trace around the edges.
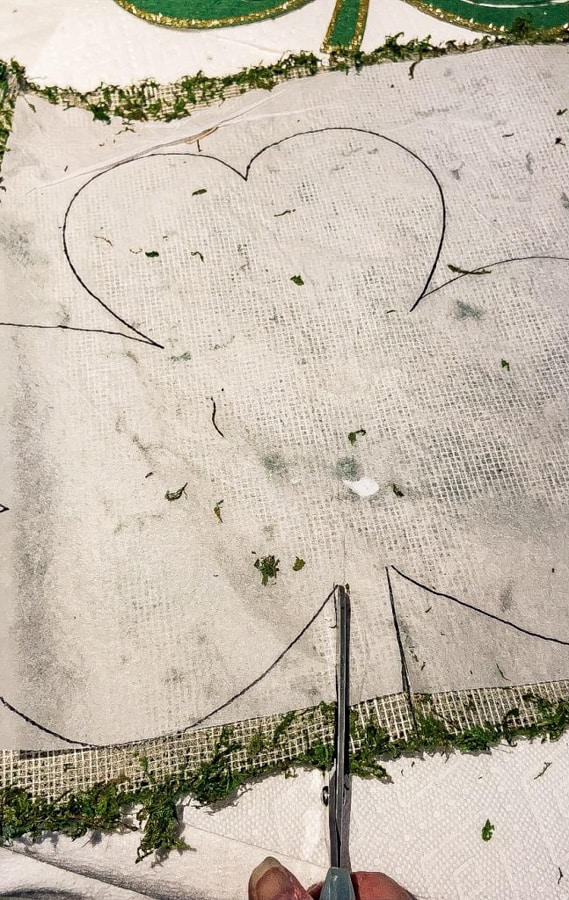
Next Step
Next, remove the shamrock placemat and begin cutting the shape out of the moss.
Step 3
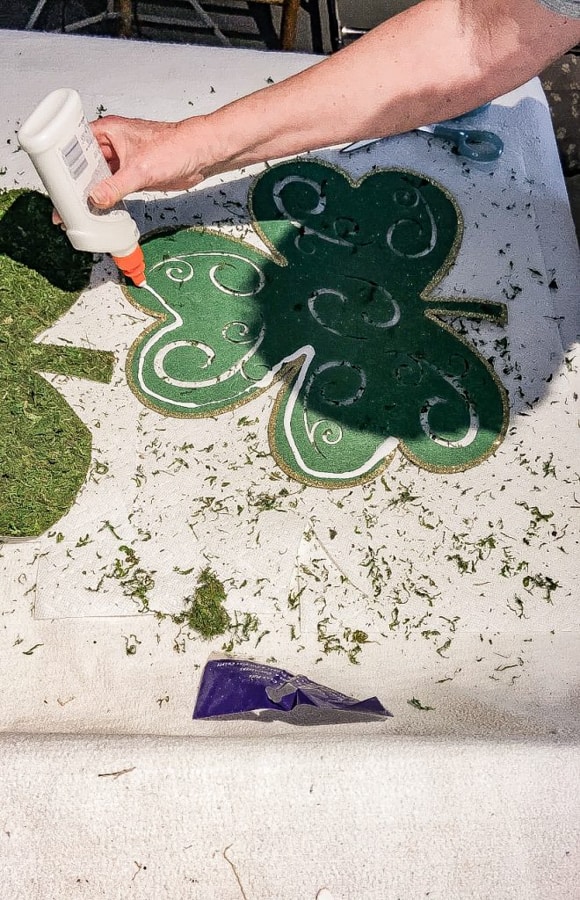
Turn the Dollar Tree Shamrock over and apply a generous bead of glue along the edges. Then fill in the center with additional glue.
Here is a fun plate charger tutorial I made last spring.
The final Step to make Moss Shamrock Placemats
Place the wrong side of the shamrock-shaped moss onto the glue and press down. You may also need to weigh the moss until the glue has set. Also, please ensure the glue has not seeped around any edges or cutouts on the felt shamrock.
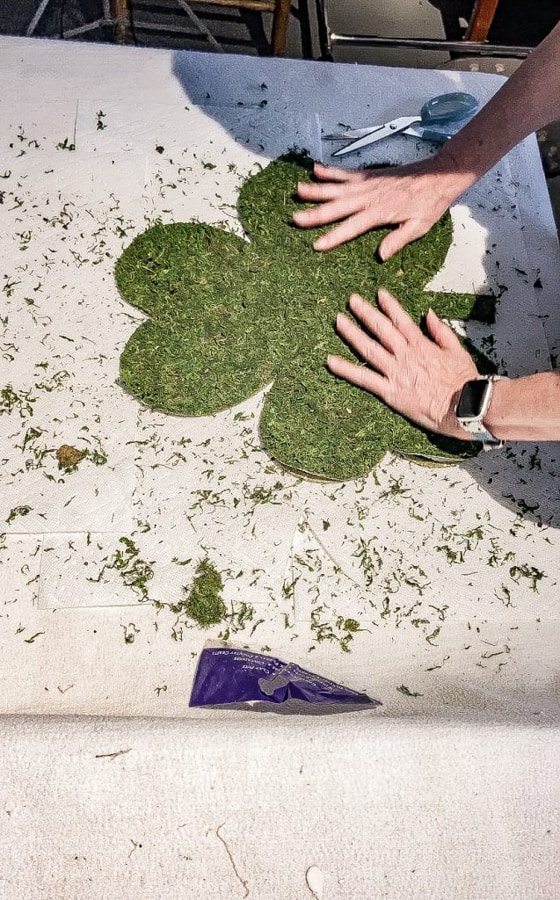
One roll of moss is exactly enough to cover the 4 Felt Shamrocks. However, the 4th one had to be pieced together. Although it’s pieced, you can’t tell when the glue is dry.
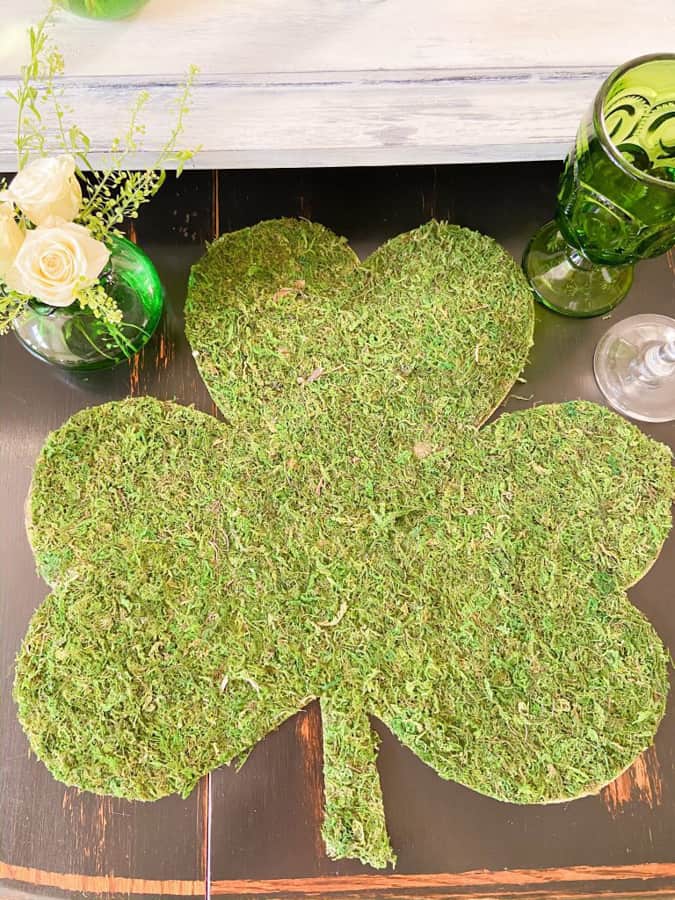
The Finished Moss Shamrock
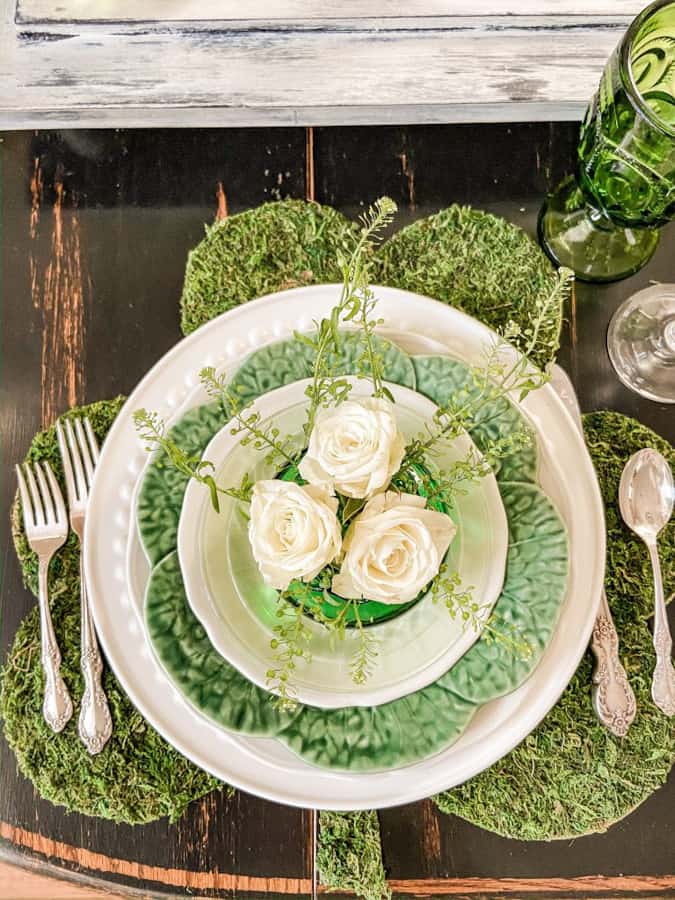
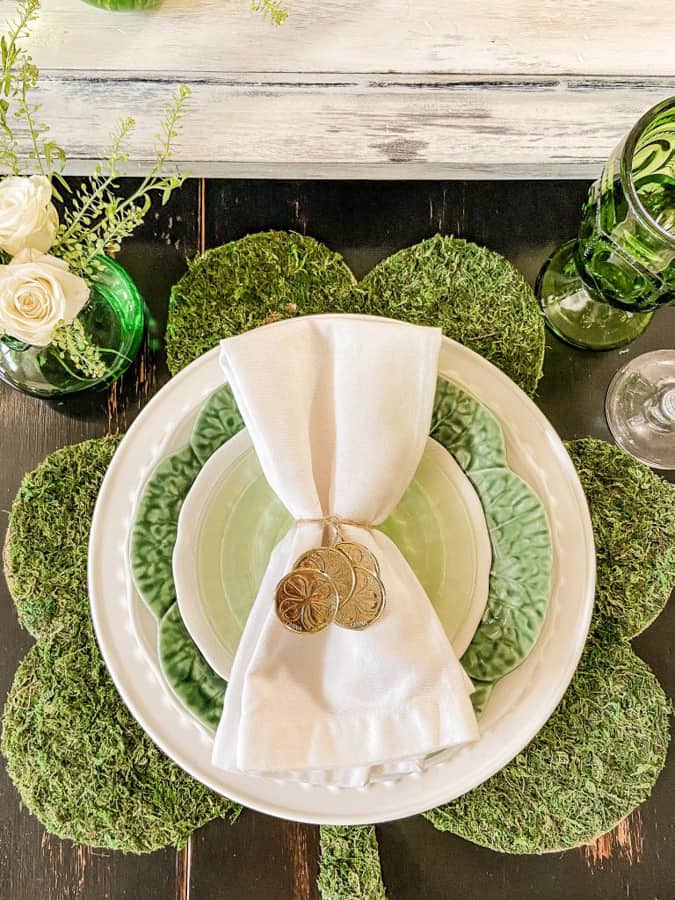
I love the texture the moss shamrock placemats give to the place setting that I have planned for the St. Patrick’s Day Virtual Supper Club.
Here is the complete St. Patrick’s Day Tablescape.
The gold coins were hot-glued to a jute string for simple napkin ties for the tablescape.
UPDATE: I used the same placemats again for a second year on my St. Patty’s Day table with a Touch of Pink, and they still looked great. Did you know that preserved moss can last for years with proper care? See this article on How To Freshen Faded Moss.
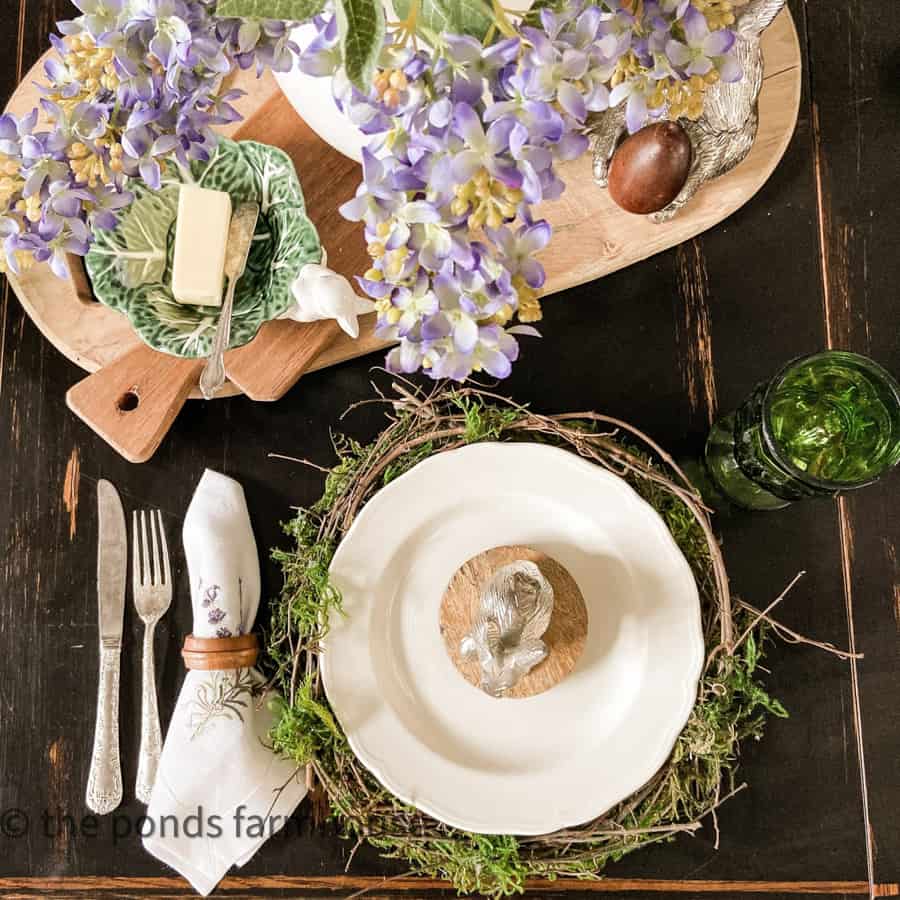
You might also enjoy these fun tables from last Spring. Easter Table from last Spring and Mother’s Day table from 2020

Pin It To Remember It
These turned out so cute and looks so easy. You are so creative. I would have never thought to do this. Thanks for sharing!
Lynda,
I really appreciate your support.
What a clever idea Rachel! Can’t wait to see it all put together Thursday!
Thanks again!🤗
Margie,
Thanks so much.
Oh my gosh this is just fabulous!! I love it! Pinned!
Ana,
So glad you like it.
Oh my word I love these! What a brilliant idea!!!
Kelly,
I really appreciate this.
These turned out so adorable and they were the perfect addition to your table
Jen,
I really appreciate this.
Adorable and Pinned! Thanks Rachel.
Thanks for the support.
Are these ever sweet! I love how they turned out- what a fun DIY Rachel!
Shawna,
Thanks so much.
I loved your shamrock placemats! Great tutorial Rachel. Thanks for sharing!
Thanks so much sweetie.
These are so adorable! I love this idea. I’m so glad you could join us for Welcome Home Saturday, Rachel!
Amanda,
Thank you so much.
Fun idea! Your tablesetting is so pretty!
Linda,
I really appreciate this. Thanks for stopping by.
Such a great idea. They look amazing. I love the napkin rings that you used as well. Adorable! Hugs to you.
Renae,
I’m so glad you like this.