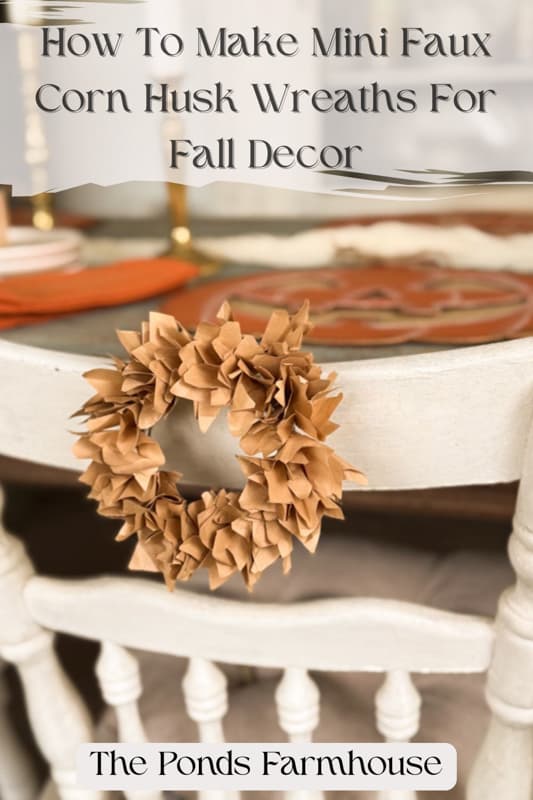
How To Make Mini Faux Corn Husk Wreaths For Fall Decor
Do you like mini wreaths for cabinet doors, chair backs, or table place settings? Wait until you see these adorable mini faux corn husk wreaths for fall. All you need is brown craft paper and recycled canning jar rings. You can create multiple wreaths in minutes, and I’ll show you how.
(Posts on The Ponds Farmhouse may contain affiliate links. As an Amazon Associate, I earn from qualifying purchases. See the full disclosure details here.)
Supply List
- Brown Craft Paper
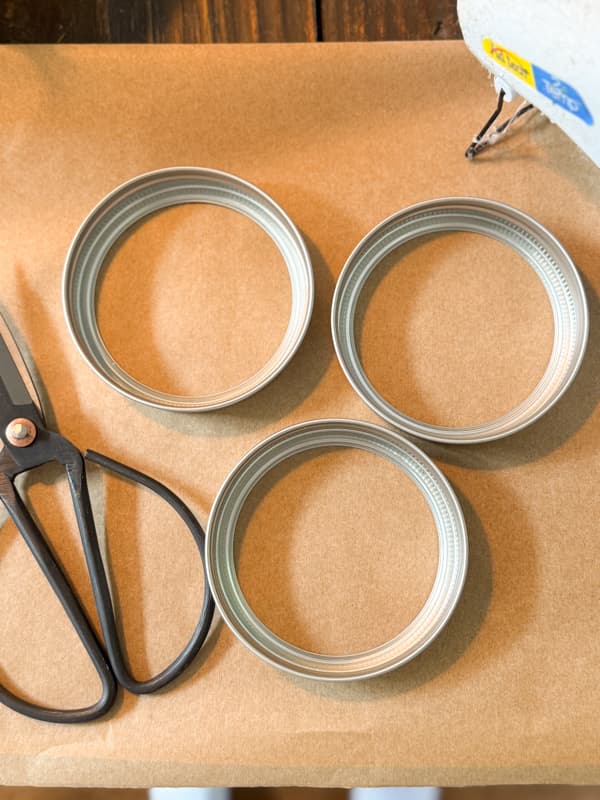
- Canning Jar Rings – recycled wide mouth if you have them.
- Hot Glue Gun
- Jute Twine
- Double Stick Mounting Tape
- Wide Ribbon for hanging (optional)
How To Create Faux Corn Husk
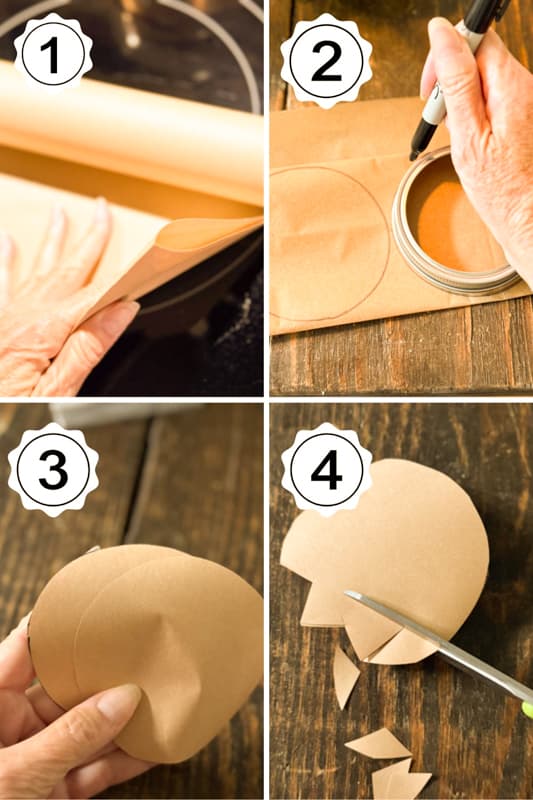
The first step is to cut out the faux corn husks from the craft paper.
Step 1 – How To Cut The Craft Paper
To complete each mini wreath, you’ll need several pieces. I recommend folding the craft paper several times to cut multiple circles at once.
- Fold craft paper as wide as the circles and fold several times so that you can cut several circles at once.
- Trace the wide-mouth canning jar ring onto the craft paper.
- Cut the circles from the paper.
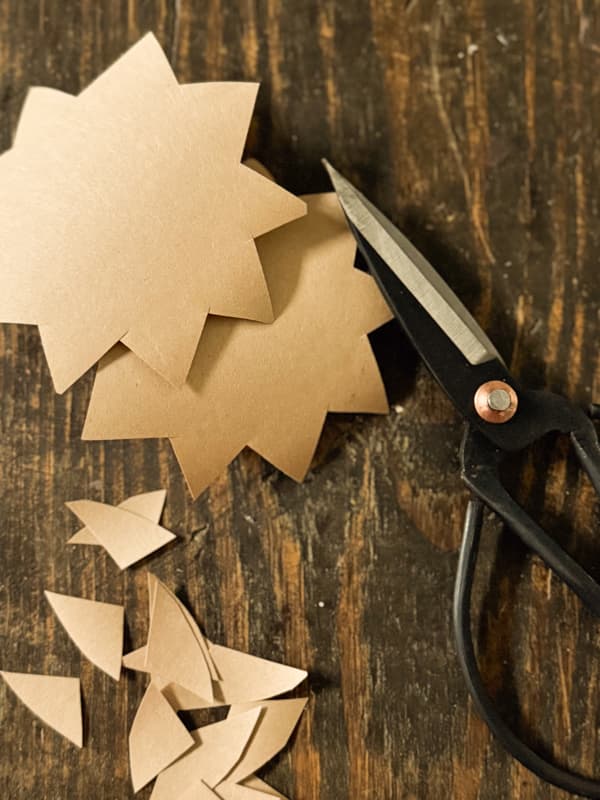
- Hold several circles together and cut a zigzag around the edges.
The zigzag cuts don’t need to be perfect. I cut mine freehand, and some are wider than others. No worries.
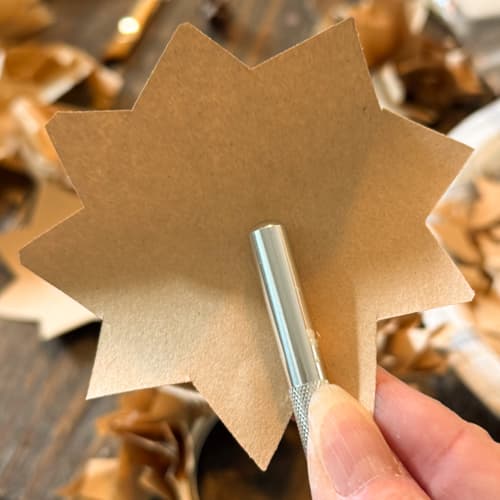
Step 2 – Create Mini-Faux Corn Husks
To create the shape of the corn husks, use a small paintbrush handle or pencil. Place the pencil in the center of the craft paper circle. Then press it around the handle to shape.

How To Prepare The Canning Jar Rings
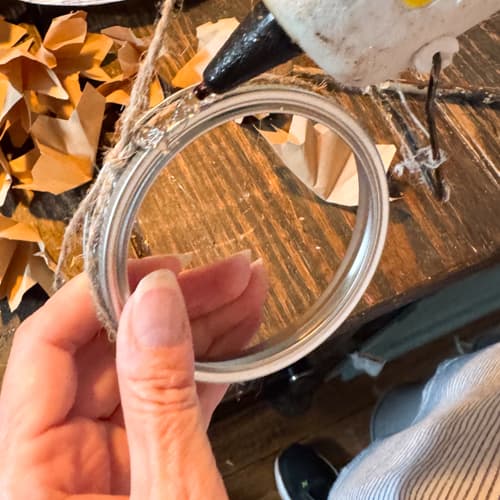
Once you have all the faux corn husk pieces cut, prepare the canning jar rings by adding jute twine around the outer rim.
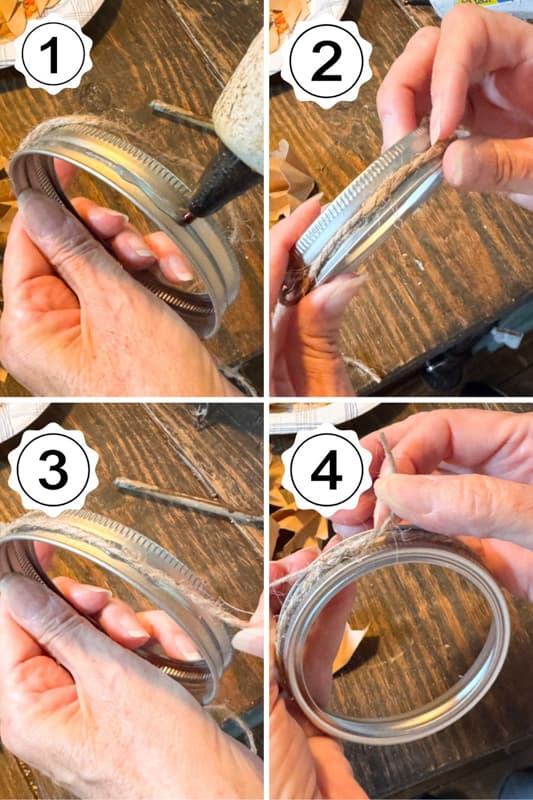
Step 3 – How To Add Jute Twine To Rings
Before adding the jute twine to the rings, cut the twine long enough to circle the ring, leaving a length at both ends to use as a hanger. I cut mine 36 inches long.
- Add hot glue to a small section of the ring.
- Fold the jute twine in half and attach it to the glue.
- Add more glue along either side of the ring and attach the twine.
- Ensure that you will have an even amount of twine on both ends when they meet. Tie the twine in a knot.
How To Assemble Mini Wreaths
Now you are ready to assemble your faux corn husk mini wreaths.
Step 4 – How To Add Faux Corn Husks To Rings
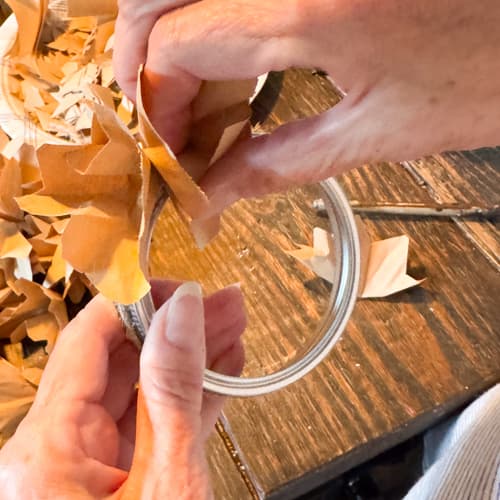
First, add hot glue to a small section of the outside rim of the canning jar rings. I started at the knot in the jute twine and worked outward from both sides.
Press one of the craft paper faux corn husks into the glue and hold until set.
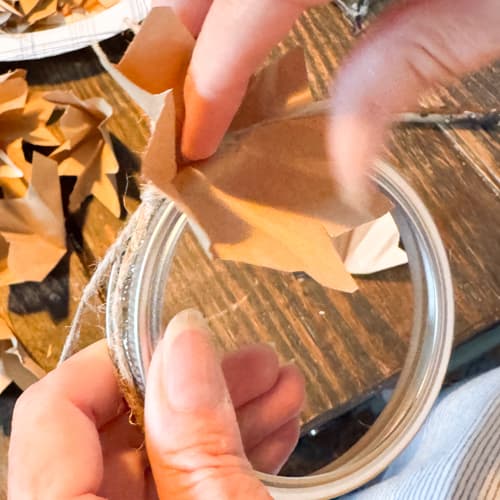
Once there is no risk of it coming loose from the ring, add another one nestled in as close as possible to each other.

Insider Tip
To help speed up the drying process, I worked from side to side. Add a couple of faux corn husks to one side and allow to dry. Add more in the opposite direction so that the first applied have more time to set and are therefore more secure on the ring. Just keep working from side to side until they meet at the bottom of the ring.
Also, only apply enough glue to attach one piece of craft paper at a time. If you apply a wide section, the glue may dry before you can add the next section.
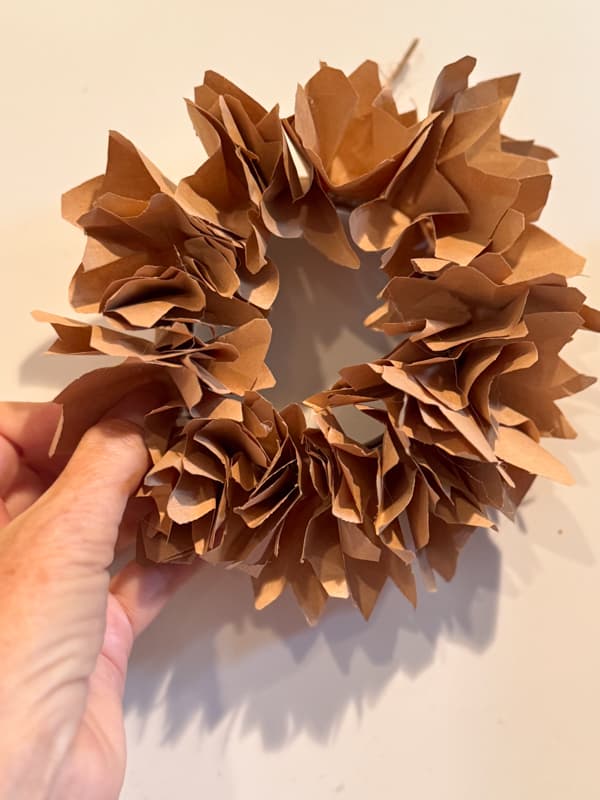
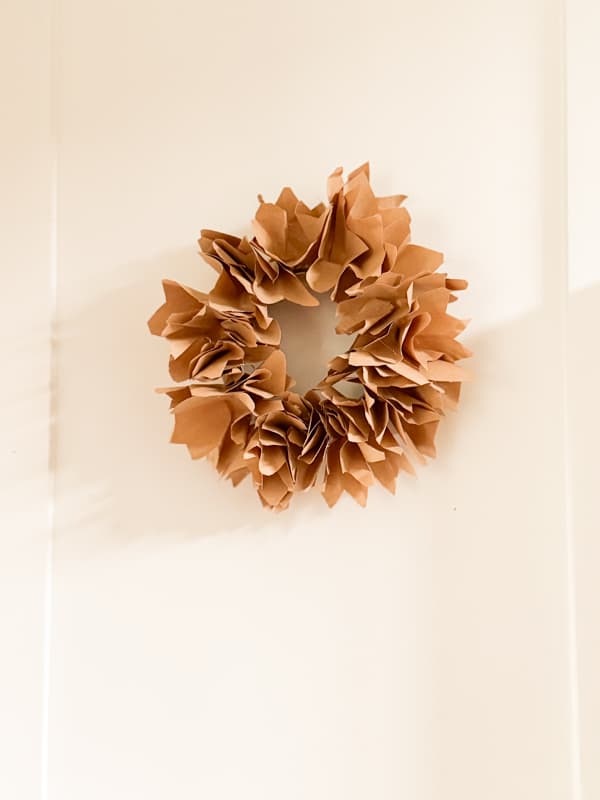
Finally, fluff the faux corn husks to shape your mini-fall wreaths.
How To Decorate With Faux Corn Husk Mini-Wreaths
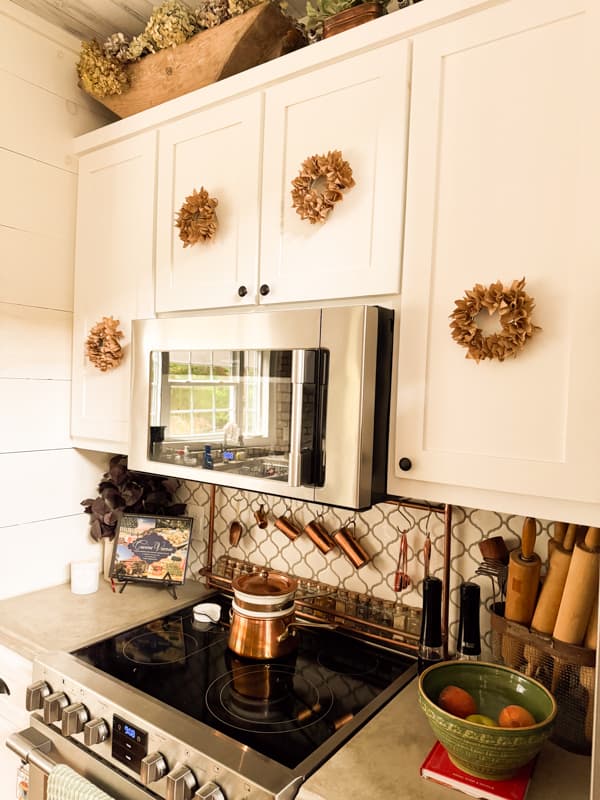
There are several ways to decorate with your cute faux corn husk mini-wreaths. I plan to use mine on the upper kitchen cabinet doors. But I’ll show you several options.
Add Mini-Wreaths To Kitchen Cabinet Doors
The mini-wreaths add a touch of fall to the kitchen when hung on the cabinet doors.
Add Wreaths to China Cabinet Doors
If you have a china cabinet or hutch with doors, the mini-fall wreaths add instant charm.

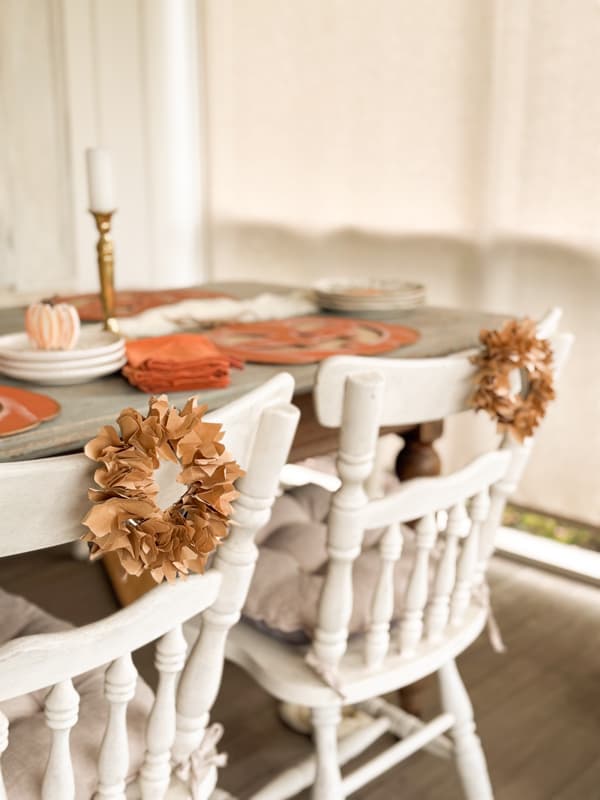
Hang Wreaths on Chair Backs
Another adorable way to use mini-wreaths is to decorate the backs of your dining table chairs. Just drape the jute twine over the chair back and secure it with tape.

They add rustic fall charm to this porch table setting.
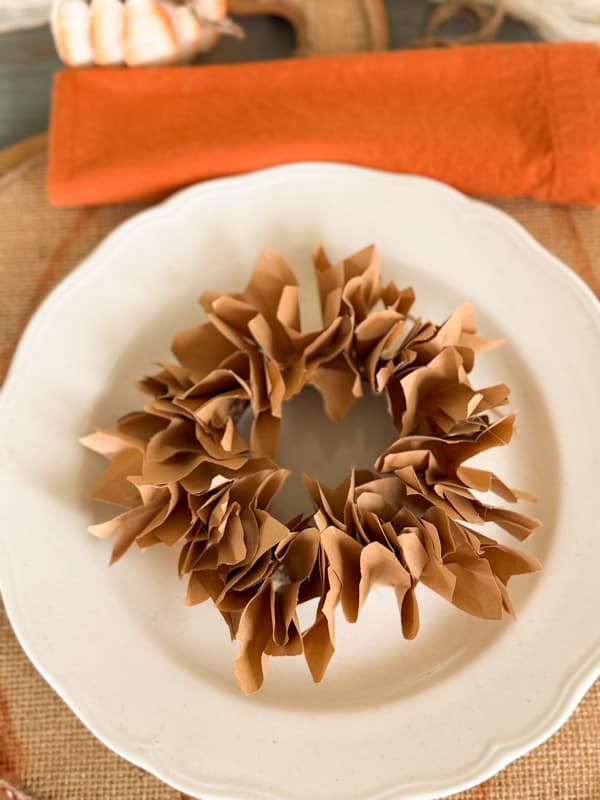
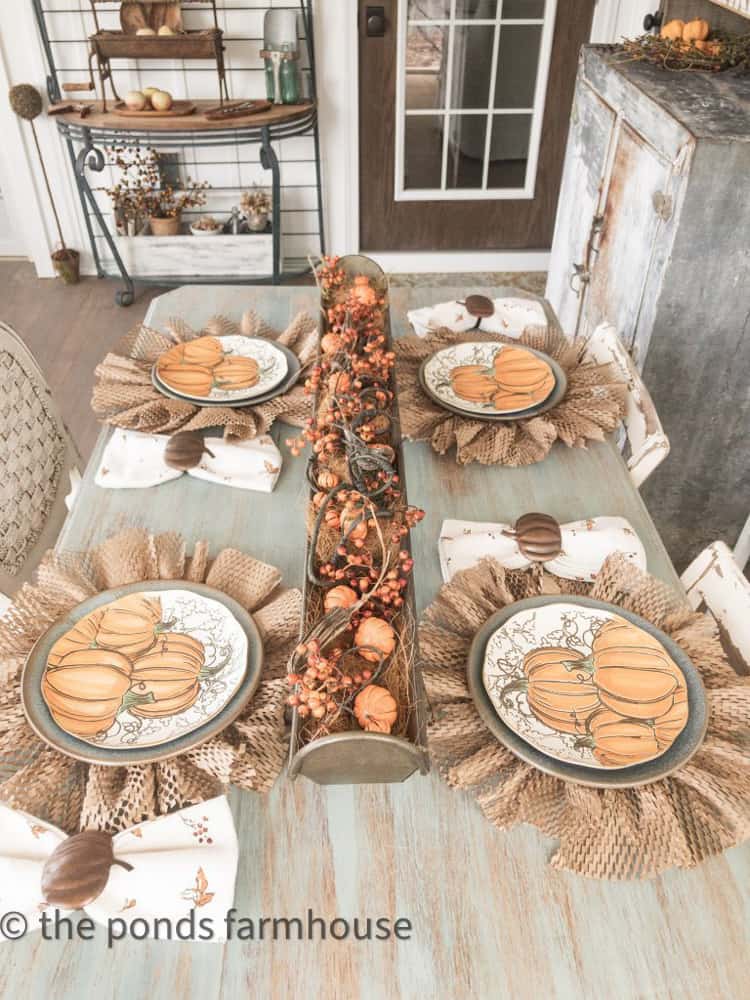
Add Mini-Wreaths To A Dinner Plate
Don’t want to add them to your chairs; instead, place one in the center of each dinner plate. They also make a sweet take-home gift for your guests.
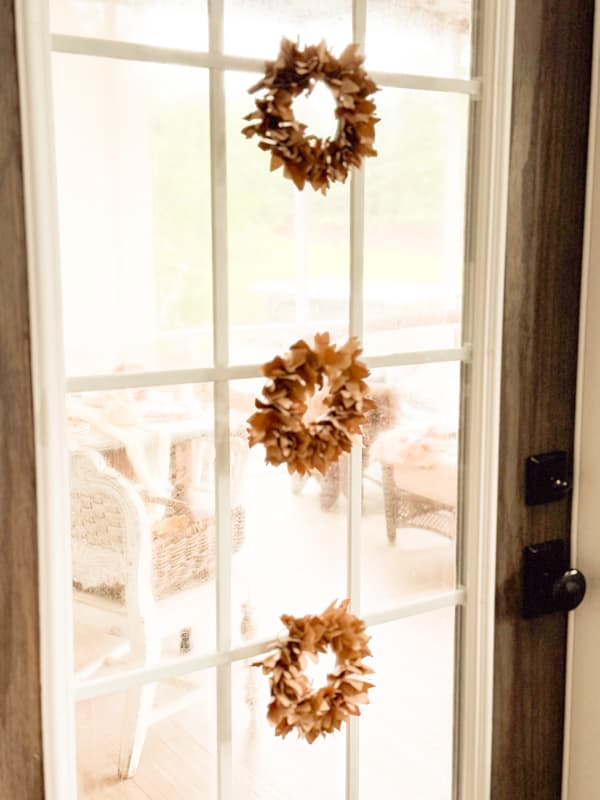
How To Add Small Wreaths To A Door
A single small wreath will be lost if hung on a door. However, consider adding a grouping instead. Add three wreaths on a door for a unique fall decoration.
You can also add a wide ribbon to attach the trio of wreaths for a more cohesive door decoration.
How To Hang Mini-Wreaths
I mentioned at the beginning to leave an excess of jute twine to make a hook to hang the mini-wreaths. I used the twine for the chair backs, but otherwise, I used heavy-duty double-stick tape. This method requires no nails or command hooks. Simply place a piece of tape on the ring and press it firmly into place on the cabinet door or glass door.
Another way to hang the wreaths is to add them to decorative ribbon. You can use the jute twine to tie each mini-wreath to the length of ribbon. You can see an example below for the kitchen cabinets.

I hope you enjoyed today’s easy mini-wreath tutorial. I look forward to sharing my next adventure with you.


These are adorable! I am thinking white craft paper for Christmas too. Thanks for sharing.
Also, prayers are being lifted for you as you recover from your surgery.
Many Blessings to you,
Candy
Candy,
I’m so glad you like them. Thank you for your continued support
These mini wreaths are so cute and your tutorial makes them look easy to make.
Angie,
Thank you!
So cute, Rachel!!🧡I pinned it to your folder on my Pinterest!! Going to try this!! Thank you for the inspo!!🤗😍
Cindy,
I’m so glad you like this idea. Thank you for pinning.
I’m looking forward to trying this with my little crafty ladies. Thanks for the fantastic idea! pinned
Cindy,
Have fun.
Excited to share these today, Rachel, they’re fabulous! I love that this is a craft idea people can make together and how you can use them all throughouth the season and around the hous too. They’re adorable! Big hugs, CoCo
CoCo,
I appreciate this so much.
Rachel! These are adorable!! What a brilliant idea. I’m inspired to try to make these myself. Thanks for the great instructions.
Anna,
I’m so glad you like them. I’ve loved decorating with them each fall.