Easy Felt Christmas Trees Tutorial: No-Sew Crafts for Beginners
Hey friends! Are you looking for easy DIY Christmas decor? I’m excited to share this adorable no-sew felt Christmas tree tutorial with you. These small trees can be customized to fit any decor style and are perfect for tabletop vignettes, mantels, shelves, and bookcase decor. This easy craft is ideal for beginners and budget-friendly, a quick, simple DIY that the whole family can make. So let’s gather the felt colors of your choice, and I’ll take you along as we craft some stunning Christmas trees.

(Posts on The Ponds Farmhouse may contain affiliate links. As an Amazon Associate, I earn from qualifying purchases. See the full disclosure details here.)
Supply List
- Styrofoam Cones 12″ and 6″ Cones
- Felt in your choice of colors.
- Hot Glue Gun
- Elmer’s Glue
- Fine Gold Glitter
- Metal Star (optional)
- Candleholders (optional). I used a variety of thrifted brass candleholders.
How To Make Felt Christmas Trees
There are several options for making felt Christmas trees; however, I chose a scalloped design for my trees. The first step I took was to create a template to transfer to the felt fabric. Next, I selected the felt colors I wanted to use and cut the strips to add to the styrofoam cones.
Step 1 – Create Template
To make the template, I used a piece of copy paper and a penny to create the scallop design.
- Cut a strip of paper approximately 1 inch wide and the full length of the paper.
- Use a penny to trace the scallops on one side.
- Cut the template from the paper.

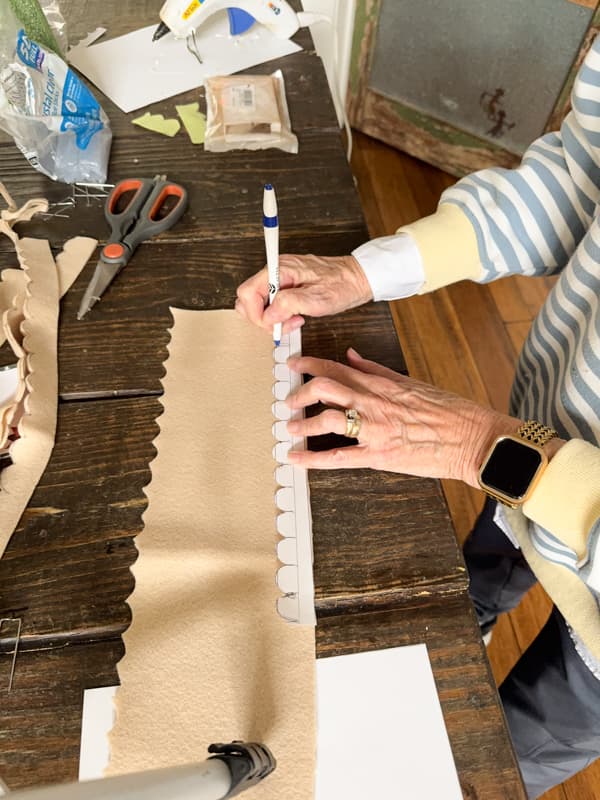
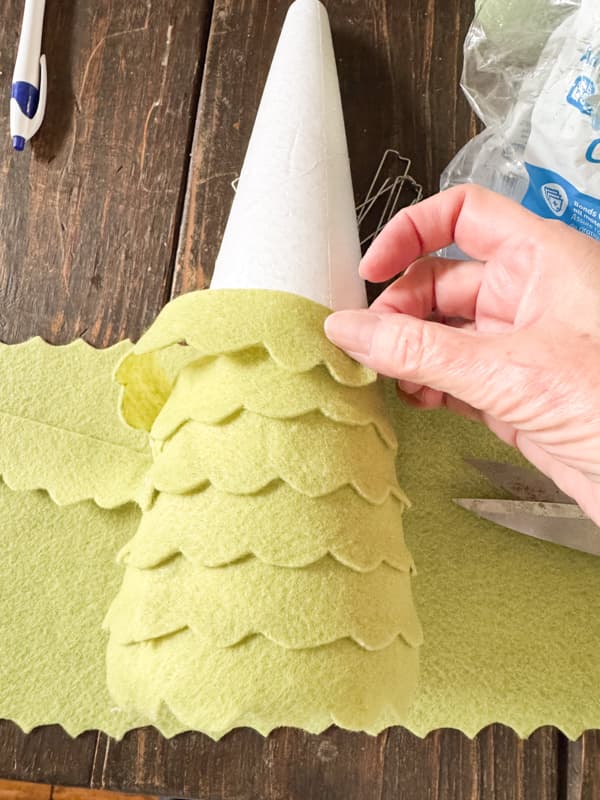
Step 2 – Trace and Cut From Felt Fabric
Next, trace the template on the felt fabric with an ink pen. When you reach the end of the template, move it to the last scallop and continue tracing. I held the template in place along the fabric’s straight edge. If you prefer, you can use straight pins to hold in place.
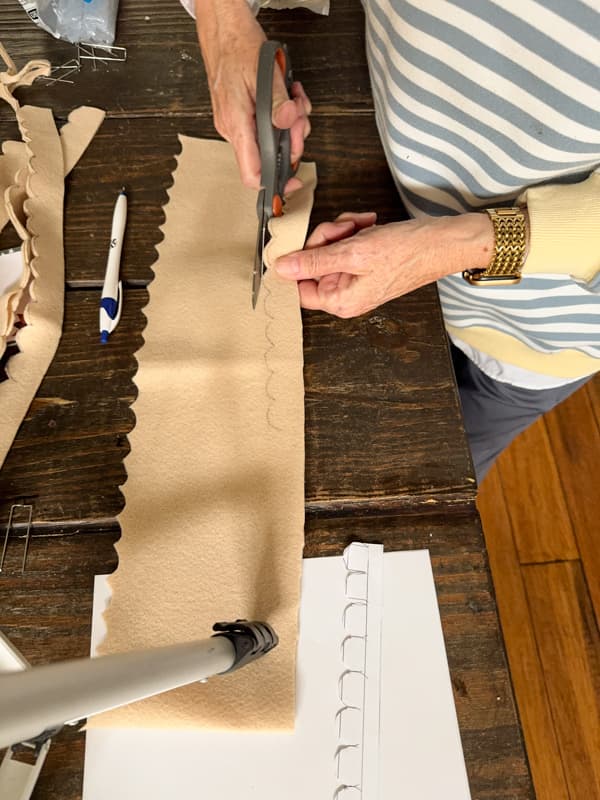
Then, use sharp scissors to cut the felt fabric design. You will need several strips to cover the cones. I was able to get two cones covered with one piece of the fabric I purchased. Link is above.
As you add more strips, you will need to trim the fabric back to an even, straight edge before reapplying the template.
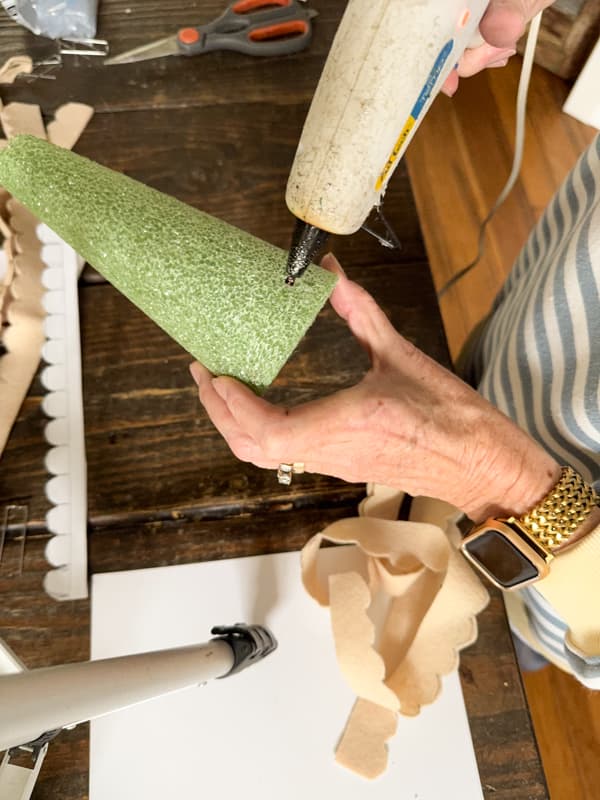
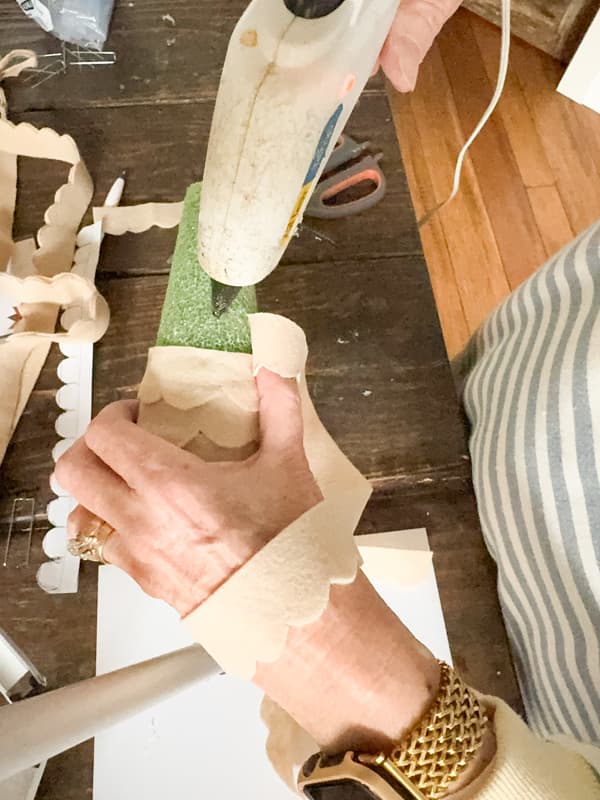
Step 3 – Attach Scalloped Felt Strips To Cones
After cutting several scalloped strips from the felt fabric, you are ready to attach them to the cones.
Begin by adding hot glue approximately 1/2 inch from the bottom of the cone. Then attach a strip of the felt, allowing the scallops to hang just below the bottom of the cone. Ensure that you can’t see the bottom of the cone from the side.
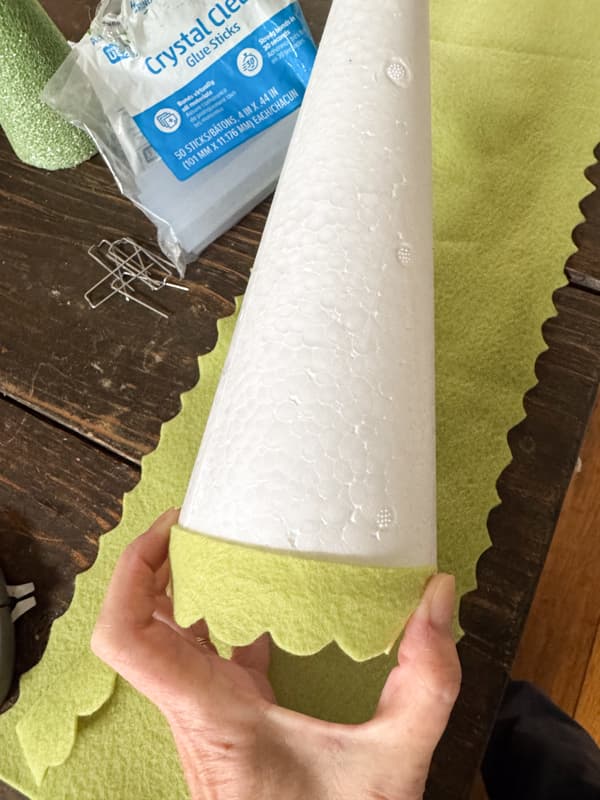
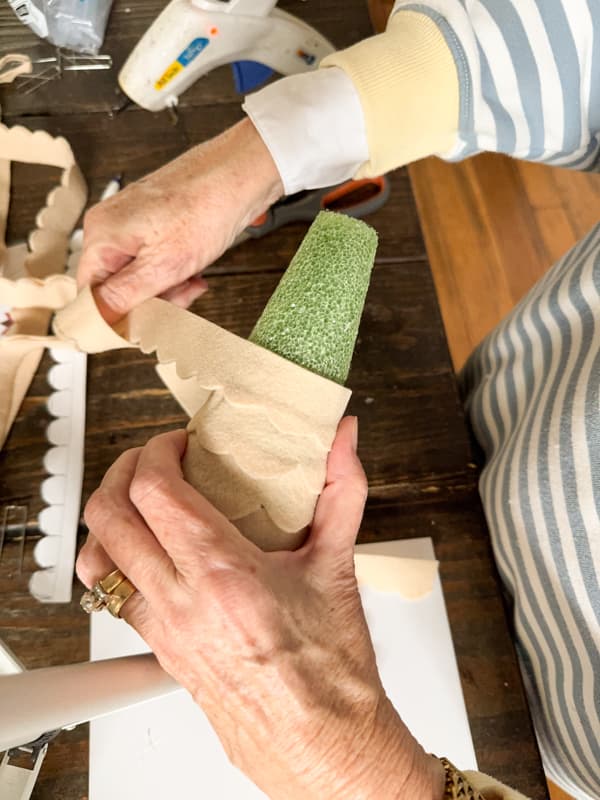
I overlapped the fabric at the back of the cone and cut the remaining fabric strip to start a new round.
Overlap each round so that the cone isn’t visible under the scalloped edge.
Add small sections of glue approximately 1/2 inch above each round as you continue adding the fabric. Press the felt into the glue and pull the fabric slightly taut. Don’t overstretch it.
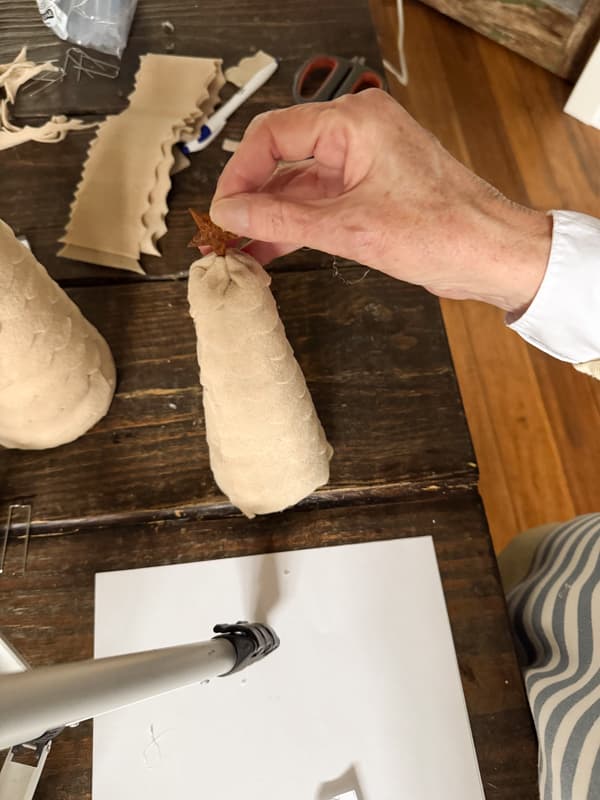
Step 4 – Finish Top of Tree
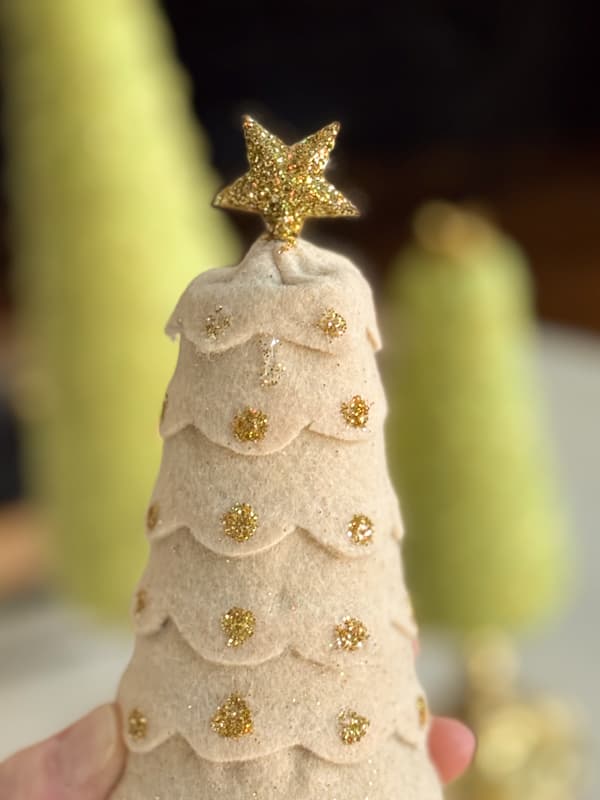
To finish the top of the tree, add a final round of felt that extends about the top. Use hot glue to press the felt over the styrofoam point. Then insert a star if you choose.
I already had these rustic metal stars, which were a great size for these trees. I didn’t particularly like the rustic look for this craft, so let me show you what I did.
How To Add Glitter To Felt Christmas Trees
I decided I wanted my felt trees to have a little sparkle, so I added gold glitter.
I used a small craft paint brush handle and Elmer’s glue to create dots on the felt fabric scallops.
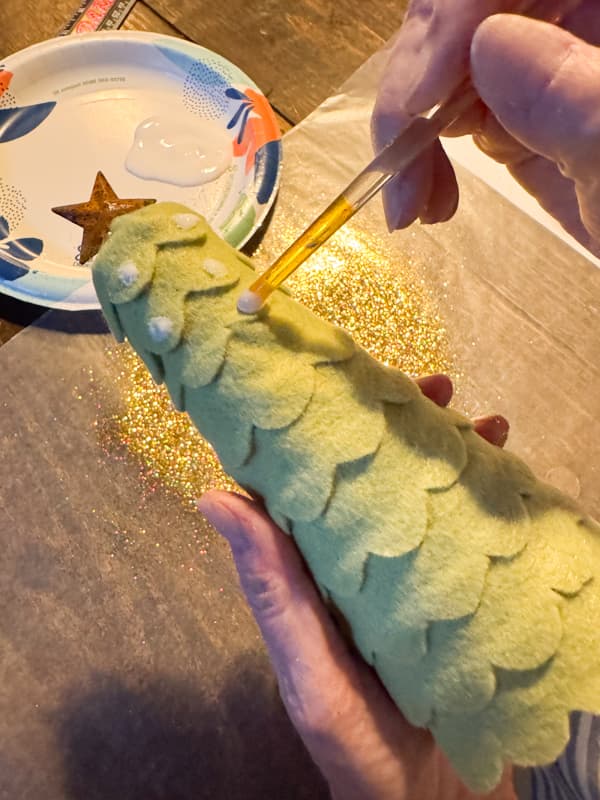
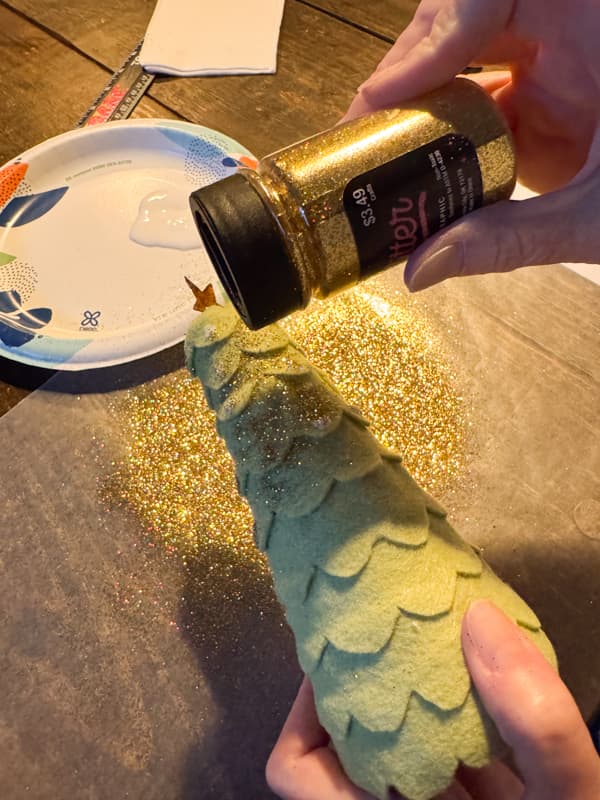
Then I sprinkled the glue dots with fine gold glitter.
In addition, I coated the metal star with glue and sprinkled glitter on the front and back for a less rustic look.
Insider Tip
Don’t waste your glitter. Hold the trees over a large piece of wax paper as you sprinkle the glue dots. Once you are finished, fold the wax paper into a funnel and pour the glitter back into the jar. You’ll notice you used very little glitter for this project and you’ll have plenty for future projects.
Decorating with DIY Felt Christmas Trees
These DIY Felt Christmas Trees turned out so cute. I used green and beige felt and made one large and one small of each color. I plan to use them on my Christmas tablescape, but they would look adorable anywhere in your decor. I’ll share the tablescape in a few days, but in the meantime, I styled them in other areas around the farmhouse.
Vintage Brass Candlestick Holder Bases
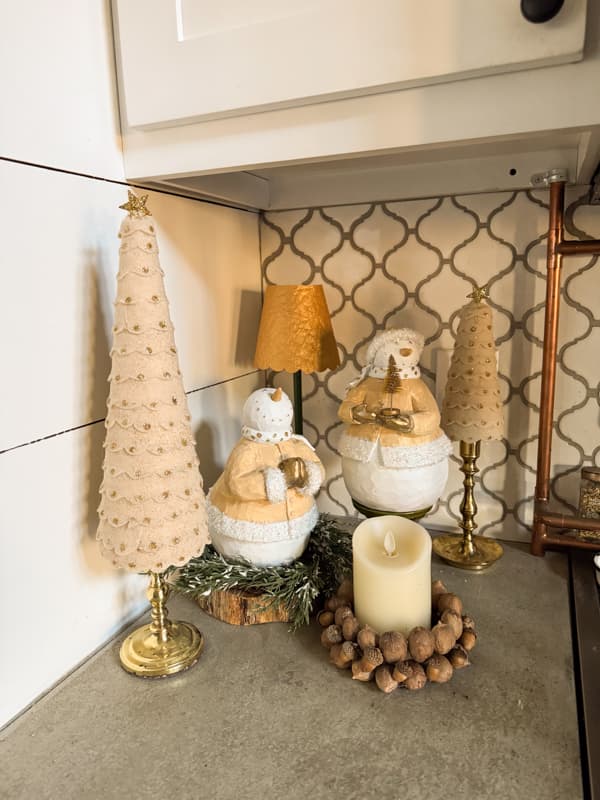
I first added each DIY felt tree to one of my vintage brass candlestick holders, varying the height.

The trees look great grouped on the side table in the living room.

The LED Cordless Lamp, with its updated shade and repurposed thrift-store snowmen, creates a fun vignette with the beige felt Christmas trees.
Resources: Shop This Post
Video
I hope you enjoyed today’s easy felt Christmas tree tutorial. Stay tuned for this year’s Christmas Tablescape, including the felt trees, coming soon.


These trees are adorable! What a beautiful job you did. I may have to give these a try. Thanks for sharing and have the best weekend! xo
Kim,
I’m so glad you like them. Thanks for stopping by.
These are so pretty! So nice to see your hands creating things again!
Blessings,
Diana
Diana,
Thank you! I really appreciate your suggestions. There are so many options. Have a blessed weekend.
Rachel,
What would you think of alternating each row, so the scallops are offset? They aew so pretty as done but it’s just a thought.
Blessings,
Diana
Diana,
Great idea!
Those are so fun and putting them on the candlesticks takes them over the top! I love them! You need a craft booth my friend!
Cindy,
Thank you for your sweet comments. I’m so glad you like the felt Christmas trees. They were fun and easy to make. Have a blessed week.