Easy Thrift Store Snowman Makeover: Christmas Upcycle DIY
Hey friends, I love finding great quality but out-of-date Christmas decor at thrift stores. I grabbed these two thrifted snowmen for only $3.00 and decided to give them a high-end makeover using simple paint and glitter. These inexpensive finds were updated within minutes using a few simple DIY techniques. Let me show you just how I did it.
(Posts on The Ponds Farmhouse may contain affiliate links. As an Amazon Associate, I earn from qualifying purchases. See the full disclosure details here.)

Thrift Store Snowmen
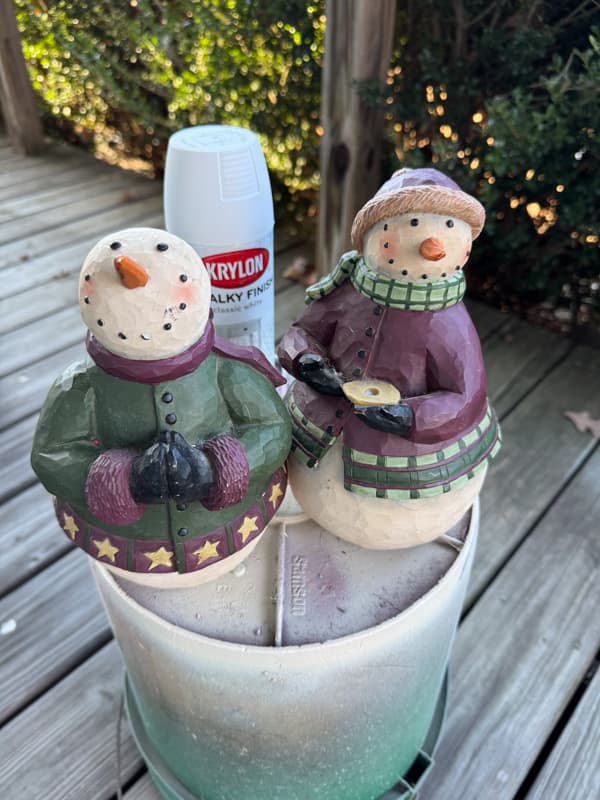
Over the summer, I ran across these two large snowmen for only $3.00. They didn’t work with my Christmas decor, but I thought I could update them. I didn’t have a clear vision, but home with me, they came. After bringing them home, I completely forgot about them. So a few days ago, I was rummaging in my workshop and ran across the pair. I immediately saw a vision of what they could look like if I did a Christmas upcycle on them. I love creating a vintage holiday decor DIY project, so here goes.
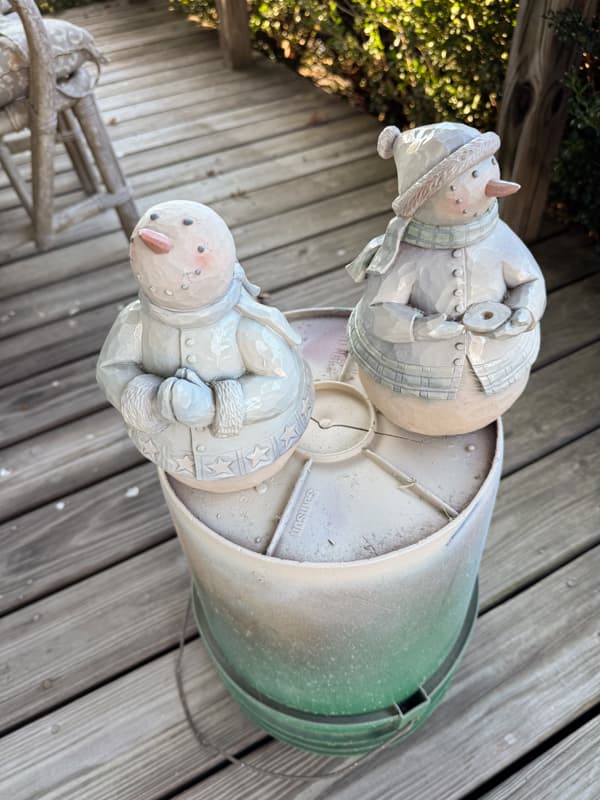
I knew the first step was to cover the outdated colors, so I grabbed a can of spray paint and went to work. I used two coats of paint to get even coverage.
Supply List
- Out of date Snowmen
- Kryon Chalky Finish Classic White Spray Paint
- Folkart Teddy Bear Brown Craft paint
- Gold Leaf Rub N Buff
- Faux Snow
- Fine Gold Glitter
- Elmer Glue
- Small gold bottle brush tree (optional)
- Small Paint Brushes

DIY Snowman Thrift Store Makeover
Once the spray paint has dried, you are ready for the thrift store makeover.
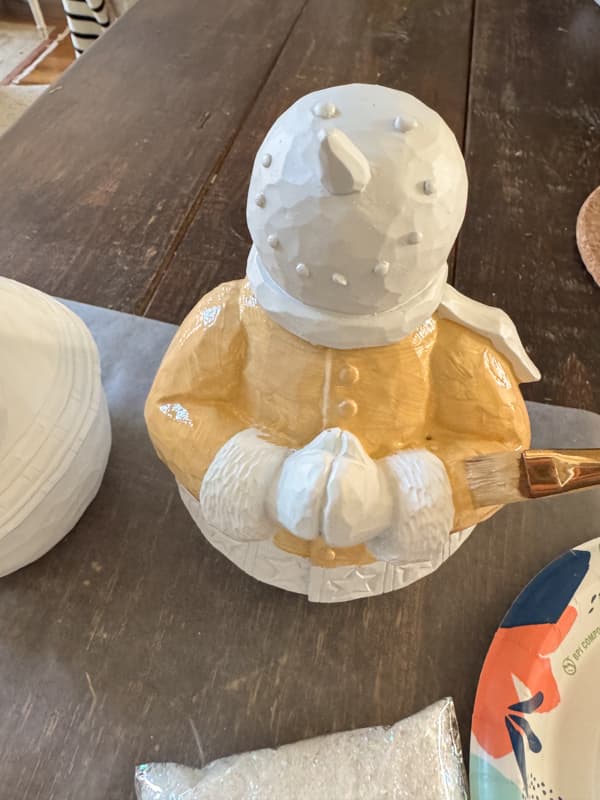
Step 1 – Paint Contrasting Color – Neutral Snowmen
I wanted to create neutral DIY Snowmen so I decided to paint the jackets with Teddy Bear Brown paint to contrast softly with the otherwise white snowmen. In addition, I used the same craft paint for the noses.
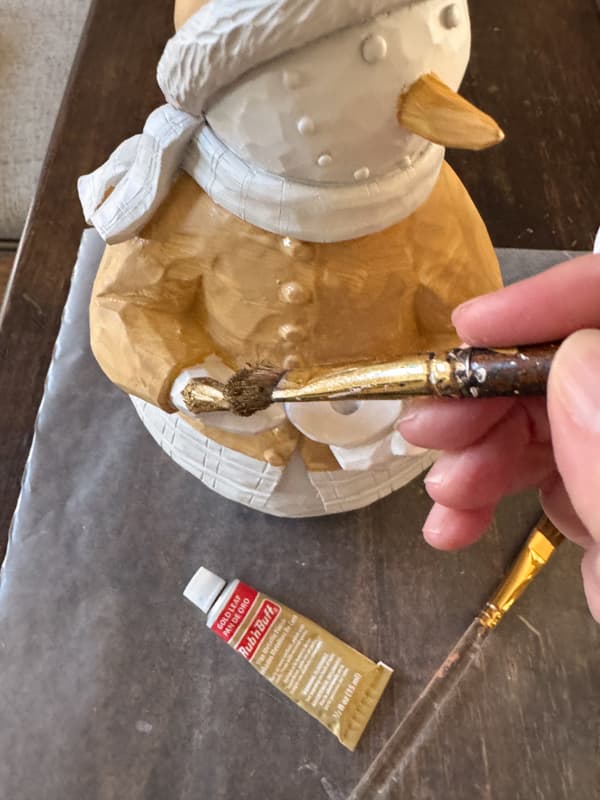
Step 2 – Add Rub N Buff
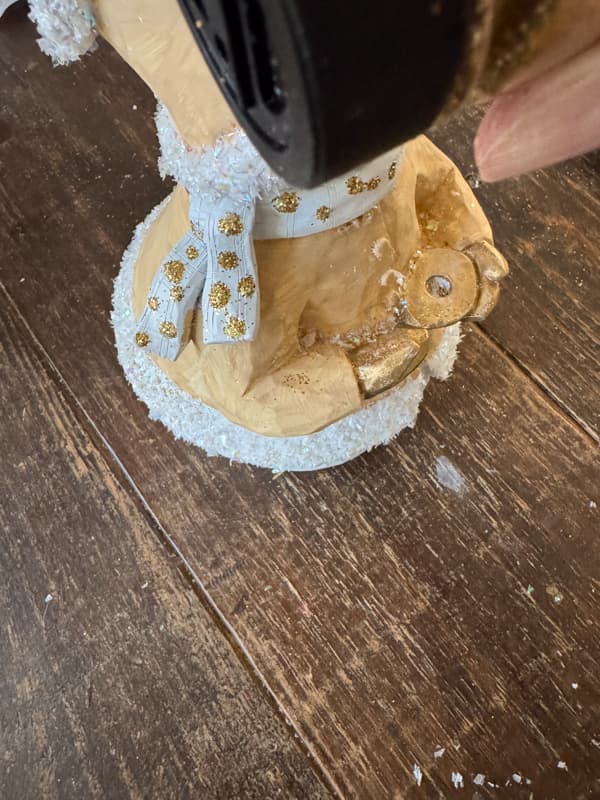
In order to add a little shine, I use Gold Leaf Rub N Buff for the gloves, eyes, and mouth. I used a small craft brush to reach into the tight spots around the snowmen’s hands. To add a small amount of gold to the eyes and mouth, I used a paper towel and gently blotted the raised areas.
Step 3 – Add Faux Snow To The Trim
To give the Christmas snowmen a snowy feel, I added Elmer’s glue to the coat trims and the hat trim. Then I sprinkled heavily with the faux snow over the glued area and shook off the excess onto the wax paper.

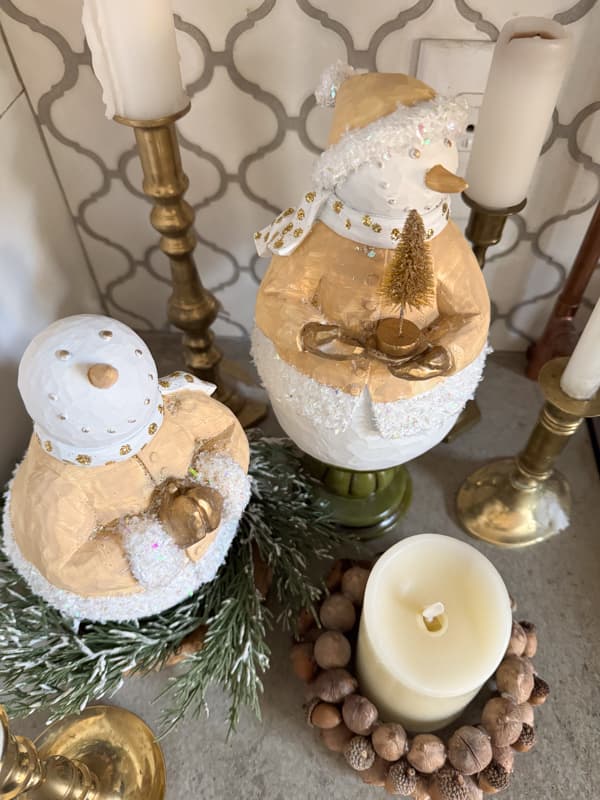
#4 – Glitter for A Vintage Holiday Decor DIY
Finally, to give the snowmen a vintage holiday decor vibe, I decided to use fine gold glitter to create polka dots on each scarf. I used the paintbrush hand to dot the scarves with glue, then sprinkled them with fine gold glitter. Once again, shake off excess, and you are done.
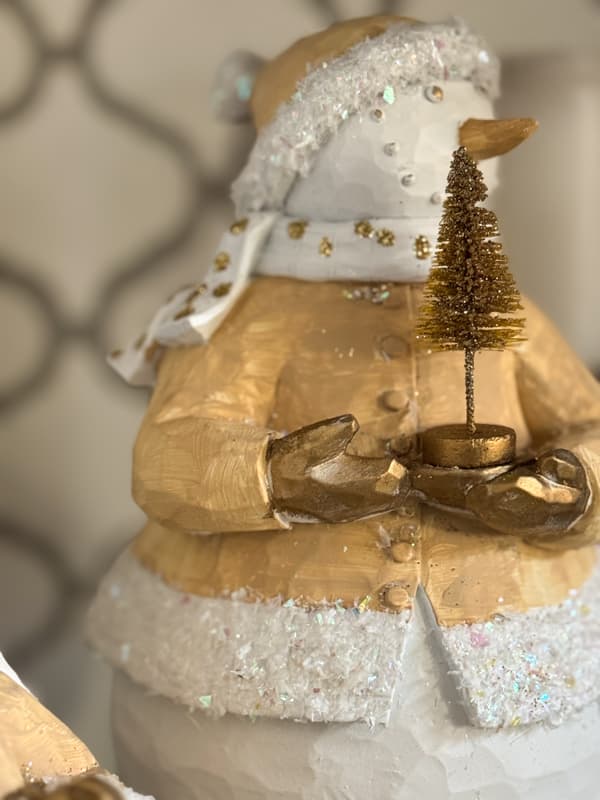
Final Enhancement – Bottle Brush Tree
One of the snowmen appears to be holding something; however, the something was missing when I purchased it. So, without knowing for sure that it was holding, I decided a small bottle brush tree would be appropriate. With just a little glue, I attached the tree and allowed it to dry.
Decorating With DIY Snowmen Ideas
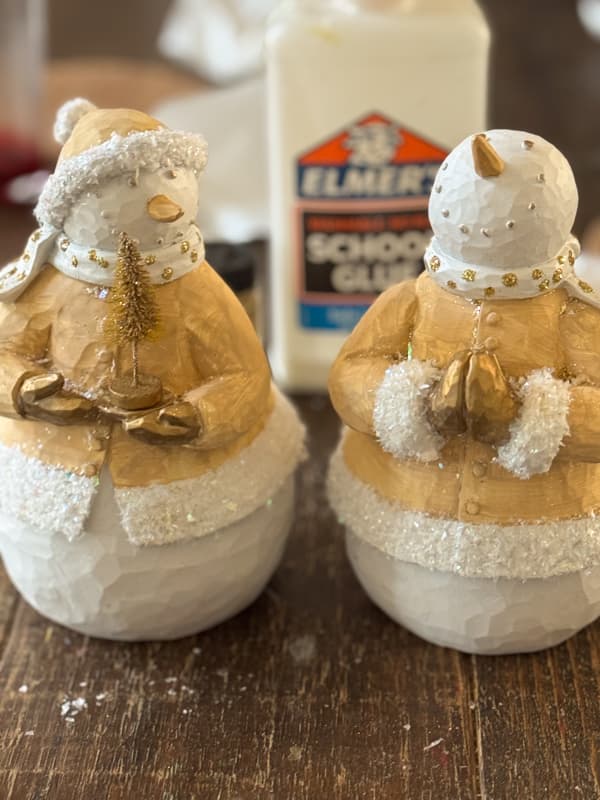
The Christmas upcycle turned out better than I anticipated. I love the neutral colors, and they definitely have a high-end appeal.
I didn’t realize until I had finished the makeover that one of the snowmen appears to be praying. So sweet.

It makes me wonder what the other snowman was holding originally. Maybe a hymn book or a candle? What do you think?
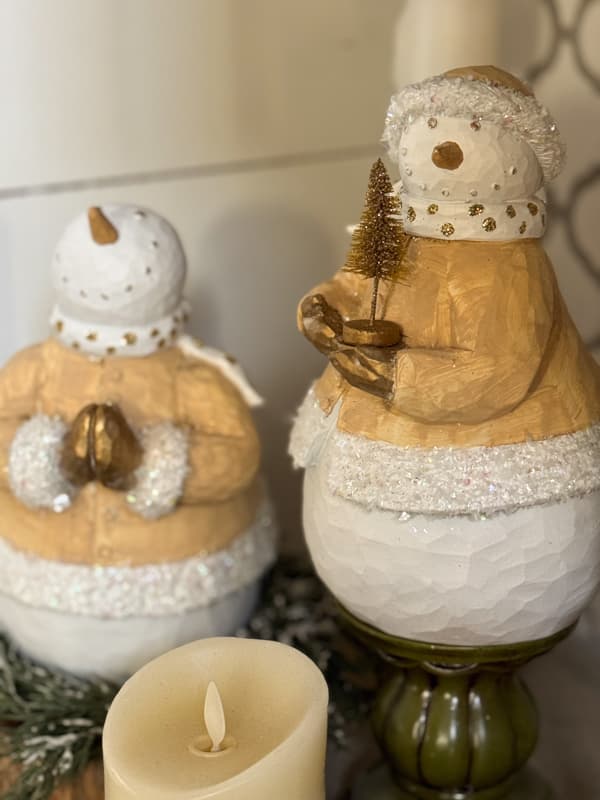
I’ve decided to use the DIY snowmen on my kitchen countertop. To vary the heights, I used a wooden round riser and a short candlestick holder.
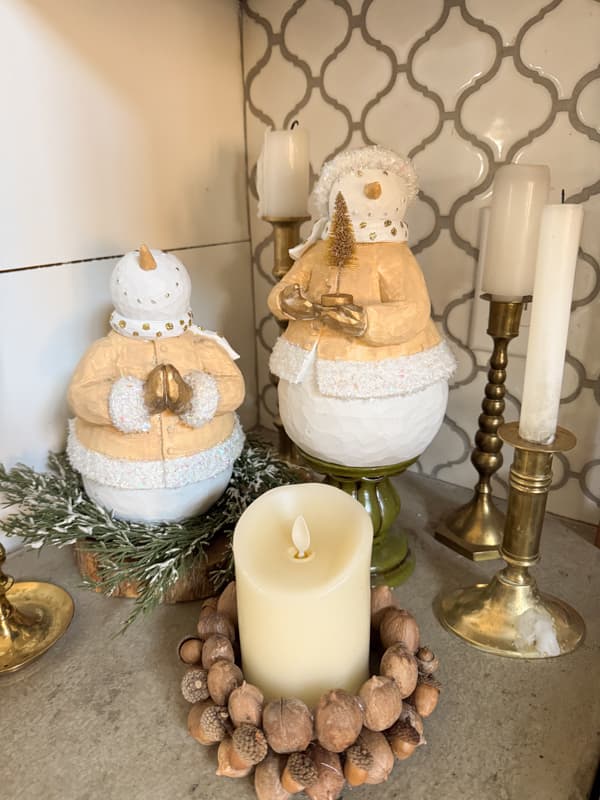
They are surrounded by vintage brass candlestick holders and the nut-and-acorn candlering I made earlier this fall.
Conclusion
This makeover was so simple and easy to complete. My only investment was the original $3.00 I paid at the thrift store. All the other materials I had on hand. The makeover took less than an hour once the original spray paint had dried. Well worth the time and effort.
Related Articles
I hope you enjoyed today’s makeover, and I look forward to sharing my next adventures with you!


They are beautiful!!!!!!!
Karyn
Thank you for your sweet compliment. Have a blessed weekend.
Rachel,
You’ve done it again you crafty soul! They are adorable. Thanks for sharing the makeover.
Marcie,
I’m so glad you like them. Keep your eyes open for deals at thrift stores. Have a blessed weekend.
They turned out so adorable! 😍
Lisa,
I’m so glad you like them. It was a fun and easy project. Have a blessed weekend.
* * * Dear Rachel * * *
Magnificent. You have created a beautiful Christmas decoration. I just Love your HaPpY Festive Snowmen. My family and I look forward to your gorgeous presentations. Rachel you are so inspirational.
* * * Have a Beautiful Day. * * *
Hugs, Kathleen & Family 🙂
Kathleen,
I am so glad you found this a good transformation. Thank you for following along. Have a blessed weekend.
Oh my gosh Rachel! If you hadn’t shown the before picture I never would’ve guessed that your snowmen are the same ones. It’s amazing what a little ingenuity & supplies can do.
Beth,
Oh thank you for this sweet compliment. I’m so glad you like them. Have a blessed week.
THE SNOWMEN ARE ADORABLE…AS USUAL, YOU HAD THE PERFECT IDEA.
SO THANKFUL AND HAPPY GOD HAS BLESSED YOU, AND YOU RANG THE BELL!
MANY PRAYERS WENT UPFOR YOUR SPEEDY RECOVERY, AND THEY WERE HEARD.
GOD BLESS YOU DAILY IN THE COMING DAYS, AND MAY YOU ALWAYS BE MINDFUL
OF WHAT HE HAS DONE FOR YOU.
WE THANK HIM FOR BEING SUCH AN AWESOME, ALMIGHTY AND HEALING GOD.
WE LOVE YOU AND HIM.
Dee,
Yes! Praise the lord for his many blessings. I’m so glad you like the snowmen makeover. I hope you have a blessed week.
Another Great Idea- thanks for sharing all the Holiday goodies you have made! I hope you have a good Holiday Season, you certainly deserve it!! Thanks again, Patty B
Patty,
I’m so glad you like this idea. I’m so happy with them and thankful that inspiration finally hit. I appreciate your well wishes and I hope you have a blessed week.
I think your idea of the second Snowperson holding a candle might be the missing item with the other praying. Perhaps cutting off a nub of a regular one for a snowman sized wider candle, or cutting down a tiny birthday candle. But I do like the tiny gold tree too.
Happy Christmas season!
Victoria,
Yes, I thought about a candle also but decided on the tree since I had one that would work. Glad you liked this project. Have a blessed day.