Easy DIY Felt Ball Garland: Cozy Winter Decor Tutorial (2026)
Hey friends! I’m back with a super easy DIY felt ball garland tutorial. If you want to add a touch of coziness to your winter home decor, this simple project is the perfect afternoon craft.
This year, I decided to keep my Christmas greenery in place for the winter season, but I needed a way to swap the holiday glitz for a warm, “hygge” feel. This felt garland came together beautifully, adding just enough color and texture to soften the look.
The best part? You can customize this to any style. While I’m going very neutral this year with shades of beige and brown, you can use any color palette to match your room. Whether you need a small accent or a long mantel garland, you can easily adjust the length to fit your space.
Let me show you how to make this DIY felt ball garland in under an hour!
(Posts on The Ponds Farmhouse may contain affiliate links. As an Amazon Associate, I earn from qualifying purchases. See the full disclosure details here.)
Supply List
- Chenille Hand Needles
- Wool Felt Balls (Shades of Brown) – count 100
- Mix Sizes of White Wool Felt Balls – count 50
- 100% cotton heavy cord
- Caramel colored sheet of felt. I used a small sheet from Hobby Lobby. Here are some options – Shade of Brown Felt Sheets
How To Make A DIY Felt Ball Garland
There are many options for creating a DIY felt ball garland. You can choose from many color combinations or use a single color. Although today’s garland is all about cozy winter decor, you can imagine a Valentine’s garland in shades of pink and red or a patriotic garland in red, white, & blue for other seasonal decorations. The options are unlimited.
You can make the garland any size you prefer to fit your decor. Here are some initial steps to help ensure you end up with the garland of your dreams.
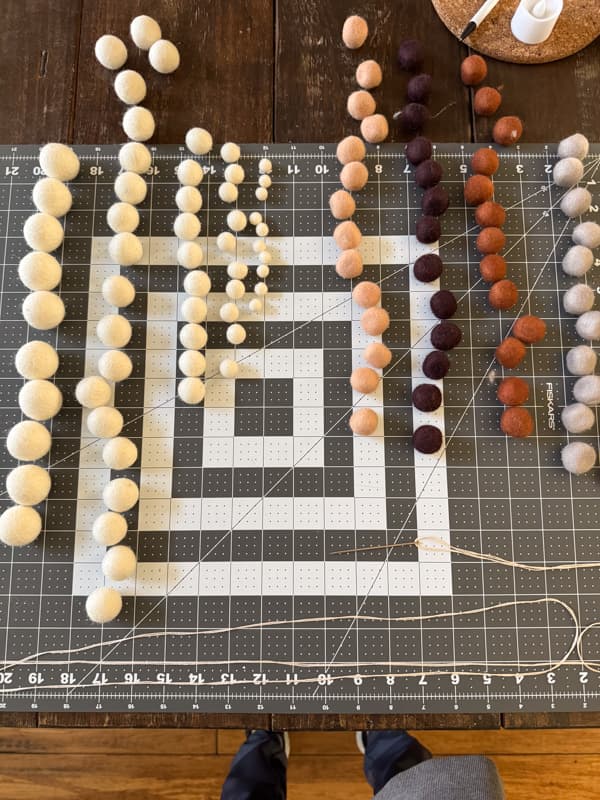
- First, determine what colors you want your garland to include.
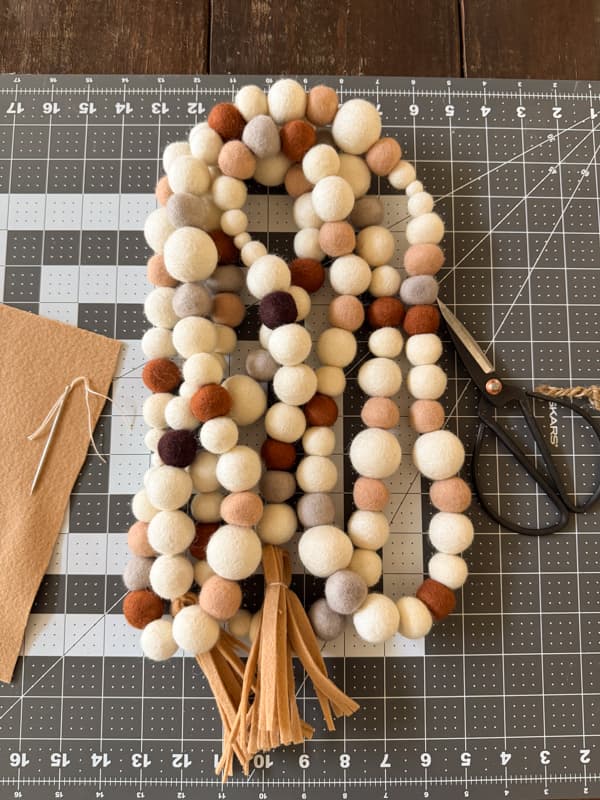
- Then, how long do you want your garland? You will need enough felt balls to cover the length, so order accordingly. My garland is 100 inches long, and I used just under 150 felt balls. I used all the white multi-sized package shown above and had only a handful of multicolor balls left.
- Measure the space you plan to use the garland to determine the length.
- Gather your supplies and lay them out to determine the pattern you want to create.
Step 1 – Prepare Your Needle
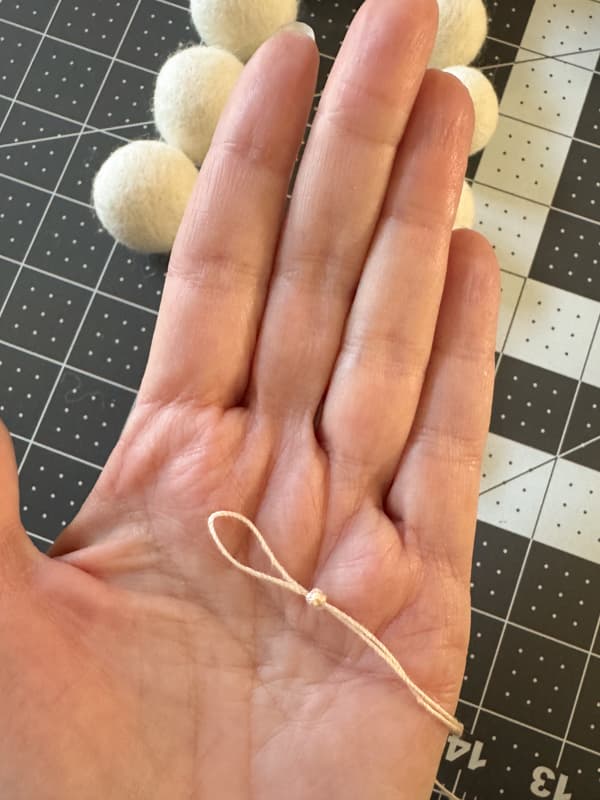
I wanted to ensure a sturdy garland so was careful to use a cord that doesn’t stretch. I measured my space and doubled the cord length. Use a large-eyed needle and thread the cord through it. You will have a double strand of cord to secure your felt balls.
Tie off the opposite end of the cord from the needle. Make a secure, heavy knot to prevent the felt balls from slipping off the end.
Step 2 – Add Felt Balls to the Cord
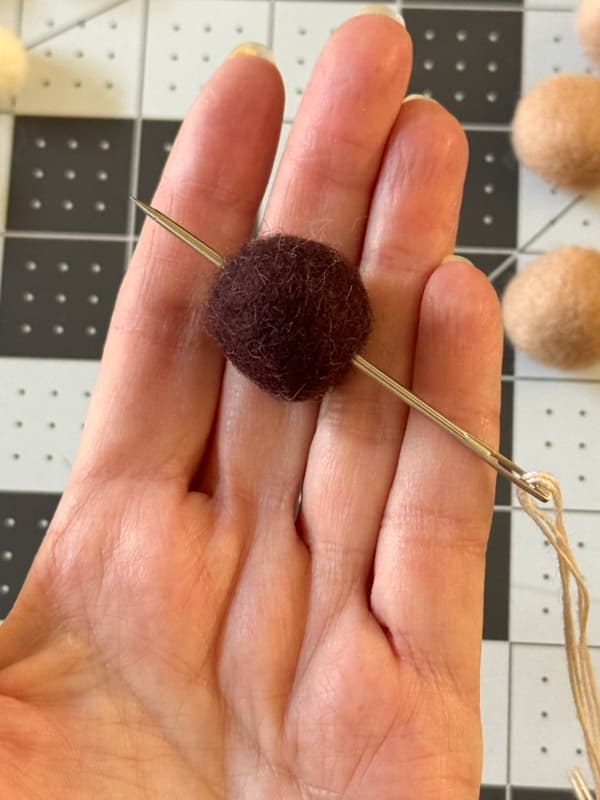
Now you are ready to begin adding the felt balls to the cord. First, get a general idea of the pattern you wish to create. I used a combination of sizes and colors to create the pattern as I went along.
Begin with the first felt ball and insert the needle through its center. Pull the ball through the thread until it reaches the knot at the end.
Insider Tip
Ensure that your cord doesn’t become knotted by laying it out straight as your go. The longer your cord, the more likely it is to knot. After you get several ball on the cord, it become easier to work with.
Continue adding felt balls in this manner until the cord is filled. If you decide you don’t like the pattern, you can remove the cord from the needle and slip the balls off to start again.
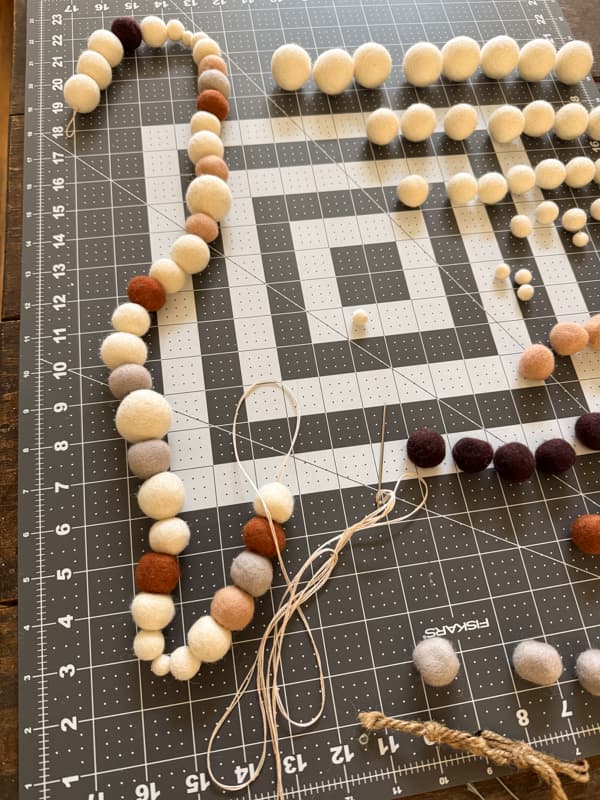
Once you are finished adding the felt balls, secure them by running the cord around the opening a few times, leaving a length of the cord to attach the tassels.
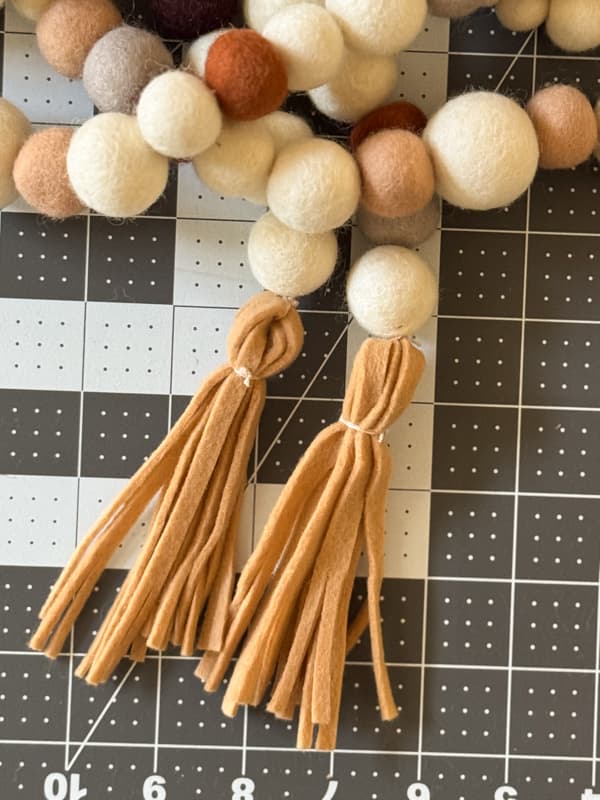
Step 3 – How To Make A Felt Tassel
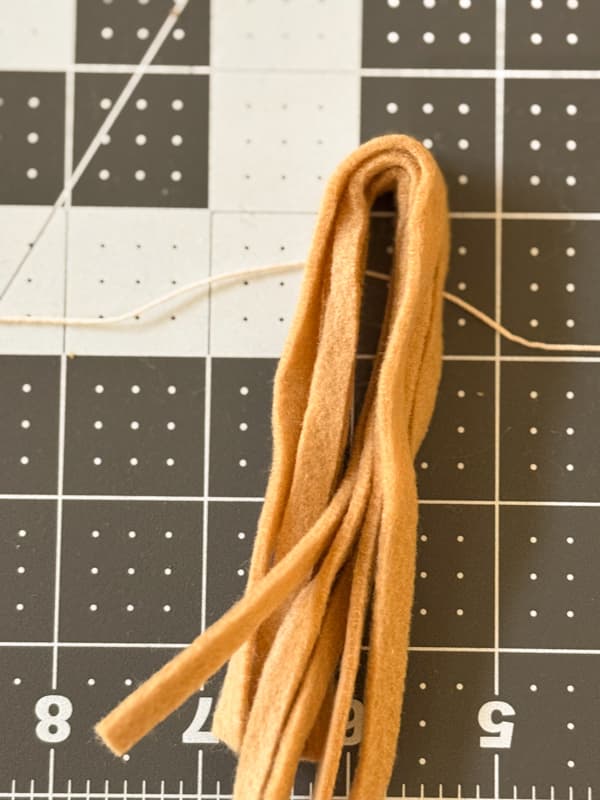
To finish off your garland, I recommend adding tassels to each end. You can make tassels out of yarn, cording or felt. I used felt for my tassel, and here is how I did so.
I used a sheet of felt in the color of one of the felt balls. Using sharp scissors I cut 1/4 inch strips from the felt. I didn’t measure but just cut quickly. Each strip was the length of the felt fabric which is 9 inchs. They don’t have to be perfect in size. I cut 10 strips, 5 for each tassel.

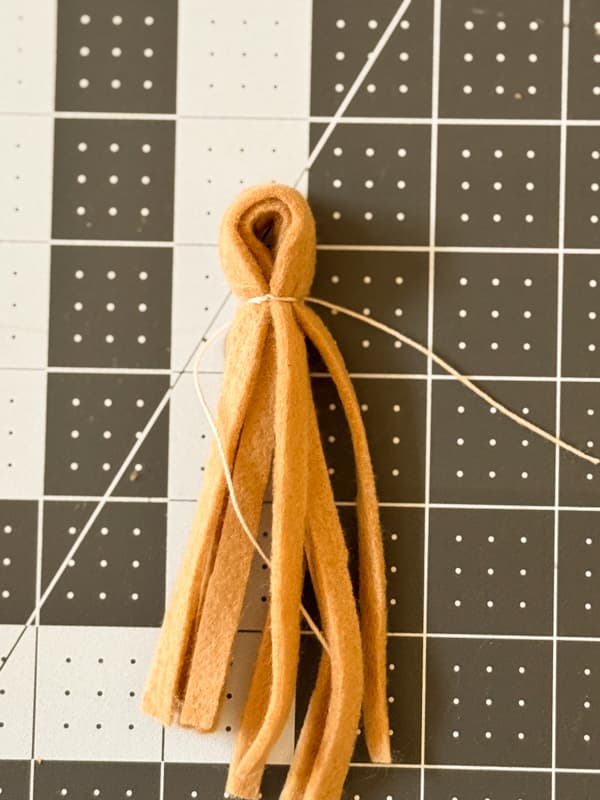
Next, fold 5 of the felt strips in half. Use the cord thread to tie around the top of the felt. Place the cord below the loop allowing enough open space at the top so that it can be attached to the garland. Tie the cord tightly and knot to secure.
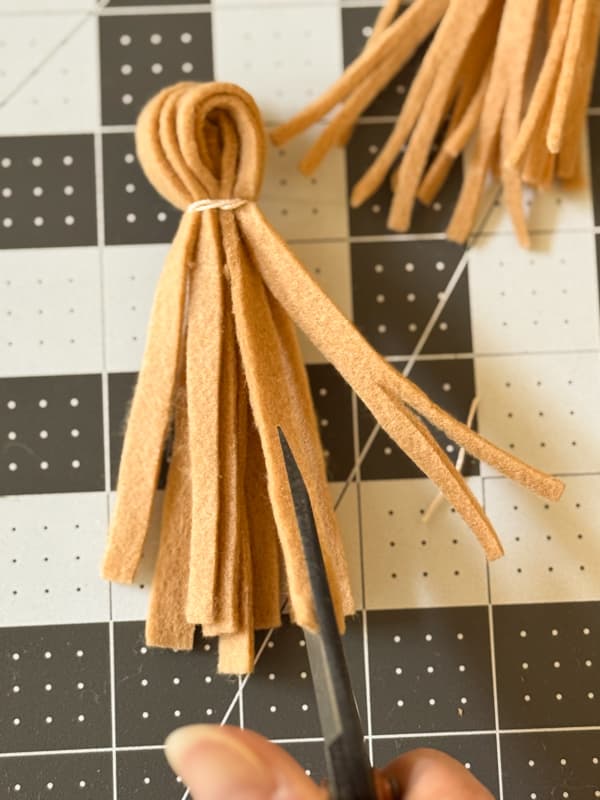
In order to make the tassels more full, I split each of the 1/4 inch ends with scissors. Don’t try to cut the full lenght of the felt strips because it can cause them to break off.
Finally, run the cord ends from the garland through the opening at the top of the tassel and tie securely.
You now have a cozy warm felt ball garland to decorate your home for Winter.
How To Decorate With A Felt Ball Garland?
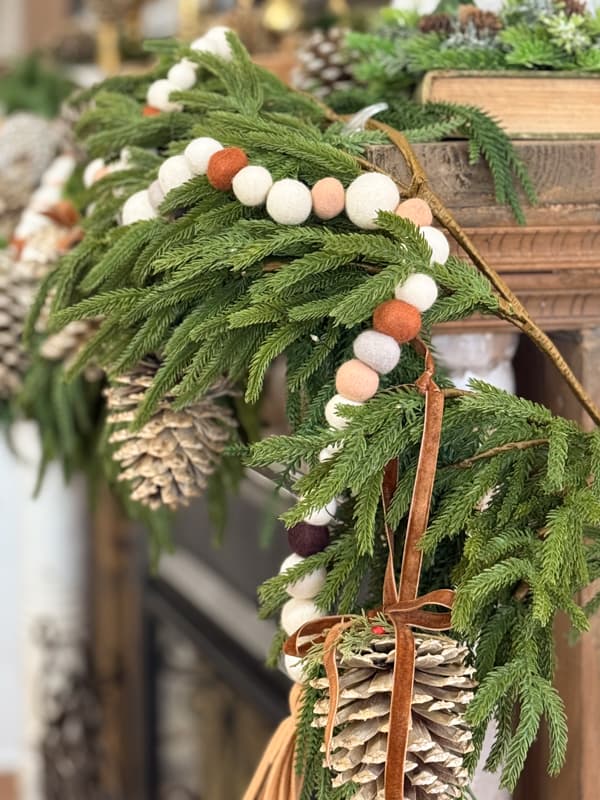
This year I decided to leave most of the greenery I had use for Christmas out for winter. To warm up the greenery, I removed the obvious traces of Christmas decor. I plan to use the felt ball garland on my fireplace mantel greenery. However, before I added it, I want to show you some other ways to decorate with it.
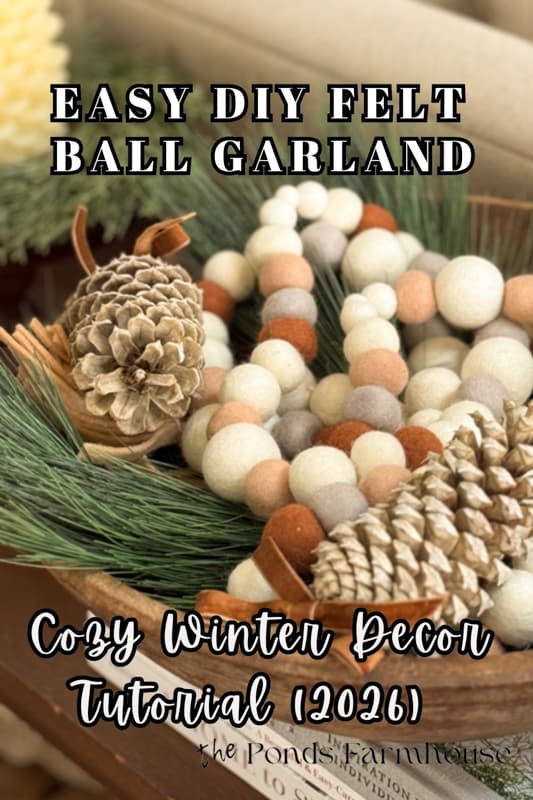
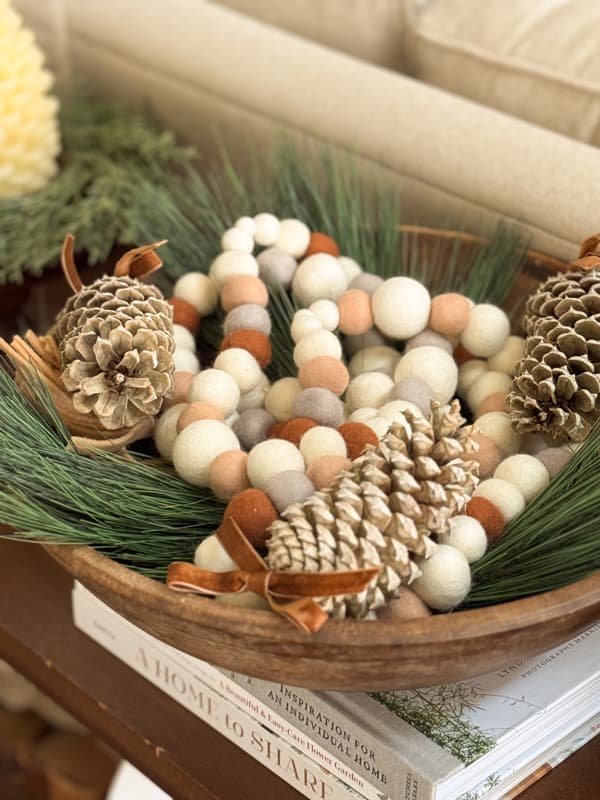
Add Felt Ball Garland As A Bowl Filler
When I removed the Christmas decoration, I left a vintage wooden bowl filled with greenery and bleached pinecones. I removed the pinecones and added the felt ball garland. Then I added just a few of the pinecones back on top.
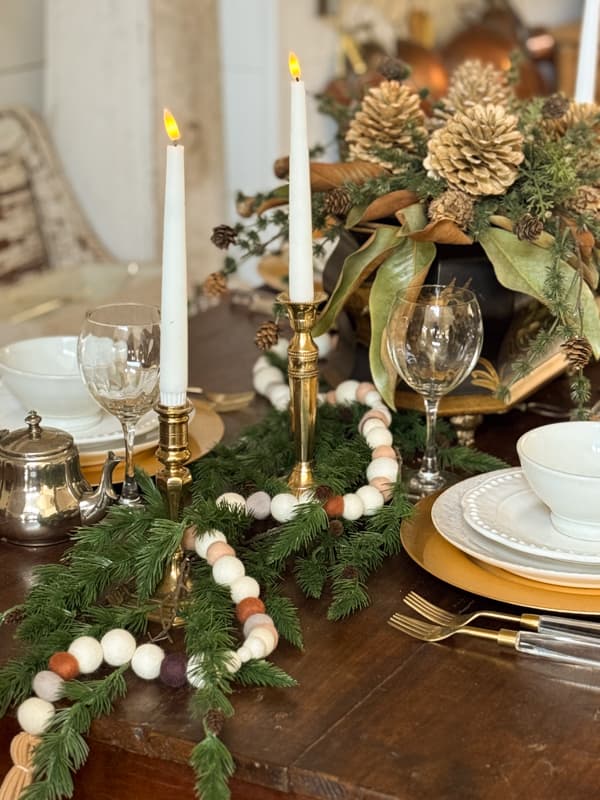
Use Felt Ball Garland on Table Runner
I also decided to leave the greenery table runner on my dining room table. See how adding the DIY garland to the greenery warms up the table for winter decorating.
DIY Felt Ball Garland With Mantel Greenery
And finally, the fireplace mantel greenery was just perfect this year and I couldn’t bare to take it all down after Christmas. So I removed the dried orange garland and left the bleached pinecones and greenery. By adding the DIY felt ball garland, the mantel looks fresh and cozy for winter.

The tassels hang down either side of the mantel and bring a touch of color to the greenery.
If you don’t have a mantel, you can use the garland in these other areas to add a little color.
- Drape the garland over a window or doorway.
- Add garland to a shelf or bookcase. Let it droop down to create visual interest.
- Drape the garland over a headboard or footboard in your bedroom.
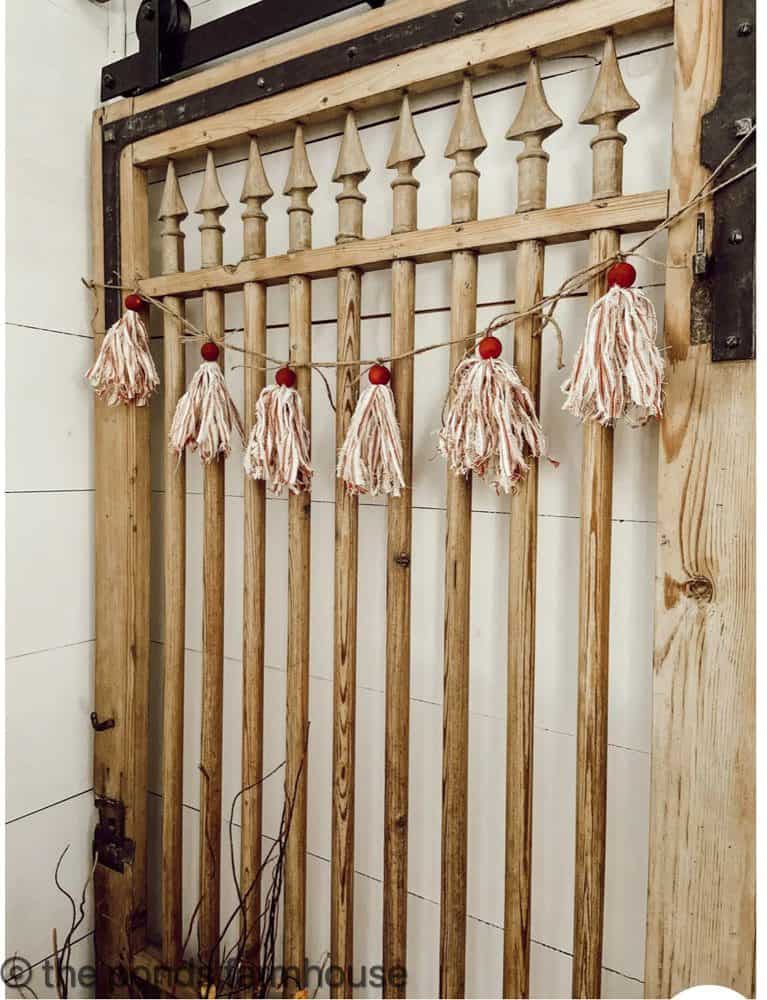
- Use it on a short banister.
- Tie a small garland around a lamp base or vase
- Drape the garland at the top of your cabinets, hutch or dresser.
I hope you enjoyed this easy project. I’ll be sharing more of the mantel and other winter decor ideas with you tomorrow. So stay turned.


Your felt ball garland looks so nice in each of the places you show it.
Angie,
I know what you mean. I wish I had the time to make 4 of them so I could them all around the house. Thank you for your kind words and Have a blessed Sunday.
What a unique idea.felt garland…iver been reading over some of your posting an I saw old doors an windows amazing..You mentioned you didnt know about the use of the small doors.im not sure but possibly they could have been the doors used for the wood boxes …instead of being opened …stacked an closed to keep floors cleaner…usually n front room…
Thelma,
Thank you for the insight on the small door. and I’m glad you liked the felt garland. Have a blessed week.