DIY Star Neutral Wreath For Summer
Do you like neutral colors for summer? With so much red, white, and blue around the house for Memorial Day and the 4th of July, I wanted to try a patriotic Neutral DIY Star Wreath for Summer without all the colors.
I decided to make these wreaths using recycled materials, and I’m excited to see what you think!
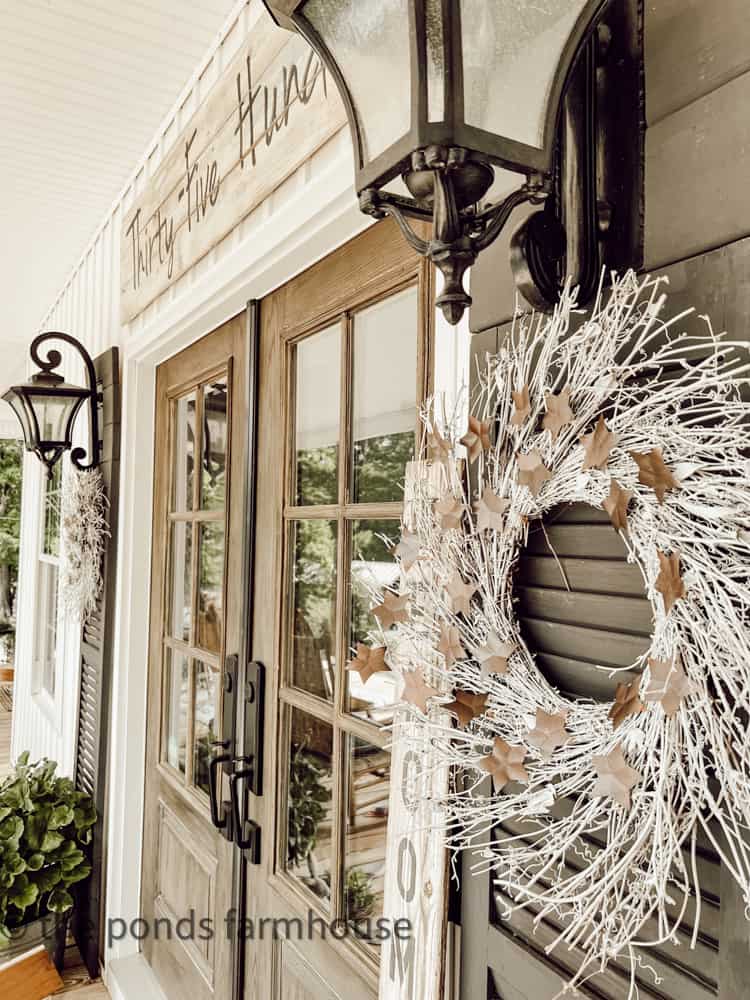
Table of contents
Anything Goes Summer
Today, I’m joining Pasha at Pasha is Home for her Anythings Goes Summer Blog Hop. You will see so much summer inspiration from 11 talented bloggers. If you are joining me from Kim at Cottage in the Mitten, Welcome! Kim’s creative ideas to make summer memorable were so fun.
If you are new to my blog, I’m so glad you stopped by. I love to decorate my Industrial Farmhouse in a curated style by combining new, vintage, thrifted and DIY decor. If you’d like to know more about my journey, click here.
(Posts on The Ponds Farmhouse may contain affiliate links. As an Amazon Associate, I earn from qualifying purchases. See the full disclosure details here.)
How To Make A DIY Star Wreath with Recycled Materials
First, you need to determine the materials for your stars. For this star wreath, I decided to recycle some aluminum cans.
In addition, I had a couple of twig wreaths that I’ve used for different occasions so they could be recycled as well.
Materials
- Several aluminum cans
- Star Punch
- Twig Wreath
- Rust-Oleum Chalked Linen White Spray Paint
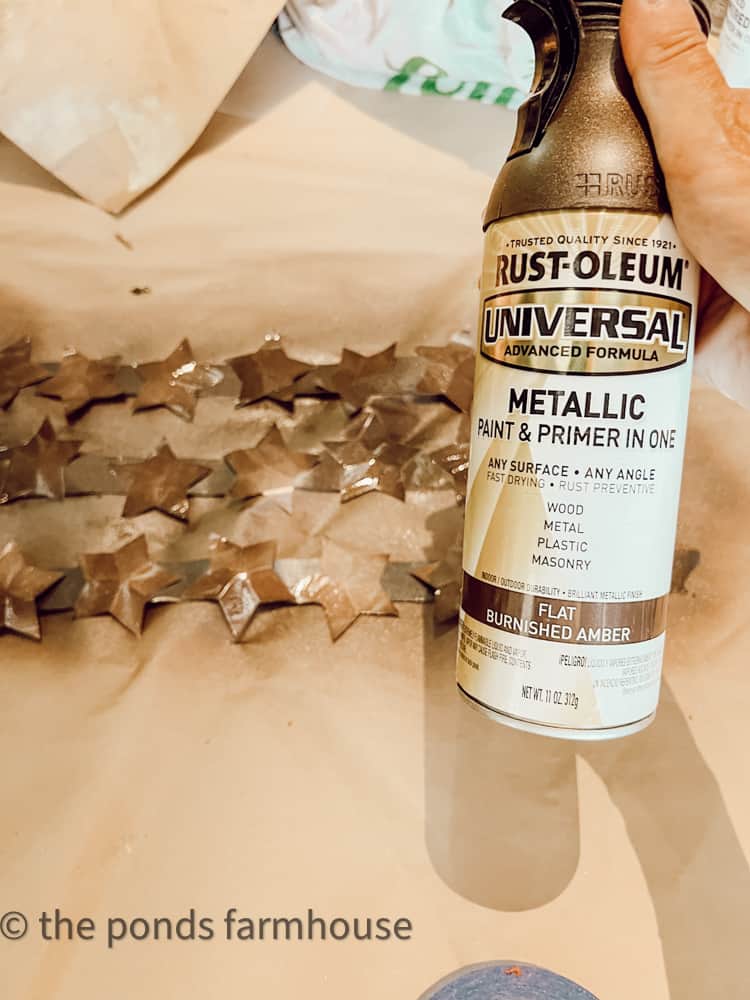
- Rust-Oleum Metallic Burnished Amber
- Scissors
- Hot Glue Gun and Glue Sticks
- Painters Tape
How To Use Recycle Cans For Star Wreath
First, start saving your aluminum cans.
It takes more cans than you might imagine.
I was planning to make two wreaths, and I used the Star Punch 2.5 inches.
Therefore, I was only able to punch 4-5 stars per can.
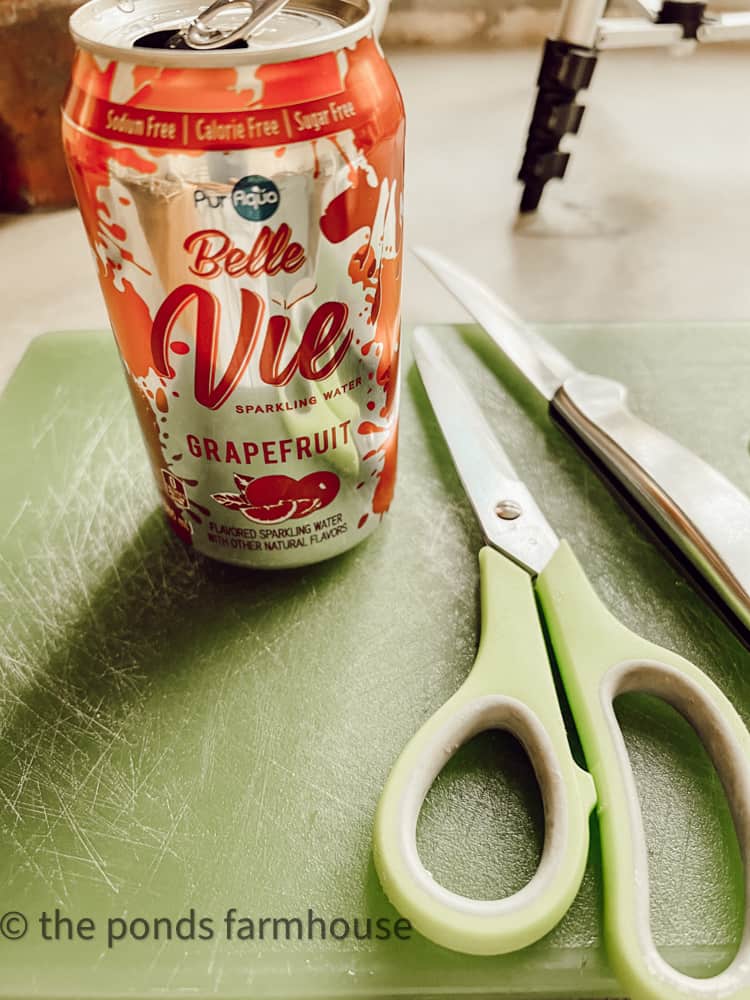
Remove the top and bottom rim of the aluminum can and then cut the can down the side to open flat.
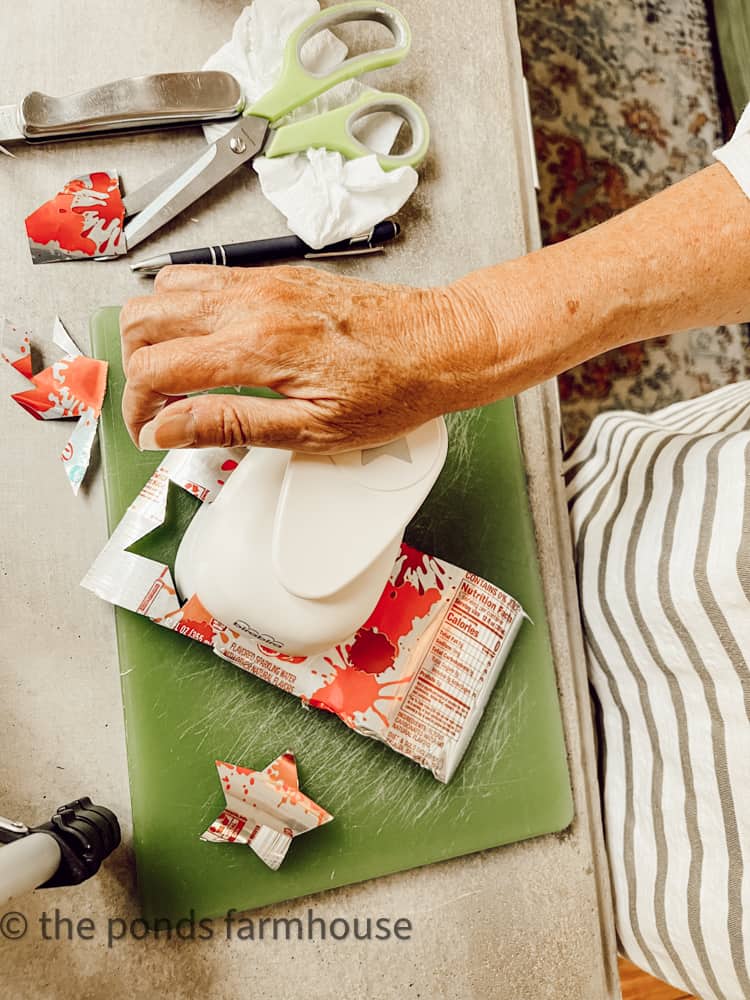
Place the aluminum in the star punch and begin to punch your stars, being sure to get as close to the edge of the can as possible to maximize the number of stars per piece.
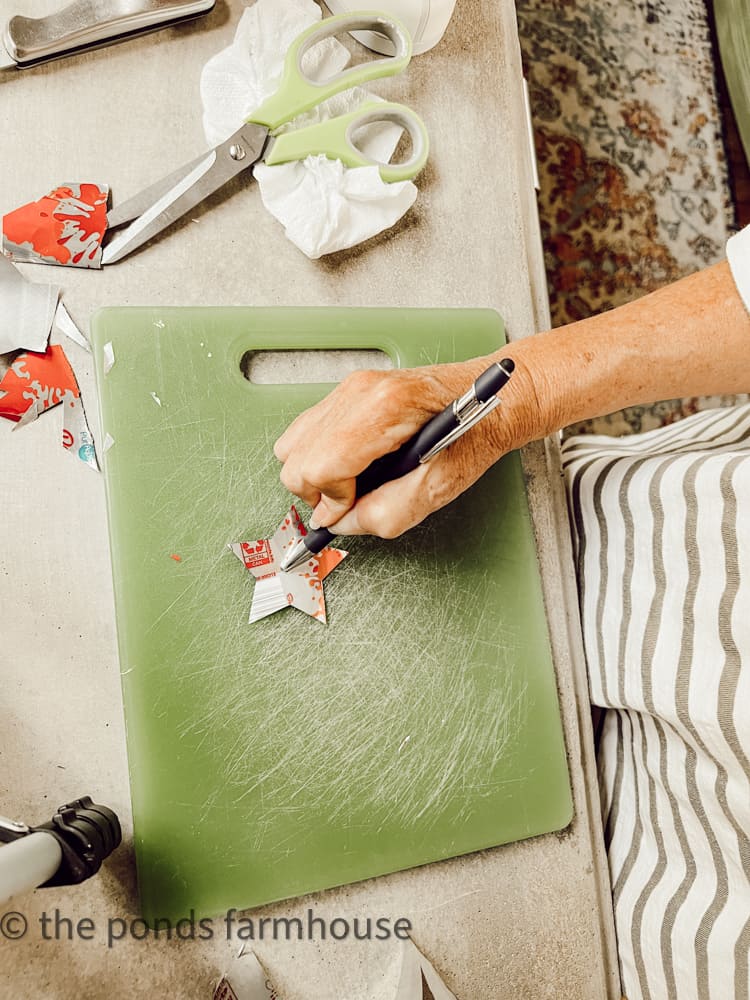
Next, using a ballpoint pen, crease the aluminum star by drawing a dot in the center and a line to each point’s corners. Press firmly to get a good crease.
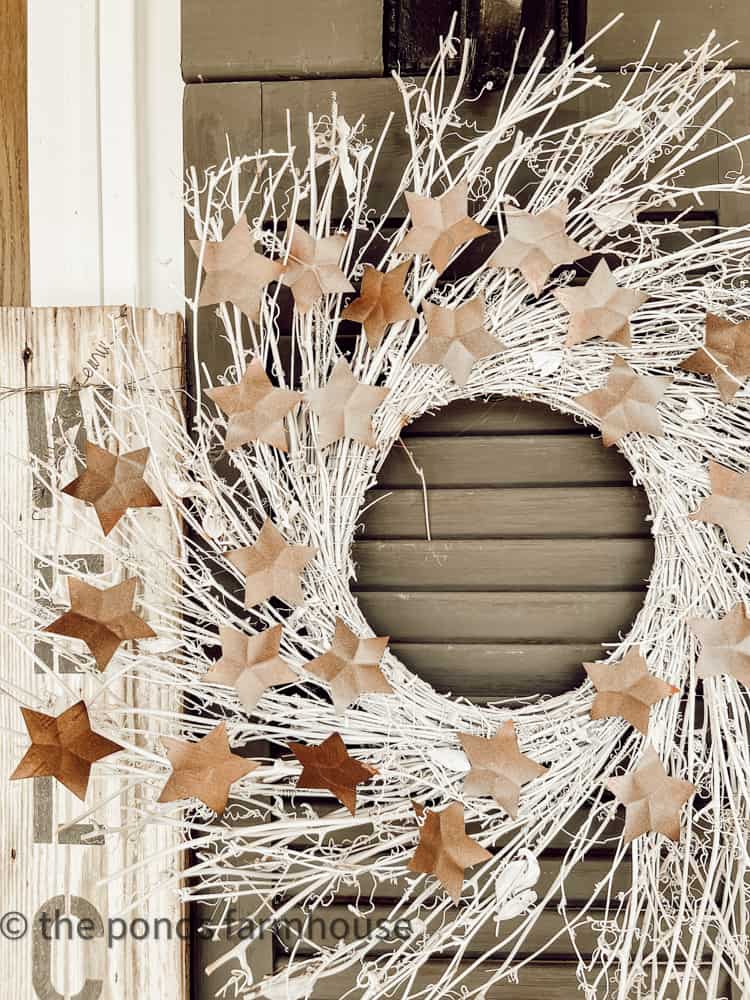
Finally, paint the star with Rust-oleum Metallic Burnished Amber Spray Paint.
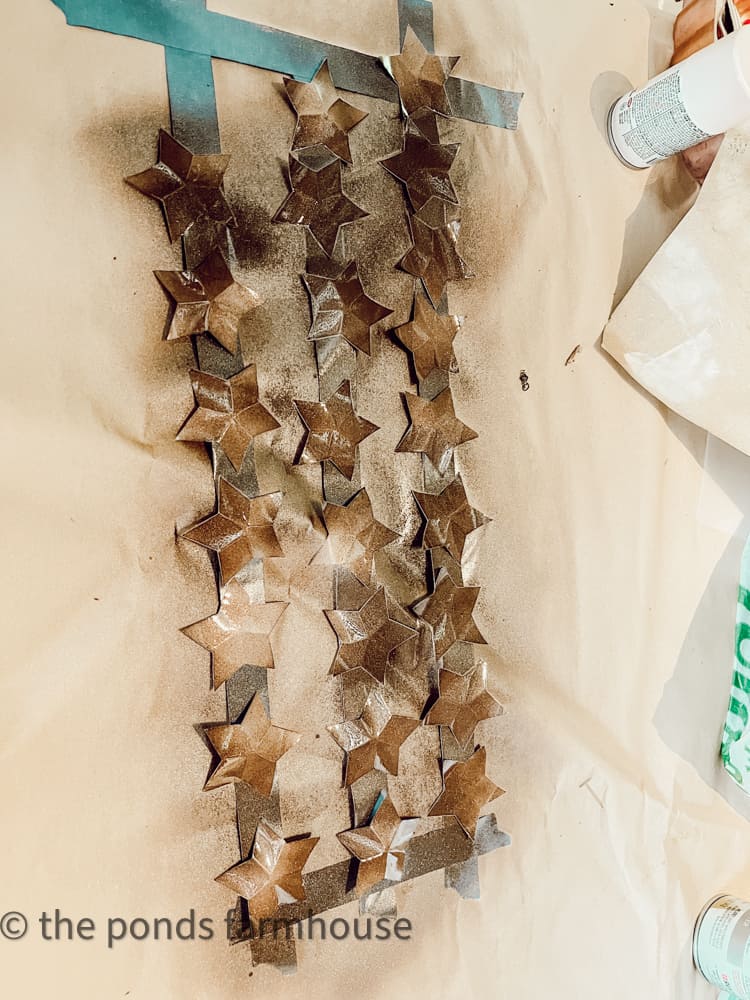
You will want to create rows of tape to hold the stars in place while painting, as the force of the spray will blow them away.
Place several pieces of tape, sticky side up, on the surface you plan to paint on. Add a row at each end, sticky side down, to hold the tape in place. Then, stick your stars to the sticky tape.
Spray paint the stars until completely covered for a rust-like finish.
Once the paint is dry, flip to the other side and repeat.
DIY Wreath for Summer
Now, you are ready to paint the twig wreaths with Rust-Oleum Chalked White Paint.
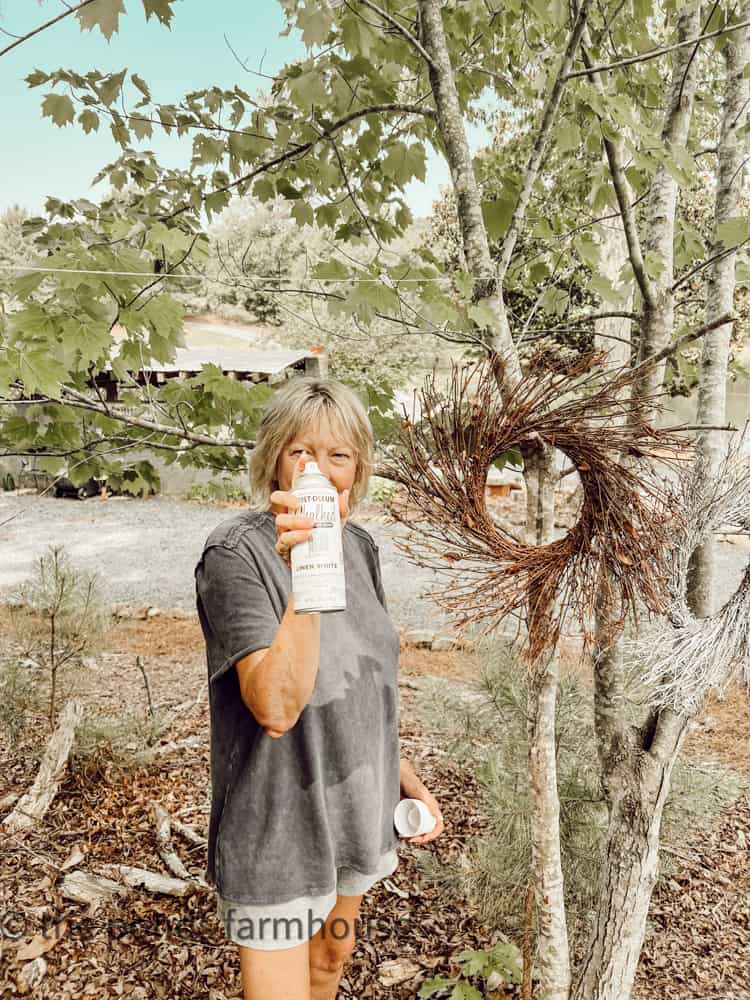
Since it was a warm, beautiful day, I hung the wreaths on a tree limb to paint them white.

Finish DIY Star Wreath
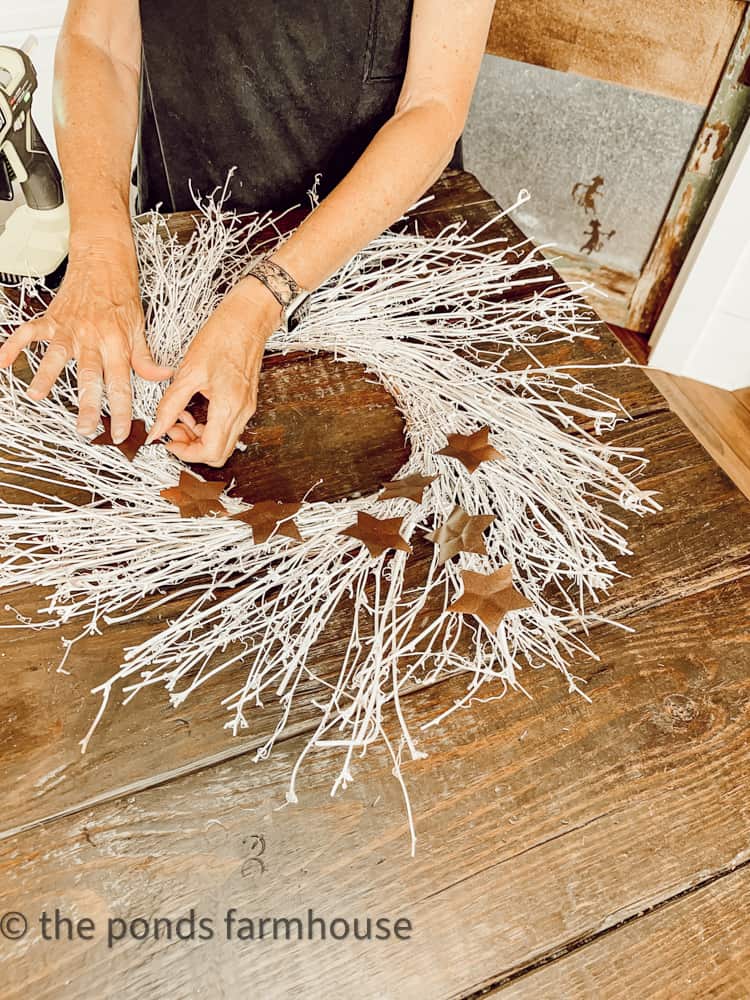
To finish the DIY star wreath, gather your stars, wreaths, and hot glue gun.
Apply hot glue to the aluminum stars’ back side and attach them randomly to the twig wreath.
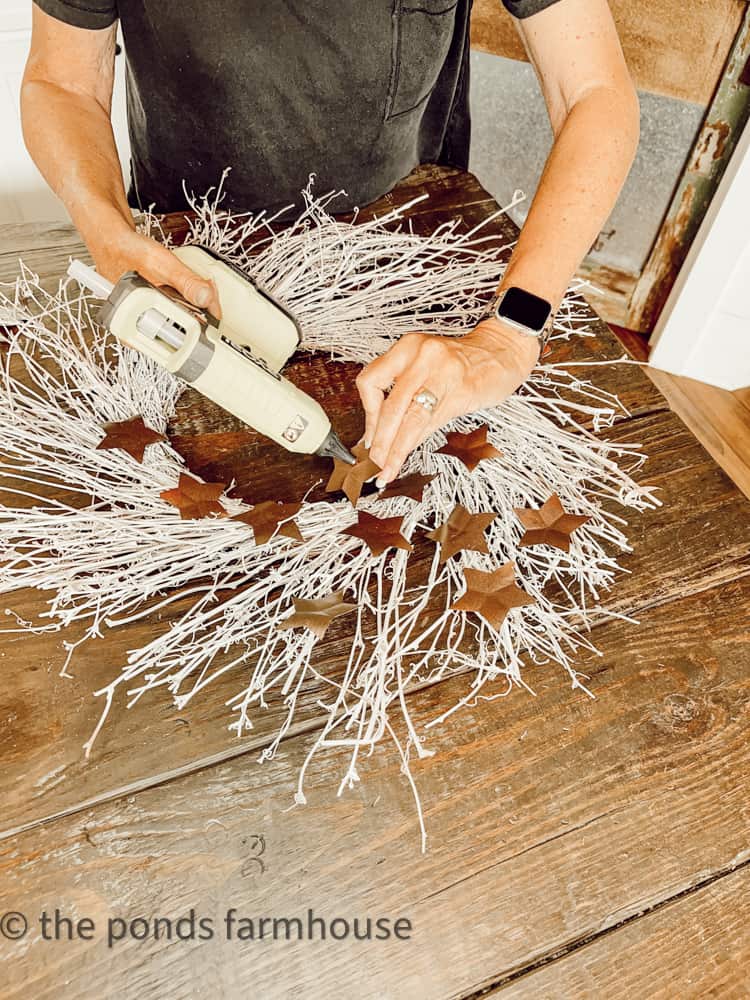
There is no right or wrong arrangement for the stars; however, I decided to make one side heavy with them and lighter as I went around the wreath.
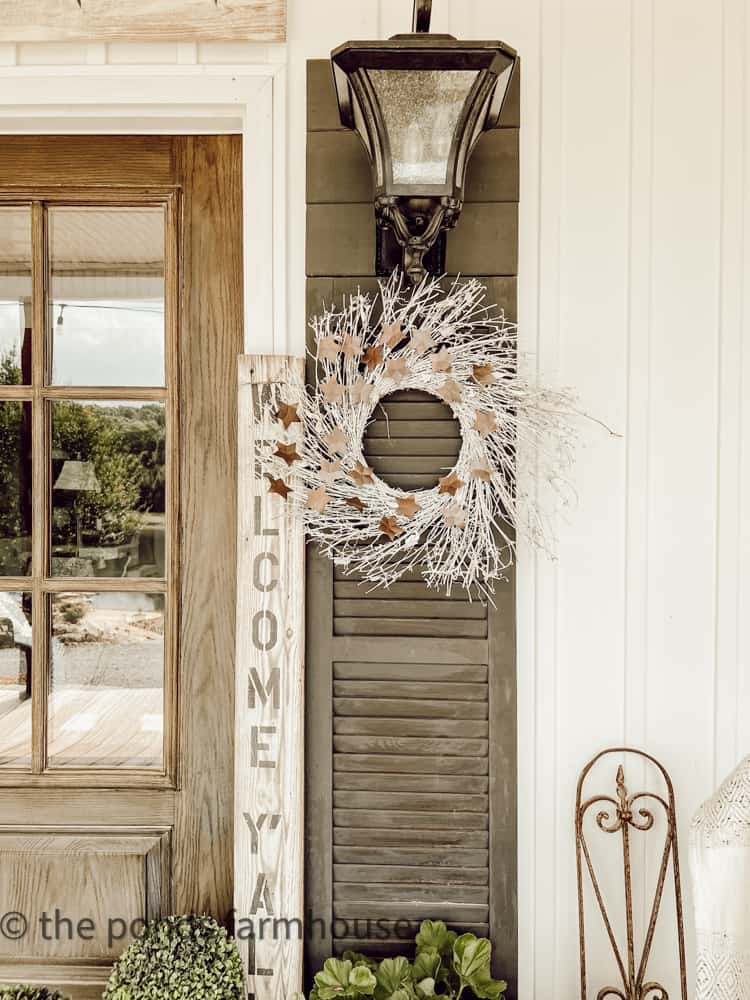
Once the stars are applied, you are ready to hang your wreath.
The neutral star wreath really pops on the black door shutters we added last fall.
The recycled stars really shine with the new burnish amber color.

I hope you enjoyed this tutorial. See the video tutorial below.
If you’d like to see more patriotic decorating ideas (with some red, white and blue) check out this Patriotic She Shed Greenhouse or this Patriotic Summer tablescape.
Thanks so much for stopping by. Be sure to check out Kelly at The Tatter Pew next. I know you will love her outdoor table with blues and terra cotta.
Resources
Click images to shop

Click Each Link Below To Follow Along…
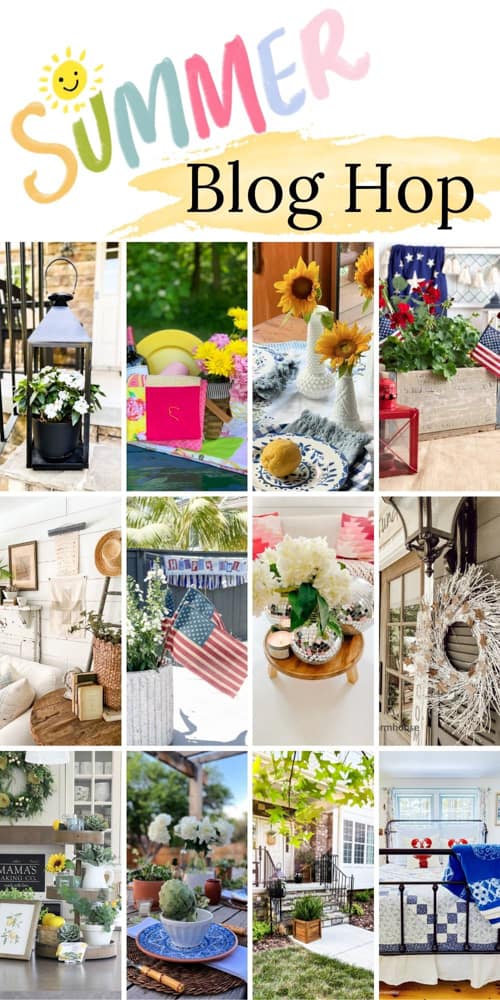
Summer Inspiration from Eleven Talented Bloggers
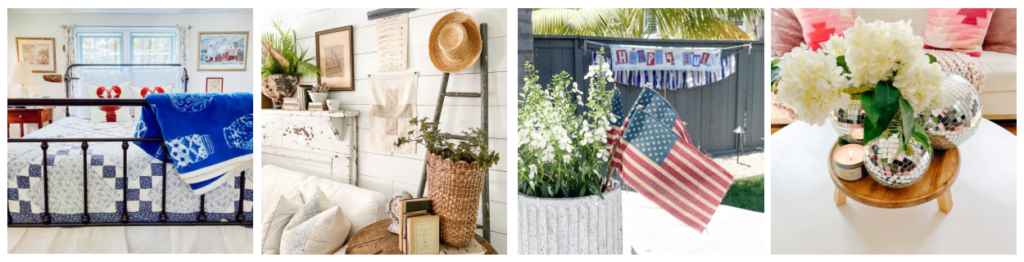
Small Cottage Guest Bedroom, Vintage and Delightful // Dabbling & Decorating
Five Simple Things That Look Good on Your Summer Mantel // Robyn’s French Nest
Five 4th of July Party Ideas That Will Sparkle // Pasha is Home
DIY Summer Disco Ball Planter // Tater Tots & Jello
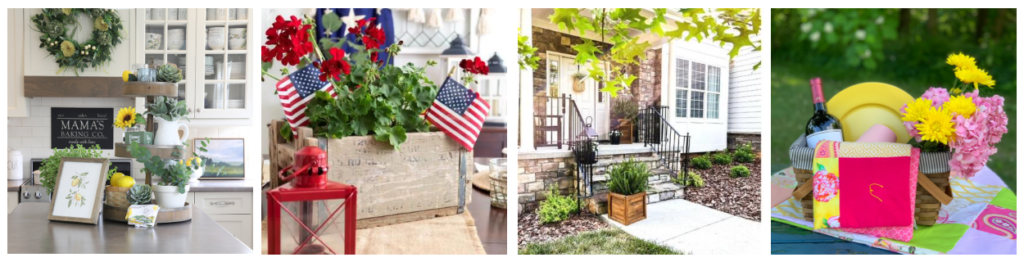
Lemon and Floral Summer Kitchen Decor // Willow Bloom Home
Five Minute Simple Summer Centerpiece // Midwest Life & Style
5 Affordable Summer Decor Ideas for a Small Front Porch // Simply 2 Moms
Seven Amazing Ways To Have A Memorable Summer // Cottage in the Mitten

DIY Star Neutral Wreath for Summer // The Pond’s Farmhouse
An Outdoor Summer Tablescape Using Blues and Terracotta // The Tattered Pew
5 Ways to Set An Everyday Summer Table // White Arrows Home

Pin It To Remember It
Did you find some great ideas you’d like to save for future reference? To save, hover over the images and pin to your favorite Pinterest Boards when you see the PIN button in the upper left-hand corner.

Oh Rachel, I love this! Great idea. This is one my to do list for sure!!
What a great project! They are the perfect summer wreath. So easy to do and the wreaths looks beautiful on your porch! Happy summer, Rachel! Such a pleasure to tour with you!
Kim,
I’m so glad you like this.
These turned out amazing Rachel! Pinned
Cindy,
I’m so glad you like this.
Wow! You are so creative. You go girl!
Renae,
You are so kind. Thanks for the encouragement.
This is such a wonderful project and it turned out so beautiful!!
Kristin,
I’m so glad you liked it.
You know I love these neutrals! What a great idea, Rachel! I feel like I always forget the power of easy spray paint!😂 They look amazing on your porch!
Robyn,
Thanks! It was a fun change.
Hi Rachel, you always have the best DIYs. Love this wreath, pinned and happy hopping:)
Ann,
I really appreciate this.
Rachel – this is soooo cool!! I honestly cannot believe that those stars are actually soda cans! What a perfect way to recycle them ;)!
xx-Pasha
Pasha,
I’m so glad you liked this project. It was a fun one.
I was so tired of seeing wreaths but I was so glad I checked yours out, I LOVE it, really pretty
Debbie,
I’m so glad that you liked this one. thanks for your kind words.
Rachel, this is so creative and I love how it turned out. I would never have thought to use old soda cans. I’m pinning this so I can remember it for later. I’d love to try it sometime!
Jen,
Thanks for your sweet comments.
Rachel, I adore all the wreaths you make and this one is just perfect. I love that it’s neutral toned. Your porch looks so charming.
Shawna,
Thanks so much.
This is awesome!! I already have a ton of cans saved so no problem there. I think I’ll make one with leaf patterns for fall. I do love that you changed things up for summer with the non red, white and blue. Something very different for sure! Very very nice!
Shirley,
Great Idea for the leaves. I may have to do one myself.
Rachel this turned out so cute! I love your creativity. It looks so pretty on your shutter too!
Kelly,
I really appreciate your encouragement.
Ok, this is so clevery and adorable, Rachel! I love how you upcycled those stars. I want to try it! Pinned 🙂
xoxo
Jennifer,
It’s a fun project and so easy.
What a creative idea Rachel…you always have the best craft projects. Love the neutral colors for summer. Pinned!
AnnMarie,
I’m so glad you like this idea.
This is such a clever idea! The neutral colors are a fun switch from the usual red, white, and blue! I wondered why you had the tape there — smart!
Molly,
Yes, the stars will blow away from the spray paint if you don’t secure them. Thanks for stopping by.
Very very neat wreath!
Kathy,
So glad you like it.
Super cute idea! I love that it’s neutral. pinned!
Cindy,
I’m so glad you like it.
This wreath is so pretty Rachel! I love the neutral tones you chose for it! The video was great too! Pinned!
Cindy,
I’m so glad you liked this. I appreciate your input.
Love your wreath! I feel inspired to make one! Thank you!
Cheryl,
I’m so glad. Thanks for stopping by.
I really liked it, very classy looking.
Breanda, thanks so much!
Amazing! I love what you did to your diy wreath. It turned out even more beautiful. I have one like this, but was not sure what to do with it. That’s until now z. Thanks for sharing
Ivory,
I really appreciate this.