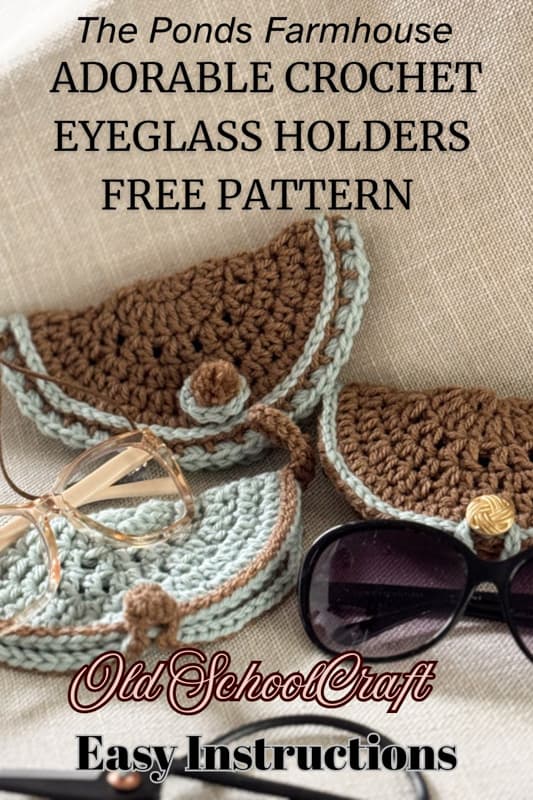
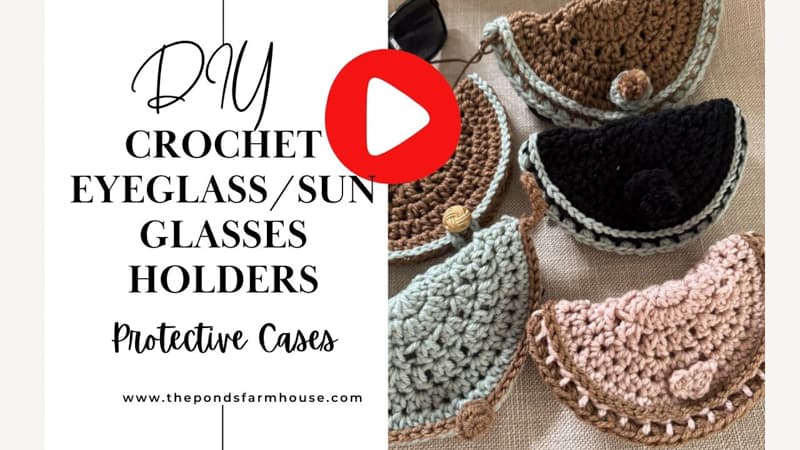
How to Quickly Crochet an Eyeglass Holder: Easy Free Sunglasses Case Pattern
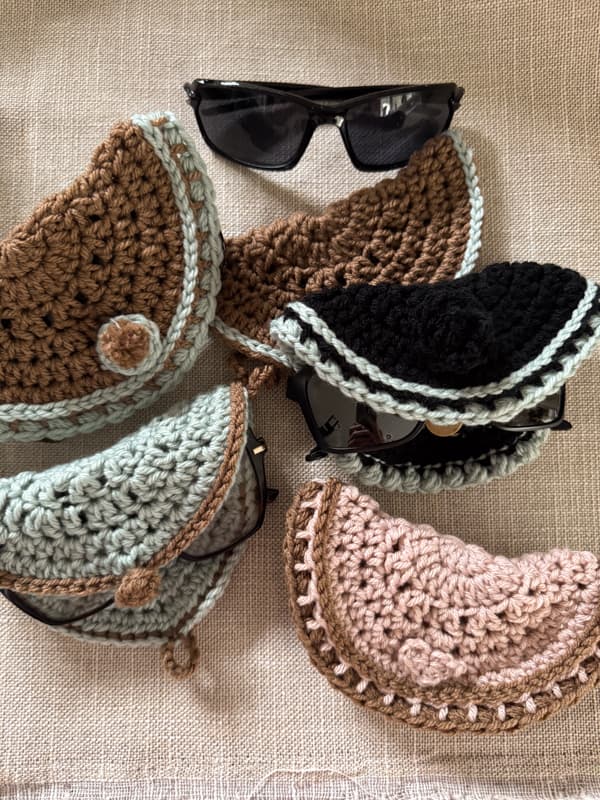
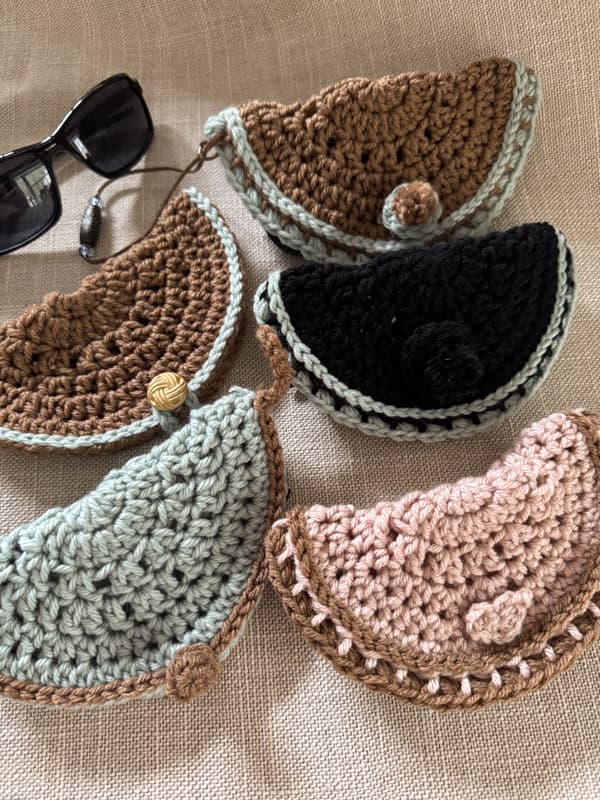
This adorable crochet eyeglass holder is the perfect solution if you’re tired of scratching your sunglasses in your handbag! While bulky hard cases offer protection, they rarely fit in smaller purses. That’s why I’m sharing this free DIY soft glasses case pattern as part of my ‘old school’ craft series—it’s quick and easy to make and takes up virtually no extra space in your bag. Whether you need a cover for large sunglasses or slim readers, this customizable pattern is a lifesaver. Let’s dive into how you can crochet your own style of protective holder in no time!
(Posts on The Ponds Farmhouse may contain affiliate links. As an Amazon Associate, I earn from qualifying purchases. See the full disclosure details here.)
Basic Crochet Stitches For This Pattern
This pattern consists of basic crochet stitches that are easy to follow. I’ve added an option that is a slightly advanced stitch, but I have included the instructions in case you want to attempt it.
- sl – slip stitch
- dc – double crochet
- hdc – half double crochet (instructions included)
- ** bean stitch – Optional stitch (instructions included)
Crochet Eyeglass Holder Supplies
You can make the crochet eyeglass case using scraps of yarn. A skein of yarn would make several of these cases. I used two colors, but the options are as unlimited as your creativity.
- Crochet Yarn – colors – Sky and Golden Brown. Approximately 20 – 25 yards of the main color should be sufficient.
- Crochet Hook Size 8 – H
- Optional – Buttons – use vintage or novelty buttons to enhance your eyeglass holder.
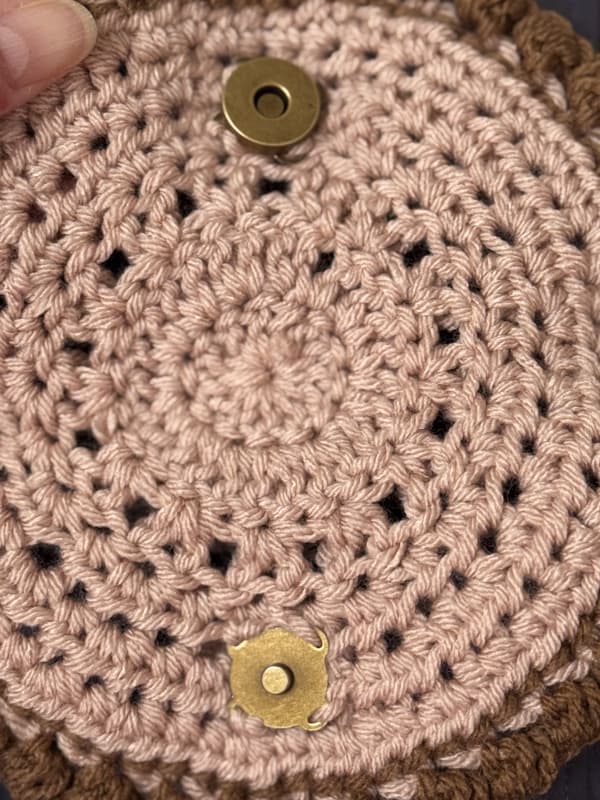
- Optional – Magnetic Snaps, clamp style, or Magnetic Sew-In Snaps – these are the ones I used.
- Needle Threader
- Optional Yarn Colors used for the cases shown on this post – Blush and Black yarn.
Step-By-Step Crochet Instructions
This is a very easy-to-follow and forgiving pattern. Once you feel comfortable working in a circle, you can’t mess this one up.
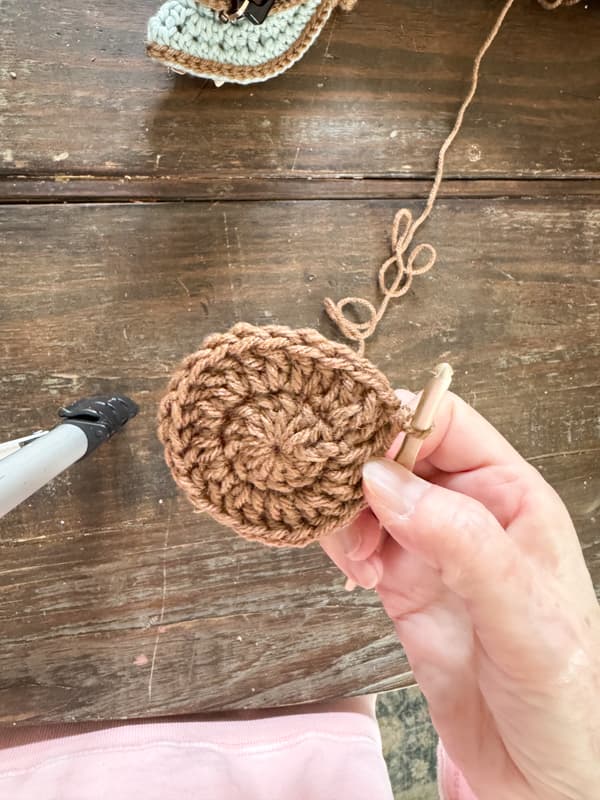
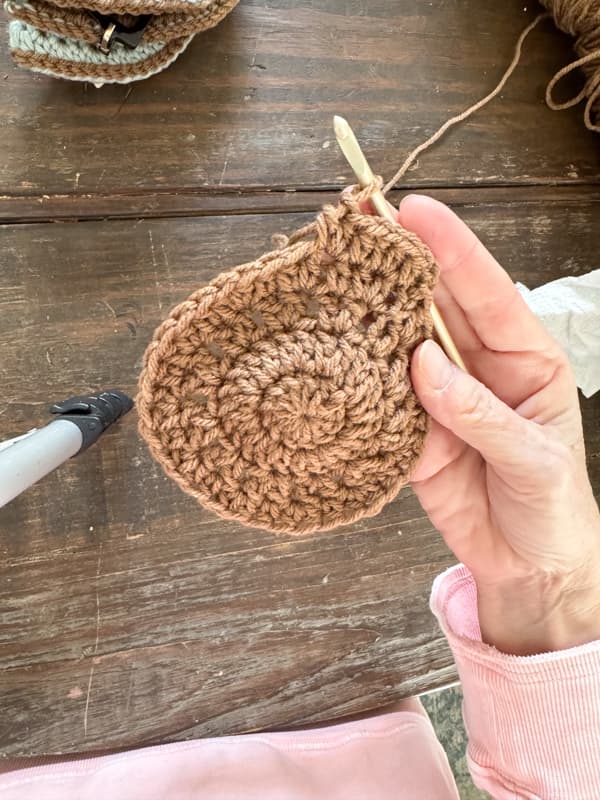
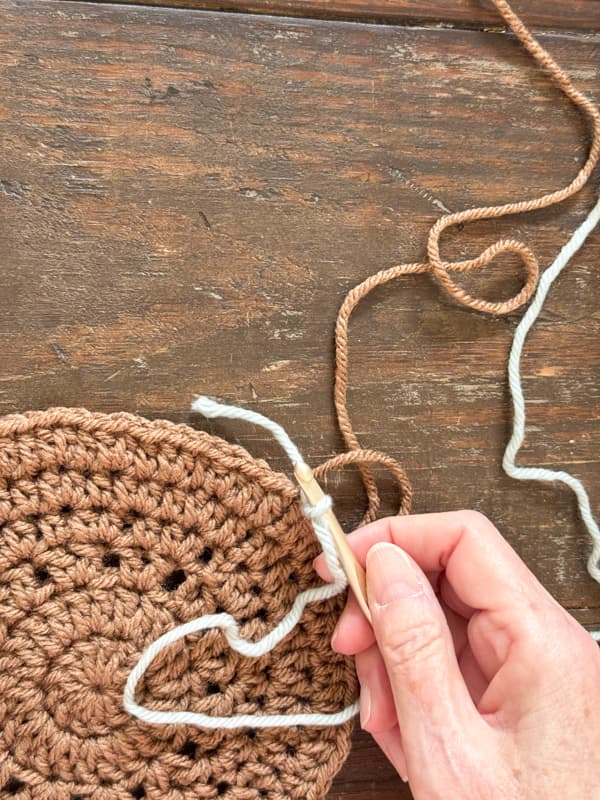
Round One – Create A Slip Loop To Form A Circle for the Case Base
I’ve included images below to illustrate the steps for creating the initial circle for this pattern.
- Wrap the yarn around your fingers to create a loose loop.
- Insert the crochet hook under the loop and wrap the yarn over the hook. Pull the yarn back through the loop and chain to secure. Then chain 3. Tighten the loop slightly if needed.
- Add 12 double crochet stitches around the loop, ensuring you cover the loose end of the yarn in each stitch and that a loose piece of yarn remains exposed.
- Pull the loose yarn tight to close the circle.
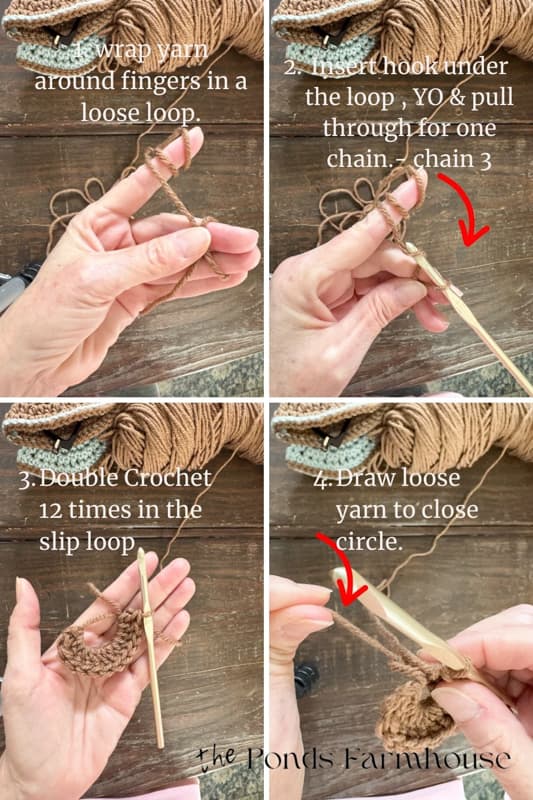
5. Use a slip stitch to connect the circle.

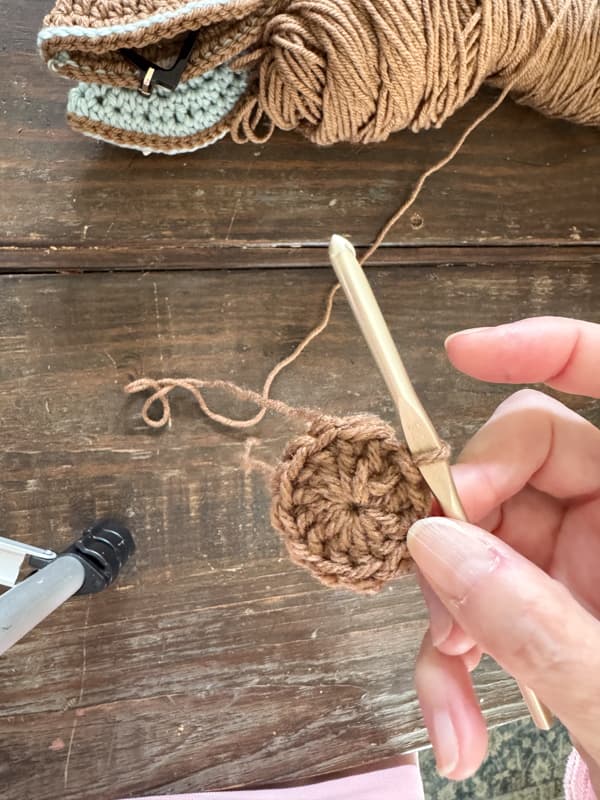
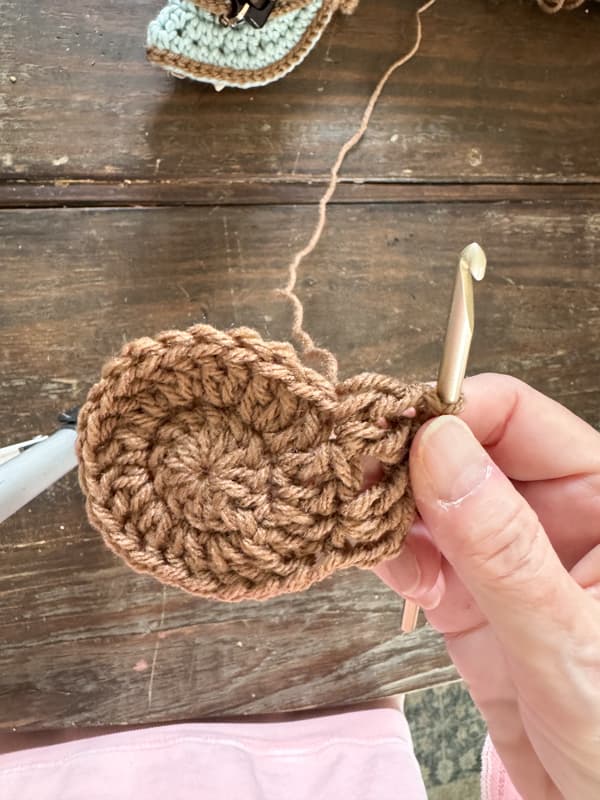
Round 2 – Double Crochet
The double crochet is a basic crochet stitch that I previously introduced. If you need a refresher, click the Crochet Dishcloth tutorial.
- Begin with a chain 3
- Add 2 double crochets in each stitch around the circle.
- Slip stitch to close the circle.
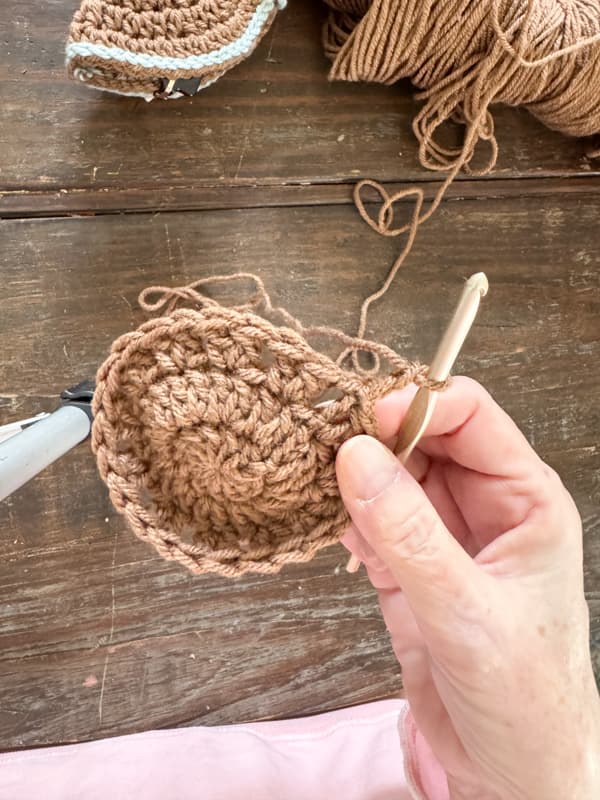
Round 3 – 2 Double Crochets every other stitch
- For the third round, begin with a chain 3.
- 2 Double Crochet in next stitch
- Skip next stitch
- 2 double crochet in the next stitch
- Repeat 2 dc in every other stitch until you close with a slip stitch.
Round 4 – Double Crochet (dc) or Half Double Crochet (hdc) Option
For round 4, you can continue using the double crochet stitch; however, I used a half double crochet stitch. It’s easy if you’ve never attempted.
Half Double Crochet Instructions
First, I’ll share a brief tutorial to make the half-double crochet.
- Yarn Over (yo) and insert hook into the next stitch, just like you would with a (dc).
- YO and pull the hook back through the stitch.
- You will have 3 loops on the hook.
- YO and pull through all 3 loops at once.
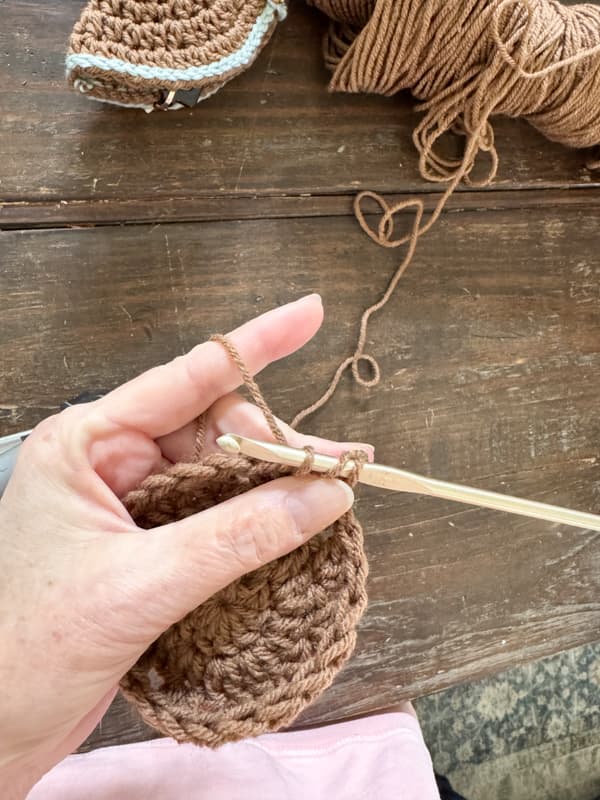
Rounds 4 – 6 – Half Double Crochet (hdc)
- Begin each round with a chain 2
- Then start the (hdc) pattern.
- 1 hdc in next stitch
- 2 hdc in next
- 1 hdc in next
- Repeat this pattern in rows 4-6, closing each round with a slip stitch and beginning each round with a chain 2.
Note: The steps are the same for both half-double crochet and double crochet stitches. However, you may not need the final round if you stick with the double crochet, since the hdc is approximately half as tall as the dc.
Insider Tip
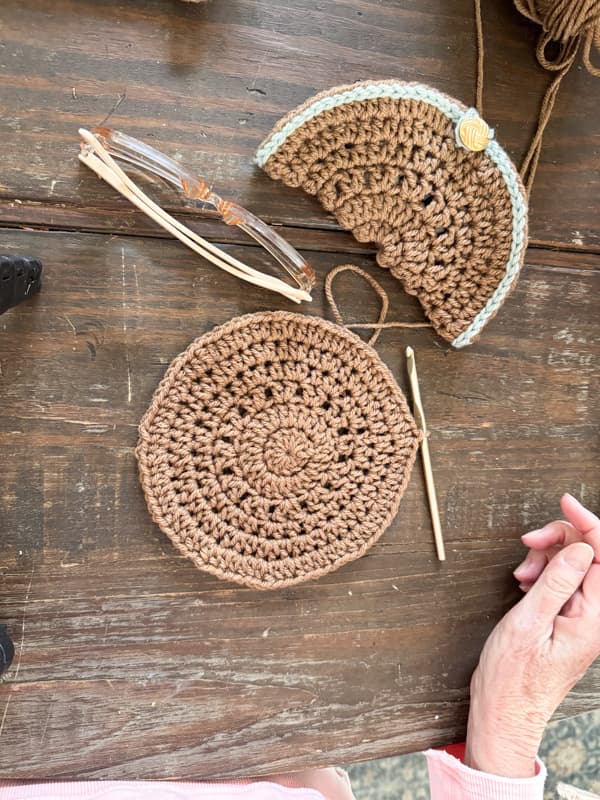
Once you have 6 rounds, you should have a piece that will cover most eyeglasses and sunglasses. If you are making a cover for smaller readers, eliminate a round or for larger sunglasses, add an additional round. You can measure your glasses against the piece by folding in half to see if your glasses fit.
Also, if you choose to continue with double crochet instead of switching to the half double crochet, you circle with will larger.
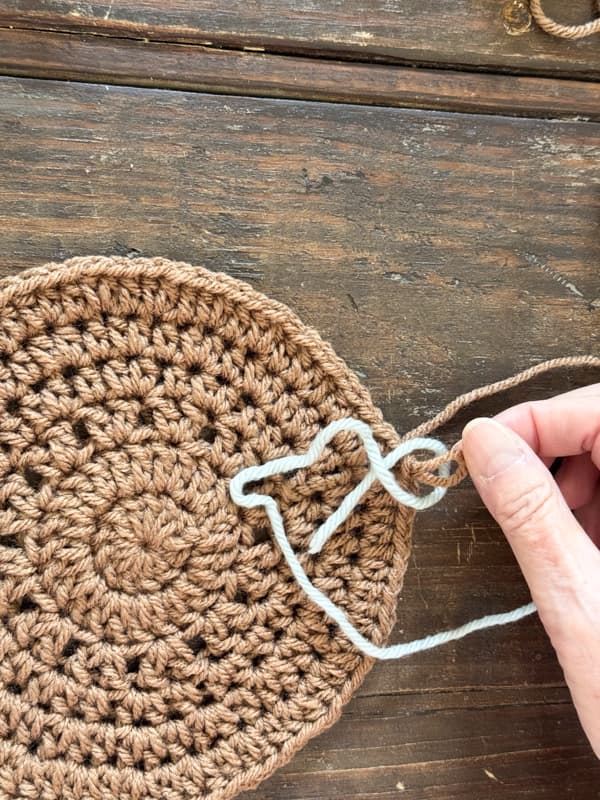
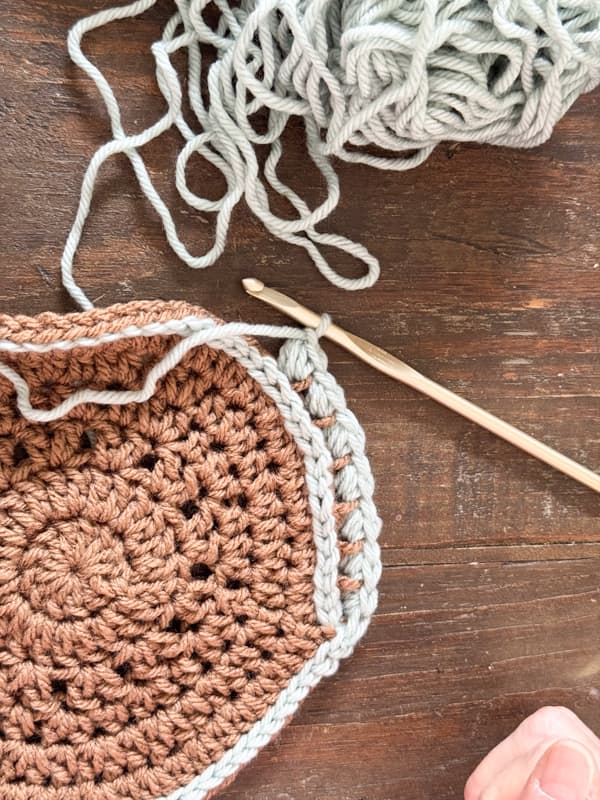
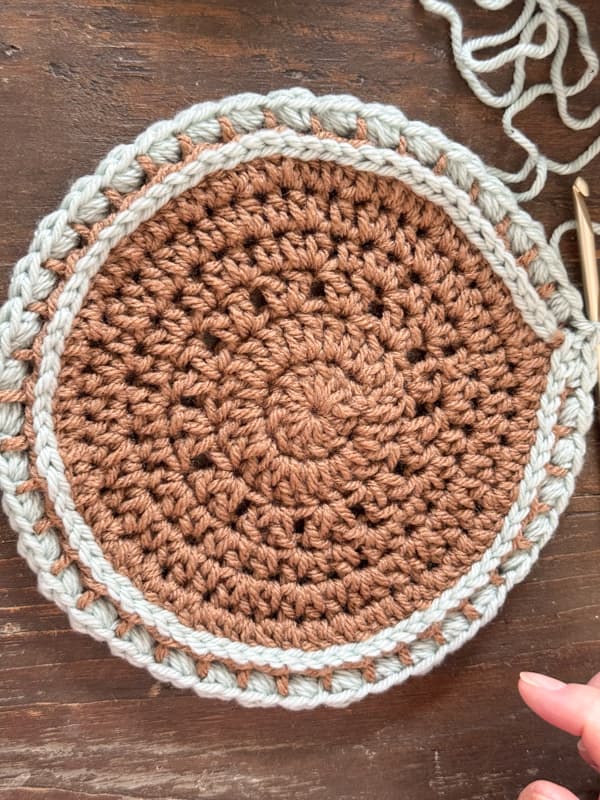
Round 7 – Optional Decorative Slip Stitch
To add a decorative touch to the pattern, I decided to use the contrasting yarn to slip-stitch around the edges. You will need to attach the new yarn color before proceeding. Without tying off the original yarn, follow these instructions to easily switch to a new yarn.
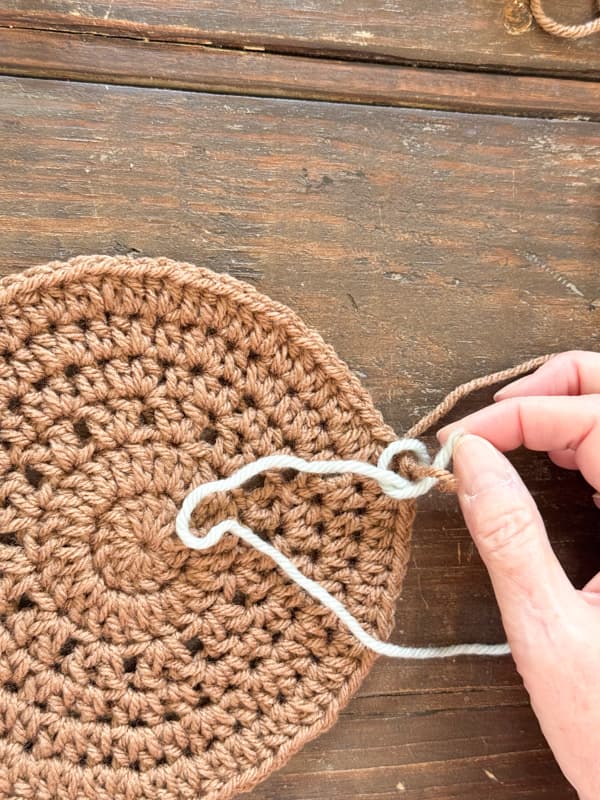
How To Change Yarn Colors Easily
- Make a loop with the new yarn color, ensuring the loose end is on the underside.
- Slip the loop over the slip stitch loop attached to the original yarn
- Take the loose end of the new yarn color and slide it into the slip-stitch loop.
- Pull the ends to tighten, ensuring the new color is next to the needle.
Slip Stitch Accent Color
Now you are ready to begin the slip stitch around the last row of stitches in the last row. Finish with a slip stitch. You can now complete your eyeglass holder.

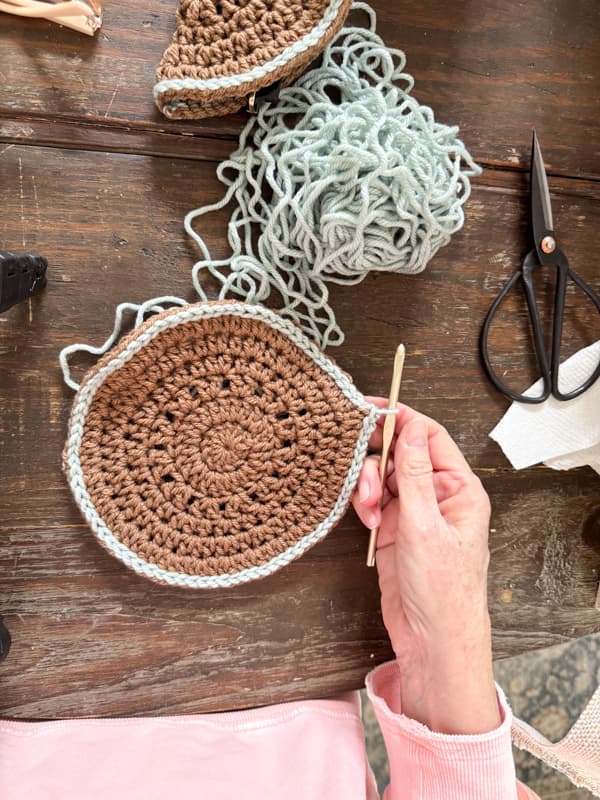
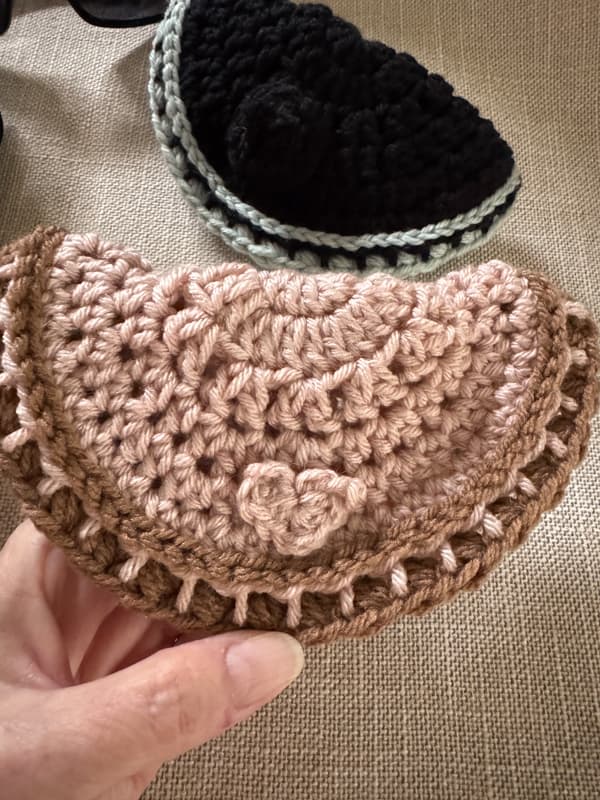
The brown case is complete with the simple accent blue stitch. This is the basic pattern, but there are some additional stitch options and embellishments if you want to make your cover unique.
How To Finish Eyeglass Holder
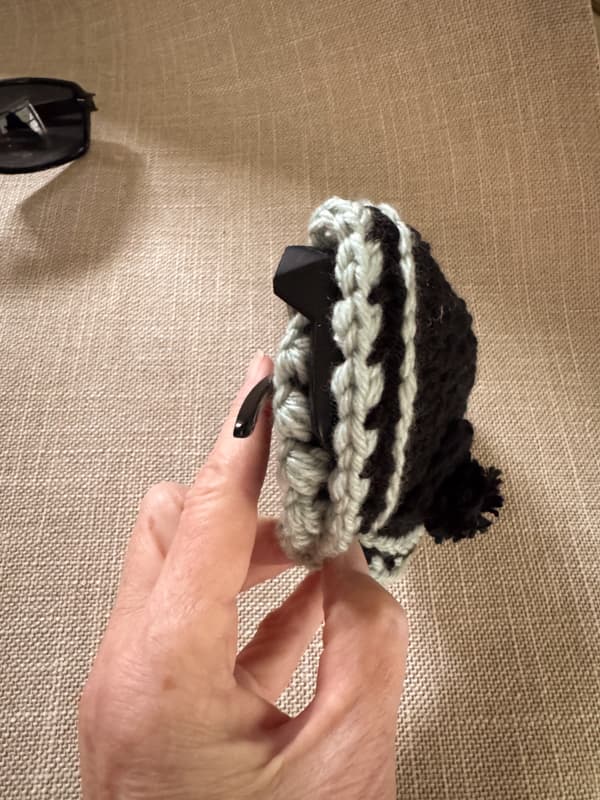
To finish the eyeglass holder, you will fold the circle in half, and you’ll need a way to secure the two sides together. Here are some options.
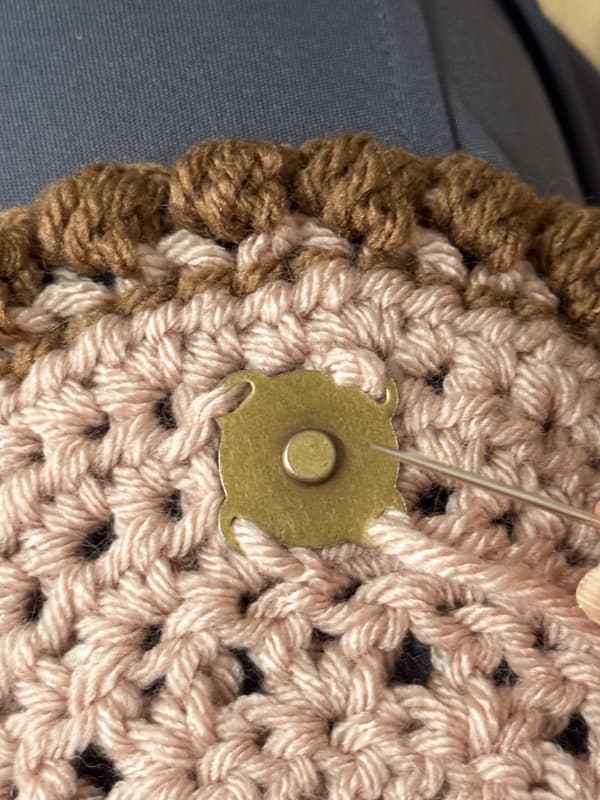
- Add magnetic snaps to secure the two sides.
- Attach a button that you can either button through the loose yarn gaps or add a loop to wrap around the button.
- Create a button using yarn.
- In addition, you can add a hanger or loop to attach to your handbag or to carry your sunglasses in the DIY case.
I found all the options simple to create. The magnetic is the easiest to open and close the case. If you use a clamp snap, you’ll want to disguise the clamps on the front. I used sew-on snaps and added an embellishment to the front, but it wasn’t absolutely necessary.
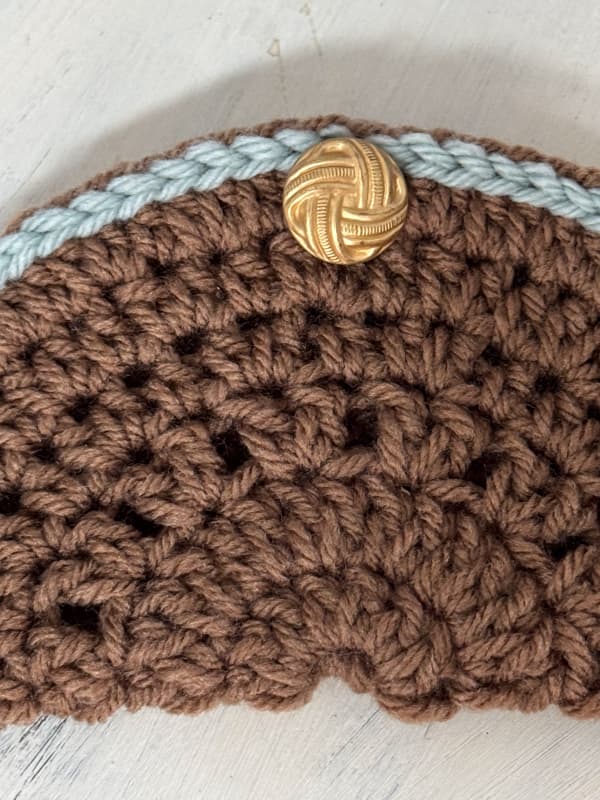
Optional Closure: How To Add a Crochet Loop to Secure With a Button
If you’d like to make a crochet loop, determine the center of your folded case before completing the decorative slip stitch. When you get to the center, chain approximately 8 chains before continuing around the circle’s edge.
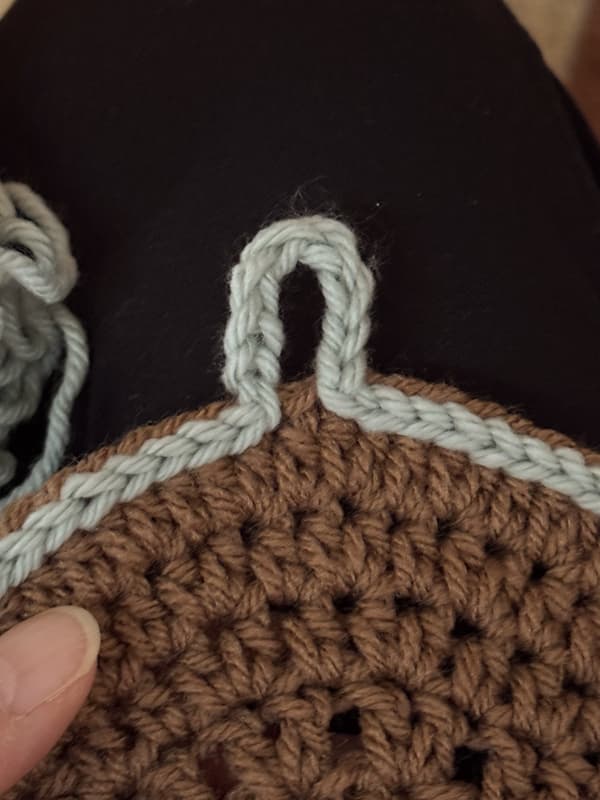
Both of the sunglasses cases below have a crochet loop that wraps around the buttons to hold the case together.
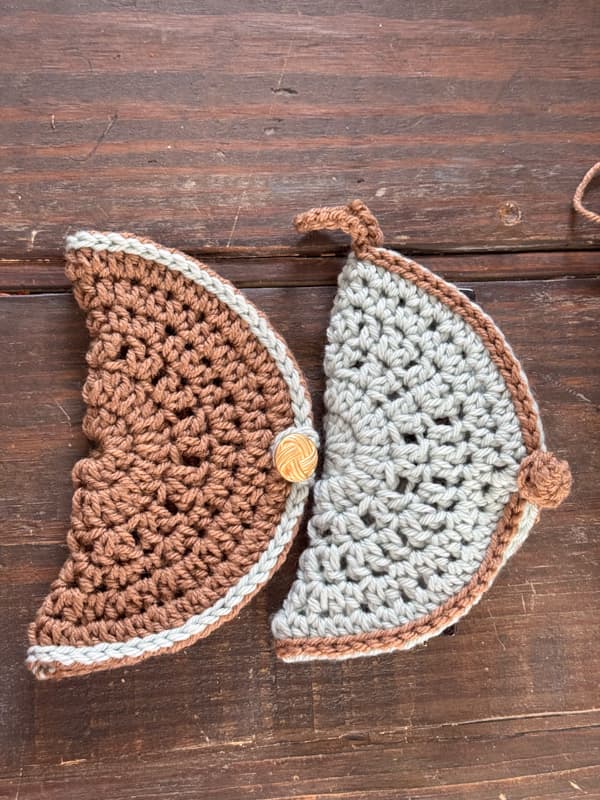
Alternative Options To Embellish Eyeglass Cases
If you want to make your DIY eyeglass case more decorative, you can add a decorative stitch around the edge. On some of my cases, I added a bean stitch around the edge. If you’d like to add, I’ve included a tutorial on how to make a bean stitch.
- Insert the hook in the back loop of the first stitch. (Don’t insert under both loops like you’ve been doing.)
- Wrap yarn over and pull the hook back through, leaving 2 loops on the hook.
- Yarn over, insert the hook back in the same back stitch. YO again and pulled back through – now you have 4 loops on the hook
- Once again, yo, insert into the same back loop, yo, pull through, six loops on the hook.
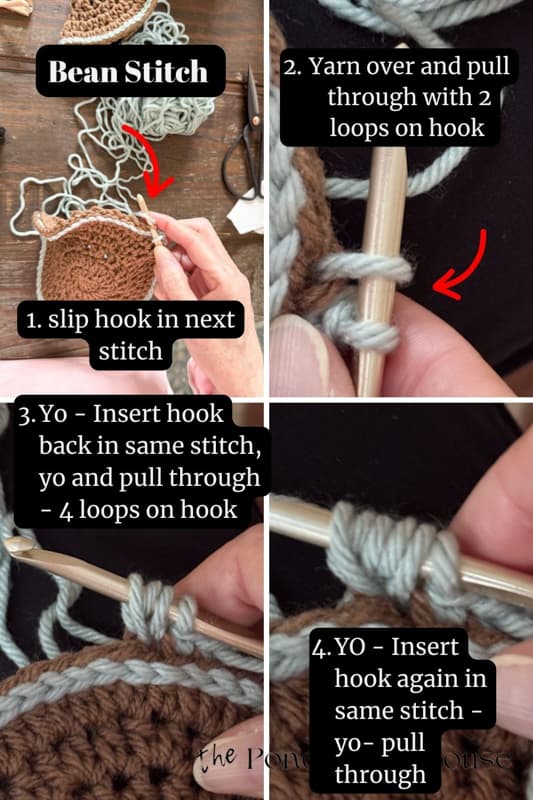
- 5 – YO and pull through all 6 loops at once.
- 6 – Chain one to secure the top of the bean stitch.
- 7 – Skip one stitch and repeat steps 1 – 6 in every other stitch around
By placing the bean stitch in the back loop, you create a unique look that sets it apart from the previous slip stitch.
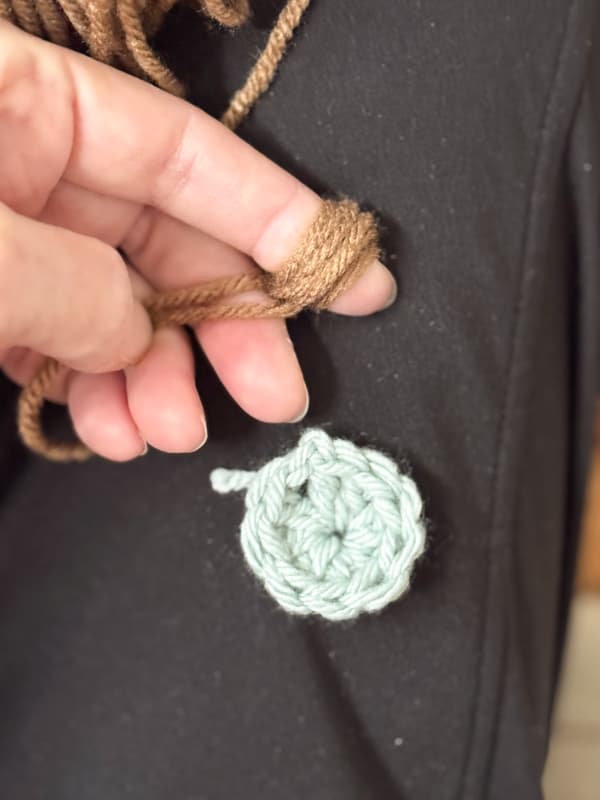
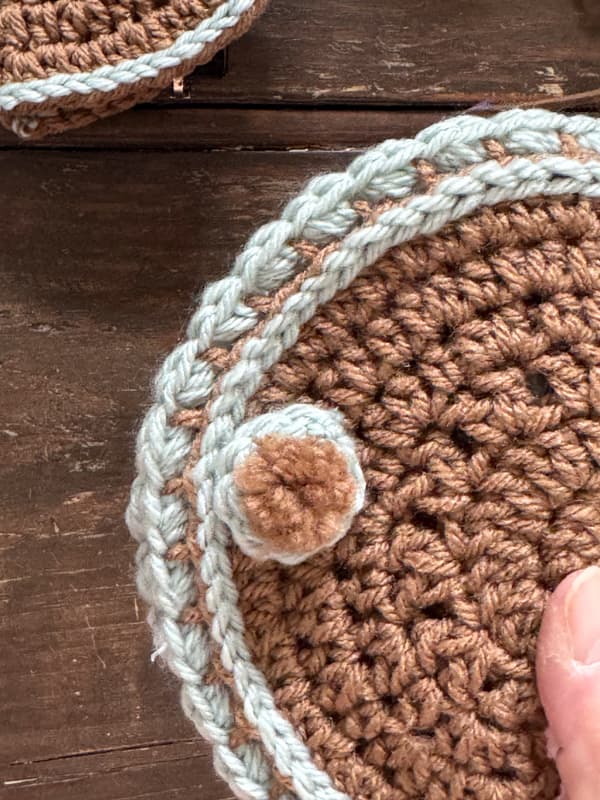
I used the magnetic snap on this eyeglass case and created a cute pom pom cover to disguise the stitches used to attach the snap. .
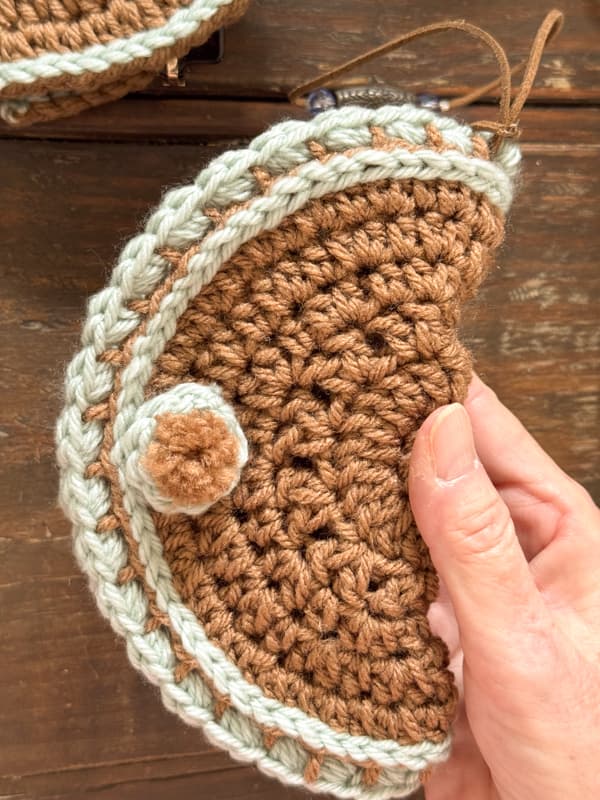
I used a crocheted embellishment, but you can add a button to cover it if you prefer. I really like this cute embellishment on this more elaborate holder. Here’s how I made it.
- Create a circle with the blue yarn. Follow the beginning instructions for the crochet case. Use the slip loop and dc 9 for this smaller version.
- Then make a tiny pom pom by wrapping the brown yarn around your finger. Slip off and carefully tie at the center of the loops. Then cut the end loops and fluff. Trim to even the ends.
- Run the ties from the pom pom to the center of the circle, then use them to tie your creation over the magnetic snap at the front of the holder.
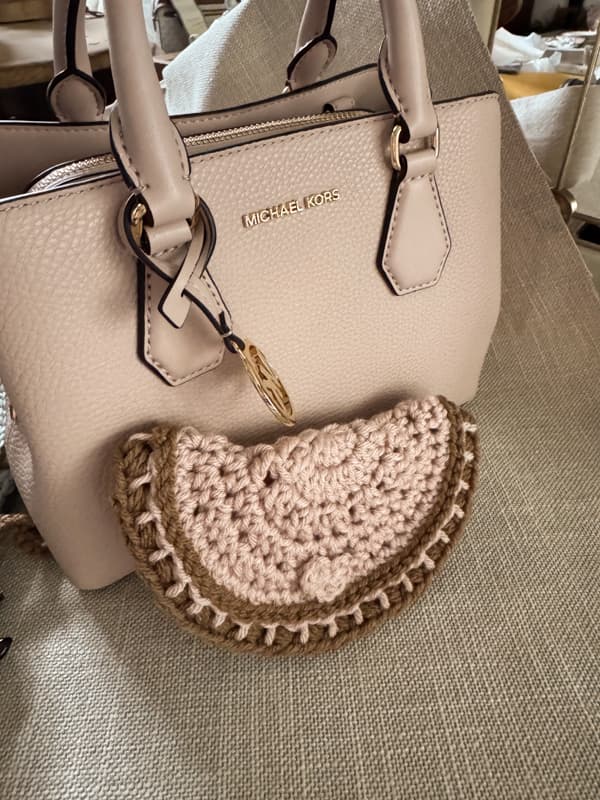
Another glass case got a cute crocheted heart to enhance the design that matches one of my handbags.
Insider Tip
All of your joining stitches will be aligned on the circle. I recommend folding along this line so that any rough stitches will be concealed in the fold of the eyeglass case.
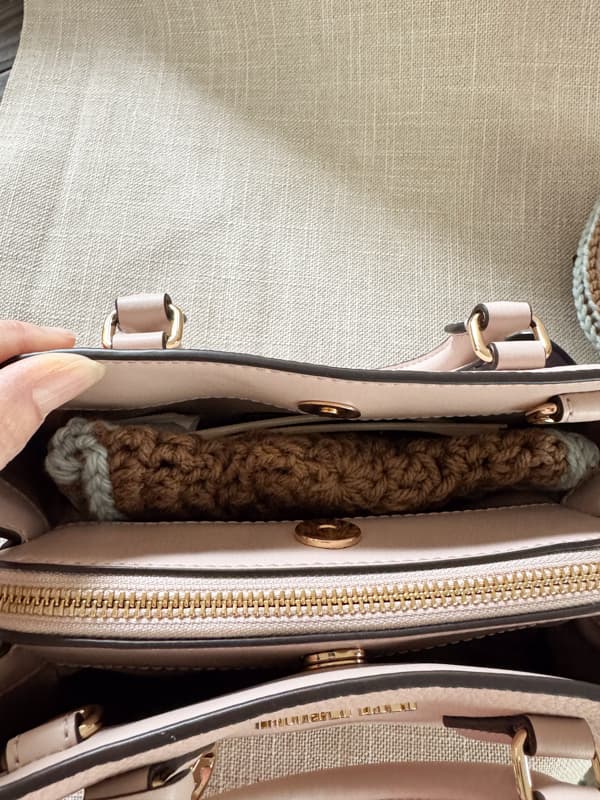
How To Add Eyeglasses to the Protective Case
The soft, protective case makes it easy to slip the glasses inside. Just slide the back of the case between the glasses and the temples. The temples will be on the outside of the case. Snap or button the case around the glasses.
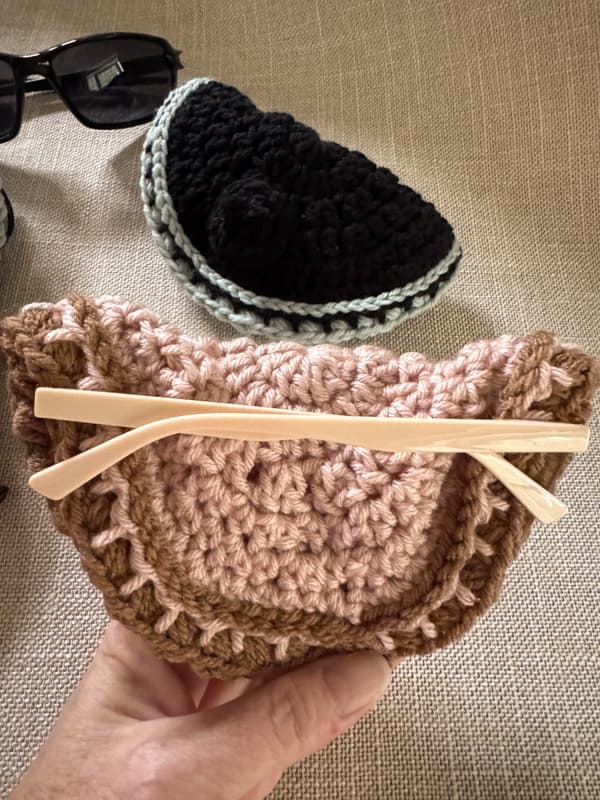
It works best if you insert the glasses with the widest side to the inside of the holder.
Budget-Friendly Space Saving Eyeglasses and Sunglasses Protective Case
This is such an inexpensive craft. The project takes very little yarn and can be made with leftover pieces from other projects, making it budget-friendly. You can create a variety of color combinations and unique stitches to express your own personal style and creativity.
In addition, the protective case for eyeglasses and sunglasses keeps them scratch-free and takes up hardly any room in your handbag. A perfect choice for small bags.

In Conclusion
I can’t wait to see your ‘old school’ crochet creations! Did you go with a classic solid color or some fun stripes? Snap a photo of your finished holder and send me a copy. I love sharing your work on my Sunday, DRA’s!
P.S. If you loved this easy pattern, sign up for my newsletter to get the next ‘Old School’ craft project delivered right to your inbox! Sign up at Subscribe!
Video


This is wonderful! Thanks for the tutorial, I have been teaching my granddaughter how to crochet and she is loving it. I can’t wait until I can show her this one she will love trying it. Great little gifts for her to make and give too.
Many Blessings to you and I am still lifting you up in prayer.
Candy
Candy,
I’m so glad you like this idea. It’s wonderful that you are passing this craft along to your granddaughter. It’s a lost art and we need to teach it to the next generation. I’m so glad you like the bedding ideas also. Have a blessed week.