Whimsical DIY Textured Lambs: Perfect for Easter & Farmhouse Decor
Hey friends, are you ready for some whimsical lamb decor? You will love this adorable DIY Textured Lamb tutorial. I am loving all the lamb decor this spring! In fact, I just shared a fluffy lamb cross-stitch tutorial last week. For today’s project, I wanted something more structural, so I created two chunky lambs using styrofoam balls, spackling, and toilet paper rolls for a fun coffee table centerpiece for Easter. They are easy to make and will add a high-end, boutique-style look to your Easter mantel or a farmhouse coffee table centerpiece. Let me share all the details.

Don’t miss it: If you love sheep decor as much as I do, you’ll also want to check out my [fluffy lamb cross stitch pattern] from last week!
(Posts on The Ponds Farmhouse may contain affiliate links. As an Amazon Associate, I earn from qualifying purchases. See the full disclosure details here.)
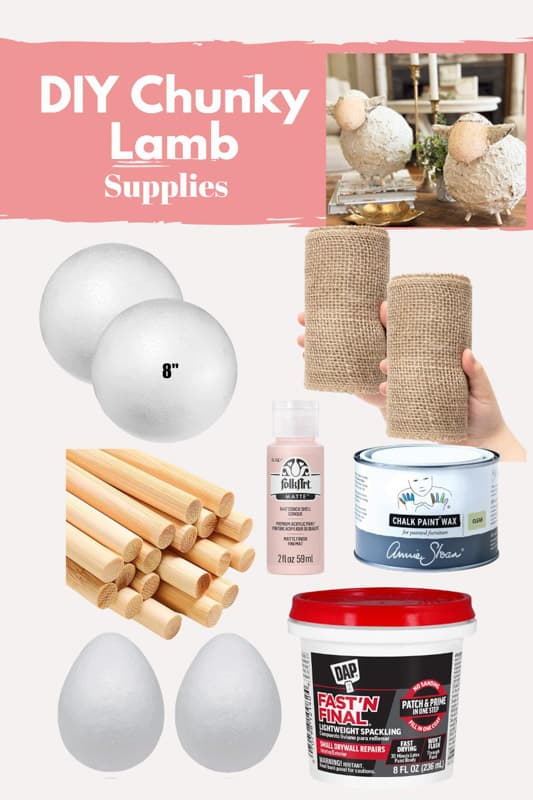
Supplies Needed for Chunky Spackled Lambs
There are several ways to create these fun chunky lambs, but here are the exact supplies I used, and I’ll share some alternatives!
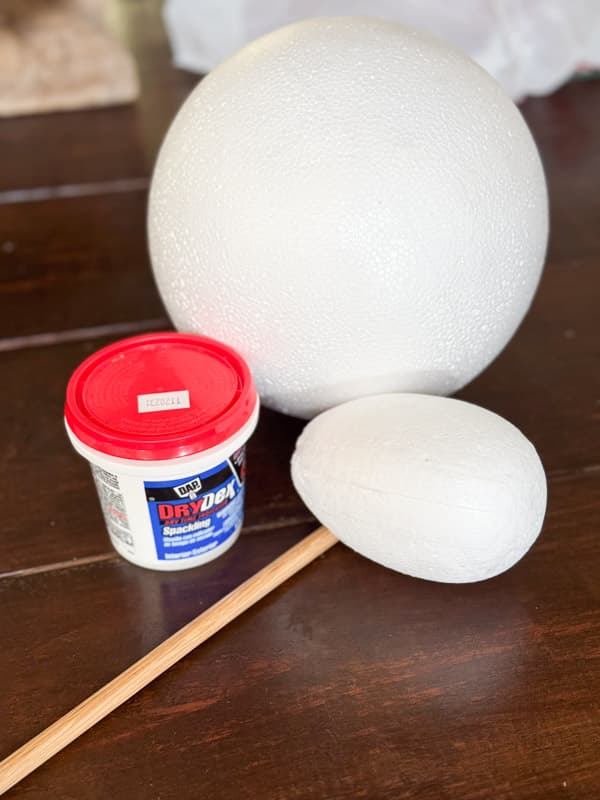
- 2 – Styrofoam balls – 8″
- Light-weight spackle
- 2 – Styrofoam Eggs – 4.75 inch
- Dowel Rod – I used two sizes. The larger for the legs and smaller for the ears, and connecting the head to the body.
- Burlap fabric ribbon
- Elmers Glue
- Hot glue gun
- Clear Wax
- Dark Wax
- 2 Felt Wool balls (I had these left over from the Felt Ball Garland I made this past winter.
- Flesh-toned craft paint. I used Conch Shell Pink.
- Small Paintbrush
Alternative Supplies
- Cheesecloth in lieu of burlap.
- Brown craft paint mixed with water instead of a clear/dark wax mixture to stain.
- Make a ball out of tin foil and cover with burlap and spackle instead of felt wool balls.
How to Make a Lamb with Styrofoam & TP Rolls (Step-by-step)
The first step is to construct the chunky lambs. You need the TP rolls, dowel rods, and styrofoam balls & eggs.
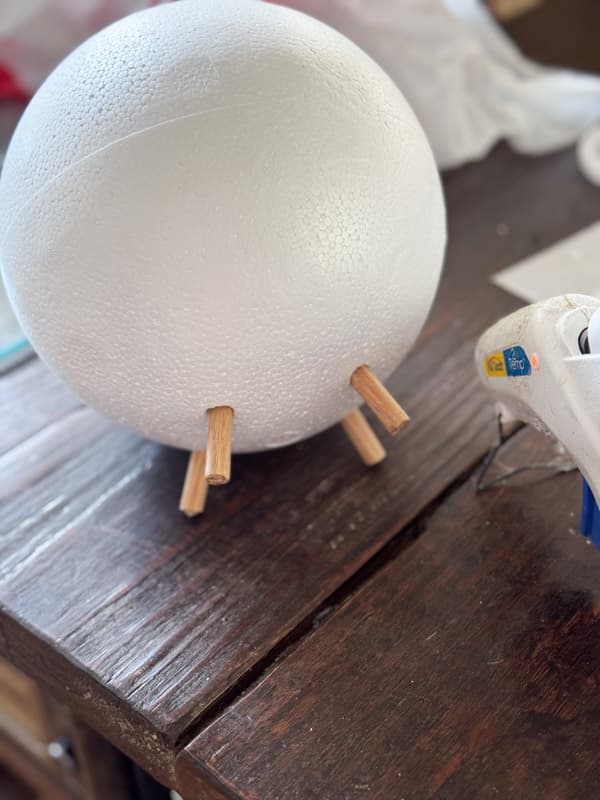
Step 1 – Attach Legs To Body
Begin by heating the hot glue gun and cutting the larger dowel rod into eight 4-5-inch-long pieces. I cut mine with pruning shears, but you can use an electric saw or a handheld saw.
Push four of the pieces into the 8-inch styrofoam ball to form the four legs. I pushed all four into place and made sure that the body sat evenly on the table. Then I removed the legs one at a time and applied hot glue to them before reinserting them in the holes. This secures the legs and makes them steady.
Step 2 – Add Head to Body
Next, cut two pieces from the smaller dowel rod, approximately 6 inches long. Stand the large balls on their legs and hold the head against them to determine the best position.
Insert the dowel rod into the body and the head, applying a drop of hot glue to secure. Push the dowel rod into the body until the egg-shaped styrofoam head is almost touching it.
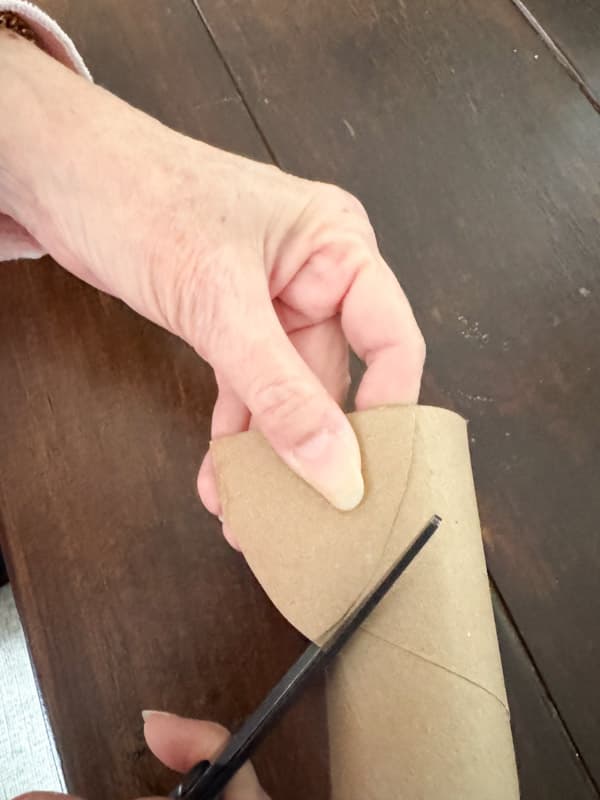
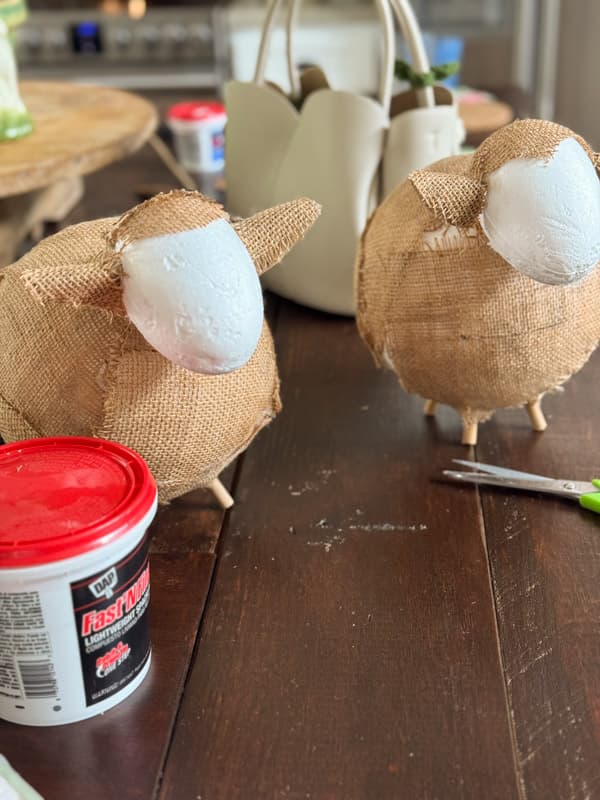
Step 3 – Make Ears
Begin by cutting the ears from the toilet paper rolls. I cut a triangle shape with rounded corners, as you can see below. You will need four ears.
Cut the small-sized dowel rod into four approximately 4″ pieces. Use hot glue to secure 1/2 of the rod to the TP ears. Fold the toilet paper ears at the center to help hold the rod in place.
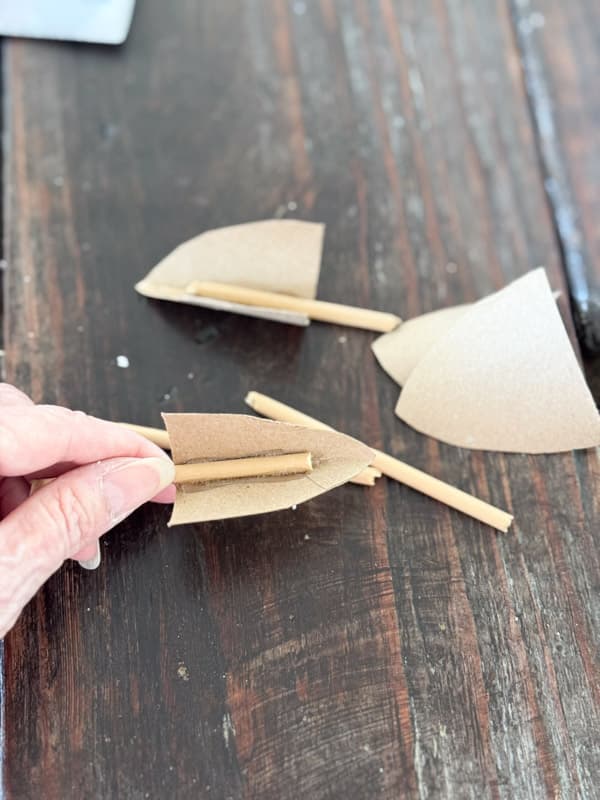
Position the ears at the side of the egg-shaped styrofoam and mark where they should be inserted. Push the dowel rod into the styrofoam and add a drop of hot glue to secure. Push deeply until the TP cardboard is snug against the head.
Tips for Working with Spackling and Styrofoam
Now you are ready to prepare the lambs for spackling. I learned very quickly that the spackling doesn’t stick well to the styrofoam, and I wanted a lot of texture on the lambs’ bodies, so here’s what I did. I had some old burlap ribbon and decided to use it for the added texture.
Step 1 – Cover With Burlap
First, I cut strips of burlap ribbon and soaked them in a 50/50 mixture of Elmer’s glue and water. Note: If you don’t have burlap, cheesecloth is another option.
Just mix the glue and water in a flat pan until smooth. Then dip the burlap pieces into the mixture. Let the drip or squeeze off excess moisture, then apply the burlap over the styrofoam balls.
If you have an area where the burlap won’t adhere securely, add some hot glue.
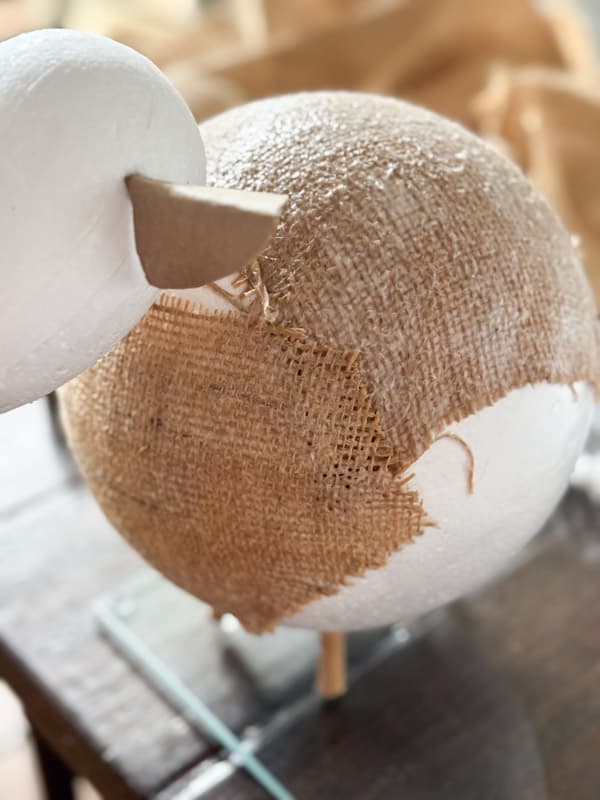
Cover the body & ears completely. Apply to the back of the head, leaving the face exposed.
Allow the glue to dry overnight.
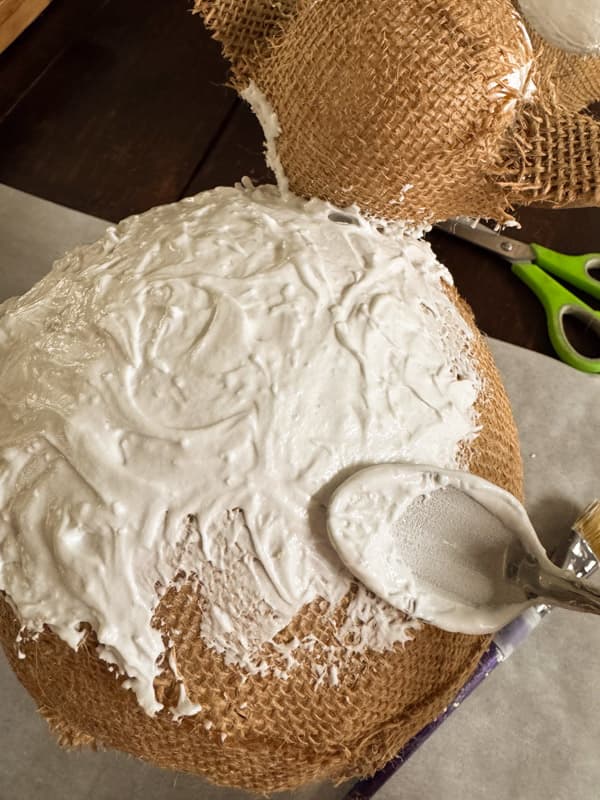
Step 2 – Add Spackling for Textured Chunky Lambs
Next, add water to the lightweight spackling. Mix until you have the consistency of thick mayonnaise. Begin applying the spackling to the burlap areas. Leave it thick and work in circular motions to create texture. I found that working with a spoon gave the best results.
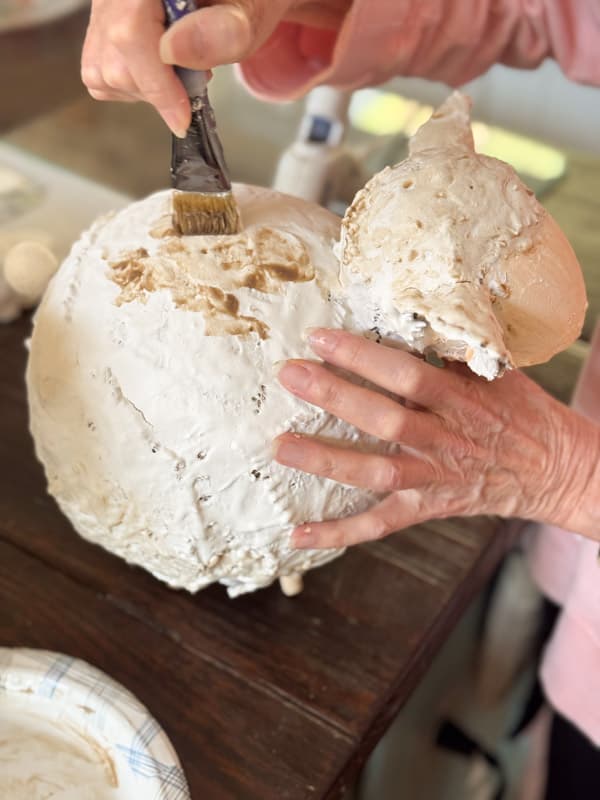
Once the body is completely covered, use a small paintbrush to apply a light coat of the spackling over the face.
Allow the spackle to completely dry for at least 24 hours.
Finishing Touches for Chunky Lambs
Now you are ready to finish the lambs. Begin by painting just the face and legs with flesh-toned craft paint. I used conch shell pink paint mixed with white.
Then, prepare the wax by mixing 75% clear wax with 25% dark wax. Blend the wax until the color is even.
Apply the wax over all the spackled bodies and blend until the coverage is even. I used a small paintbrush for this step.
The wax will settle into low spots, adding to the textured appearance. Once the face paint is dry, add some of the wax mixture here as well.
Allow the wax to partially dry and rub with a towel to smooth and buff.
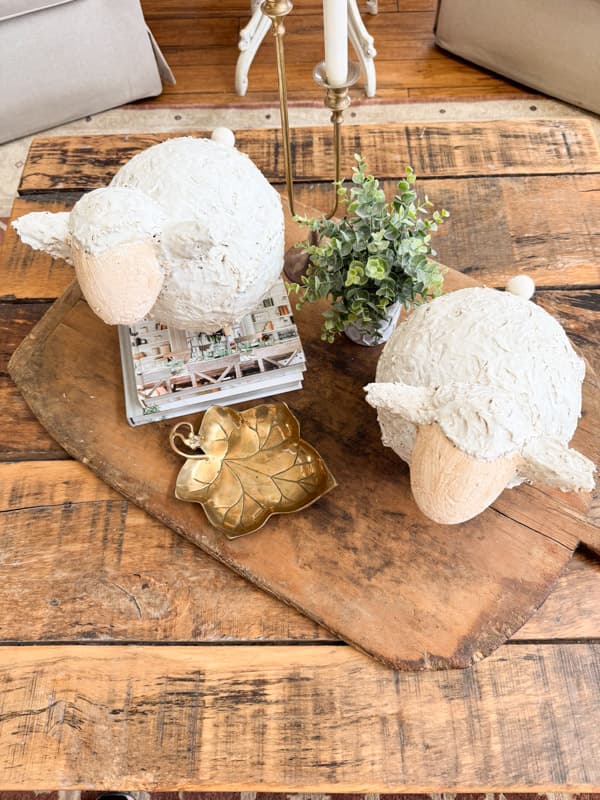
Finally, use hot glue to attach the felt wool tail.

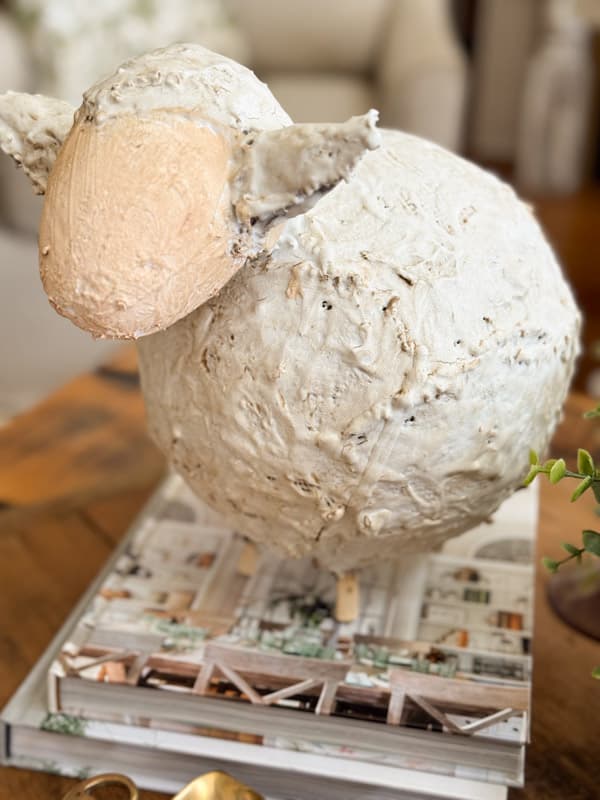
Styling Your Lambs for Easter and Beyond
The finished lambs are just adorable. Their fat and sassy bodies are perfect for farmhouse decorating. Their unique decor style is similar to items I often see in high-end boutiques. They can be used for Easter decorating and beyond.
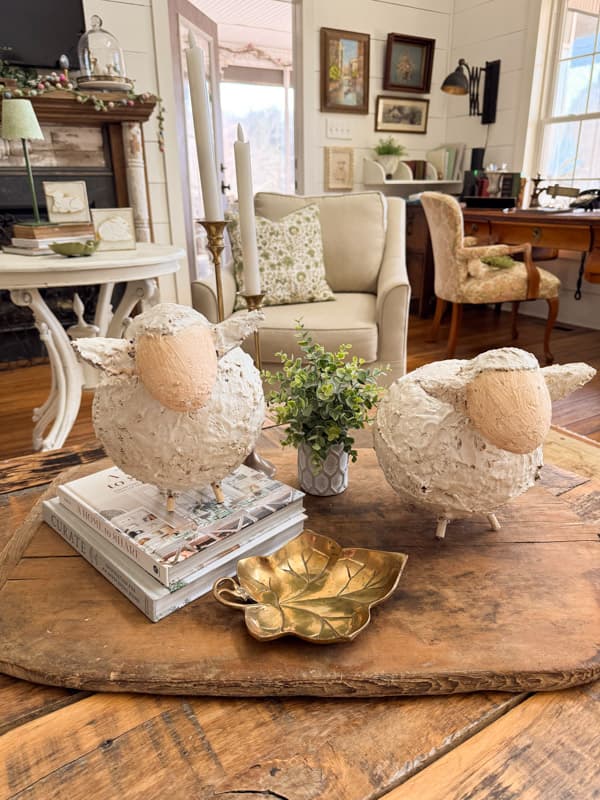
I wanted to make the lambs for our coffee table Easter centerpiece, but they would look adorable for Easter mantel decor, in the kitchen, or bathroom.
Optional Embellishments For Lambs
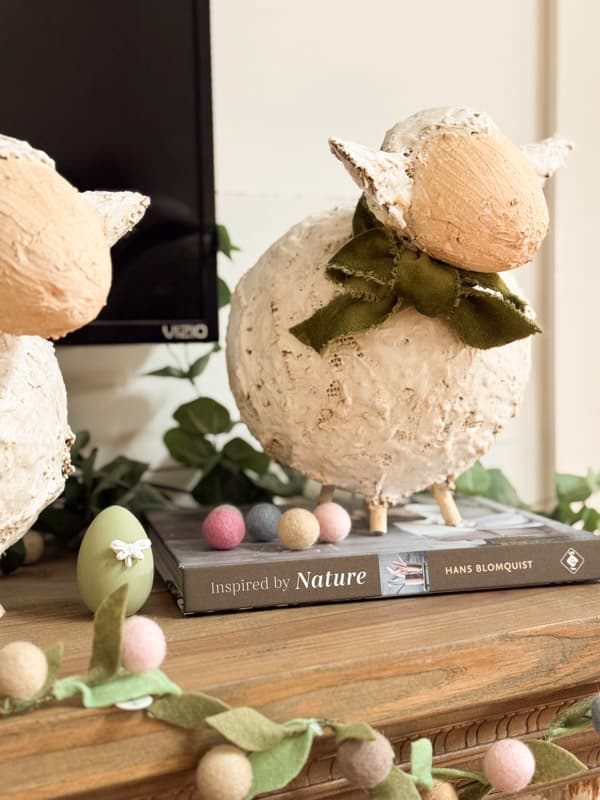
There are several ways you can embellish the lambs for seasonal looks!
- Add bows or ribbon around their necks.
- Add buttons or a bead for eyes
- Add a bead as an earring to their ear.
- Add a hat or scarf.
FAQ
Resources: Click the Image below to shop!
Recommended Articles
If you enjoy decorating with lambs, you’ll not want to miss these DIY projects!
Spring Air Dry Clay Canvas Art With Lambs & Bunnies
Easter Lamb Makeover: Giving Thrift Store Finds New Life
Fluffy Lamb Cross Stitch Pattern & Tutorial


Oh my gosh! The lambs are adorable, one of my favorites of your projects.
Bonnie
They are fun aren’t they? So glad you like them. Let me know if you make them. I’d love to see other versions. Have a blessed weekend.
Wow, your lambs are so cute and look like spring.
Angie,
Thank you so much. I’m glad you like them.
Cut four ears. What did you do with the other two?
Barbara,
My instructions are for making two lambs. I used two ears on each lamb. Sorry for any confusion. Have a blessed weekend.
LOVE LOVE LOVE THESE…I WILL be making these for sure…hope they turnout like yours…thanks so much for all your items to make….i too have ovarian cancer since 2019 but still here/?? ha love
Lynda,
I’m so glad you love the lambs. I’m sure they will turn out great. Wow, thank for sharing your encouraging story! God has blessed you! Have a wonderful week.
These are absolutely adorable. I was actually looking for another Easter diy where you made the most beautiful cabbage. Love everything you do.
Karen,
Oh I’m so glad you like them. I’m loving seeing them each day on my coffee table. They make me smile! Let me know if you make them, I’d love to share your version. Thanks for stopping by and lifting me up with your thoughts. Have a blessed day.
These are adorable, Rachel! It’s great to see you crafting again. I’m excited to try these, so thanks for the extra tips and tricks. I can totally see using these all season or even gifting for a nursery! Sharing this on From the Front Porch today. They’re fabulous! Big hugs, CoCo
CoCo,
Thank you for sharing and so glad you like them.