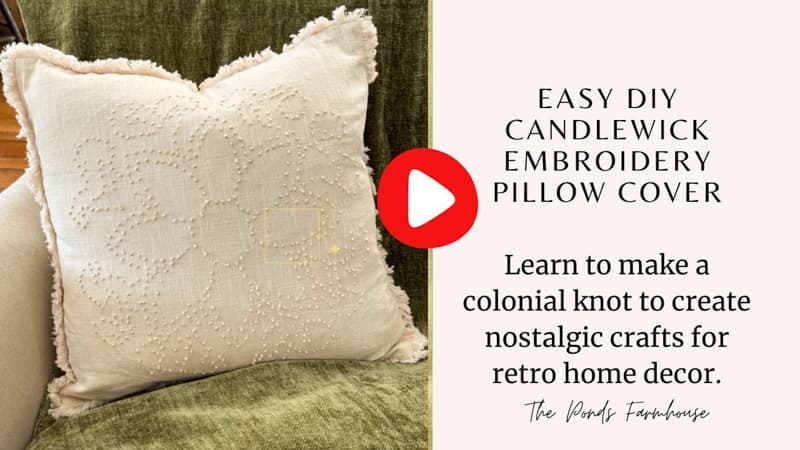
Candlewick Needlework 101: Learn How To Make A Retro Colonial-Inspired Pillow
Are you ready for another old-school, nostalgic craft? I’m so excited to share a couple of stunning pillows I made using colonial-inspired candlewick needlework. This retro craft is one I first learned as a newlywed, and making these pillows brought back so many happy memories of decorating my first home.
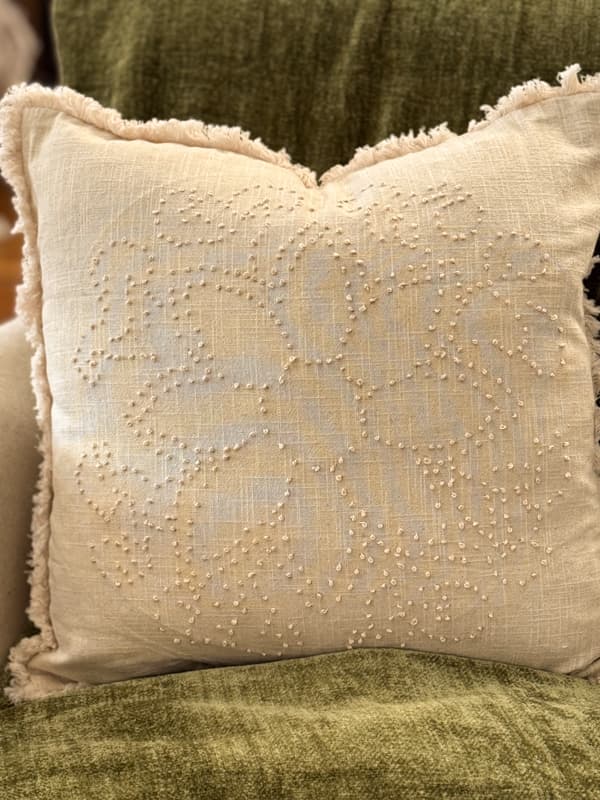
What’s old is new again! All types of embroidery are currently having a ‘moment,’ and candlewicking is no exception. Today’s versions feature a textured, tone-on-tone raised design that feels both retro and modern-chic. I’m sharing a step-by-step tutorial on how to master this easy stitch—once used on everything from colonial bed covers to tablecloths—so you can bring a bit of heritage into your own home. Let’s gather some supplies and begin!
(Posts on The Ponds Farmhouse may contain affiliate links. As an Amazon Associate, I earn from qualifying purchases. See the full disclosure details here.)
What is Candlewicking? (A Brief History)
Candlewicking is a craft that dates back to Colonial America (late 1700s to early 1800s). Pioneer women were resourceful, enhancing their plain muslin bedding and clothing with a durable yet fascinating stitch called candlewicking.
Without the luxuries of colorful embroidery and fine linens, they decorated their simple wares with soft-spun cotton, the same unbleached thread used to make candle wicks. The name candlewicking caught on because they were literally using candle wicks as embroidery thread. The candlewick stitch is also known as the colonial knot or Figure 8 Knot. It’s sturdier than the popular French Knot and holds up better to heavy laundering. It also requires slightly fewer threads, which was vital given the low supply.
While it started as a simple way to embellish fabric, it evolved into a sophisticated “whitework” style (white thread on white or unbleached fabric). Most of the designs were simple and inspired by nature – trees, flowes and geometric patterns.
Supply List –
I decided to use ready made pillow covers for this project. However you can make your pillow after you have finished the candlewick embroidery on muslin. You can see more details at the end of this post.
- I found these 18x 18 linen and cotton blend pillow covers that worked perfectly for this project. You can use 100% cotton muslin if you prefer.
- Candlewick Flower Pattern – Click to download pattern to print.
- Double Heart Candlewick Pattern – Click to download pattern to print.
- 100% Cotton Embroidery Thread
- Embroidery Needles
- Embroidery Hoops
- Transfer Paper
- Needle Threader
- Optional – Heat Eraseable Markers
- Optional – 18×18 Down Pillow Inserts
Choosing the Right Muslin and Thread
Although you can use the candlewick stitch in any color, if you are looking for a retro style, unbleached muslin and natural cotton are your best options. I wanted an authentic tone-on-tone pillow, so I used a ready-made natural cotton pillow cover that looks like muslin. They cost less than I could purchase the fabric for, and saved me from having to sew a pillow cover. In addition, I used a slightly heavier natural cotton thread to make the knots more prominent.
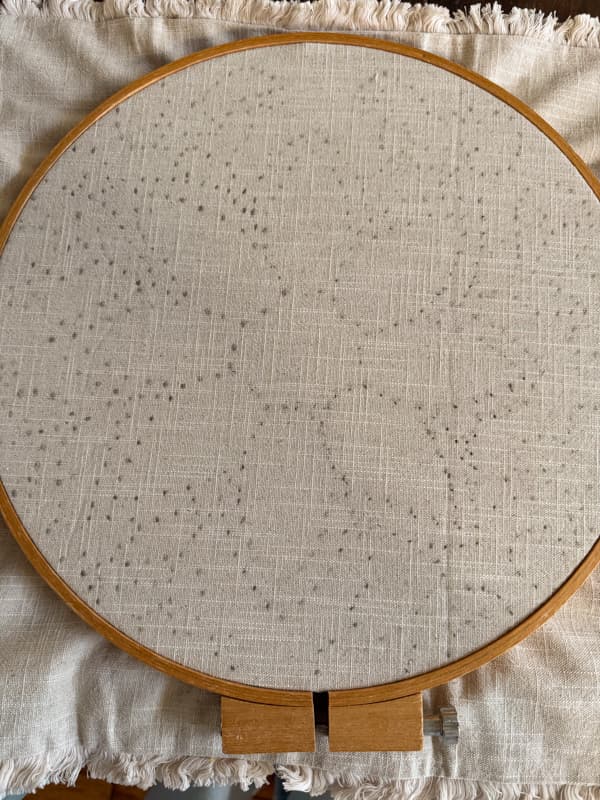
How To Transfer The Pattern
I included the pattern I used to make my pillow cover, and you can download and print it for your convenience. Because the pillow is 18×18, the pattern needed to be divided into 4 sections for printing. Once you have all four pieces printed, you can match up the pattern and tape them together. Cut away any overlaps from the backside. Then you will be ready to transfer the pattern to your fabric.
Here are the steps to successfully transfer the pattern.
- Lay the pillow cover or fabric on a flat surface.
- Then place the transfer paper, graphite side down, at the center of the fabric.
- Position the pattern over the paper, ensuring it is centered on the pillow cover.
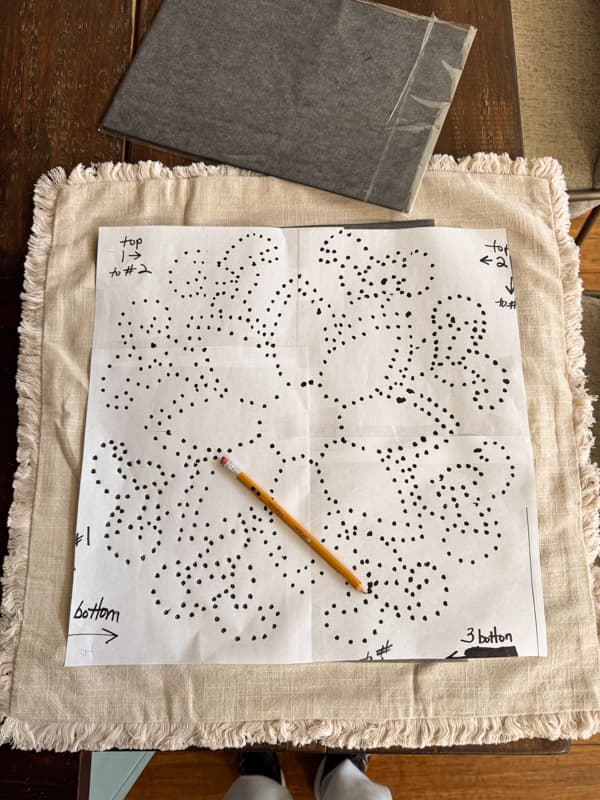
- Tape the pattern to the fabric to avoid slipping.
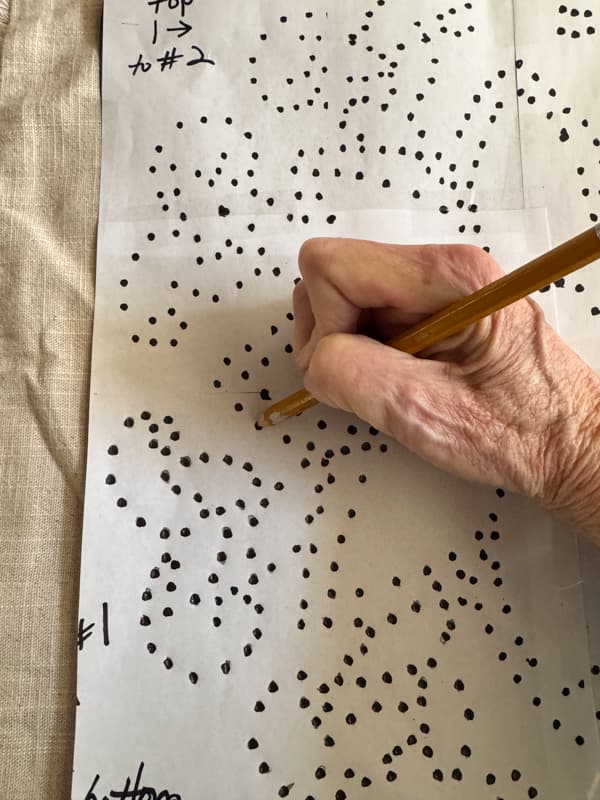
- Use a sharp-pointed pencil or pen to mark each dot on the pattern. Ensure that the design is being transferred to the fabric. If you have areas where the pattern has overlapped, you may need to press harder to see the dot.
Insider Tip
I taped the pattern to the fabric on one side and left the other side loose so that I could raise the pattern and determine if the transfer was visible.
In addition, if you have areas where the pattern has overlapped, you may need to press harder to see the dot.
How To Prepare the Pillow Cover for Embroidery
Once you have the pattern transferred, add the embroidery hoop. Insert the hoop’s inside rim into the pillow cover. Position the design at the center of the hoop, then attach the outer hoop rim over the fabric. Pull the fabric taut and tighten the hoop screw.
Step-By-Step Making A Colonial Knot
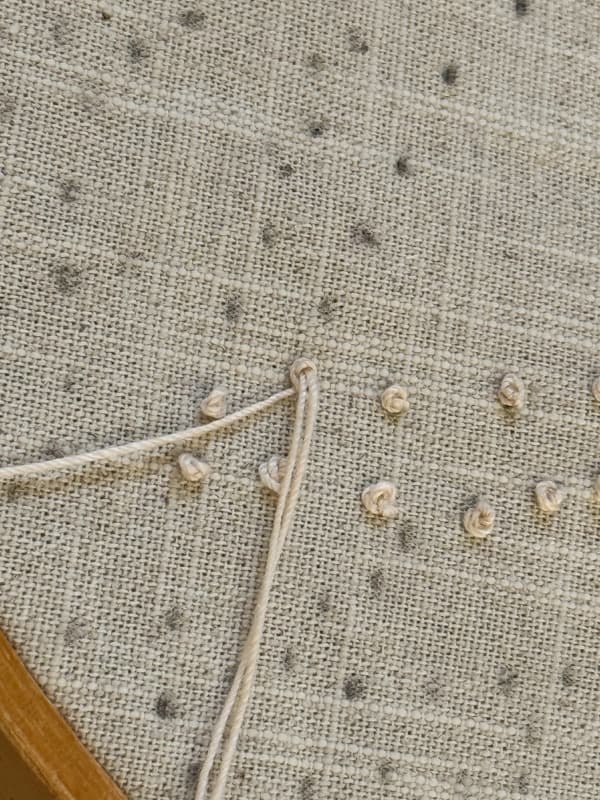
The Colonial Knot (sometimes called the “Figure-8 Knot”) is the traditional stitch used in candlewicking. It creates a sturdy, candle-like bead of thread on the surface of your fabric.
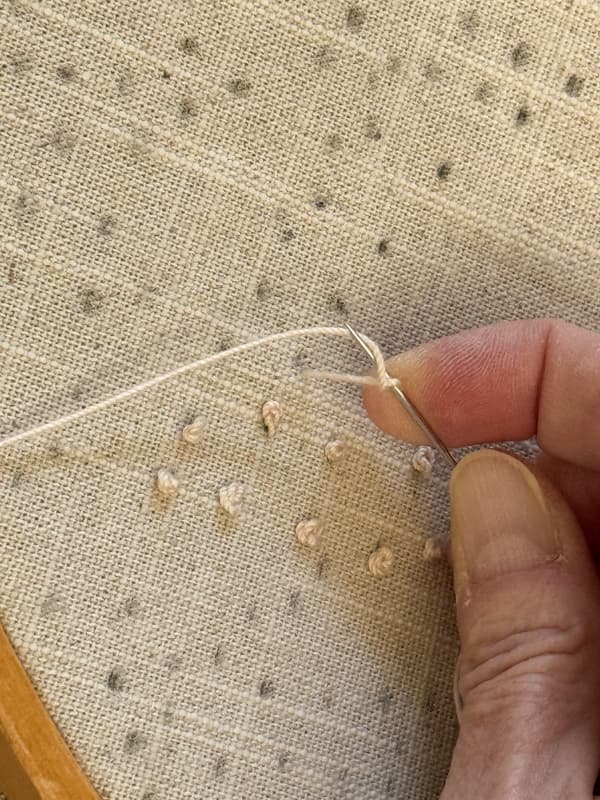
- Thread the Needle – Begin by loading the needle with thread. Because the thread is heavy-duty, you may need to use a needle threader. Caution: Don’t use an extra-long length of thread. I only load as much as I can pull with my arm extended. If the thread is too long, you will be more likely to create knots as you are creating your stitch.
- Add a knot to the end of the thread – I tie a double knot to prevent it from pulling through the fabric.
- Bring the Needle Up – Place the threaded needle inside the pillow cover and find the first dot on the pattern. Pull your needle and thread through the fabric at the center of the dot.
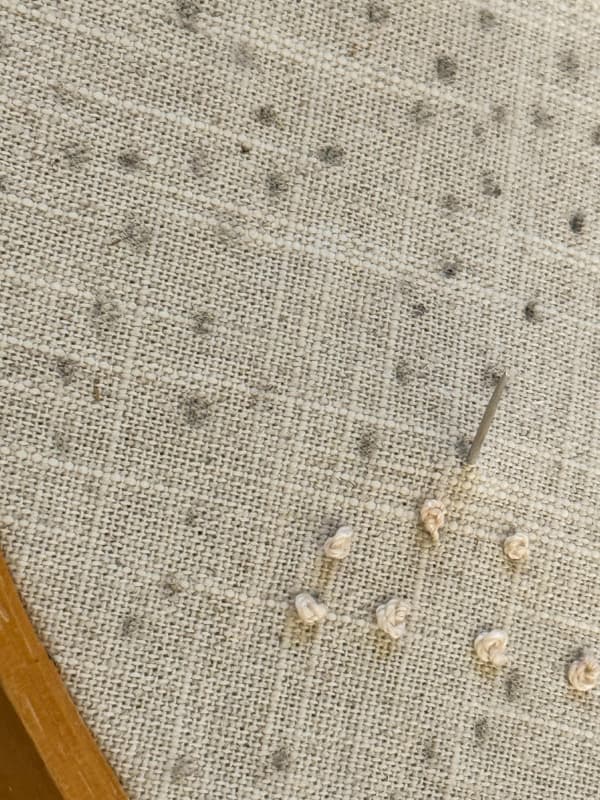
- The “C” Shape: Lay the thread on the fabric in a backwards “C” shape.
- Place your needle over the top of the curve and under the thread emerging from the fabric.

- The Figure-8 – Wrap the thread over the top of the needle, then under the tip, forming a figure-8 around the needle. Holding the original loop next to the needle helps secure the figure 8.
- Keep the Tension – Hold the tail of the thread firmly with your non-dominant hand. Pull it so the figure-8 sits snugly against the needle.
- Finish the Knot: Insert the needle back into the fabric very close to (but not in the exact same hole) where you first came up.
- Secure The Knot – Keep holding the thread tail taut as you pull the needle through to the back. This prevents the knot from looping or tangling.
- Messy Knot – Are your knots a bit messy? Don’t worry because candlewicking is meant to have a handmade, textured feel. You will learn that the more consistent your tension, the more uniform your knots will look.
Insider Tip
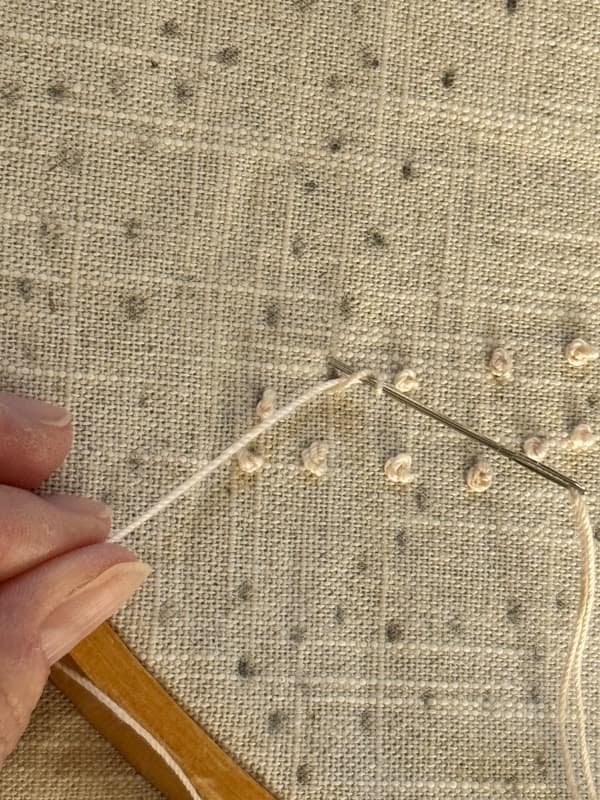
Although there are no rules as to where to begin your adding the knots, I worked from the center outward. To avoid using too much thread, I worked the knots in a circular motion until the stitches were completed along the outside edge of the pattern.
How To Finish a Candlewick Pillow Cover
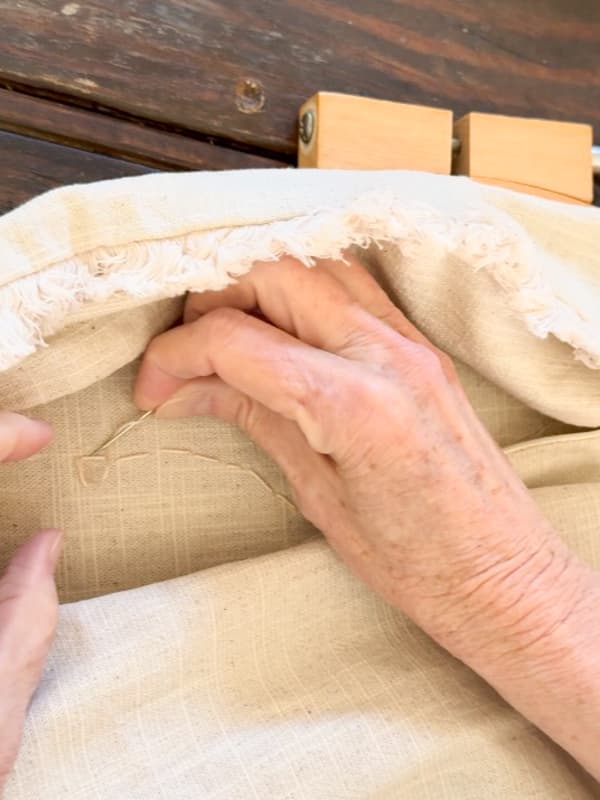
As you create the candlewick knots, you will be reloading your needle with thread several times. When you reach the end of each thread, go to the inside of the fabric and run the needle under and over several stitches on the backside. This will secure the thread and prevent any unraveling.
Complete Your Nostalgic Pillow
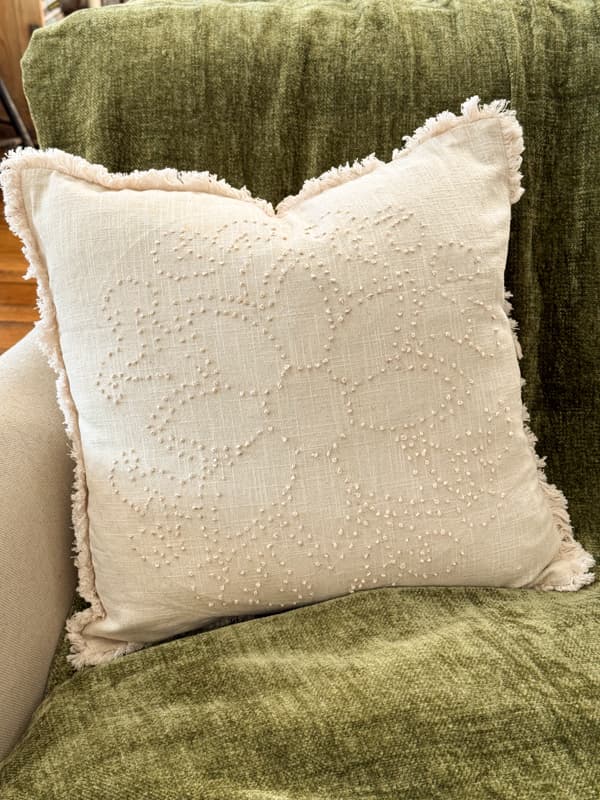
If you are using a ready-made pillow cover, you can now add the pillow insert. Just remove the pillow cover from the embroidery frame and insert the pillow form. I like to use down filled pillow inserts for an upscale look.
The nostalgic pillow gives your home a retro, vintage feel and adds texture to your decor. You are ready to add the pillow to your sofa or bedding.
Optional Candlewick Pillow Cover Design
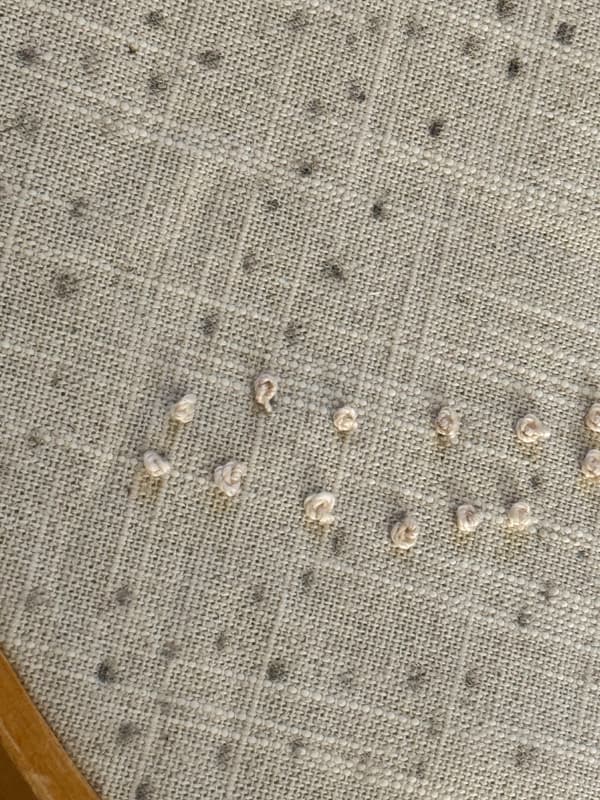
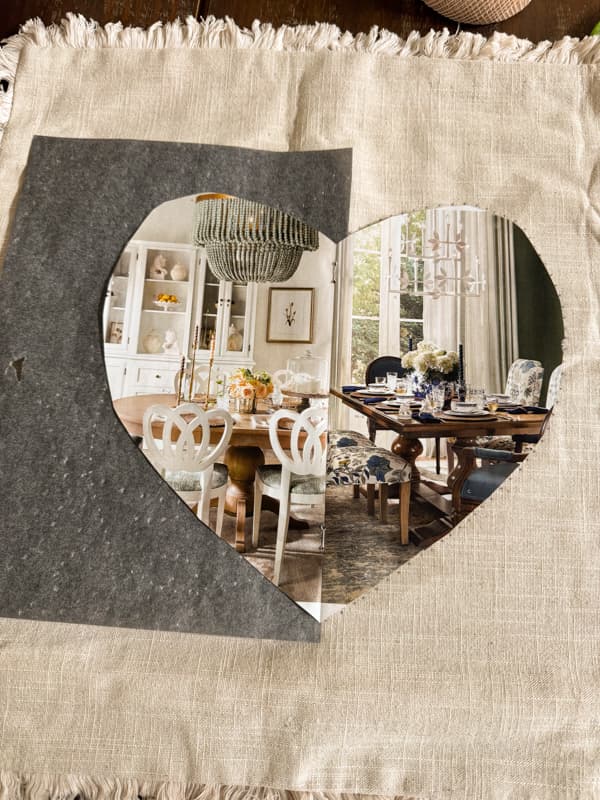
After completing the flower design, I decided to make a heart design, and everything is very similar except that I made up the pattern as I went along. You can download the double heart candlewick pattern to get the original heart shape but the remaining stitches are done without a pattern.
I cut out a heart design from the centerpage of a magazine and added the dots by hand. I’ve included the dots on the printable pattern for you. Although this method would be perfect for using a heat-erasable marker, mine had dried up, so I used the transfer paper to create the dots.
I taped the heart to the fabric on one side at a time and slid the transfer paper underneath. I then went along the outside edge of the paper heart and created the dots for my pattern. You can see the transferred dots on the right-hand side of the paper template shown below.
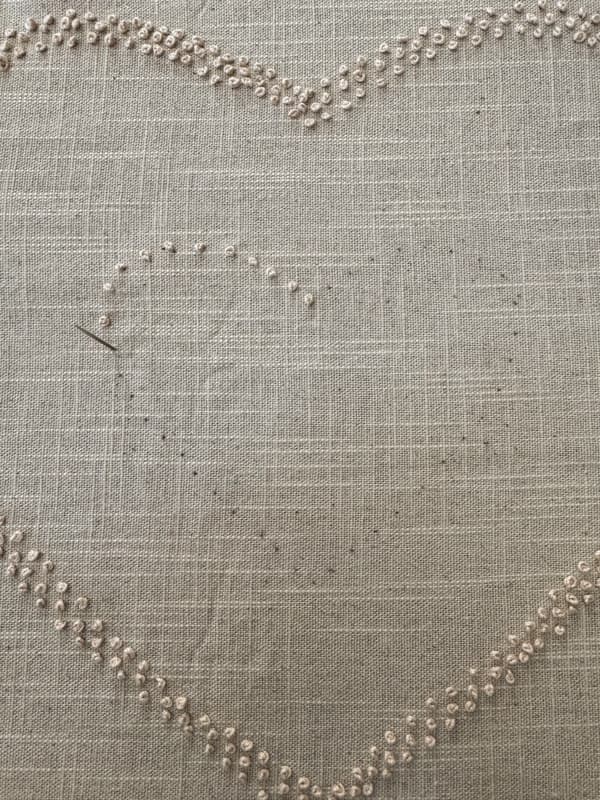
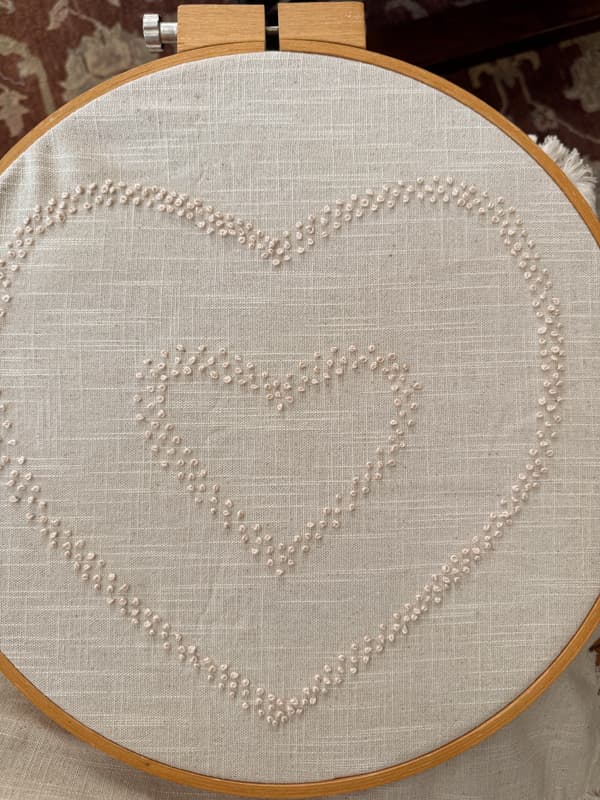
Once I had completed the first row of colonial knots, I decided to add two more rows to the inside of the first. First, for the second row, I add a knot in between each of the previous ones. On the third row, I place the knot even with the first row. They are nestled close together
Then I decided I needed a smaller heart inside the first one and created another pattern inwhich I used the same technique.
The result was a classic design that was quick and easy to make.
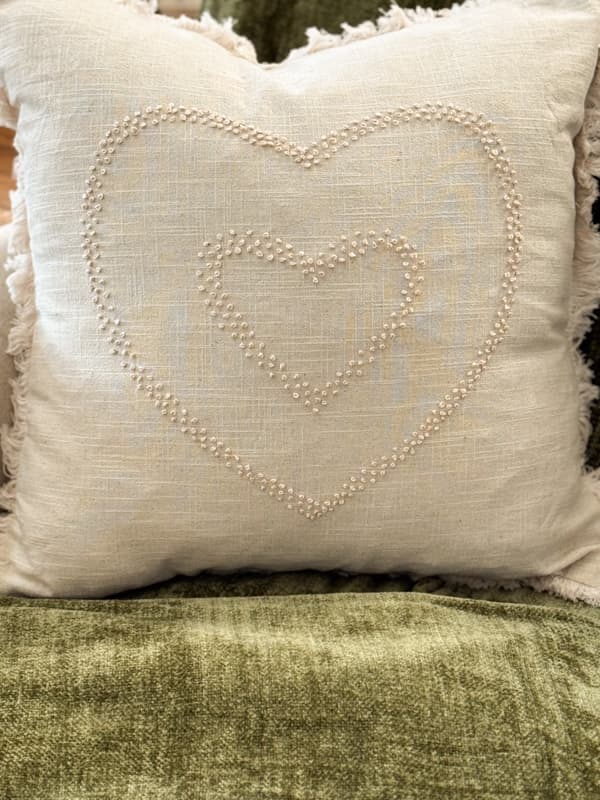
The nostalgic heart candlewick pillow adds a touch of romance to your bedding and is perfect for Valentine’s Day or any time of year.
FAQ
Video Tutorial

Rachel you have been busy with these lovely pillows…I thought for a minute they were French knots on the pillow case. I really like the heart pillow.. Praying for your continued recovery.
Lorri
Lorri,
They are very similar to French knots. So easy to make and I’m glad you liked them. Thank you for your kind words.
I’m so happy to see this! I too used to do candlewicking years ago. Time to try it again! Thanks for the inspiration. 💕
Lisa,
I’m so glad you are going to try this craft again. I loved the results and hope you do too. Have a blessed week.
Do the black dots from the transfer paper wash out easily?
Gay Ann,
I tried to be sure and over the dots with the colonial knot but a few areas didn’t get covered. I used a Q-tip with rubbing alcohol and it came right out.
This brings me back! I used to love candle wicking! Think I still have all my stuff for it; I should pick it back up again. So happy that embroidery is back in style:) Give me all the grandma hobbies:)
Lora
Yes, It’s been years since I did this type of craft. It was fun to revisit these old timey crafts.