Showstopping DIY Giant Paper Tulips: Easy Coffee Filter Decor
If you love unique and impactful decor, you’ll love this! I recently decided to create some giant paper tulips using coffee filter crafts, and I’m so excited about how they turned out. I was inspired by some giant tulips that my friend Stacy shared from her garden. I could picture the oversized blooms standing on my table for a stunning centerpiece.
Today, I’m sharing step-by-step instructions for making these showstopping giant tulips using coffee filters, kraft paper, and crepe paper. So gather your supplies and let’s get started.

(Posts on The Ponds Farmhouse may contain affiliate links. As an Amazon Associate, I earn from qualifying purchases. See the full disclosure details here.)
Paper Flower Inspiration
When I saw Stacy’s stunning tulip display, I was inspired to duplicate the look. Since I don’t have Stacy’s green thumb, I decided to try creating some giant paper tulips. I’ve created several projects using coffee filters, and with a bit of experimentation, I achieved the desired look. Here is my inspiration.

Supply List
- Coffee Filters
- Green Crepe Paper Streamers
- Floral wire stems
- Craft Paper
- Dowel Rod 3/16″ cut to the desired height of tulips
- Craft Paint Hot Pink, SeaShell Pink, and Marigold
- Small paint brush
- Spray bottle with water
- Small jars or recycled horseradish jars.
- Small pebbles
- A champagne flute
- Pruning Shears
- Wire Snips

How To Create Giant Tulip Petals With Coffee Filters
You will need six petals or six coffee filters per tulip. Here’s how to create giant tulip petals using simple coffee filters: follow these five easy steps.
- Fold the coffee filters in half and cut them into an oval shape.
- At one end of the filter, cut several small strips so that it appears frayed, as pictured in Image 2.
- Lay the individual cut coffee filters on a paper plate and spray them with water.
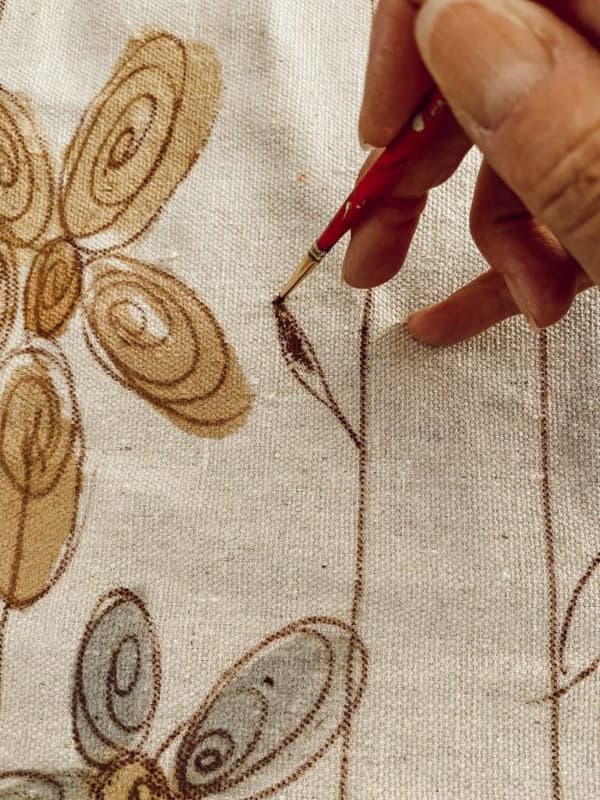
- On the frayed end of the coffee filter, paint with the marigold paint. Then use a combination of the hot pink and seashell pink to paint the remaining filter. The paint will be runny, like watercolor, and you don’t want a heavy coverage.
- Place the watercolor coffee filters on a clean paper plate and dry in the microwave for approximately one minute. Once you have six dried petals, you are ready to begin assembling them.


How To Assemble Giant Tulip Petals
To create a giant tulip petal, you will need six dried watercolor coffee filters, a champagne flute, and a hot glue gun.
Begin by folding the first coffee filter around the rim of the champagne flute, with the marigold-painted edge inside the glass and the pink area wrapped around the outside of the glass.

Next, add a small amount of hot glue to the rim and overlap the next petal. Continue to add glue and overlap each petals until you have all six in place. Finally, press the outside of the petals around the champagne flute to create the shape of a tulip. Then remove the flute.


How To Make The Paper Tulip Stem
Now you are ready to add the paper tulip stem. First, determine how tall you want each tulip to be. I cut the rods into different lengths to achieve a variety of heights for the giant tulips. Then cut your dowel rods to size. I used pruning shears to cut the wooden rod easily.
Add a small amount of hot glue to one end of the dowel rod and begin wrapping it with the green crepe paper streamer. Once you reach the other end of the rod, secure the crepe paper with additional hot glue.

How To Add The Paper Flower To The Stem
To add the paper flower to the stem, you will need to squeeze the bottom of the tulip petals. I used a small amount of hot glue to hold the squeezed edges in place. Then insert the crepe paper-covered dowel rod and add more hot glue to secure.


How To Make Tulip Leaves
Now it’s time to make the tulip leaves. Gather your crepe paper, floral wire stems, and hot glue.
- Begin by cutting the crepe paper and floral wire stems to the length you want your leaves.
- Next, fold the crepe paper streamer lengthwise and cut one end at an angle.
- Add a bead of hot glue down the center of the crease.
- Place the floral wire stem into the glue at the center of the crepe paper. Ensure that wire is secured by folding the paper around it.


How To Attach The Leaves To The Tulip Stems
To attach the crepe paper leaves, bend the floral wire away from the wooden stem. Use hot glue to attach the leaf to the wooden stem. Use a small amount of the crepe paper streamer to wrap around the base of the leaf and secure with hot glue. I added two different-sized leaves for each tulip. Once you have your leaves secured, you are ready to create the bulb.

How To Create The Paper Tulip Bulb
To create the tulip bulb, start with pieces of craft paper that will cover your chosen jar. I soaked the craft paper with coffee and allowed it to dry. You can place it in the microwave for one minute to speed up the process. The coffee will stain the paper, giving it a more organic appearance.

Next, fill the bottom of your jar with a few pebbles to weigh it down. I added hot glue to the wooden stem of the tulip and added it to the center of the pebbles. Holding it in place, I added more hot glue around the stem and filled in the gaps with paper filler to pack it tightly. Ensure that your tulip is standing straight as you fill the jar.
Add Craft Paper To Jar
Finally, wrap the jar with the prepared craft paper. Add hot glue to the rim of the jar and squeeze the paper around it to secure it in place. You may need to add hot glue to some folded areas of the paper to ensure it fits snugly around the jar.


To enhance the authenticity of the bulb, I added a few sprigs of Spanish moss around the top of the paper. Just add a drop of hot glue to secure the moss. Then shape the leaves and you are ready to decorate with your paper flowers.

Paper Tulip Centerpiece
To decorate with these stunning paper tulips, I created a centerpiece for my dining table. I used three of the bulbs in a woven container and filled around the bulbs with moss balls and Spanish moss. Then I added the other two to the table, placing them on either side of the container.
The weighted jars allow the giant tulips to stand on their own for easy styling.

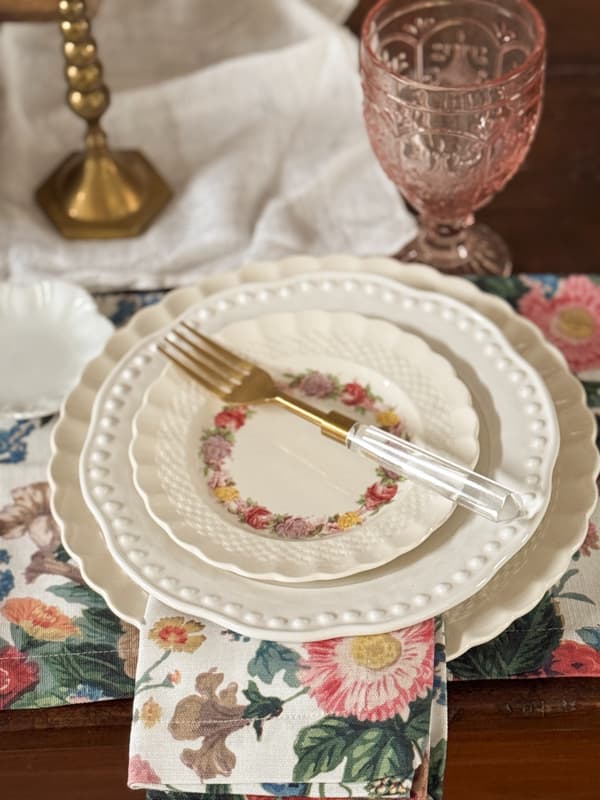
The centerpiece makes a stunning display for Spring and Summer when combined with woven placemats, cabbage plates, and festive napkins. I had previously used the DIY paper cabbages on my tablescape, but decided to move them to the wall basket for this updated table setting.

The DIY giant tulips will also look amazing grouped on a mantel or open shelf. How would you decorate with them?

Video Tutorial

I hope you enjoyed this fun tutorial and I look forward to sharing my next adventure with you!


Rachel…you have outdone yourself!! Stunning and so life like… I thought the cabbages were lovely ..these tulips are beautiful… thanks for the instructions…
Lorri,
Thank you! They are by far my favorite also. So glad you like them! Thanks for your comments and have the best weekend.
Rachel, your paper tulips are absolutely adorable! I must give this a try. Your tulips look so pretty on your table. I love the pink color. I am always amazed at all the wonderful ideas you come up with. Thanks, so much, for sharing! These look like the “parrot” tulips that I saw when we spent our winters in Texas. I had never seen a “parrot” tulip and I just loved them when I saw them at the grocery store. My hubby always bought me some for our condo and I loved looking at them on our dining room table. Have a wonderful weekend!
Mary-Ann,
Thank you for your sweet compliments. I didn’t know they were all Parrot tulips, so thank you for the information. I just knew they were stunning and wanted to duplicate the look. I hope you have the best weekend. See you next week.
Wow! Your tulips are beautiful!
Angie,
I’m so glad you like them. Thank you for stopping by.
These are amazing, Rachel! I love how you added the layers of color so they look more natural. They’re really beautiful. Excited to try this and will share on tomorrows From the Front Porch. They’d be such a fun weekend craft project or gift to give a loved one. Hugs, CoCo
CoCo,
I really appreciate your sweet compliments and thank you for sharing.
What a brilliant and unique DIY! Love the full plant design. Today I’ve featured your tutorial on Crafts on Display, I hope you enjoy it, and keep up the amazing work! https://craftsondisplay.com/paper-crafts/coffee-filter-tulips-181717/
Violeta,
Thank you including a link to my tutorial.