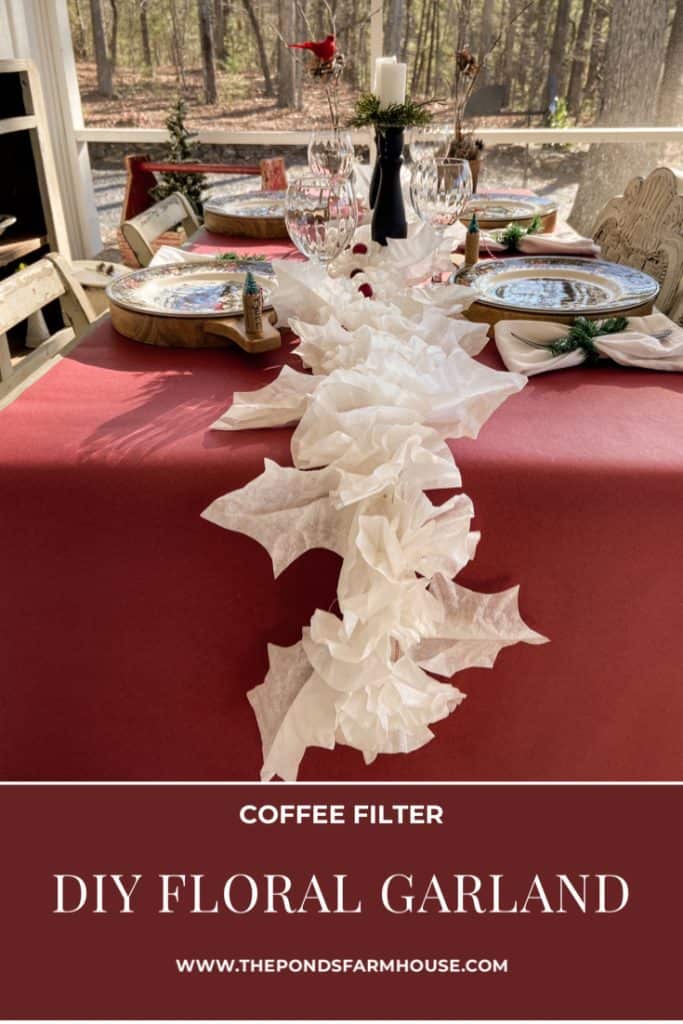
DIY Floral Garland Using Coffee Filters
Who knew coffee filters could be so versatile? I was inspired by a floral table garland I saw in Ballard Designs and decided to try duplicating the look. I’ll show you how to turn this inexpensive coffee filter craft into a delicate, paper-flower garland that adds whimsy to tables, mantels, and more. The DIY floral garland can be customized for any occasion, such as weddings, bridal showers, party decorations, etc., for a high-end style decoration. Get ready to unleash your inner artist with this fun and unexpected DIY project.
Y’all know I love unique table accessories, so I was sold when I saw a floral paper garland used as a table runner. Unfortunately, the price was slightly beyond my budget. I’ve made this garland several times, so……. let me show you what I did…..
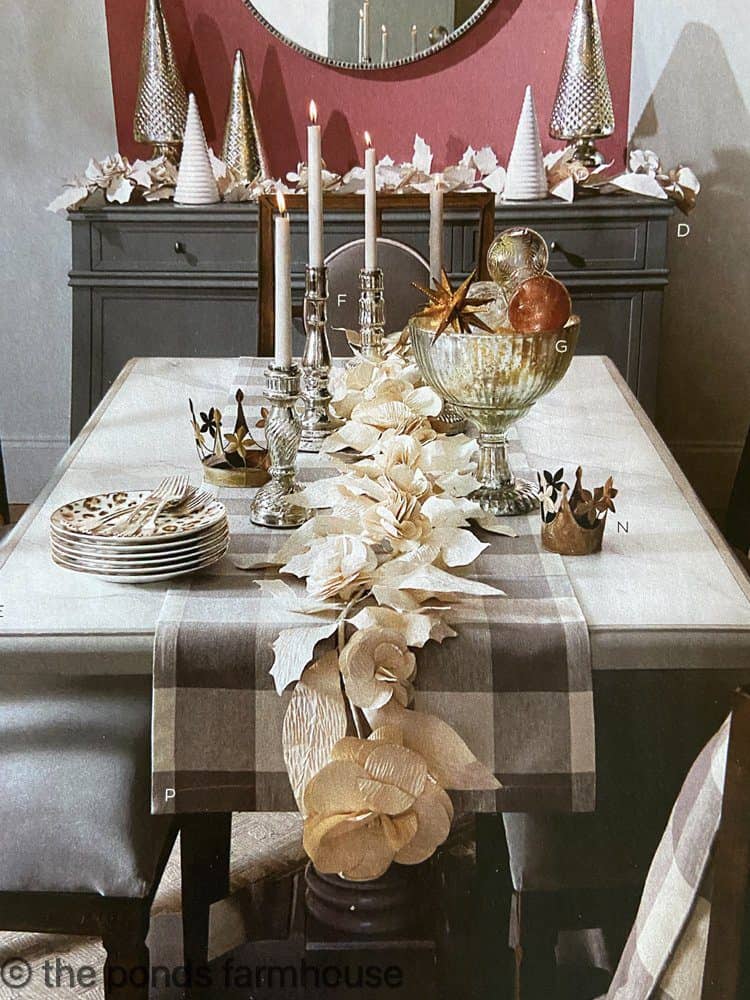
As you see in the inspiration photo, I plan to use this runner on my table. However, I love making garlands this time of year; you can see the fresh herb and dried orange one I made for my kitchen window.

(Posts on The Ponds Farmhouse may contain affiliate links. As an Amazon Associate, I earn from qualifying purchases. See the full disclosure details here.)
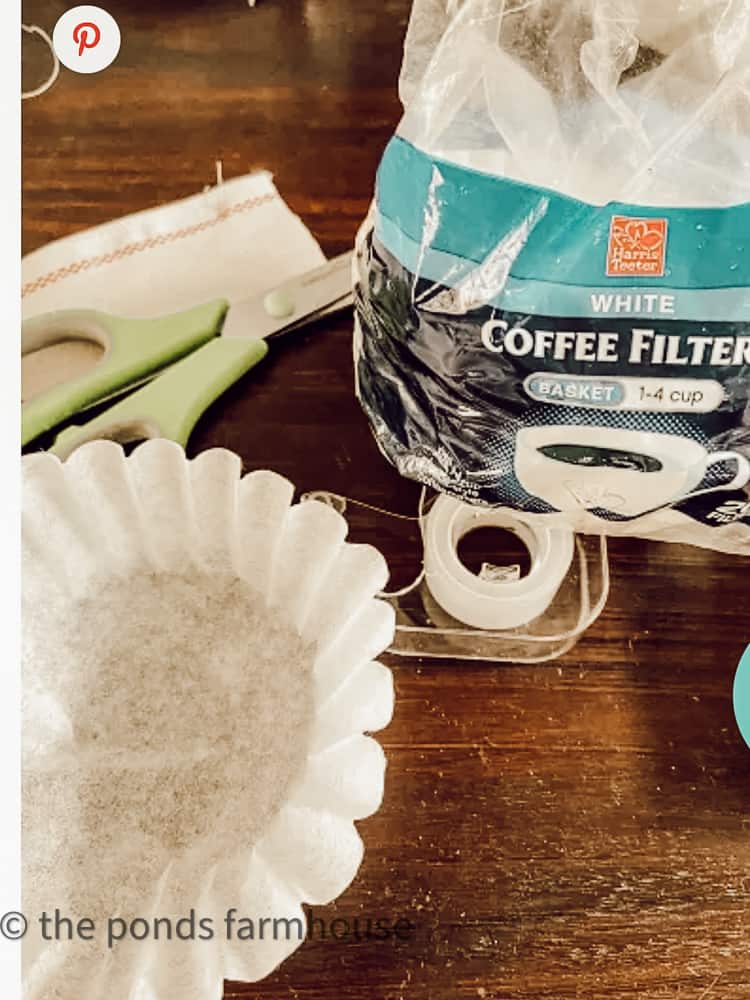
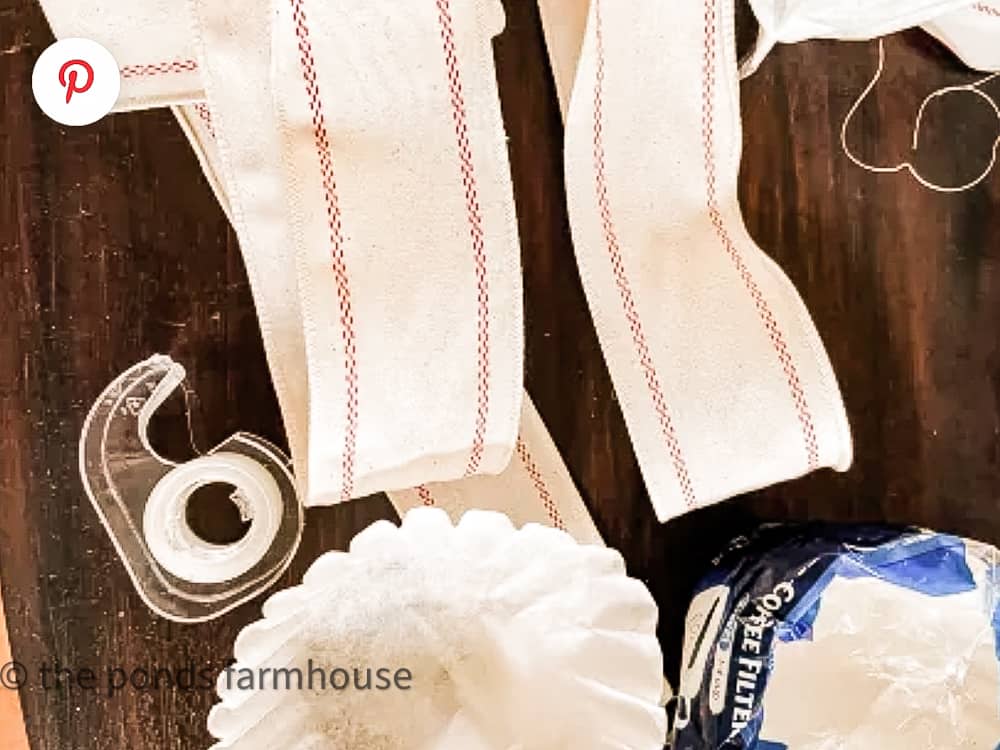
Materials To Make a Coffee Filter Crafts
Use these simple materials for an easy coffee filter crafts idea.
- Coffee Filters (I used the small 1-4 cup size)
- Tape
- Ribbon – I used a two-inch wide ribbon
- Hot Glue Gun & Glue Sticks
- Coffee (optional)
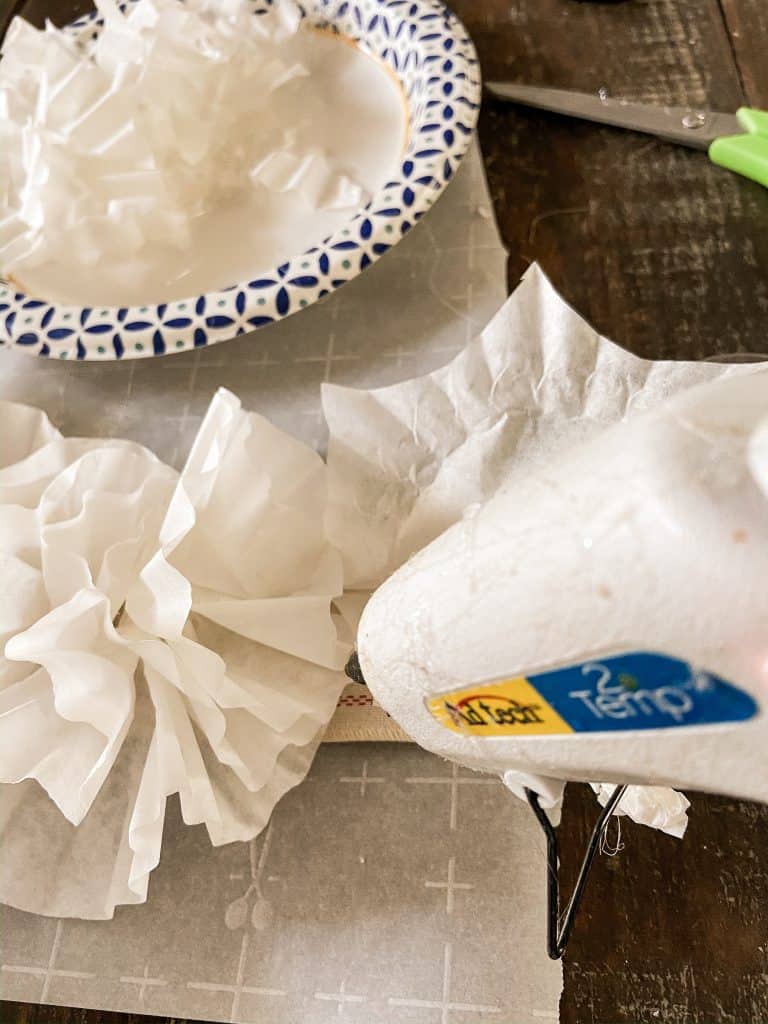
The Flowers For The Floral Garland
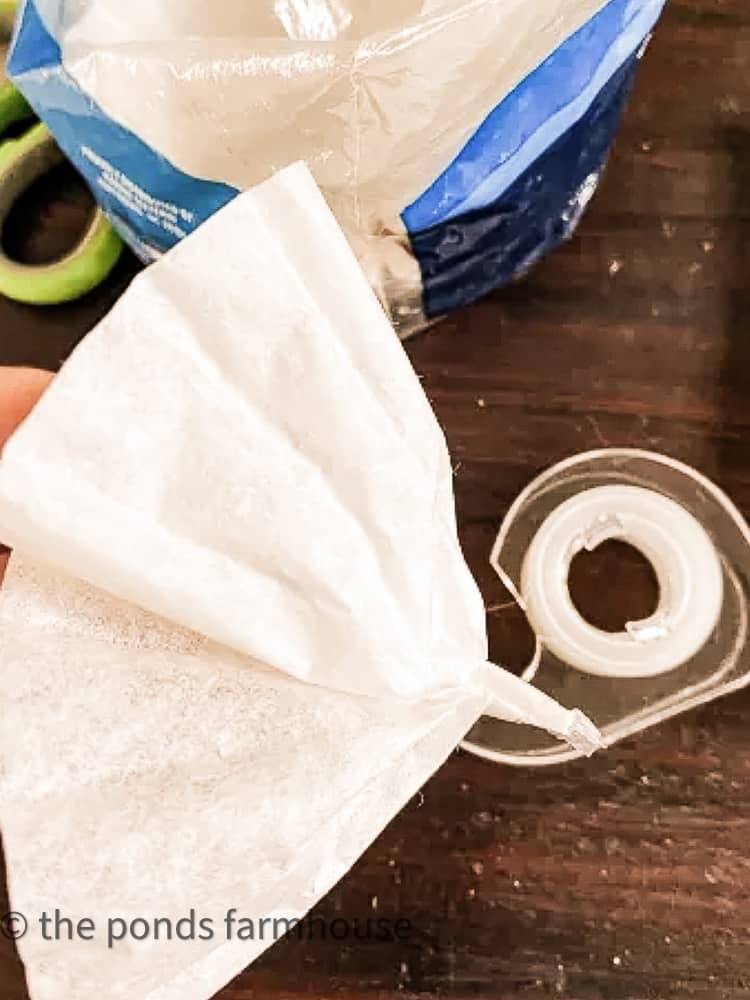
First, you want to make your flowers from the filters. You can begin by holding the filter in the middle and twisting a small amount together.
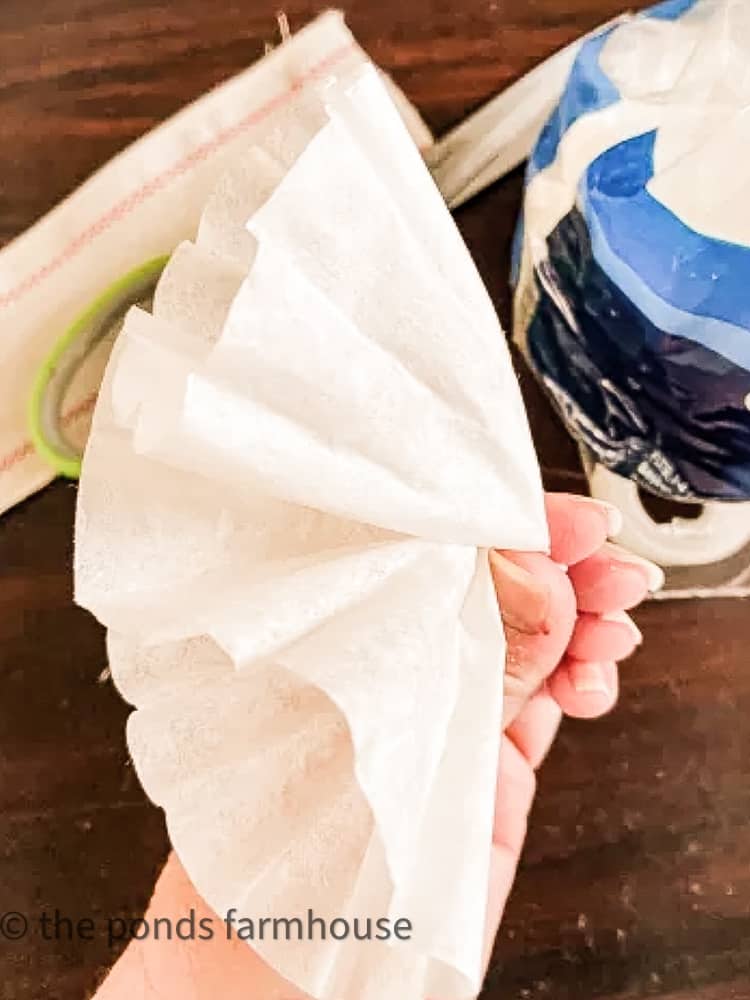
Then to secure the twisted area, wrap it with a small piece of clear tape.
After making several individual flowers, I create sets of two or three to speed up the process of gluing them to the ribbon to create the garland.
The total number needed will vary depending on placement and the length of the garland.

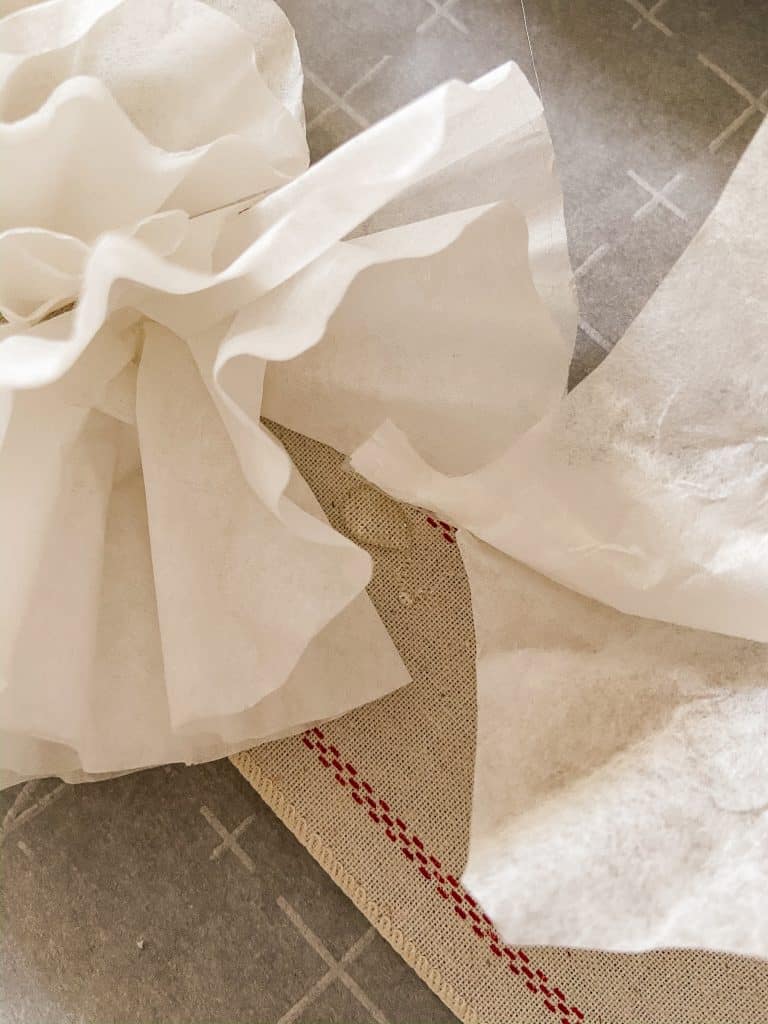
Construct Leaves for the Floral Garland
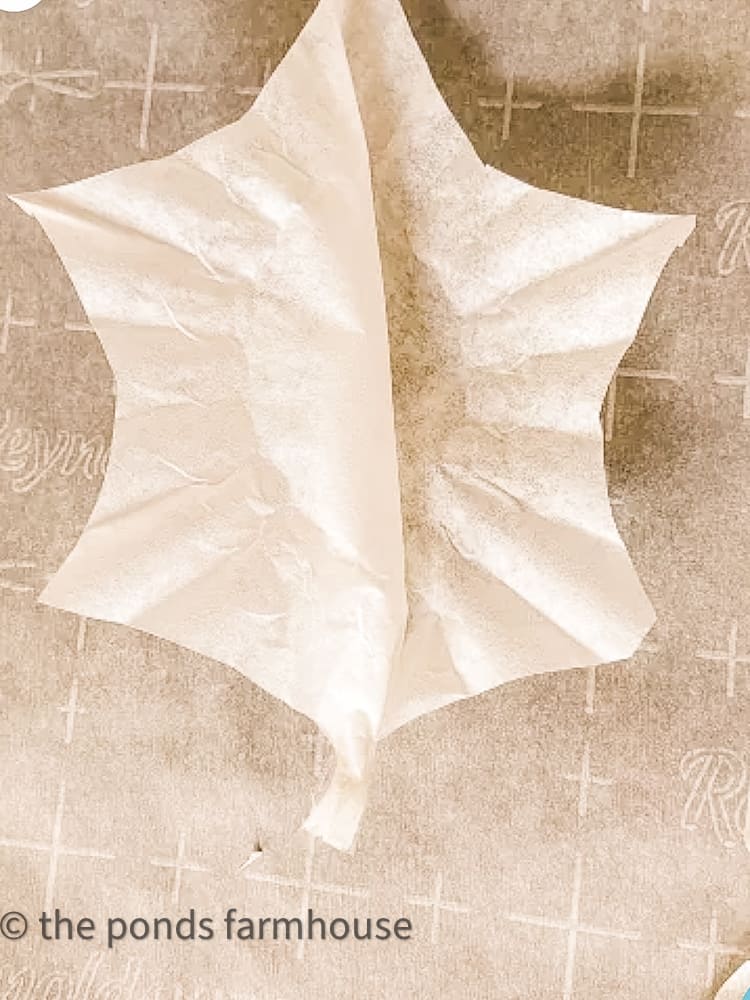
Next, make several holly-shaped leaves to attach to the garland.
Fold the coffee filter in half and cut 3 half-moon shapes from the open sides of the filter. Cut one on the side and then at the top and bottom.
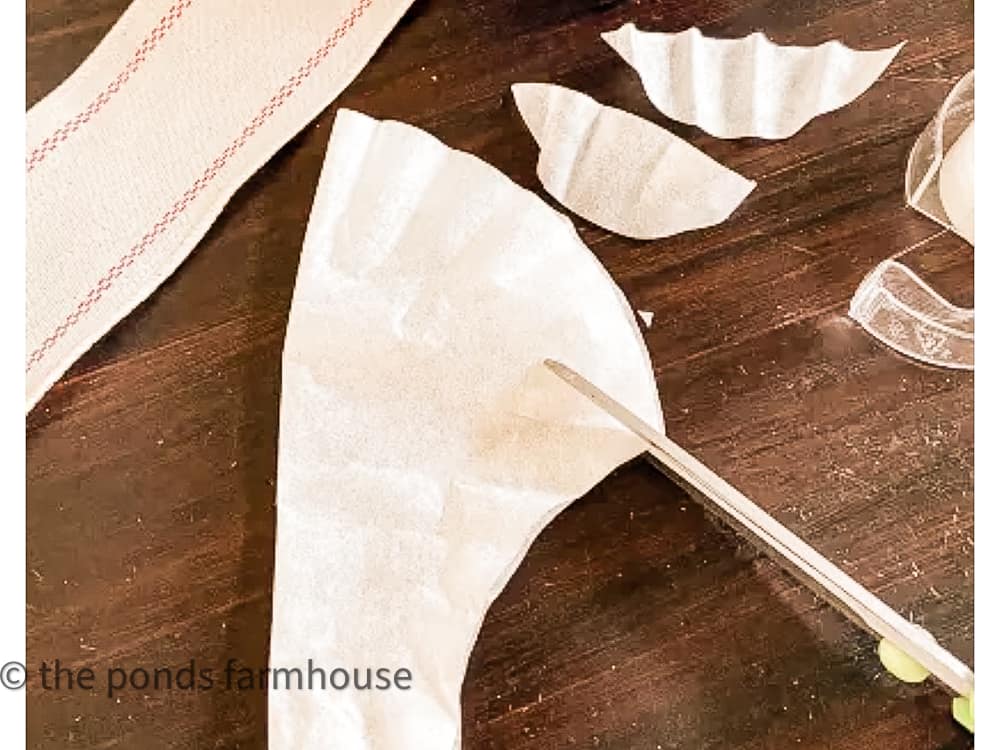
Then, open the filter and fold it over in the center. Twist the bottom of the leaf to hold the shape while attaching to the ribbon with hot glue.
Again, the number needed will vary. I recommend making a good supply of flowers and leaves.
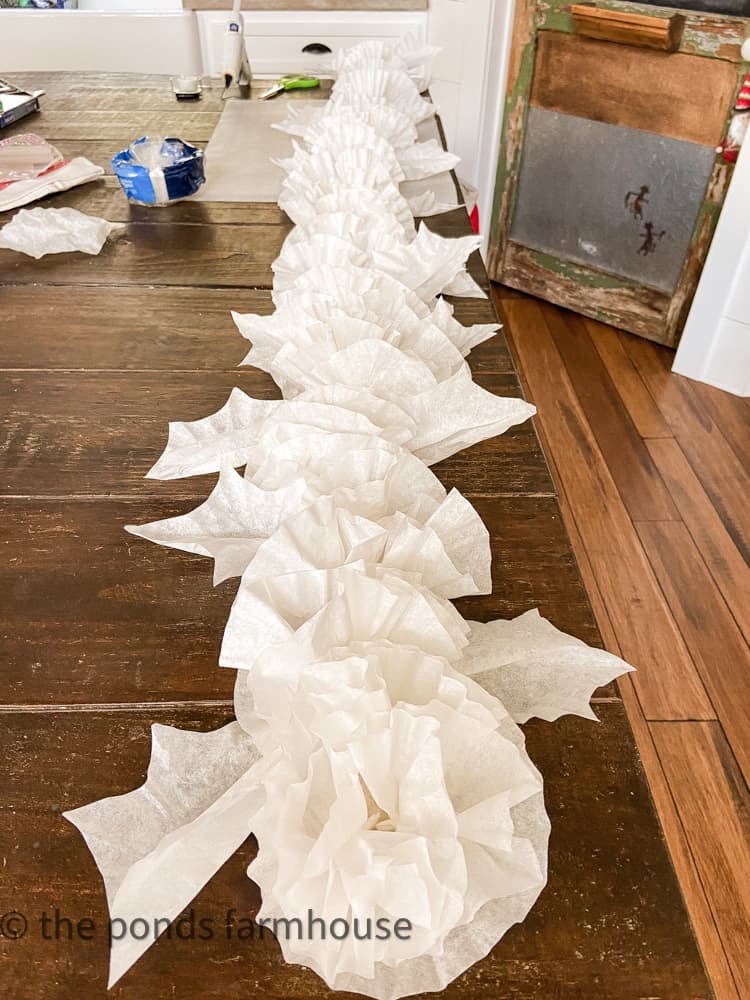
Start Constructing the Floral Garland
You can begin by cutting the ribbon to the length you want your garland. I plan to use mine on my table, so I measured the table length and down the sides for the drop-off.
I used the ribbon I had left over from a previous project, but a burlap ribbon would work nicely with this project. I recommend using a ribbon close to the color of your coffee filters for best results.
First, spread your ribbon out and protect your tabletop. Then using a hot glue gun, attach the flowers and the leaves randomly to the ribbon. I referred to my inspiration photo for placement.
Here, the DIY Floral Garland is starting to take shape.
If you’d like to see a video tutorial – click here.
DIY Coffee Filter Floral Garland
Equipment
- Hot glue gun
- Scissors
Materials
- Coffee Filters I used the small 1-4 cup size
- Ribbon 2 inch wide
- Tape
- Coffee optional
Instructions
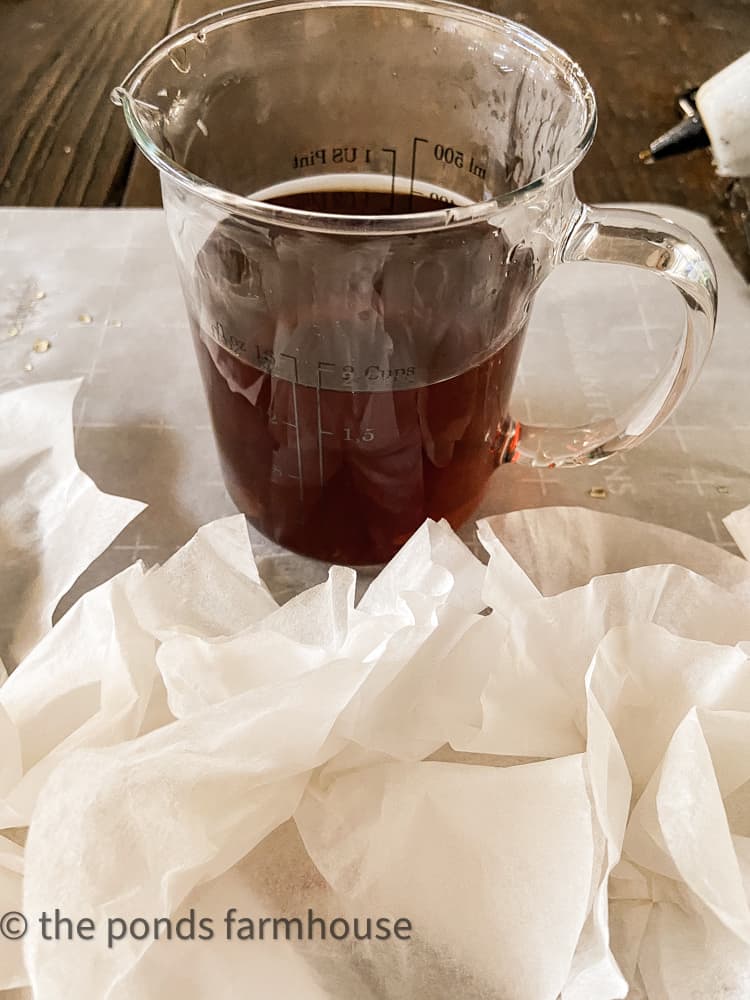
- Note: If you want your floral garland stained, I recommend staining the coffee filters before starting the projects.
- To stain, dampen a cloth with coffee and rub it over the coffee filters. You don't have to soak the filters; just lightly dampen.
- Once they are dry, begin the project.
- Cut the ribbon to the length you desire the garland.
- Begin by making the flowers by twisting the center of the coffee filter. The number of flowers will depend on the length of your garland.
- Secure with tape around the twisted area.
- Next, prepare several holly-shaped leaves.
- Fold the coffee filter in half and cut half-moon shapes from the open side of the filter.
- Then, open the filter and fold it over in the center. Twist the bottom of the leaf and, once again, use a small piece of tape to secure the leaf shape.
- Spread the ribbon on a protected surface and begin to add the flowers and leaves to the ribbon with hot glue.
- Place them randomly until the ribbon is full.
Notes
Staining the Garland – Optional Step
The floral garland was a bit too white for my table, so I decided to stain the coffee filters.
Because the garland was already intact, I used a paper towel soaked in coffee and gently wiped it over it to stain the leaves and flowers. This will leave a very subtle stain on the garland.
Note: You can use brown coffee filters. However, I used what I had on hand.
In addition, I only wanted mine to be lightly stained. I’m concerned that the brown filter may be a little dark.
However, if I had realized that the filters needed to be stained, I would have done that before attaching them to the ribbon.
I’ve used coffee to stain fabric for an aged look and recently used it to age labels for vintage bottles.
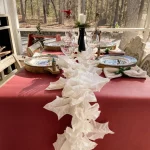
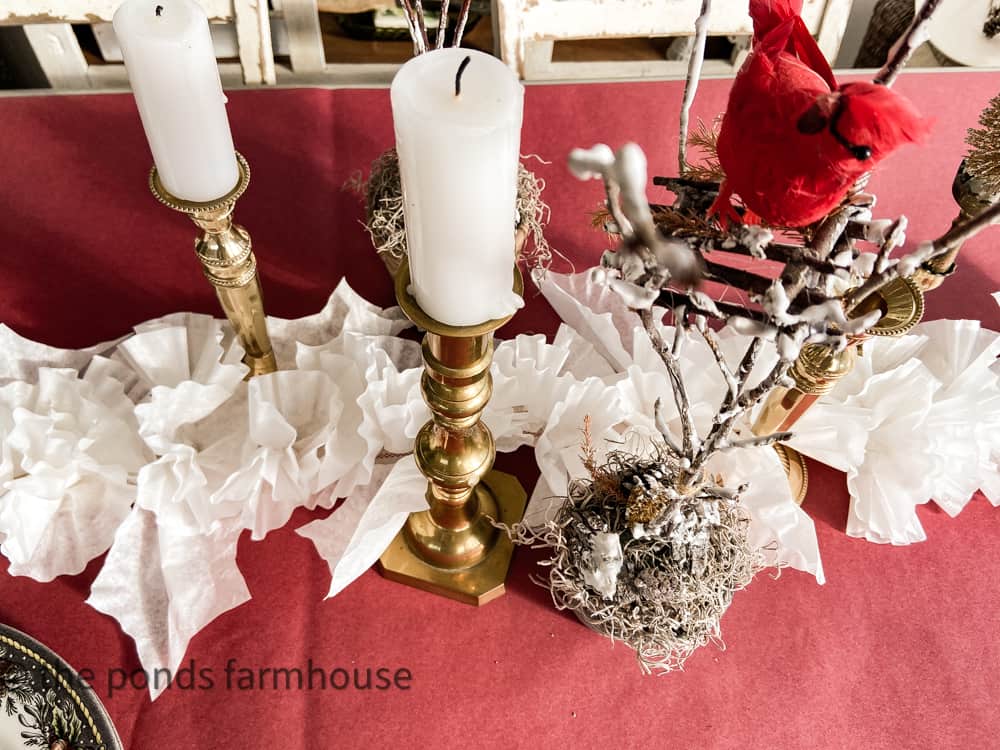
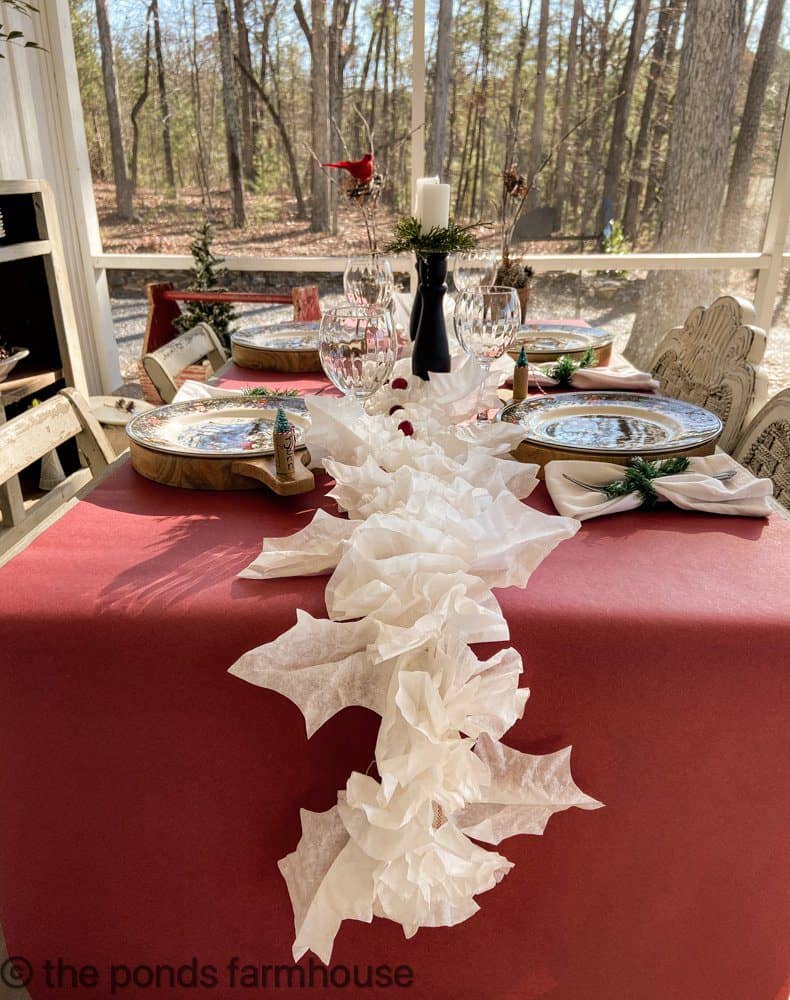
You should see this tablescape if you like a red and white Christmas table.

The garland helps to create a cozy winter table with simple vintage brass candlestick holders. Add a red tablecloth and a few Christmas decorations for an instant festive holiday table.

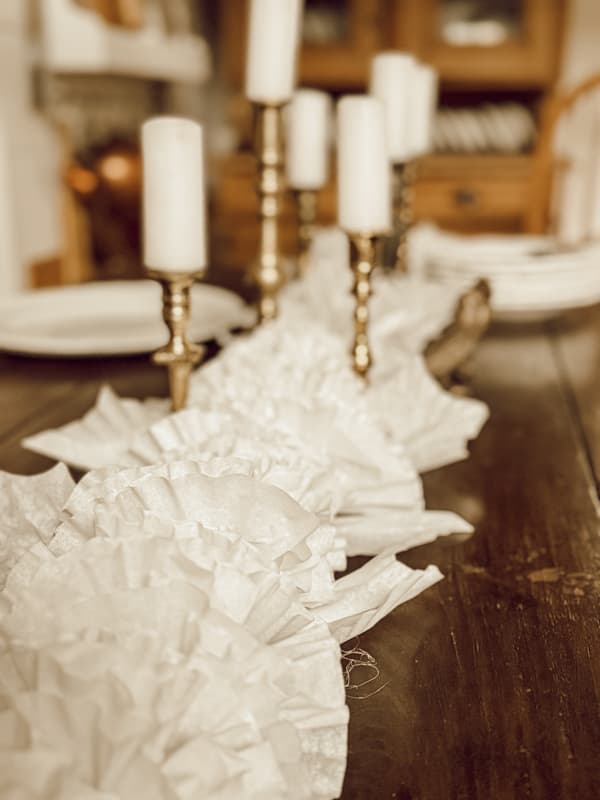
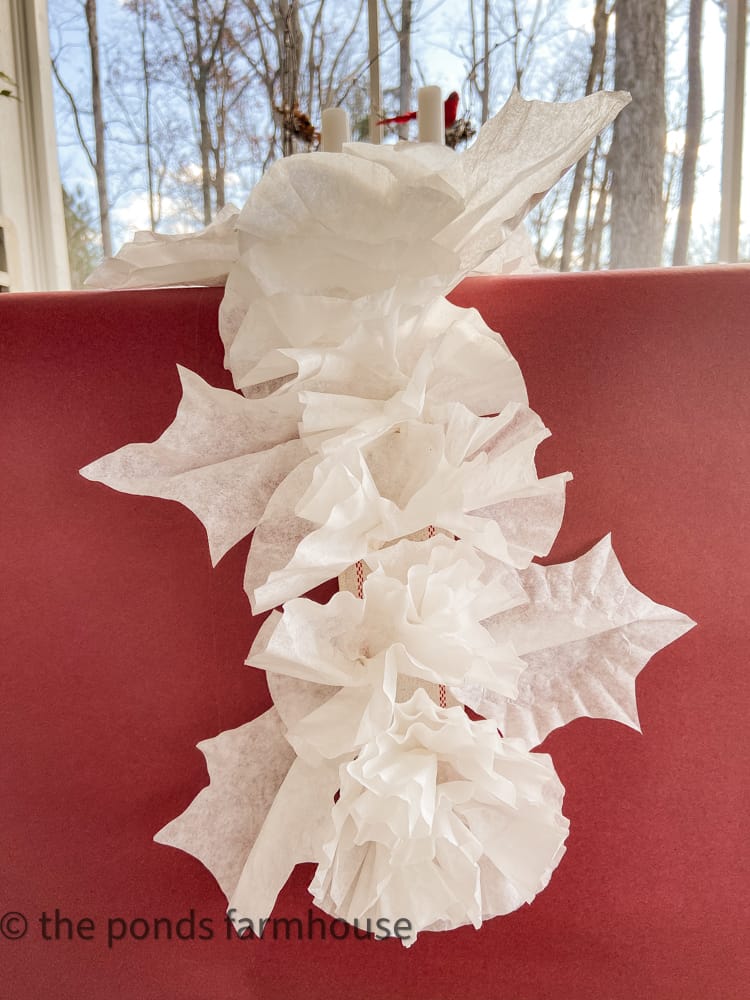
The Finished DIY Floral Garland Using Coffee Filters
The festive holiday tables both look enchanting. You can customize a table garland for your home with just a little time and creativity.
Adding greenery to the garland completely changes its appearance.
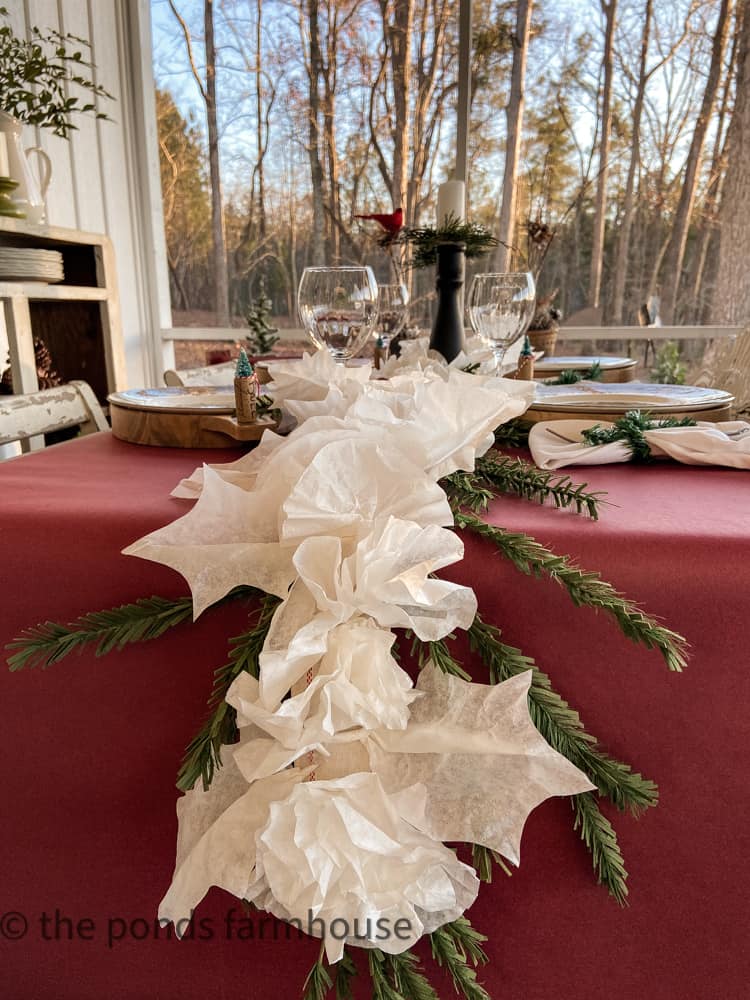
In addition, adding candlelight mixed with brass accents is perfect for any occasion.

See the completed floral garland on 5 Ideas for Creative Christmas Table.
Thanks so much for stopping by today!

Pin It To Remember It
Did you find some great ideas you’d like to save for future reference? To save, hover over the images and pin to your favorite Pinterest Boards when you see the PIN button in the upper left-hand corner.


What a great idea ! Love doing any projects using coffee filters but this idea beats them all! Thanks for sharing! Have a great day! 😁
Margie,
I’m so glad you like this.
Rachel
Rachel you seriously do the coolest DIYs! I love it!
Stacy,
Thanks so much for the encouragment
Woman, you are too talented! I actually like yours better. Thank you.
Your mind amazes me. I would have see that garland, looked at the price, said nope then flipped the page. I would have never thought to make my own! Your garland looks fantastic! Great tutorial too. Merry Christmas!
Cindy,
I appreciate all your encouragement.
Rachel
Truth? I really liked yours better than the inspiration photo!!! Very clever and very economical for sure….a little time spent and voila!! Something very unique!! Thanks so much for sharing!!
Karolyn
I really appreciate you for stopping by.
Another home run.
Denise,
I really appreciate this.
Amazing Rachel, you see garland and I see coffee filter. You do amazing things.
Cindy
Cindy,
You are so funny. I appreciate you for stopping by and commenting.
Rachel
These are pretty, but the instructions, especially for the holly leaves, make no sense to me. Where to do you cut out the half moons from the folded filter? I’ve tried and mine look nothing like yours. How many do you cut?
Teddee,
I only cut a couple of half moons from each folded filter. It then gives the appearance of a holly left when you fold it in the center like the spine of the leaf. I’ve updated the post with a link to a video tutorial. Here is the link. I hope this helps to clarify the process. https://youtu.be/UgjWbUNAG6o
If this link doesn’t click through, just copy the link address and copy and paste to your browser or go back to the blog post and link from there.
I appreciate you for asking and hope this helps.
I was so happy when I saw this as one of the Christmas projects listed on a list. Then I got here and the pictures apparently aren’t available. I thought at first it was just my system but I checked it on my phone & iPad. Same thing.
Zoe,
I appreciate you for alerting me of this issue. I have made the corrections and the images are back. Thanks again.
So pretty, my friend.
Renae,
I really appreciate this.
Rachel, this coffee filter garland is so pretty — and your instructions make it so easy to make! I just love this and am going to go and purchase the coffee filters. I am going to use the white filters as they will look so pretty with all my blue! This garland looks so beautiful on your table and I love the way is trails on the ends. I tell you, your DIY ideas are absolutely “the best”! Thanks for always sharing your wonderful ideas with us! Hope 2025 is a wonderful one for you! Make sure you make some time for “you”!
Mary-Ann
I’m so glad you like this idea. It’s so easy and will look lovely with your blue decor. Please let me know how it turns out. Have the best day!