How to Make a Boutique Style Glass Cutting Board (Reverse Decoupage Tutorial)
Hey friends, you know I love getting the high-end boutique decor look for less, and I think I nailed it with this Boutique-Style Glass Cutting Board tutorial. Using an inexpensive, clear tempered glass board and napkins of my choice, I’ve added high-end style to my kitchen with reverse napkin decoupage.
It’s actually the same technique I used for my Reverse Decoupage Dishes, but it’s much easier to do on this flat surface! I’ll probably make one for each season. Let me quickly show you the details.
(Posts on The Ponds Farmhouse may contain affiliate links. As an Amazon Associate, I earn from qualifying purchases. See the full disclosure details here.)
Inspiration For Decorative Glass Cutting Board
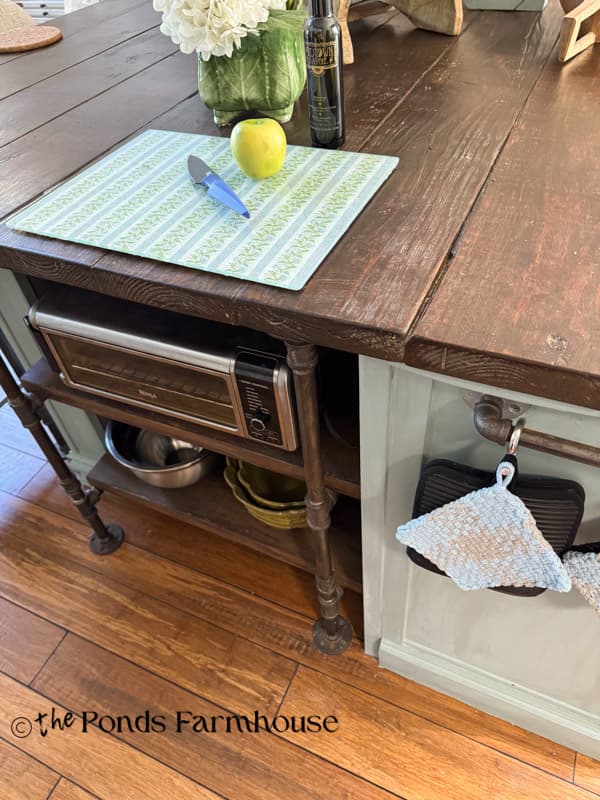
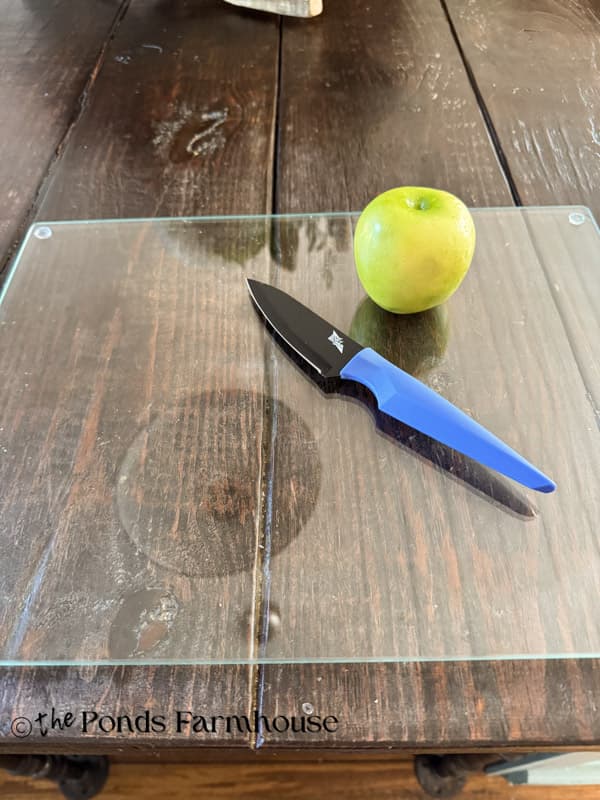
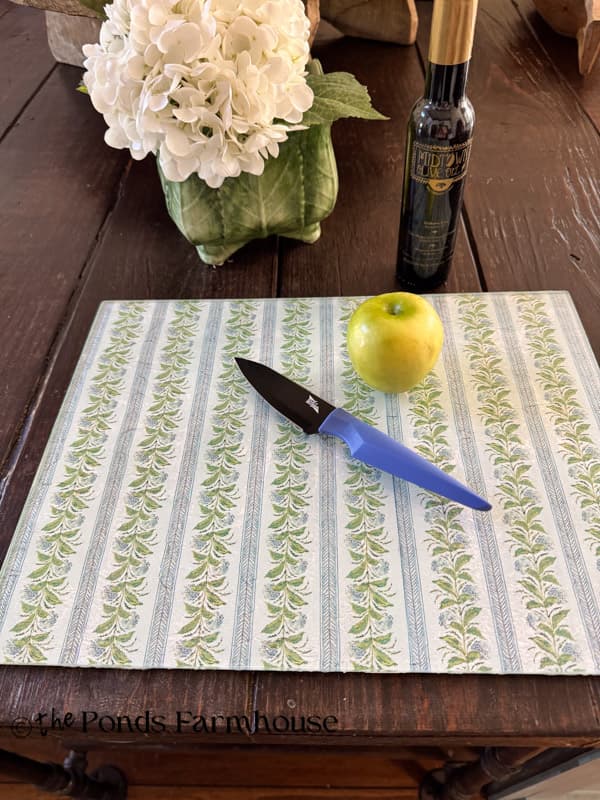
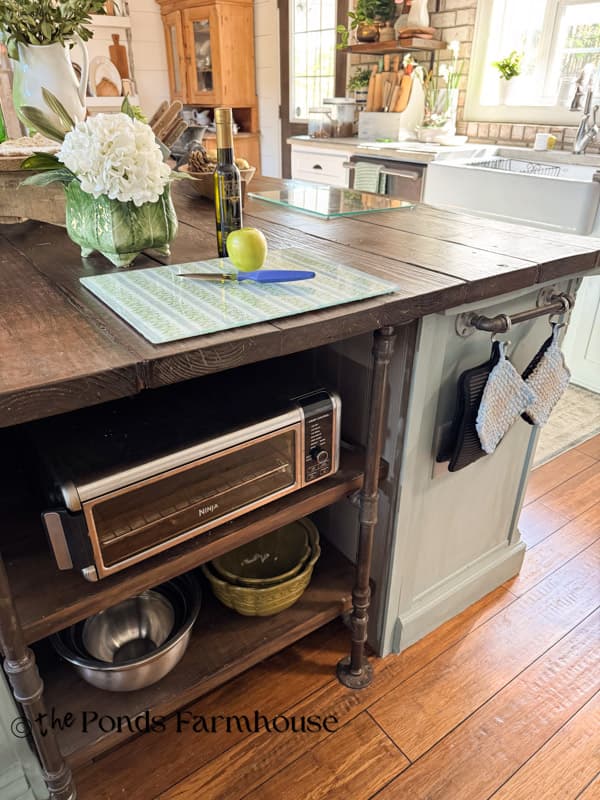
We have just refinished our wooden kitchen island countertop, and I decided to add a glass cutting board for extra protection. Once I placed it on the wooden top, it basically disappeared and lacked that vintage charm I love. That’s when inspiration struck. I’ve been seeing these great, decorative glass cutting boards online and in kitchen boutique stores.
Then, after seeing how much you all loved the Boutique-Style Reverse Decoupage Dishes I shared recently, I realized this technique would be perfect for a larger piece. It’s actually much easier to do on a flat surface, so today I’m showing you how to apply that same look to a glass cutting board! Below is a before-and-after of the cutting board on the kitchen island.
Supply List
- Tempered Glass Cutting Board
- Guest Size Paper Napkin of your choice. Here are a few I liked…
- Annie Sloan Pure White Paint
- Mini Handheld Heat Press
- Clear POLYVINE Varnish Satin
- Mod Podge Dishwasher Safe
- Foam Roller
- Mini Finger Sander
- Small Paintbrush
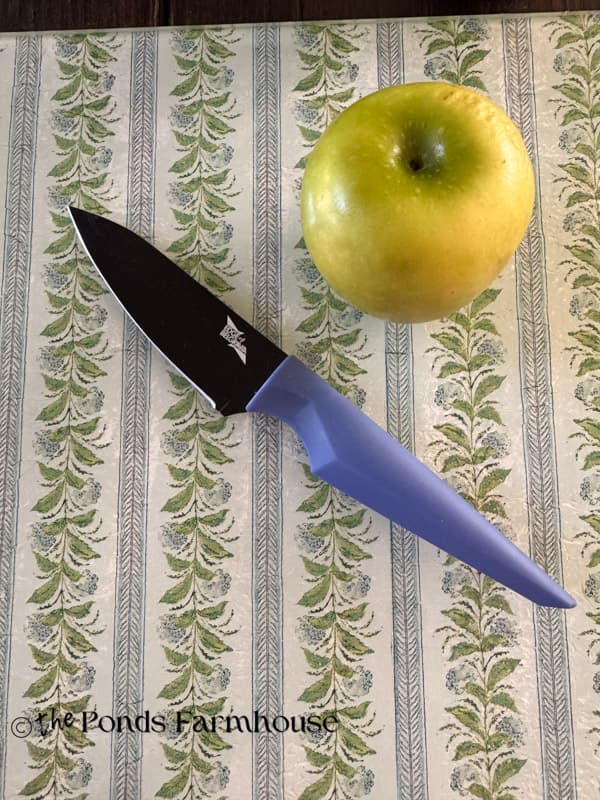
I wanted to use a napkin to coordinate with the duck egg paint on the island.
Step 1 – Prepare Glass Cutting Board
The cutting board I used has rubber pads on the underside, so the first step is to remove them and any sticky residue. I had to use Goo Be Gone to get the sticky off. Then I washed the board and used rubbing alcohol to ensure it was completely free of residue. Thankfully, the board came with replacement rubber pads, as the ones I removed were no longer useful.
Next, prepare a spot to apply the napkin decoupage that will allow for drying time.
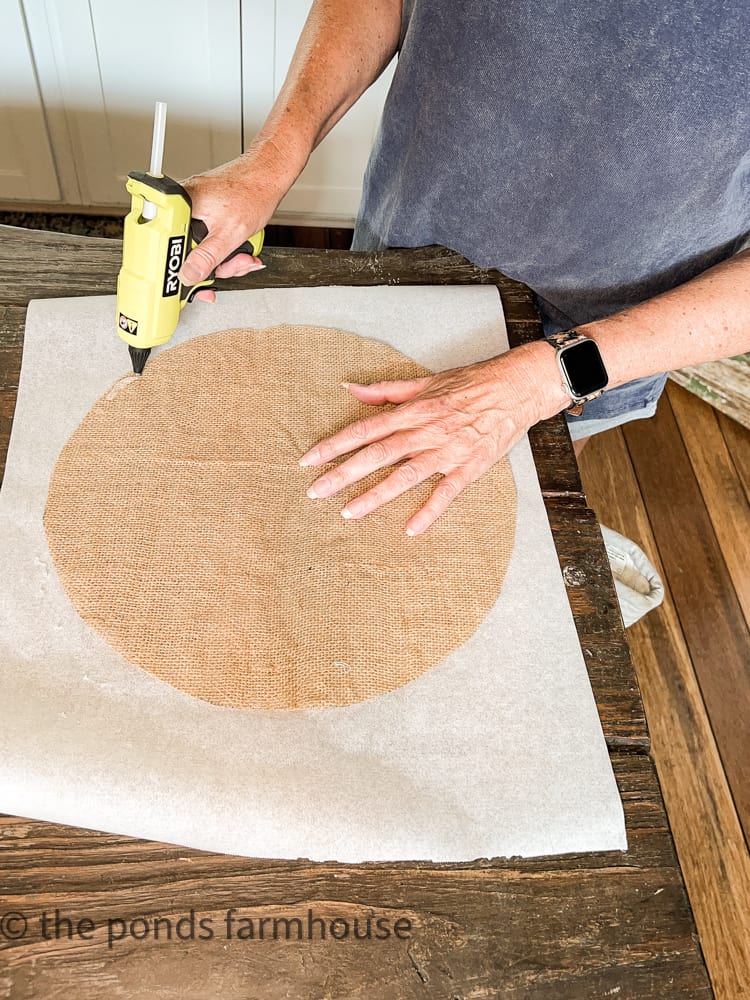
Step 2 – How To Apply Varnish or Mod Podge
- Place the cutting board on a riser, upside down, so you can cover all its edges and the bottom.
- Use a foam roller and coat the backside with the varnish or Mod Podge. The varnish provides a clearer undercoat.
- Allow to dry for several hours or overnight.
Step 3 – How To Apply Reverse Napkin
As with the Pottery Barn Plates, you will begin by using a heat press to apply the napkin.
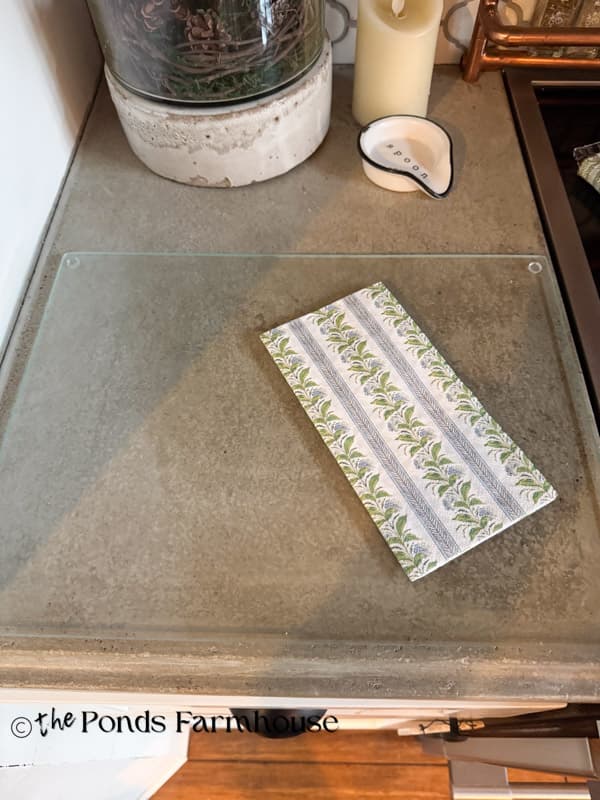
- Determine your napkin arrangement and separate the napkin using only the top decorative layer. Cut the napkin to fit the backside of the cutting board. If you have several seams in your application, you may want to tear the edges so that they blend seamlessly. Refer to this technique on the Pottery Barn Dupe Dishes Tutorial.
- Heat the handheld heat press.
- Lay the napkin pieces with the decorative side down on the glass, then gently run the heat press over them to adhere.
- Once the napkin has been attached in all areas, use a small paintbrush to apply a coat of varnish or Mod Podge over the top. Apply from the center outward, working out any wrinkles or bubbles as you go.
- Allow to dry overnight.
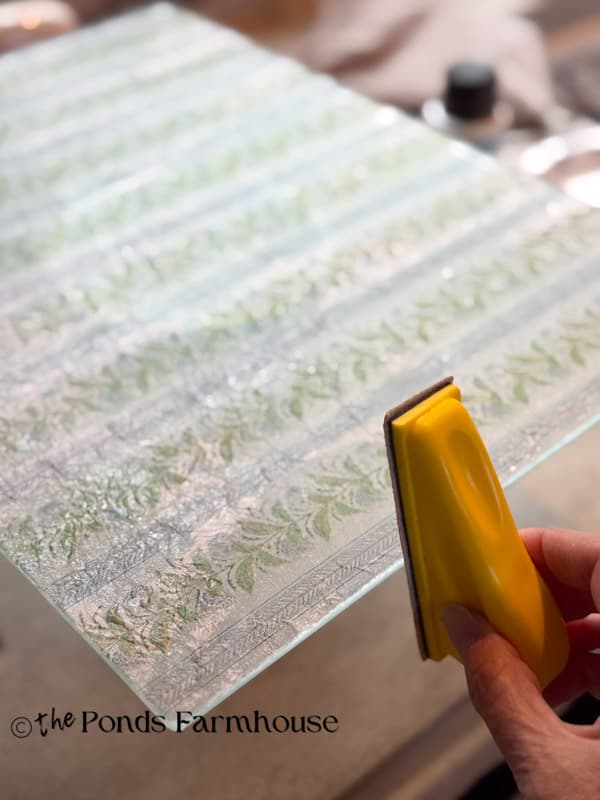
- After the project is dry, remove any rough edges or overlapping napkin using the small finger sander.
Note: Most napkins are three-ply, and you only want to use the top layer. If you apply two layers, the top will bubble up and peel off.
Step 4 – Paint the Backside of the Cutting Board
Next, apply two coats of the Pure White paint over the napkin using a small paintbrush. Allow a couple of hours between coats. Check to ensure that the coverage is to your satisfaction. Then allow to dry again overnight.

How To Waterproof Your Decorative Cutting Board
I wanted my cutting board to be not only decorative but also functional, so I used Dishwasher Safe Mod Podge to seal the napkin to the board.
- Before applying, use the finger sanders to smooth or remove any paint or napkin from the edges or top of the glass board.
- Apply a thin coat of Mod Podge Dishwasher Safe sealer, ensuring you cover the edges so no area of the napkin is exposed.
- Allow to dry overnight.
- The next day, apply a second coat of the sealer and ensure you cover the edges again.
- Allow several days to dry before adding the rubber pads back to the board.
Note: This sealer needs to cure for 28 days before washing. So far, I’ve just washed the board surface with a wet washcloth. I probably won’t submerge the board in water and will update after the cue time if any issues arise.
Gift Ideas for Decorative Cutting Boards
This project was so easy and has inspired me to think ahead for gift ideas. Using smaller glass cutting boards to create gifts for hosts, teachers, friends, and family would be very cost-effective. You can customize the boards to match the recipient’s decor. Add a loaf of bread, cheese, or serving knives to the boards, and they would be such thoughtful and special gifts.
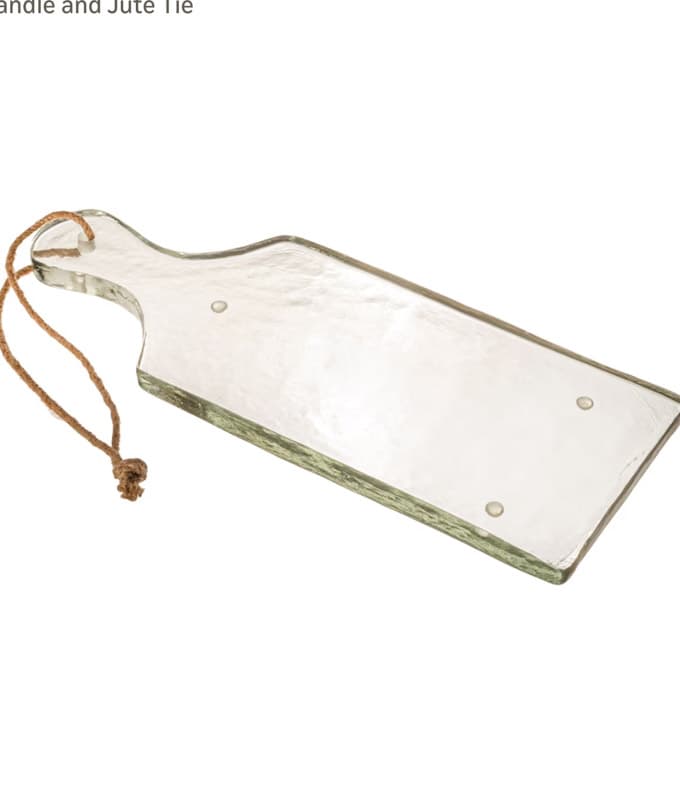
The decorative one below is from Pottery Barn for $69.50, and the clear glass one from Amazon is $27.00. I’m sure there are other sources that will be even less. I’ll be checking the thrift stores. LOL.

FAQ
Boutique-Style Decorative Glass Cutting Board
I’m loving the board on my kitchen island. It’s both functional and decorative. Plus, it’s much more sanitary than a wooden or plastic cutting board. I hope this tutorial inspires you to look at those plain glass cutting boards in a whole new way! It truly is one of the easiest ways to bring a custom, boutique feel to your kitchen without spending a fortune. Whether you’re protecting a newly refinished countertop like I was, or just looking for a thoughtful handmade gift, reverse napkin decoupage is the answer. If you decide to make one, I’d love to hear what napkin design you chose!


Another great idea! i used to have a pretty glass cutting board. I will definitely give this a try. There is a product called Maker’s Magic that works exactly like Mod Podge Dishwasher, except it cures in 48 hours and is food contact safe. It would be perfect for projects like this. Yours is beautiful!
Michelle,
Thank you for the information. I’ll have to check into this product. Have a blessed weekend.
Is there anything you can’t do, Rachel! I love this idea so much. You could write an entire book on decoupage ideas. Truly, they are fabulous and such a great gift idea too. Our kitchen could definitely use a pop of color, so I’m excited to try this idea. Sending you hugs and can’t wait to share, CoCo
CoCo
You are so kind and supportive. Thank you for your comments.